
DIY Farmhouse Console Table: Build a Stunning 8-Board Entryway Masterpiece
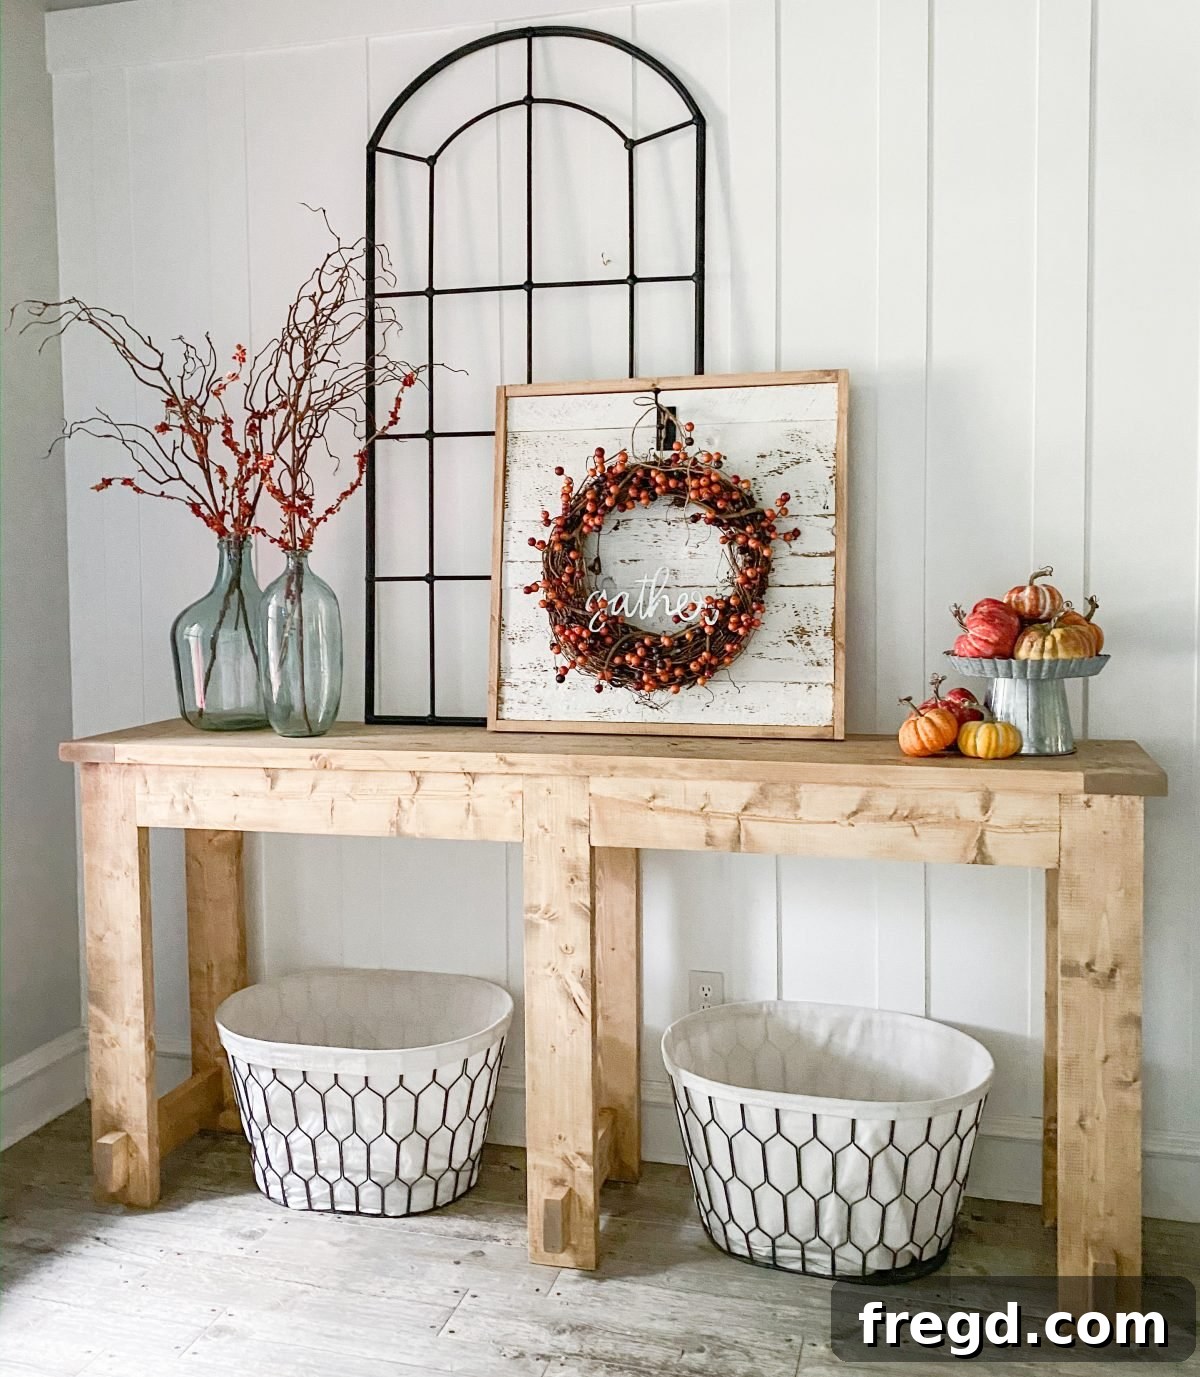
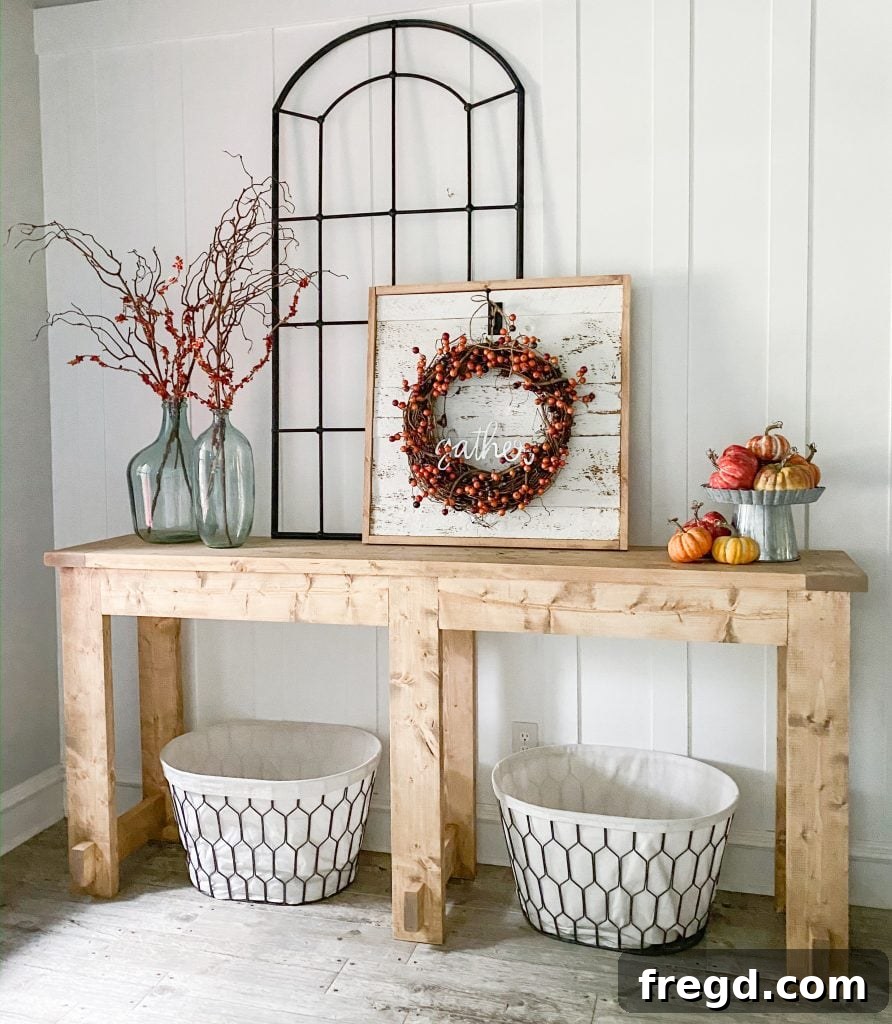
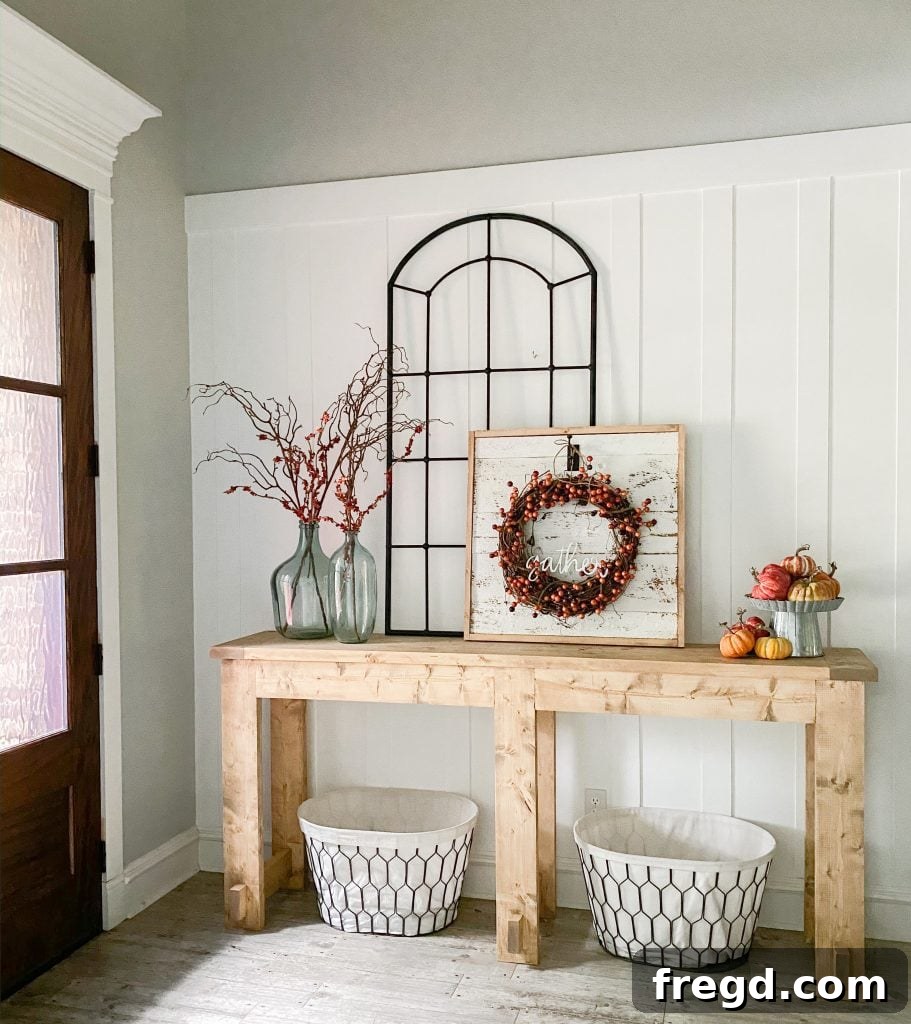
There’s nothing quite like the crisp air of autumn to spark inspiration for home decor and woodworking projects. The desire to infuse warmth and character into our living spaces often leads us to seek out unique furniture pieces. For a long time, my entryway featured a simple bench, which served its purpose well. However, I yearned for something with more decorative potential, a piece that could truly anchor the space and allow for seasonal styling. This longing led to the creation of an absolutely charming eight-board console table, designed not only for beauty but also for efficiency and budget-friendliness. Utilizing just eight standard 2×6 boards, this project minimizes material cost and simplifies the cutting process, saving you precious time. The result? A beautiful and functional farmhouse-style console table that will transform your entryway or living area. Just look at how wonderfully it turned out!
Why Choose This DIY Farmhouse Console Table Project?
Embarking on a DIY furniture project offers immense satisfaction, and building your own console table is no exception. This particular design is incredibly popular for several reasons. Firstly, its farmhouse aesthetic effortlessly blends with various decor styles, from rustic to modern, adding a touch of timeless elegance. Secondly, the simplicity of using only eight 2×6 boards makes it an accessible project for woodworkers of all skill levels. You’ll avoid complicated joinery and expensive specialty lumber, making it a truly budget-friendly option. A console table is also incredibly versatile, serving as a focal point in an entryway, a display surface in a living room, or even a functional desk alternative in a small space. It provides ample surface area for decorative items, lamps, family photos, or practical storage solutions, instantly elevating the look and feel of any room.
Watch the Build in Action!
Sometimes, seeing the steps in motion can make all the difference. While the detailed instructions are provided below, you can also get a comprehensive visual walkthrough of this project. Watching the video can help clarify specific techniques, demonstrate the proper use of tools, and give you a better understanding of each stage of the build.
CLICK HERE to watch the full DIY Farmhouse Console Table build video!
Your Blueprint for Success: Free Printable Plans
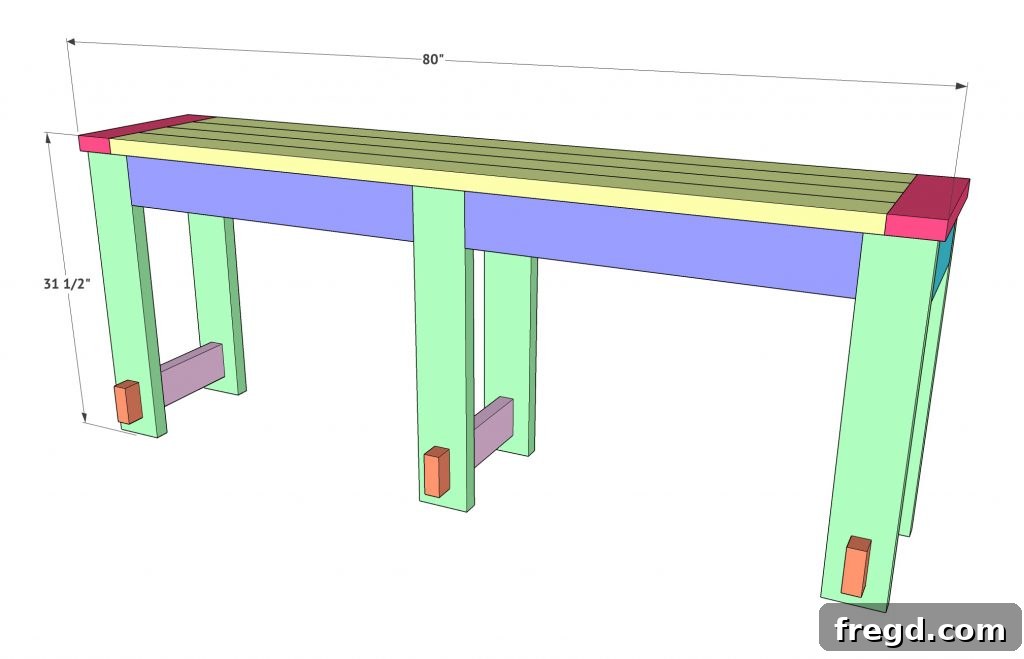
To ensure your build is as smooth and straightforward as possible, we’ve created detailed, free printable plans for this 8-board console table. These plans include precise measurements, cut lists, and diagrams that complement these step-by-step instructions. Having them handy in your workshop will be invaluable for accurate cuts and assembly. You can download your copy at the very end of this post!
Gather Your Essentials: Materials and Tools
Before you dive into the sawdust, it’s crucial to gather all your materials and tools. Preparation is key to a successful and enjoyable woodworking experience. Make sure you have everything listed below to avoid interruptions during your build.
Materials You’ll Need:
- Eight (8) 2×6 boards (It’s always a good idea to purchase a little extra lumber in case of miscuts or knots.)
- High-quality Wood Glue (a strong, reliable glue like Titebond III for durable joints)
- 2.5-inch Pocket Hole Screws (for creating strong, hidden joints)
- 2.5-inch Wood Screws (for specific connections, as detailed in the steps)
- 2-inch Brad or Finish Nails (for attaching decorative elements cleanly)
- Wood Stain (your preferred color, or experiment with custom mixes as described later)
- Polyurethane or other wood sealer (highly recommended for durability and protection)
- Sandpaper (various grits, from coarse to fine, for smooth finishes)
Tools for the Job:
- Table Saw (essential for ripping boards to precise widths)
- Miter Saw or Circular Saw (for accurate cross-cuts)
- Pocket Hole Jig (e.g., Kreg Jig, indispensable for pocket hole joinery)
- Drill/Driver (for driving screws and creating pilot holes)
- Brad Nailer (optional but highly recommended for decorative trim)
- Tape Measure and Pencil (for accurate marking)
- Safety Glasses and Hearing Protection (non-negotiable for all woodworking!)
- Clamps (various sizes, incredibly useful for holding pieces during assembly and glue-up)
- Orbital Sander (optional, but greatly speeds up the sanding process for a professional finish)
Building Your Dream Farmhouse Console Table: A Step-by-Step Guide
Now that you have all your materials and tools ready, let’s get building! Follow these detailed steps carefully, paying close attention to measurements and safety.
-
Prepare Your Boards: Precise Ripping and Cross-Cutting
The foundation of any good furniture piece lies in accurate cuts. Begin by making all your cross-cuts (cutting boards to their length) first. Then, proceed to rip each board to its specified width. For easier and safer handling through the table saw, we’ll rip boards to either 4 inches or 5 inches wide as indicated in the plans. Ripping narrower boards is generally safer and provides more control, especially with longer pieces. Double-check all measurements before making any cuts to minimize waste. Precision at this stage will save you headaches later on.

Carefully ripping the 2×6 boards to the required 4-inch or 5-inch widths. Pro Tip: Always use push sticks and featherboards when ripping on a table saw for maximum safety and control. Ensure your blade is sharp for clean cuts.
-
Construct the “E” Shaped Side Frames
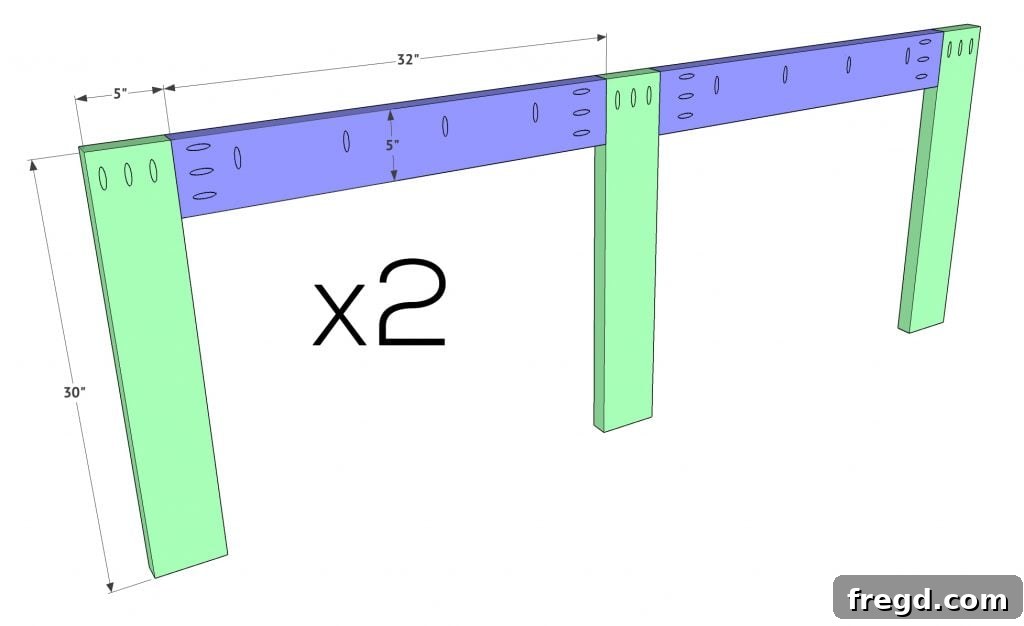
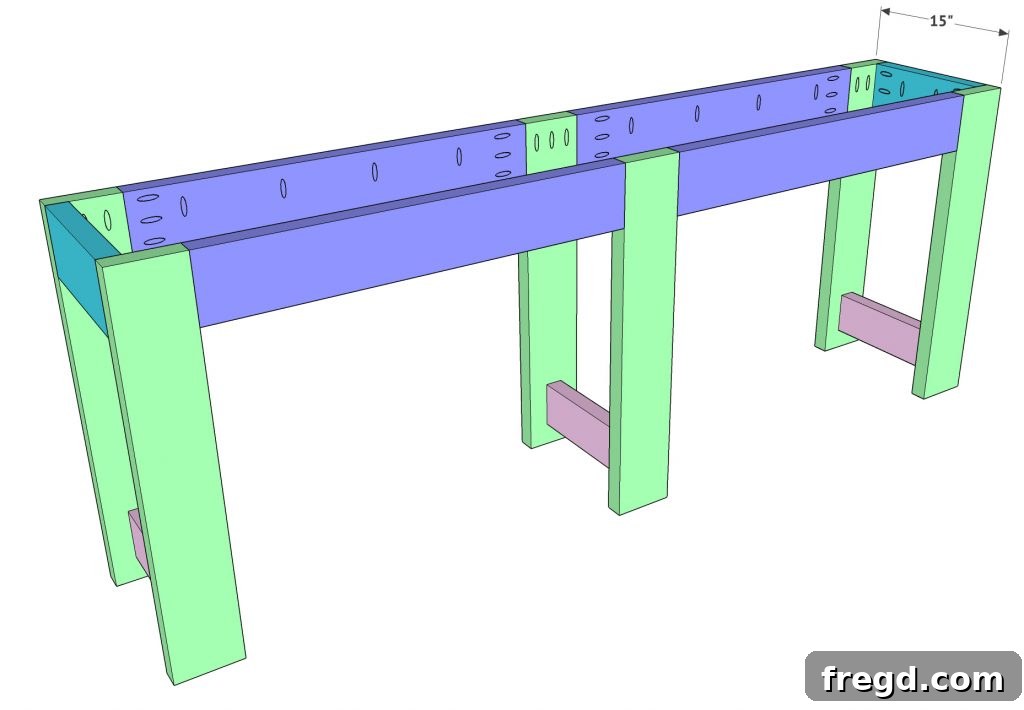
The console table’s robust side supports are designed in an “E” shape. You will need to build two identical “E” shaped frames. The boards for this section should be ripped to 5 inches wide each. Once ripped and cross-cut to length (refer to the plans), use your pocket hole jig to add 1.5-inch pocket holes to the apron pieces (the horizontal connectors). Apply a generous amount of wood glue to the mating surfaces and attach the aprons to each leg using 2.5-inch pocket hole screws. Ensure that the top edge of the legs is perfectly flush with the top edge of the aprons. This creates a smooth, level surface for the tabletop later on.
-
Connect the Side Frames with Smaller Aprons
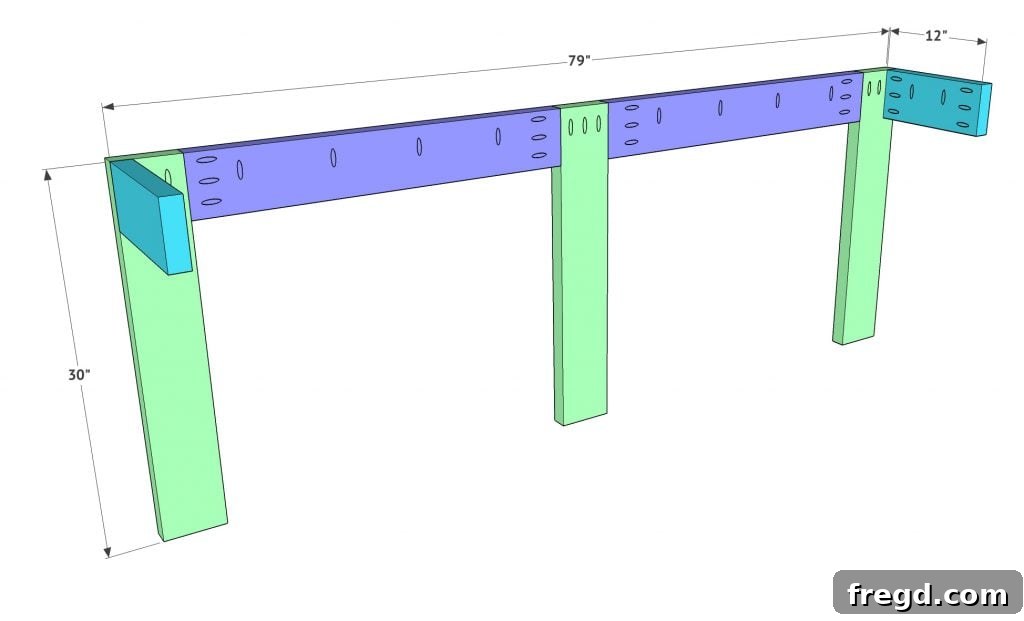
Now, take one of your completed “E” shaped side frames. Attach the smaller apron pieces (these connect the two “E” frames together) to this first frame. These aprons should be flush with both the top and the outer side edge of the outside legs. This precision ensures a square and stable structure for your table. Use wood glue in conjunction with 2.5-inch pocket hole screws for a strong, lasting bond. Clamp the pieces securely while the glue dries to prevent any movement.
Joining the first ‘E’ frame with the connecting aprons for the main structure. -
Integrate the Second “E” Shaped Frame and Initial Leg Supports
Bring in your second “E” shaped side frame and attach it to the opposite ends of the smaller aprons you just installed. You have a couple of options for attachment here: either use 2.5-inch pocket hole screws and wood glue, or opt for 2.5-inch wood screws driven directly through the back legs and into the small aprons. Given the potentially narrow width for easily maneuvering a pocket hole driver in this area, using standard wood screws can often be simpler. Since these screws will be on the back of the table, they won’t be visible in the final display. At this stage, it’s also helpful to temporarily place the small leg supports into position. While not permanently attached yet, they can help brace the structure and hold things steady as you secure the second “E” frame.
Securing the final ‘E’ frame to form the sturdy base of the console table. -
Install the Leg Support Boards
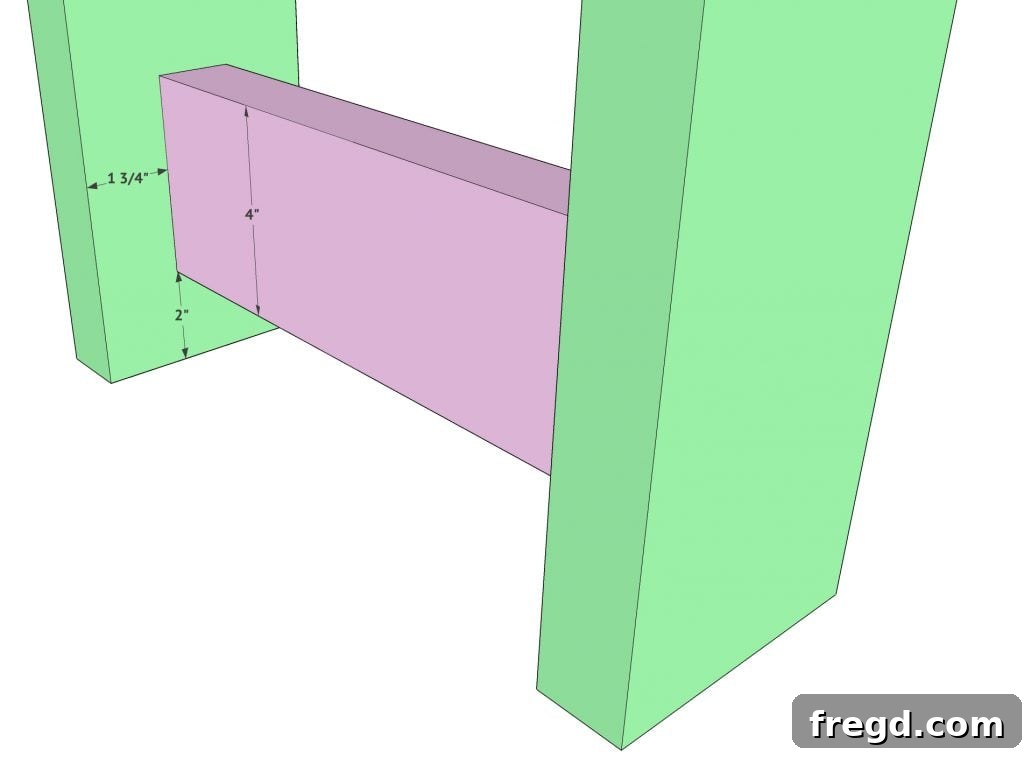
The leg support boards are crucial for adding stability and visual balance to the console table. These supports should be ripped to 4 inches wide and cut to a length of 12 inches each (refer to your plans for exact placement). Carefully line them up against the legs, marking their desired position with a pencil. Once aligned, secure them using wood glue and 2.5-inch wood screws driven through the main legs and into the support boards. Don’t be concerned about the screw heads being visible at this stage; they will be neatly concealed by decorative trim in an upcoming step, ensuring a clean and professional finish.
Installing the leg supports, enhancing both structure and design. -
Add the Charming Decorative Pieces
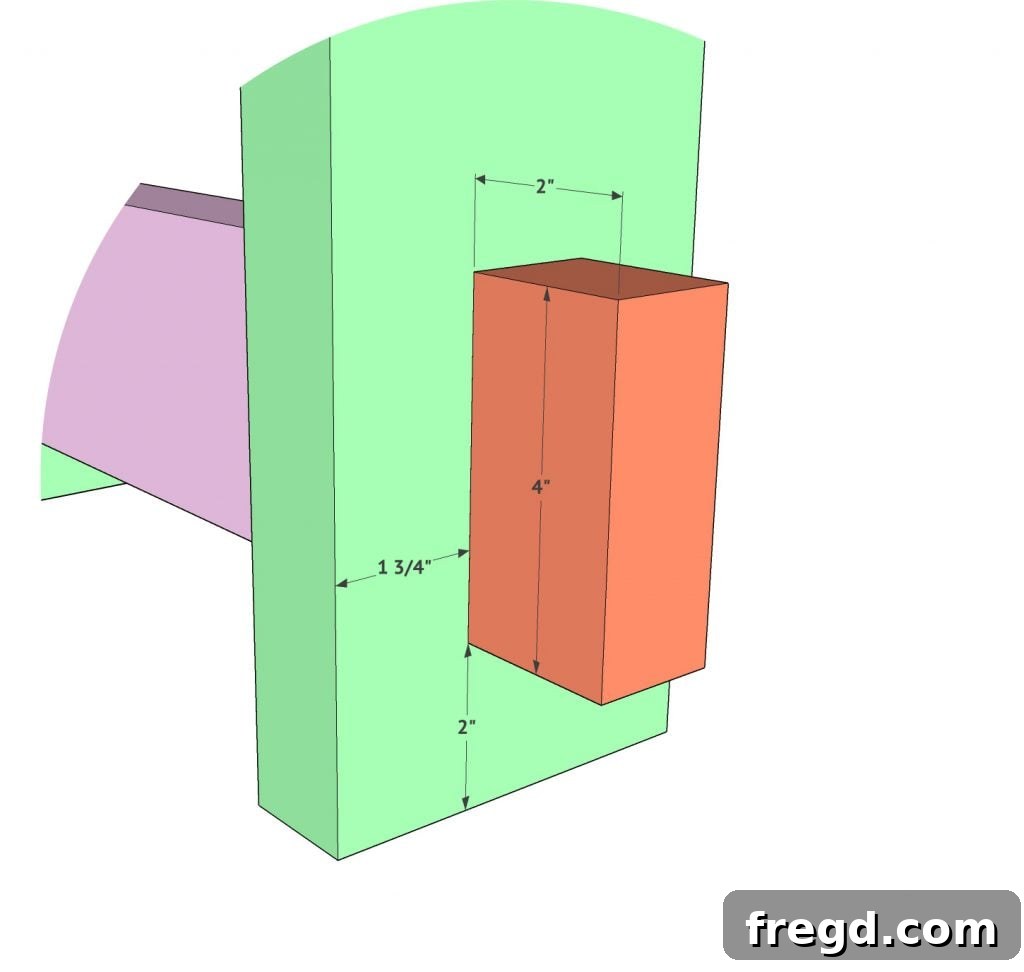
Now for a touch of embellishment that elevates the table’s farmhouse charm! Attach the small decorative pieces to the bottom of each leg. There will be a total of six such pieces, one on each of the lower leg sections. These not only add a lovely aesthetic detail but also cleverly cover up the wood screws used in the previous step for the leg supports, creating a seamless look. Apply wood glue to the back of each decorative piece and secure them with 2-inch brad or finish nails. The brad nailer makes this step quick and leaves minimal holes to fill.
The decorative trim pieces add farmhouse charm and conceal fasteners. -
Assemble the Table Top Planks
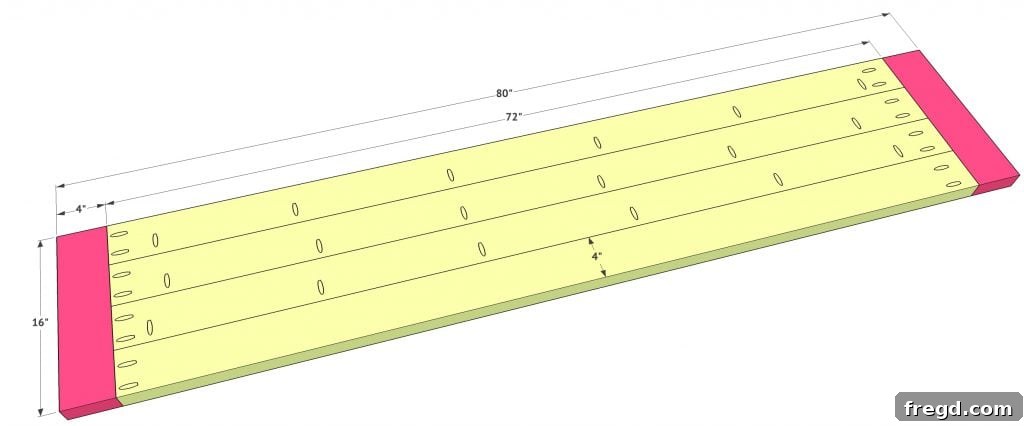
Next, we’ll build the table top. The individual planks for the top should be ripped to 4 inches wide each (again, refer to your plans for exact lengths). Lay them out on a flat surface in the desired arrangement. Using your pocket hole jig, add 1.5-inch pocket holes as indicated in your plans – typically along the long edges where planks will join together, and possibly on the underside ends for later attachment to the base. Apply wood glue between the plank edges and secure them using 2.5-inch pocket hole screws. This creates a strong, unified table top surface.
Connecting the top planks with pocket hole screws for a solid surface. -
Attach the Table Top to the Base
With both the base and the top assembled, it’s time to bring them together. Carefully position the table top onto the base. You’ll want to ensure an even 1/2-inch overhang on both the front and back edges, as well as on the sides at each corner. This consistent overhang provides a balanced and finished look. Once aligned, apply wood glue to the top edges of the base where it contacts the tabletop. Then, using 2.5-inch pocket hole screws, drive them upwards through the base aprons and into the underside of the tabletop. These hidden fasteners create a very strong and clean connection.
Securing the tabletop to the base, ensuring proper overhang on all sides. -
Verify Table Top Spacing and Alignment
Take a moment to step back and visually inspect the spacing of the table top planks. Ensure that the gaps between the planks (if any, depending on your design) are even and consistent across the entire surface. This attention to detail will greatly enhance the finished appearance of your table. Make any minor adjustments now before the glue fully cures. This stage also allows you to double-check that your overhangs are perfectly symmetrical, contributing to the professional look of your DIY project.
A detailed look at the table top plank spacing, highlighting craftsmanship.

The Finishing Touch: Staining, Sealing, and Customizing Your Look
Once your table is fully assembled, the final step is to apply a finish that protects the wood and enhances its natural beauty. This is where you can truly personalize your farmhouse console table to match your home’s aesthetic.
For my table, I opted for a custom stain mixture, blending equal parts of two different stain colors. This technique is a fantastic way to achieve a unique hue that might not be available off-the-shelf. Simply mix your chosen stains in a separate container, stirring thoroughly, and then apply as you would a single stain. Always test your custom mix on a scrap piece of the same wood to ensure you achieve the desired color before applying it to your entire table. After staining, apply several coats of a durable topcoat, such as polyurethane, to protect the wood from spills, scratches, and daily wear. Lightly sand between coats for an ultra-smooth finish.
Styling Your Farmhouse Console Table: Inspiration and Ideas
With your beautiful new console table complete, the fun truly begins: decorating! A console table is a versatile canvas for displaying your personal style and celebrating the seasons. For fall, consider adding elements like miniature pumpkins, gourds, rustic lanterns, and natural foliage. A woven basket underneath can provide both storage and texture. During the holidays, swap in festive garlands, twinkling lights, and seasonal ornaments. For everyday styling, consider a pair of elegant lamps, a stack of art books, a small plant, and a treasured piece of art or a mirror above the table. Varying heights and textures will create visual interest. I’m already looking forward to Thanksgiving and sharing the custom wreath display I’ll be building for this very table very soon, so stay tuned for more decor inspiration!
Your Handcrafted Masterpiece Awaits!
You’ve now got all the knowledge and inspiration needed to craft your very own stunning 8-board farmhouse console table. This project isn’t just about building furniture; it’s about creating a unique piece that reflects your dedication and personal touch, adding significant value and charm to your home. The satisfaction of building something with your own hands, especially a piece this beautiful and functional, is truly unmatched. We hope you enjoy every step of the process, from the first cut to the final decorative flourish.
Download Your Free Console Table Plans!
Ready to embark on this rewarding DIY journey? Don’t wait any longer to build this gorgeous piece that will undoubtedly become a conversation starter in your home. Click the link below to download your comprehensive, free printable plans for the 8-Board Farmhouse Console Table. These plans will provide all the detailed measurements and diagrams you need to make your build a resounding success!
CLICK HERE TO DOWNLOAD YOUR FREE FARMHOUSE CONSOLE TABLE PLANS!