
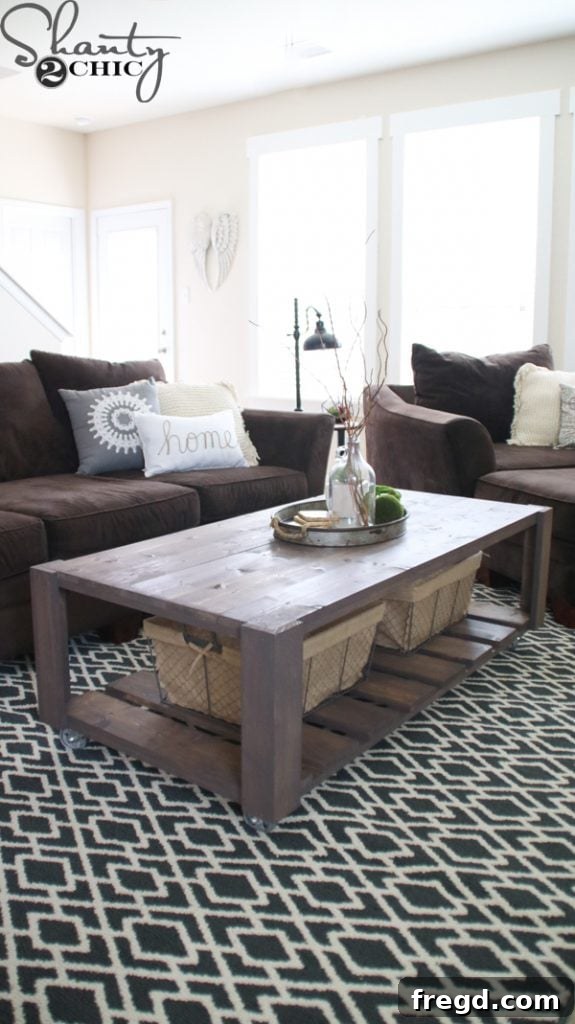
What happens when you combine the creative energy of two passionate DIY sisters, a truckload of lumber, and a tight 48-hour deadline, all for the love of family? You get an epic home transformation we affectionately dubbed a #shantyhousecrash! A few months ago, my sister Whit and I embarked on a special journey to Houston to visit our baby sister and her wonderful family. With four lively children under the age of six, and having just moved into a new house, she was overwhelmed and her home still didn’t quite feel like “home.” Without hesitation, Whit and I seized the opportunity to turn our visit into a whirlwind Shanty House Crash, tackling six exciting projects and completely revamping two of her rooms!
Today, I’m thrilled to unveil one of the standout projects from that incredible weekend: the versatile and charming DIY Crate Coffee Table on Wheels. This piece was specifically designed for her bustling living room, crafted to meet the unique demands of a young, active family while adding significant style and functionality.
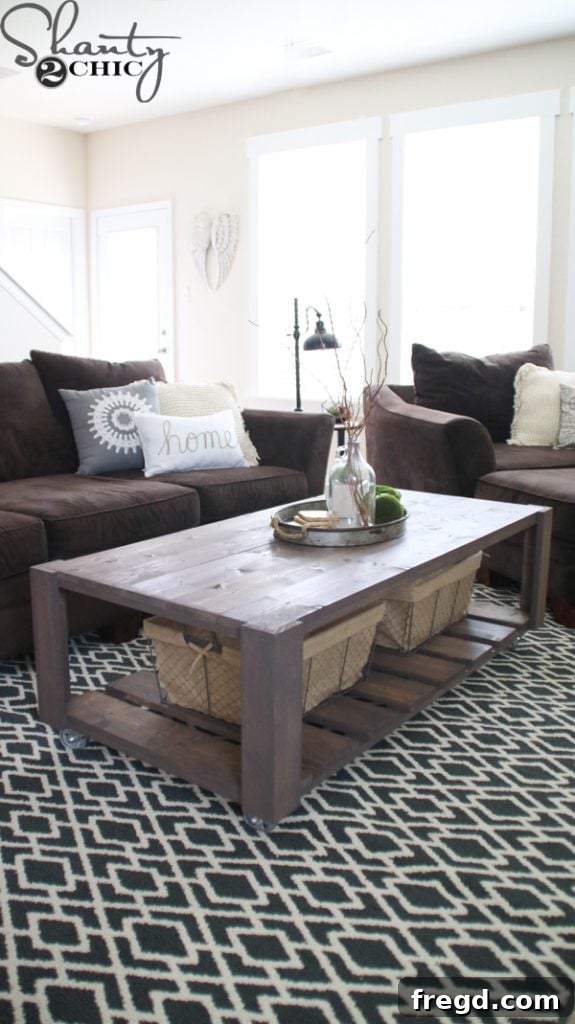
Crafting a Functional & Stylish DIY Rolling Coffee Table
This DIY Crate Coffee Table isn’t just a piece of furniture; it’s a multi-purpose hub designed to withstand the rigors of family life. Our primary goals for this project were clear: to provide a rock-solid, sturdy surface that could handle four energetic little climbers, offer ample storage space to conquer the inevitable mountain of toys, and, of course, be a beautiful, eye-catching centerpiece in the living room. Challenge accepted and, dare I say, triumphantly met!
One of the most appealing aspects of this project is its accessibility. It’s a surprisingly easy build, making it a fantastic undertaking for DIY enthusiasts of all skill levels, even those just starting their woodworking journey. With a straightforward design and minimal specialized tools, you’ll be amazed at what you can create in a weekend. Below, I’ll guide you through my construction process, providing detailed insights and tips along the way. But before we dive in, don’t forget to grab your essential blueprint:
Make sure to click HERE to print your free, comprehensive plans! These plans include all the exact measurements and cut lists you’ll need for a successful build.
Essential Tools for Your DIY Coffee Table Project
One of the beauties of this project is its simplicity, which extends to the tool list. You won’t need a massive workshop or an arsenal of expensive equipment. Here are the core tools that will make this build a breeze:
- Miter Saw: Perfect for making accurate, straight cuts and precise angles. If you don’t have one, a circular saw with a guide or even a good hand saw and miter box can work for smaller projects, though it will require more effort.
- Drill: Essential for drilling pilot holes and driving screws, especially when using pocket hole joinery. A cordless drill offers maximum portability and convenience.
- Kreg Jig: This tool is a game-changer for creating strong, concealed joints. It allows you to drill pocket holes at an angle, making connections sturdy and virtually invisible. We highly recommend investing in one if you plan on doing more woodworking projects.
- Nailer (Brad Nailer): A brad nailer (either pneumatic or electric) significantly speeds up the assembly process, offering quick and secure temporary or permanent fastening. It’s particularly useful for attaching planks and making quick connections.
Step-by-Step Construction Guide
1. Building the Sturdy Legs
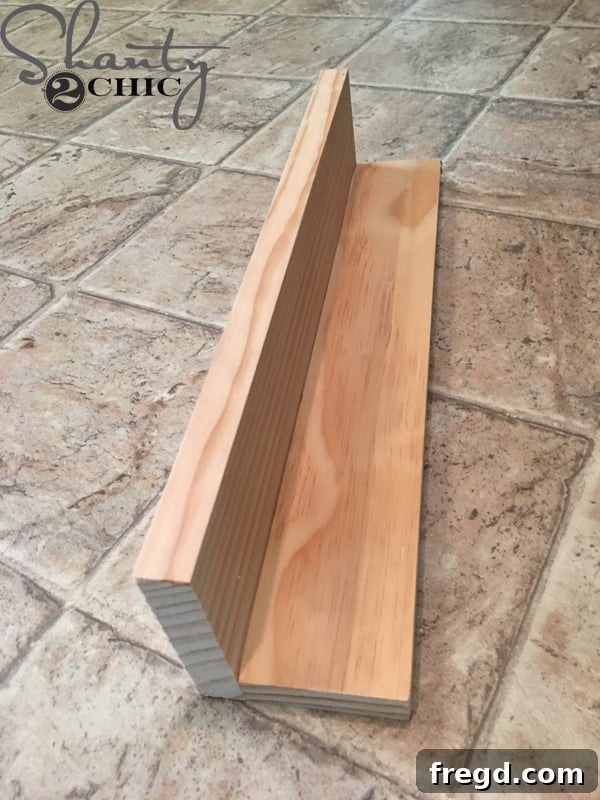
The foundation of our durable coffee table begins with strong legs. The first step is to precisely cut and assemble the four individual legs. Each leg is constructed by attaching a 1×4 piece to a 1×3 piece. We achieve a robust connection using a combination of high-quality wood glue and 1 1/4″ brad nails. Apply a generous bead of wood glue along the edge of the 1×3, then align the 1×4 piece, ensuring the edges are flush. Secure them together with brad nails, spacing them every few inches for optimal hold. This combination of glue and nails creates a joint that is both strong and stable, crucial for a table that will see a lot of activity.
2. Preparing the Top and Bottom Frames with Pocket Holes
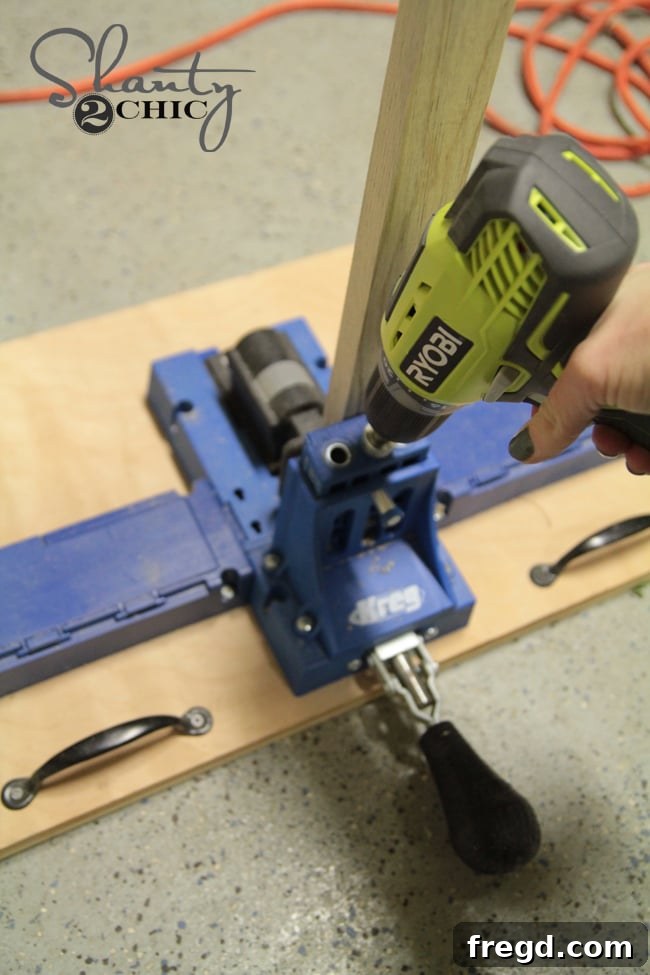
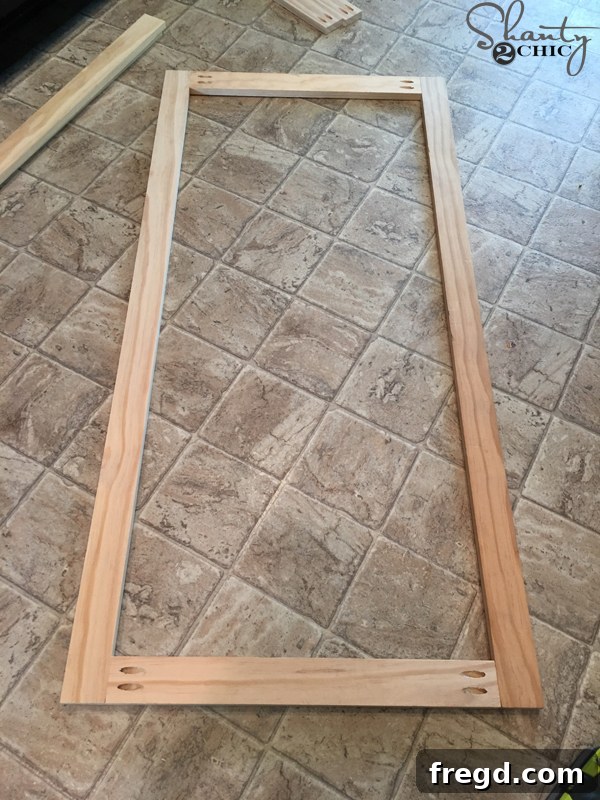
Next, it’s time to prepare the pieces that will form the top and bottom frames of your coffee table. Begin by accurately cutting all the necessary components for these frames according to the dimensions provided in your free plans. Once cut, we’ll utilize the incredible Kreg Jig to drill 3/4″ pocket holes into the short pieces of the frame. Pocket holes are fantastic for creating strong, hidden joints that give your furniture a clean, professional look. You can find the specific Kreg Jig model that we absolutely adore HERE on Amazon. Always refer to your printable plans for the precise placement and number of pocket holes for each piece to ensure maximum structural integrity.
3. Assembling the Bottom Frame
With your pocket holes drilled, it’s time to assemble the robust bottom frame. This is a critical step as it will bear the weight of the table’s contents and provide stability. Begin by attaching the long side pieces of the frame to the shorter end pieces. Apply wood glue to the ends of the short pieces where they will meet the long pieces. Then, using 1 1/4″ pocket hole screws, securely fasten the pieces together. Ensure your frame is perfectly square as you assemble it; a quick check with a carpenter’s square can prevent headaches down the line. A square frame is essential for a stable and aesthetically pleasing finished product.
4. Installing the Bottom Planks for Storage
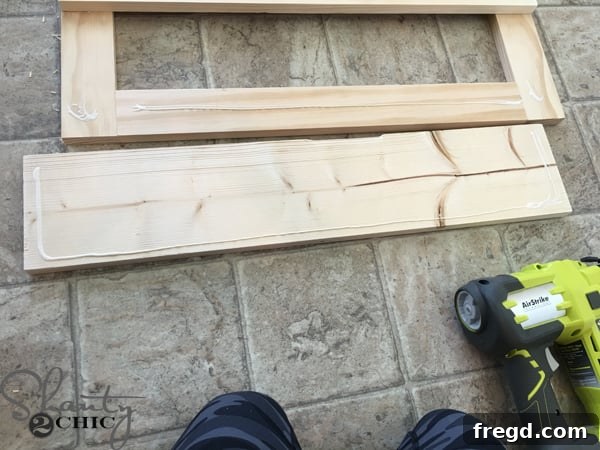
Once the bottom frame is fully assembled and square, measure its inner width precisely. This measurement will guide you in cutting the planks that will form the base of your storage area. Cut your planks to size, ensuring they fit snugly across the frame. To attach them, apply wood glue along the top edges of the bottom frame where each plank will rest, then secure them with 1 1/4″ brad nails. It’s crucial that the ends of these planks are flush with the outer edges of the frame, creating a seamless and tidy look. This section is where all those toys and books will find their home, so make sure it’s solid!
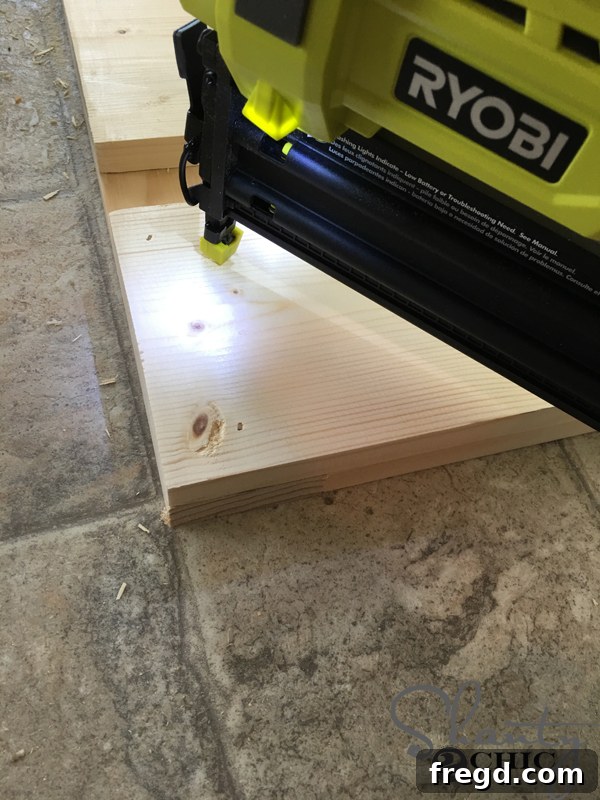
Pro Tip for Even Spacing: To ensure your planks are spaced perfectly and look professional, attach the two end planks first, making sure they are flush with the very ends of the frame. Then, you can easily measure and space out the remaining planks evenly between these two anchors. This method guarantees a consistent and appealing look across the entire bottom shelf.
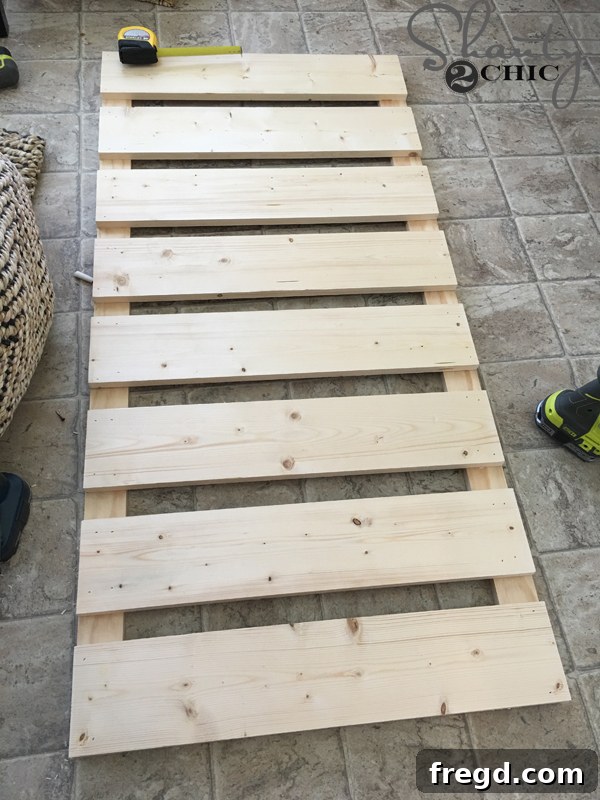
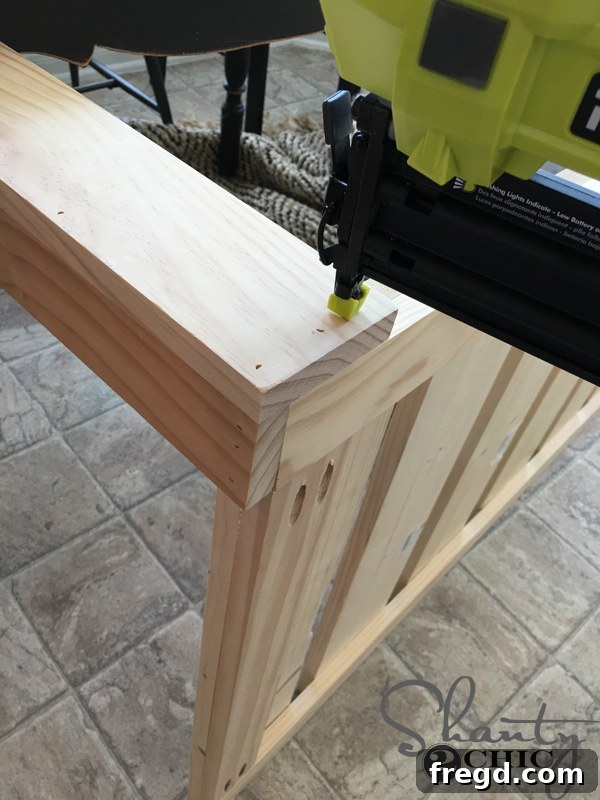
Here’s a clear view of the completed bottom frame with all the planks securely attached, ready for the next phase of assembly.
5. Attaching the Legs to the Bottom Frame
Now, it’s time to bring the legs and the bottom frame together to start forming the main structure of your coffee table. Carefully position each leg so that its bottom edge is perfectly flush with the bottom of the assembled frame. This precise alignment is key to ensuring the table sits level and looks professionally built. Attach each leg to the frame using 1 1/4″ brad nails and a generous amount of wood glue. Pay close attention to the orientation of the legs: the wider 1×4 side of each leg should be positioned along the long side of the coffee table. This not only provides better stability but also contributes to the table’s overall aesthetic.
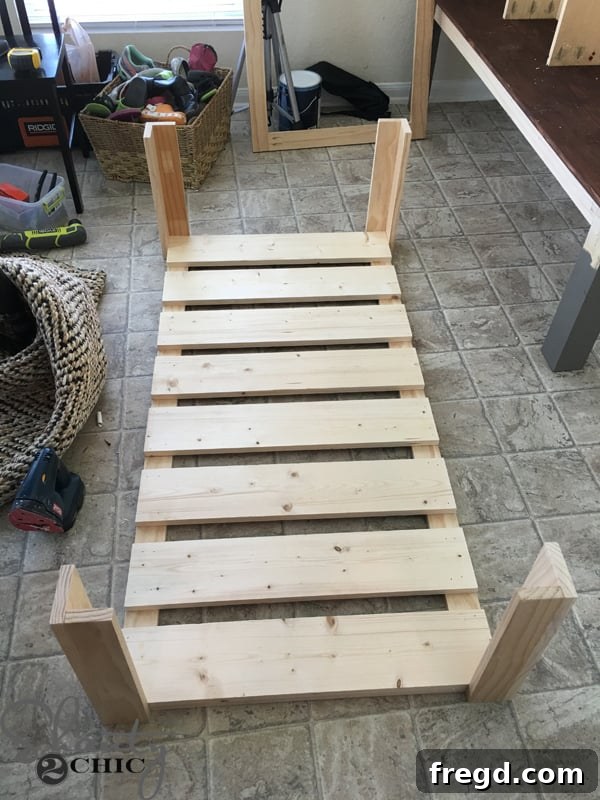
Once all four legs are securely attached, your coffee table will begin to take its definitive form, looking something like this:
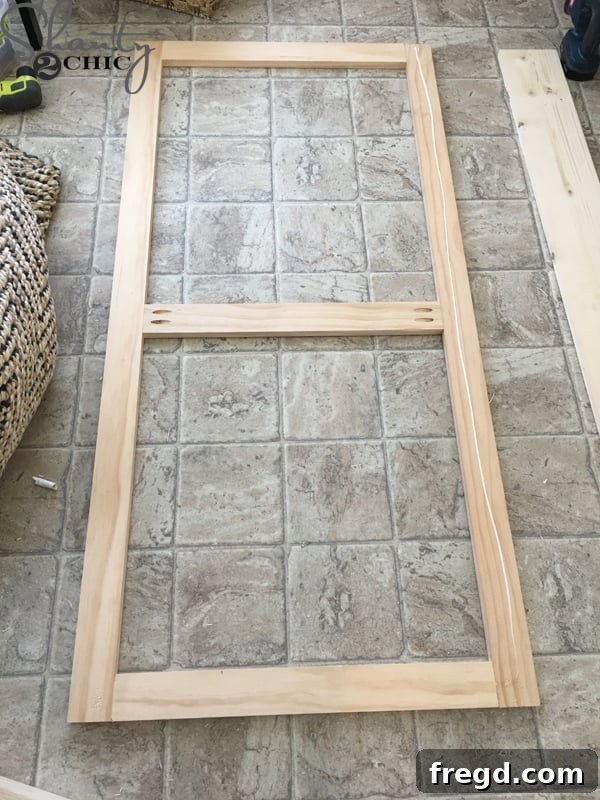
6. Assembling the Top Frame with Support
The top frame is assembled in much the same way as the bottom frame, utilizing the same pocket hole joinery techniques. However, there’s one key addition: a central support piece. This support is crucial for preventing any sagging of the tabletop planks over time, especially in a high-traffic item like a coffee table. Refer to your detailed plans for the exact dimensions and precise placement of this central support. Ensure all connections are secure with wood glue and pocket hole screws, and double-check for squareness.
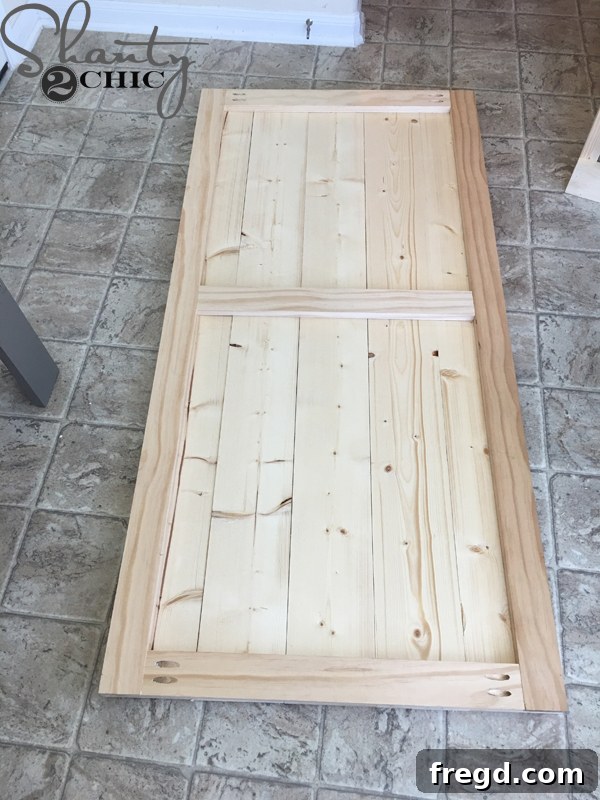
7. Attaching the Table Top Planks to the Frame
Now for the visible surface of your coffee table! Measure the full length of your assembled top frame and cut your tabletop planks to size. For this step, we use a clever technique to ensure a perfect fit and strong bond. Lay the tabletop planks on a clean, flat surface, side-by-side. Make sure they are placed upside down, so you are looking at what will be the ‘bad’ or underside of the planks. Carefully position the assembled top frame over these planks, ensuring that all edges are perfectly flush. Once aligned, run a continuous line of wood glue along the underside of the frame where it makes contact with the planks. Finally, secure the frame to the planks using 1 1/4″ brad nails. This method creates a strong, unified tabletop unit.
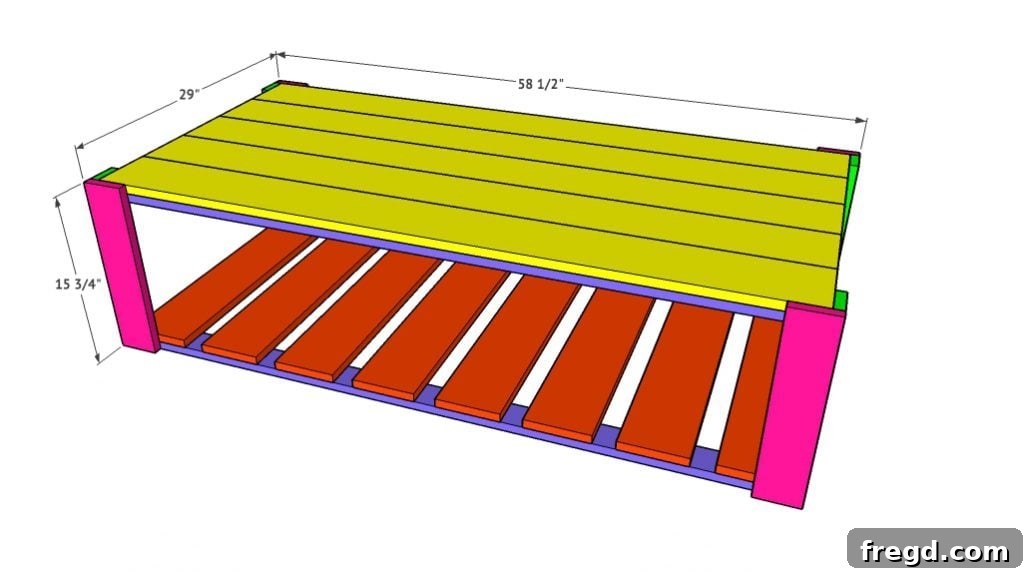
8. Connecting the Top Assembly to the Legs
With the tabletop planks now securely attached to the top frame, it’s time to marry this assembly with the rest of the table’s structure. Carefully place the entire tabletop assembly onto the legs. The top of each leg should be perfectly flush with the very top surface of the tabletop planks. This detail is important because the tops of the legs will actually become part of the finished tabletop surface, creating a seamless and integrated design. Secure the top frame to the legs using 1 1/4″ brad nails and plenty of wood glue. Double-check all connections to ensure they are firm and stable.
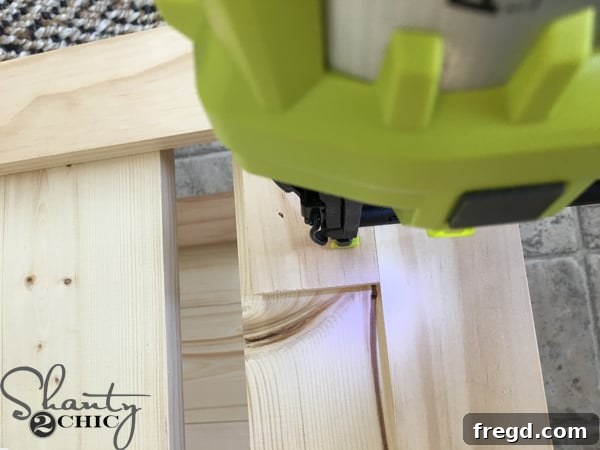
9. Preparing for Mobility: Caster Blocks
To prepare your coffee table for its rolling feature, carefully flip the entire table upside down. At each corner, you’ll attach scrap caster blocks. These small wooden blocks provide a solid surface for mounting the casters, ensuring they are securely fastened and can handle the table’s movement. Attach these blocks using wood glue for a strong bond and then reinforce with 1 1/4″ brad nails. This step might seem minor, but it’s crucial for the longevity and functionality of your rolling table.
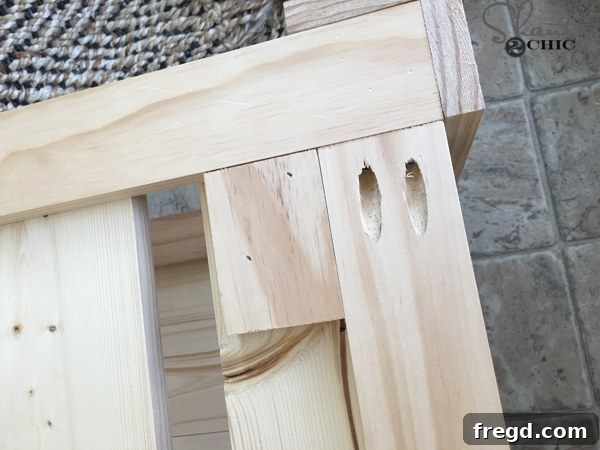
10. Adding the Rolling Casters
With the caster blocks in place, it’s time for the final piece of hardware that transforms this coffee table into a truly versatile piece of furniture – the casters! Carefully attach one caster to each corner, screwing them firmly into the previously installed caster blocks. The casters we used for this project, which glide beautifully and provide excellent mobility, were found HERE on Amazon. Once installed, these wheels will allow your table to be effortlessly moved around the room, making cleaning, redecorating, or simply shifting to create more play space a breeze.
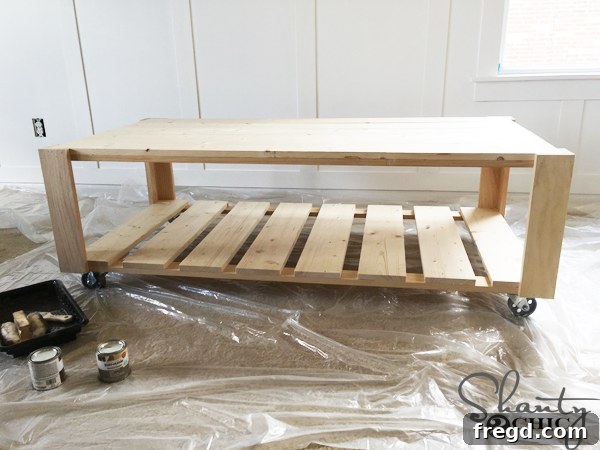
11. The Art of Finishing: Staining for Style and Durability
Once all the hardware is attached, flip your coffee table right-side up, and take a moment to admire your craftsmanship! Now comes the truly transformative step: applying the finish. Before staining, always ensure your wood surface is clean, dry, and thoroughly sanded. Start with a medium-grit sandpaper (e.g., 120-grit) to smooth out any imperfections, then move to a finer grit (e.g., 220-grit) for a silky smooth finish. Wipe away all dust with a tack cloth before applying any stain.
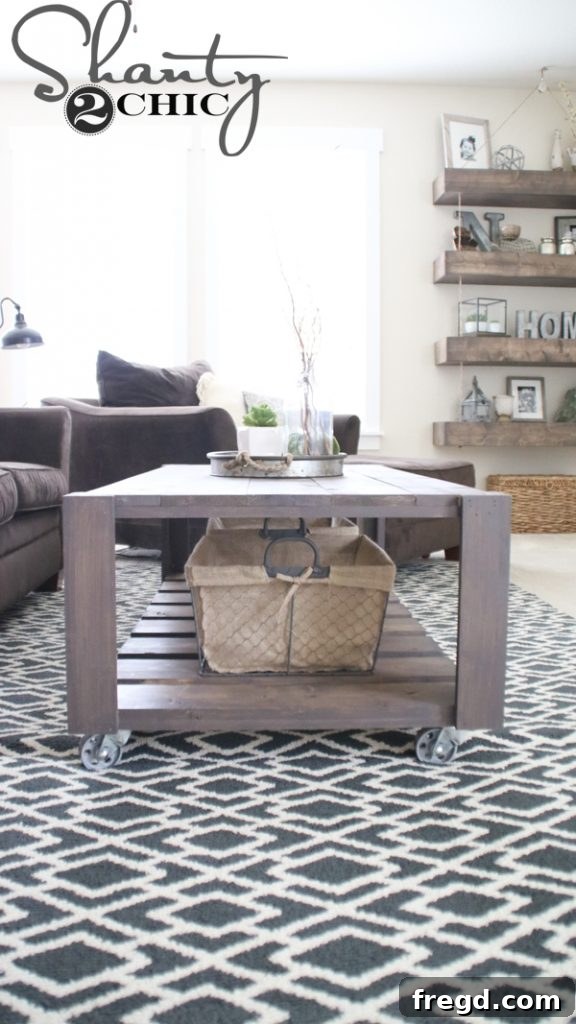
For this particular coffee table, we achieved a stunning, rich brown-gray hue by mixing dark walnut and weathered gray stains at a 50:50 ratio. This custom blend delivers a sophisticated, aged look that perfectly complements a range of decor styles from rustic to modern farmhouse. If you’re looking for a simpler option, Varathane now offers a ready-made color called Briarsmoke that closely matches our custom mix. You can typically find Varathane stains on Amazon HERE. If Briarsmoke isn’t available, our 50:50 blend is a fantastic alternative that you can easily create yourself.
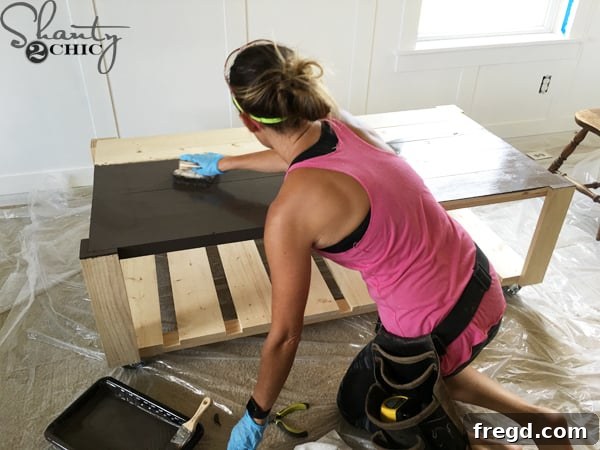
I applied a single, even coat of stain to the entire table using a high-quality Lamb’s Wool applicator. This tool ensures smooth, consistent coverage and minimizes streaks. For a visual guide and more in-depth tips on achieving a perfect stain, be sure to check out our “How to Stain Wood” video HERE!
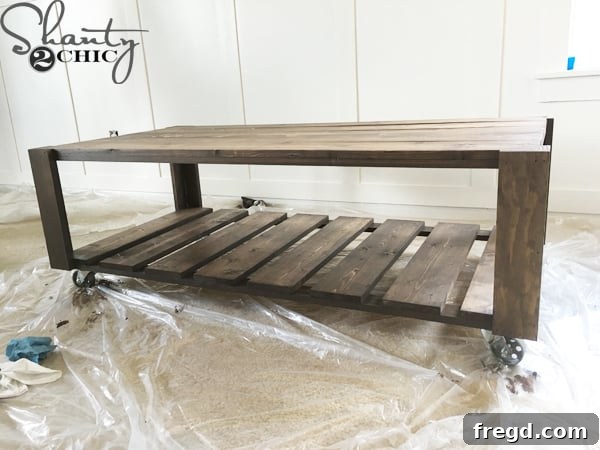
After applying the stain, allow adequate time for it to dry completely. In our experience, this usually takes about an hour, depending on humidity and ventilation. Patience at this stage ensures a flawless finish and proper adhesion for the protective topcoat.
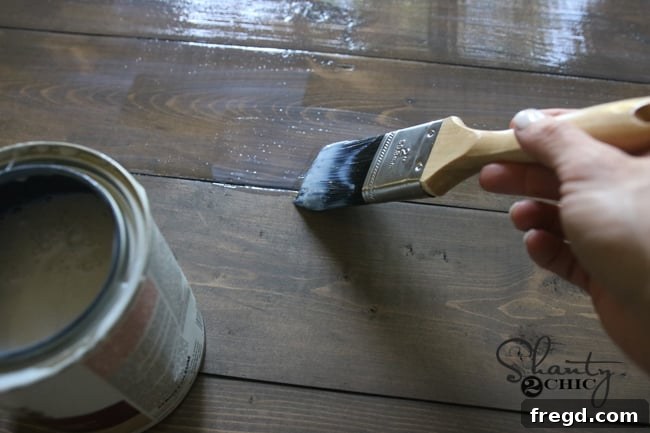
12. Sealing with Polyurethane for Ultimate Protection
The final, crucial step in finishing your DIY Crate Coffee Table is applying a protective topcoat. For a piece designed to withstand spills, scratches, and the general wear and tear of a busy household with kids, we highly recommend Varathane’s Triple Thick Polyurethane. This product offers exceptional durability and a beautiful, long-lasting finish in just one coat. You can find Triple Thick Polyurethane HERE on Amazon. If you’re unsure about the best way to apply polyurethane for a professional result, our “How to Stain Wood” video (linked previously) also covers polyurethane application techniques. Once the poly dried, we officially declared a well-deserved break! Your coffee table is now protected and ready for action.

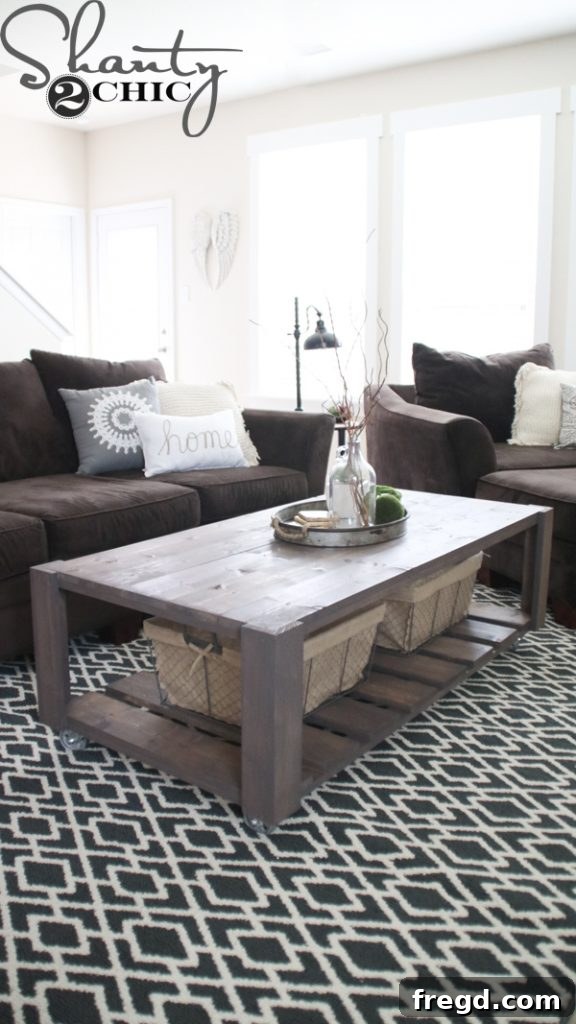
Styling Your New Coffee Table and Living Space
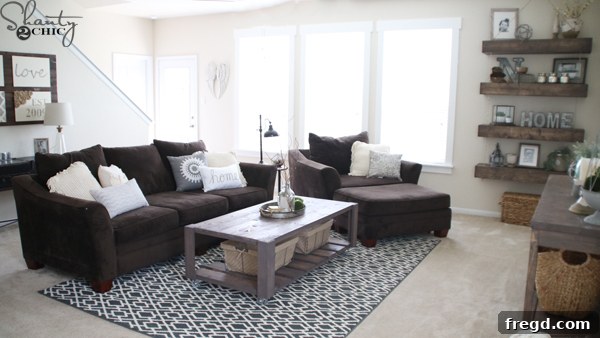
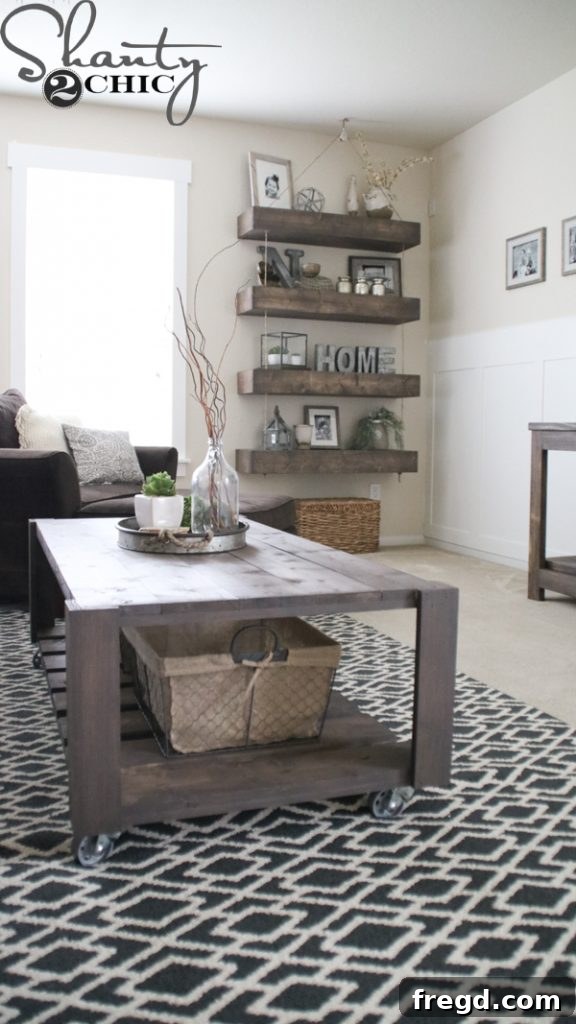
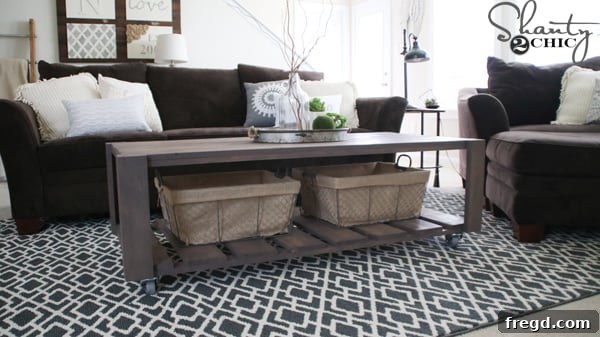
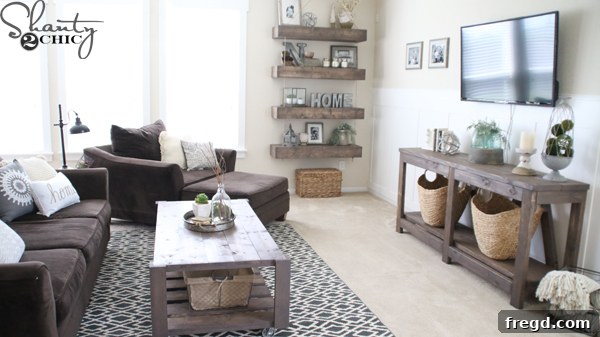
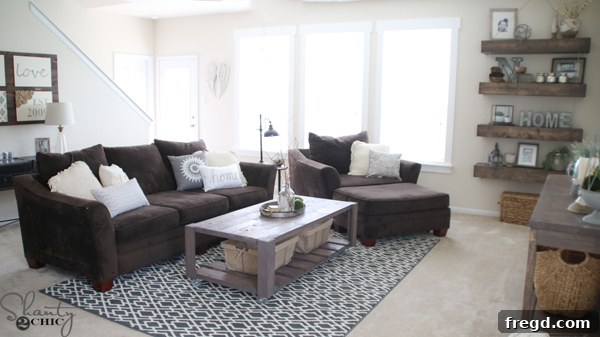
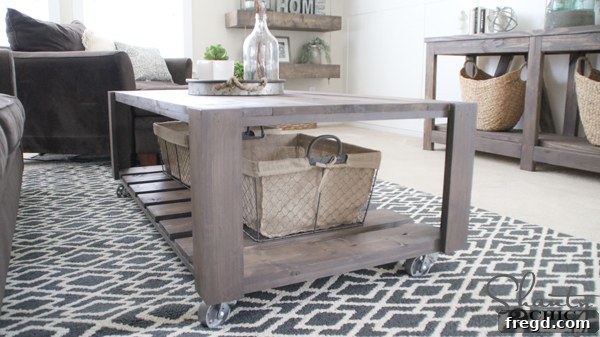
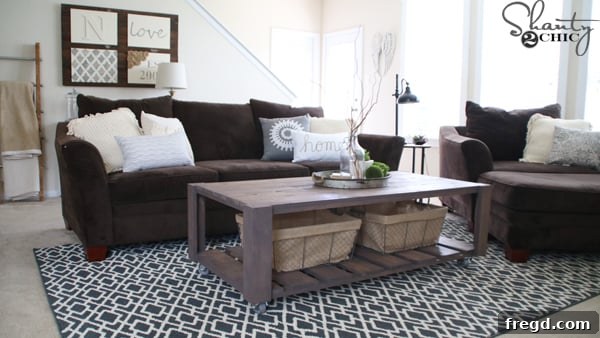
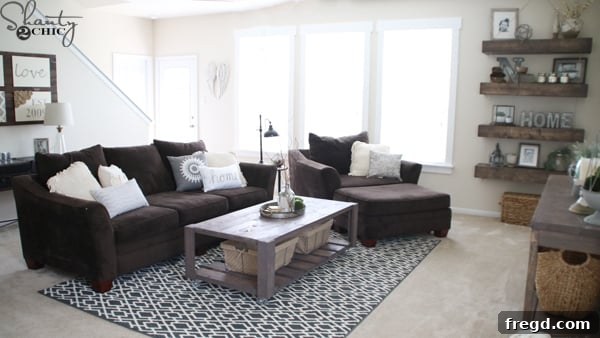
With the coffee table complete, it was time for the fun part: styling! We discovered the perfect set of functional and stylish baskets from AtHome, which fit snugly into the open compartments of the table, offering ideal storage for toys, blankets, or magazines. These baskets truly completed the ‘crate’ aesthetic while maximizing practical storage.
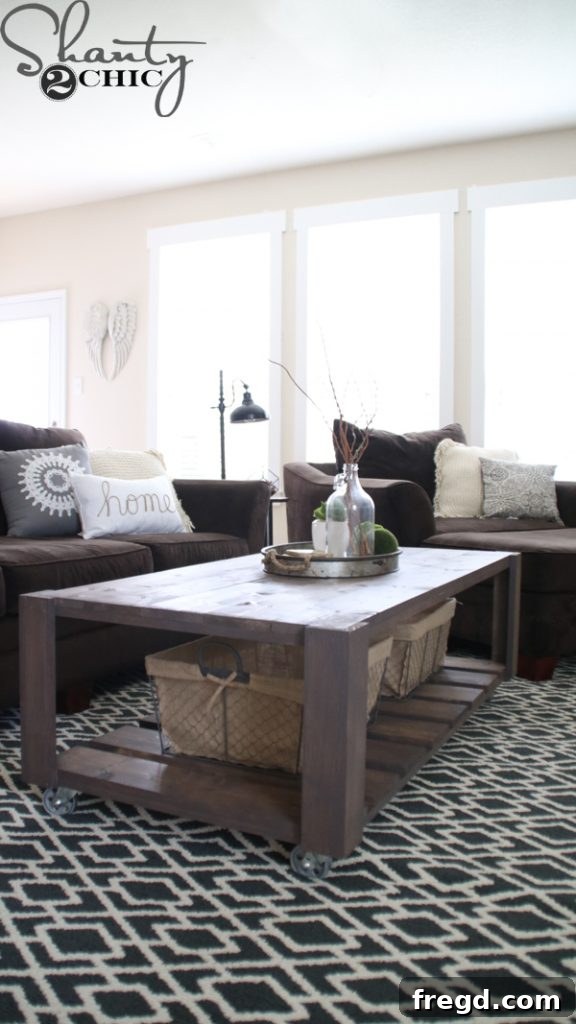
Now, let’s take a tour around the transformed living room to see how this beautiful, functional DIY Crate Coffee Table integrates into the overall design and contributes to a cohesive, inviting space. The entire room, including the decor, was thoughtfully curated and sourced from AtHome, making it easy for anyone to recreate this stylish look.
Discover More Shanty House Crash Projects!
The DIY Crate Coffee Table on Wheels was just one of the many exciting transformations we completed during our Shanty House Crash. If you loved this project and are eager to explore the other DIY builds that brought this living space to life, you’re in luck! We’ve made sure to provide detailed plans and tutorials for every project featured in this inspiring room makeover. Dive into these additional resources to elevate your own home decor:
- Floating Shelves with Pulley Design: Add unique architectural interest and versatile storage with these stylish shelves. Find the plans HERE.
- Elegant Window Trim: Transform ordinary windows into focal points with custom, easy-to-install trim. Get the details HERE.
- Diagonal Base Farmhouse Console Table: A statement piece that combines rustic charm with practical surface space, perfect for an entryway or behind a sofa. Build your own with plans HERE.
- Classic Board and Batten Wall: Add architectural character and visual texture to any room with this timeless wall treatment. Learn how to create it with our guide and video HERE.
We hope this detailed guide empowers you to tackle your next DIY project with confidence and creativity. Transforming a space, especially for loved ones, is one of the most rewarding experiences. Don’t forget to download the free plans for this DIY Crate Coffee Table and start building your own functional masterpiece!
Thanks so much for stopping by and being a part of our DIY journey!
Ashley