
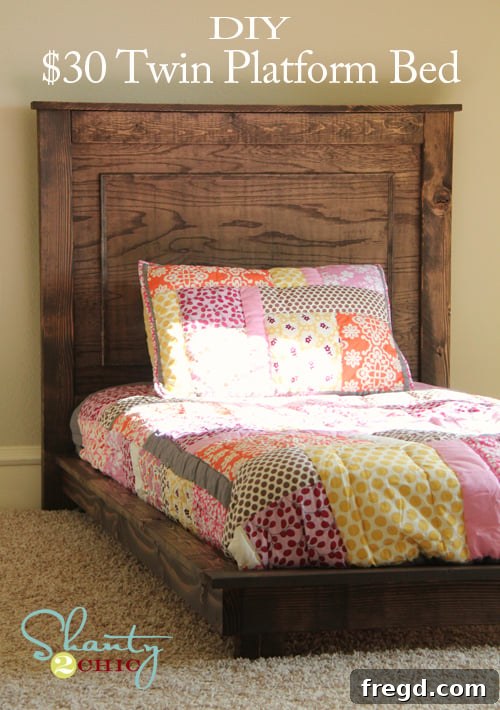
Unlock Your Dream Bedroom: Build a Stylish & Sturdy Twin Platform Bed for Just $30!
Imagine furnishing your child’s room with brand new, custom-built beds, perfectly suited to their space and style, without breaking the bank. Sounds too good to be true, right? Well, prepare to be amazed! We’re thrilled to share how you can construct a robust and incredibly chic twin platform bed for an astonishingly low cost – we’re talking just $30! This isn’t just a budget-friendly project; it’s an opportunity to create beautiful, functional furniture that will stand the test of time, all while enjoying the immense satisfaction of a DIY success.
For many DIY enthusiasts, a Kreg Jig is an indispensable tool, making pocket-hole joinery quick and easy. Indeed, I relied on my trusty Kreg Jig to assemble these delightful beds, simplifying the process and ensuring strong connections. However, please don’t let the lack of specialized tools deter you! The beauty of this design lies in its adaptability. You can absolutely build these twin platform beds using alternative joinery methods, such as traditional screws and wood glue, or even simple butt joints reinforced with corner brackets. The core design is so straightforward and forgiving that even novice woodworkers can achieve professional-looking results. These minimalist platform beds boast a clean, contemporary aesthetic that effortlessly complements almost any existing headboard, wall decor, or room theme. Their understated elegance makes them a versatile foundation for a variety of bedroom styles, from modern and Scandinavian to rustic or classic. Beyond their charming appearance, these beds offer a practical advantage that many parents will truly appreciate: their low-profile design means there’s no cavernous space underneath for kids to stash forgotten toys, stray socks, or sticky treasures. This feature alone can be a game-changer for maintaining a tidy and clutter-free children’s bedroom!
Embarking on a woodworking project, especially one that involves furniture, can feel daunting. But with the right guidance, it becomes an enjoyable and rewarding experience. That’s where incredible resources like Ana White’s website come into play. Her clear, concise, and incredibly detailed plans are a godsend for DIYers of all skill levels. For these fantastic $30 twin platform beds, I followed Ana’s directions meticulously, and I highly recommend you do the same. Her step-by-step instructions ensure a smooth build process, making what might seem complex surprisingly simple. You can easily access the comprehensive and easy plans for these sturdy and stylish twin platform beds directly on Ana White’s site by clicking HERE. She truly outdoes herself with designs that are both beautiful and achievable for the home builder, proving once again why she’s a favorite in the DIY community.
During my build, I discovered a few small tips and tricks that significantly streamlined the process and improved the final outcome, which I’m eager to share. One such detail involved installing the bed feet. Precision is key when it comes to furniture construction, especially ensuring that all legs are perfectly level for stability and aesthetics. To achieve this effortlessly, I created a simple 1/2-inch spacer using a scrap piece of wood. This allowed me to consistently align each foot at the exact same height before securing it, preventing any wobbles and ensuring a perfectly level bed frame. This small step made a big difference in the professional finish and structural integrity of the bed.
When it comes to fasteners, many woodworkers swear by traditional wood screws. However, through experience, I’ve developed a preference for drywall screws for many of my projects, including these beds. While designed for drywall, their sharp points and coarse threads often allow them to bite into wood more easily than some wood screws, making installation quicker and requiring less force. They glide in effortlessly, which can save a lot of wrist strain on larger projects. Plus, as an added aesthetic bonus, I find their black finish to be quite appealing, blending seamlessly with darker wood stains or creating a subtle contrast that adds character to the piece. Of course, regardless of the screw type, the true secret to enduring strength in woodworking joints lies in the power of adhesive. For all crucial connections on these beds, I generously applied Gorilla Wood Glue. This high-performance wood glue creates a bond stronger than the wood itself, ensuring that once assembled, your platform bed will be incredibly sturdy and durable, standing up to years of use and play.
Another critical component of any platform bed is the support system for the mattress. This is typically achieved with side cleats and slats. Attaching the side cleats correctly is vital for the bed’s structural integrity and to properly support the mattress without sagging. Here’s a look at how straightforward it was to secure these essential supports, providing a robust ledge for the bed slats to rest upon. Careful measurement and secure fastening at this stage will guarantee a long-lasting and comfortable sleep surface.
As the construction phase neared completion, it’s always exciting to see the raw wood framework come together, hinting at the finished piece. This image captures the twin platform bed just before I applied the stain. It’s a moment that truly showcases the simple yet elegant lines of the design. However, I learned a valuable lesson shortly after this stage regarding mattress support. While the initial plans provided adequate support, my energetic girls, in their “barely jumping” on the beds, managed to put enough stress on one of the slats to cause a minor break. This quickly highlighted the importance of robust and ample mattress support, especially for children’s beds that often endure more than just sleeping! To ensure maximum durability and peace of mind, I went back and added several more mattress support boards than initially planned. This reinforcement proved to be a simple and effective solution, completely resolving the issue and making the beds incredibly sturdy. It’s a small adjustment that greatly enhances the longevity and safety of the beds, making them ready for whatever adventures childhood brings.
With the construction complete and any necessary reinforcements made, the next step was to transform the raw wood into a beautiful, finished piece of furniture. For this project, I chose my absolute favorite wood stain: Rust-Oleum Dark Walnut. This particular stain offers a rich, deep brown hue with beautiful warm undertones that truly highlight the natural grain of the wood, adding a touch of sophistication and warmth to the simple design. The application process is straightforward: simply apply with a brush or rag, allow it to penetrate, and then wipe off any excess. For added protection and durability, especially for furniture that will see daily use, I always recommend applying a protective topcoat, such as a polyurethane or lacquer, after the stain has fully dried. This seals the wood, protects against scratches and spills, and enhances the richness of the stain, ensuring your DIY bed looks fantastic for years to come.
And here they are, in all their finished glory! The transformation from raw lumber to these elegant, sturdy twin platform beds is truly rewarding. The Dark Walnut stain provides a beautiful, deep finish that brings out the natural character of the wood, giving them a timeless appeal. Seeing the completed beds standing proudly in the room, knowing they were built with my own hands for such an incredibly low cost, is an immense source of pride and satisfaction. While the beds themselves are complete, the room is still a work in progress. I’m already looking forward to building the rest of the coordinating pieces, like nightstands and dressers, to truly complete the space and ensure a cohesive, beautifully furnished children’s bedroom. It’s amazing how a few well-chosen DIY projects can transform an otherwise bare room into a warm and inviting sanctuary.
We genuinely hope you’re as thrilled with these DIY twin platform beds as we are! The combination of their incredibly low price point and exceptional sturdiness makes them an unbeatable project for anyone looking to upgrade a bedroom on a budget. My girls absolutely adore their new “tree” colored beds, and knowing they’re built to withstand the rigors of childhood play brings immense satisfaction. If you’re looking to complete the bedroom ensemble, you might also be interested in the coordinating headboard project. I’ve previously shared a detailed post on building a DIY Pottery Barn-inspired twin headboard, which you can check out HERE to perfectly complement these platform beds.
Ready to roll up your sleeves and build your own? Don’t hesitate any longer! Head over to Ana White’s website now to grab the complete, easy-to-follow plans for these fantastic and affordable twin platform beds. Her detailed instructions will guide you every step of the way, ensuring a successful and rewarding DIY experience. Click HERE to get the plans from Ana White and start your project today! You’ll be amazed at what you can achieve with a little wood, some basic tools, and a great set of plans. Happy building, and may your DIY journey be filled with creativity and success!
Have a wonderful day, and if you’re inspired, please feel free to PIN AWAY and share this project with your friends and followers! Your support is always greatly appreciated!
~Whitney