
Welcome to Day 3 of our enchanting 12 Days of Christmas Series! We’re absolutely thrilled to share another fantastic DIY project designed to infuse your home with festive cheer and a touch of personalized warmth. If you haven’t already, we invite you to join our vibrant community and stay updated with all our holiday inspirations on Instagram and Facebook. Your support and engagement truly light up our season!
Today, we’re diving into a project that I’m particularly excited about. It’s not just incredibly easy to construct, but also remarkably budget-friendly, proving that stunning holiday decor doesn’t have to break the bank. Get ready to transform simple materials into cherished keepsakes!
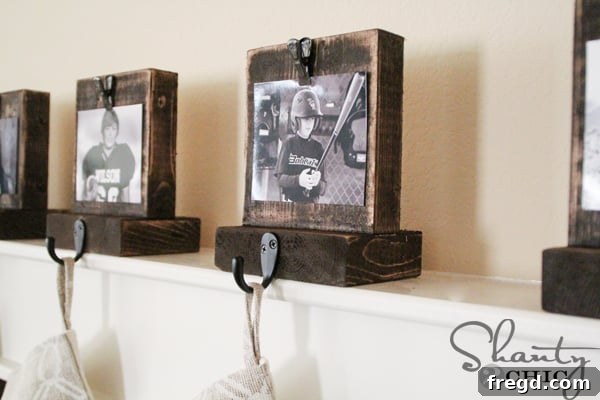
Our featured project for Day 3 is a set of charming DIY Wooden Stocking Hangers, designed to add a personal and rustic touch to your holiday mantelpiece. I’m absolutely captivated by their rustic appeal, which beautifully complements my more elegant stockings (sourced from Crate and Barrel). This blend of rustic charm and sophisticated flair creates a truly unique holiday display that feels both cozy and chic.
One of the most appealing aspects of this project is its cost-effectiveness. Each individual stocking hanger will set you back just a couple of dollars at most. What’s even better is the efficiency of the design: a single standard board can yield enough material to craft up to nine beautiful hangers, making it perfect for larger families or for gifting. They’re not only quick to assemble but also incredibly simple, making this an ideal woodworking project for beginners and seasoned DIY enthusiasts alike. Let’s dive into the step-by-step process and bring these custom photo stocking hangers to life!
Craft Your Own Personalized Photo Stocking Hangers
Imagine your holiday mantel adorned with custom-made stocking hangers, each featuring a cherished family photo. These DIY Photo Stocking Hangers are designed to do just that, offering a wonderful way to display festive memories year after year. Here’s a detailed guide to creating these beautiful and functional pieces.
Materials You’ll Need:
- One 2×6 board (8 feet long) – This common pine board is sturdy and provides ample material.
- Wood stain (e.g., Rust-Oleum Dark Walnut)
- Oil-rubbed bronze hooks (one per hanger)
- Small metal clips (from the scrapbook section of craft stores like Hobby Lobby, one per hanger)
- 3M Command Strips (16lb capacity or suitable alternative for securing to the mantel)
- Wood glue (optional, for extra strong joints)
Tools Required:
- Miter saw or circular saw (for precise cuts)
- Kreg Jig (for pocket holes) or a drill and suitable wood screws
- Drill (e.g., Ryobi 12V drill)
- Foam brush or clean rag (for applying stain)
- Clean cloth (for wiping off excess stain)
- Sander (e.g., Ryobi Corner Cat Sander) or sandpaper (medium to fine grit)
- Hot glue gun and glue sticks
- Measuring tape and pencil
- Safety glasses and gloves
Step-by-Step Construction Guide:
1. Preparing Your Wood Pieces
Begin by taking your 8-foot 2×6 board. For each individual stocking hanger, you will need two distinct pieces: one measuring 4 inches in length and another measuring 6 inches in length. Carefully measure and mark these dimensions on your board, then use a miter saw or circular saw to make clean, precise cuts. It’s a good idea to cut all your 4-inch pieces first, and then all your 6-inch pieces to maintain consistency. Always prioritize safety when operating power tools by wearing appropriate eye protection and ensuring your work area is clear.
2. Drilling Pocket Holes for Secure Assembly
The 4-inch piece will serve as the stable base of your stocking hanger, while the 6-inch piece forms the top section where you’ll eventually display your treasured photos. To securely join these two components, I recommend drilling two 1 1/2-inch pocket holes into each 6-inch piece using a Kreg Jig. The pocket hole system creates strong, hidden joints that are perfect for woodworking projects like this. The image clearly shows the ideal placement for these holes. If you don’t own a Kreg Jig, don’t worry! An excellent alternative is to simply drive two 2 1/2-inch wood screws directly through the bottom of the 4-inch base piece and into the center of the 6-inch top piece. Ensure the screws are long enough to penetrate deeply into the top piece for a robust connection.
3. Assembling the Hanger Base
With your pocket holes drilled, assembly is incredibly straightforward. Align the 6-inch top piece squarely on top of the 4-inch base piece. Secure them together using 2 1/2-inch Kreg pocket hole screws. If you opted for the alternative method, simply pre-drill pilot holes to prevent wood splitting, and then drive your 2 1/2-inch wood screws from the bottom of the base into the top piece. This creates a solid, stable structure for your stocking hanger that will withstand the weight of even a generously filled stocking.
4. Applying a Rich Wood Stain
Now, it’s time to give your hangers their signature rustic look. I highly recommend Rust-Oleum Dark Walnut stain – it’s a personal favorite for its rich, warm tone that beautifully enhances the wood grain. Using a foam brush or a clean, lint-free cloth, apply a single, even coat of the stain to all surfaces of the wood. Work in the direction of the wood grain for the best results. Allow the stain to penetrate the wood for approximately 5 minutes. After this brief period, use a clean cloth to gently wipe away any excess stain, blending it smoothly to achieve an even finish. This wiping process is crucial for preventing a blotchy appearance and bringing out the natural beauty of the wood. Let the stained pieces dry completely according to the manufacturer’s instructions, usually several hours or overnight, before proceeding to the next step.
5. Adding Rustic Character Through Distressing
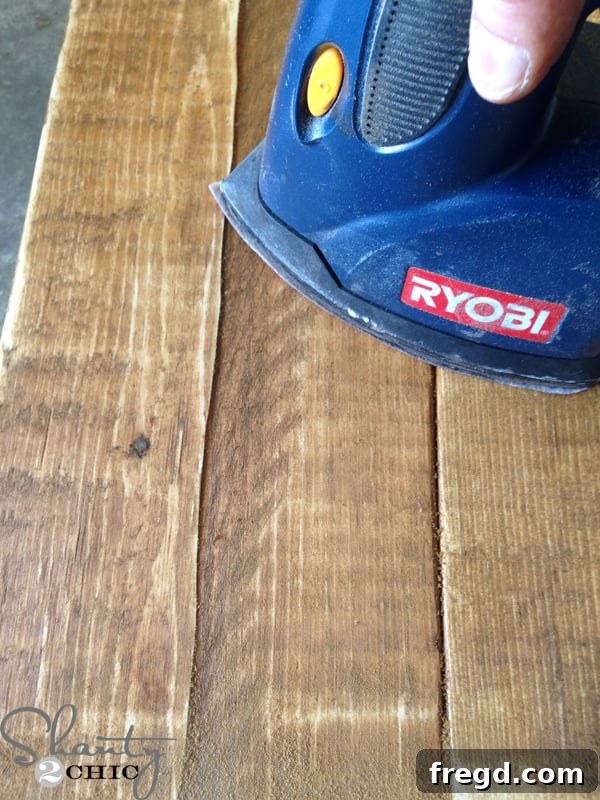
Once the stain is thoroughly dry, you can enhance the rustic aesthetic by distressing the wood. I used my Ryobi Corner Cat Sander for this, as its compact design makes it ideal for reaching edges and corners. Focus on lightly sanding the edges, corners, and any raised areas of the wood. The goal is to gently remove some of the stain and expose the lighter wood underneath, mimicking the natural wear and tear of aged wood. Don’t be afraid to experiment; the beauty of distressing is its imperfect nature. This step adds depth and character, giving each hanger a unique, time-worn appearance that complements any farmhouse or rustic holiday decor theme.
6. Attaching the Stocking Hooks
To prepare your hangers for their primary function, you’ll need to attach the hooks. I opted for oil-rubbed bronze hooks, as their dark, antique finish perfectly complements the rustic wood and dark stain. Position each hook centered on the front face of the 6-inch top piece, ensuring there’s enough clearance for your stockings. Mark the screw holes with a pencil.
7. Securing the Hooks with Precision
Using my trusty Ryobi 12V drill, I attached the hooks firmly in place. This particular drill is fantastic for smaller projects due to its compact size and lightweight design, making it easy to handle and maneuver. Despite its modest size, it delivers ample power to get the job done efficiently and accurately. Drill pilot holes if necessary to prevent splitting, then secure the hooks with the provided screws. Ensure they are straight and tight, ready to hold your stockings securely.
8. Preparing Your Photo Clips
This is where the “photo” aspect of your hangers comes to life! I found these adorable little metal clips in the scrapbook section of Hobby Lobby. They typically come with small red rubber ends, which I carefully removed to achieve a cleaner, more minimalist look that integrates seamlessly with the rustic design. These clips are perfect for holding photos, holiday cards, or even small festive trinkets.
9. Attaching the Photo Clips
To integrate the photo clips onto your hangers, simply use a hot glue gun. Apply a small dab of hot glue to the back of each metal clip and firmly attach it to the top center of each stocking hanger. Hold it in place for a few seconds until the glue sets. This placement allows the clips to be a prominent feature, ready to showcase your chosen photographs. The hot glue provides a strong bond that will keep your clips in place throughout the holiday season.
Ensuring Stability: The Command Strip Solution
While these hangers are sturdy, a stocking brimming with gifts can become quite heavy, potentially causing the hanger to topple over – a holiday disaster no one wants! To prevent this, I highly recommend using 3M Command Strips to secure each stocking hanger firmly to your mantel. These strips are truly brilliant because they provide exceptional holding power without damaging the finish of your furniture, making them ideal for temporary holiday decor.
I used one 16lb capacity Command Strip per hanger, which proved more than sufficient for my needs. However, you can adjust the size or even double up on the strips if you anticipate particularly heavy stockings or desire added peace of mind. Always follow the instructions on the Command Strip packaging for optimal adhesion and removal. This simple addition makes your beautiful DIY stocking hangers not only decorative but also incredibly functional and safe.
To apply, simply attach one strip to the bottom of each stocking hanger, positioning it slightly towards the back. Then, carefully press the hanger firmly onto your mantelpiece. The beauty of Command Strips lies in their clean removal; when the holidays are over, you can take them down without leaving any sticky residue or damage to your mantel’s finish. This makes them a truly indispensable item for seasonal decorating, allowing you to enjoy your DIY creations worry-free.
The Grand Reveal: Hang Your Stockings!
With all the preparation complete and your hangers securely in place, the moment has arrived! Simply drape your festive stockings over the hooks, and behold your personalized holiday display. The combination of rustic wood, elegant hardware, and cherished photographs creates a truly inviting and memorable mantelscape.
I absolutely adore how these turned out! They strike the perfect balance between rustic charm and a touch of sophisticated elegance. The ability to easily change the pictures using the clips each year is truly fantastic. This year, I let my kiddos pick out the photos they wanted to display, and they had an absolute blast with it, adding an extra layer of joy and personalization to our holiday decorations. This simple feature transforms them into dynamic pieces that evolve with your family’s memories.
We sincerely hope you love crafting and displaying these DIY Stocking Hangers as much as we do. Your shares and pins mean the world to us and help spread the holiday cheer and inspiration to even more DIY enthusiasts. Don’t hesitate to share your own creations with us!
Discover More Holiday Inspiration from Our Friends!
The festive fun doesn’t stop here! We’re part of a wonderful series featuring incredibly talented bloggers who are also sharing their Day 3 holiday projects. We encourage you to hop over to their blogs and explore the amazing inspiration they have in store for you. Get ready to fill your home with handmade warmth and creativity this season!
Michael of Inspired by Charm is sharing delightful DIY Gold-Leafed Holiday Boxes – perfect for adding a touch of sparkle to your gifts or decor!
Marianne of Songbird has an Easy & Quick NOEL Christmas Banner that will bring festive elegance to any room.
Cassity of Remodelaholic is warming up the season with a delicious Pumpkin Steamers Recipe – a cozy treat for chilly evenings.
KariAnne of Thistlewood Farms is showcasing a delightful Pom Pom Pillow, perfect for adding a touch of whimsical charm to your Christmas decor.
Donna of Funky Junk Interiors is always full of creative upcycled ideas, and her latest project is sure to inspire!
More DIY Projects to Get Your Home Holiday Ready!
Looking for even more ways to deck the halls and infuse your home with handmade charm this holiday season? We’ve been busy creating a variety of projects that are perfect for transforming your space into a festive wonderland. Explore these recent DIYs to spark your creativity and get your home ready for joyous celebrations!
DIY Rectangle Wreath: Break away from traditional circles with this modern and elegant rectangular wreath, perfect for adding a contemporary touch to your front door or interior walls.
DIY Bar Cart: Elevate your holiday entertaining with a stylish and functional bar cart, perfect for serving drinks and appetizers to your guests with flair.
Free Printable Merry Christmas Banner: Instantly add a festive message to your holiday decor with this easy-to-print banner that can be customized to your liking.
DIY Christmas Tree Stands: Create charming wooden stands for your mini Christmas trees or festive plants, adding height and visual interest to your holiday displays.
Thank you so much for joining us on this creative journey and for stopping by today! We cherish your readership and look forward to sharing more inspiring projects with you throughout the holiday season and beyond.
Happy building and happy holidays!
~Ashley