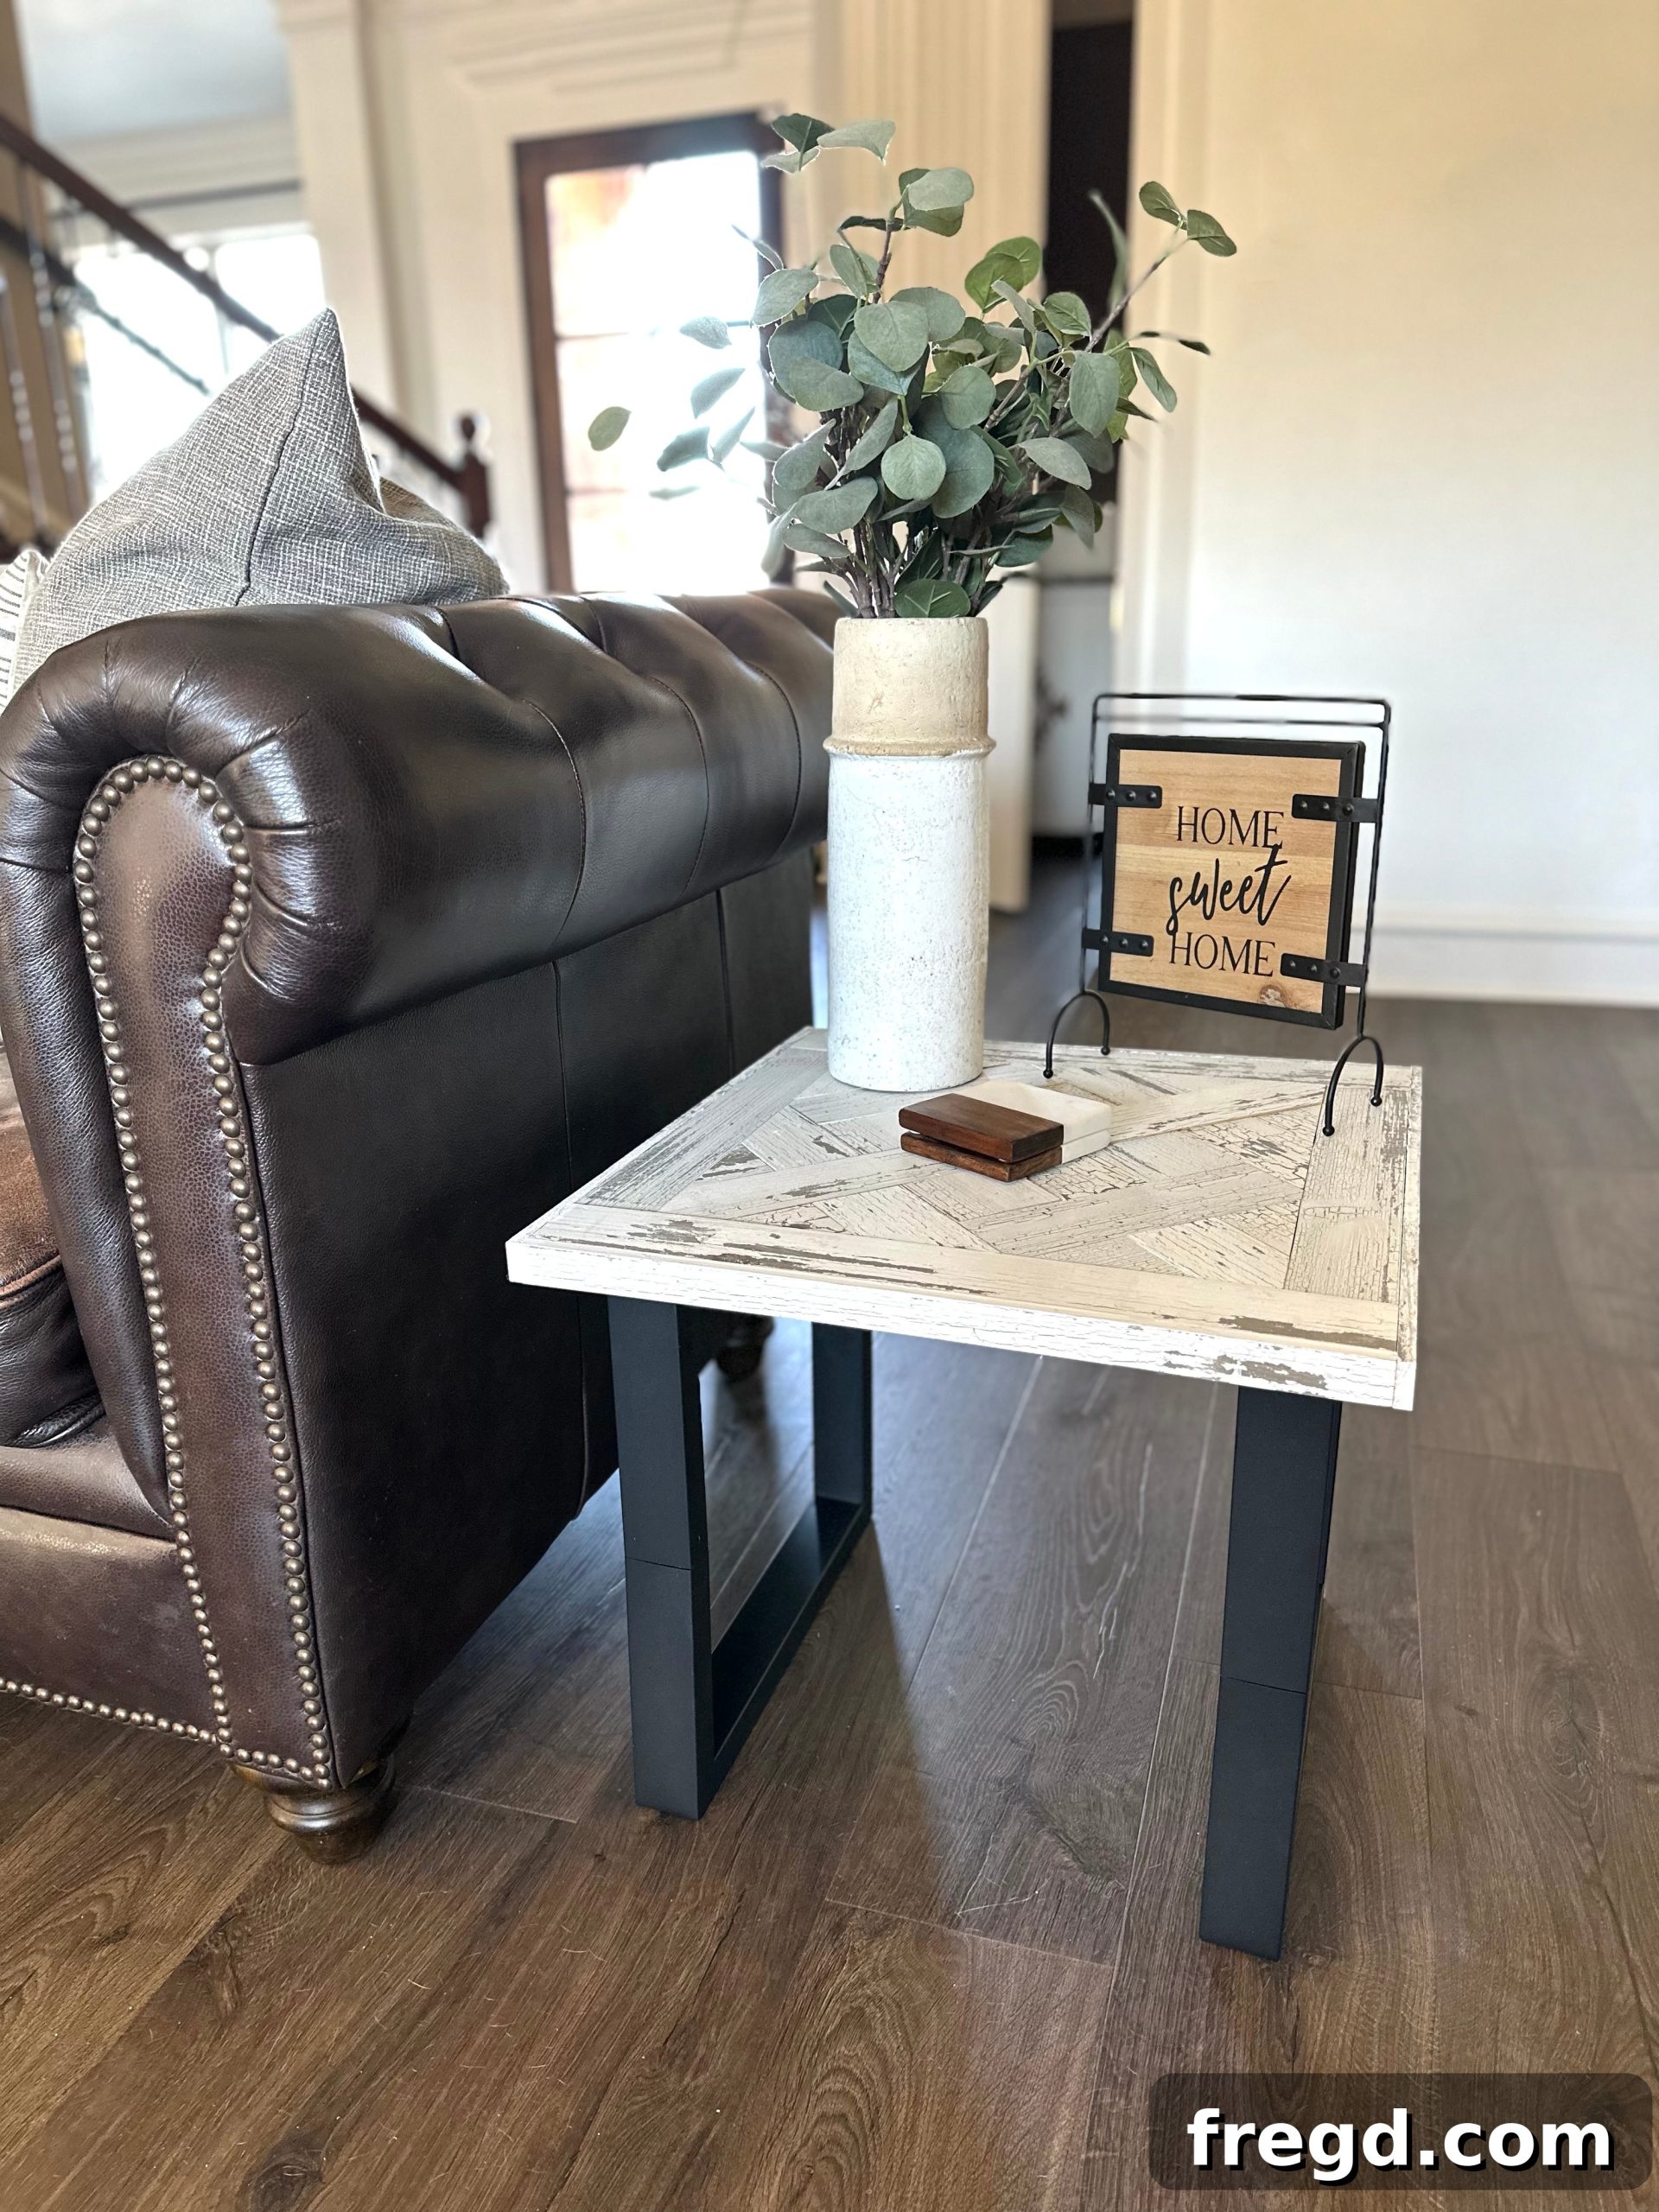
Unlock the satisfaction of building your own custom furniture with this comprehensive guide on how to construct a stylish End Table featuring an intricate parquet top. Designed for simplicity and elegance, this DIY project is perfect for woodworkers of all skill levels, from absolute beginners to those looking for a quick and rewarding build. With just a few essential tools, free printable plans, and a detailed step-by-step tutorial provided by Shanty2Chic, you’ll be able to create a unique piece that enhances any living space.
We often find ourselves immersed in the creation of various coffee tables, but it’s a special occasion when we design and build a matching set of end tables to complement them. Today’s project is exactly that, and we couldn’t be more thrilled to share it with you! The previous DIY Parquet Coffee Table I built was a fantastic piece on its own, however, once placed in my living room, I felt it didn’t quite harmonize with the existing decor. It wasn’t an eyesore, but the aesthetic didn’t seamlessly blend with my rustic stone fireplace, leaving me with a nagging feeling that it could be better. As a passionate carpenter, this minor design dilemma quickly turned into an exciting opportunity to conceptualize and construct a new coffee table that would perfectly fit the space. Fortunately, a good friend absolutely adored the original coffee table and had the ideal spot for it in her own home, making for a perfect exchange. In fact, she loved it so much that she commissioned me to build her a set of matching end tables!
This project is exceptionally beginner-friendly, requiring only a handful of common woodworking tools. The plans provided are for a single end table, so if your goal is to create a pair, simply remember to double your material and effort. Let’s gather our supplies and start building this beautiful piece of furniture!
Important Note on Parquet Design: Achieving the distinctive parquet pattern necessitates precise measuring and fitting of each individual piece to your table top. The cut list diagrams serve as a valuable guide, but anticipate that specific measurements for each small component will vary slightly. It is crucial to measure your own design and cut pieces to fit progressively as you assemble, ensuring a perfect, custom fit for your unique end table. This adaptive approach guarantees the best results for your intricate wood mosaic.
DIY Parquet End Table: A Step-by-Step Guide for Beginners
Essential Tools for Your Project
Embarking on this DIY end table project is made simple with the right tools. Here’s what you’ll need to make precise cuts, secure joints, and achieve a professional finish:
- Drill: Essential for pre-drilling holes and securely attaching the metal legs to the tabletop.
- Miter Saw (or Circular Saw): Crucial for making accurate crosscuts and angle cuts required for the parquet design and frame pieces. A circular saw with a guide can also work effectively for straight cuts.
- Pin Nailer (or Brad Nailer): Perfect for attaching the smaller trim and parquet pieces without leaving visible holes, providing a strong hold when combined with wood glue.
- Table Saw (optional): While not strictly necessary, a table saw can greatly expedite the process of ripping barn wood planks to custom widths for the parquet pattern. If you don’t have one, careful measurements and multiple passes with a circular saw can achieve similar results.
- Tape Measure: Absolutely indispensable for all measurements, ensuring precision in every cut and placement.
- Pencil: For marking cuts and placement points on your wood pieces.
- Safety Glasses: Always wear safety glasses when operating power tools to protect your eyes from debris.
Materials You’ll Need
Selecting the right materials is key to the success and durability of your end table. Here’s a comprehensive list of what you’ll need, along with some considerations for your choices:
- 3 – 1/2″x6″x48″ Barn Wood Planks: These planks are ideal for achieving a rustic, reclaimed look for your parquet design. If barn wood is unavailable or you prefer a different aesthetic, you can substitute with 1×6 pine boards. Just remember to adjust the width of your trim pieces accordingly to maintain proportion.
- 1 – 1/2″x24″x24″ Hardwood Plywood: This will form the sturdy base of your tabletop. Hardwood plywood offers excellent stability and a smooth surface for your parquet inlay.
- 2 – Metal Legs: These modern metal legs provide a sleek contrast to the rustic wood top and offer robust support. Ensure they are the appropriate height for an end table.
- 1″ Pin Nails (or Brad Nails): For discreetly securing the parquet and trim pieces. The small gauge of pin nails makes them almost invisible, especially when combined with wood glue.
- Wood Glue: A high-quality wood glue is essential for creating strong, lasting bonds between all wood components. It’s the primary adhesive, with nails offering immediate clamping power.
- Wood Putty (optional): If using unfinished lumber or if any nail holes are exposed in barn wood, wood putty will help create a smooth, finished surface.
- Sandpaper (various grits, optional): For smoothing out surfaces before finishing, especially if you opt for unfinished pine or a stained finish.
- Stain or Paint (optional): For custom finishing touches, particularly if you’re not using pre-finished barn wood.
Building the Sturdy Tabletop Frame
The foundation of your stunning end table begins with a robust tabletop frame. This step involves preparing the plywood base and constructing the initial wooden border that will house your beautiful parquet design.
Step 1: Cut the Plywood to Size
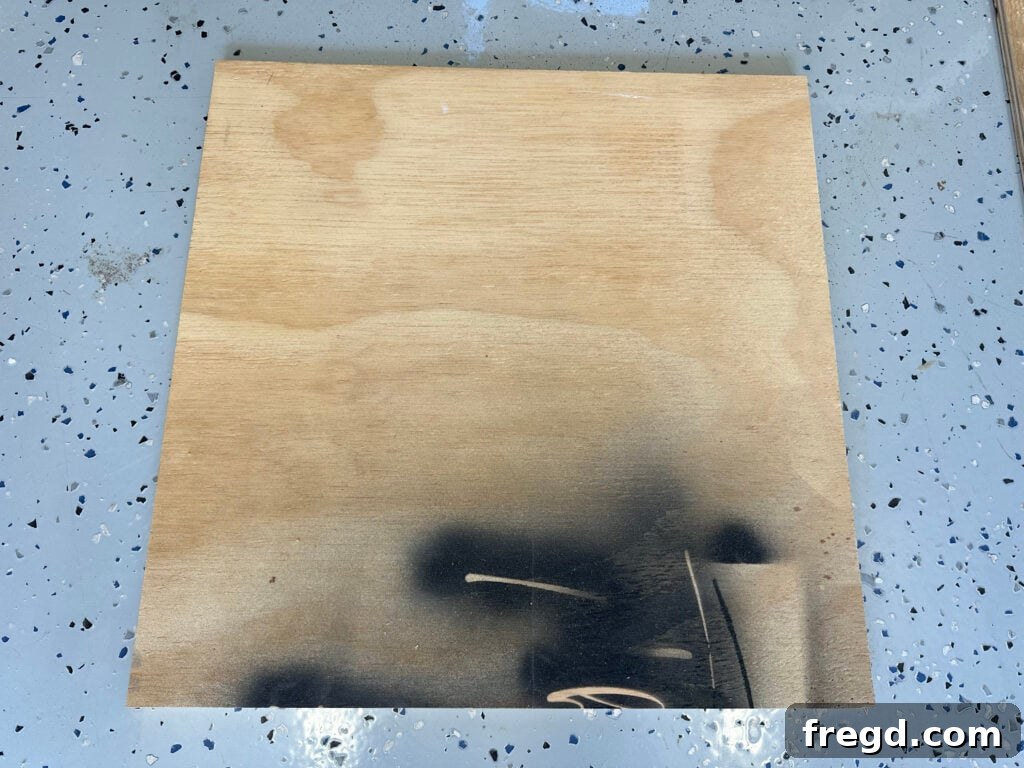
To start, accurately cut your 1/2″ hardwood plywood sheet to the exact dimensions specified in the plans. For this project, a 24″x24″ square is typical, but always refer to your specific plans. Don’t worry about any existing marks or spray paint on the scrap plywood you might be using, as this surface will be entirely covered by the parquet pattern and trim pieces. Ensure your cuts are straight and precise, as this forms the core of your tabletop.
Step 2: Attaching the Long Frame Boards
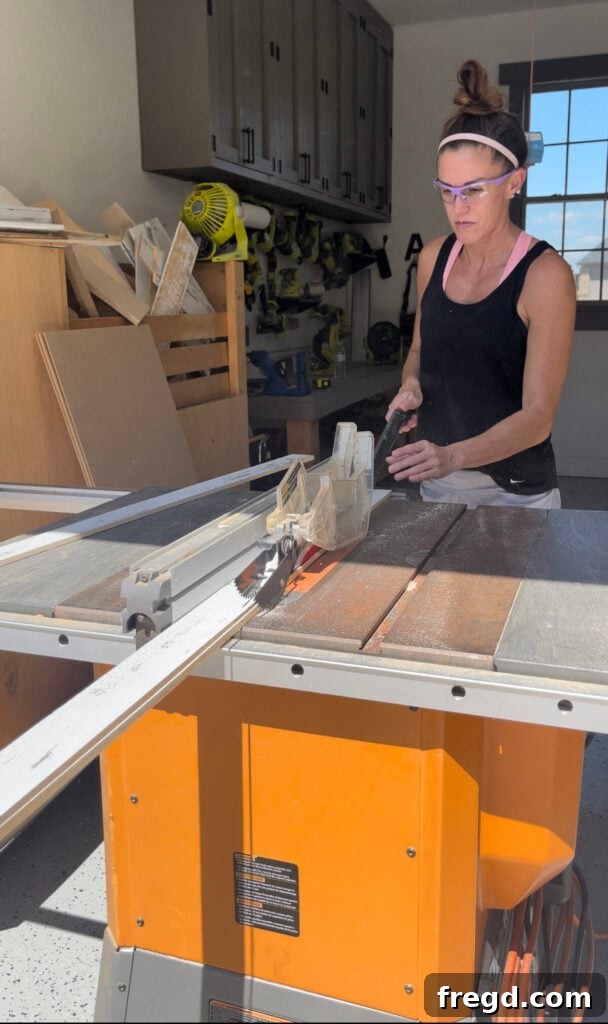
Before assembling the frame, take your barn wood planks and rip them down to the specific widths detailed in your cut list. The parquet design requires several different board widths to achieve its unique visual texture. Once your planks are prepared, identify the longest pieces designated for the tabletop frame. Apply a consistent, thin bead of wood glue along the edge of the plywood where these long frame boards will sit. Carefully position the boards, aligning them flush with the edge of the plywood. Secure them in place using 1″ pin nails. Drive the nails at slight angles for extra holding power and ensure they are countersunk for a smooth finish. The glue provides the primary strength, while the nails hold the pieces tight while the glue dries.
Step 3: Attaching the Short Frame Pieces
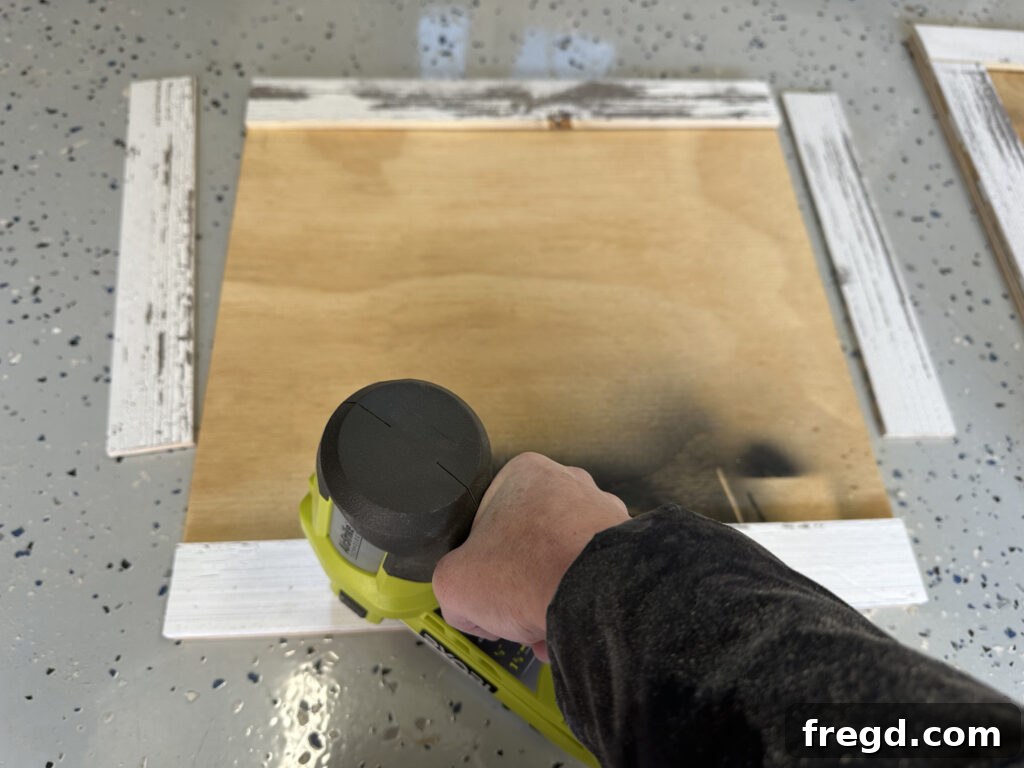
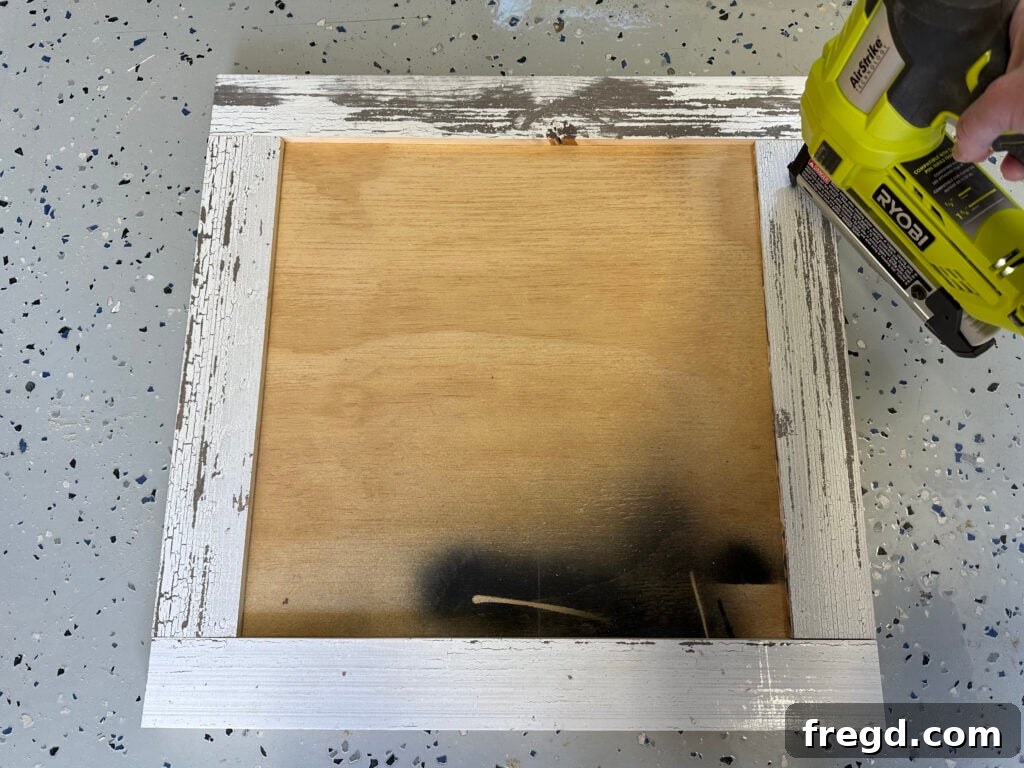
With the long frame boards securely in place, it’s time to complete the tabletop’s outer boundary. Use your tape measure to precisely determine the length of the short frame pieces needed to fit snugly between the already attached long boards. Cut these pieces to size using your miter saw, ensuring clean, square ends. Apply wood glue to the edges that will contact the plywood and the long frame pieces. Position them carefully and attach them using 1″ pin nails, again ensuring a tight fit and flush surfaces. This completes the foundational frame, creating a perfect recessed area for your beautiful parquet design.
Crafting the Exquisite Parquet Design
The parquet design is the star of this end table, adding a sophisticated and custom touch. This section requires careful measurement and cutting, but the result is incredibly rewarding. Remember our earlier note: measure and cut each piece as you go for the best fit.
Step 4: Attach the First Corner Pieces
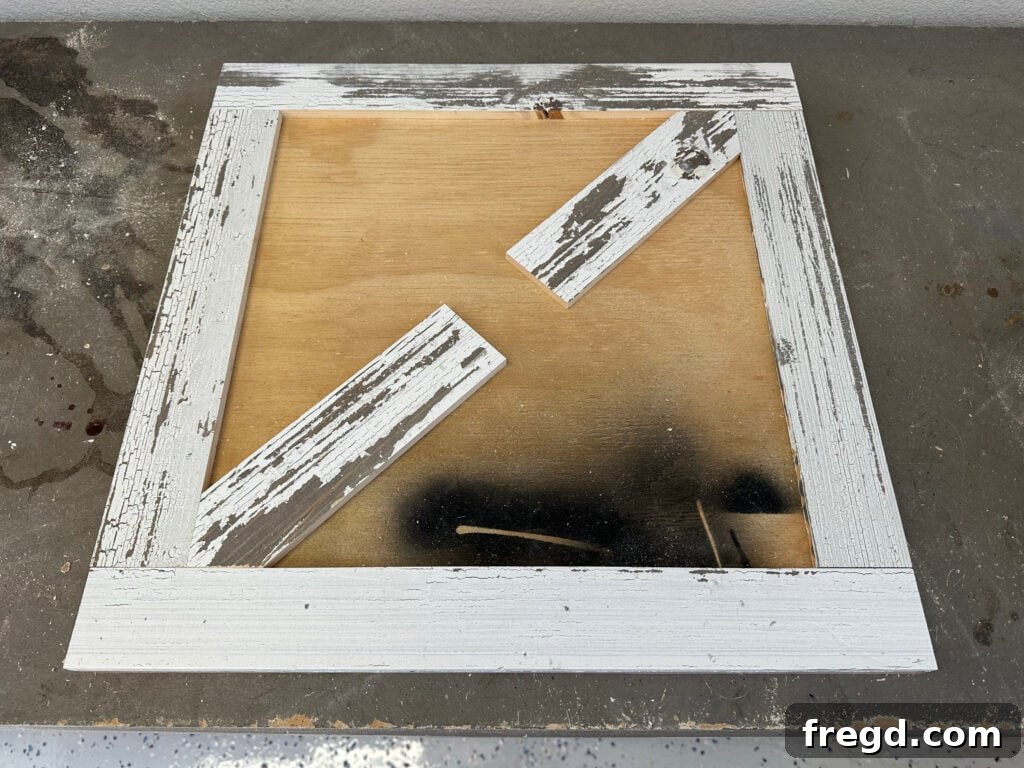
Start by tackling the first corner of your parquet pattern. Measure and cut the designated corner pieces to size, ensuring that any angled cuts (often 45 degrees) are precise. A helpful strategy is to cut the mitered (angled) end of the piece first, then place it in its position on the tabletop and mark the exact length for the straight end cut. This “cut-as-you-go” method minimizes errors. Apply wood glue to the back of each piece and firmly press it into place. Secure with 1″ pin nails. Aim for tight seams and a flush surface with the surrounding frame.
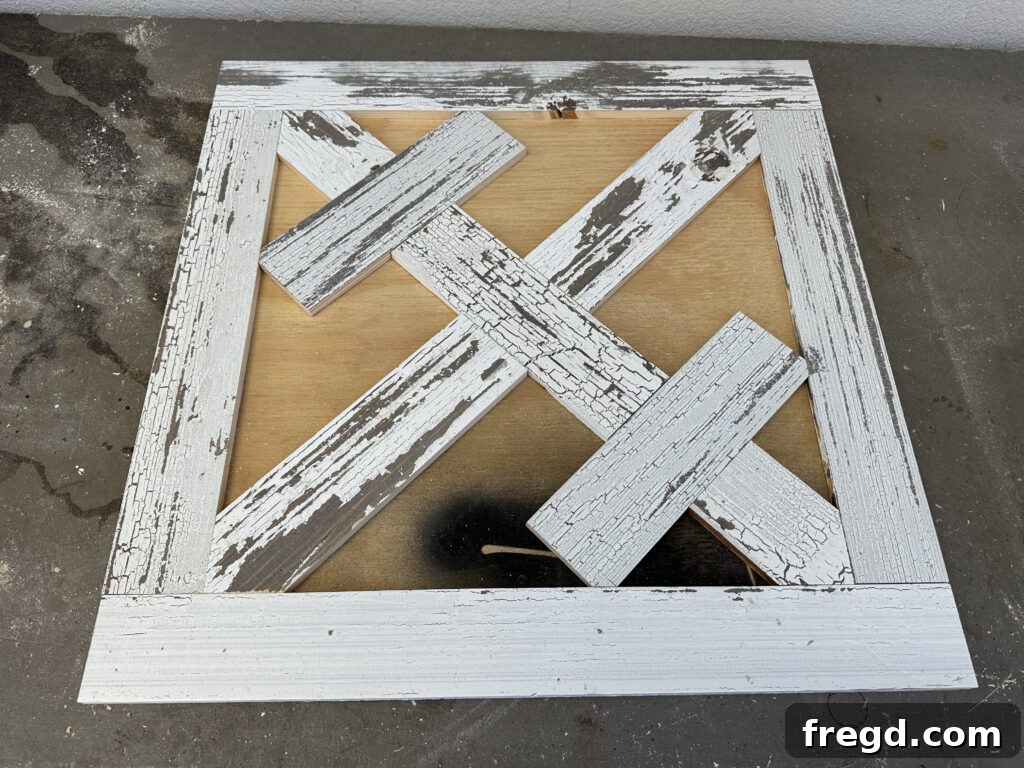
Step 5: Attach the Second Corner Pieces and Middle Cross Piece
Once your first corner pieces are securely attached, move on to the second corner, typically diagonally opposite or adjacent, depending on your specific parquet pattern. Repeat the measuring and cutting process, focusing on accuracy for both the angled and straight cuts. Simultaneously, or immediately after the second corner, measure and cut the middle cross piece that connects elements of your design. Apply wood glue generously and use pin nails to fix these pieces firmly to the plywood base. Pay close attention to the alignment, ensuring the pattern develops symmetrically and beautifully.
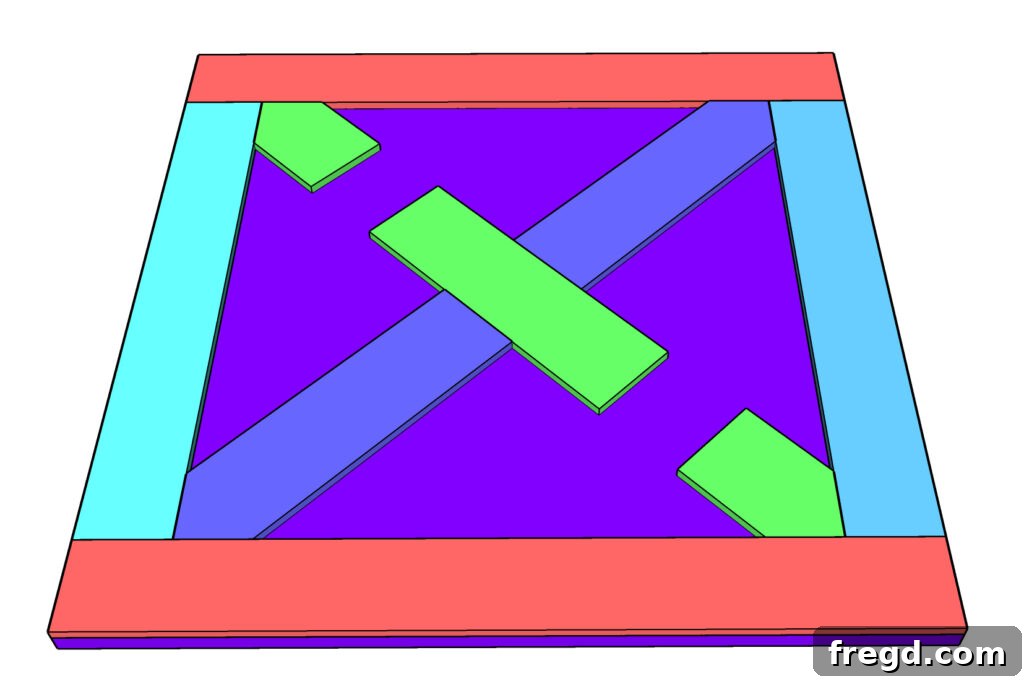
Step 6: Attaching the Split Inside Box Pieces (Yellow Boards)
Now, let’s incorporate the pieces that form the “split inside box” — which we’ll refer to as the “yellow boards” based on the provided diagrams. The most effective way to achieve a perfect fit for these pieces, especially if they have an angle on one end, is to cut one end at a precise 45° angle first. Then, place the board into its intended position within the parquet pattern and accurately mark where the straight cut needs to be made on the opposite end. This ensures a custom fit for each board. Apply wood glue to the back and secure these yellow boards with 1″ pin nails, maintaining consistent pressure until the glue sets.
Step 7: Attach the Long Inside Box Pieces (Orange Boards)
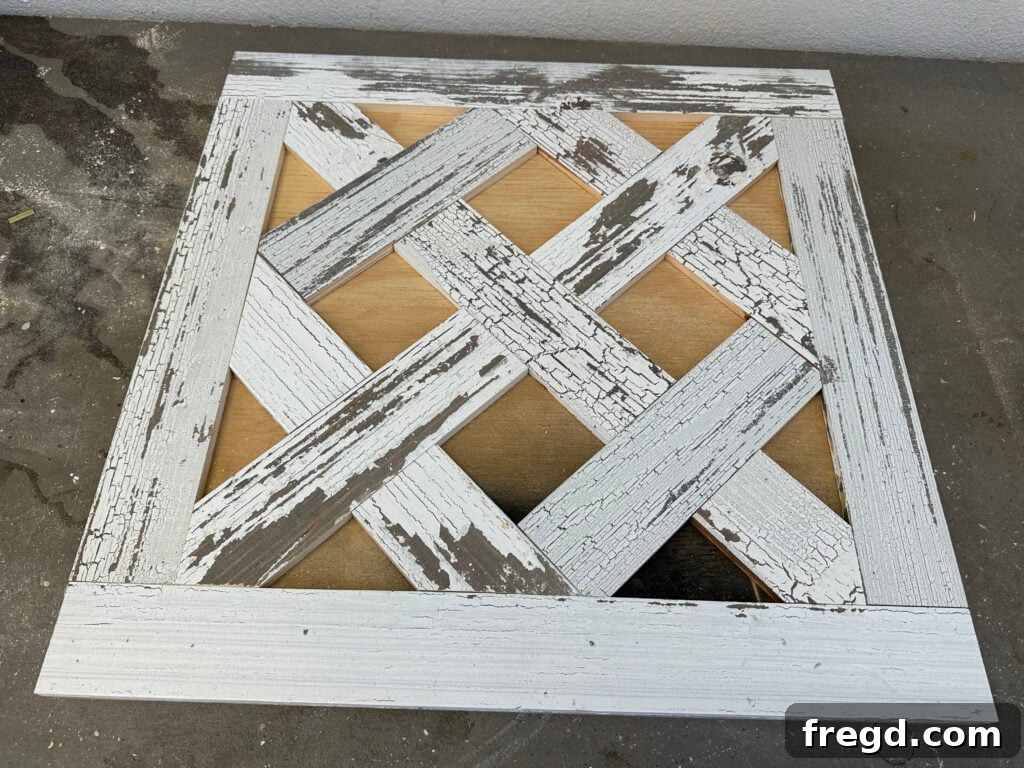
Next, we move to the “orange boards,” which constitute the longer pieces within the inner box of the parquet. For these, you’ll need to measure the precise length required for each board. After making the primary length cut, carefully mark and remove 45° notches from the corners of these pieces. These notches will allow them to fit perfectly around the existing parquet elements, creating clean intersections. Apply wood glue to the back and edges of each orange piece and firmly attach them with 1″ pin nails. Double-check that all joints are tight and surfaces are flush.
Step 8: Adding the Square Pieces
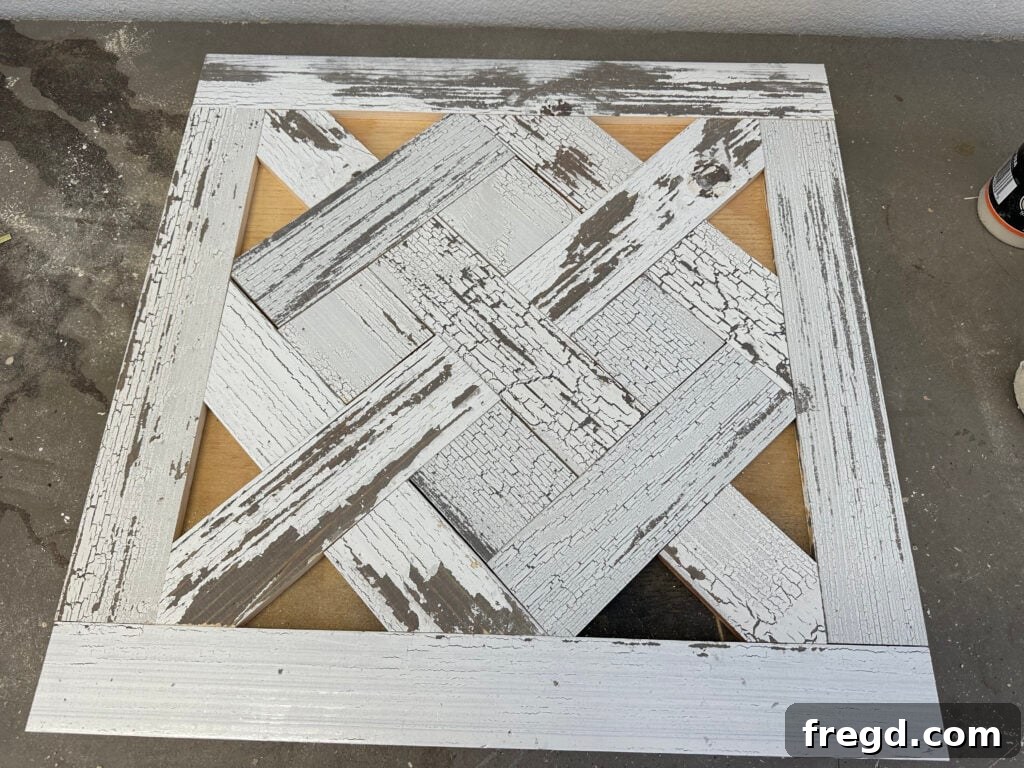
The intricate details of the parquet design now require the addition of the small square pieces that fill specific gaps. Carefully measure each square opening individually, as there might be slight variations in size due to previous cuts. Cut your wood stock to create these perfect squares. Once cut, apply wood glue to the back of each square and position it firmly into its designated spot. Follow up by securing each square with a couple of 1″ pin nails. Ensure the top surface of the squares is level with the surrounding wood, contributing to a seamless and polished look.
Step 9: Filling with Triangle Pieces
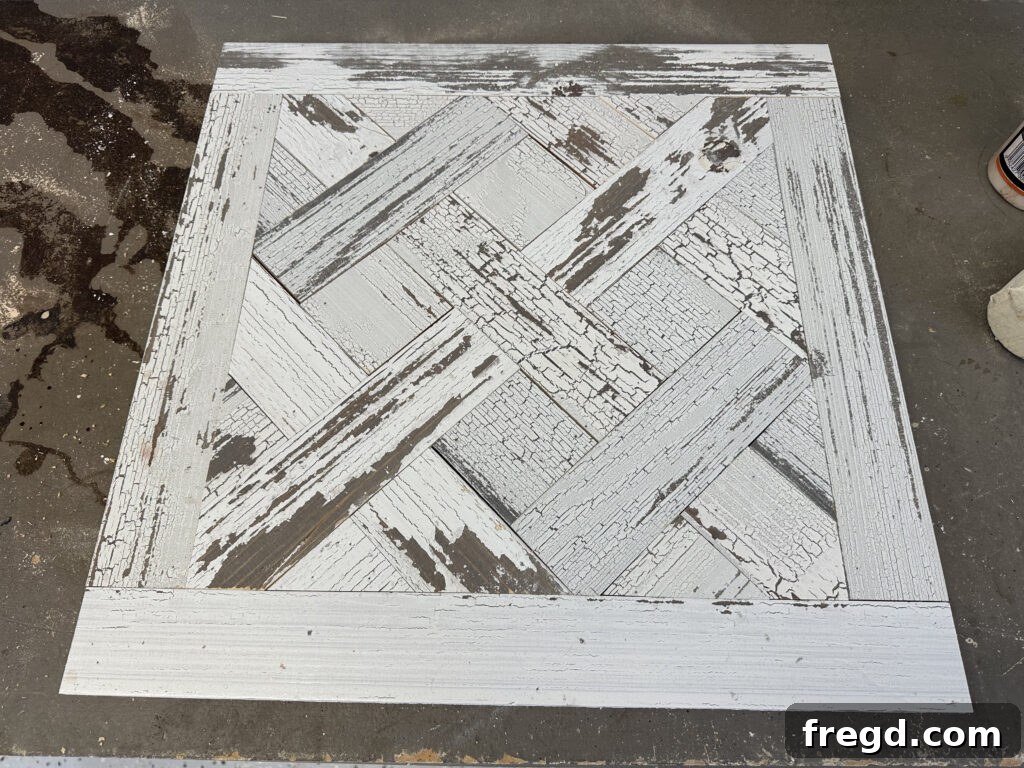
The final pieces to complete your parquet masterpiece are the triangle inserts. These can often be the trickiest because their sizes may not be perfectly uniform across the tabletop. Therefore, it is absolutely essential to measure and cut each individual triangle piece. A helpful tip for efficiency is to cut one triangle piece, test its fit in several similar spots, and if it fits well, replicate that exact cut for those matching spots. This saves time and reduces waste. Once a triangle piece is cut and fitted, apply wood glue to its back and secure it firmly with 1″ pin nails. Work systematically, ensuring all gaps are filled and the parquet surface is complete and smooth.
Finishing the Table Edges with Trim
Adding the side trim not only gives your end table a refined, finished look but also protects the edges of your parquet top and conceals the plywood base. This step helps define the table’s overall aesthetic.
Step 10: Attaching the Short Trim Boards
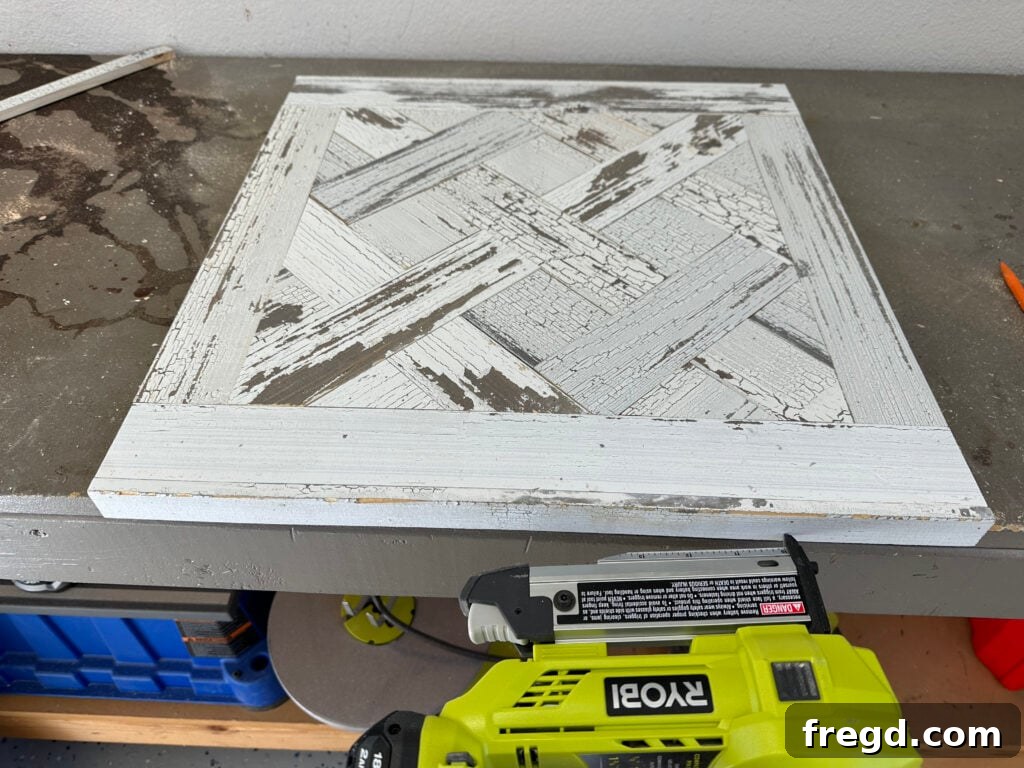
Now it’s time to give your tabletop a clean, finished edge. Begin by measuring and cutting the pieces for the short sides of your table. These trim pieces should be cut to perfectly match the length of the table’s short edges. Apply a strong bead of wood glue along the edge of the plywood and the side of the parquet top where the trim will be placed. Carefully position the trim board, ensuring its top surface is perfectly flush with the top surface of your finished parquet design. Secure these short trim pieces using 1″ pin nails, spacing them evenly for a strong hold. This creates a neat, continuous line around the tabletop.
Step 11: Attaching the Long Trim Boards
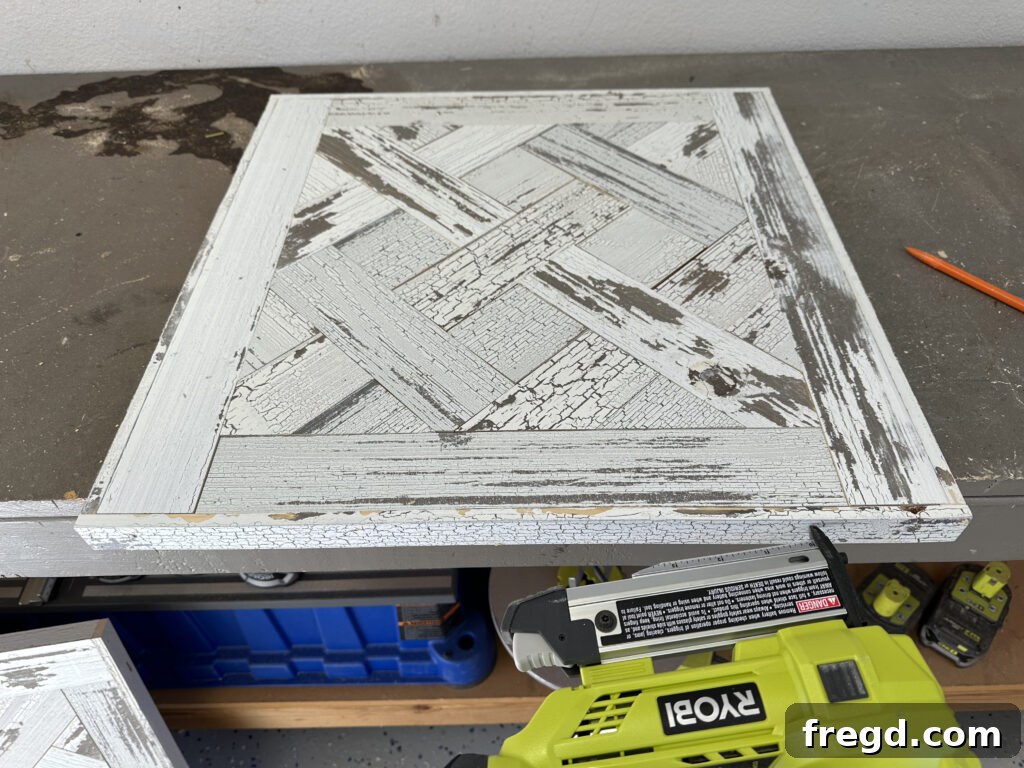
Once the short trim boards are secured, measure, cut, and attach the long trim boards to the remaining sides of the table top. These pieces will fit between the short trim pieces you just installed. Similar to the previous step, apply wood glue to the mating surfaces and align the top of the trim flush with the top of the table. Use 1″ pin nails to firmly secure these pieces. This process encapsulates the parquet design and gives the tabletop a complete, polished look, ready for the base.
Attaching the Stable End Table Base
With your beautifully crafted tabletop complete, the next crucial step is to attach the metal legs, transforming your woodworking project into a functional and stylish end table. These legs provide both stability and a modern aesthetic.
Step 12: Add the Metal Leg Base
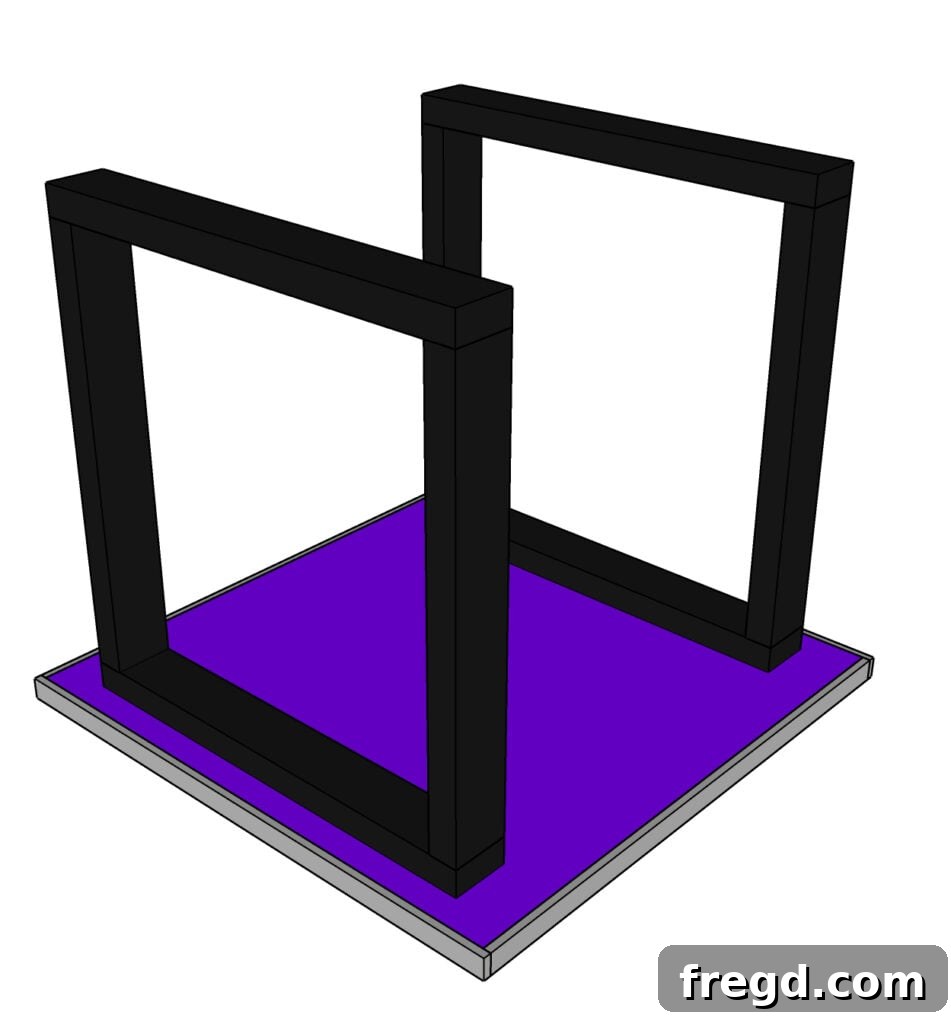
Carefully flip your completed tabletop upside down, exposing the plywood base. Position the metal legs on the underside of the table, ensuring they are perfectly centered and spaced evenly for optimal stability and visual balance. It can be very helpful to mark the placement of the legs with a pencil on the plywood before drilling, outlining where each leg will sit. This ensures accurate alignment. While metal legs often come with their own fasteners, it’s essential to check their length. For this project, the provided fasteners were too long, so 2 1/2″ wood screws were used through the pre-drilled screw pockets in the base of the metal legs. Always use screws that are long enough to provide a secure hold without penetrating through the top surface of your table. Secure both metal legs firmly to the bottom of the table top using a drill. Ensure all screws are tightened to prevent wobbling.
- You can purchase similar modern metal legs here to replicate the look of this end table.
Applying the Perfect Finish
The finishing stage is where your end table truly comes to life, enhancing the natural beauty of the wood and protecting it for years to come. The approach to finishing will depend on the type of wood you chose for your build.
If you opted for pre-finished barn wood planks, your work is largely complete! The natural character and distressed look of barn wood are often desired. However, you might notice some exposed nail holes from the pin nails. To address these, you can fill them with a small amount of wood putty. Once the putty dries, a light touch-up with flat white paint, or a color that matches your barn wood, can effectively conceal these minor imperfections, blending them seamlessly with the wood’s rustic charm.
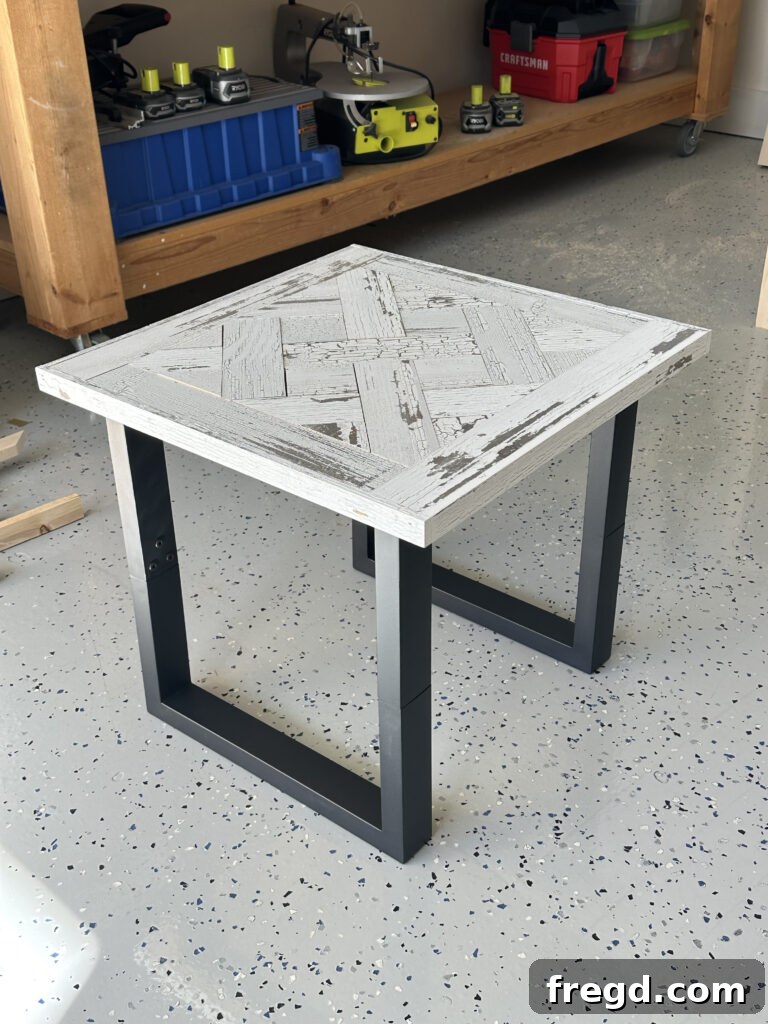
Conversely, if you used unfinished lumber, such as pine boards, this stage is crucial for bringing out the wood’s inherent beauty and protecting it. Begin by thoroughly sanding the entire tabletop. Start with a course grit sandpaper (e.g., 80 or 100 grit) to remove any imperfections, glue squeeze-out, or rough spots. Follow up with progressively finer grits (e.g., 150, then 220 grit) to achieve a super smooth, touchable surface. After sanding, meticulously clean off all dust. Fill any visible nail holes with wood putty and allow it to dry completely, then sand smooth again.
For the finish itself, staining is highly recommended, especially with a parquet design. A good wood stain will penetrate the wood fibers, emphasizing the natural grain patterns and making the intricate parquet design truly pop. Apply your chosen stain according to the manufacturer’s instructions, ensuring an even coat. After the stain has dried, apply several coats of a protective topcoat, such as polyurethane, lacquer, or a clear varnish. This will provide durability, resistance to spills, and a beautiful sheen. Always follow drying times between coats and lightly sand with a very fine grit sandpaper (e.g., 320 or 400 grit) between coats for the smoothest possible finish.
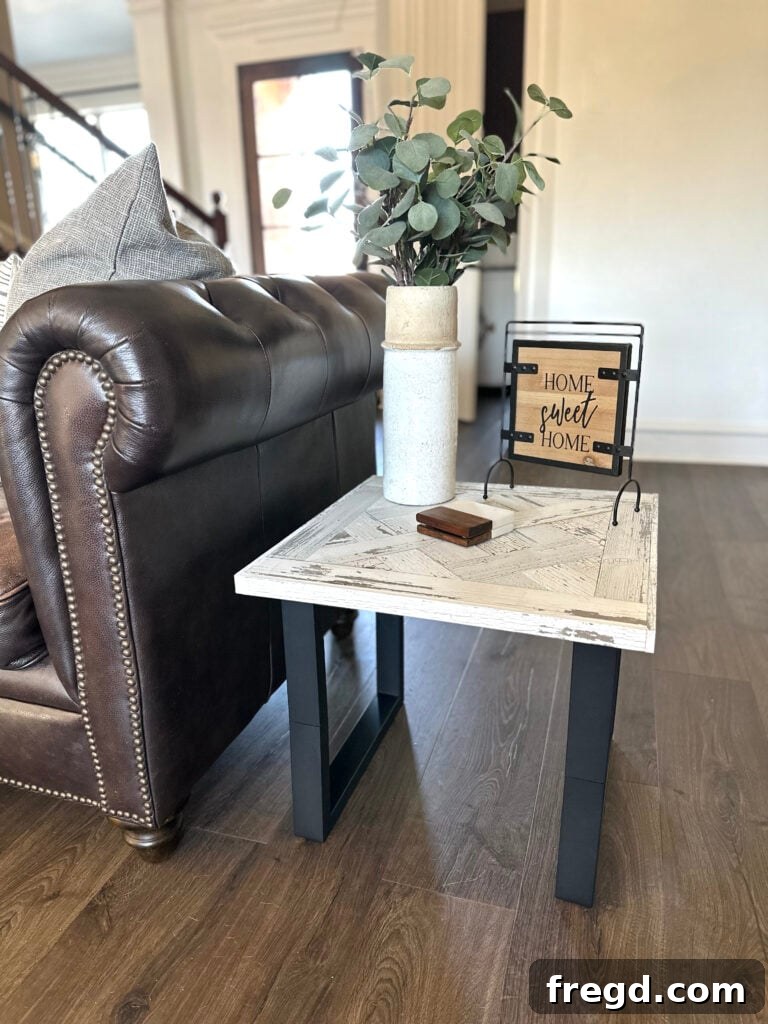
I absolutely adore this little piece of furniture, and I have no doubt that my friend will cherish it even more. Building custom pieces like this not only adds character to a home but also brings immense personal satisfaction. I’m already contemplating designing and building my own unique end table!
We love seeing your creative builds! Make sure to share your finished projects with us on social media. Use the hashtag #shanty2chic so we can celebrate and share your amazing work with our community!
Happy Building, and may your sawdust dreams come true!
Summary: How to Build Your End Table
Ready to jump into building your own end table? Here’s a quick overview and access to the essential resources:
This tutorial by Shanty2Chic guides you through building a stylish end table with a distinctive parquet design using simple tools and techniques. Perfect for adding a touch of custom craftsmanship to your home.
Click here for the full set of FREE printable plans, including the shopping list and detailed cut diagrams!
Quick Recap of Tools Needed:
- Miter Saw
- Drill
- Pin Nailer (or Brad Nailer)
- Table Saw (optional)
- Tape Measure
- Pencil
- Safety Glasses
Quick Recap of Supply List:
- 3 – 1/2″x6″x48″ Barnwood Planks (or 1×6 pine boards)
- 1 – 1/2″x24″x24″ Hardwood Plywood
- 2 – Table Legs (metal recommended)
- 1″ Pin Nails (or Brad Nails)
- Wood Glue
- Wood Putty (optional)
- Sandpaper (various grits, optional)
- Stain or Paint (optional)
Simplified Step-by-Step Instructions:
Building the Table Top Frame
- Cut the 1/2″ plywood to your desired tabletop size (e.g., 24″x24″).
- Rip barn wood planks (or pine boards) to various widths as per your cut list.
- Attach the long frame pieces to the plywood edges with wood glue and 1″ pin nails.
- Measure, cut, and attach the short frame pieces between the long ones, securing with glue and nails.
Creating the Parquet Design
- Measure, cut, and attach the first set of corner pieces, using a “cut one end, mark other” method for accuracy.
- Measure, cut, and attach the second set of corner pieces and the middle cross piece.
- Measure, cut, and attach the “yellow” split inside box pieces, using 45° angle cuts on one end.
- Measure, cut, and attach the “orange” long inside box pieces, carefully creating 45° notches in the corners.
- Measure, cut, and attach the small square pieces to fill the remaining gaps.
- Measure, cut, and attach the triangle pieces, ensuring each is custom-fitted due to potential size variations.
Trimming the Sides of the Table
- Measure, cut, and attach the short trim boards to the table top sides, ensuring they are flush with the top surface, using wood glue and 1″ pin nails.
- Measure, cut, and attach the long trim boards to the remaining sides, flush with the top, securing with glue and nails.
Attaching the Legs
- Flip the tabletop over, center the metal legs on the plywood underside, mark their position, and attach securely using appropriate length wood screws (e.g., 2 1/2″ wood screws) through the pre-drilled pockets.
The Finish!
- If using pre-finished barn wood, fill any exposed nail holes with putty and touch up with matching paint.
- If using unfinished lumber, sand thoroughly with progressively finer grits, fill all nail holes, and apply a stain (recommended for parquet designs) followed by several coats of a protective topcoat like polyurethane.
And there you have it! Your very own handcrafted parquet end table. Enjoy your new furniture, and don’t forget to share your success!
Discover more inspiring DIY End Table Plans from Shanty2Chic: