
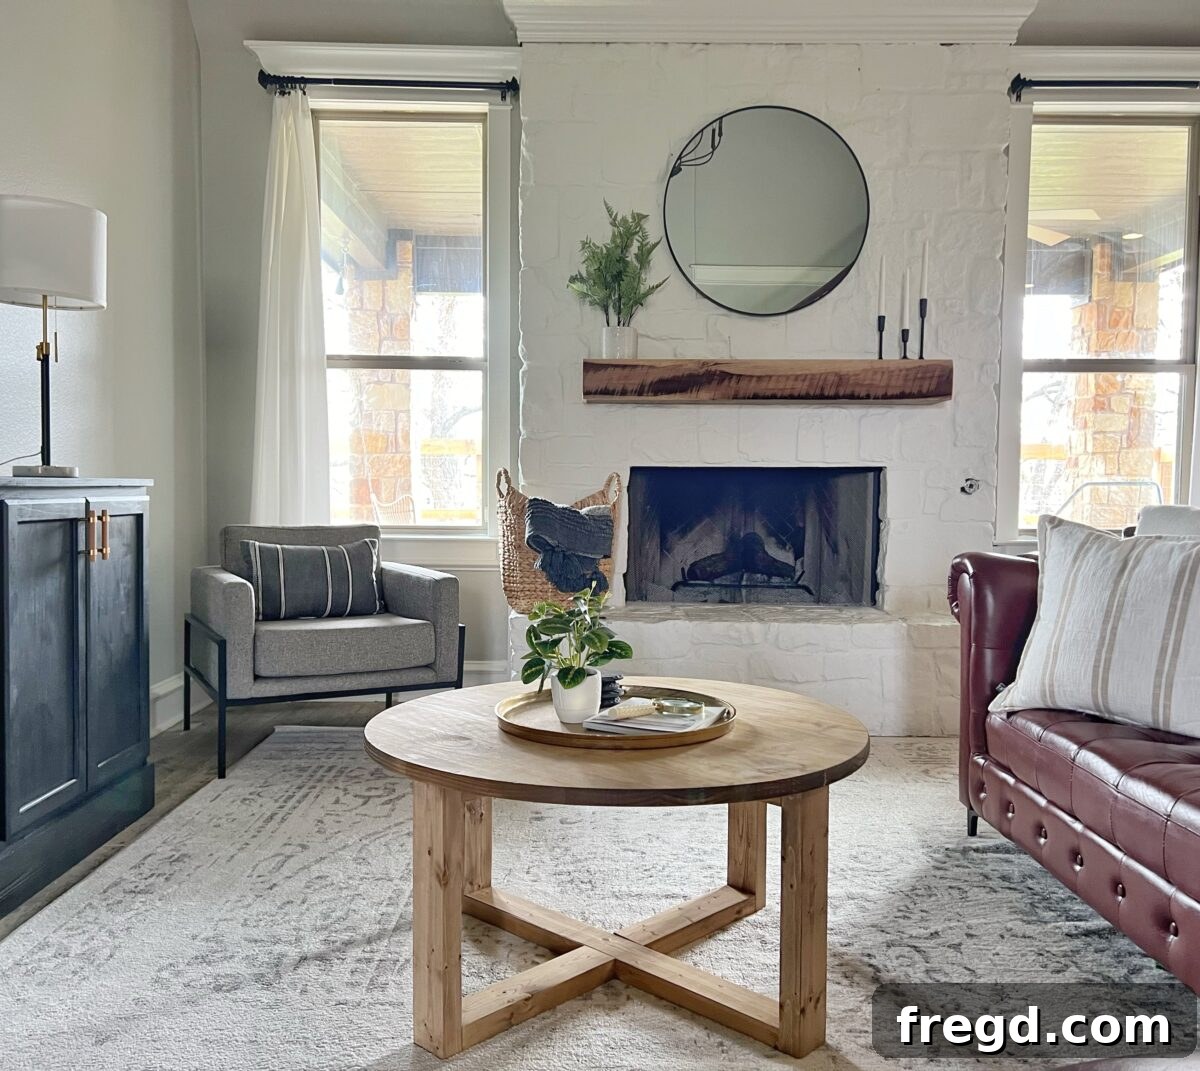
Master the Art of DIY: Build Your Own Stunning Round Coffee Table (Under $65!)
Are you ready to transform your living space with a piece of custom furniture that won’t break the bank? Building your own furniture is incredibly rewarding, and a coffee table is often the perfect starting point for any aspiring DIYer. It’s a project that offers immense satisfaction, allows for personalization, and significantly impacts the aesthetic of a room. Plus, with kids (or even just active pets!), having a durable, cost-effective coffee table that you built yourself offers peace of mind.
We’ve created numerous DIY coffee tables over the years, and each one has been a testament to how easy and impactful these builds can be. This DIY Round Coffee Table is no exception – a fantastic project that combines affordability with modern design. Imagine crafting a stylish centerpiece for your living room using just two 2×4 boards and a round project panel! The total lumber cost for this beauty was remarkably under $65. Get ready to dive in and watch our comprehensive how-to video below, designed to guide you through every step!
This project is ideal for beginners, offering clear instructions and a detailed video tutorial to ensure your success. Simply click the video above to build alongside us! You can also download our FREE printable plans at the bottom of this post for an easy reference.
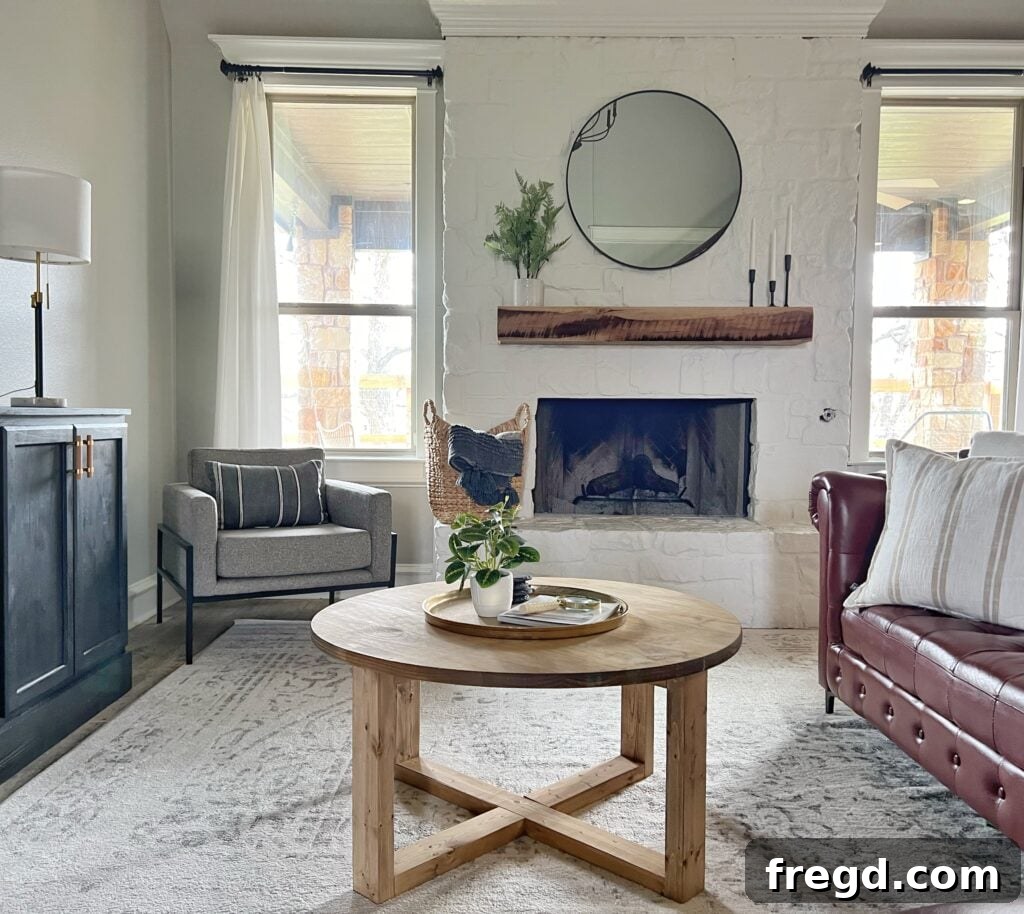
Table of Contents
The Foundation of Flawless Joinery: Understanding the Kreg Jig
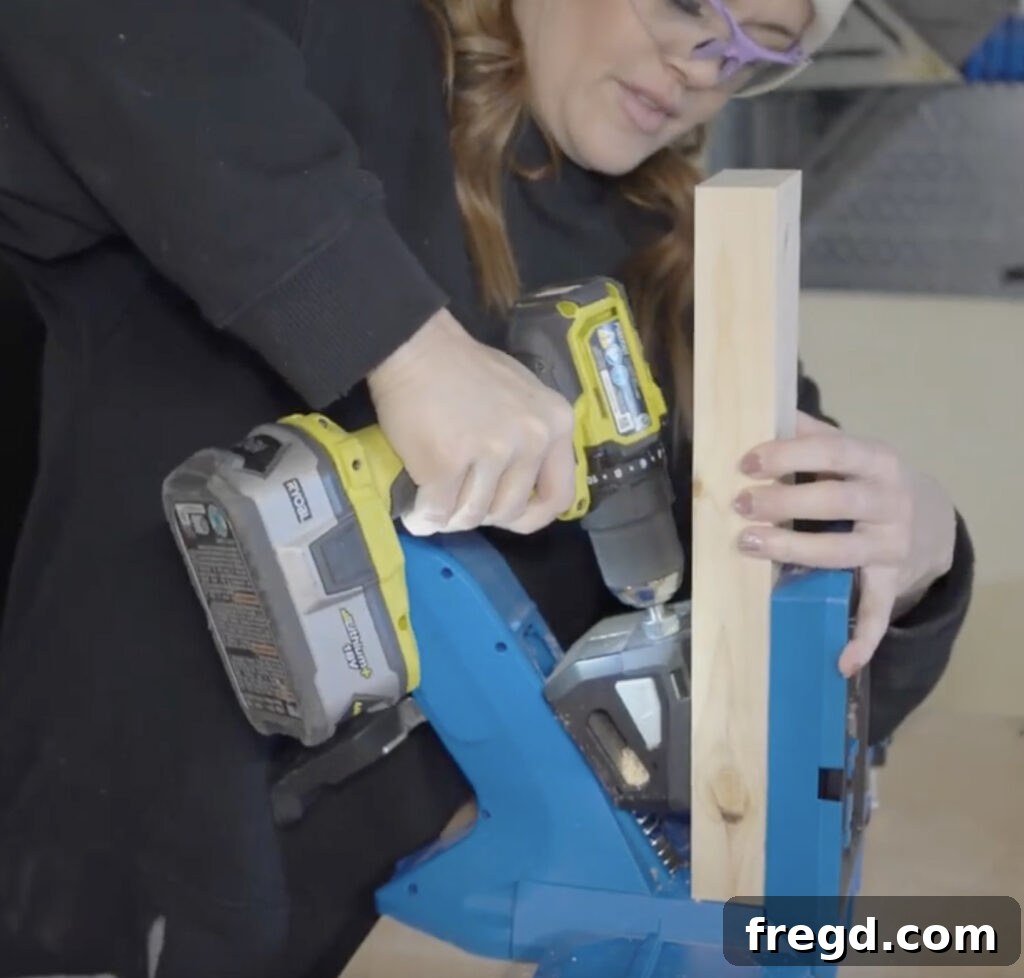
A question we frequently encounter from aspiring woodworkers is, “What exactly is a Kreg Jig?” For those new to the world of DIY furniture, a Kreg Jig is an invaluable pocket-hole jig that revolutionizes how you create strong, durable joints. It allows you to drill angled holes into one piece of wood, which then connects to another piece using special screws. This method results in incredibly robust joints that are faster to assemble and significantly cleaner than traditional countersunk wood screws.
When we first started building furniture, discovering the Kreg Jig was a monumental game-changer. Its user-friendly design and the remarkable strength it brought to our projects immediately impressed us. For this particular round coffee table, we utilized our beloved Kreg Jig 720 PRO. This model is truly a joy to work with, offering enhanced features that make it a worthwhile upgrade even for those who already own an older model. Its intuitive clamping mechanism and dust collection port elevate the woodworking experience, making complex joinery simple and efficient. You can explore the Kreg Jig 720 PRO further HERE on Amazon. For a deeper dive, check out our video tutorial on how to use it HERE!
Elevating Aesthetics: The Art of Ripping Your Lumber
Before moving on to drilling pocket holes, a crucial step we take to enhance the finished look of our furniture is ripping the boards. For this project, I trimmed my 2×4 boards down to a precise 3 inches wide each. This process involves first making cross-cuts with a miter saw to get the desired lengths, and then using a table saw to rip the rounded edges off the framing lumber. While this step is entirely optional, we highly recommend it if you want your DIY pieces to have a more refined, upscale appearance, rather than looking like they were built with standard construction-grade wood.
The subtle difference this technique makes is truly remarkable, especially on a table design like this one where multiple boards are stacked or joined. By removing those factory-rounded edges, the individual pieces fit together seamlessly, creating a solid, uniform aesthetic that mimics the look of a single, custom-milled piece of timber. It’s a small detail that contributes significantly to a professional, high-end finish. Curious to see this technique in action? You can watch our detailed tutorial on how we rip our boards to achieve a straight edge HERE!
Building the Robust Base: Step-by-Step Assembly
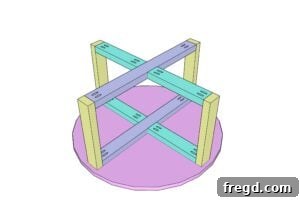
The foundation of our round coffee table is its incredibly sturdy base, constructed from the 2x4s you just ripped down to 3 inches wide. Precision and strong joinery are key here to ensure a stable and long-lasting table. Here’s how you’ll build the base:
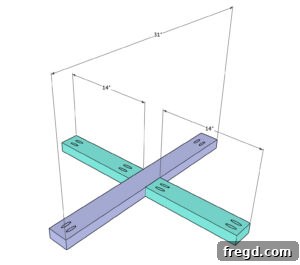
- Begin by adding 1.5-inch pocket holes to the ends of each board. These strategically placed holes will allow for hidden, strong connections.
- Next, attach these boards using 2.5-inch pocket hole screws and a generous application of wood glue. The glue provides additional strength and helps prevent future movement.
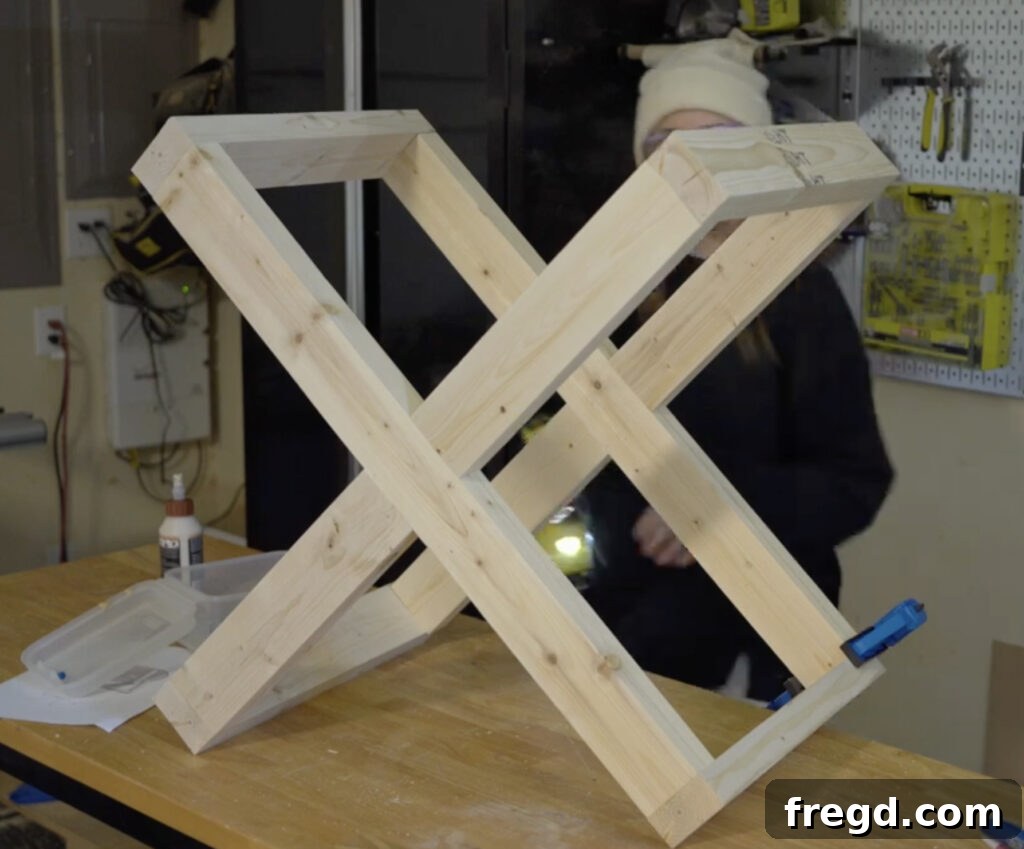
- You will repeat this process to create two identical “X” pieces. These symmetrical components will form the core structure of your table base, ensuring balance and stability.
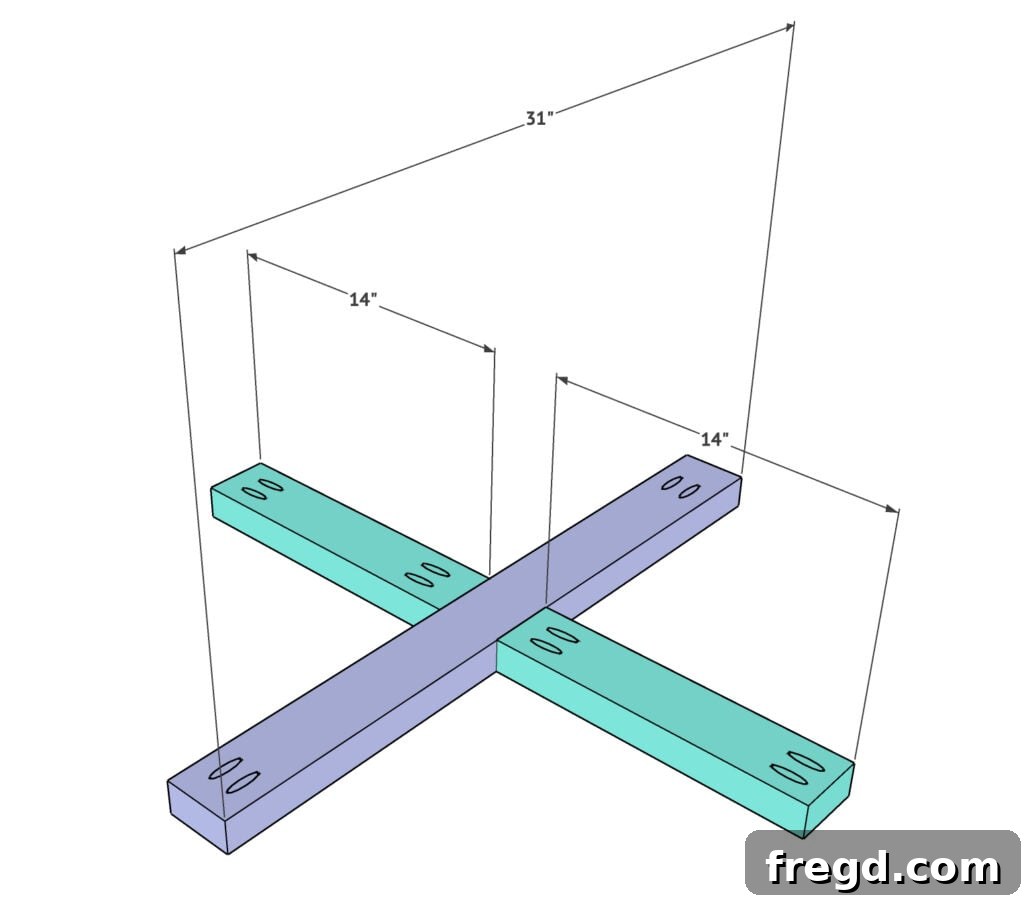
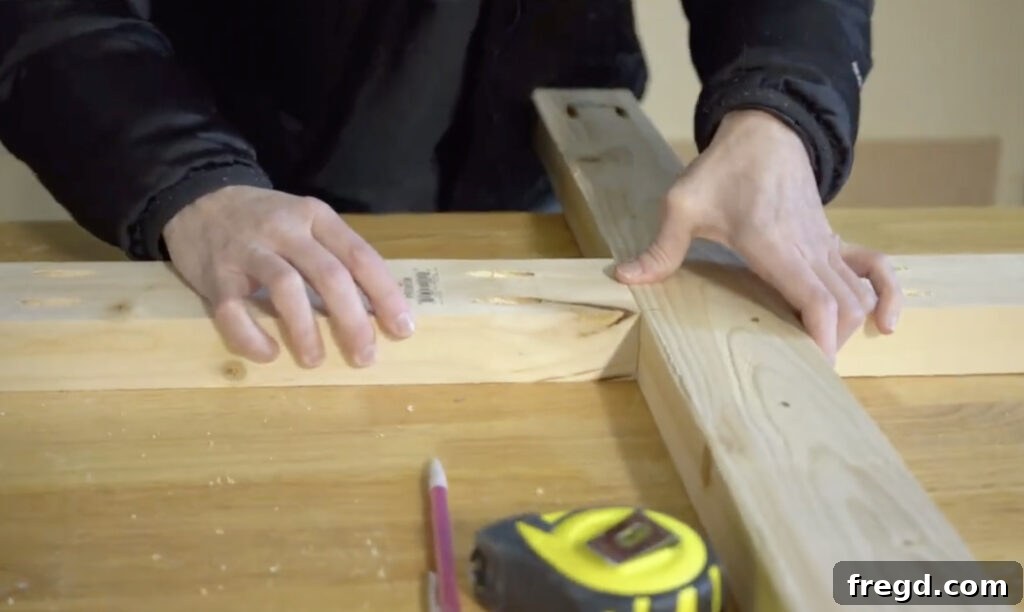
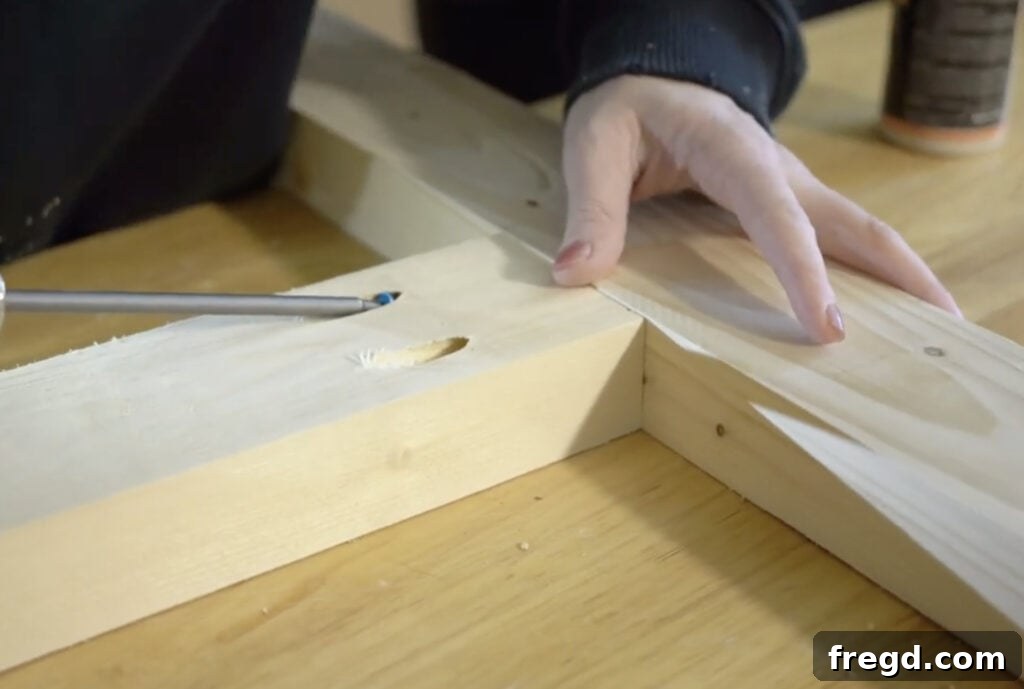
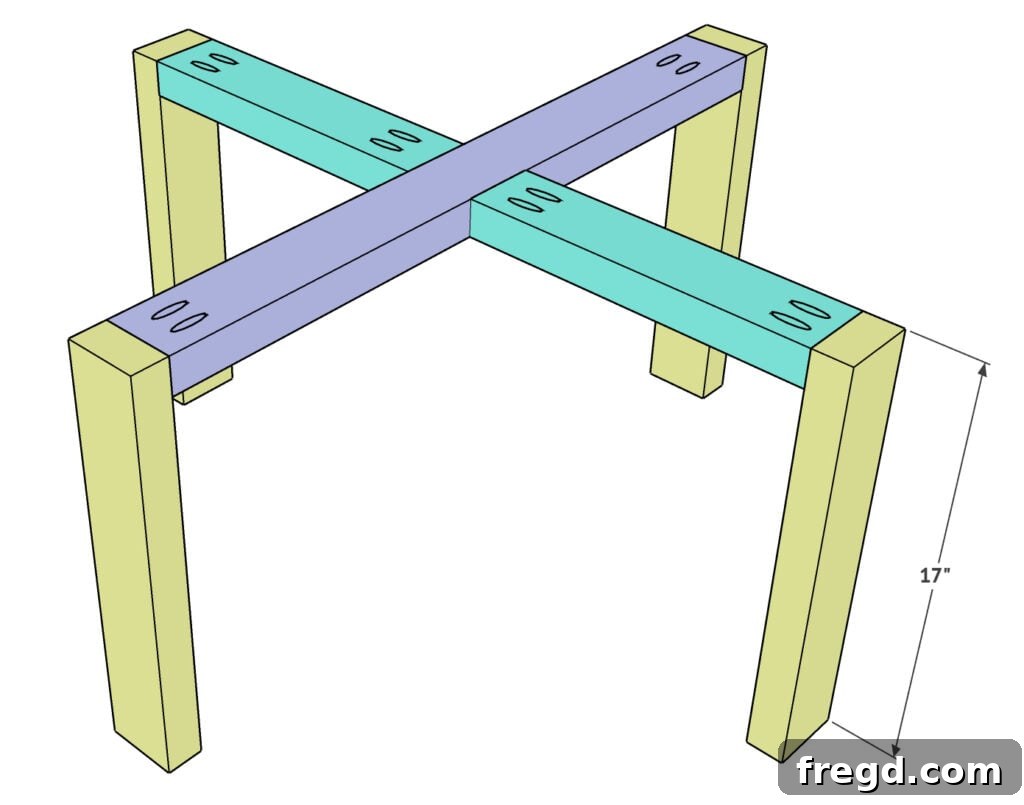
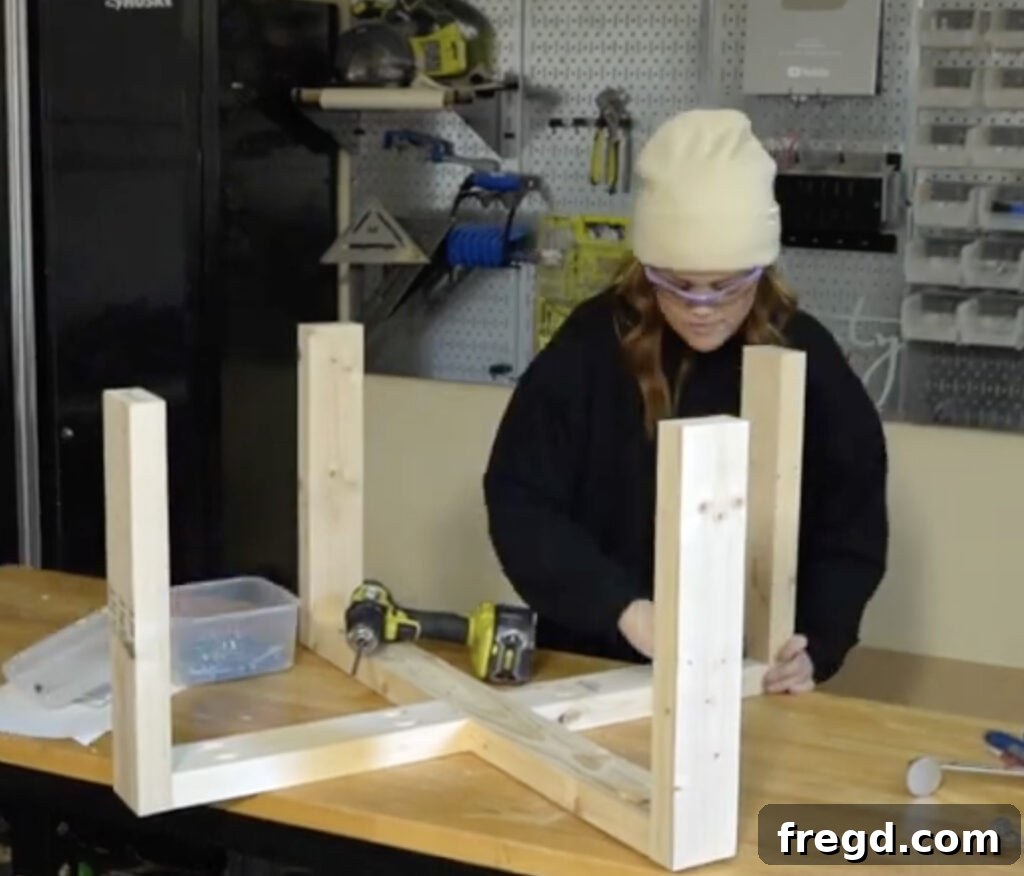
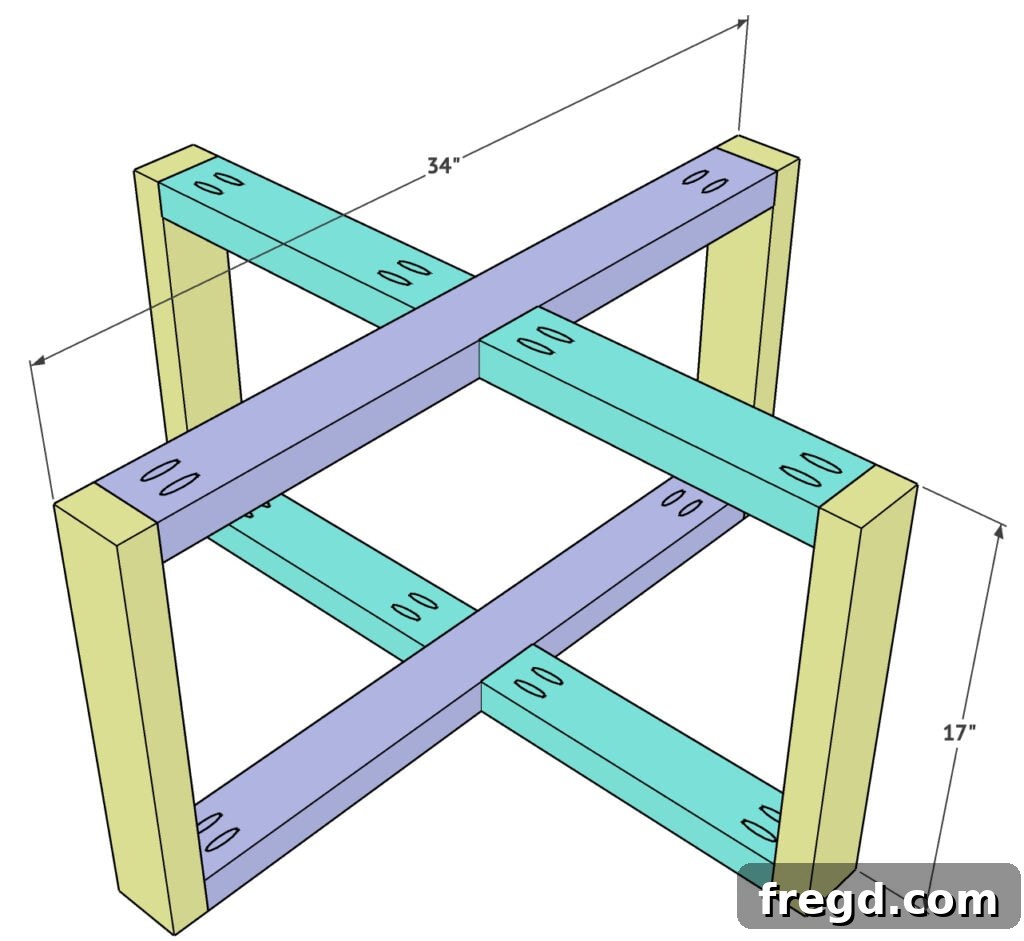
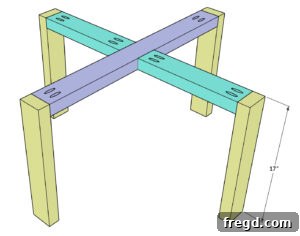
Once your two ‘X’ pieces are ready, it’s time to assemble the uprights (legs) of the table. Carefully attach the four table legs to the ends of one of the ‘X’ pieces. Use 2.5-inch pocket hole screws and wood glue for a secure bond. Ensure that the ends of the leg pieces are perfectly flush with the ‘X’ piece, and position the pocket holes facing upwards, as demonstrated in our video and diagrams. This orientation will conceal the pocket holes once the table is complete, maintaining a clean aesthetic.
The Unsung Hero: Kreg VersaGrip™ Clamps
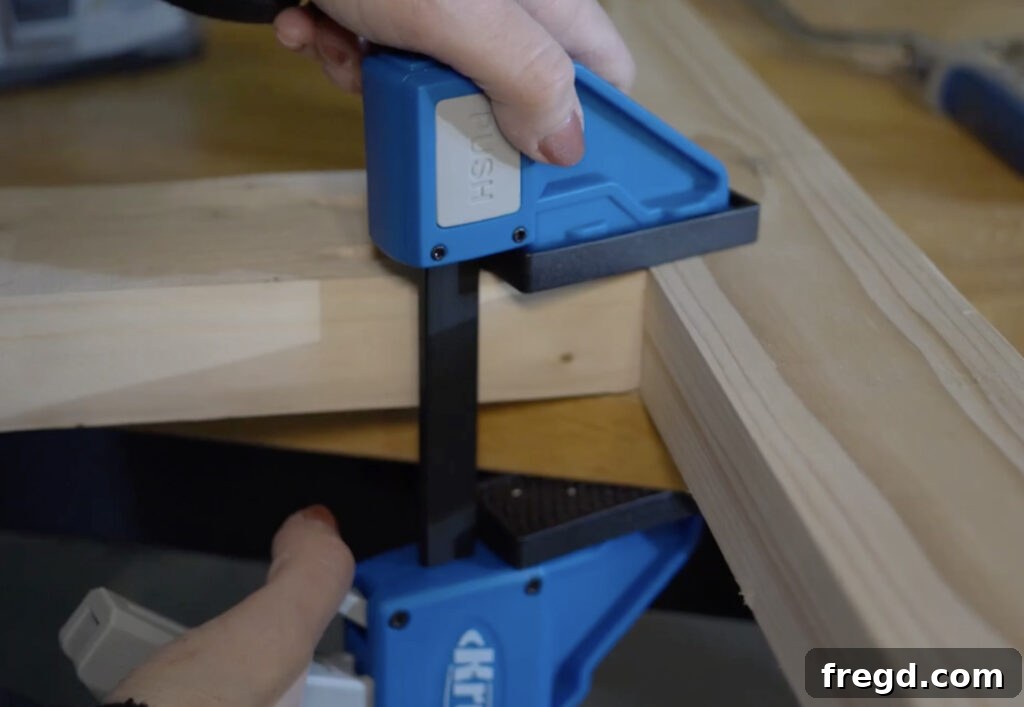
In woodworking, the right clamps can make all the difference, especially when you need an extra set of hands to hold pieces perfectly in place during assembly. For this stage of attaching the legs and the second ‘X’ piece, our new Kreg VersaGrip™ Clamps proved to be indispensable. We absolutely love these clamps for their incredible versatility and secure grip!
What makes the VersaGrip™ so fantastic is its adaptable clamp head, which can be repositioned along the bar and even reversed. This ingenious design allows it to excel in a multitude of clamping applications, from securing joints for pocket hole screws to holding irregular shapes. This flexibility means fewer clamps are needed, and they adapt to your specific project needs with ease, providing firm, consistent pressure. Using them ensured that every joint was held perfectly flush and square while the glue dried and screws were driven. You can find these highly recommended clamps HERE on Amazon and see for yourself how they can streamline your woodworking projects!
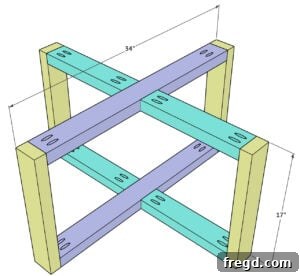
With the legs securely attached to the first ‘X’ piece, it’s time to complete the base by joining the second ‘X’ piece. Attach this remaining ‘X’ piece to the other ends of the leg pieces. Again, use wood glue for maximum hold and secure it with 2.5-inch pocket hole screws. Ensure that the ‘X’ piece sits flush with the ends of the leg pieces, and maintain the same pocket hole orientation as shown in the provided images and video. This careful attention to detail will ensure your base is not only strong but also aesthetically pleasing.
The Perfect Top: Discovering the Round Laminated Pine Panel
Finding the right tabletop material for this DIY round coffee table was a moment of pure excitement! For a long time, only rectangular project panels were readily available, making it challenging to find affordable, pre-made round options. However, during a recent trip to Lowe’s, I was thrilled to discover they now carry round laminated pine project panels in a variety of sizes!
For our project, I selected the 36-inch round panel, which boasts a robust 1-inch thickness. At just $50, it presented an incredible value – especially when considering the cost and effort of cutting and laminating a round top from scratch. Beyond the fantastic price, I am particularly fond of how beautifully these panels take stain, allowing for rich, even color and grain enhancement. The extra 1/4 inch in thickness (compared to standard 3/4-inch panels) also provides a more substantial and premium feel to the finished table. This panel is truly a gem for any DIY enthusiast looking to create a high-quality round surface without the fuss. You can check its availability and details HERE on Lowe’s website!
Streamlining Your Build: The Kreg Quick-Flip Advantage
Once the sturdy base of your coffee table is fully assembled and cured, the next step is to attach it securely to the round tabletop. This is where another ingenious tool from Kreg comes into play: the Kreg Quick-Flip. This multi-functional tool is designed to significantly simplify and speed up the process of attaching components, delivering a clean and professional finish every time. I find myself reaching for it constantly for various projects due to its sheer efficiency!
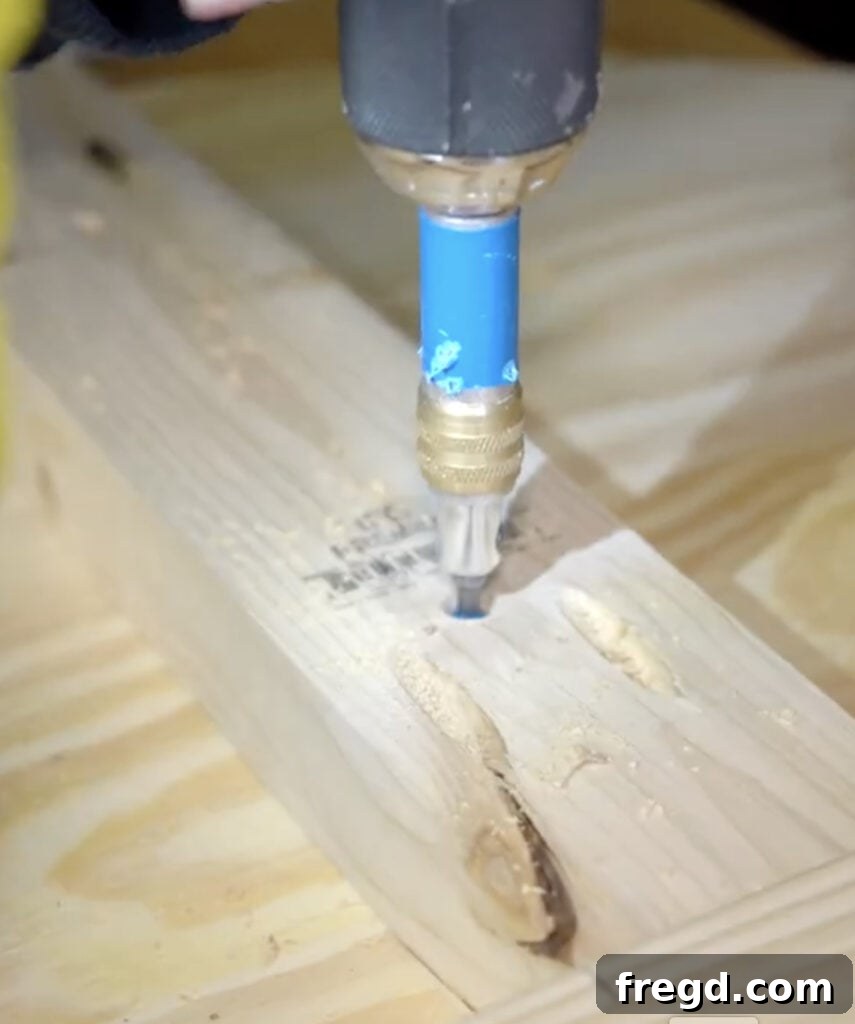
The Kreg Quick-Flip operates with a clever dual-sided design. One side allows you to drill a precise pilot hole and simultaneously create a counterbore – a wider, shallow hole that lets the screw head sit flush or slightly below the surface. After drilling, you simply “quick-flip” the tool to reveal the #2 square-drive bit on the other side, ready to drive your Kreg Screw. This seamless transition eliminates the need to switch drill bits, saving you valuable time and effort. The result is joinery that is not only strong but also beautifully hidden, contributing to the overall high-quality appearance of your custom coffee table. Discover the efficiency of the Kreg Quick-Flip for yourself HERE on Amazon!
Securing Your Masterpiece: Attaching the Tabletop
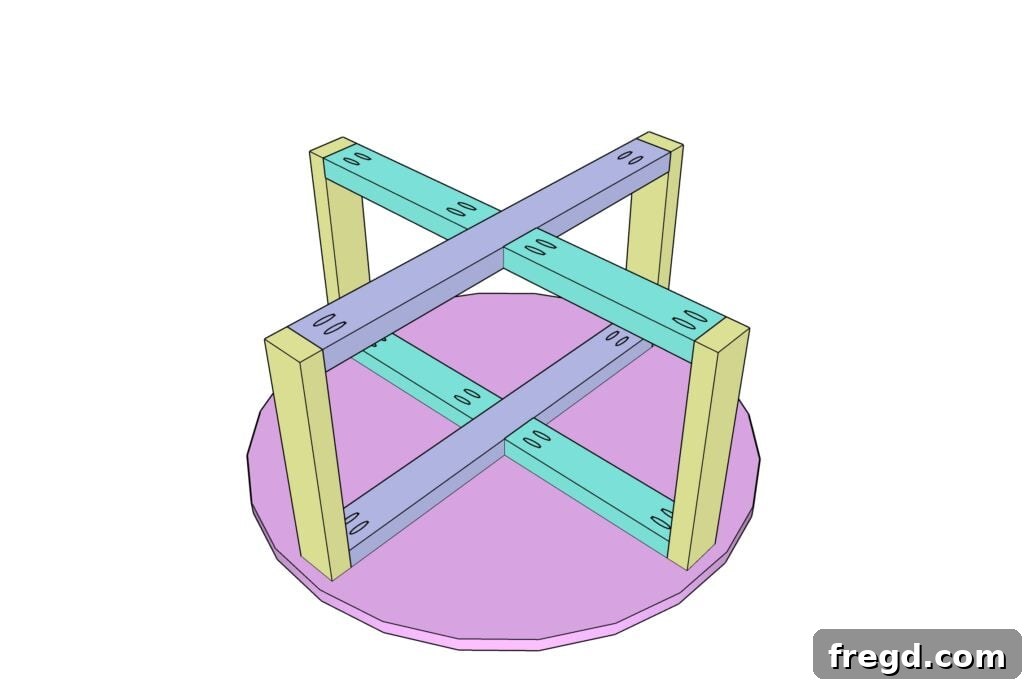
Now for the satisfying step of uniting your carefully crafted base with the beautiful round tabletop. This connection needs to be robust to ensure your coffee table withstands daily use. Here’s how to attach the coffee table base assembly to the bottom of your tabletop:
- Carefully position the base squarely on the underside of your round project panel. Take your time to center it properly, ensuring an even overhang around all sides.
- Once satisfied with the placement, use 2-inch Kreg pocket hole screws. Drive these screws through the pre-drilled pocket holes in the top frame of your base and into the tabletop.
- As mentioned, the Kreg Quick-Flip tool makes this part significantly easier by streamlining the drilling and driving process. It ensures each screw is seated perfectly for a strong, concealed joint.
- Aim for approximately a 1-inch overhang from the outer edge of the legs to the perimeter of the tabletop. This slight overhang provides a classic, balanced look and protects the base structure from minor bumps.
Double-check all connections to ensure they are tight and secure. Once this step is complete, your coffee table will truly begin to take its final form, ready for the finishing touches that will bring your vision to life.
Bringing Your Vision to Life: Staining and Finishing
The finishing process is where your DIY round coffee table truly comes alive, allowing you to customize its appearance and protect the wood for years to come. Achieving a professional-looking finish requires a bit of patience and attention to detail. Here’s a comprehensive guide to staining and protecting your new coffee table:
1. Prepare for Perfection with Sanding:
Before applying any stain, thorough sanding is paramount. I start with a medium-grit sandpaper, typically 120-grit, to smooth out any imperfections, remove mill marks, and prepare the wood grain to accept the stain evenly. After the initial pass, I switch to a finer 220-grit sandpaper for a silky-smooth finish. This two-step sanding process ensures that your wood surface is perfectly prepared for optimal stain absorption and a flawless final feel. Tools like a random orbital sander or a detail sander (such as the Ryobi Corner Cat, which I love for corners and edges) work wonderfully for this stage.
2. Crafting Your Custom Stain Color:
For this coffee table, I opted for a custom stain blend to achieve a unique and warm aesthetic. You’ll need three different Varathane stain colors and an empty container (an inexpensive tub from the hardware store or any clean empty bucket you have at home works great). My winning formula was a mix of:
- Two parts Natural stain
- One part Golden Oak stain
- A small splash of Weathered Gray stain
Simply combine these proportions in your container and stir gently until thoroughly mixed. This blend creates a rich, nuanced tone that beautifully highlights the pine grain without being too dark or too light. Always test your custom blend on a scrap piece of the same wood to ensure it’s exactly the color you envision before applying it to your main project.
3. Application and Protection:
Apply your custom stain according to the manufacturer’s directions, typically by wiping it on with a rag and then wiping off the excess after a few minutes to control the intensity of the color. Allow ample drying time between coats if you desire a deeper hue. Once the stain is completely dry, it’s crucial to apply a protective topcoat. This step shields your beautiful work from spills, scratches, and daily wear and tear. I consistently receive questions about my preferred protective coat, and my go-to choice is THIS polyurethane. It provides exceptional durability and a beautiful, lasting finish that will keep your coffee table looking fantastic for years.

Your Dream Coffee Table: The Final Reveal
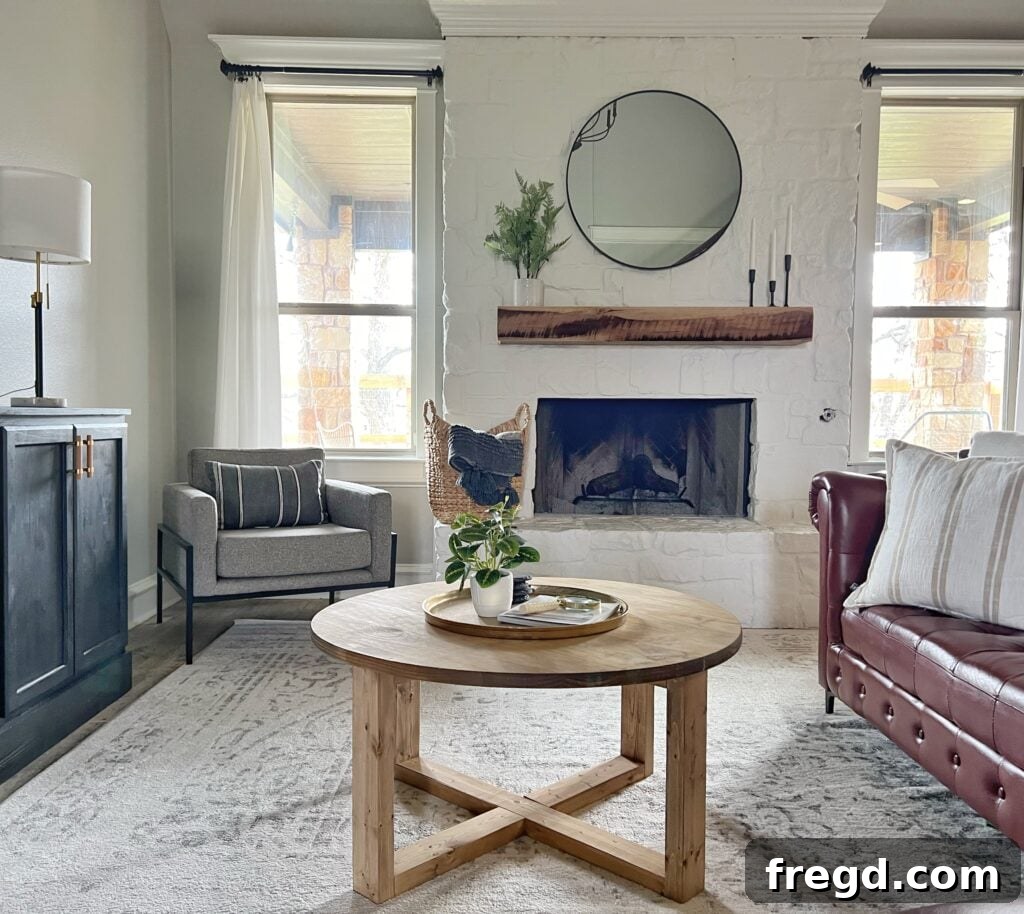
Congratulations! You’ve successfully built a stunning DIY Round Coffee Table that is both functional and a stylish statement piece. This project proves that you don’t need extensive woodworking experience or a massive budget to create high-quality, beautiful furniture for your home. With basic tools, affordable lumber, and our detailed guidance, you’ve crafted something truly special.
Below, you’ll find a concise summary of the supplies and instructions, perfect for a quick reference during your build. Don’t forget to grab the free printable plans HERE to keep handy!

DIY Round Coffee Table
Supply List
- 1 36″ Round Laminated Pine Project Panel
- 2 2×4 framing lumber ripped to 3″ wide each
- Wood glue
- 2.5” pocket hole screws
- 2” Kreg pocket hole screws
- Kreg Jig (e.g., 720 PRO)
- Miter saw & Table saw
- Kreg VersaGrip™ Clamps
- Kreg Quick-Flip
- Sander (orbital or detail sander)
- 120-grit and 220-grit sandpaper
- Varathane stains: Natural, Golden Oak, Weathered Gray
- Empty container for mixing stain
- Clean rags for stain application
- Polyurethane protective coat
Instructions
-
Rip 2×4 boards to 3″ width. Add 1.5” pocket holes to the ends of each board and attach using 2.5” pocket hole screws and wood glue to create two identical X pieces.

-
Attach the 4 leg pieces to the ends of one X piece using 2.5” pocket hole screws and wood glue. Ensure leg ends are flush with the X piece and pocket holes face up.
-
Attach the other X piece to the ends of the leg pieces using wood glue and 2.5” pocket hole screws. This X will be flush with leg ends, pocket holes facing as shown.
-
Attach the base assembly to the bottom of the table top using 2” Kreg pocket hole screws. Use the Kreg Quick-Flip. Ensure about a 1” overhang from the legs to the tabletop edge.
-
Lightly sand the entire table with 120-grit, then 220-grit sandpaper for a smooth finish.
-
Mix your custom stain (2 parts Natural, 1 part Golden Oak, splash of Weathered Gray). Apply evenly and wipe off excess.
-
Once stain is dry, apply your chosen polyurethane protective coat for durability.
Video Tutorial
Expand Your Craft: More Shanty Woodworking Projects!
Loved building your round coffee table? Don’t stop there! The world of DIY woodworking offers endless possibilities to create custom pieces that perfectly fit your style and needs. We’ve compiled an extensive collection of woodworking projects, many with free plans, to inspire your next build. If you’re particularly keen on enhancing your living room, check out some of our other popular DIY coffee table ideas:
Explore Our Other DIY Coffee Table Ideas with Free Plans!
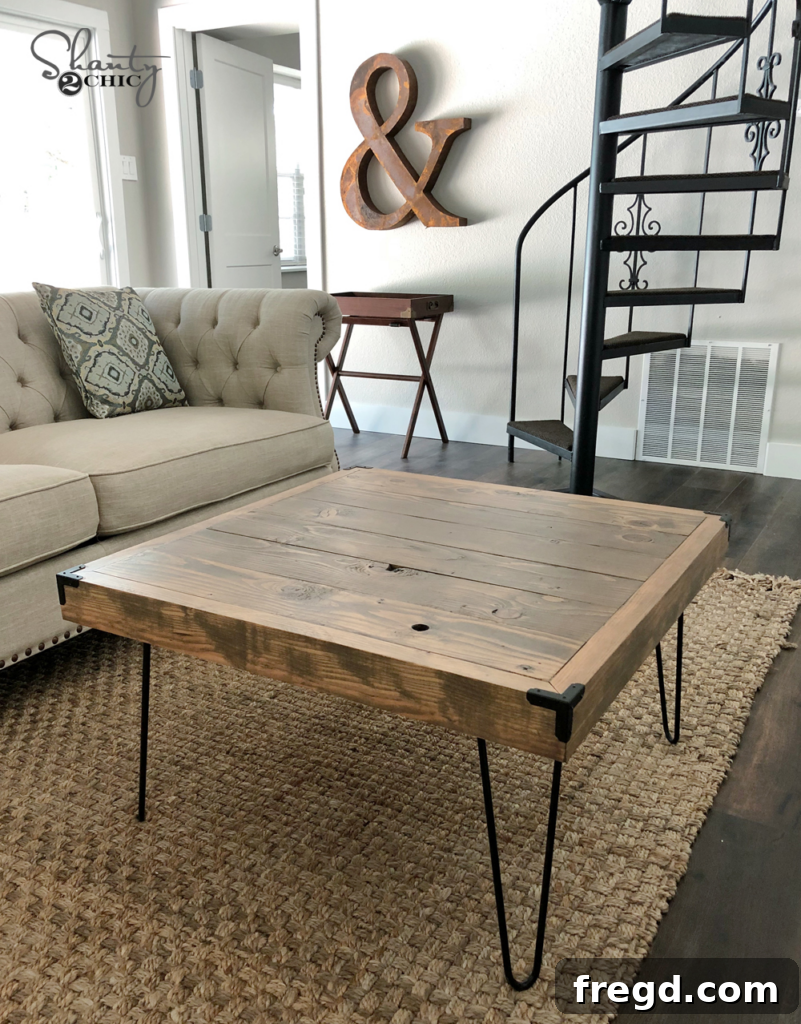
Coffee Table with Hairpin Legs
Farmhouse Style Coffee Table
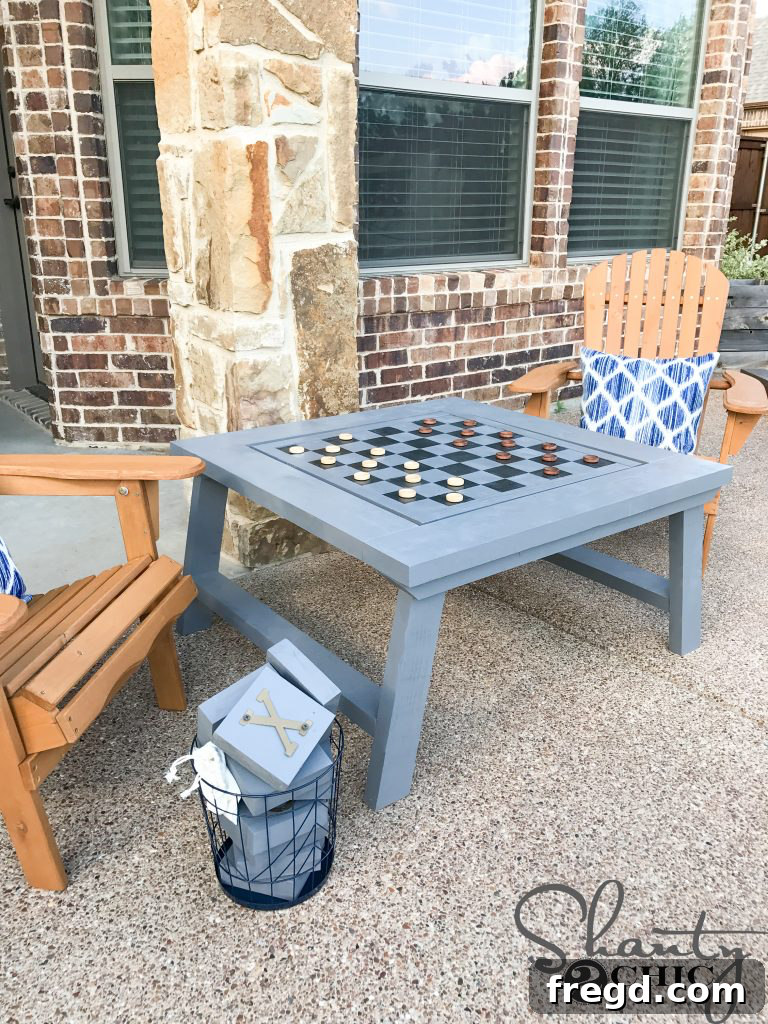
Outdoor Coffee Table
Stay Connected with Shanty2Chic!
We love seeing your DIY creations and connecting with our amazing community! Be sure to follow us on all our social media channels for daily inspiration, new project announcements, tips, and behind-the-scenes content. Join our growing family of DIY enthusiasts!
- YouTube
Stop by and check our our complete collection of DIY Coffee Table Plans – we have over 15 free plans to choose from, ensuring you find the perfect project for your home!