
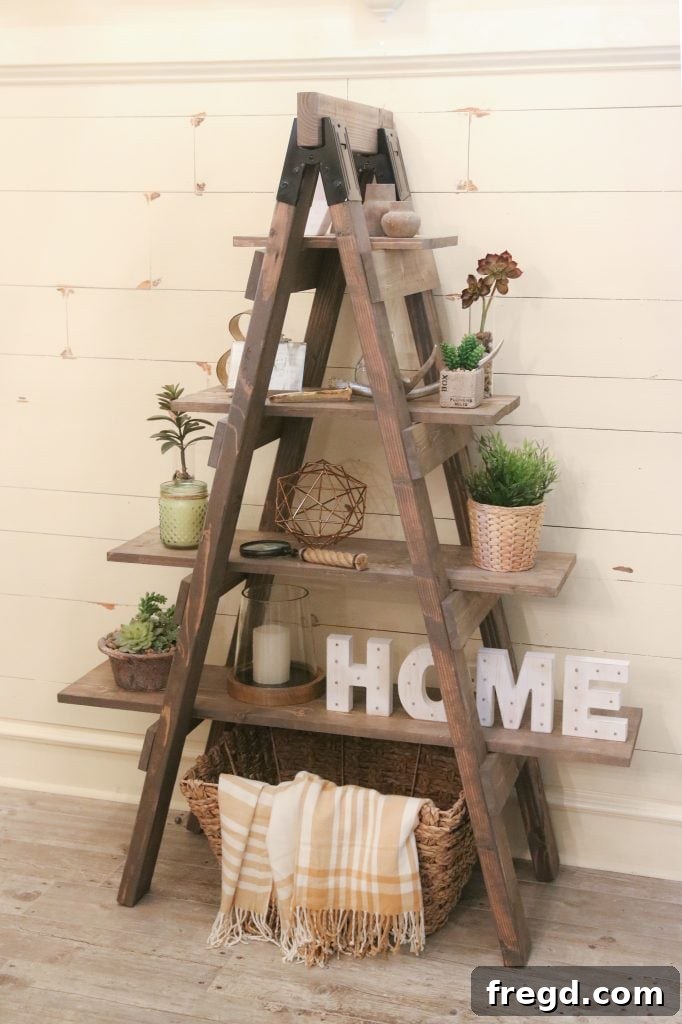
Welcome back, DIY enthusiasts! We’re thrilled to share another exciting project that combines functionality, style, and simplicity. Get ready to transform your living space with our latest creation: the DIY Sawhorse Bookcase. This unique ladder shelf design is not only incredibly versatile but also surprisingly easy and affordable to build, requiring just three essential tools and less than $50 in materials.
Inspired by the classic charm and practical appeal of ladder shelves, we set out to design a piece that truly stands out. The result is a super unique bookcase perfect for displaying your favorite books, decorative items, or even organizing essentials in any room of your home. To guide you through every step of this rewarding build, we’ve prepared a comprehensive how-to video. Simply click HERE to watch our detailed tutorial and build along with us!
DIY Sawhorse Bookcase: Crafting Your Perfect Ladder Shelf
The allure of a ladder shelf lies in its elegant simplicity and the way it leans casually against a wall, offering open storage without overwhelming a room. Our DIY Sawhorse Bookcase takes this concept and elevates it with the ingenious use of sawhorse brackets, giving it a distinctive, industrial-chic edge while ensuring robust stability. This project is a testament to how simple tools and smart design can yield truly impressive results.
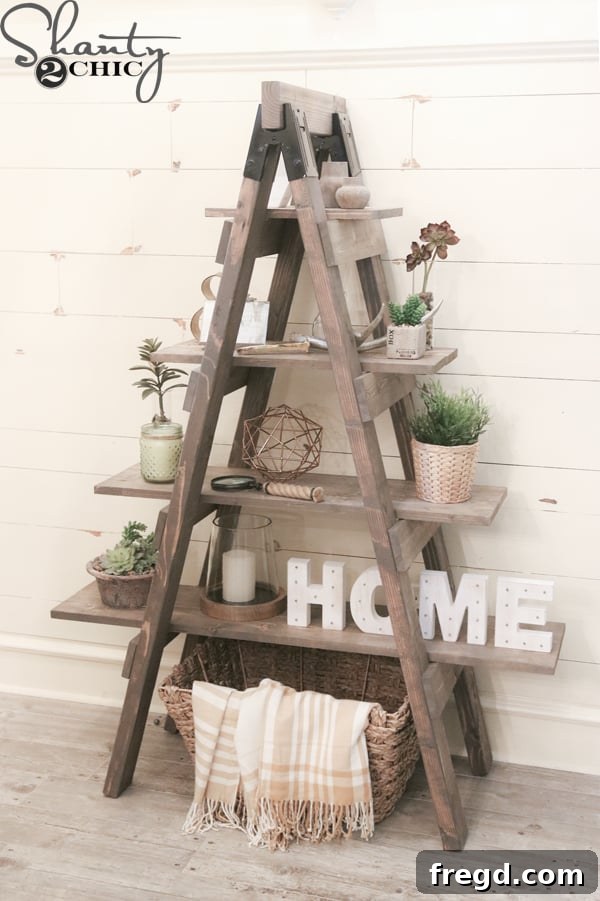
To make your building experience as smooth as possible, we provide free, printable instructions that include a detailed cut list and diagrams. You can download these essential plans by clicking HERE. With the plans in hand, you’ll have all the necessary measurements and steps at your fingertips, ensuring precision and confidence throughout your build.
The Essential Tools: A Minimalist Approach to DIY
One of the most appealing aspects of this project is its reliance on a minimalist toolset. We’ve specifically designed this, and several other projects, to be completed using only three versatile 18-volt cordless tools. This makes it incredibly accessible for beginners who might not have a full workshop, as well as efficient for experienced builders. These tools offer the perfect balance of power, portability, and ease of use for a wide range of woodworking tasks.
Our Go-To Three-Tool Kit:
- Tool #1: 18-Volt Miter Saw – This precision cutting tool is indispensable for making accurate crosscuts and angle cuts, ensuring all your wood pieces fit together perfectly. For this project, it handles cuts up to a 1×4 board with ease, and with a simple flip of the board, it can tackle wider pieces up to 1×8. If you don’t own a miter saw, a circular saw can serve as a capable alternative for all cuts in this build.
- Tool #2: 18-Volt Brad Nailer – A brad nailer is fantastic for quickly and securely attaching pieces, especially when combined with wood glue. It drives small nails (brads) with minimal effort, leaving tiny holes that are easy to fill, resulting in a clean finish. It’s a significant time-saver compared to traditional hammering.
- Tool #3: 18-Volt Drill – From drilling pilot holes to driving screws, an 18-volt drill is a fundamental tool for any DIY project. Its versatility and power make it essential for securing hardware and assembling various components.
This DIY Ladder Shelf is the second exciting build in our five-project series, all achievable with just these three tools! If you missed the first project, a stylish DIY Console Table, you can find its plans and video HERE. For those eager to dive into all five projects immediately, we’ve compiled them into a convenient e-book! For only $4.99, you can download all five 3-tool project plans directly to your device. This e-book is packed with detailed instructions and is a fantastic resource for expanding your DIY skills. Click HERE to grab your copy of the e-book today and receive a special bonus printable as our thank you for your purchase!
Getting Started: Your Step-by-Step Build Guide
Now that you’re armed with your tools, materials, and plans, let’s get building! This project is designed to be straightforward, making it an excellent choice for anyone looking to add a touch of handcrafted charm to their home.
Step 1: Preparing Your Sawhorse Brackets
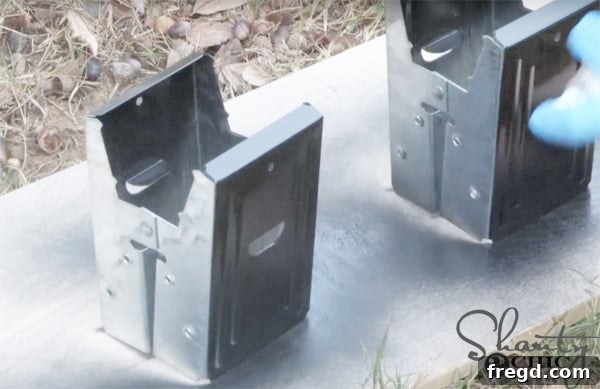
Our journey begins with a quick but impactful step: customizing the sawhorse brackets. While not strictly necessary if you prefer the standard silver finish, we chose to spray paint ours to achieve a cohesive aesthetic with the planned wood stain. This was our very first step because the bookcase itself is a quick build, and we wanted to allow ample time for the paint to dry thoroughly without delaying the main construction. These sturdy brackets are readily available at most local hardware stores, typically costing around $7 for a set. Opting for a black or bronze spray paint can instantly elevate the look, adding a refined touch to the rustic design.
Step 2: Precision Cuts for Your Wood Components
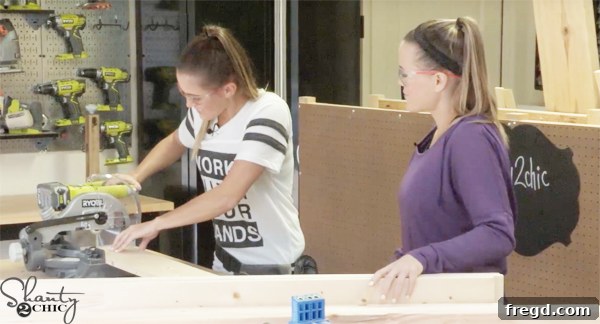
Next, it’s time to accurately cut all your wood pieces according to the dimensions provided in our printable cut list. For this crucial step, we utilized our reliable 18V Ryobi Miter Saw. This tool makes quick work of precise cuts, ensuring all your components fit together snugly. While it’s designed to cut up to a 1×4 board in a single pass, a clever trick allows you to cut up to a 1×8 by simply flipping the board after your initial cut. Always prioritize safety when operating power tools by wearing appropriate protective gear and maintaining a firm grip on your materials. If a miter saw isn’t part of your current tool collection, a circular saw can perform all the necessary cuts for this build effectively.
Step 3: Clever Spacing for Ladder Side Rails
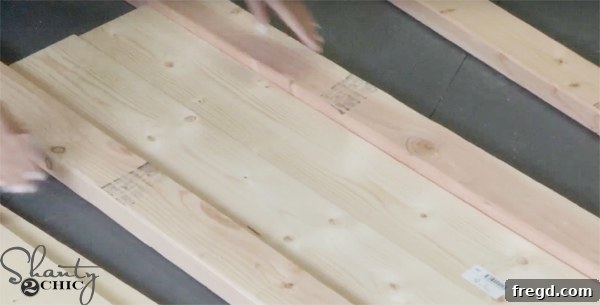
Once all your pieces are cut, we’ll prepare the side rails for the ladder sections. This step is critical for ensuring your shelves fit perfectly later on. Here’s a smart tip to guarantee accurate spacing: place two pine boards side-by-side between two of your side rails. This simple trick provides the exact width needed, ensuring that your future shelf pieces will slide effortlessly and securely into place between the rails. This method eliminates guesswork and helps maintain consistency across both ladder frames.
Step 4: Attaching the Rungs to Form the Ladder
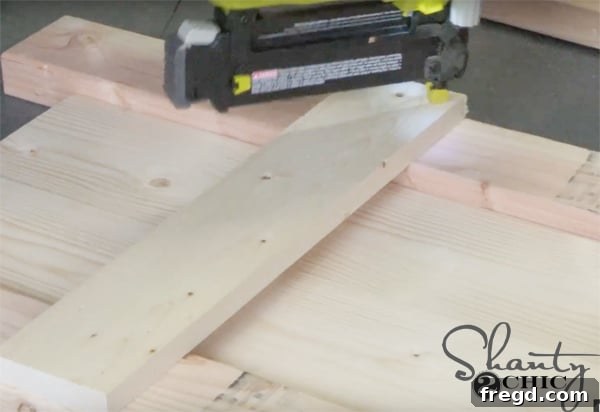
Now, let’s assemble the ladder rungs. We recommend starting with the bottom rung and progressively working your way upwards. Refer to your printable plans for the precise placement of each rung. To ensure maximum stability and durability, apply a small dab of wood glue to each rail where the rung will sit before attaching it. Then, secure the rungs using 1 1/4″ brad nails with your 18-volt nailer. It’s important to make sure the edges of the rungs are perfectly flush with the outside edges of the side rails for a clean and professional look.
Step 5: Completing Both Ladder Frames
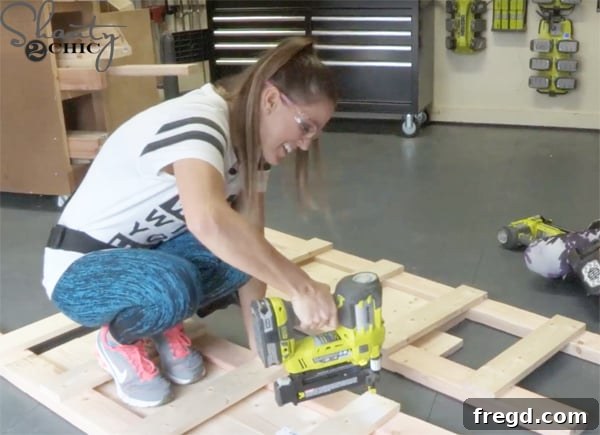
Continue working your way up the ladder frames, attaching each rung in the same manner as the previous step. Consistency in applying wood glue and ensuring flush edges will contribute to the overall strength and aesthetic appeal of your bookcase. Once you’ve completed one ladder, repeat the entire process to construct the second ladder, ensuring both are identical and ready for the next phase of assembly.
Step 6: Integrating the Sawhorse Brackets
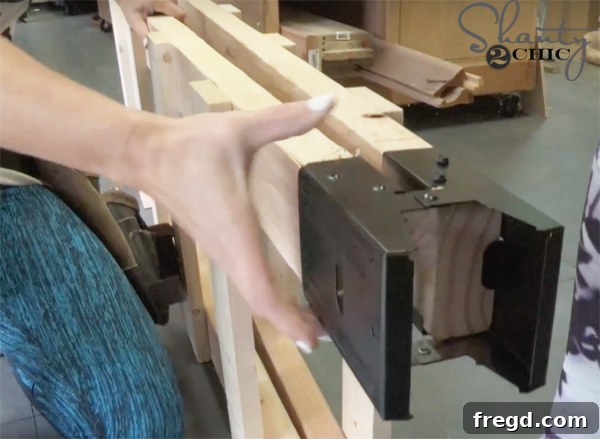
With both ladder frames now complete, bring them together, ensuring the rungs are facing outwards. Carefully slip a painted sawhorse bracket over the top ends of each ladder frame. The brackets should fit snugly, providing the foundational structure that defines the unique sawhorse look of this bookcase. This step truly begins to bring the distinctive design to life.
Step 7: Securing the Brackets in Place
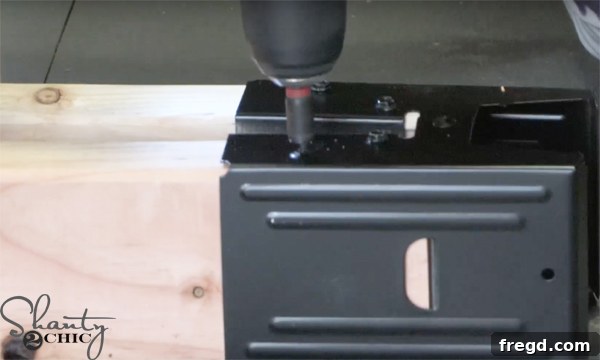
To ensure the sawhorse brackets are firmly attached and provide maximum stability, use your 18-volt drill and small hex screws to secure them to the ladder frames. Drive the screws through the designated holes in the brackets and into the top ends of the ladder rails. This connection is crucial for the structural integrity of the entire bookcase, so make sure they are tightened securely without over-tightening and stripping the wood.
Step 8: Positioning the Top Board
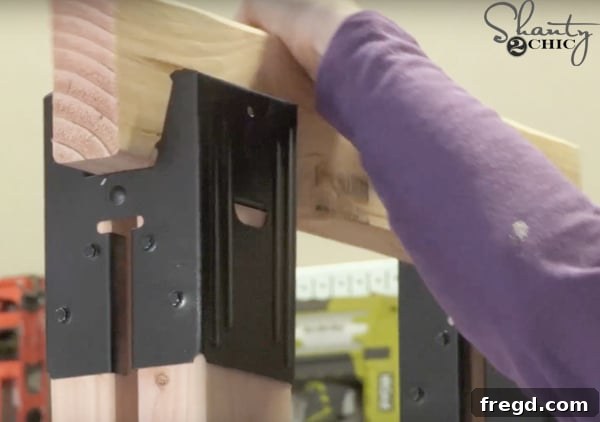
Next, stand the assembled ladder frames upright, still held together by the brackets. Carefully place the top board into the opening end of the sawhorse brackets. This board will serve as the uppermost shelf and also acts as a critical cross-member, tying the two ladder structures together. Ensure it sits evenly and is properly aligned within the bracket openings.
Step 9: Finalizing the Frame with the Top Board
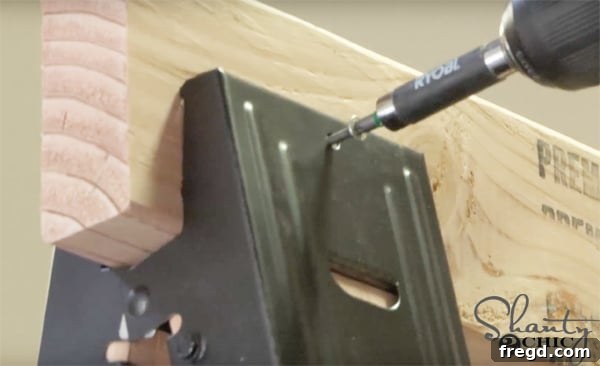
To fully secure the top board and lock the structure in place, gently pull the bottom of the ladder frames apart until the internal teeth at the top of the sawhorse brackets firmly grip and sink into the top board. This action creates a remarkably strong connection. Then, use a 1 1/4″ Spax screw to further secure the top board. Spax screws are renowned for their superior holding power and ease of use, often eliminating the need for pilot holes in many wood types. If you have trouble finding these locally, you can find a wide selection of them on Amazon HERE.
Step 10: Sliding in the Shelf Panels
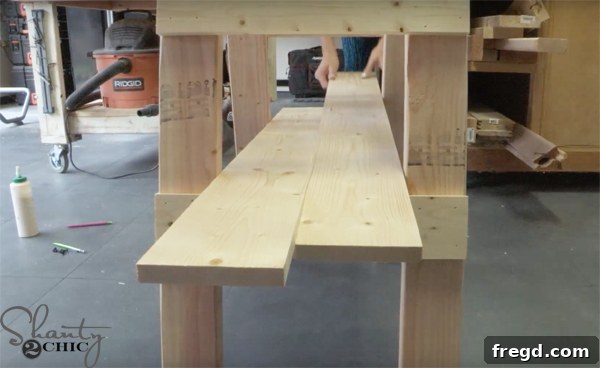
With the main frame and brackets securely in place, it’s time to add the shelf panels. Carefully slide each individual shelf piece over the rungs of the ladder frames. Refer back to your printable plans to ensure each shelf is placed at its proper height and orientation. The careful spacing you achieved earlier will now pay off, allowing these shelves to fit perfectly into position.
Step 11: Attaching the Shelves to the Rungs
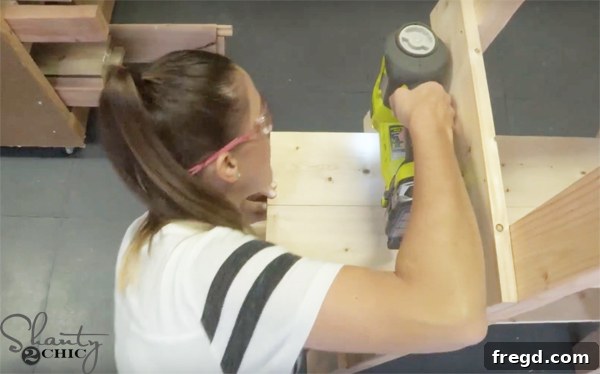
Once each shelf panel is in position, use your 1 1/4″ brad nails to attach them securely to the rungs. It’s crucial to line up your nailer precisely so that the nails shoot directly into the center of the rungs beneath the shelf, ensuring a strong and lasting hold. We recommend starting with the bottom shelf first and working your way up, as this can provide better stability during the attachment process and make it easier to reach each subsequent shelf.
The Finishing Touch: Staining for Style and Protection
The structural assembly is complete, but the true character of your DIY Sawhorse Bookcase emerges with the finishing touches. A good finish not only enhances the wood’s natural beauty but also provides crucial protection against daily wear and tear.
Step 12: Sanding for a Smooth Finish
Before applying any stain or paint, thorough sanding is essential for a professional-looking finish. We sanded the entire piece using a 120-grit sanding block. This grit is effective for smoothing out any rough edges, pencil marks, or minor imperfections without removing too much material. For an even smoother feel, you could progress to a finer grit like 180 or 220, but 120-grit provides a great foundation for stain adhesion and a pleasant tactile surface. Ensure all sanding dust is wiped away with a tack cloth before proceeding.
Step 13: Applying Your Chosen Stain
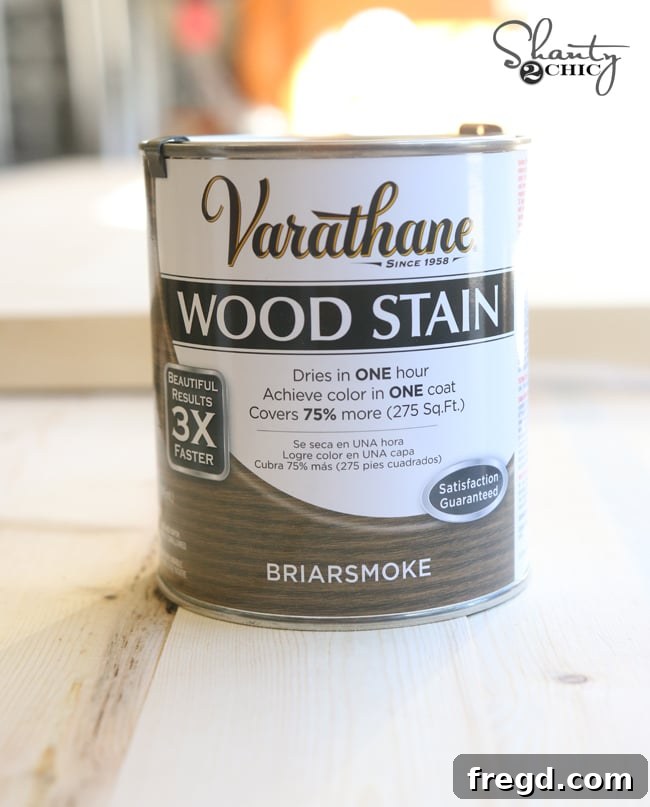
For this project, we chose our current favorite: Briarsmoke stain by Varathane. This rich, smoky hue provides a beautiful, sophisticated look that perfectly complements the rustic-industrial design. To apply, simply wipe on one coat of stain with a clean, lint-free cloth, ensuring even coverage. Allow the stain to sit for approximately 5 minutes, giving the wood time to absorb the pigment. Then, with a fresh, clean cloth, gently wipe off any excess stain, blending it seamlessly for a consistent and streak-free finish. This technique highlights the wood grain while imparting a durable and stunning color. If “Briarsmoke” isn’t your style, experiment with other stains, paints, or even a clear coat to match your home decor perfectly.
Your Completed Sawhorse Bookcase: Ready for Display!
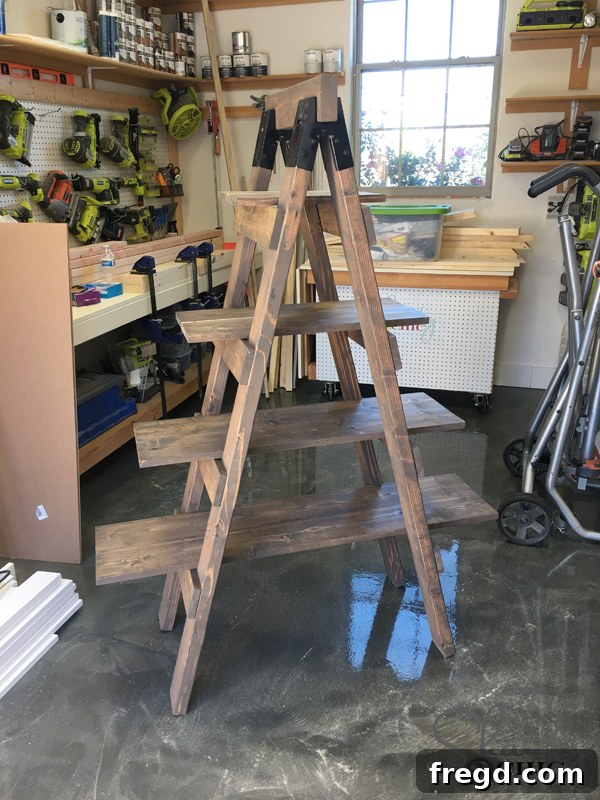
And just like that, your DIY Ladder Shelving Unit is complete! Isn’t it incredible how easily and quickly such a stylish and functional piece of furniture comes together? The simple elegance of this design, combined with its sturdy construction, makes it an instant classic in any home.
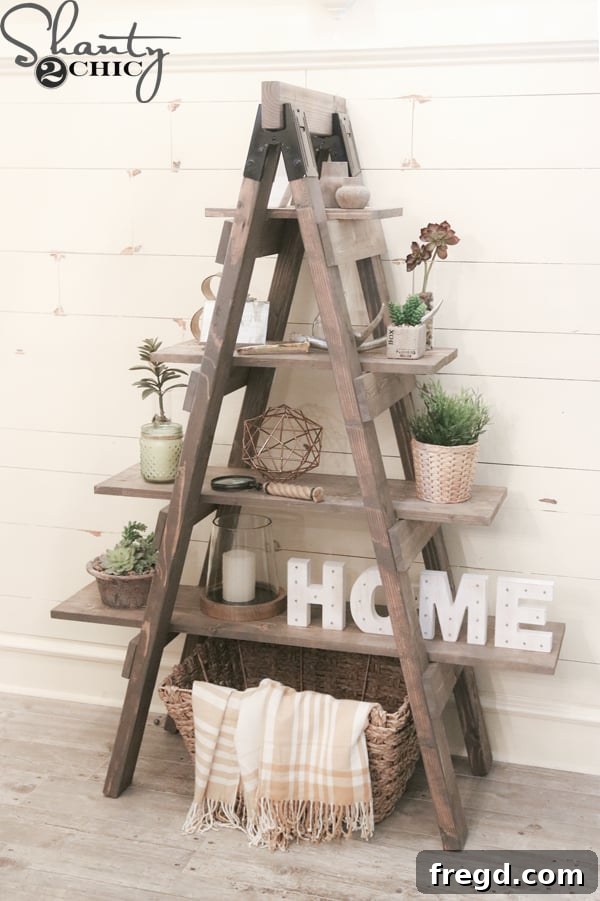
Versatile Decor and Functionality
Now comes the fun part: dressing up your new wooden ladder shelf! We absolutely adore how it retains the charming aesthetic of an old wooden ladder, adding character and warmth to any space. Beyond its visual appeal, this bookcase offers fantastic storage opportunities. Imagine it elegantly displaying plush towels and toiletries in a bathroom, neatly organizing your beloved book collection in a living room or study, or serving as a chic organizational hub in an office. The possibilities are truly endless!
Creative Customization and Expansion Ideas
The beauty of DIY lies in its adaptability. This sawhorse bookcase is a perfect canvas for further customization. For instance, it would be a relatively easy modification to build a second ladder bookshelf and run one long, continuous shelf between the two, effectively creating a stylish and functional desk – perfect for a home office or a creative nook. You could also consider adding small castor wheels to the bottom for mobility, or integrating small baskets for concealed storage. Don’t be afraid to personalize it with different paint colors, distressed finishes, or even by altering the number of shelves to suit your specific needs.
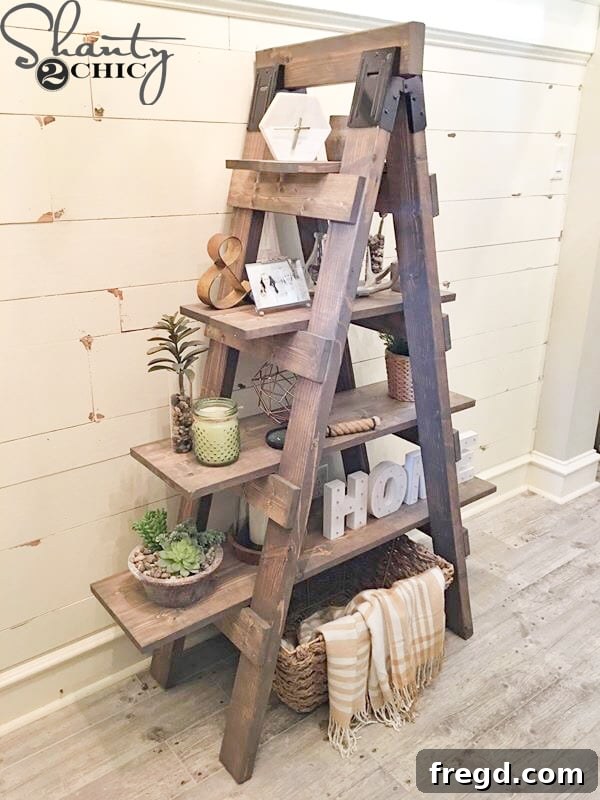
We absolutely love seeing your creativity come to life! Whatever you choose to do with your Sawhorse Bookcase, please share pictures with us on our social media accounts. We’d be thrilled to see your unique styling and share your inspiring creations with our community of readers!
Unlock More Projects: Resources and E-book Access
If you haven’t already, make sure to check out the comprehensive how-to video for this DIY Ladder Bookcase by clicking HERE. It offers visual guidance that complements the written instructions perfectly.
And for those who are too eager to wait for the remaining three plans in our exciting 3-tool DIY project series, we have great news! You can download our exclusive e-book for only $4.99 today. This fantastic resource includes not only these DIY Ladder Shelf Plans but ALL five of our innovative 3-tool project plans, plus a special bonus printable as a thank you. It’s the ultimate guide to expanding your woodworking skills with minimal tools!
Thank you so much for joining us on this creative journey. We hope you enjoy building and styling your new Sawhorse Bookcase as much as we enjoyed designing it!
Happy building,
Ashley and Whitney