
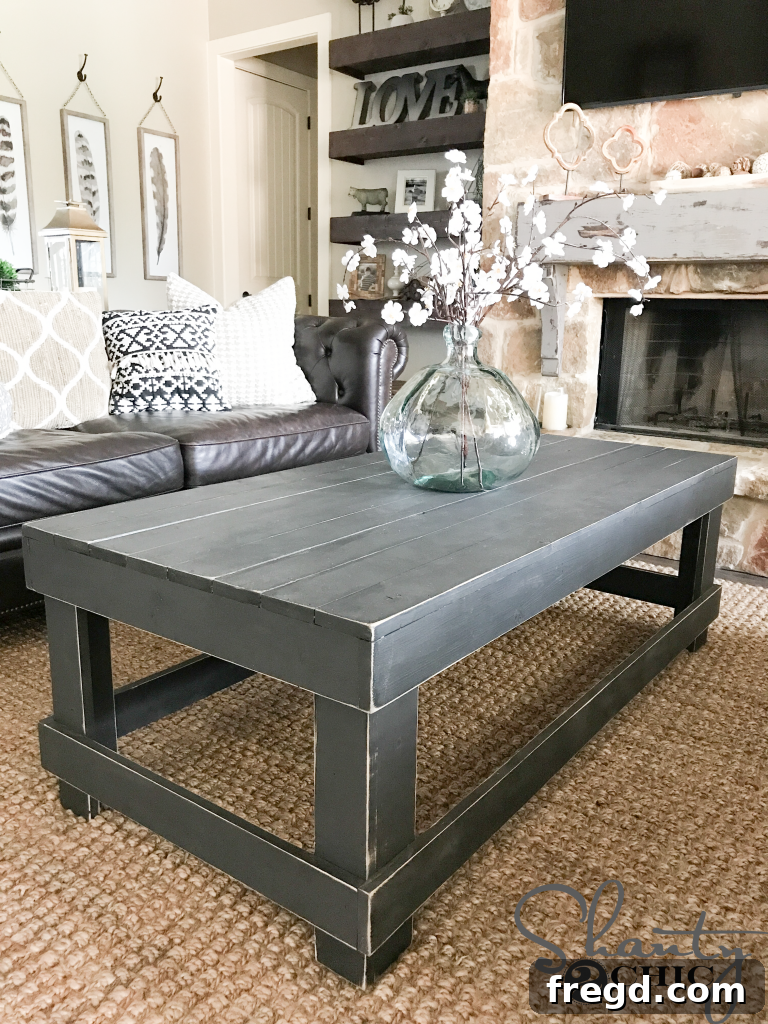
Build Your Own Stylish Coffee Table with Just Two Tools: The “Table for Two” DIY Guide
Imagine crafting a stunning, functional piece of furniture for your home with minimal tools and an incredibly low budget. Sounds too good to be true? Think again! We’re thrilled to share our latest DIY project: a charming coffee table that we affectionately call the “Table for Two.” The most astounding part? We constructed this entire piece using just two power tools and a handful of inexpensive 1×4 boards, proving that impressive woodworking doesn’t require an arsenal of expensive equipment or advanced skills. This project is perfect for anyone looking to add a personalized touch to their living space without breaking the bank or feeling overwhelmed by complex instructions.
Whether you’re a seasoned DIY enthusiast or taking your first steps into the world of woodworking, this comprehensive guide will walk you through every stage of building your very own “Table for Two.” We’ve designed this project to be straightforward, accessible, and immensely rewarding. Get ready to transform humble lumber into a stylish focal point for your home, all while enjoying the satisfaction of a handmade creation.
The Dynamic Duo: Essential Tools for Your “Table for Two” Project
You read that right! Our streamlined approach to furniture building means you only need two core tools to bring this vision to life. This simplicity is intentional, making the project approachable for everyone and demonstrating that powerful results can come from focused, efficient tool use. These two workhorses are a staple in many DIY shops for good reason, offering precision and speed that are invaluable for projects like this, especially when tackling a DIY coffee table.
1. The Versatile 18-Volt Miter Saw
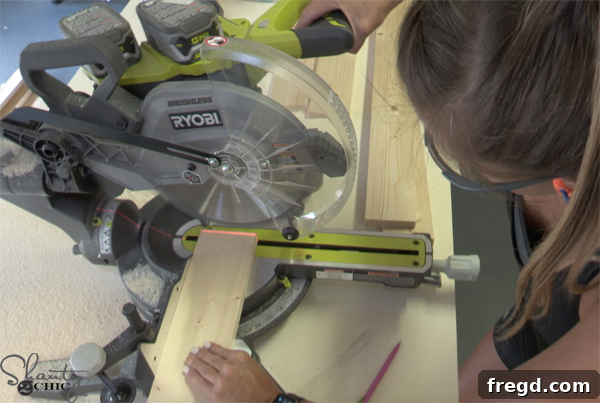
The first hero of our project is a trusty 18-volt miter saw. This cordless wonder provides the freedom and flexibility to make precise cuts without being tethered to an outlet. A miter saw is an absolute game-changer for woodworking, allowing you to quickly and accurately cut lumber to specific lengths and angles. For a project like our coffee table, where consistent board lengths are crucial for a professional finish, the miter saw ensures every piece fits together perfectly. Its portability makes it ideal for setting up your workspace virtually anywhere, whether it’s a dedicated shop, a garage, or even a well-ventilated outdoor area. The power of an 18-volt battery system means you get plenty of runtime for all your cuts, making the process smooth and efficient for your homemade table.
2. The Reliable 18-Gauge Brad Nailer
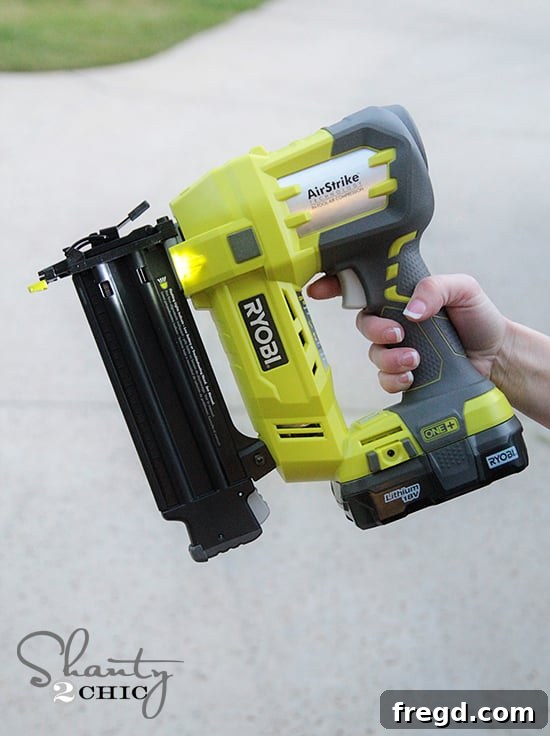
Our second indispensable tool is an 18-gauge brad nailer. This tool is a fantastic choice for quickly and securely joining pieces of wood, especially when combined with wood glue for added strength. Brad nailers shoot thin, small-headed nails (brads) that create strong joints without leaving large, unsightly holes, which is perfect for furniture building where aesthetics matter. The 18-gauge size strikes a great balance between holding power and minimal impact on the wood surface. For attaching aprons, supports, and tabletop planks, the brad nailer dramatically speeds up the assembly process compared to traditional hammer and nails, while also providing a cleaner finish. Like our miter saw, an 18-volt cordless brad nailer offers excellent mobility, allowing you to move around your project freely as you assemble. Together, these two tools form a powerful and efficient team, proving that you don’t need a complex workshop to create beautiful custom furniture like this easy woodworking project.
Budget-Friendly Brilliance: Materials for Under $65!
Beyond the minimal tool requirement, another highlight of the “Table for Two” project is its incredibly low material cost. We built this entire coffee table using only 13 standard 1×4 lumber boards. This choice of material is deliberate: 1x4s are readily available at any home improvement store, easy to work with, and, most importantly, exceptionally affordable. Opting for these standard dimensions allowed us to keep the total lumber cost to an astonishingly low $65! This makes the “Table for Two” an ideal project for anyone looking to furnish their home on a tight budget or seeking a rewarding DIY experience without a significant financial investment.
In addition to the lumber, you’ll need standard woodworking supplies: high-quality wood glue for strong, lasting joints, and 1 1/4″ brad nails for your nailer. These common consumables are inexpensive and essential for a sturdy build. With such an accessible material list, this project truly embodies the spirit of smart, affordable DIY home decor. You’re not just building a table; you’re crafting value and style.
Ready to Build? Download Your Free Plans & Watch the Video Tutorial!
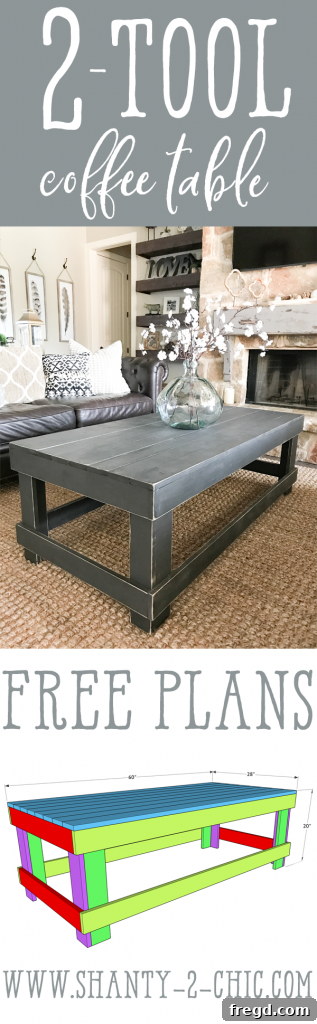
We believe in making DIY accessible to everyone. That’s why we’re providing comprehensive, FREE printable plans for the “Table for Two.” These plans include all the necessary measurements and detailed diagrams to guide you through each step of the construction process. Simply click the link below to download them and start planning your build!
Download the FREE Printable Plans HERE
For those who learn best by watching, we’ve also created a detailed video tutorial that walks you through the entire build. Join us in our shop as we demonstrate each step, offering tips and insights that will help you tackle the project with confidence. Watching the video alongside the plans provides a comprehensive learning experience, ensuring you understand every nuance of assembling your budget-friendly furniture.
Click HERE or the image below to watch the video tutorial!
See? Building beautiful furniture doesn’t have to be complicated! Let’s dive into the step-by-step tutorial for your simple DIY project.
Step-by-Step Construction Guide: Building Your “Table for Two” Coffee Table
Now that you have your tools, materials, and plans ready, it’s time to get your hands dirty and start building! Precision and patience are key at each stage, ensuring a sturdy and aesthetically pleasing final product. Follow these detailed steps to assemble your stunning coffee table.
1. Preparing Your Pieces: The Initial Cuts
The foundation of any successful woodworking project begins with accurate cuts. Refer to your printable plans for the precise measurements for each component of the coffee table: the leg pieces, short aprons, long aprons, and tabletop planks. Use your 18-volt miter saw to make all these cuts. Take your time, double-check measurements before cutting, and always prioritize safety. Clean, square cuts will ensure that your table assembles smoothly and stands strong, contributing to the overall quality of your homemade table.
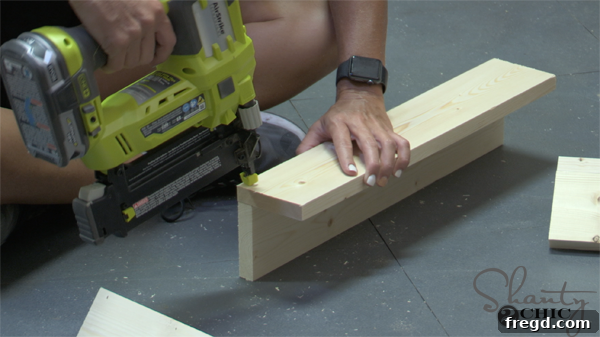
2. Assembling the Table Legs (The “L” Shape)
The “Table for Two” features four robust legs, each constructed from two individual leg pieces. To form one leg, take two identical leg pieces and attach them together to create an “L” shape. This configuration provides excellent stability and a visually substantial look. Apply a generous bead of wood glue along the joining surfaces before securing them with 1 1/4″ brad nails. The glue provides long-term bond strength, while the brad nails hold the pieces in place while the glue dries, preventing movement and ensuring a tight fit. Repeat this process for all four table legs to ensure a solid foundation for your DIY coffee table.
3. Attaching the Short Apron Pieces (Top)
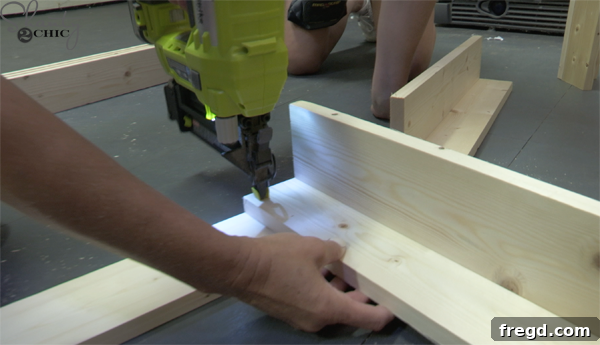
With your legs assembled, it’s time to connect them. Take one short apron piece and attach it to the edge of two legs. Crucially, ensure that the apron is attached to the side of the leg *without the seam*. This thoughtful detail ensures a cleaner, more finished appearance on the visible exterior of your table. Align the apron so it is perfectly flush with the top edge of the legs. Again, use 1 1/4″ brad nails and wood glue for a durable connection. This step forms the end sections of your coffee table frame.
4. Attaching the Short Apron Pieces (Bottom)
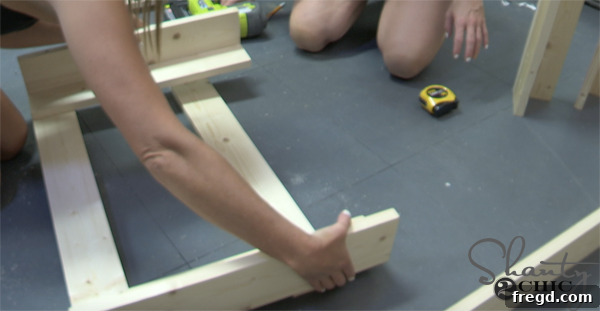
Following the same method, attach the bottom short apron piece to the legs. This piece should be positioned precisely 3 inches from the very bottom of the legs, providing structural integrity and a balanced aesthetic. Just like the top apron, ensure it’s flush with the leg edges and secured with both 1 1/4″ brad nails and wood glue. By completing both top and bottom short aprons on each end, you’ll create two sturdy leg assemblies that are ready to be connected, giving your rustic coffee table its form.
5. Connecting with Long Apron Pieces
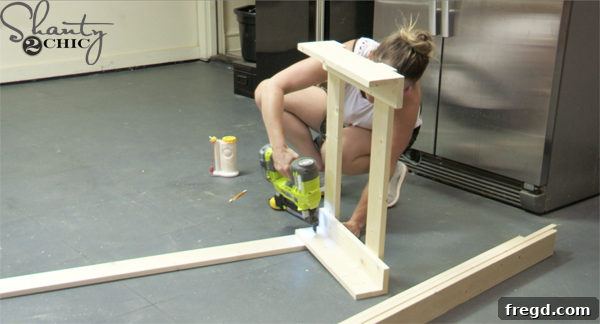
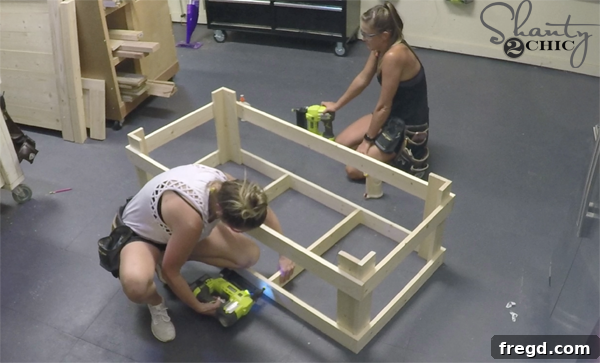
Now that you have your two leg assemblies complete, it’s time to bring them together to form the full table frame. Attach two long apron pieces to connect the leg assemblies. The top long apron should be flush with the top short apron pieces, creating a continuous, level surface around the perimeter of your table frame. Similarly, attach the bottom long apron pieces, ensuring they are flush with the bottom short apron pieces. This meticulous alignment is crucial for the overall structural integrity and the polished look of your coffee table. Secure all connections firmly with 1 1/4″ brad nails and wood glue.
6. Installing the Tabletop Supports
With the main frame complete, you’ll next install the internal supports that will hold your tabletop planks securely. These supports are vital for preventing sagging and ensuring an even surface. Attach them from the outside of the top apron pieces and into the supports themselves. Use 1 1/4″ brad nails and wood glue for these connections as well. Refer to your plans for the exact placement and spacing of these supports to ensure optimal tabletop stability and longevity for your homemade table.
7. Attaching the Tabletop Planks
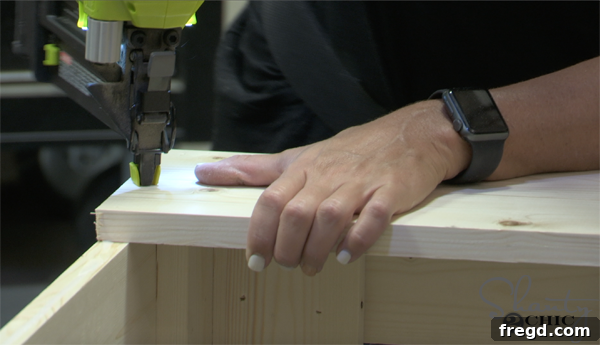
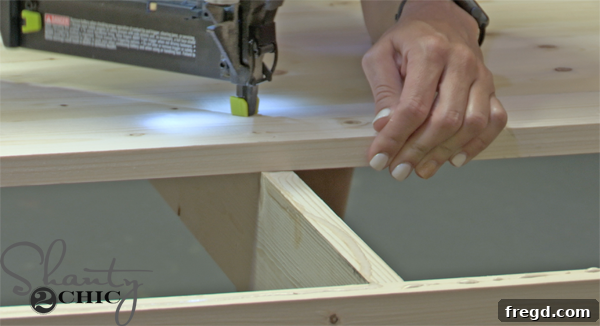
This is where your coffee table really starts to take shape! Begin attaching the tabletop planks, starting from one side and working your way across to the other. Ensure each plank is centered and evenly spaced according to your plans. It’s crucial to attach the ends of the boards securely to the apron pieces beneath them. This provides the primary connection points and adds significant stability to the tabletop. Additionally, for maximum strength and to prevent any warping over time, ensure you also nail and glue the planks into the internal supports you just installed. Use 1 1/4″ brad nails and wood glue for every connection, creating a robust and beautiful tabletop surface for your new living room furniture.
The Art of the Finish: Giving Your Table Character
With the construction complete, it’s time to bring your “Table for Two” to life with a stunning finish. This stage allows you to personalize your piece and protect it for years to come. Our chosen finish provides a charming rustic, distressed look, but feel free to explore other options that match your home decor style and vision for your DIY coffee table.
1. Painting with Chalked Spray Paint
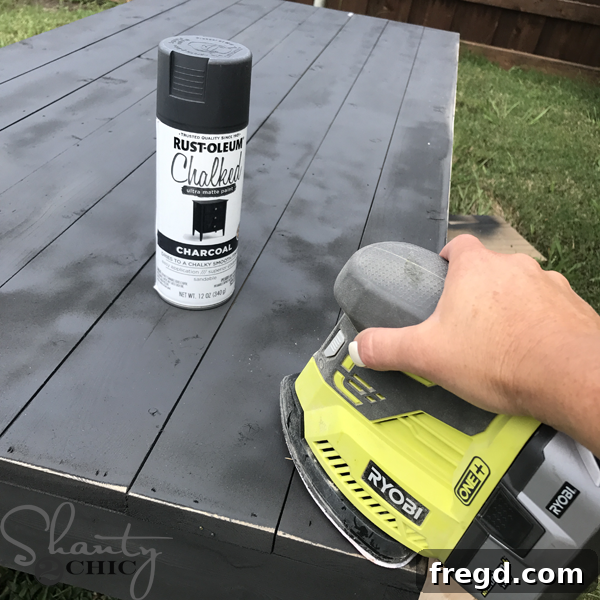
For a beautiful, matte, and chalky appearance, we opted for two coats of Rust-Oleum Chalked spray paint in the sophisticated Charcoal shade. Spray paint provides excellent coverage and a smooth application, making this step relatively quick and easy. Apply light, even coats to avoid drips, allowing adequate drying time between applications. Before painting, if you prefer a perfectly smooth finish, you can fill any visible nail holes with wood filler, sand them smooth, and then proceed with painting. However, we embraced the authentic DIY aesthetic and chose to leave the nail holes, as they contribute to the distressed character we were aiming for, enhancing the rustic coffee table look.
You can find the Rust-Oleum Chalked Spray Paint HERE on Amazon.
2. Achieving a Light, Distressed Look
To achieve that coveted light, distressed finish, we used our Ryobi Corner Cat sander equipped with a 120-grit sanding pad. The key is to lightly run the sander along the edges and corners of the table. This technique gently removes small amounts of paint from the high points, revealing the raw wood underneath and simulating natural wear and tear. The result is a charming, aged aesthetic that adds depth and character to your coffee table. Experiment with the amount of sanding to achieve your desired level of distress, perfecting your unique DIY furniture piece.
3. Protecting Your Investment: Matte Topcoat
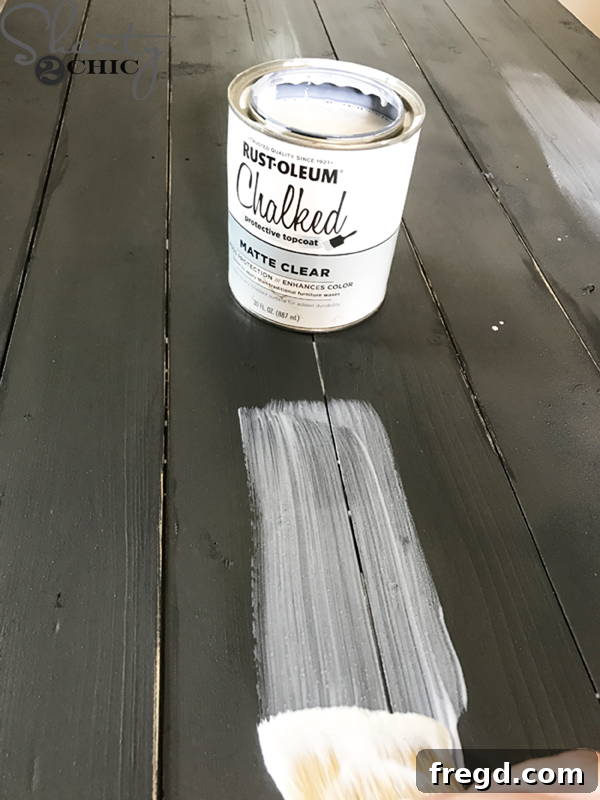
To protect your beautifully painted and distressed finish from everyday wear and tear, a durable topcoat is essential. We applied two coats of Rust-Oleum Chalked topcoat in a matte finish. Don’t be alarmed when you apply it; this topcoat goes on white, resembling glue, but it dries to a perfectly clear, protective matte layer. You can easily apply it with a quality paint brush, ensuring even coverage over all surfaces. This final protective layer will safeguard your table against spills, scratches, and general use, preserving its beauty for years to come, making your budget-friendly furniture even more durable.
You can find the Rust-Oleum Chalked Paint Top Coat HERE on Amazon.
The “Table for Two” Revealed: A Testament to Simple DIY and Shanty Sisters’ Ingenuity
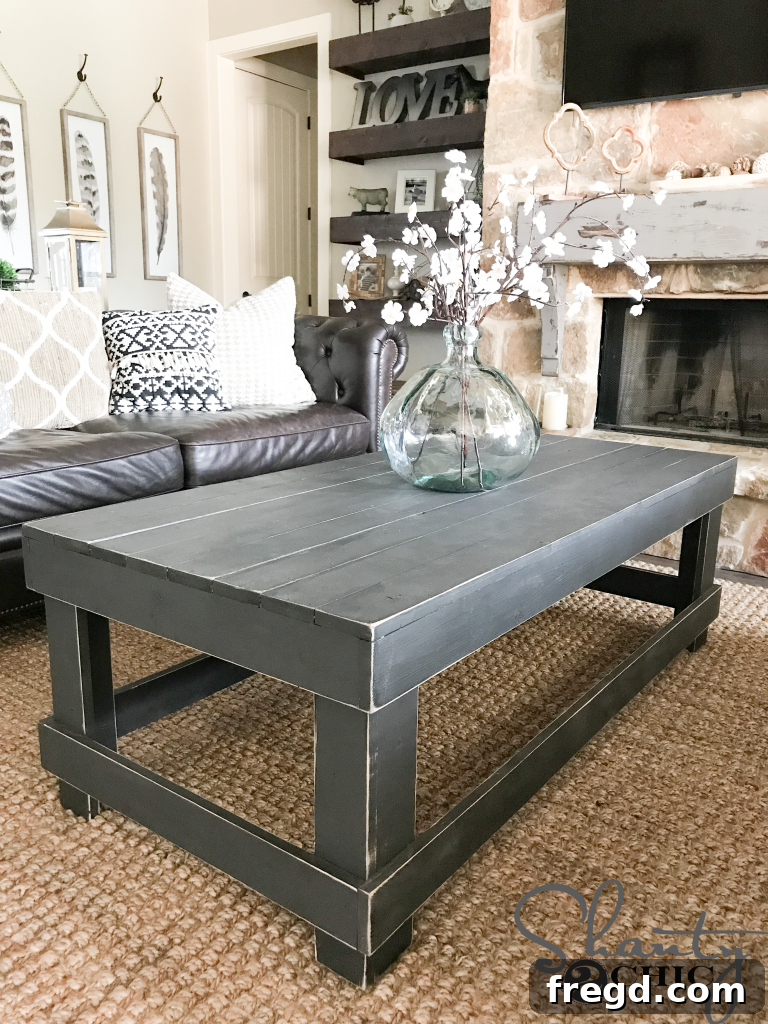
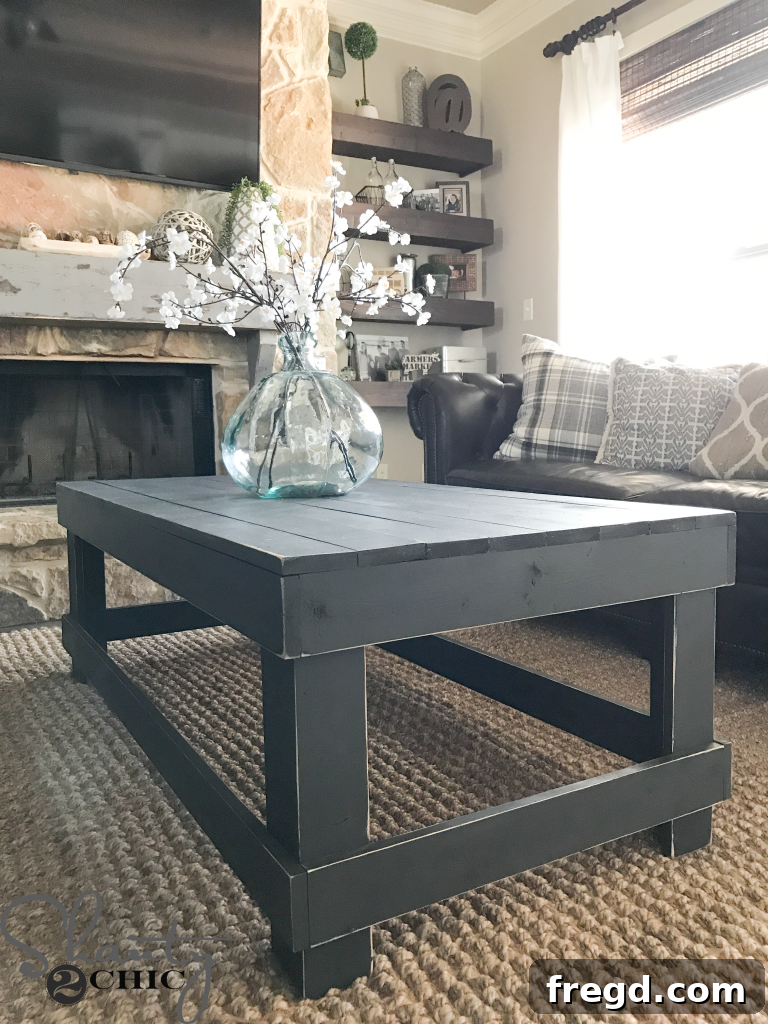
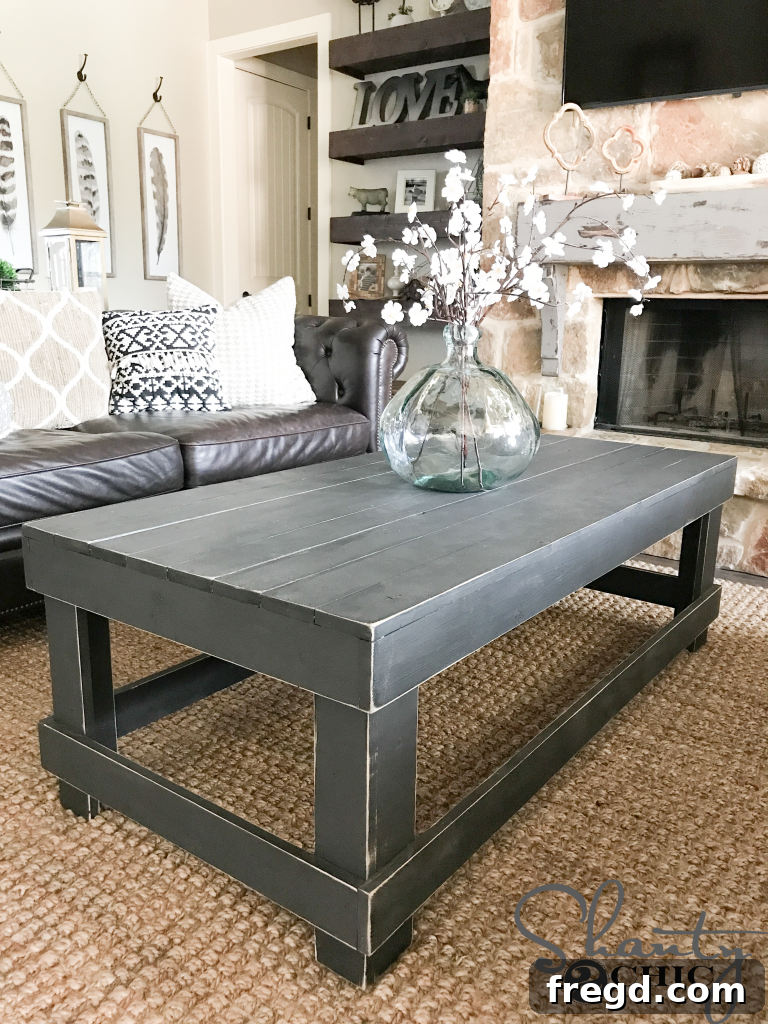
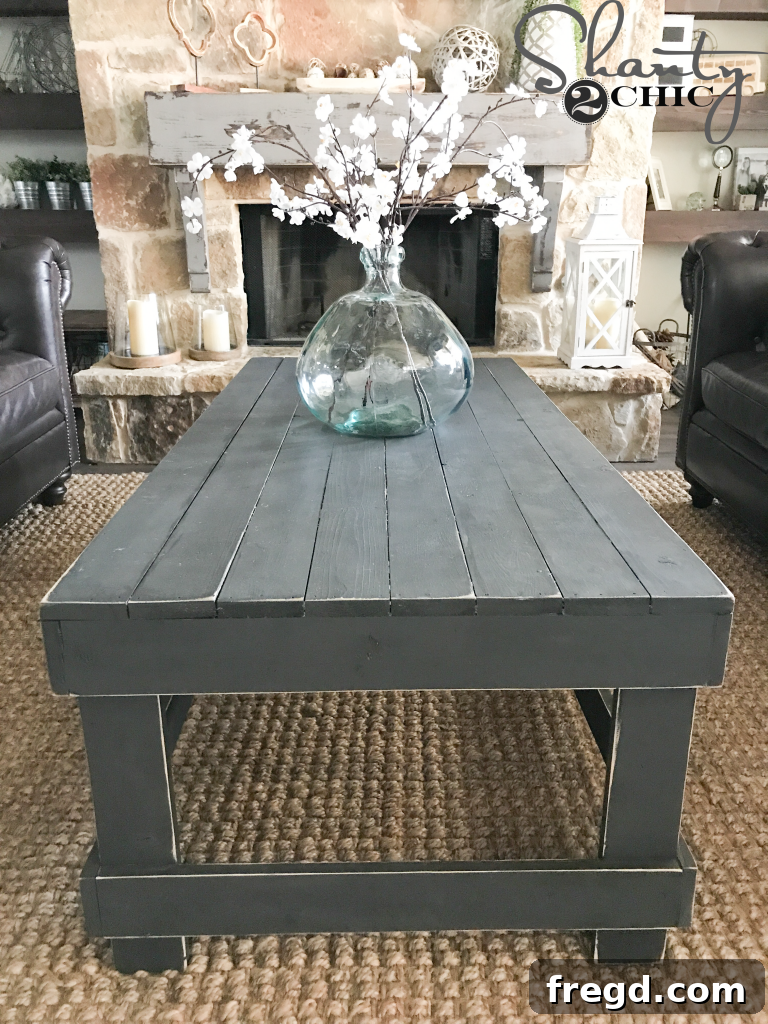
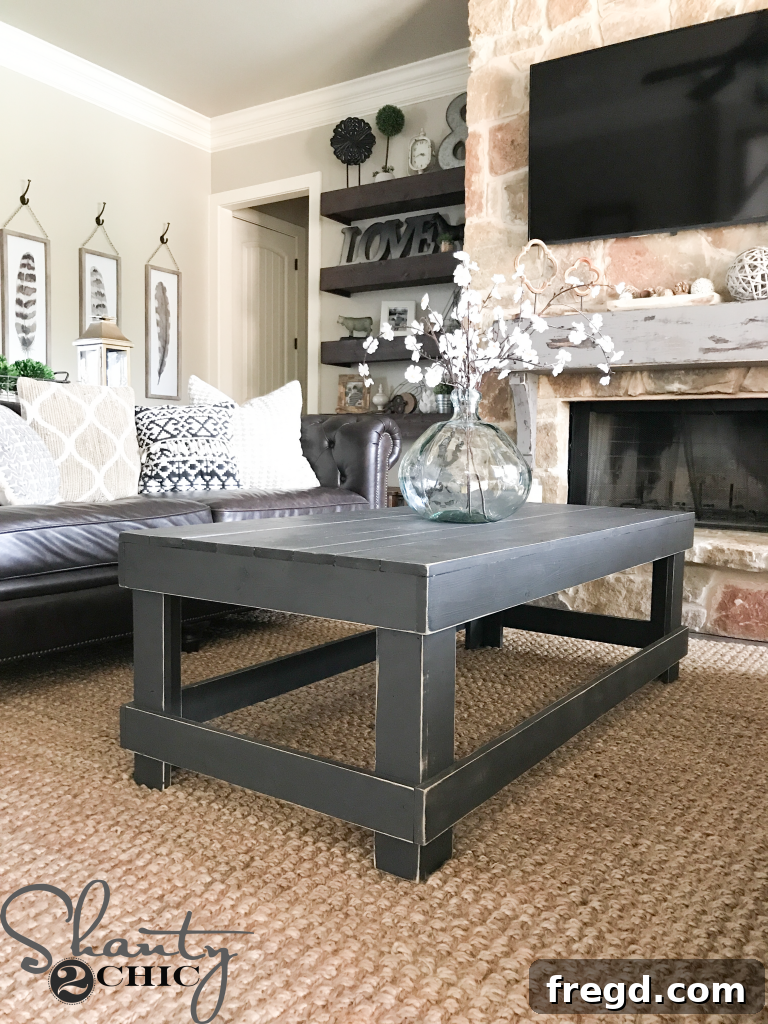
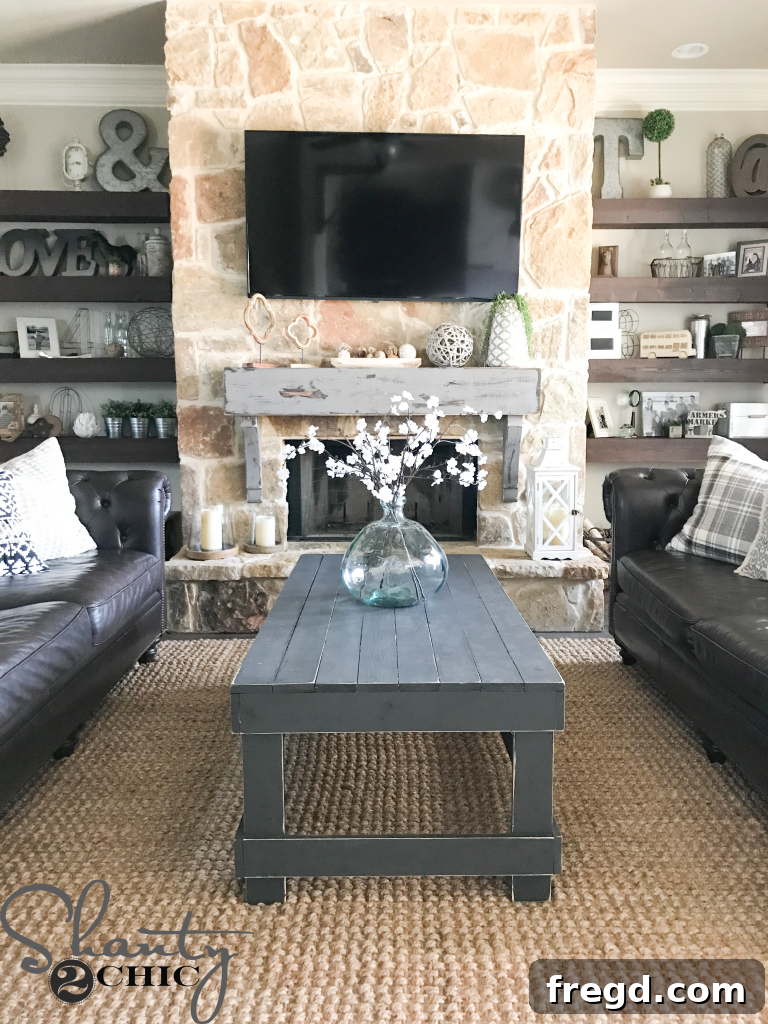
And there you have it! From just 13 humble 1×4 boards and the focused power of two essential tools, we, the Shanty Sisters, have brought the “Table for Two” to life. This project stands as a true testament to what can be achieved with simple materials, smart techniques, and a passion for DIY. It’s not just a coffee table; it’s a conversation starter, a personalized centerpiece, and a symbol of your creativity and resourcefulness. This robust and stylish table, crafted with your own hands, is ready to be the focal point of your living room, perfect for holding drinks, books, or a cozy evening spread. Enjoy your new piece of easy woodworking success!
Styling Your Space: Complementary Decor for Your “Table for Two”
A beautifully crafted coffee table deserves an equally captivating setting. Our “Table for Two” fits seamlessly into various decor styles, from modern farmhouse to rustic industrial. We’ve curated a selection of complementary decor pieces that enhance its charm and create a cohesive, inviting atmosphere in the room. Here’s a closer look at the other elements that complete this stylish space, inspiring you to personalize your own home around your new DIY masterpiece, enhancing your overall home decor.
Curated Decor Details for an Inviting Home:
-
DIY Mantel:
Enhance the warmth and focal point of your living room with a custom-built mantel. Our DIY Mantel adds architectural interest and a perfect spot for decorative accents above the fireplace. Find the Free plans HERE to build your own.
-
Basket Weave Jute Rug:
Ground your living space with a natural texture underfoot. This beautiful basket weave jute rug adds organic warmth and a touch of casual elegance, perfectly complementing the rustic appeal of the “Table for Two.” It’s durable, stylish, and comfortable, defining the seating area with subtle sophistication. You can find this exquisite rug HERE.
-
Elegant Vase on Table:
Bring life and freshness to your coffee table with a carefully selected vase. A simple yet elegant vase, like the one featured, serves as a versatile decor piece, ready to hold seasonal flowers or captivating botanical stems. Its form and finish can subtly tie into the overall room aesthetic. Discover similar styles HERE.
-
Botanical Stems in Vase:
Complete your vase arrangement with beautiful botanical stems. These provide a touch of nature, adding height, color, and organic movement to your coffee table display. Whether faux or fresh, they instantly elevate the ambiance of the room, creating a serene and inviting atmosphere. Find these charming stems HERE.
-
DIY Floating Shelves:
Maximize your wall space and display your favorite books or decorative items with custom floating shelves. These versatile additions provide both functionality and a minimalist aesthetic, keeping your living room clutter-free while showcasing personal touches. Get the Free plans HERE to build your own sleek shelves.
-
Cozy Pillows:
Comfort is key in a living room. Assorted pillows from AtHome Stores and Target add layers of texture, color, and comfort to your sofa and armchairs, inviting relaxation. Choose patterns and fabrics that complement your overall color scheme and add a touch of personality to your seating arrangements.
-
Feather Prints on Wall:
Adorn your walls with delicate and artistic feather prints. These elegant pieces of wall art add a touch of natural beauty and serenity to the room, creating a sophisticated backdrop that harmonizes with the rustic elements of the coffee table. Explore similar feather prints to enhance your decor HERE.
Conclusion: Your Next DIY Success Story Awaits!
The “Table for Two” project is more than just building a coffee table; it’s an invitation to discover the joy and satisfaction of creating something beautiful and functional with your own hands. With minimal tools, a modest budget, and our comprehensive guide, you’re well-equipped to tackle this rewarding woodworking adventure. We hope this tutorial inspires you to embrace the DIY spirit and add a unique, handcrafted touch to your home. Happy building!