
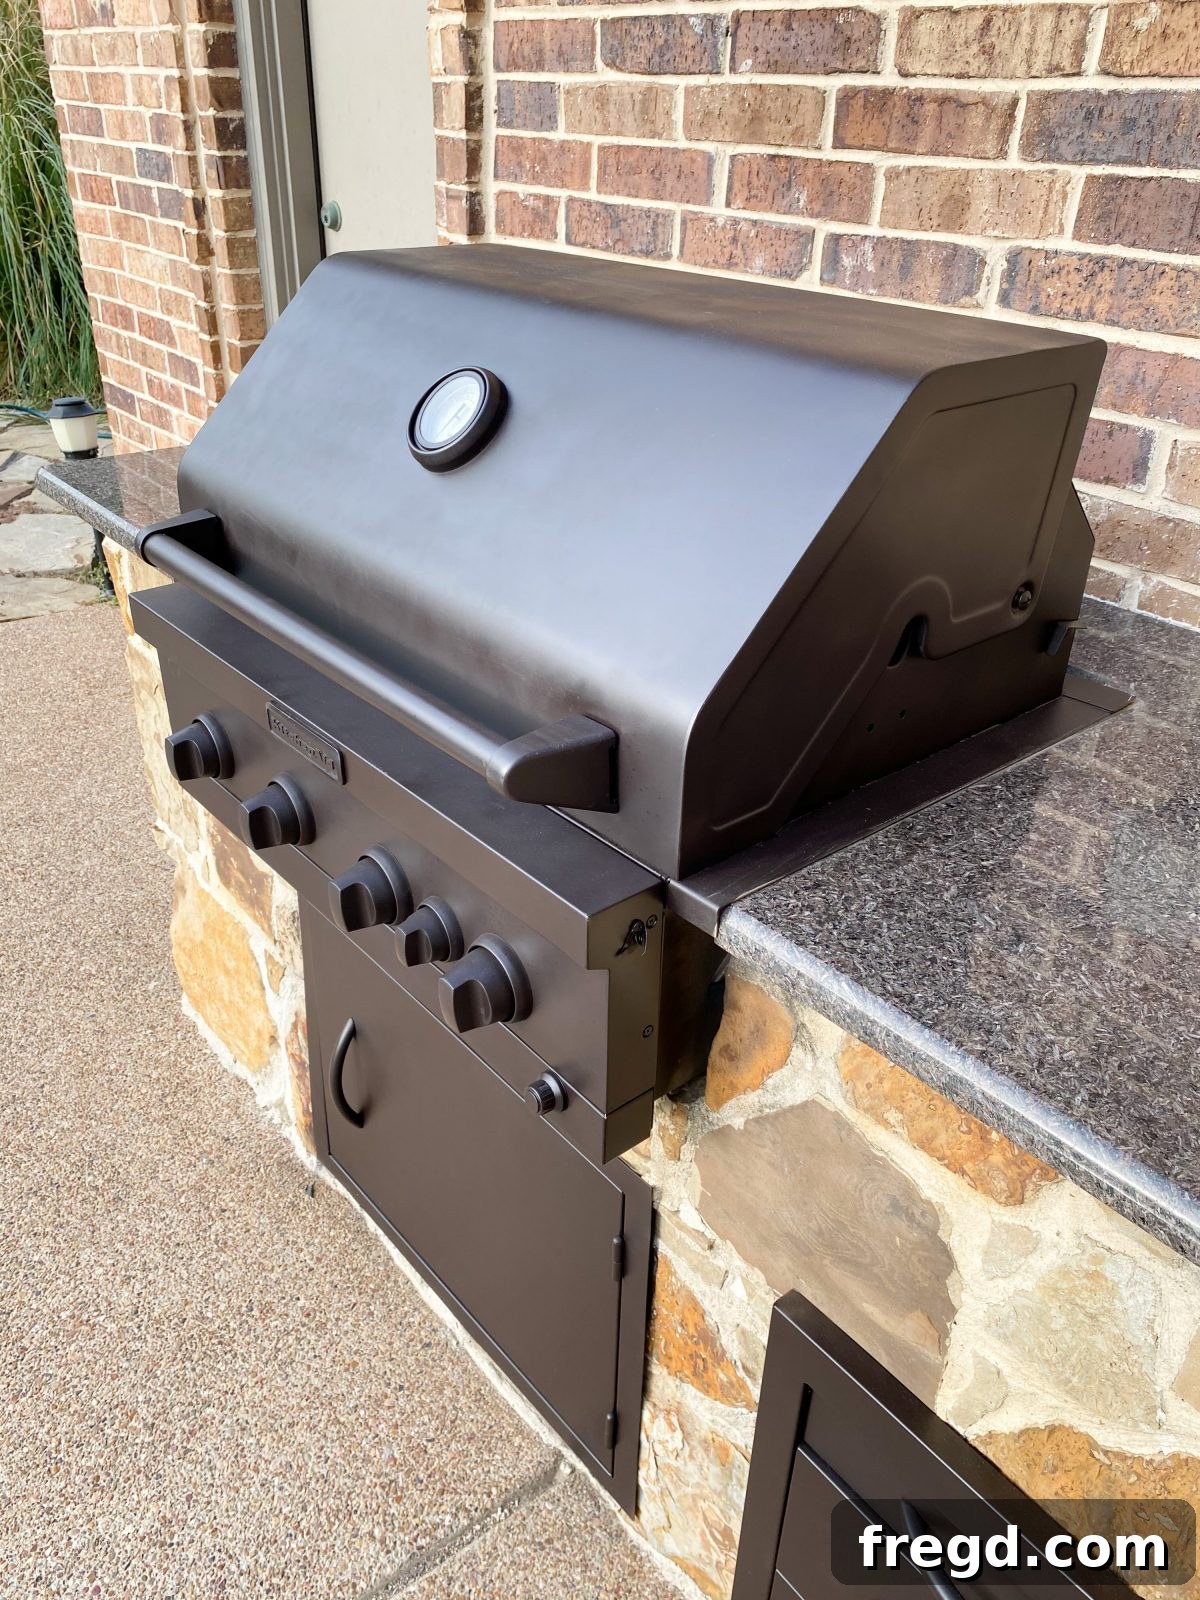
Transforming a rusty outdoor grill from an eyesore to a backyard centerpiece is more achievable and affordable than you might think. Say goodbye to the idea of buying a costly new grill and embrace the satisfaction of a DIY grill makeover! This comprehensive guide will walk you through giving your tired old grill a stunning new lease on life with high-heat spray paint, just like we did with incredible results.
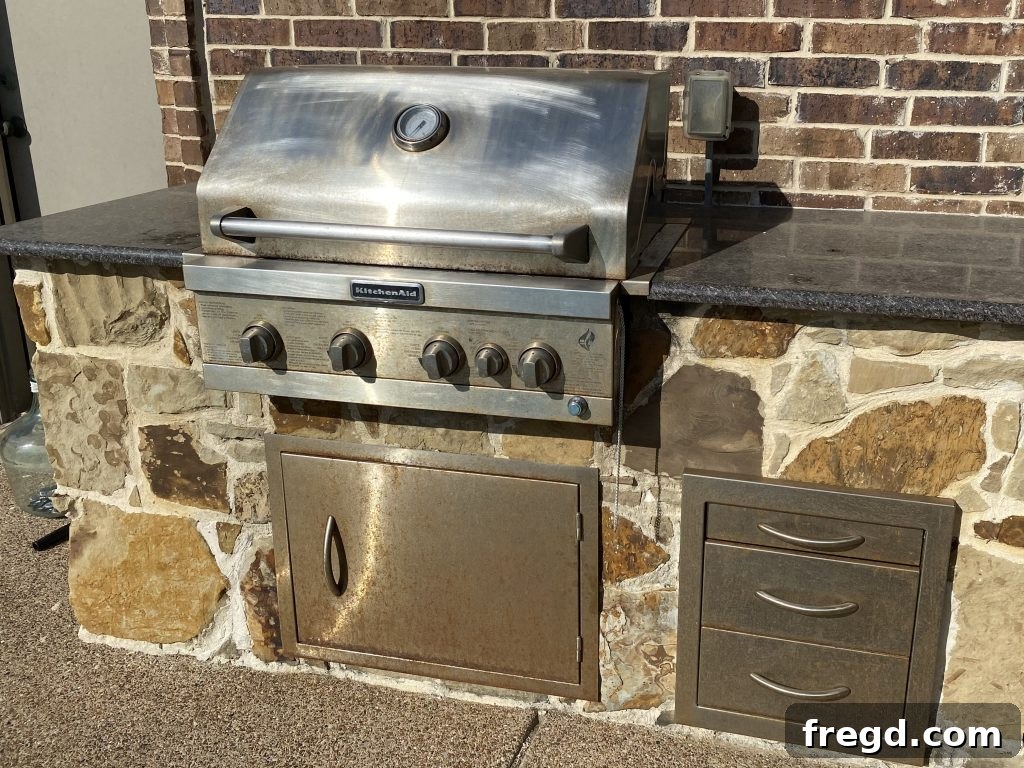
For too long, my beloved outdoor grill sat uncovered by the pool, battling the relentless chlorine spray and succumbing to rust. Despite its weathered appearance, the grill’s core functionality remained excellent. The thought of replacing it, only to face the same rust problem down the line, was disheartening. This sparked a quest for a durable, cost-effective solution. After extensive research and admiring countless before-and-after transformations online, I discovered the power of high-heat spray paint. Partnering with Krylon, a leader in quality paints, proved to be the perfect choice for this restoration project.
This project was long overdue, and the transformation was nothing short of amazing! What initially seemed like a daunting task took only about two hours from start to finish, yielding results I absolutely adore. The new matte black finish is not only sleek and modern but also provides superior protection, making me prefer it significantly over the original stainless steel. If you’re ready to revitalize your outdoor cooking space, follow along to see how simple it was to completely transform our rusty grill into a stylish, functional appliance!
How to Paint a Rusty Grill: A Step-by-Step Guide to Outdoor Grill Restoration
Revitalizing your rusty outdoor grill doesn’t require professional help or expensive tools. With the right materials and a few simple steps, you can achieve a professional-looking finish that extends the life of your grill and enhances your backyard aesthetics. This guide focuses on using high-heat spray paint for a durable and attractive result.
Essential Supplies for Your Grill Makeover:
Gathering all your supplies before you begin will ensure a smooth and efficient project. Choose quality materials for the best outcome.
- 1 Scouring Pad: A heavy-duty scouring pad or wire brush is crucial for removing loose rust and grime, creating an ideal surface for paint adhesion.
- Soap and Water: A degreasing dish soap and a bucket of water are essential for thorough cleaning, removing grease, dirt, and chemical residues.
- Contractor Paper or Newspaper: Used for masking off large areas you don’t want to paint, like the grilling grates, burners, and controls.
- Painter’s Tape: High-quality painter’s tape is vital for creating clean lines and protecting delicate components like temperature gauges and handles.
- Krylon High Heat Spray Paint: The star of this project! Ensure you select a paint specifically designed for high temperatures (up to 600°F or more) to withstand the grill’s heat and offer rust protection. Matte Black is a popular choice for its modern look.
- Safety Gear: Don’t forget safety glasses, work gloves, and a respirator or face mask to protect yourself from paint fumes and debris.
- Drop Cloth or Tarp: To protect your work area from overspray.
Step 1: Thorough Preparation is Key to a Lasting Finish
The success of your grill painting project heavily relies on proper preparation. Rushing this stage can lead to poor paint adhesion and a less durable finish.
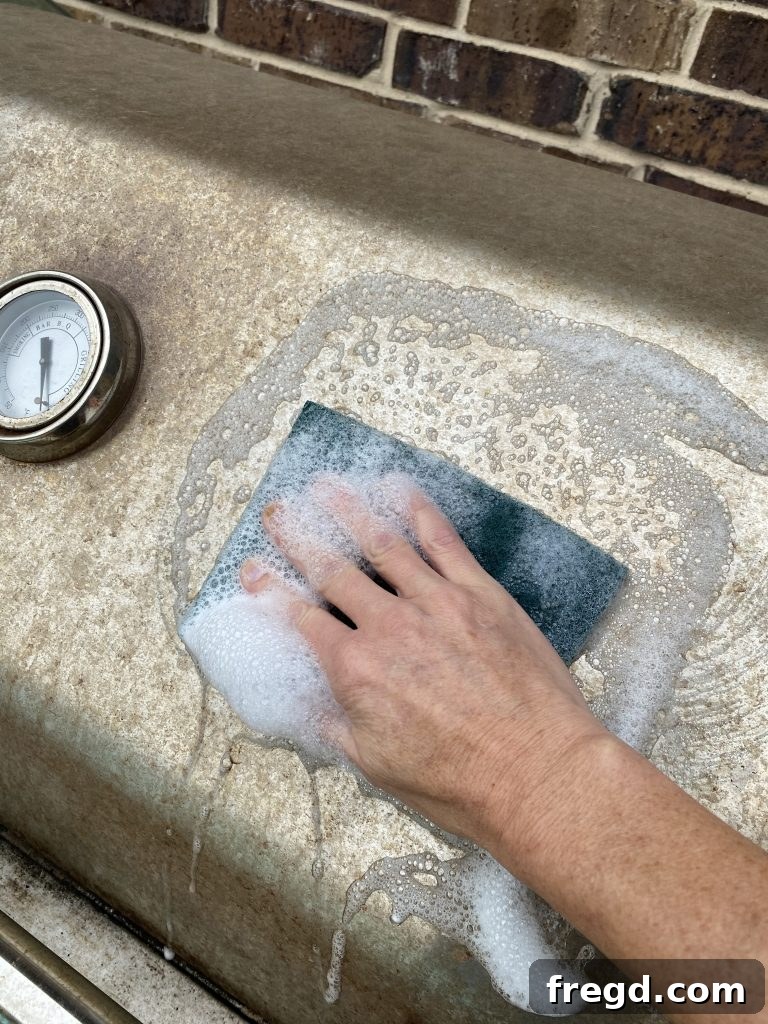
Clean the Entire Grill: Begin by thoroughly cleaning the entire grill surface. Using a scouring pad with soap and water, scrub away all visible rust, grease, dirt, and any flaking old paint. For stubborn rust, a wire brush can be very effective. This step is critical because any contaminants left on the surface will prevent the new paint from adhering properly. Once you’ve scrubbed every inch, rinse the grill thoroughly with clean water to remove all soap residue and loose debris. Allow the grill to air dry completely. Ensure there’s no moisture trapped in any crevices, as this can compromise paint adhesion and potentially cause rust to reappear.
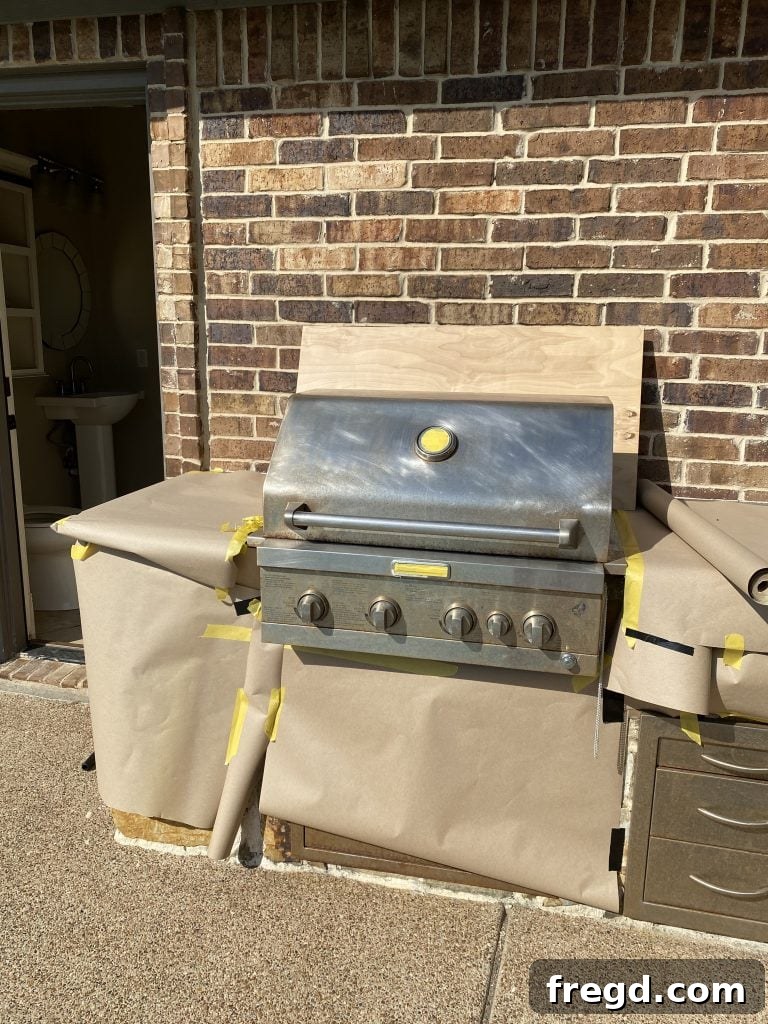
Mask Off Non-Paintable Areas: Once the grill is bone dry, it’s time to protect the parts you don’t want painted. This includes the grilling grates, burners, internal components, temperature gauges, control knobs, and any handles or wheels you wish to keep their original finish. Use high-quality painter’s tape for precise edges and contractor paper or old newspapers for larger areas. Take your time with this step to ensure all sensitive parts are completely covered. Consider removing any easily detachable parts like side tables or ignitors for easier, cleaner painting. Lay down a drop cloth or tarp around your work area to protect your patio or lawn from overspray.
Step 2: The Art of High-Heat Spray Painting
With preparation complete, the exciting part begins! Proper spray painting technique will ensure a smooth, even, and durable finish.
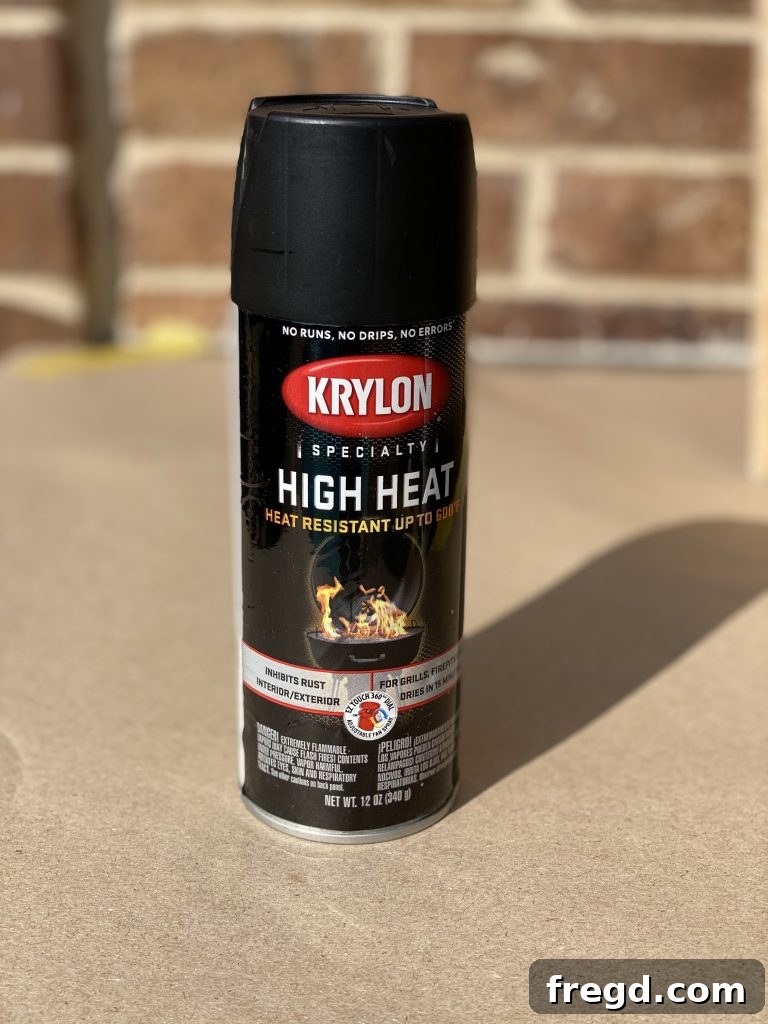
Choosing the Right Paint: For this project, I chose the Black High Heat Spray Paint by Krylon. This product is truly remarkable! It applies incredibly smoothly, without any frustrating drips or clogging, making the painting process a breeze even for beginners. The key feature of this paint is its ability to withstand temperatures up to 600°F (315°C), which is essential for a grill that will be exposed to intense heat. Moreover, it offers excellent protection against rust, making it ideal not just for outdoor grills but also for fire pits and other high-heat metal surfaces. The matte black finish provides a contemporary, high-end look that instantly upgrades the grill’s appearance.
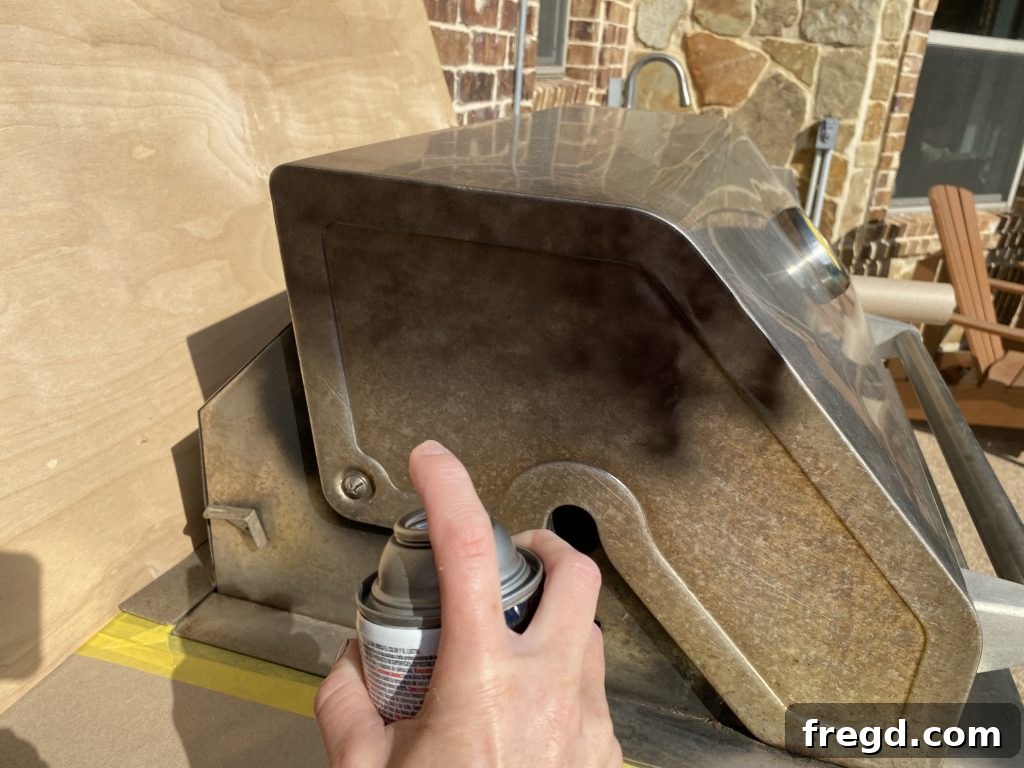
Applying the Paint: Always shake the spray can well before and periodically during use. To achieve the best results and avoid drip marks, start by applying one very light, even coat. Hold the can about 8-12 inches from the surface and use steady, sweeping motions, slightly overlapping each pass. This initial coat doesn’t need to provide full coverage; its purpose is to create a thin, even base for subsequent coats. Ensure you work in a well-ventilated area, and wear your safety glasses and respirator.
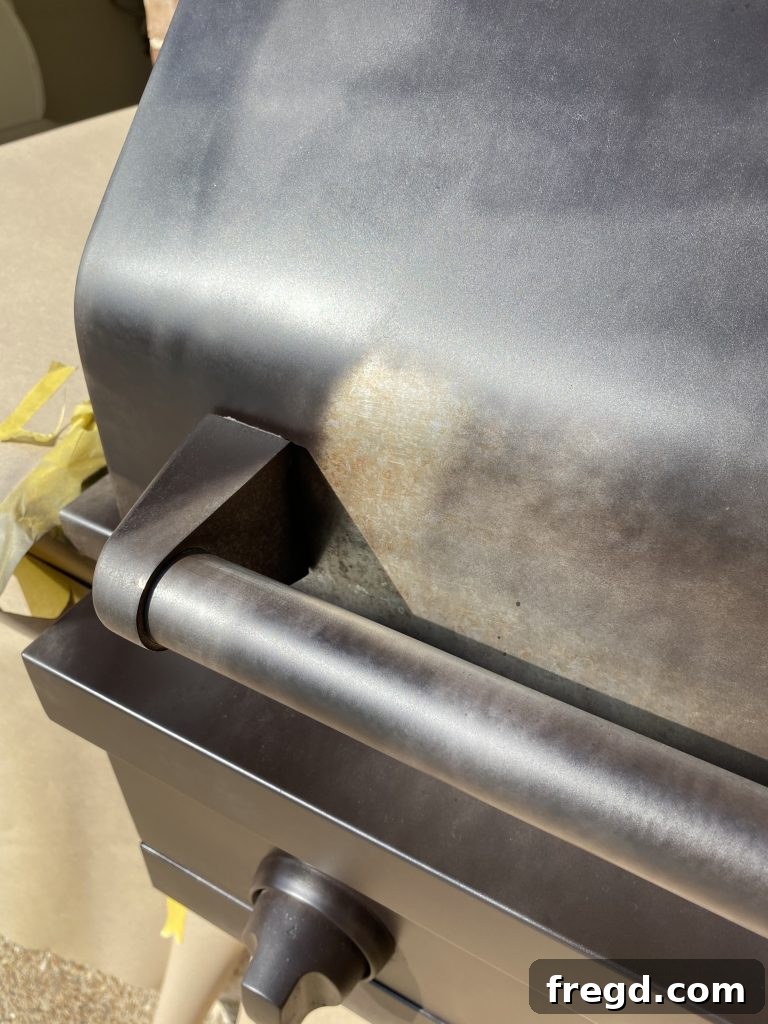
Multiple Thin Coats for Durability: After the first light coat, allow adequate time for the paint to dry to the touch, typically 15-30 minutes, or as per the product instructions. Then, apply a second, slightly heavier coat, maintaining the same steady sweeping motion. You may need a third coat to achieve complete, uniform coverage, especially if your grill had significant rust spots or a very different original color. Patience is key here; multiple thin coats will always yield a much more durable, smoother, and professional-looking finish than one thick coat, which is prone to drips, unevenness, and longer drying times. Optimal painting conditions include low humidity and moderate temperatures (typically 50-90°F / 10-32°C).
Step 3: The Flawless Finish and Essential Curing Process
Once the painting is complete, the final steps involve revealing your beautiful work and ensuring the paint is properly cured for long-term durability.
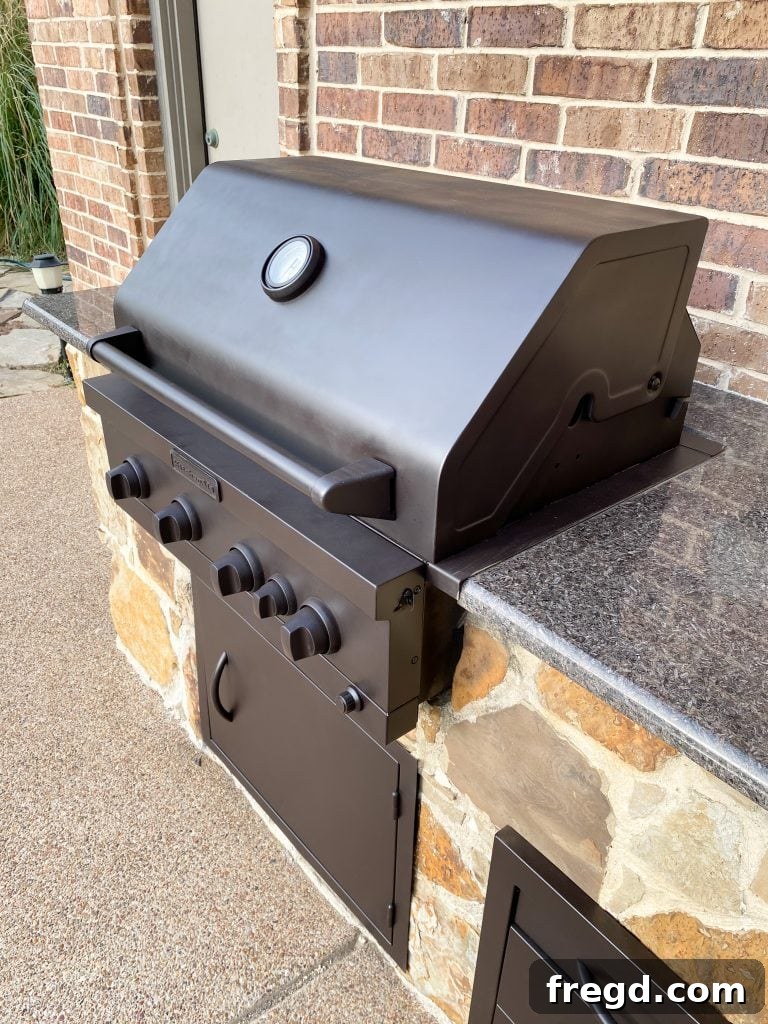
Removing Tape and Paper: After the final coat of paint has completely dried to the touch (usually a few hours, but refer to product instructions), carefully remove all the painter’s tape and contractor paper. It’s best to do this when the paint is dry but not fully cured, as completely cured paint can sometimes peel with the tape. Be gentle to avoid accidentally scratching your fresh paint. Admire your sharp, clean lines and the stunning transformation!
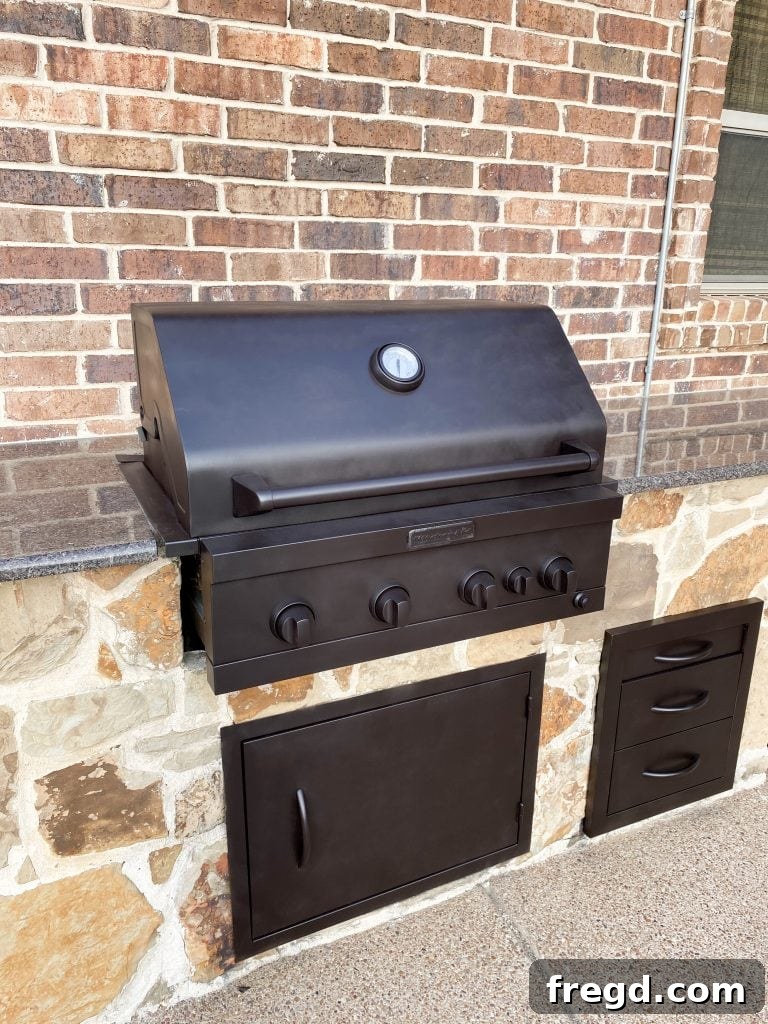
Curing the Paint for Maximum Durability: This is a critical, often overlooked step for high-heat paints. High-heat paints typically require a curing process involving heat to achieve their maximum hardness, heat resistance, and adhesion. Consult your paint can’s instructions for specific curing times and temperatures, but a general method is to heat the grill gradually over a few hours. For example:
- First Hour: Light a single burner on low heat for 30-60 minutes.
- Second Hour: Increase to medium heat for 30-60 minutes.
- Third Hour: Finally, run the grill on high heat for another 30-60 minutes.
During the initial curing, it’s normal to see some smoke and smell an odor as the paint’s solvents burn off. Ensure you do this outdoors in a well-ventilated area. Once cured, your grill’s new finish will be incredibly durable and ready for countless cookouts! I am absolutely thrilled with how my old rusty grill turned out. This revamp was not only budget-friendly but also incredibly satisfying, all thanks to the ease of use and exceptional quality of Krylon High Heat Spray Paint.
Before & After: A Glimpse at the Transformation
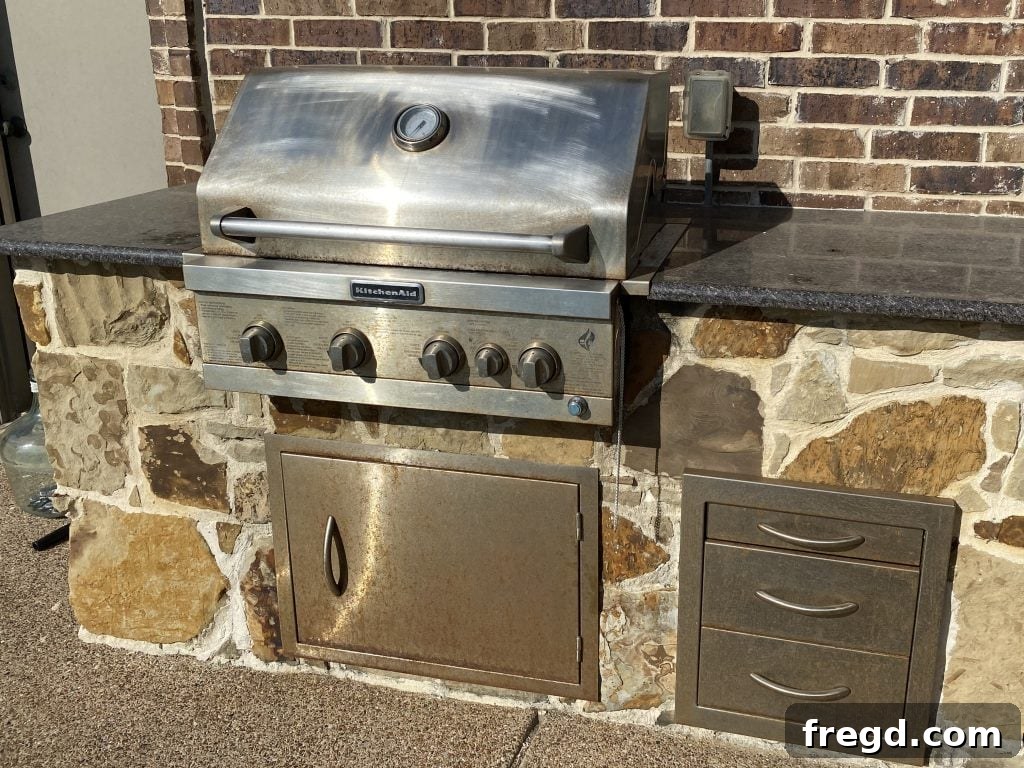
Sometimes, seeing is believing. Here’s a quick reminder of the challenging “before” state of our grill.
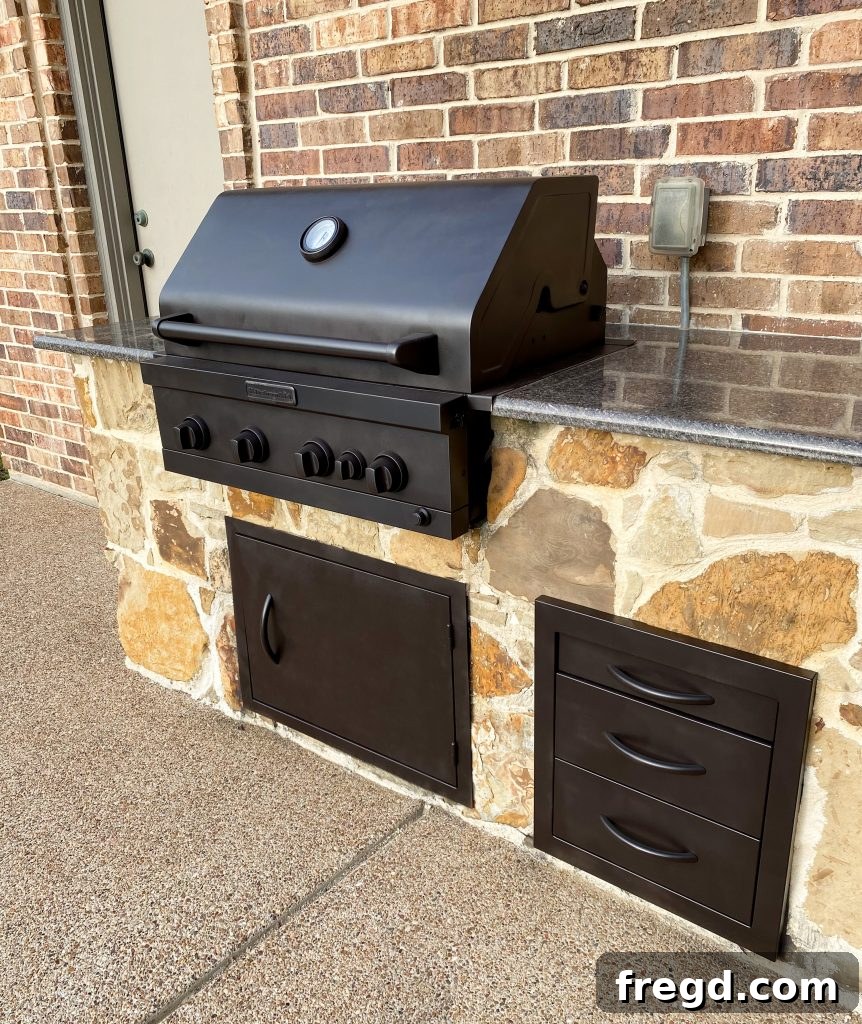
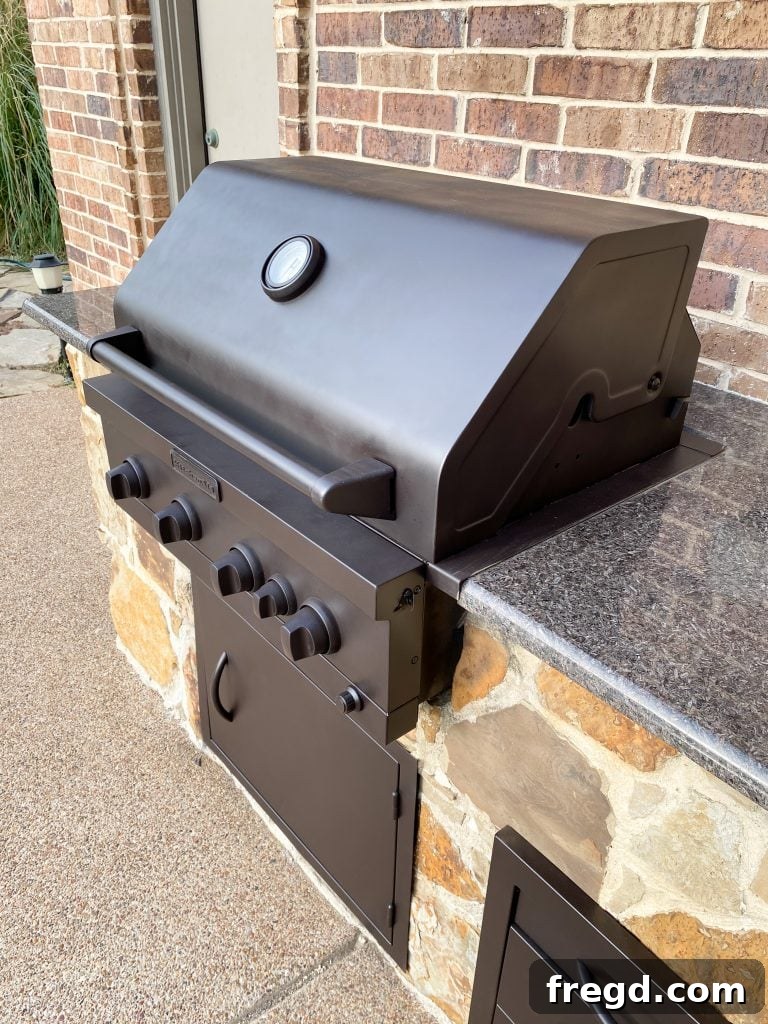
And now, prepare to be amazed by the “after”! The transformation is truly dramatic, turning a neglected appliance into a stylish focal point.
Why DIY Your Grill Makeover?
Beyond the cost savings, there are numerous benefits to undertaking a DIY grill restoration:
- Cost-Effectiveness: A can or two of high-heat spray paint is significantly cheaper than purchasing a new grill, especially if your current one is still mechanically sound.
- Environmental Friendliness: Restoring your grill is a sustainable choice, reducing waste and extending the life of an existing appliance.
- Customization: You get to choose the color and finish, giving your grill a personalized touch that perfectly matches your outdoor decor. Matte black is always a classic, but other high-heat colors might also be available.
- Sense of Accomplishment: There’s immense satisfaction in transforming something old and rusty into something new and functional with your own hands.
- Rust Protection: High-quality high-heat paints often include rust-inhibiting properties, adding an extra layer of protection against future corrosion.
Frequently Asked Questions About Painting Outdoor Grills
Here are answers to some common questions you might have about this DIY project:
- Q: Is it safe to cook on a painted grill?
A: Yes, absolutely! Once the high-heat paint has been fully cured according to the manufacturer’s instructions (which involves heating the grill gradually), it forms a safe, durable, and heat-resistant finish. The initial curing process burns off any remaining solvents, leaving a food-safe surface for the exterior. Never paint internal cooking surfaces or grates. - Q: How long will the painted finish last?
A: With proper preparation, application, and curing, a high-quality high-heat paint finish can last for several years, providing excellent protection against rust and weathering. Regular cleaning and covering your grill when not in use will help prolong its life. - Q: Can I paint over heavily rusted areas?
A: While high-heat paint offers rust protection, it’s crucial to remove as much loose and flaky rust as possible during the preparation phase. Painting over heavily corroded areas without proper cleaning and possibly rust treatment will lead to poor adhesion and premature peeling. - Q: What parts of the grill should NOT be painted?
A: Never paint the cooking grates, burner tubes, heat diffusers, or any internal surfaces that come into direct contact with food or flames. These parts require specialized materials or are designed to withstand direct heat and should be cleaned separately. - Q: How many cans of paint will I need?
A: The quantity of paint needed depends on the size of your grill and how many coats you apply. For an average-sized grill, 1-2 cans are usually sufficient. It’s always a good idea to have an extra can on hand.
Now, I’m off to find other neglected items in my backyard to give them a fresh coat of paint – perhaps a fire pit or patio furniture! The possibilities are endless when you discover the power of a simple can of spray paint.
Ready to start your own grill transformation? You can get more information about the incredible Krylon High Heat Spray Paint here!
Thanks so much for stopping by and happy grilling!