
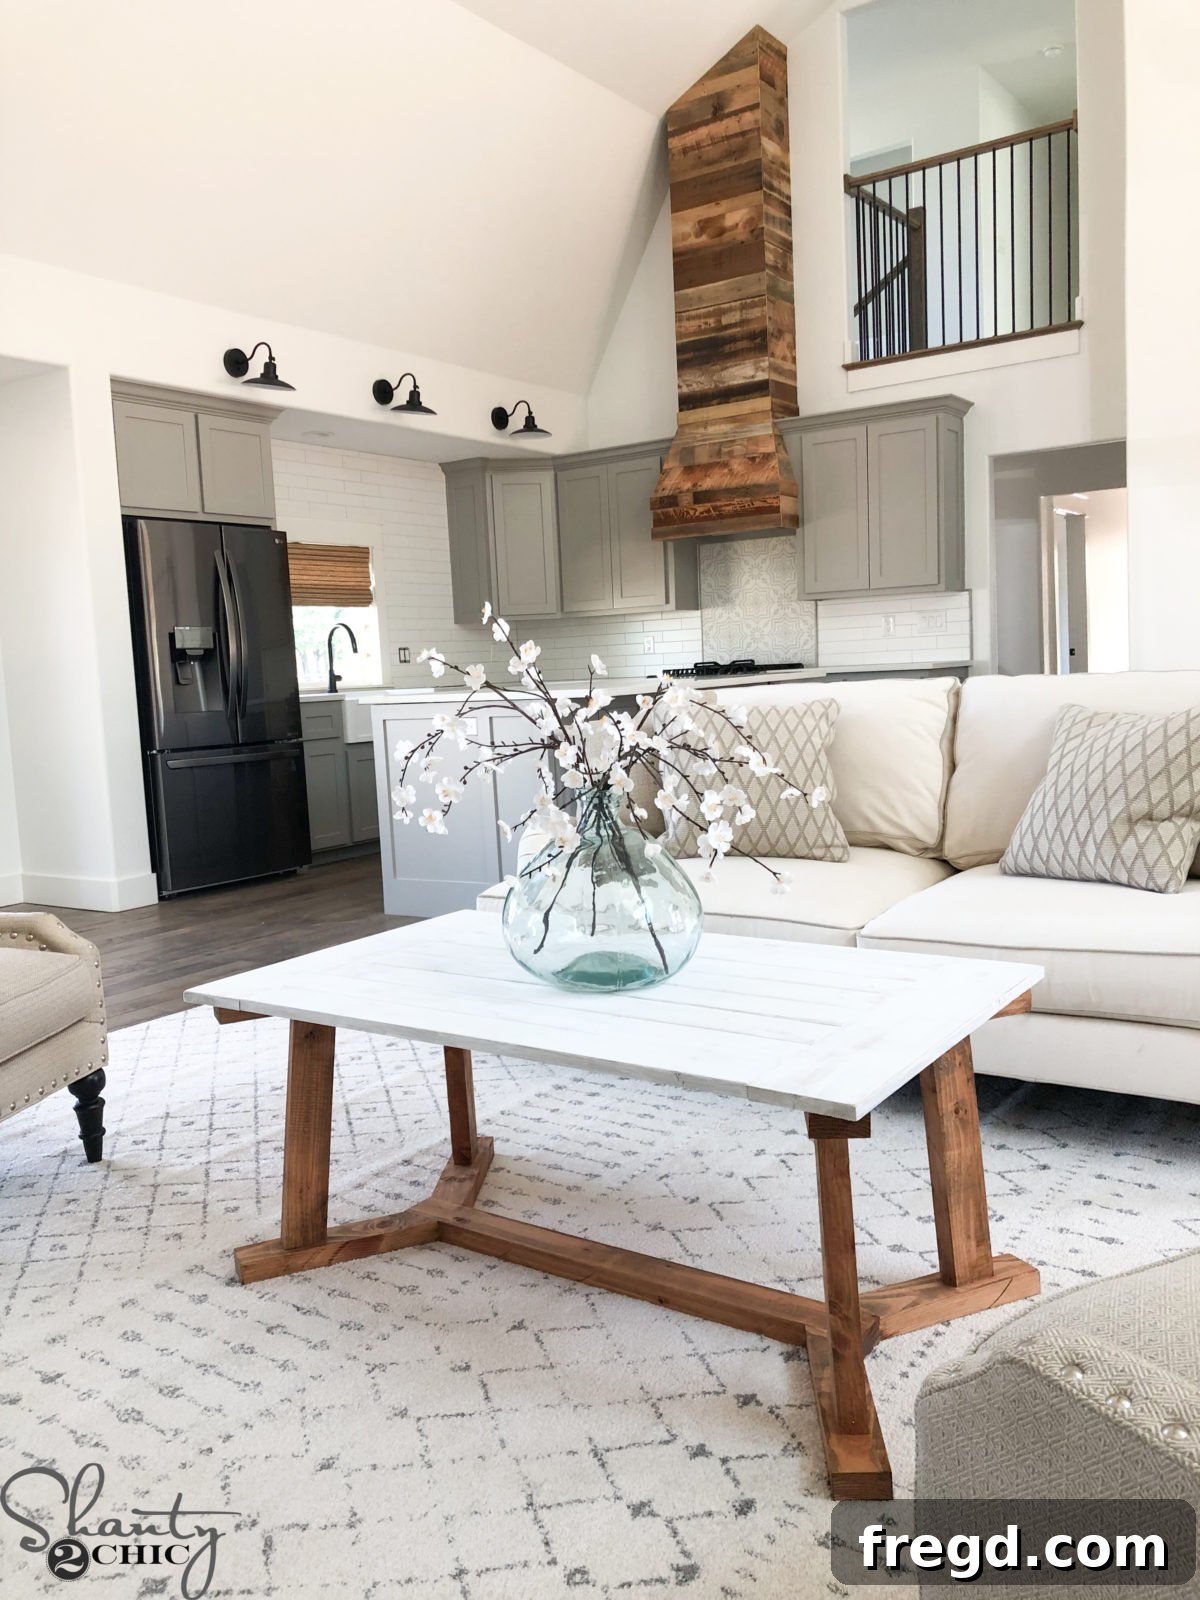
In the latest installment of our Shanty Flip House series, Episode 7, we delve into the exciting process of transforming a house into a truly inviting home. Our recent renovations, involving the removal of walls and portions of the ceiling, have left us with a magnificent, expansive, yet somewhat bare canvas in the main living area. The central challenge? To thoughtfully define and anchor each space, allowing potential homeowners to envision the comfortable and functional lifestyle possible within these open confines.
A crucial step in bringing this vision to life was the construction of a beautiful, custom-designed coffee table for the living room. This isn’t just any table; it’s a centerpiece meticulously crafted to sit perfectly in front of the fireplace, serving as the anchor around which furniture can be arranged to create a distinct and welcoming living zone within the larger open-plan layout. We believe that thoughtful details like this are key to showcasing a property’s full potential.
For those inspired to undertake this rewarding project, we’re thrilled to provide comprehensive, free printable plans and a detailed how-to video guide. Building this stylish DIY Modern Farmhouse Coffee Table is simpler than you might imagine, and incredibly budget-friendly, costing less than $40 in lumber alone! Imagine crafting a piece that not only enhances your home’s aesthetic but also fits your exact needs without breaking the bank. This project is a testament to how accessible and enjoyable woodworking can be, even for those new to the craft.
Click the image above to watch the step-by-step video tutorial for building your own Modern Farmhouse Coffee Table, part of our Shanty Flip House Episode 7 journey!
Ready to jump straight into the practical details? Click HERE to jump to the Free Printable Plans and complete Supply List!
Build Your Own DIY Modern Farmhouse Coffee Table: The Ultimate Guide
Welcome to our detailed guide on constructing a stunning DIY Modern Farmhouse Coffee Table. This project is designed to be accessible for woodworkers of all skill levels, offering an incredible way to add a custom, high-quality piece of furniture to your home without the high price tag. The Modern Farmhouse style perfectly blends rustic charm with clean, contemporary lines, making this coffee table a versatile addition to almost any decor, from urban lofts to traditional family homes. Beyond its aesthetic appeal, building your own furniture provides immense satisfaction and allows for personalization that store-bought items simply cannot match.
In this comprehensive tutorial, we’ll walk you through every step, from selecting your materials to applying the perfect finish. We’ll emphasize techniques that ensure durability and a professional look, demonstrating that budget-friendly doesn’t mean compromising on quality or style. This table, built for our Shanty Flip House project, proved to be an essential element in creating a welcoming and defined living space, illustrating how a single piece of furniture can profoundly impact a room’s functionality and atmosphere.
Why Choose the Modern Farmhouse Style for Your Coffee Table?
The Modern Farmhouse aesthetic has captivated homeowners worldwide for its ability to create warm, inviting, and effortlessly chic interiors. It’s a style that celebrates simplicity, natural materials, and a sense of history, updated with contemporary touches for a fresh, clean feel. For a coffee table, this means sturdy construction, often featuring exposed wood grains, clean lines, and a practical design. Our DIY Modern Farmhouse Coffee Table embodies these principles, offering a timeless piece that is both functional and beautiful. It serves as a focal point, drawing the eye and grounding your living room furniture arrangement, making the space feel intentionally designed and complete.
Essential Supplies for Your Coffee Table Project
Before you begin, gathering all your materials is crucial for a smooth and efficient building process. One of the most appealing aspects of this project is its affordability; you can achieve a high-end look with readily available, inexpensive lumber. Here’s a detailed list of what you’ll need:
- 4 – 1x4x8 Common Boards or Pine: These will form the core structure and visible elements, chosen for their straightness and minimal knots.
- 1 – 1x6x8 Common Board or Pine: Used for specific structural elements where a wider board is beneficial for stability and aesthetic.
- 3 – 2x4x8 Common Boards or Pine: These provide the robust framework for the table base, ensuring it can withstand daily use.
- 1 1/4″ Pocket Hole Screws: Essential for creating strong, concealed joints in the tabletop and other smaller components.
- 2 1/2″ Pocket Hole Screws: For joining thicker sections of the base, providing superior strength.
- 2 1/2″ Wood Screws: Used for direct fastening where pocket holes aren’t feasible or for additional reinforcement.
- Wood Glue: A crucial component for enhancing the strength and longevity of every joint, creating a truly solid piece of furniture.
- Sanding Supplies: Various grits of sandpaper (e.g., 80, 120, 180, 220) for preparing the wood for finishing.
- Wood Filler (Optional): For minor imperfections or filling screw holes if desired.
- Wood Stain or Paint & Sealer: To achieve your desired finish and protect the wood.
Tools You’ll Need for This DIY Project
While this project is beginner-friendly, having the right tools makes a world of difference in precision and ease. Here’s what you’ll want to have on hand:
- Miter Saw: Indispensable for making accurate, clean crosscuts and angled cuts.
- Drill: For pre-drilling holes and driving screws with ease and precision.
- Kreg Jig: Your best friend for pocket hole joinery, creating incredibly strong and concealed joints. Click here for the link to our favorite Kreg Jig model!
- Table Saw (optional): Useful for ripping boards to custom widths or squaring edges, though not strictly necessary for this project if you select straight lumber.
- Tape Measure & Pencil: For accurate measurements and markings.
- Safety Glasses & Hearing Protection: Always prioritize safety when working with power tools.
- Clamps: Essential for holding pieces together while glue dries and screws are driven. Face clamps are particularly useful for tabletop assembly. Click here for the link to the face clamps we use!
- Orbital Sander: For efficient and smooth sanding of all surfaces.
Building the DIY Modern Farmhouse Coffee Table: Step-by-Step Instructions
With your supplies and tools ready, let’s dive into the construction. Follow these detailed steps carefully to build a sturdy and beautiful coffee table that will last for years.
Step 1 – Constructing the Table Top
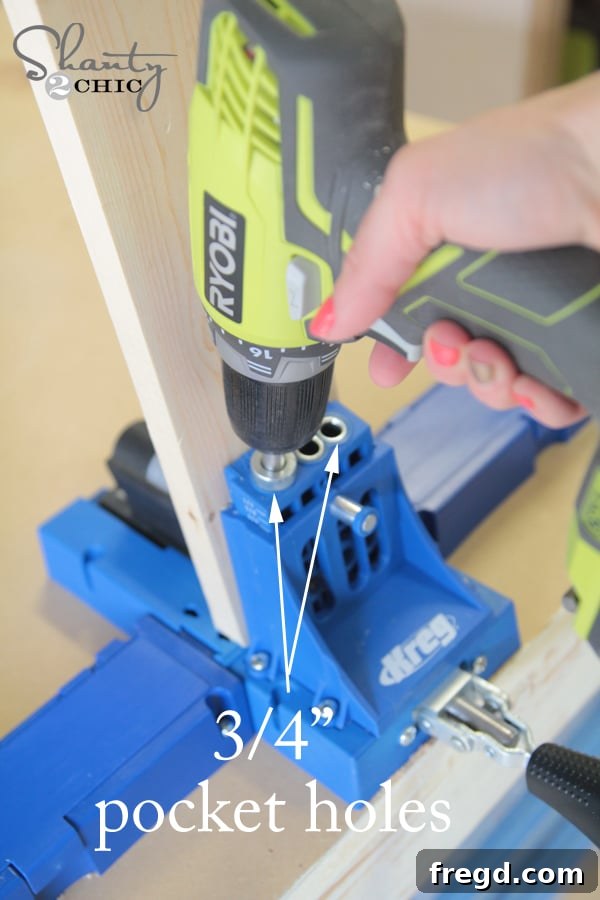
Begin by cutting your table top planks to the exact lengths specified in your detailed cut list. Accuracy here is key for a seamless finish. Once cut, use your Kreg Jig to drill 3/4″ pocket holes along the edges of the planks, as indicated in the plans. These holes will allow you to create strong, hidden joints. For best results, use a consistent depth setting on your Kreg Jig.
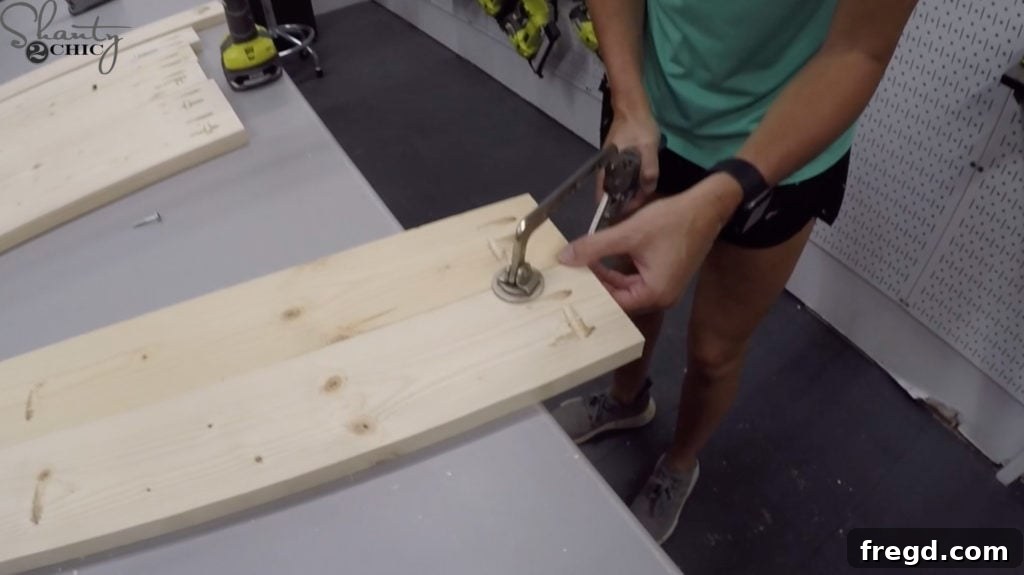
Apply a thin, even layer of wood glue along the mating edges of the planks. Then, join them together using 1 1/4″ pocket hole screws. To ensure a super smooth and perfectly flush table top surface, we highly recommend using Kreg Face Clamps at each pocket hole location. These clamps effectively pull the joint tight, preventing any unevenness that can be difficult to correct later. Wipe away any excess glue immediately with a damp cloth.
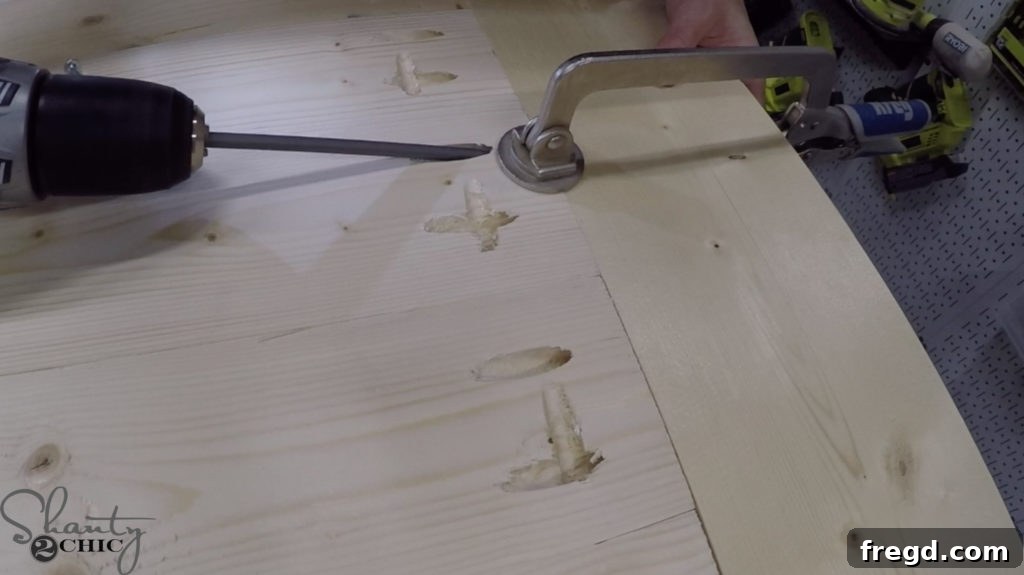
Next, measure and cut your breadboards to size. These pieces will be attached to the ends of the table top planks, adding a finished look and providing structural stability. Apply wood glue to the ends of the main tabletop planks before attaching the breadboards. Secure them in place using 1 1/4″ pocket hole screws, ensuring they are flush with the tabletop surface. This step not only enhances the aesthetic but also helps to prevent potential warping of the tabletop over time, a common issue with wider plank surfaces.
Step 2 – Assembling the Robust Table Base
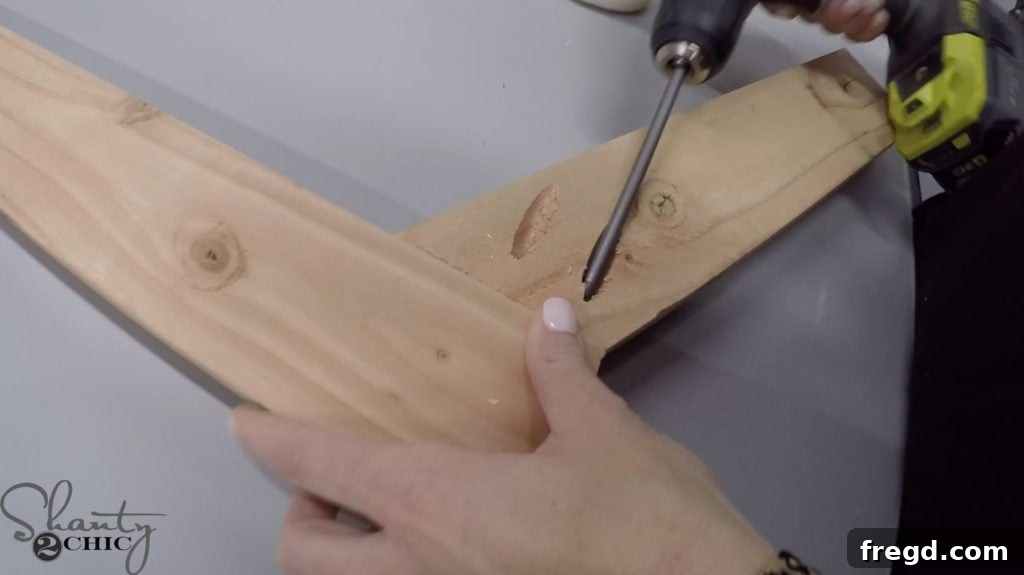
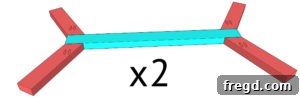
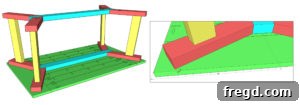
Now, shift your focus to the foundation of your coffee table: the base. Cut all the base pieces according to the dimensions in your cut list. Pay close attention to the angled ends of each foot; these angles are crucial for the table’s distinctive design and stability. Drill 1 1/2″ pocket holes into these angled ends. These larger pocket holes accommodate the thicker 2×4 lumber and provide a strong joint.
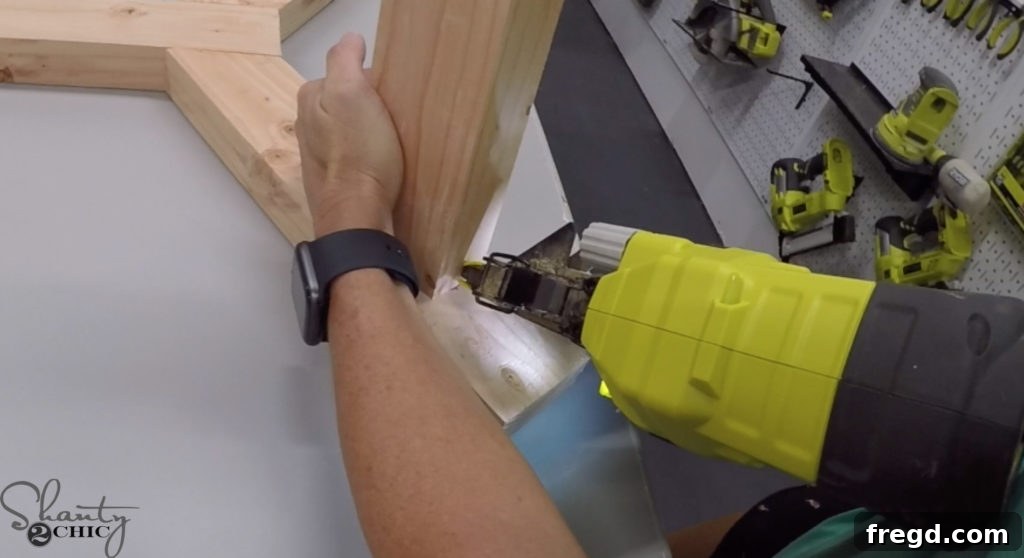
With the pocket holes drilled, apply a generous amount of wood glue to the joining surfaces and attach the feet to the runner using 2 1/2″ pocket hole screws. Ensure these connections are tight and square. You will need to build two identical bases for the coffee table, one for each end. Double-check your measurements and angles to ensure symmetry between the two base units.
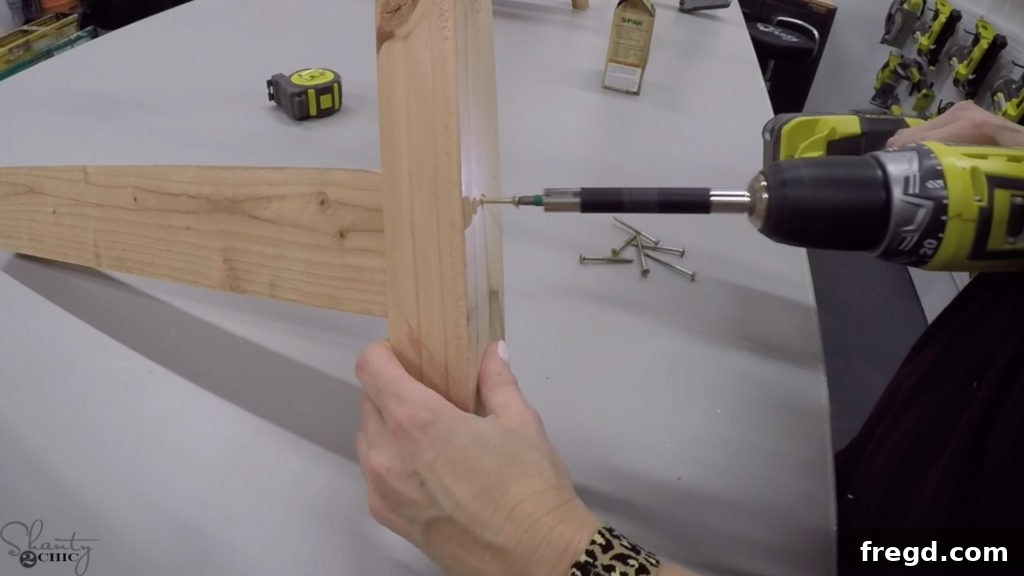
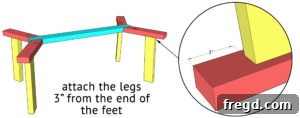
Cut the legs to their specified lengths. Attach these legs to the *top* base unit you just constructed. Use 2 1/2″ wood screws, driving them down from the top surface of the base into the legs. It’s important that the pocket holes on the legs are facing upwards at this stage – this strategic placement will conceal them later and allow for a clean connection. A helpful tip: temporarily secure the legs with a couple of 2″ brad nails to hold them perfectly in place before driving the wood screws, ensuring accuracy and stability.
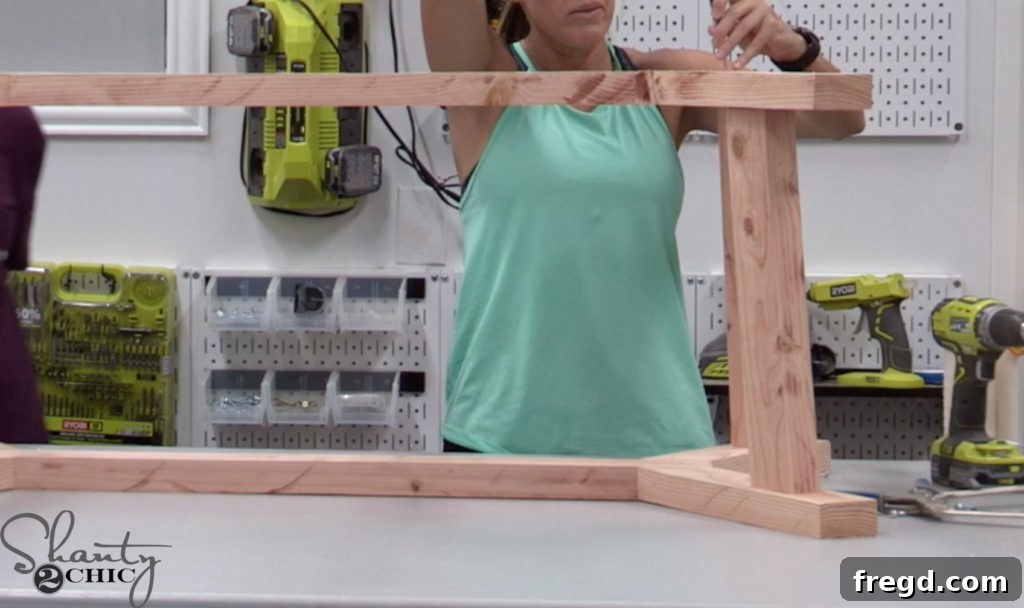
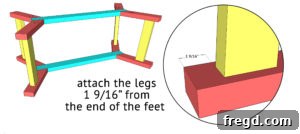
Once the top base and legs are securely joined, carefully flip the entire base assembly over. Now, attach the *bottom* base to the legs. Again, use wood glue for maximum strength and secure it with 2 1/2″ wood screws, driving them from the bottom surface of the lower base up into the legs. Crucially, ensure the pocket holes on the legs are now facing downwards. This thoughtful orientation ensures that all pocket holes will be hidden from view once the table is complete, contributing to a professional and polished appearance. Always refer to your detailed plans for the exact placement and spacing of the legs to maintain the intended design integrity.
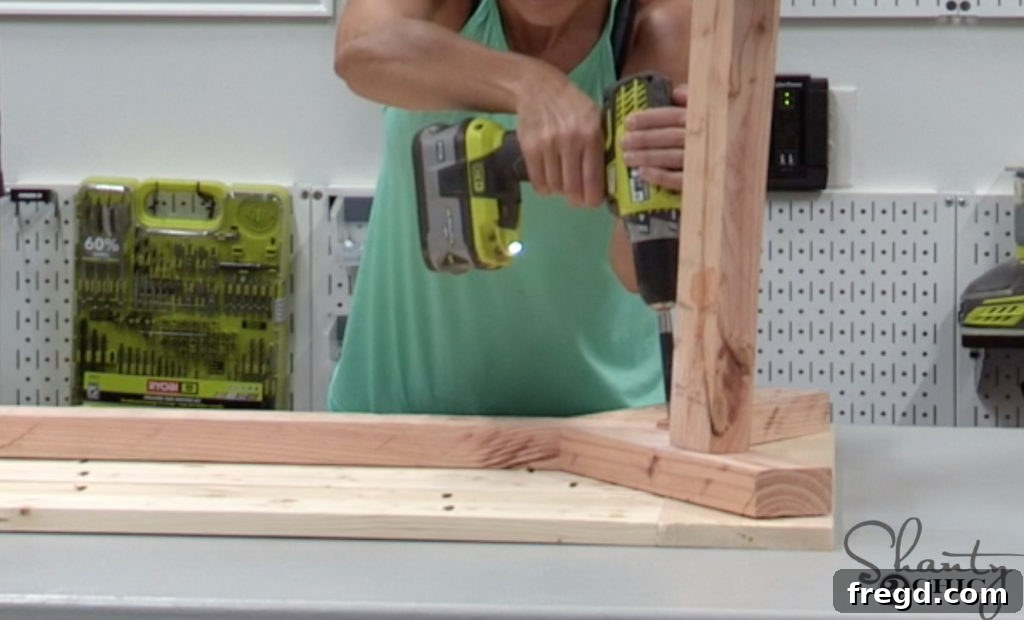
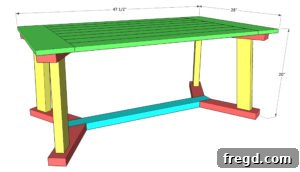
For the final assembly, place your completed table top upside down on a clean, protected surface. Carefully center the assembled base on top of the inverted tabletop. Once precisely aligned, attach the table base to the top using 2 1/2″ wood screws. Drive these screws from the top of the base (where the pocket holes previously faced up) directly into the underside of the table top. This method creates a strong, concealed connection that will hold your table firmly together for years of enjoyment.
Step 3 – The Perfect Finish: Sanding and Sealing
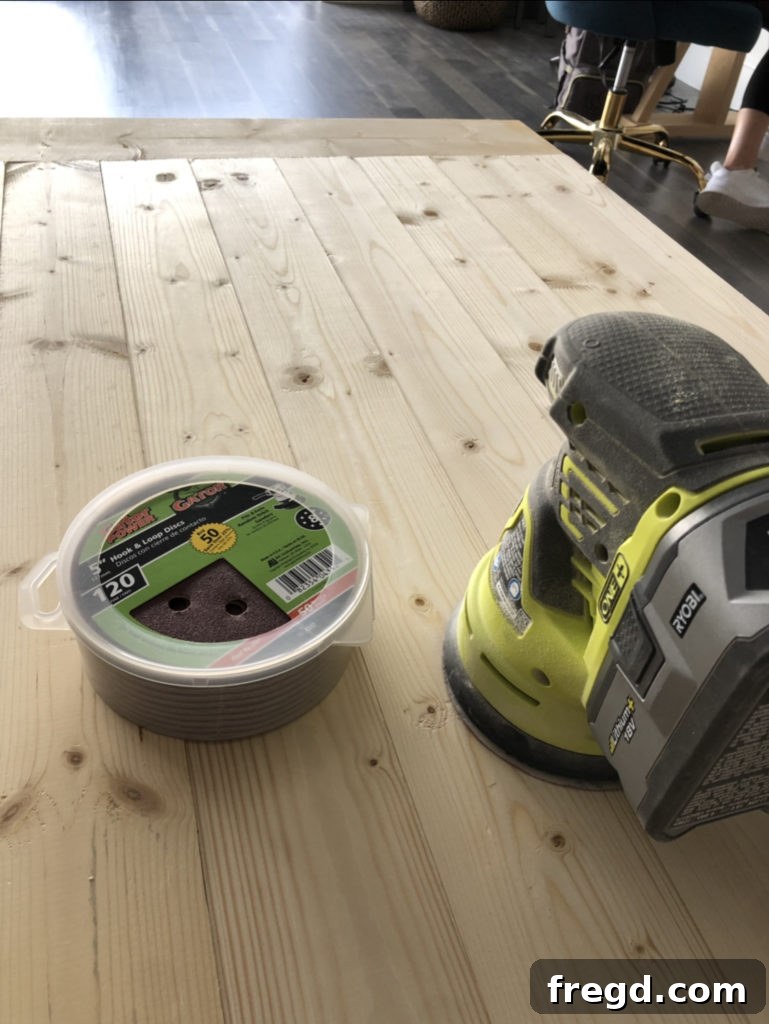
With the construction complete, it’s time to bring out the true beauty of your DIY Modern Farmhouse Coffee Table. This stage, while seemingly simple, is critical for a professional and durable outcome. Start by thoroughly sanding the entire table. Begin with a coarser grit sandpaper (e.g., 80 or 100) to remove any major imperfections, glue squeeze-out, or rough edges. Gradually progress to finer grits (120, then 180, and finally 220) to achieve a silky-smooth surface. The goal is to eliminate all sanding marks from the previous grit, creating a perfect canvas for your chosen finish. Pay extra attention to all visible surfaces and edges.
After sanding, wipe down the entire table with a tack cloth or a slightly damp rag to remove all dust. Any lingering dust can interfere with the finish, causing streaks or an uneven appearance. Now, you’re ready to apply your chosen finish! For a classic Modern Farmhouse look, a wood stain followed by a protective topcoat (like polyurethane or lacquer) is often preferred. Experiment with different stain colors on scrap pieces of the same wood to find the perfect shade that complements your home decor. Alternatively, you could paint the base for a two-toned look, leaving the top stained, or paint the entire piece for a more contemporary farmhouse vibe.
Allow ample drying time between coats and according to the manufacturer’s instructions for your chosen products. A durable topcoat is essential for protecting your coffee table from spills, scratches, and daily wear, ensuring it remains a beautiful and functional part of your home for many years to come.
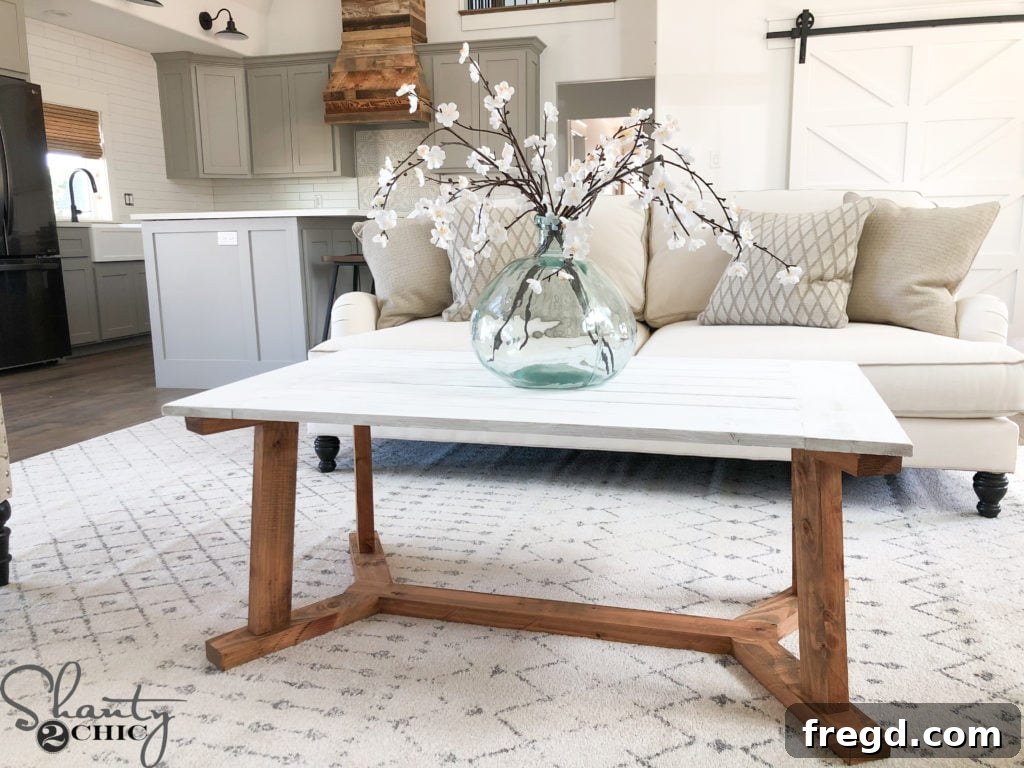
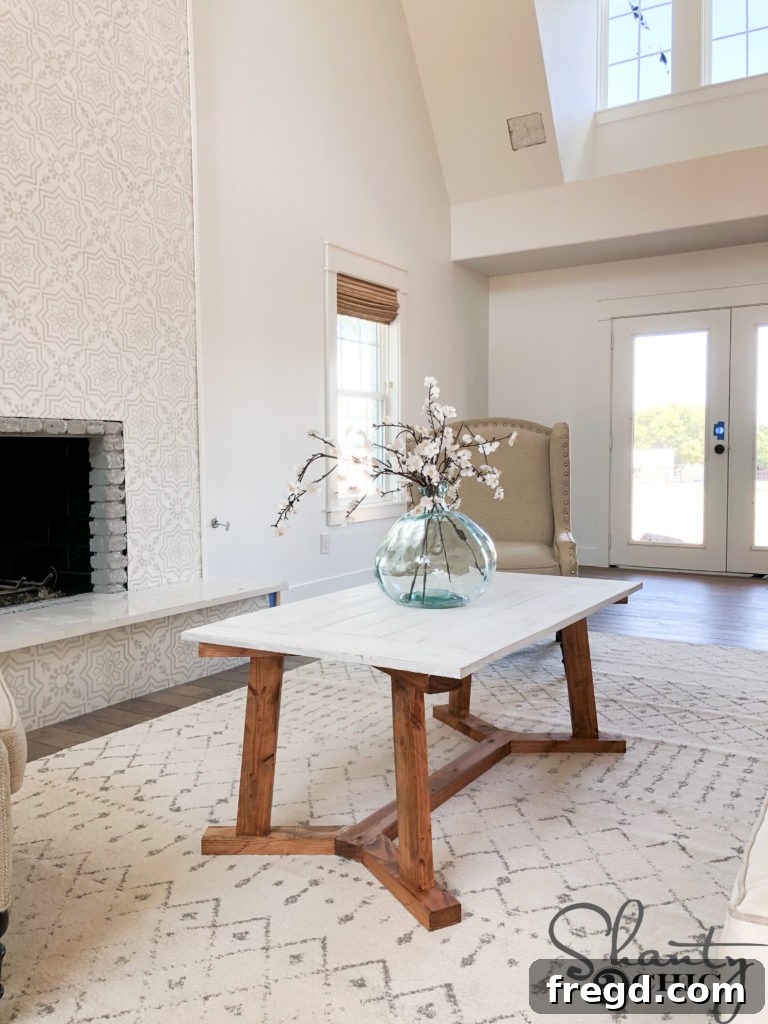
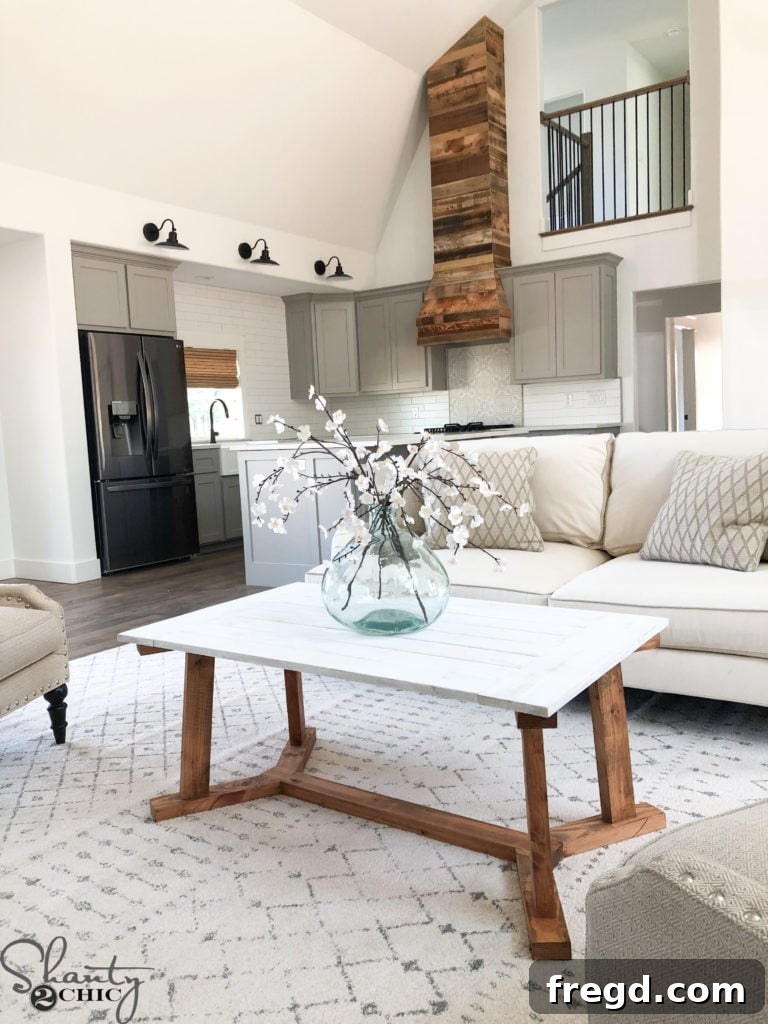
DIY Modern Farmhouse Coffee Table: Free Plans & Overview
Here’s a concise overview of the project details and a direct link to download the full, printable plans. We’ve simplified the previous “recipe card” structure into clear, readable HTML for easy access to all the crucial information without unnecessary complexity.
DIY Modern Farmhouse Coffee Table
Build this incredibly stylish and sturdy DIY Modern Farmhouse Coffee Table using approximately $40 in lumber and just a few essential tools. This project is perfect for adding a personalized touch to your living room and creating a functional, beautiful centerpiece.
CLICK HERE TO DOWNLOAD THE FULL SET OF PLANS INCLUDING THE DETAILED CUT LIST AND SUPPLY LIST!
Tools Required
- Miter Saw
- Drill
- Kreg Jig
- (Optional) Table Saw
- Tape Measure & Pencil
- Safety Glasses & Hearing Protection
- Clamps (especially face clamps)
- Orbital Sander
Supply List Overview
- 4 – 1x4x8 Common Boards or Pine
- 1 – 1x6x8 Common Board or Pine
- 3 – 2x4x8 Common Boards or Pine
- 1 1/4″ Pocket Hole Screws
- 2 1/2″ Pocket Hole Screws
- 2 1/2″ Wood Screws
- Wood Glue
- Sanding Supplies (various grits)
- Wood Stain or Paint & Sealer
Key Instructions at a Glance
For detailed, image-supported instructions, please refer to the full plans downloadable above. This is a quick summary:
Prepare Your Lumber
- Cut all planks and base pieces according to the precise measurements in the downloadable cut list. *Note: The plans account for optional ripping of 2x board rounded edges; adjust if you choose not to rip.*

Refer to the full downloadable plans for complete cutting dimensions.
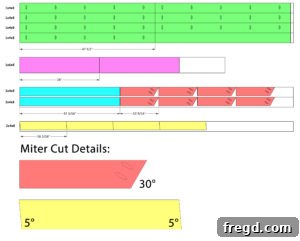
Table Top Assembly
- Drill 3/4″ pocket holes on tabletop planks and join them with 1 1/4″ pocket hole screws and wood glue. Use face clamps for a flush surface.
Ensure all joints are tight and flat for a professional finish. - Cut and attach breadboards to the ends of the tabletop using 1 1/4″ pocket hole screws and wood glue.
Breadboards add stability and a decorative element.
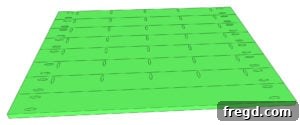
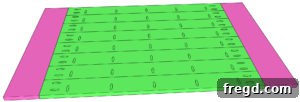
Table Base Construction
- Drill 1 1/2″ pocket holes into the angled ends of the feet pieces. Attach feet to runners using 2 1/2″ pocket hole screws and wood glue. Build two identical bases.
Precise angles and strong joints create a sturdy base. - Cut legs to size and attach to the top base with 2 1/2″ wood screws, ensuring pocket holes face up.
Careful alignment is key for a balanced table. - Flip the base, then attach the bottom base to the legs with wood glue and 2 1/2″ wood screws, ensuring pocket holes face down.
Hidden pocket holes result in a cleaner finish. - With the tabletop upside down, center the base. Attach the base to the tabletop using 2 1/2″ wood screws from the top of the base into the tabletop.
The final structural connection for your coffee table.
Finishing Your Table
- Thoroughly sand the table to achieve a smooth surface, then apply your chosen stain or paint and a protective finish. Share your completed projects with us using #shanty2chic!
The finishing stage is where your table truly comes to life.
Happy Building!
We are incredibly excited to see your creations! Don’t forget to share photos of your finished DIY Modern Farmhouse Coffee Table on social media and tag us with #shanty2chic. Your projects inspire us and our community, and we love to feature the amazing work of our fellow DIY enthusiasts. Happy building, and enjoy your new custom furniture piece!