
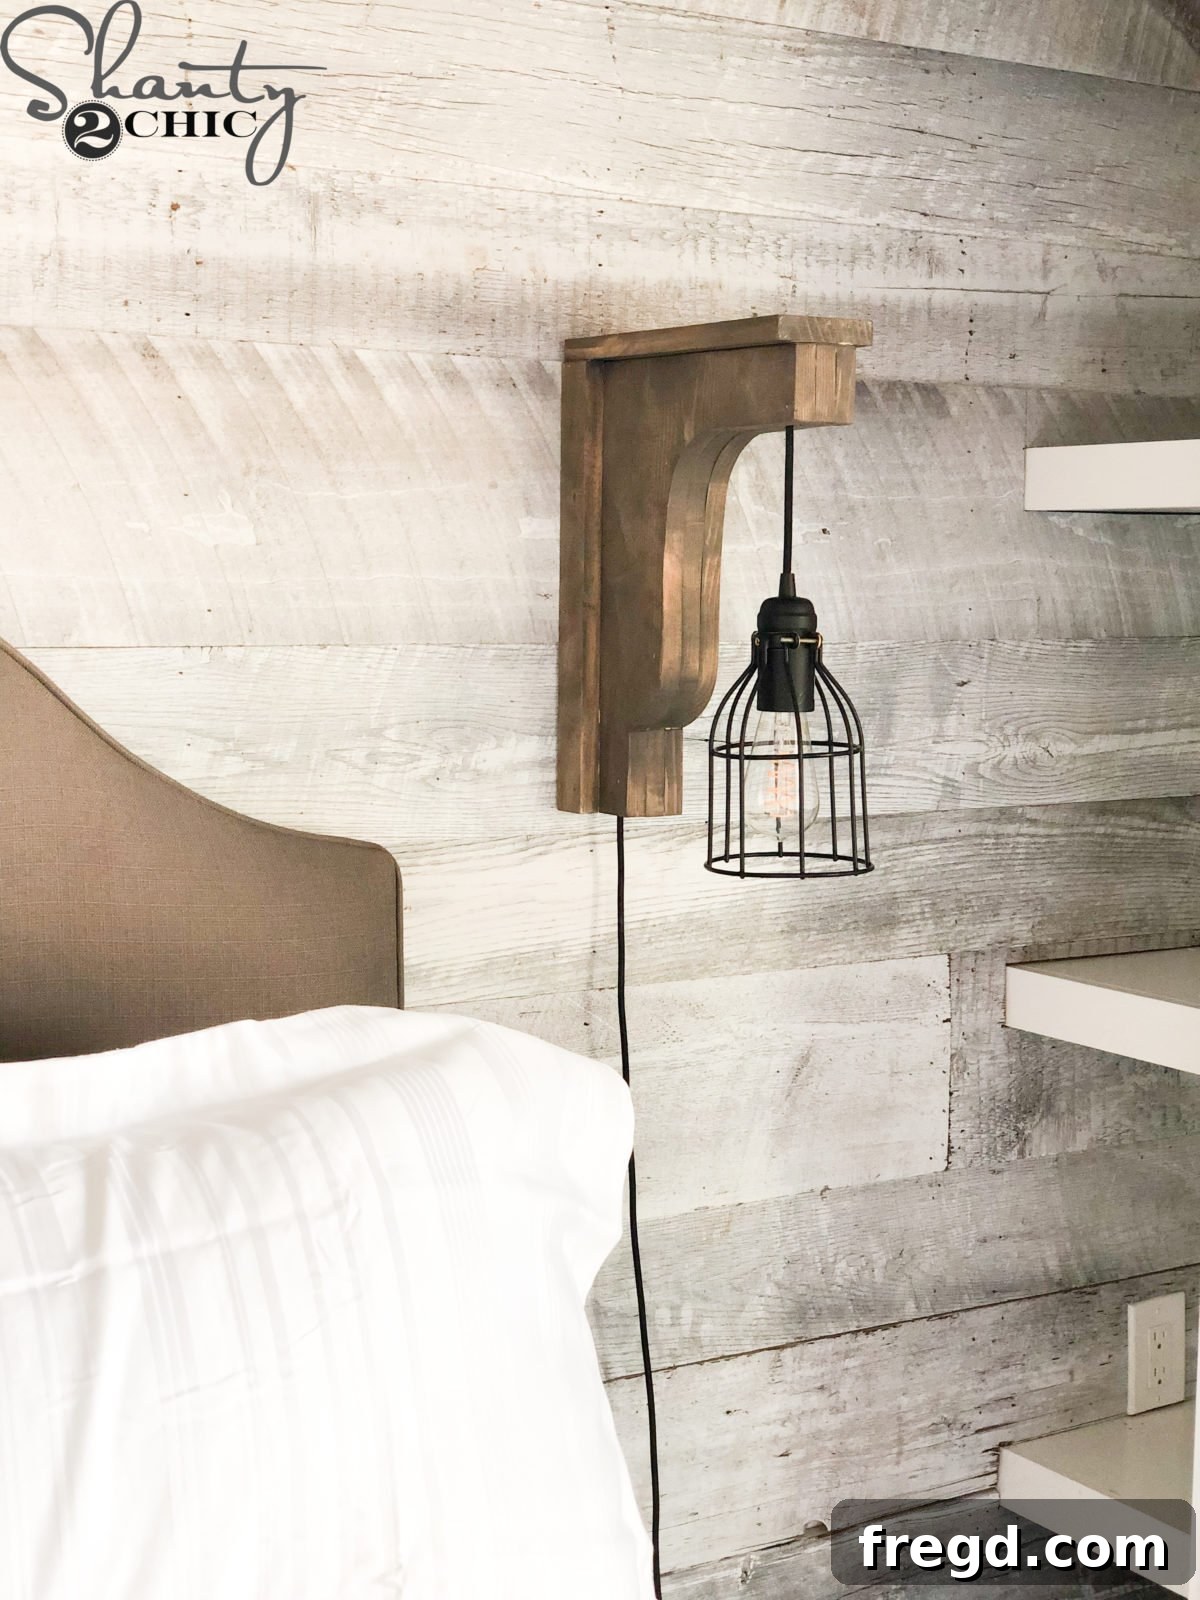
Welcome back to the latest installment of our Shanty Flip House series, Episode 6! As our ambitious renovation project draws closer to completion, our focus shifts to incorporating personalized touches and cutting-edge technology that elevates both functionality and aesthetic appeal. Having previously integrated Caséta by Lutron smart lighting systems into our own homes, we were confident that this intelligent feature would be an indispensable addition to this flip house, significantly enhancing its modern charm and convenience. We discovered the perfect opportunity to implement their innovative Lamp Dimming Smart Plugs within a unique design element: custom-built Corbel Light Sconces for the master bedroom. For those eager to replicate this stunning and practical upgrade, we are delighted to share comprehensive, free plans and a detailed how-to guide below. Prepare to transform your living spaces with smart, stylish lighting solutions!
Elevating Your Home with Caséta by Lutron Smart Lighting
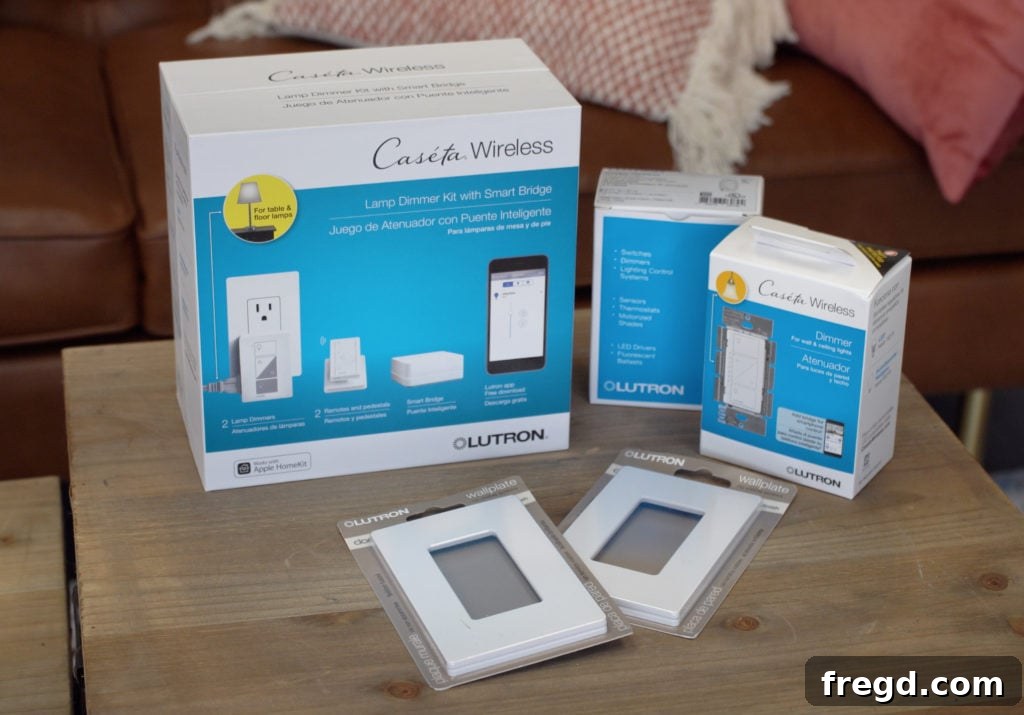
Caséta by Lutron stands at the forefront of smart home innovation, offering an intuitive and highly efficient platform for controlling virtually all your home’s lighting, switches, and even ceiling fans. What truly sets Caséta apart is its unparalleled compatibility, seamlessly integrating with more smart home devices and voice assistants than any other lighting brand on the market. In our own experience, connecting Caséta with our Alexa devices has been a game-changer, providing the incredible convenience of managing our entire lighting scheme with simple voice commands. Imagine effortlessly adjusting the ambiance, turning lights on or off, or even dimming them without lifting a finger – it’s the ultimate in modern living.
Beyond mere convenience, Caséta by Lutron offers a robust ecosystem that transforms how you interact with your home. Its reliable wireless technology ensures consistent performance, while the extensive range of products, from in-wall dimmers to smart plugs, allows for a comprehensive smart lighting solution tailored to any space. Whether you’re building a new home, undertaking a major renovation like our flip house, or simply looking to upgrade your current living situation, Caséta provides an accessible entry point into sophisticated home automation. The system not only adds a layer of modern luxury but also contributes to energy efficiency and enhanced home security, making it a wise investment for any homeowner.
Discover Our Favorite Caséta Features
Our long-standing experience with Caséta by Lutron has highlighted several features that consistently impress us, making it our top recommendation for smart lighting solutions. These functionalities are not just about convenience; they truly enhance daily living and provide peace of mind.
Intelligent Scheduling Capabilities
One of the most impactful and frequently utilized features of the Caséta wireless system is its advanced scheduling ability. This powerful tool offers both practical benefits and an added layer of security. When you’re away on vacation or a business trip, you can program your lights to activate at varying times throughout the day and evening, intelligently mimicking occupancy. This creates the illusion that your home is lived in, acting as a powerful deterrent against potential intruders. Furthermore, the scheduling feature eliminates the inconvenience of returning to a dark home after a long day at work. Simply set your lights to automatically switch on shortly before your typical arrival time, providing a welcoming, brightly lit environment. This thoughtful automation ensures your home is always ready for you, enhancing comfort and safety without any manual effort.
Seamless Control with the Smart Phone App
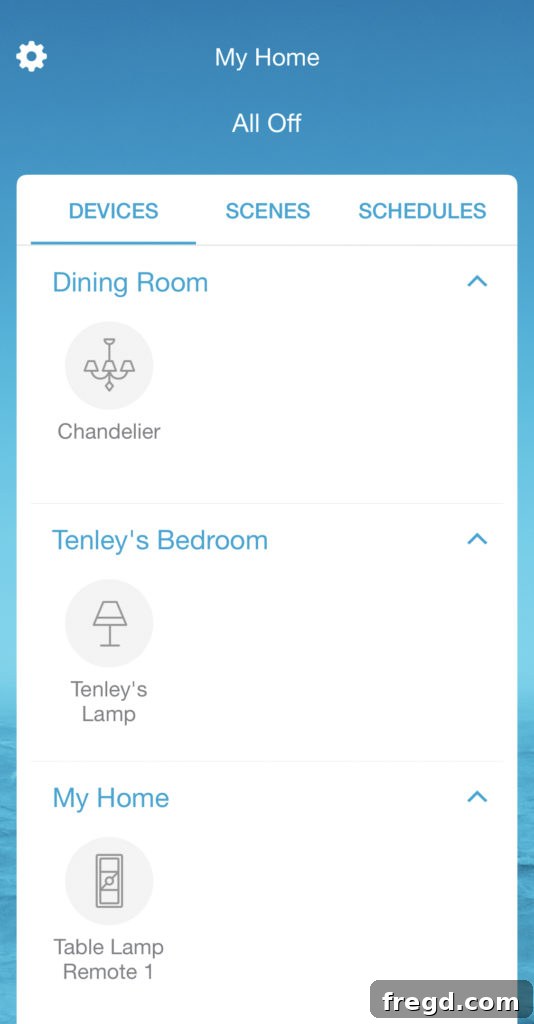
At the heart of the Caséta experience is the incredibly intuitive Lutron App, accessible right from your smartphone. This powerful application grants you complete command over every smart device within your system, no matter where you are. The app allows for easy labeling of each device, ensuring you can quickly identify and control specific lights or fans. But its capabilities extend far beyond individual control. You can group multiple devices together to craft personalized “scenes” – predefined lighting configurations that instantly transform the mood of a room. Imagine a “Movie Night” scene that dims the main lights and turns on accent lamps, or a “Morning Routine” scene that gradually brightens your bedroom. Creating schedules, adjusting dimmer levels, and setting specific on/off times are all effortlessly managed within this single, comprehensive interface. The ability to control your entire home’s lighting ecosystem from your palm is truly amazing, offering unparalleled flexibility and customization.
Convenient Pico Remote Control
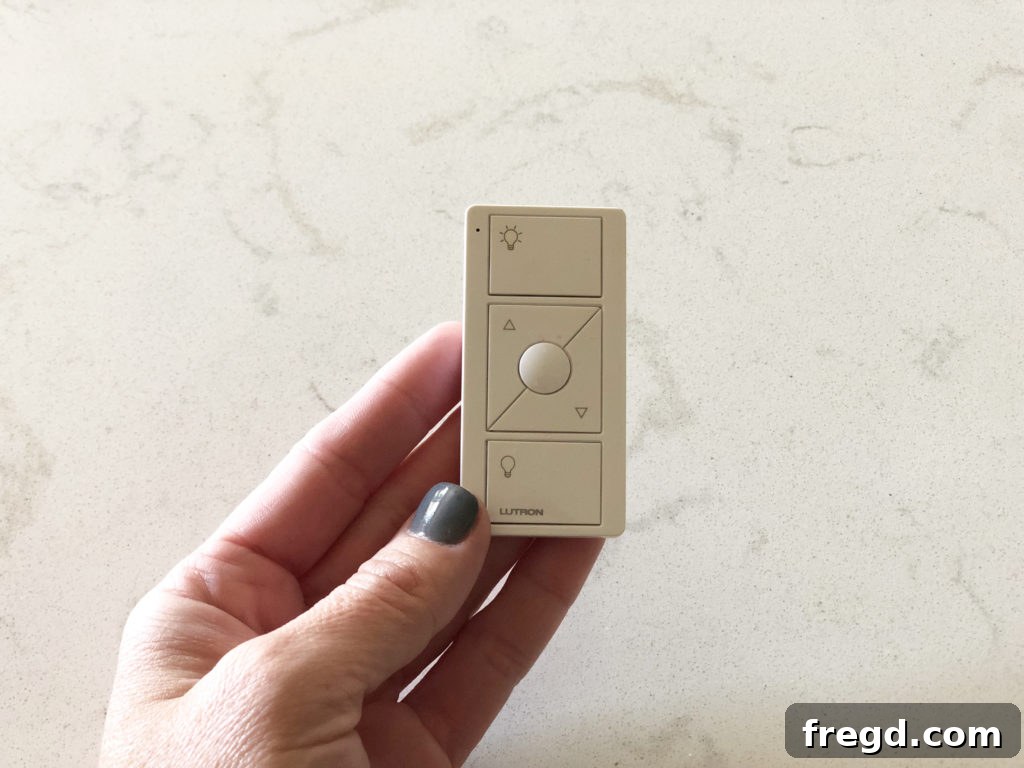
While voice commands and smartphone apps offer incredible remote access, sometimes you just need a simple, physical switch. The Caséta Pico Remote provides precisely that – a highly versatile and convenient handheld control for each of your smart switches. These compact remotes allow you to instantly turn your lights on or off, and precisely dim them, all with the tactile feedback of a button press. Their portability means you can place them wherever they’re most convenient – perhaps on a bedside table, mounted to a wall without needing any wiring, or even carried with you as you move between rooms. This physical interface serves as a perfect complement to the digital controls, ensuring that everyone in the household, regardless of tech savviness, can easily manage the lighting. The Pico Remote embodies the Caséta philosophy of making smart lighting accessible and user-friendly for every situation.
The DIY Project: Elegant Corbel Sconce Lighting
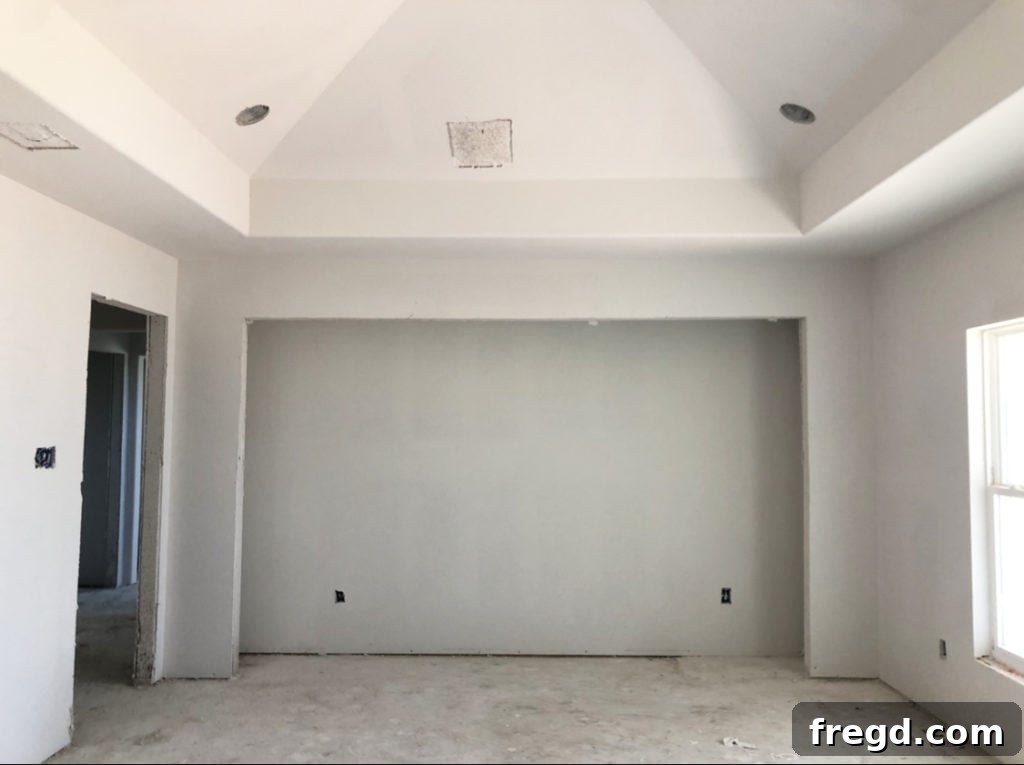
In the master bedroom of our Shanty Flip House, we envisioned a truly unique and inviting space. The design centered around a distinctive alcove, perfectly framed to serve as a stunning backdrop for the bed. Our vision included planking the entire feature wall, adding texture and character, and then flanking the bed with custom-built Corbel Light Sconces. These architectural elements not only add aesthetic appeal but also provide soft, ambient lighting. However, the design inherently involved exposed electrical cords leading to the lights. This challenge presented the perfect opportunity to integrate the Caséta Lamp Dimming Smart Plugs, offering an elegant solution to manage the lighting wirelessly and seamlessly blend modern technology with rustic craftsmanship. This project perfectly illustrates how smart home devices can enhance custom DIY solutions.
STEP 1 – Designing and Drawing the Corbel
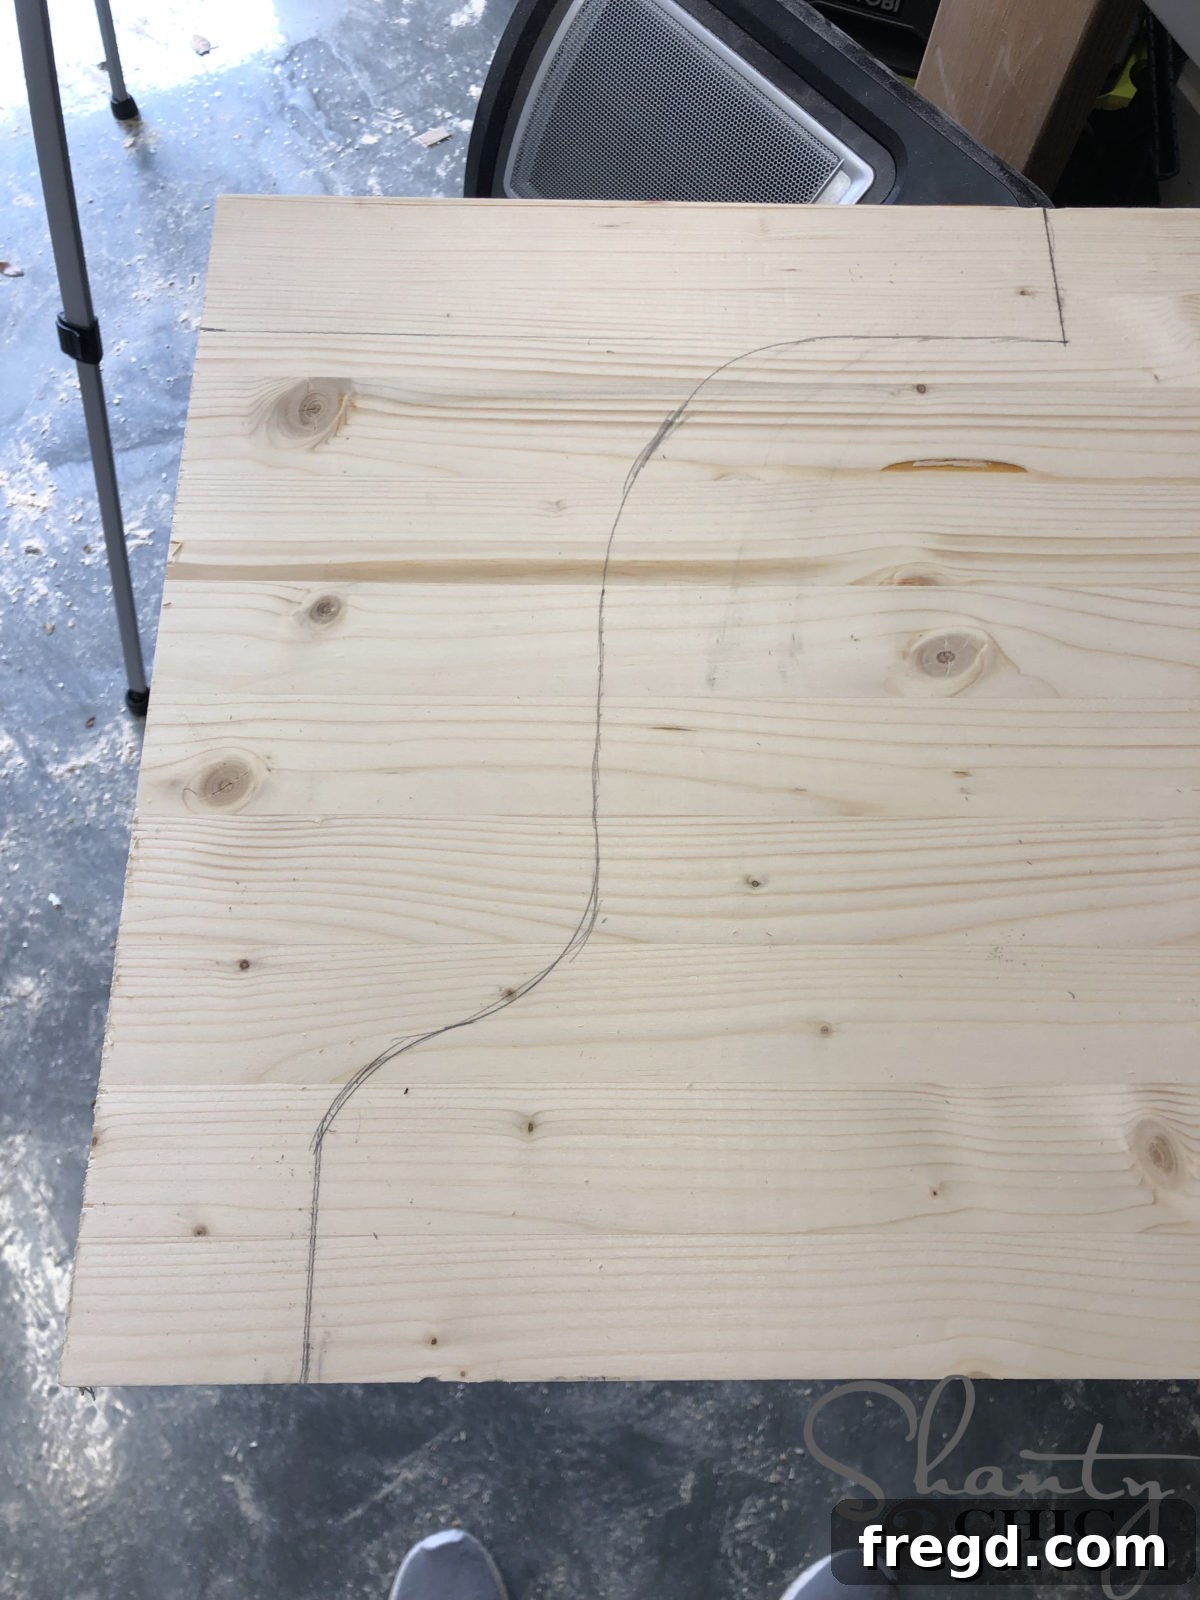
Our first step in crafting these elegant corbel sconces was to prepare the wood. I began by using my miter saw to precisely rip off the edge of a 1×12 board, ensuring a perfectly square edge. This initial squaring is a critical step for almost any woodworking project, as rough lumber often has imperfect ends that can lead to inaccurate cuts and misaligned components later on. If you don’t have access to a miter saw, a jigsaw can be effectively used by clamping a scrap piece of wood to your workpiece, serving as a straight-edge guide for clean, square cuts. Once I had a perfectly square foundation, I free-handed a unique corbel design directly onto the board. For those who prefer a more structured approach or wish to replicate our design exactly, refer to the free plans we’ve provided for precise measurements and detailed specifications. This thoughtful design phase sets the stage for a beautifully crafted final product.
STEP 2 – Precision Cutting of the Corbel Shapes
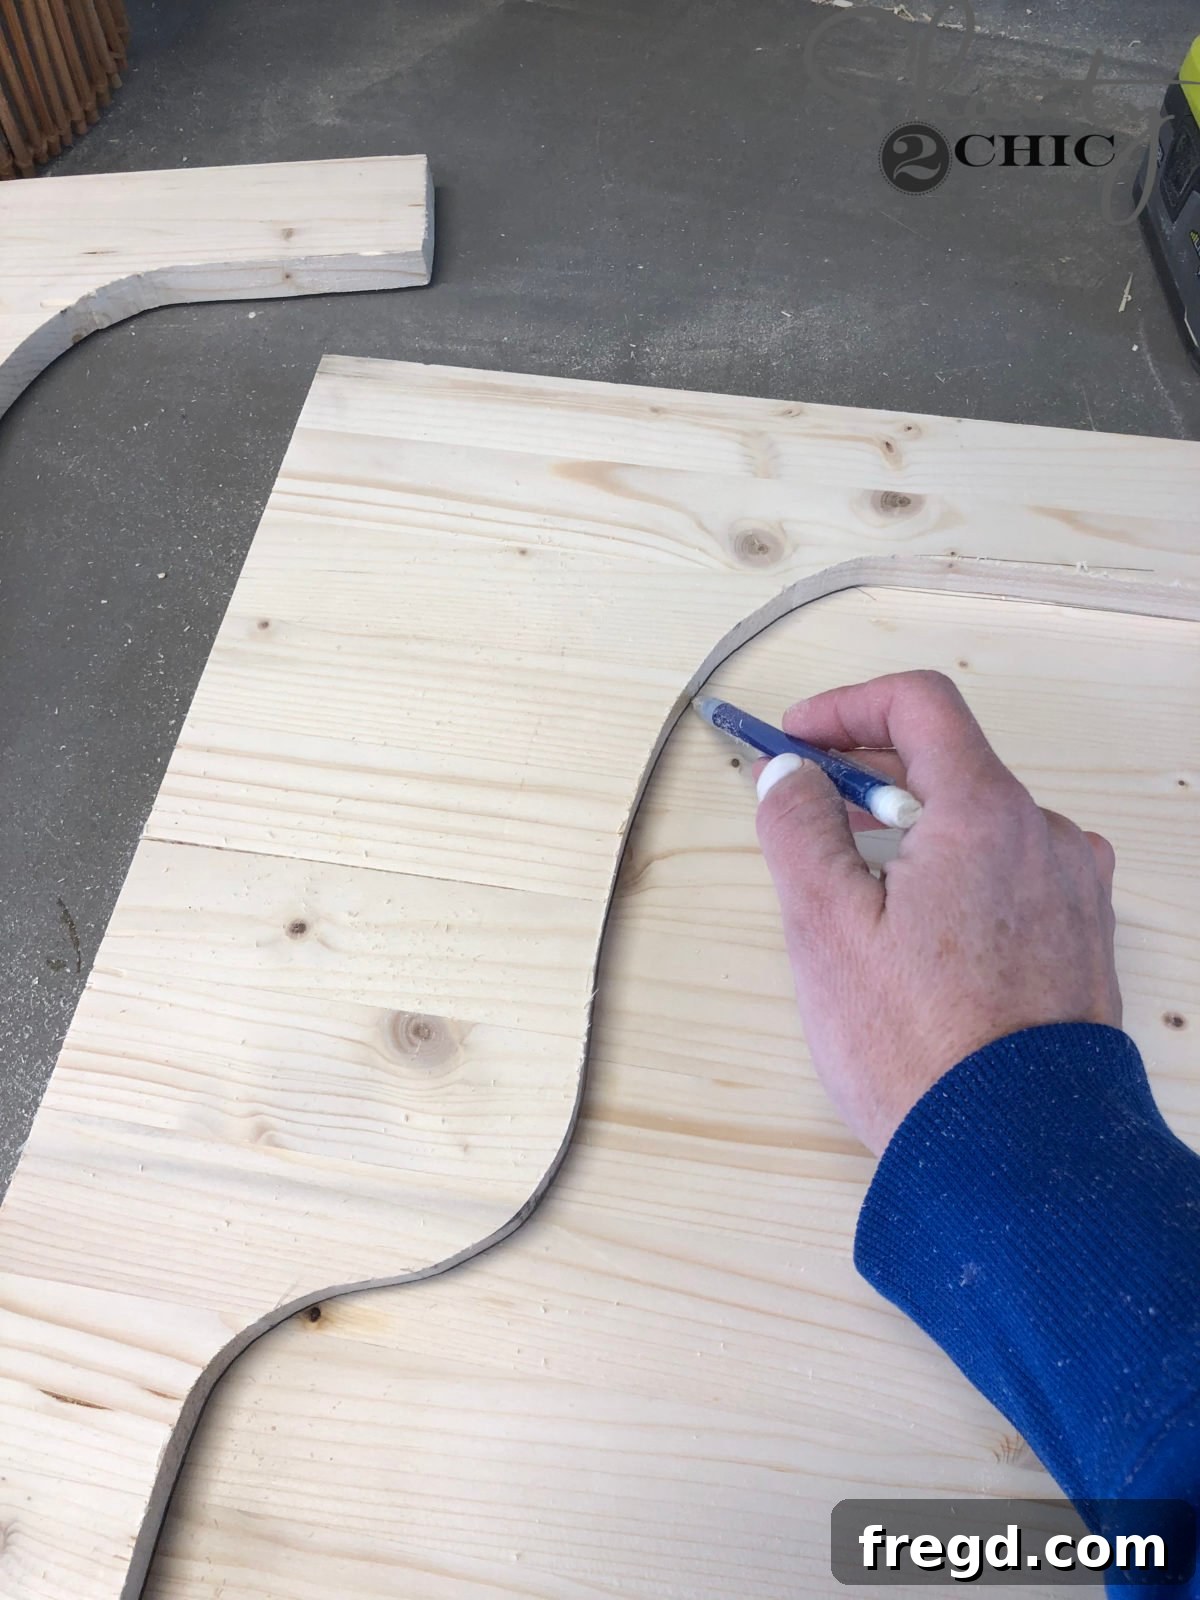
With our design expertly drawn, the next phase involved careful cutting to bring the corbels to life. I used my jigsaw to meticulously cut out the first corbel, following the lines of the free-handed design with steady precision. The jigsaw is ideal for these intricate, curved cuts, allowing for flexibility and detail. Once the first corbel was perfectly shaped, it became our master template. I then used this completed piece to trace the identical outline onto the wood for the second and third corbels. This method is crucial for ensuring that all three corbels are as consistent and symmetrical as possible, a key factor in achieving a professional and cohesive look for the pair of sconces. Taking the time to use a template guarantees uniformity and simplifies the cutting process for subsequent pieces, saving time and preventing discrepancies in the final assembly.
STEP 3 – Crafting a Cord Channel for Seamless Integration
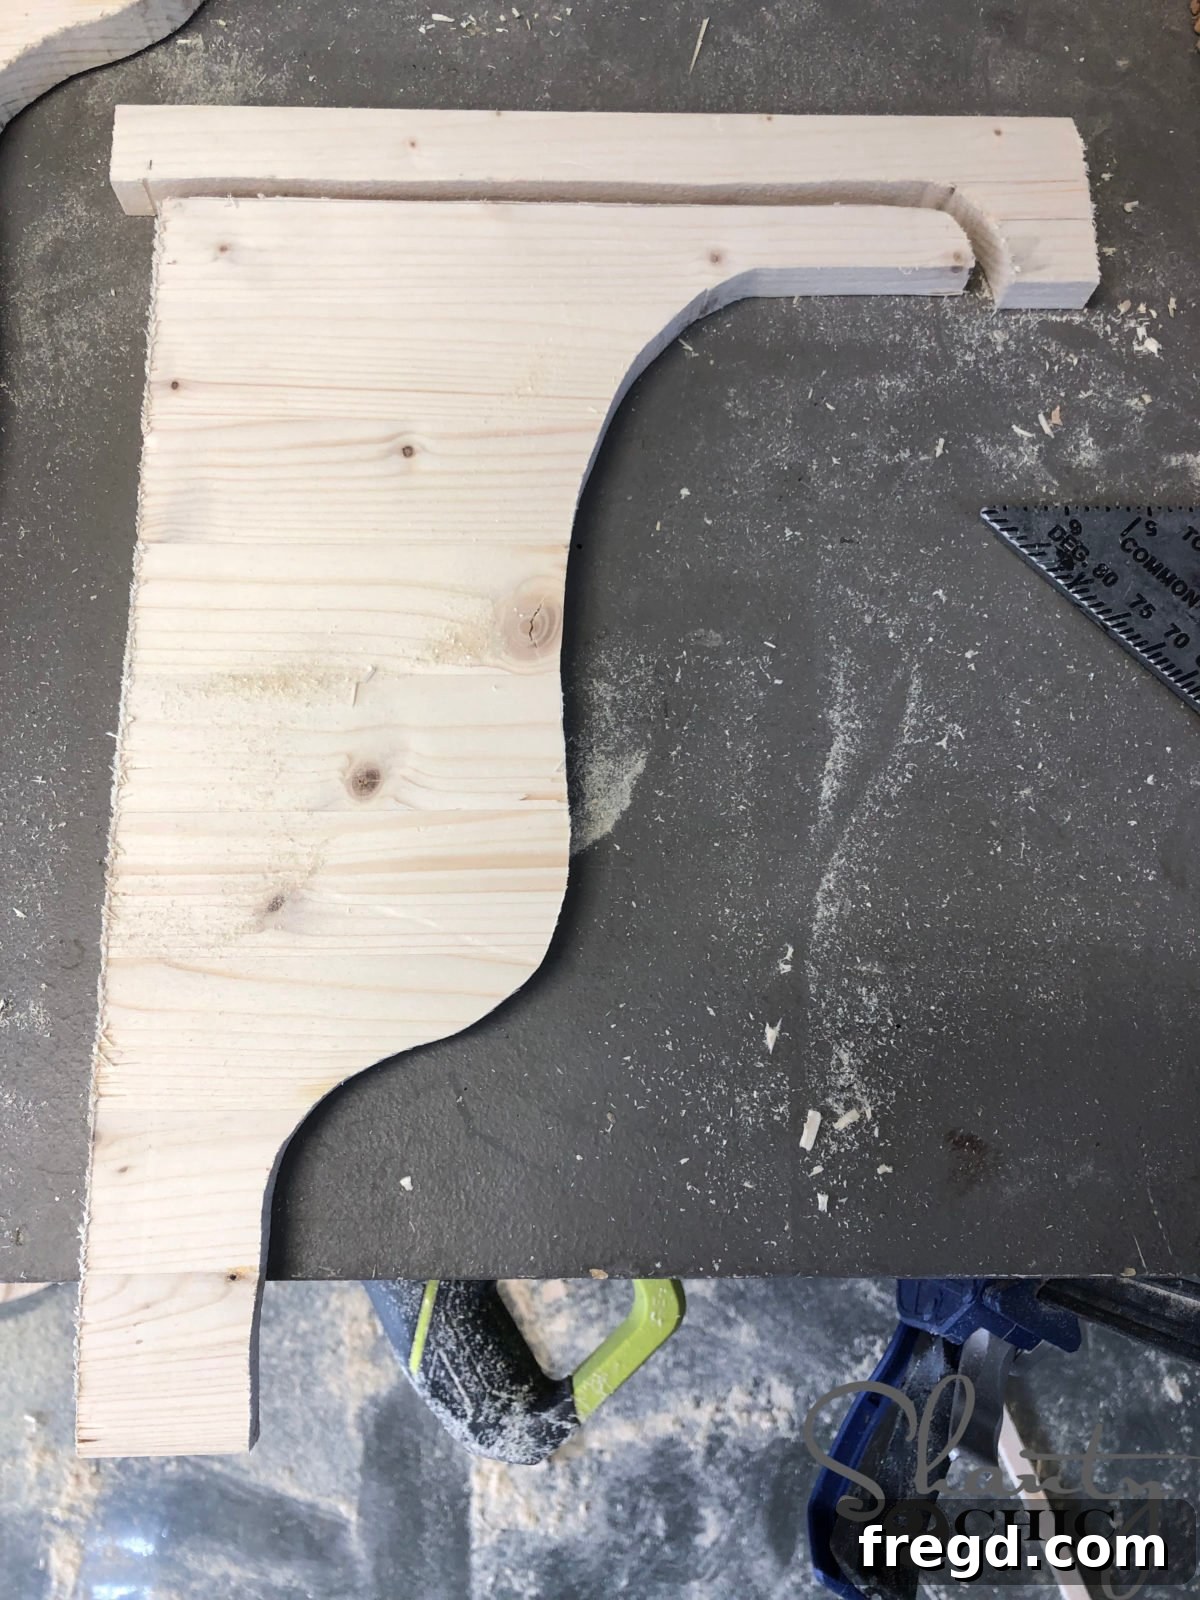
To ensure a clean and professional finish, completely concealing the lamp’s electrical cord was paramount. This step involved preparing the “middle” corbel piece by cutting a precisely sized channel through its thickness. Using my jigsaw, I carefully carved out a groove that would accommodate the cord, allowing it to run discreetly within the structure of the sconce. This channel is specifically designed to prevent the cord from being pinched or damaged, while also keeping it entirely out of sight once the corbel is assembled. For exact placement and dimensions of these crucial cuts, please refer to the detailed free plans. It’s important to note that after this step, the middle corbel will be divided into two distinct pieces, ready to sandwich the cord and create an elegant, wire-free appearance. This small detail significantly enhances both the safety and aesthetic appeal of the finished light sconce.
STEP 4 – Assembling the Corbel Components
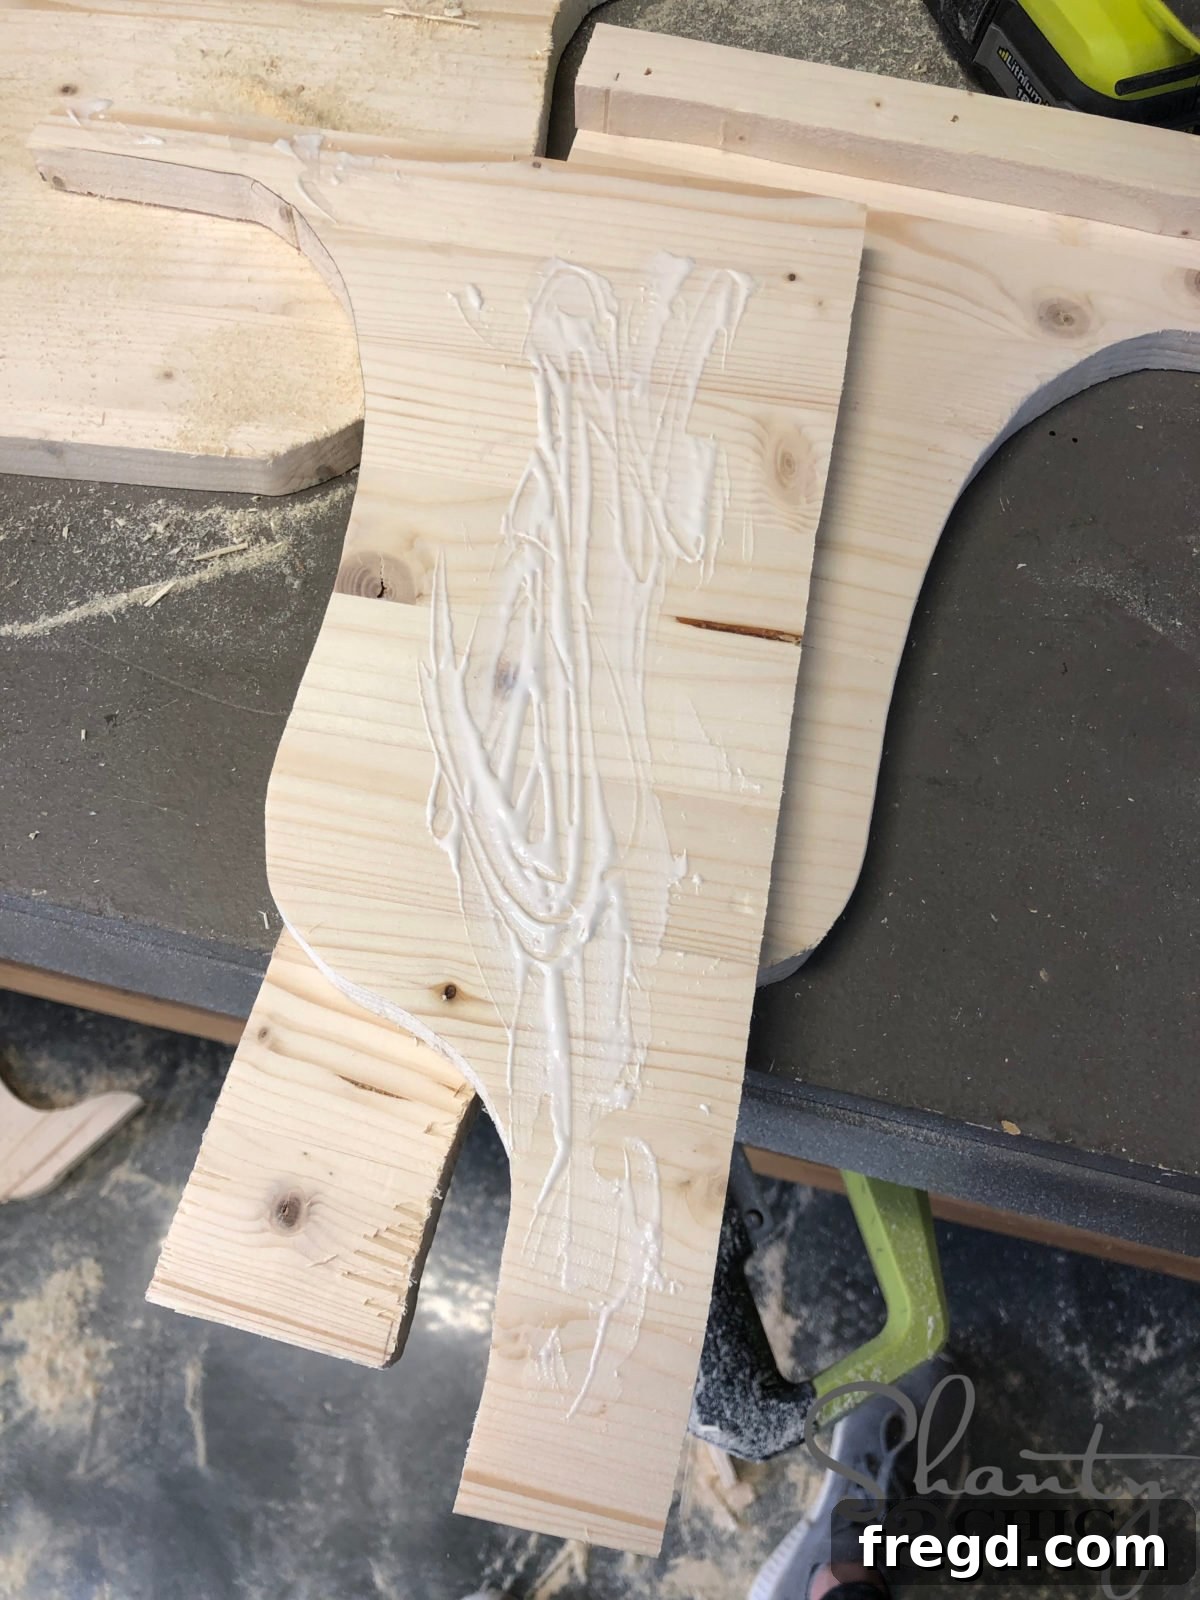
With the cord channel meticulously cut, it was time to bring the individual corbel pieces together to form the complete sconce. I started by applying a generous, even layer of high-quality wood glue to the back surfaces of the two middle corbel pieces. This adhesive provides a strong, durable bond that will ensure the integrity of the sconce for years to come. Once glued, I carefully positioned these middle pieces onto one of the outer corbels, ensuring that the front edges were perfectly flush with each other. Securing them in place, I used 1 1/4″ brad nails, strategically placed to provide immediate hold while the wood glue cured. This combination of glue and nails offers maximum strength and stability. The precise alignment at this stage is crucial for a clean, professional appearance of the finished sconce.
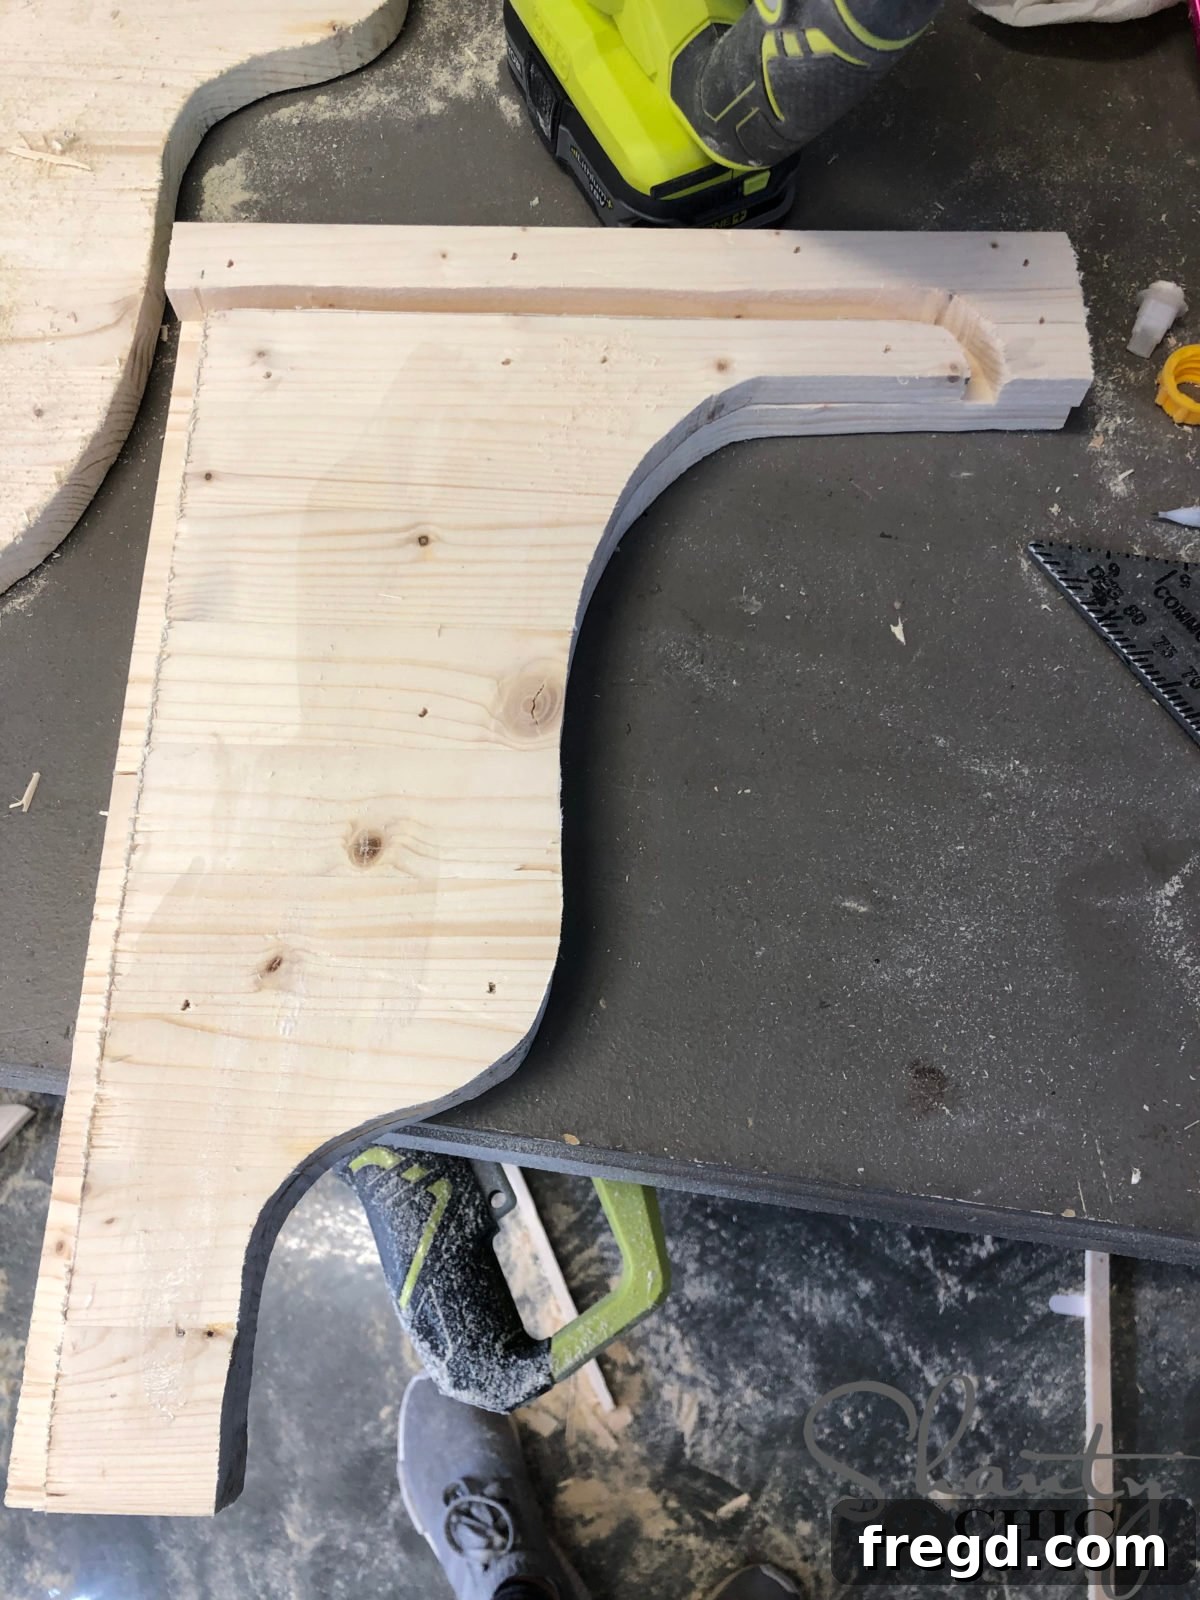
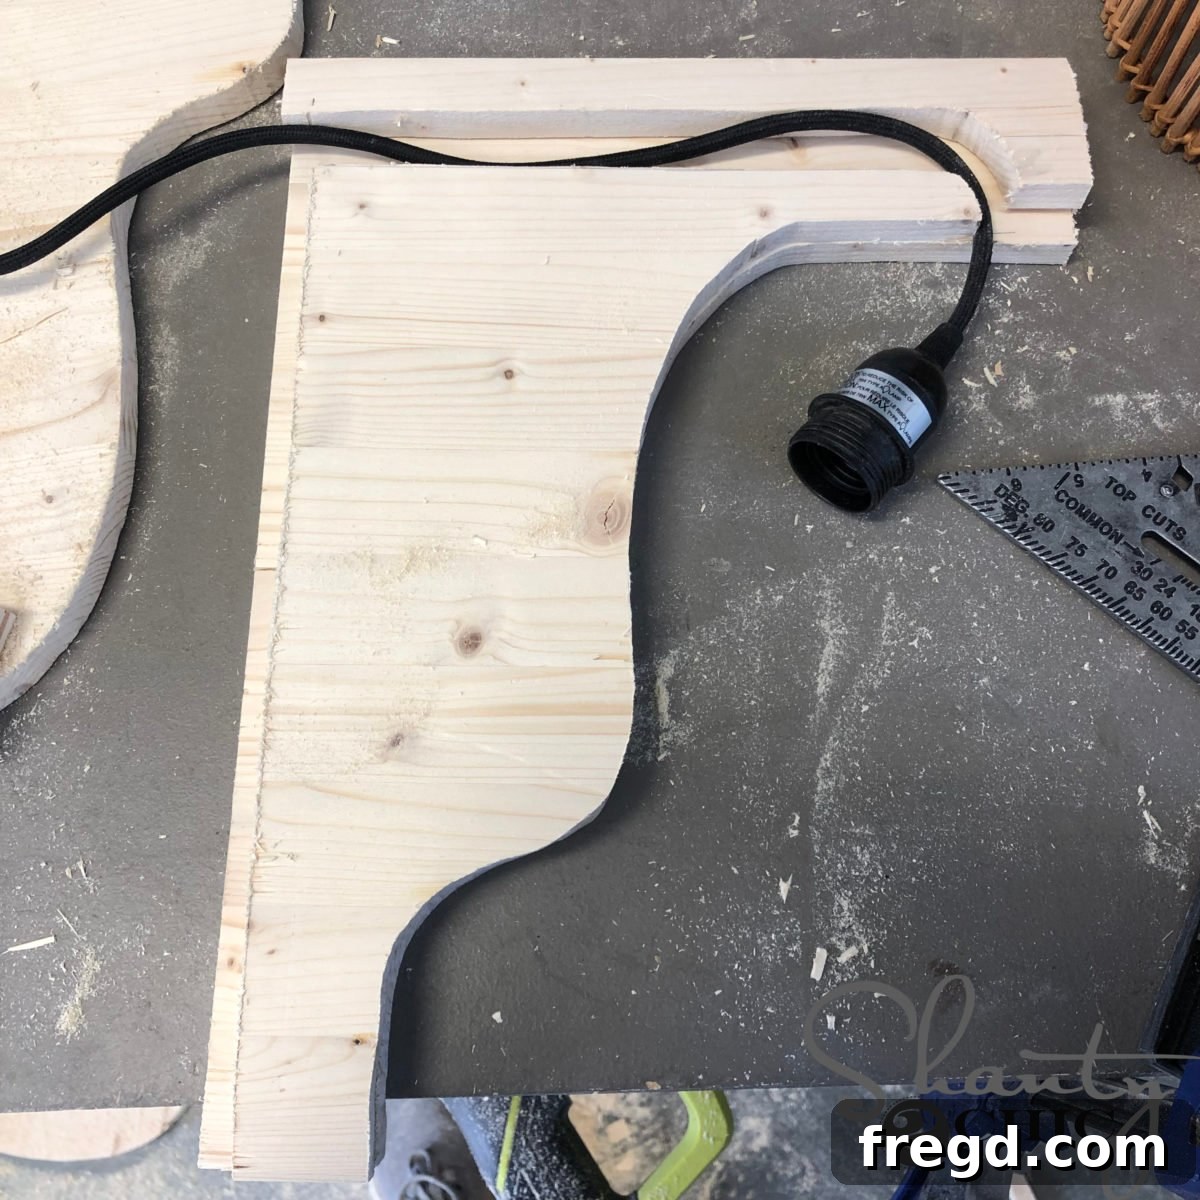
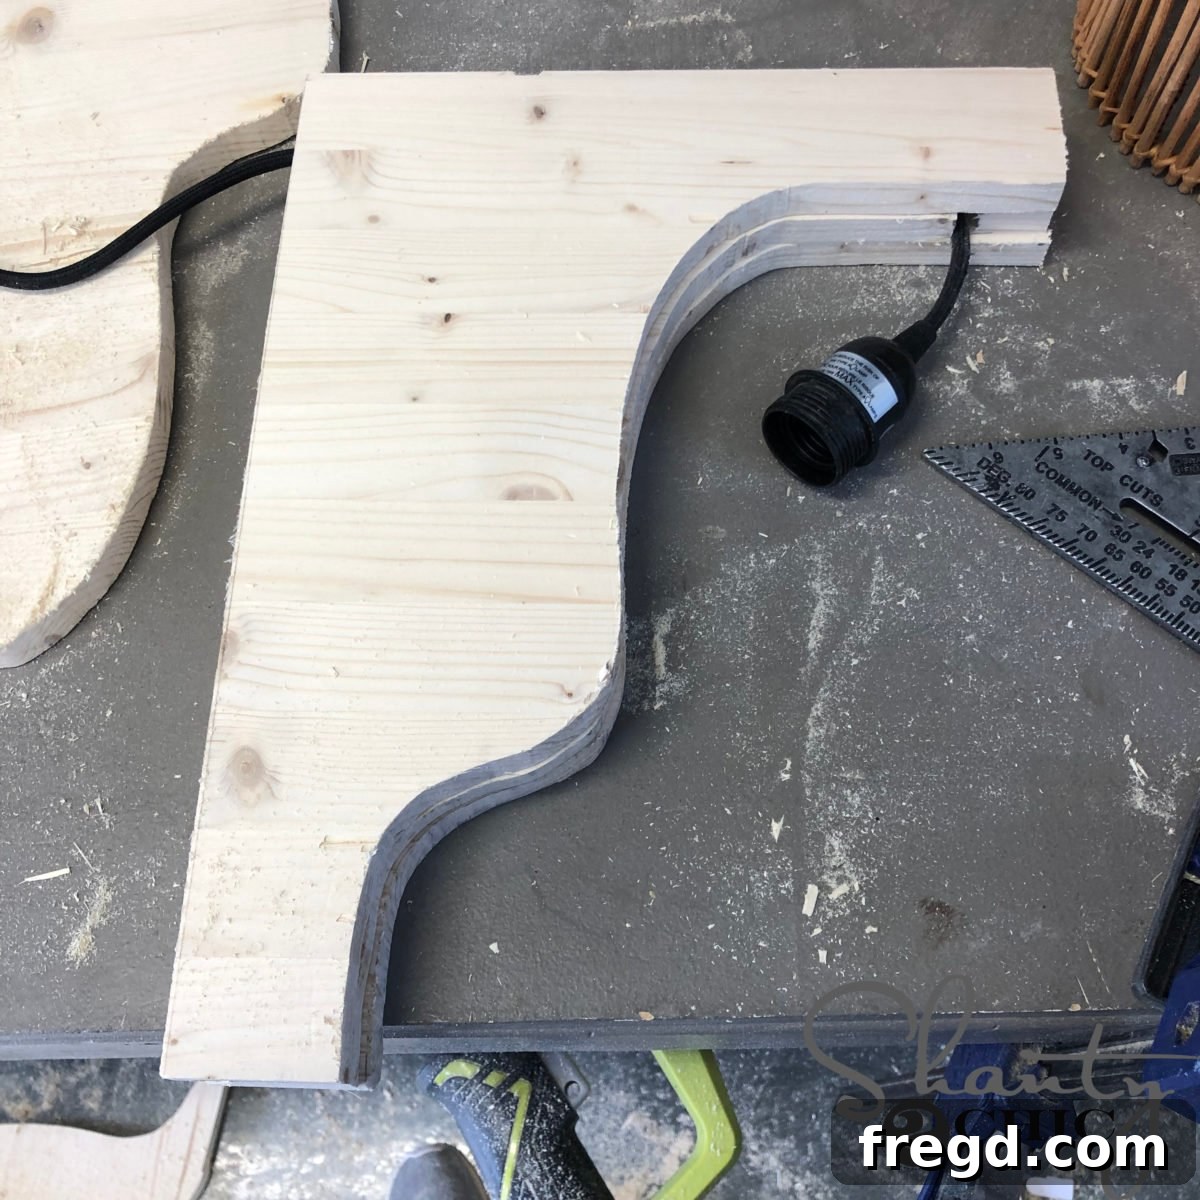
Once the initial middle corbel piece was securely attached, the next crucial step involved carefully integrating the electrical cord. I gently placed the cord into the channel that was previously cut into the middle corbel. It’s important to ensure the cord sits snugly within this groove, without any tension or kinks. With the cord perfectly seated, I then applied wood glue to the remaining surfaces of the middle corbel and positioned the final outer corbel on top. Again, precision was key, making sure all the edges were perfectly flush. I then fastened this last piece with 1 1/4″ brad nails, ensuring the entire structure was tightly bound. This multi-layered assembly not only creates a robust and aesthetically pleasing corbel but also ingeniously hides the lamp cord, maintaining a sleek and professional look that complements the smart plug integration.
STEP 5 – Adding Decorative Trim to the Corbel Structure
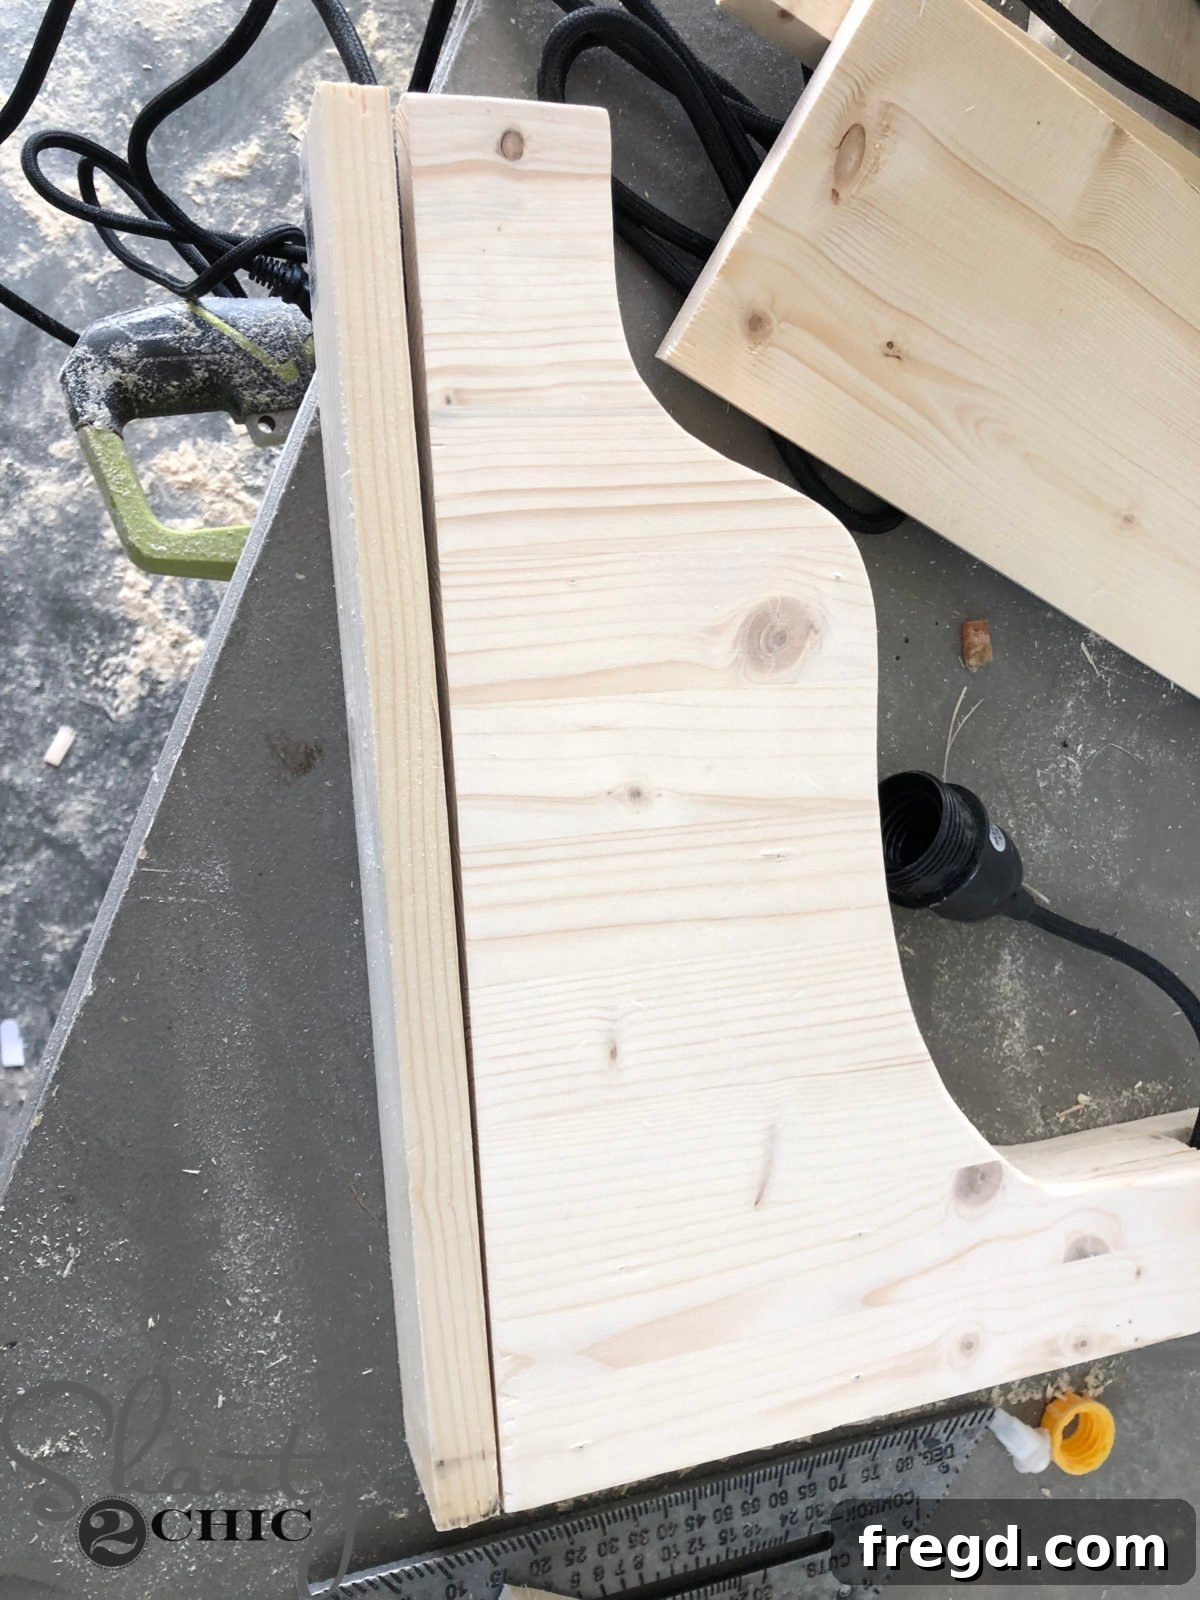
To give the corbel sconces a more finished and substantial look, the next step involved adding decorative trim pieces. I meticulously measured and cut the back, cleat, and side trim pieces to their precise dimensions, ensuring they would perfectly frame the corbel body. This stage requires careful measurement to achieve tight, clean joints that will enhance the overall aesthetic of the sconce. The back cleat, though not permanently attached at this point, plays a crucial role as a spacer and will later be vital for mounting the corbel to the wall. The addition of these trim elements transforms the raw wooden structure into a refined, elegant fixture, ready to complement the sophisticated design of the master bedroom. Accuracy in cutting these pieces is paramount for a seamless and professional final appearance.
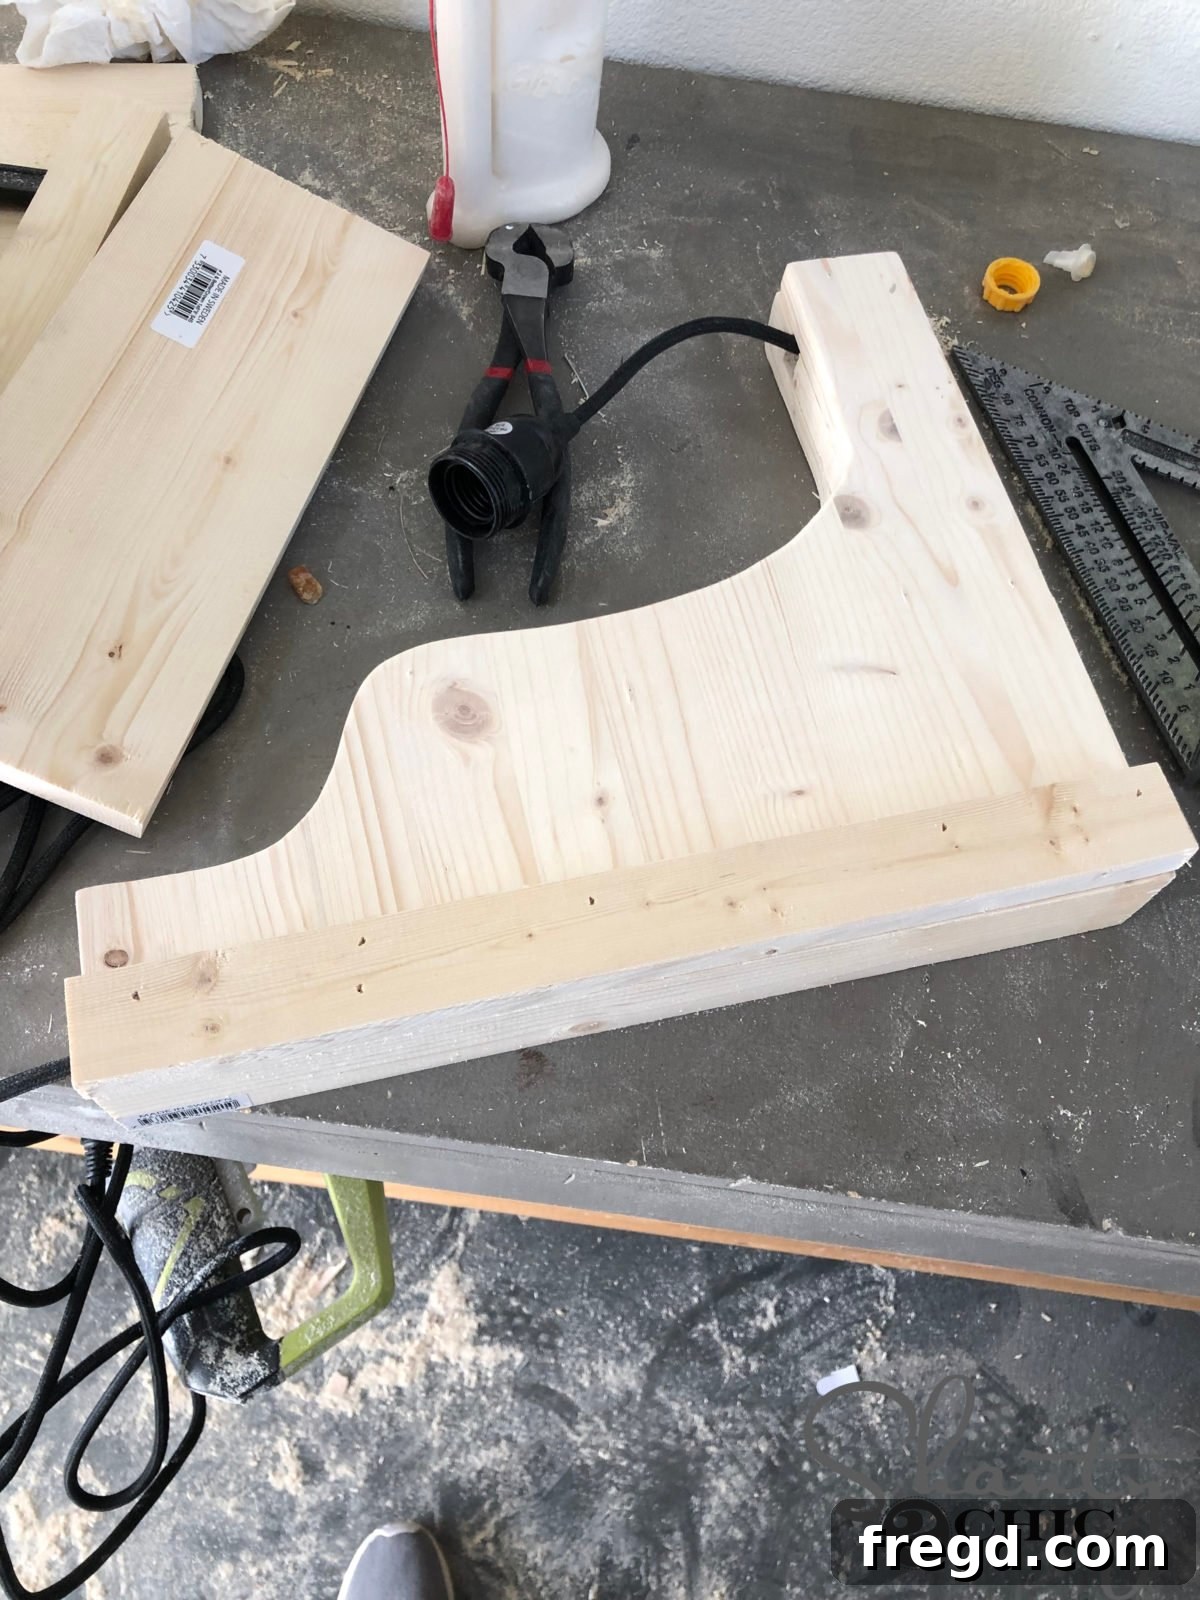
Continuing the trim installation, I then focused on attaching the 1×2 side trim pieces. Crucially, I used the back cleat as a temporary spacer to ensure correct positioning and depth. With wood glue applied for a strong bond, I secured the side trim pieces with 1 1/4″ brad nails. It’s essential that the side trim sits perfectly flush with the back of the cleat, as this alignment will ensure a smooth, gap-free installation against the wall later on. A vital detail to remember here: DO NOT ATTACH THE BACK CLEAT PERMANENTLY at this stage. It remains a separate component for mounting purposes. This method creates a recessed channel for the cleat to slide into, making the final wall hanging process robust and clean. The meticulous attachment of these side trims begins to define the sconce’s final form, adding visual weight and elegance.
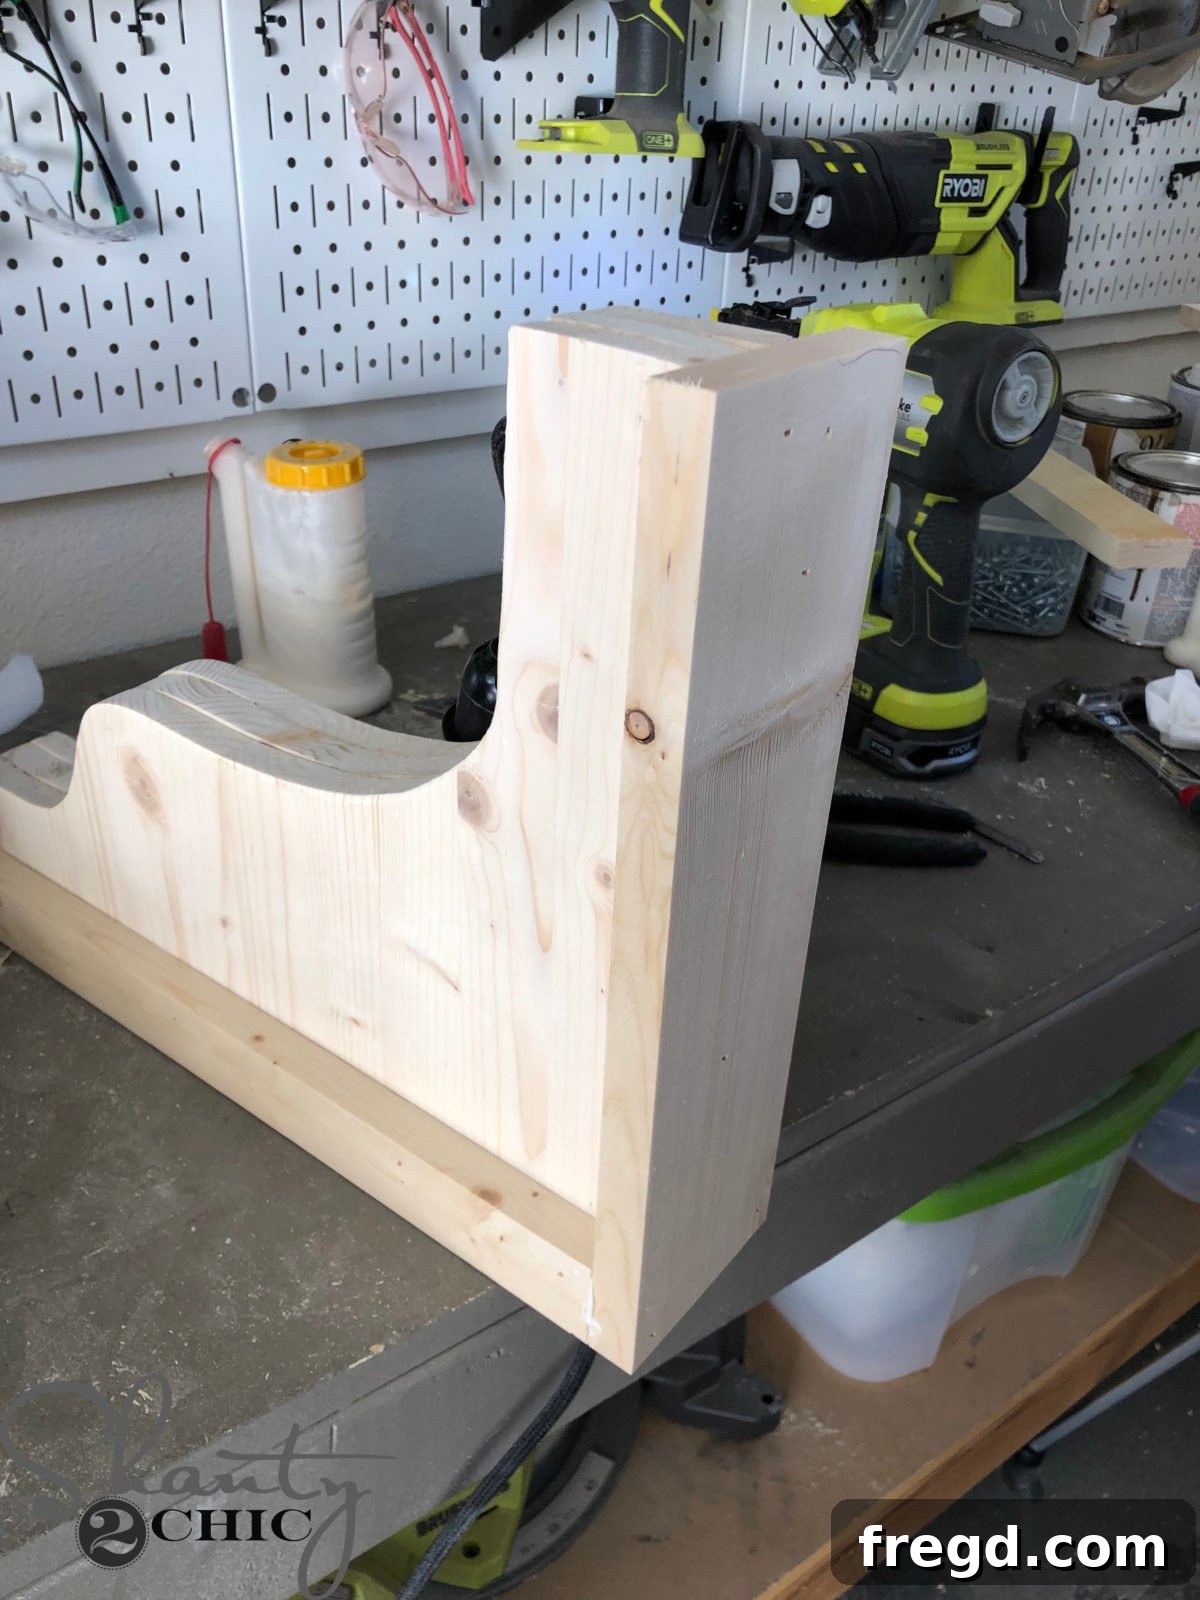
The final step in constructing the corbel sconce involved adding the top trim piece, which elegantly caps off the structure. After carefully measuring and cutting the top trim to the exact required size, I positioned it atop the corbel. Applying wood glue for a lasting bond, I then secured it with 1 1/4″ brad nails. A critical consideration at this point is the placement of your nails: ensure they are driven into the outer corbels and the side trim pieces, deliberately avoiding the internal cord channel. This precaution prevents any risk of puncturing the electrical cord, maintaining both safety and functionality. With the top trim in place, the corbel sconce is structurally complete, boasting a refined, custom-built appearance that perfectly combines form and function, ready for its smart lighting integration.
Effortlessly Hanging the Corbel Sconces on the Wall
With the corbel sconces meticulously crafted, the final stage involved securely mounting them to the master bedroom wall. This process, designed for both stability and ease, ensures the sconces become a permanent and beautiful fixture in the room.
Step 1 – Attaching the Cleat to the Wall
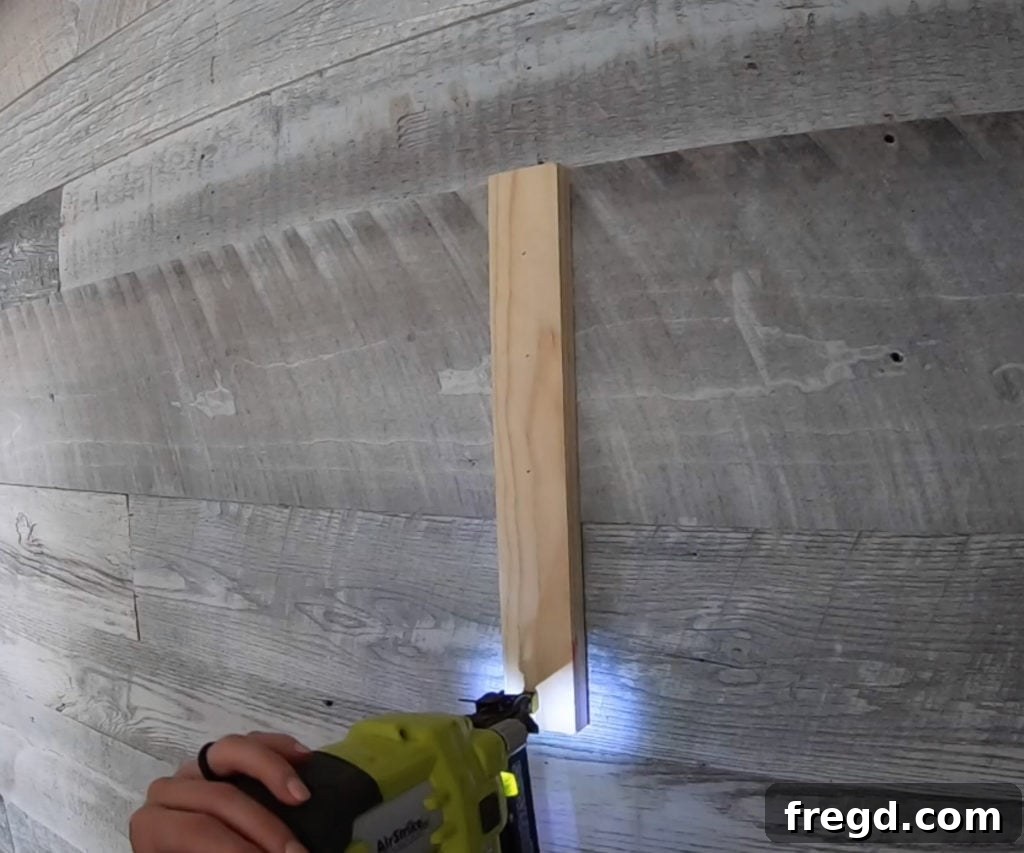
Due to our intentional design choice to plank the master bedroom wall where the corbels would be installed, our method for attaching the cleats was straightforward yet secure. We utilized 2″ brad nails to firmly fasten the cleats directly into the planking. The solid wood planks provided an excellent surface for secure attachment, negating the need for more complex mounting hardware. However, it’s crucial to adapt your mounting strategy based on your wall type. If you were attaching these corbels directly to standard drywall, the approach would differ significantly. In such a scenario, we would strongly recommend using appropriate wall anchors to ensure the cleat is robustly secured. Wall anchors provide the necessary support in gypsum board, preventing the sconce from pulling away or becoming unstable over time. Always select the right fastening method for your wall material to guarantee a safe and lasting installation.
Step 2 – Securing the Corbel to the Cleat
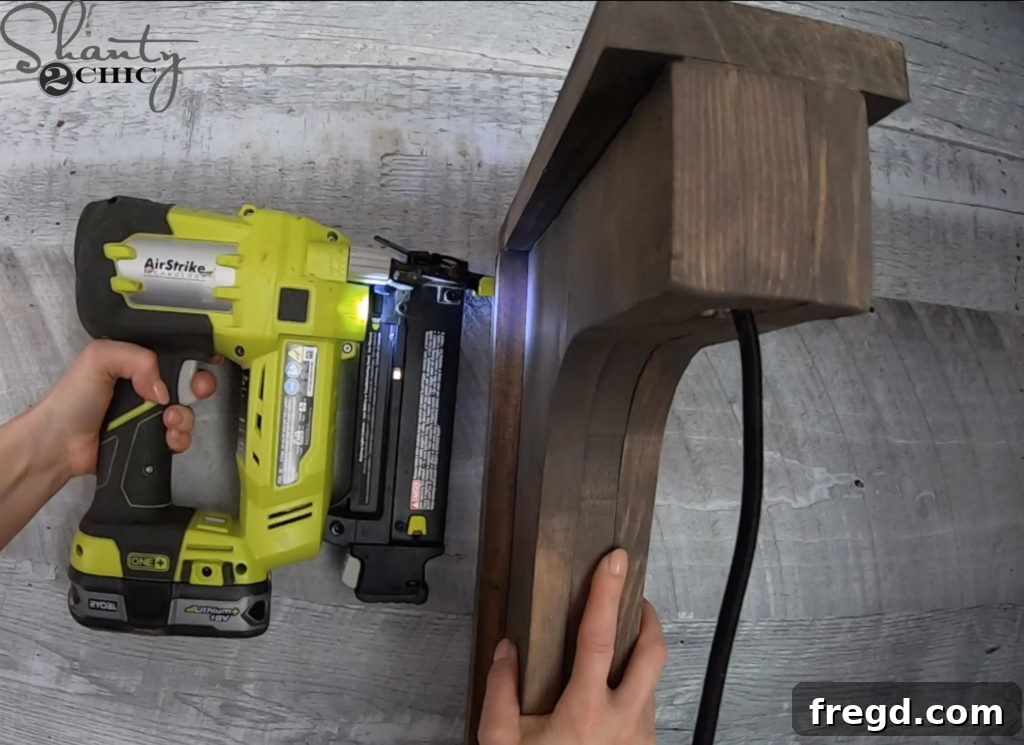
Once the cleat was firmly attached to the wall, serving as our anchor point, the next step was to integrate the finished corbel sconce. We carefully slid the corbel over the exposed cleat, aligning it perfectly so the cleat fit snugly into the recessed channel we created earlier. This design ensures a strong, hidden connection. With the corbel in its correct position, we then secured it by driving 1 1/4″ brad nails from the side trim of the corbel directly into the cleat. This fastening method creates a robust bond between the sconce and the wall, ensuring it is stable and flush. The brad nails provide ample strength without being overly visible, maintaining the clean lines of our custom design. This step truly brings the entire project together, transforming individual components into a cohesive and functional piece of decor.
Step 3 – Activating Smart Lighting with Lutron Lamp Dimming Smart Plug
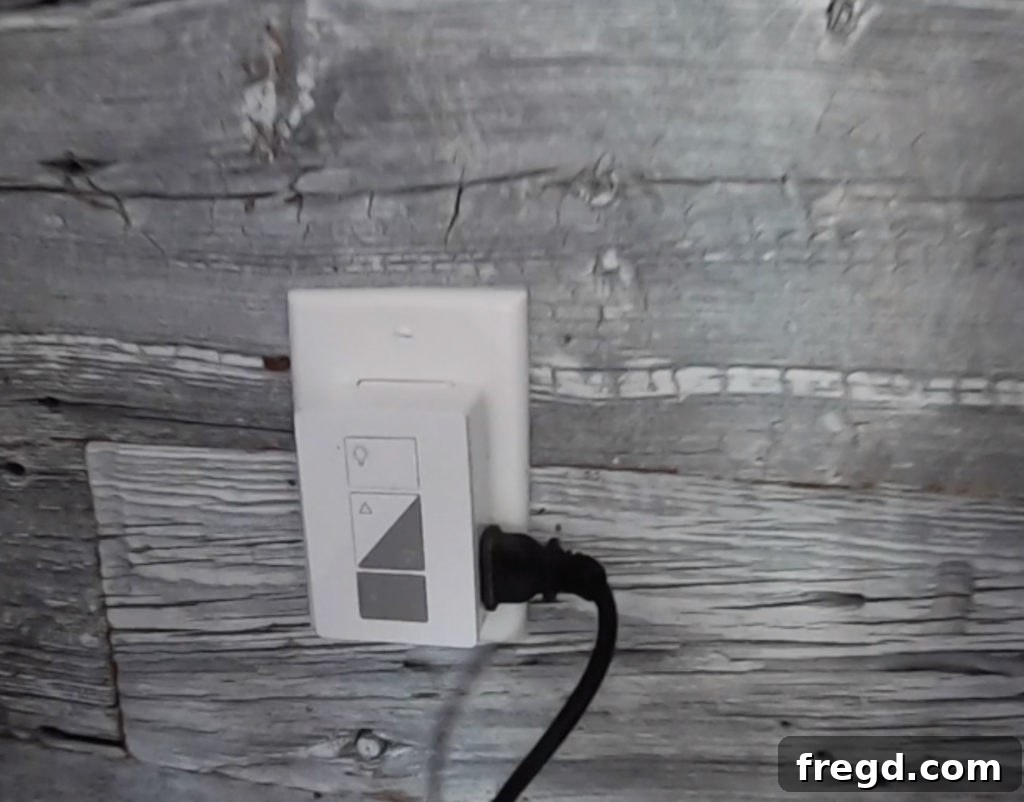
The final and most exhilarating step in this project was the integration of smart home technology, bringing our custom corbel sconces to life with modern control. We simply plugged the Lutron Lamp Dimming Smart Plug into the wall outlet. Following this, we took the lamp’s cord, which was discreetly channeled within the corbel, and plugged it directly into the smart plug. This process was incredibly straightforward and instantaneous. Now, with the Caséta system fully engaged, we possess effortless control over our beautiful new corbel lights. We can activate, deactivate, or precisely dim them using either intuitive voice commands through our smart home assistants or with a few taps on our smartphones via the Lutron app. This seamless blend of DIY craftsmanship and intelligent technology truly makes for a bright idea!
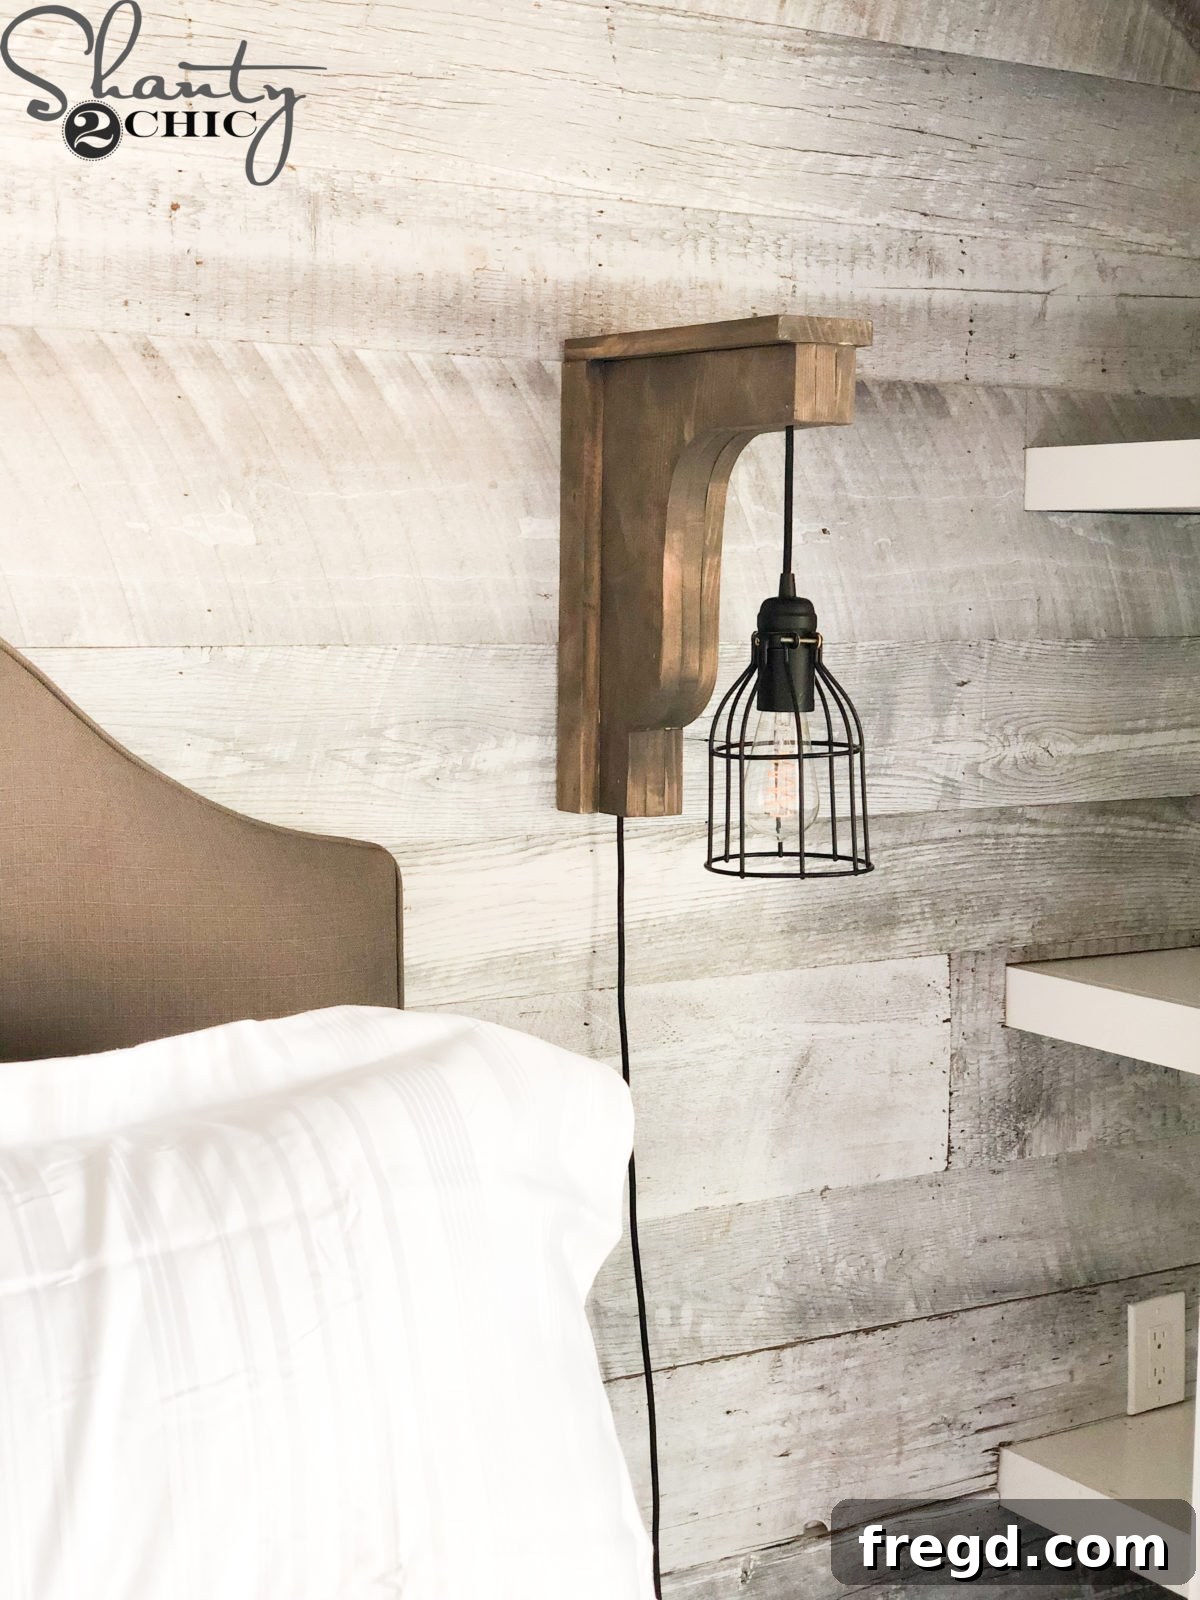
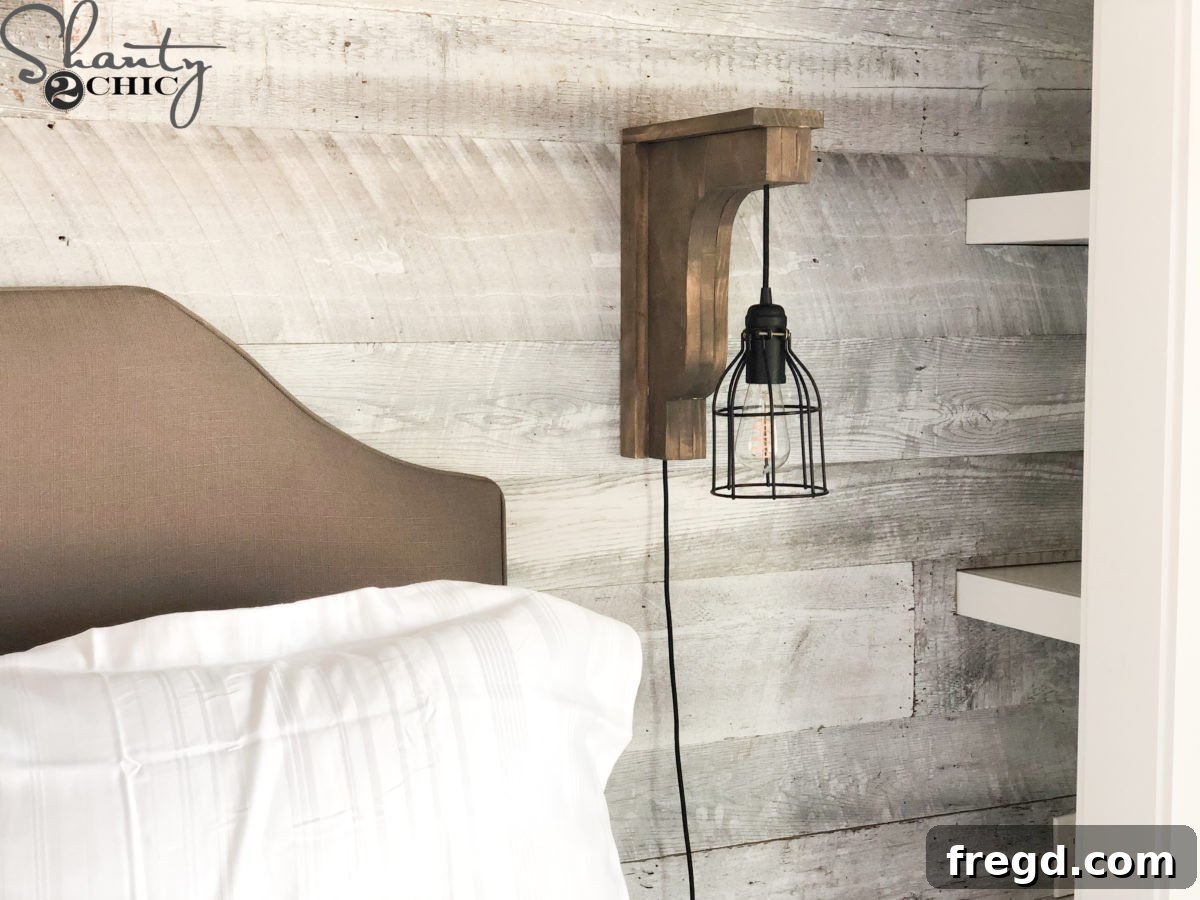
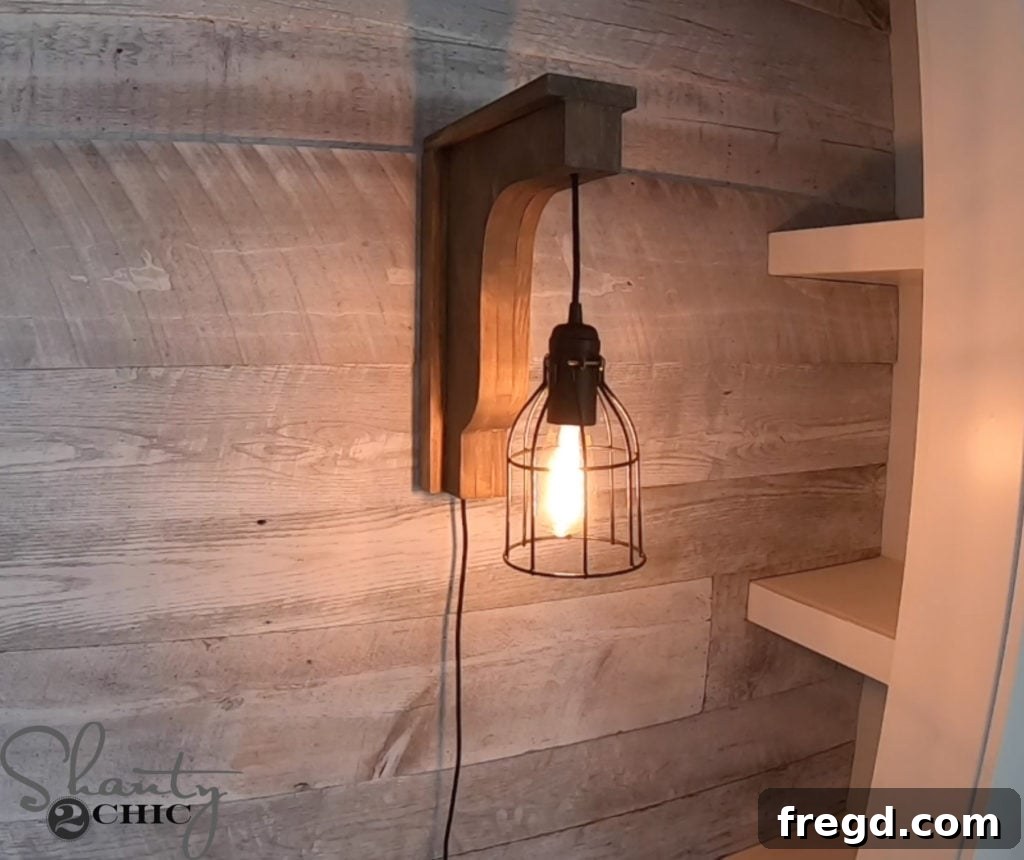
Indeed, that truly is a bright idea, combining bespoke design with cutting-edge convenience! We are incredibly proud of how these Corbel Light Sconces, powered by Caséta by Lutron, have transformed the master bedroom in our Shanty Flip House. The ability to craft custom lighting fixtures and then seamlessly integrate them into a smart home ecosystem exemplifies the potential for modern home renovation projects.
We highly encourage you to explore the extensive range of innovative products offered by Caséta by Lutron! Whether you’re looking to upgrade existing lights, add smart control to lamps, or completely automate your home’s ambiance, Caséta provides user-friendly, reliable solutions that make having smart lighting in your home not only easy but also incredibly enjoyable and rewarding. Discover how simple it is to elevate your living experience with smart lighting today!