
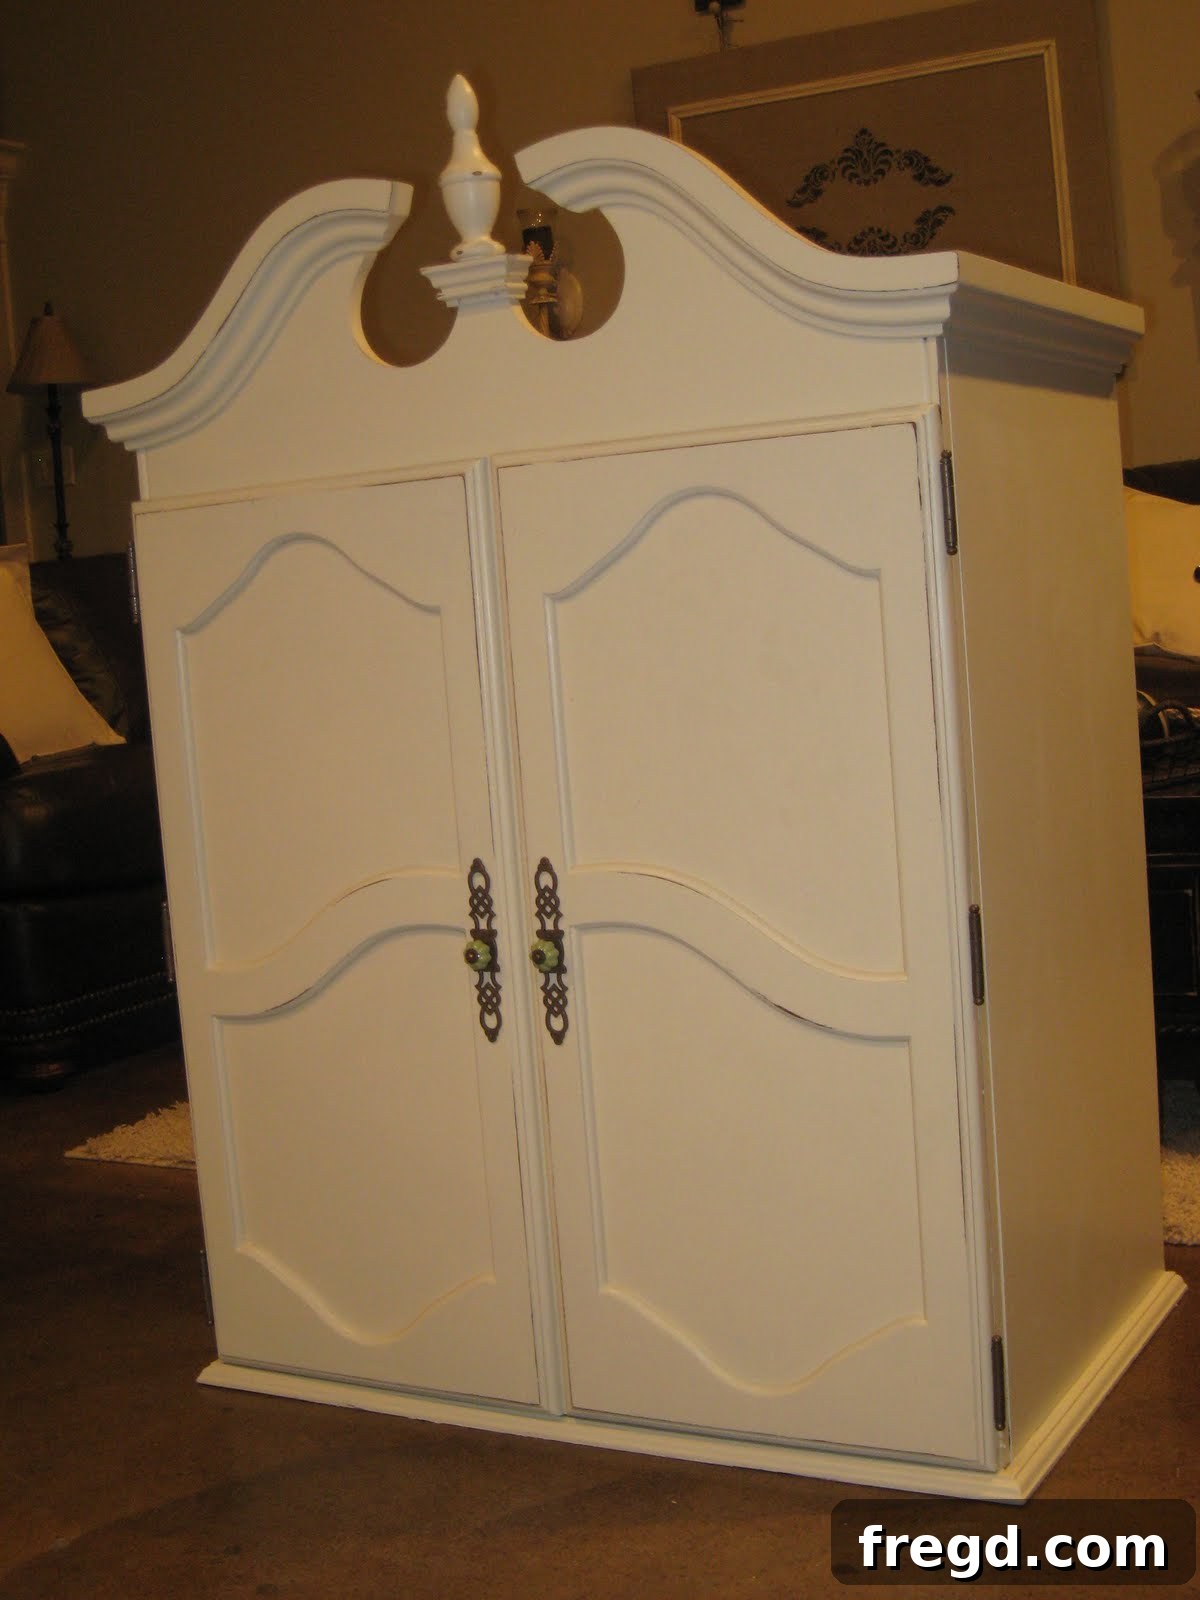
From Dated to Dazzling: Reviving a Highboy Armoire with a Shabby Chic Makeover
Every DIY enthusiast knows those projects that test your patience and push your creativity to its limits. This highboy armoire transformation was precisely one of those. It felt like a constant battle against unexpected challenges, yet the ultimate outcome was so incredibly rewarding that every moment of struggle was worth it. Today, I’m thrilled to unveil the stunning top half of this project, offering a glimpse into the dramatic change a little paint and vision can achieve!
The Original Charm: A Cherry Wood Highboy Armoire
Typically, this is where I would proudly showcase the “before” pictures, allowing you to fully appreciate the dramatic transformation. However, in a moment of oversight that still frustrates me, I simply cannot locate any original photographs! It leads me to believe I might have been so eager to start this vintage furniture restoration project that I completely forgot to document its initial state. My apologies for that!
Nevertheless, let me paint a vivid picture for you. This piece began its journey as a classic cherry wood highboy armoire. It boasted the rich, warm tones characteristic of cherry, a beautiful wood that often speaks of tradition and timeless elegance. The armoire was accessorized with standard brass hardware, which, while functional, contributed to its somewhat dated aesthetic. Structurally, it was in excellent condition – a solid, well-built piece of furniture with plenty of life left. It simply needed a fresh perspective, a touch of modern charm, and a complete aesthetic overhaul to bring it into the contemporary home – what I affectionately call “shantying it up a bit!” The potential for a DIY furniture makeover was undeniable, promising to turn a good piece into a truly great one.
Prepping for Perfection: Hardware Renovation
The first crucial step in any successful furniture renovation is often addressing the hardware. The original brass hardware, while sturdy, no longer fit the vision I had for this piece. Its shiny, traditional finish would clash with the softer, more rustic look I aimed to achieve. Therefore, the decision was made to remove all the brass hardware, preparing it for a makeover of its own.
Removing hardware is usually a straightforward process, but it’s essential to be gentle to avoid stripping screws or damaging the wood. Once removed, the hardware was thoroughly cleaned to remove any grime, polish, or old lacquer that might prevent paint adhesion. A clean surface is paramount for any successful paint job. After cleaning, I opted for a transformation using Rust-Oleum Hammered Brown Spray Paint. This choice was deliberate: the hammered finish adds a textured, industrial-chic appeal, while the brown tone provides a sophisticated contrast to the light main body of the armoire. Applying spray paint to hardware requires careful technique – several light, even coats are always better than one thick coat, preventing drips and ensuring full coverage. It’s truly amazing how a simple change in furniture hardware update can instantly elevate the entire piece.
The selection of Rust-Oleum Hammered Brown Spray Paint was a game-changer. This specific paint not only provides excellent durability but also creates a unique, textured look that mimics hand-forged metal. It’s perfect for adding a touch of rustic elegance to updated hardware. This simple step breathed new life into the old brass, making it a stylish complement to the impending main body color. This image here is the only “before” reference I have for the hardware itself, giving you a hint of its former appearance, even if the armoire’s original look remains a mystery!
The Main Event: Painting the Armoire Body Off-White
With the hardware set aside to dry, it was time to focus on the main event: transforming the cherry wood body. My initial plan was to spray paint the entire piece, envisioning a quick and seamless application. However, as is often the case with DIY projects, plans sometimes hit unexpected snags. This particular armoire simply did not take to spray paint well. Despite proper surface preparation, the paint struggled to adhere evenly, resulting in an undesirable patchy finish. This was certainly another “bump in the road,” reminding me that flexibility is key in any renovation endeavor!
Undeterred, I pivoted to a brush-on application. I chose Olympic Off White satin paint, a decision that ultimately proved to be perfect for achieving the desired shabby chic aesthetic. Before applying the paint, I ensured the armoire was clean and lightly scuff-sanded to give the paint something to grip onto. The “Off White” shade provides a soft, elegant base that brightens any room without being stark, while the “satin” finish offers a subtle sheen that is both durable and easy to clean. Applying multiple thin coats with a high-quality brush not only ensures a smooth, professional-looking finish but also allows for better adhesion and prevents drips. This careful application process, although more time-consuming than spray painting, paid off immensely, creating a beautifully uniform and inviting surface.
While I lack the “before” picture of my specific armoire, you can imagine it looked quite similar to the piece linked below in terms of its general structure and original wood tone, albeit my armoire featured elegant doors on the front, adding to its grand presence. This image serves as a good proxy for understanding the starting point of many similar vintage armoire restoration projects.
Adding the Finishing Touches: Hardware Reinstallation and New Knobs
Once the multiple coats of Olympic Off White satin paint had thoroughly dried and cured – a critical step often overlooked but essential for durability – it was time to reintroduce the hardware. The newly painted hammered brown hardware looked magnificent against the crisp off-white finish, offering a sophisticated contrast and enhancing the overall aesthetic. This combination of classic and subtly industrial elements perfectly encapsulates the desired “shabby chic” vibe.
To further personalize the piece and add a touch of whimsy, I embarked on a hunt for new knobs for the door pulls. My search led me to Hobby Lobby, a treasure trove for unique and charming decor elements. I was delighted to discover a set of “really cute knobs” that perfectly complemented the fresh look of the armoire. Choosing the right knobs or pulls can dramatically alter the perception of a piece of furniture, acting like jewelry that completes an outfit. These new additions not only serve a functional purpose but also contribute significantly to the aesthetic appeal, solidifying the armoire’s transformation from dated to truly dazzling. This simple act of upgrading furniture pulls can make a world of difference in a home decor DIY project.
The Art of Subtle Distressing: Embracing a Clean Shabby Chic
With the paint dry and new hardware installed, the armoire was already looking fantastic. However, to truly embody the “shabby chic” spirit without venturing into overly rustic territory, I decided on a technique of subtle distressing. Many painted furniture projects involve heavy distressing or glazing for an aged look, but for this piece, I envisioned a cleaner, softer aesthetic. This meant passing on the glazing – a decision that might shock some seasoned DIYers, but one that perfectly aligned with my vision for a more refined finish.
To achieve this delicate effect, I lightly sanded the edges of the armoire. My tool of choice was a 3M sanding block paired with 80-grit sandpaper. The coarse grit allowed for efficient removal of paint on the edges, while the sanding block provided a comfortable grip and even pressure, crucial for controlled distressing. The technique involves gently rubbing the sandpaper along the raised edges and corners where natural wear would typically occur. This process subtly revealed hints of the underlying cherry wood and the initial brown primer/hardware paint in some areas, creating a soft, worn appearance without looking artificial. The result was exactly what I had hoped for: a sophisticated, gently aged look that retains the piece’s elegance while adding character and depth. This distressing furniture technique is fantastic for achieving a bespoke feel.
A Temporary Home and Anticipated Grand Reveal
For the moment, this beautifully transformed top half of the armoire has found a temporary resting place in my living room. The original plan was for it to reside upstairs, completing a unified look in a different space. However, life, as it often does, threw another unexpected curveball our way. My husband recently sustained a back injury, which has understandably put a pause on any heavy lifting or furniture moving. So, for now, this gorgeous piece graces our living area, serving as a constant reminder of progress and perseverance, even if it means I’m navigating around it a bit more than usual!
Despite the minor logistical delays, my excitement for this project remains unwavering. I am absolutely in love with how the top half has turned out – it’s a true testament to the power of a creative furniture painting project. I simply cannot wait to share the transformation of the bottom half with all of you, and then, the ultimate reveal: the fully assembled, complete armoire! I’ll soon be showcasing the entire piece, discussing its final placement, and demonstrating how a highboy armoire can become a stunning focal point in any room. In the meantime, please enjoy these detailed views of the elegant top half. It’s a sneak peek at the potential an old piece of furniture holds for a budget-friendly home decor upgrade.
Thank you so much for joining me on this incredible journey. Stay tuned for the complete reveal of this magnificent highboy armoire!
~Whitney