
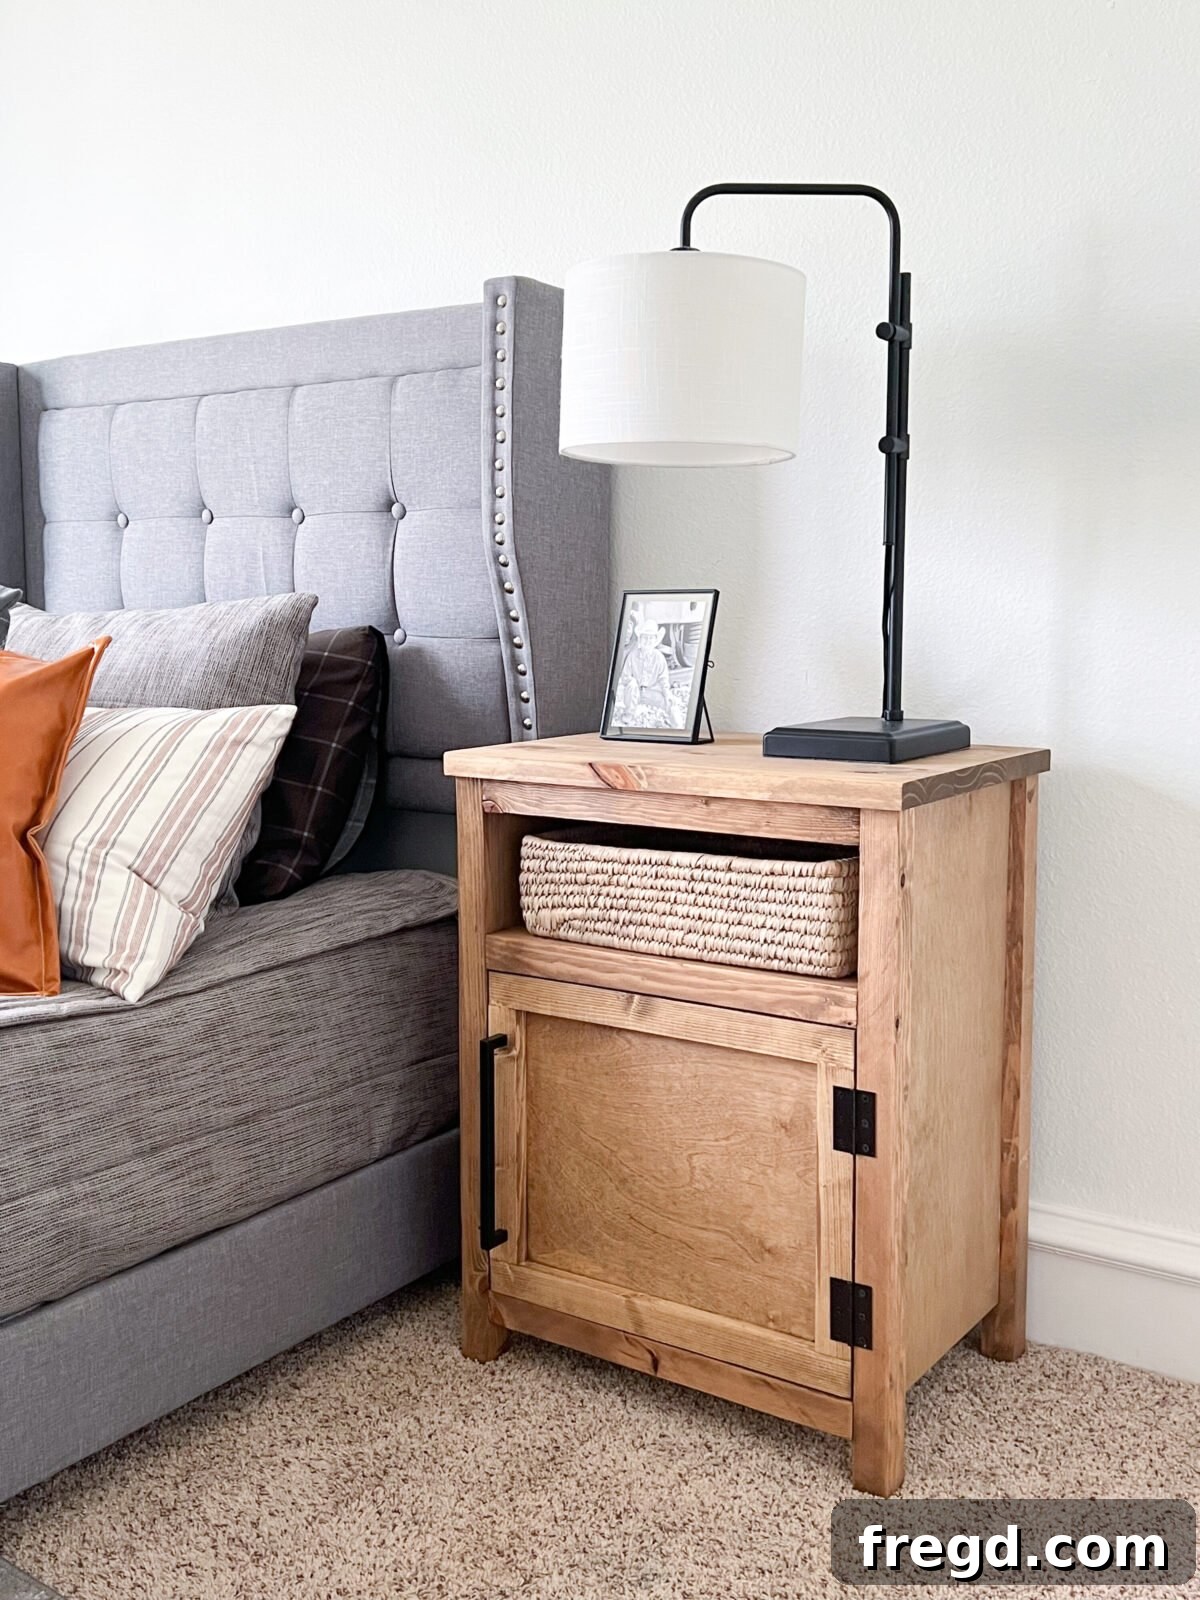
Build Your Own Modern Farmhouse Nightstand: Free Plans & Video Tutorial
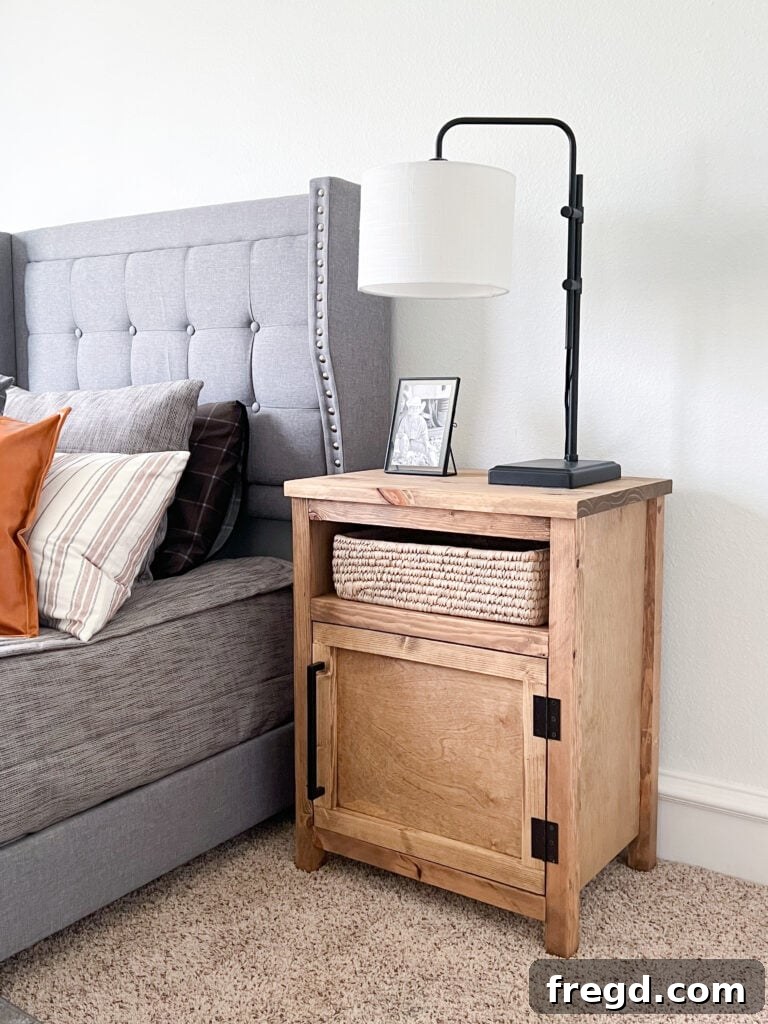
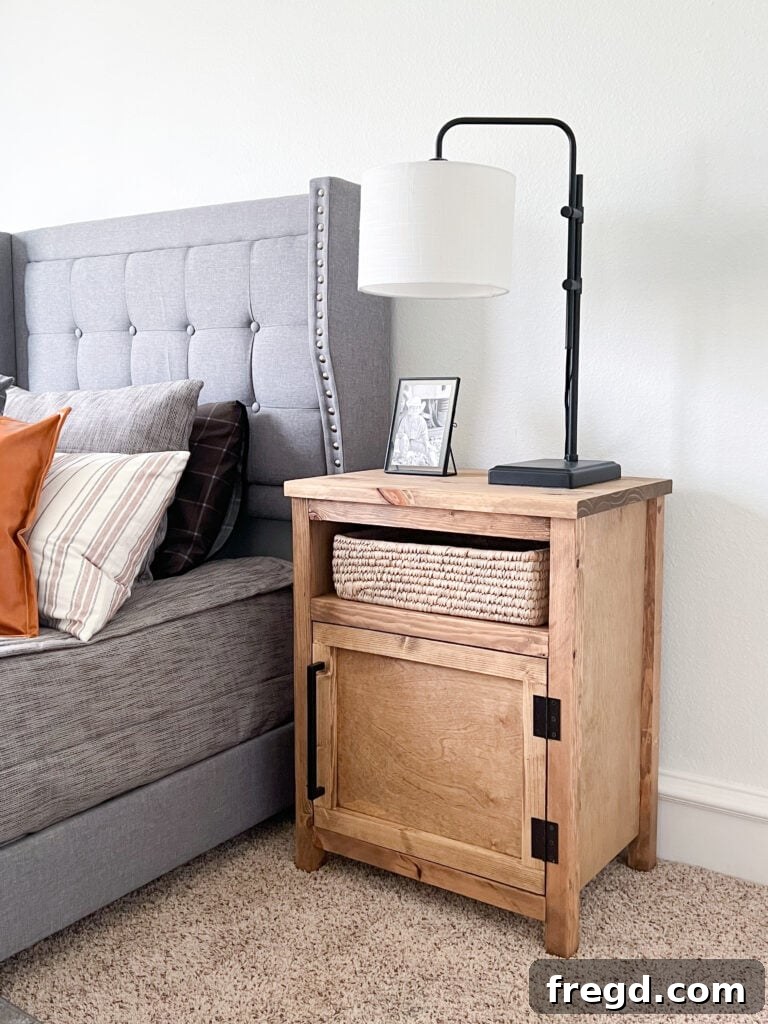
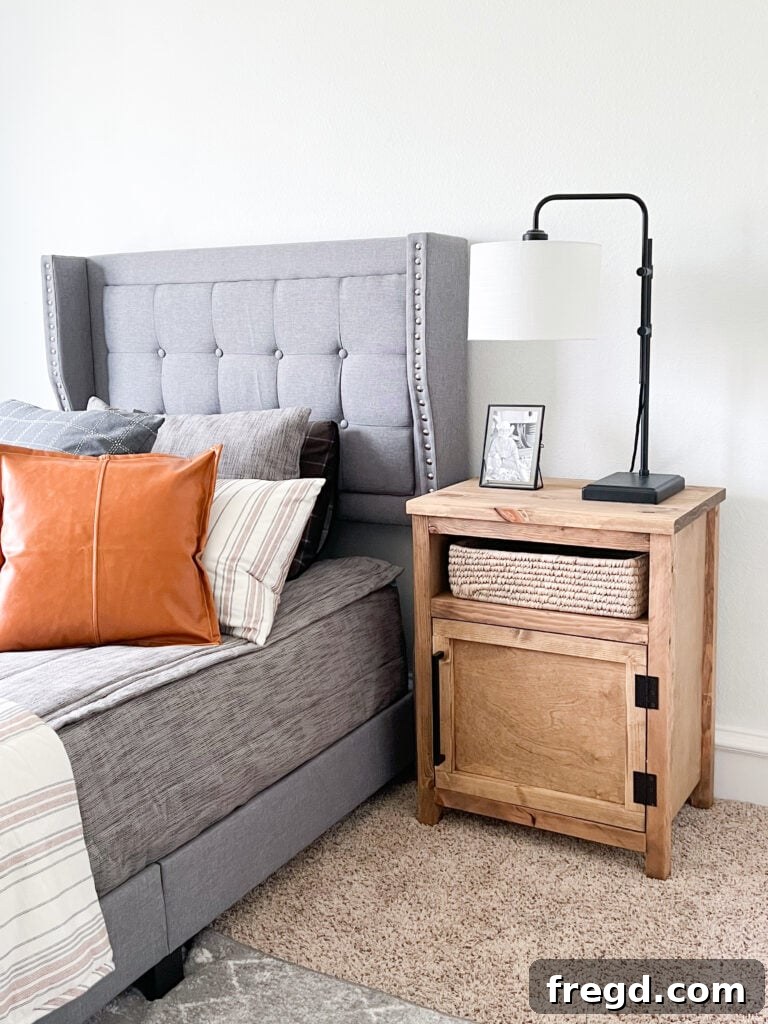
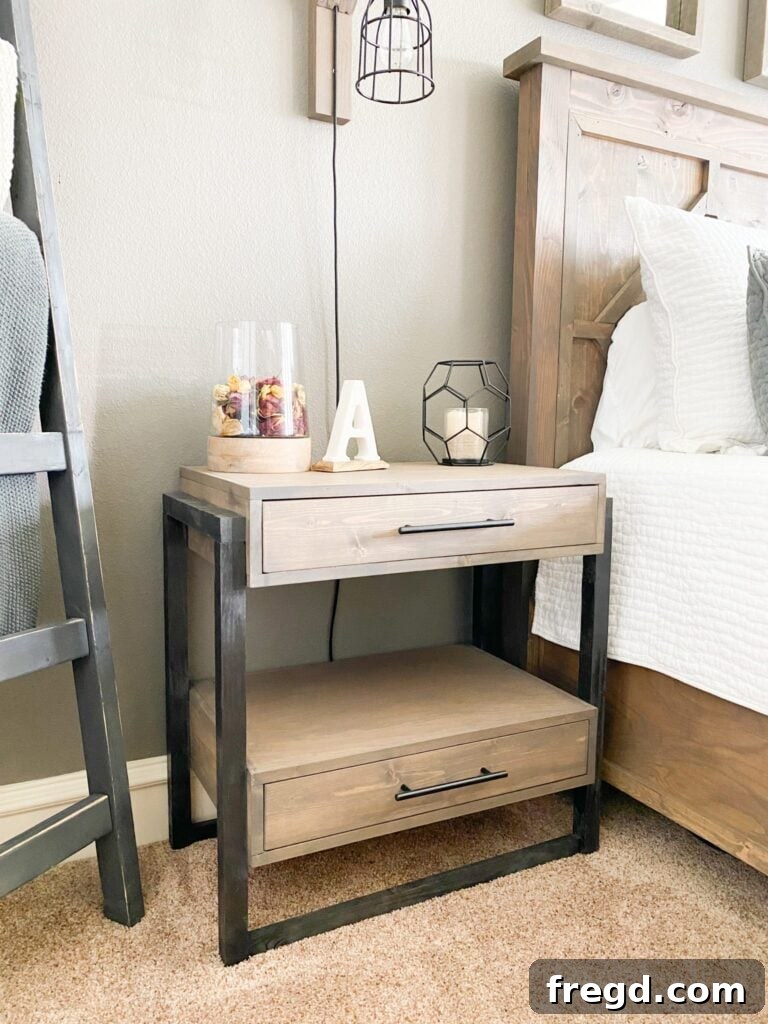
Welcome, DIY enthusiasts and home decor lovers! Are you ready to add a touch of rustic charm and modern elegance to your bedroom without breaking the bank? Whitney and Ash from Shanty2chic had a fantastic time crafting these custom Modern Farmhouse nightstands for Whitney’s son, Brooks. The goal was simple: design an affordable yet stylish piece of furniture, especially challenging with today’s fluctuating wood prices. The result? A stunning nightstand that perfectly blends farmhouse warmth with contemporary lines, proving that high style doesn’t have to come with a high price tag. We absolutely adore how they turned out, and more importantly, Brooks loves them too! This project is perfect for intermediate woodworkers but also accessible for ambitious beginners looking to expand their skills.
Below, you’ll find everything you need to embark on this rewarding DIY journey: a detailed material and tool list, step-by-step instructions, essential tips for a professional finish, and of course, the free downloadable plans and an insightful video tutorial. Get ready to transform your space with a personalized piece that truly reflects your style!
Project Overview: Your Modern Farmhouse Nightstand
This DIY Modern Farmhouse Nightstand project offers a perfect blend of style, functionality, and affordability. Designed with an open shelf and a closed cabinet, it provides versatile storage for books, devices, and personal items, keeping your bedside clutter-free. The clean lines combined with the rustic wood finish embody the popular modern farmhouse aesthetic, making it a standout piece in any bedroom. You’ll primarily work with readily available plywood and pine, utilizing pocket hole joinery for strong, hidden connections. This method not only simplifies the construction process but also results in a professional-looking finish.
Watch the Build: DIY Nightstand Video Tutorial
Before diving into the detailed steps and plans, we highly recommend watching our comprehensive DIY YouTube video. It provides invaluable visual guidance, allowing you to see each step in action, from cutting your lumber to final assembly. Watching the video will clarify techniques, offer helpful tips, and give you the confidence to tackle this project with ease.
Essential Tools & Materials List
To ensure a smooth and successful build, gathering all your necessary tools and materials beforehand is crucial. Here’s what you’ll need:
Key Tools:
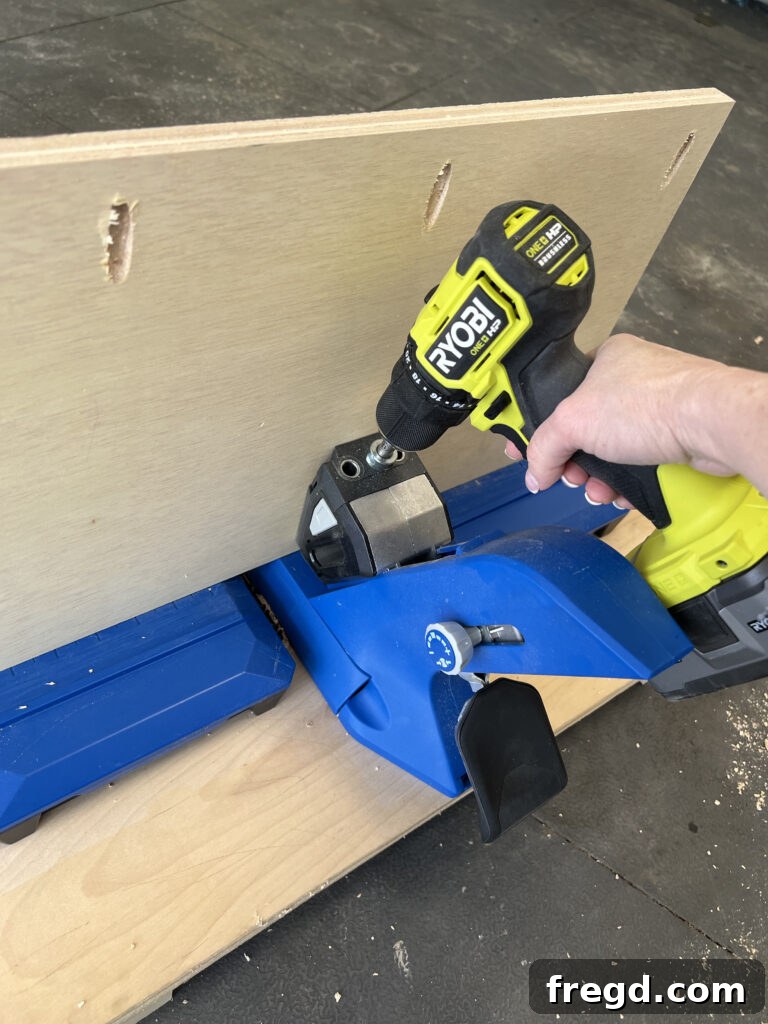
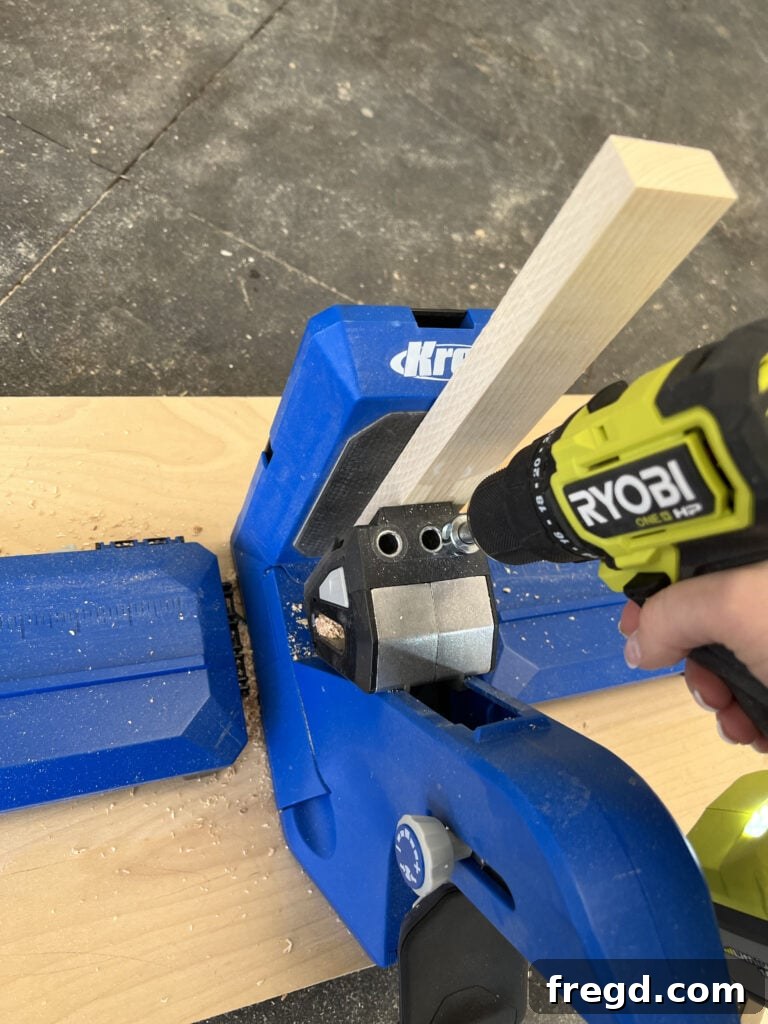
- Kreg Jig 720 PRO: This pocket hole jig is a game-changer for woodworking projects, making strong and invisible joints. We absolutely adore this model for its ease of use and precision. If you’re still using an older Kreg model, the 720 PRO is a fantastic upgrade worth considering.
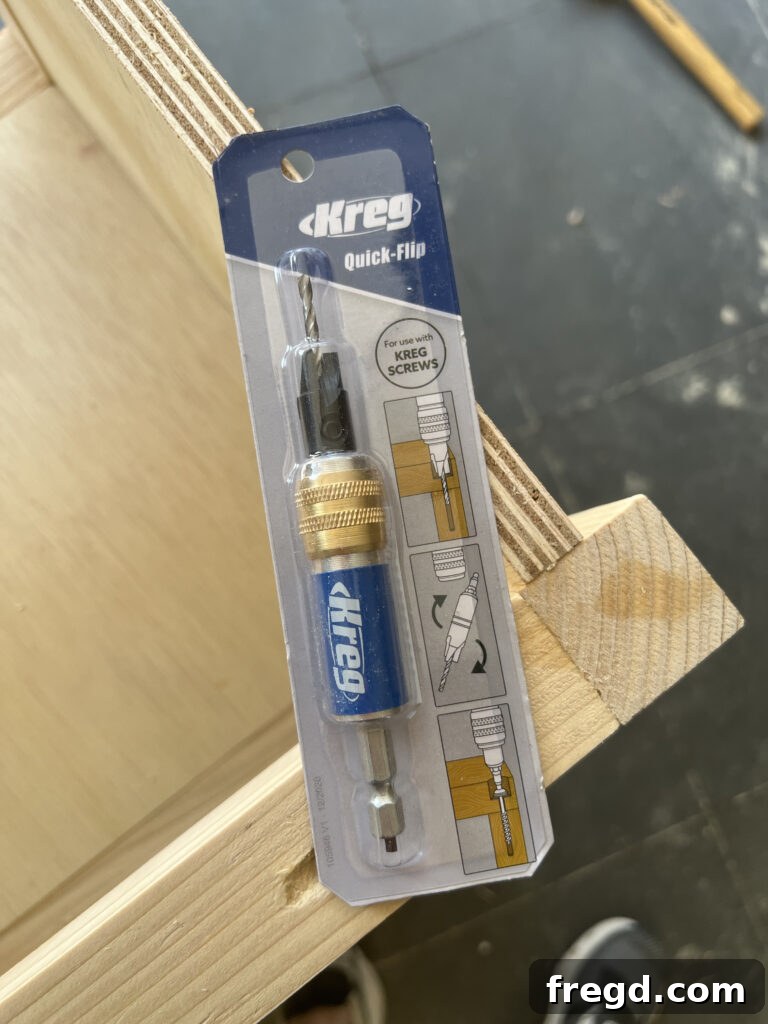
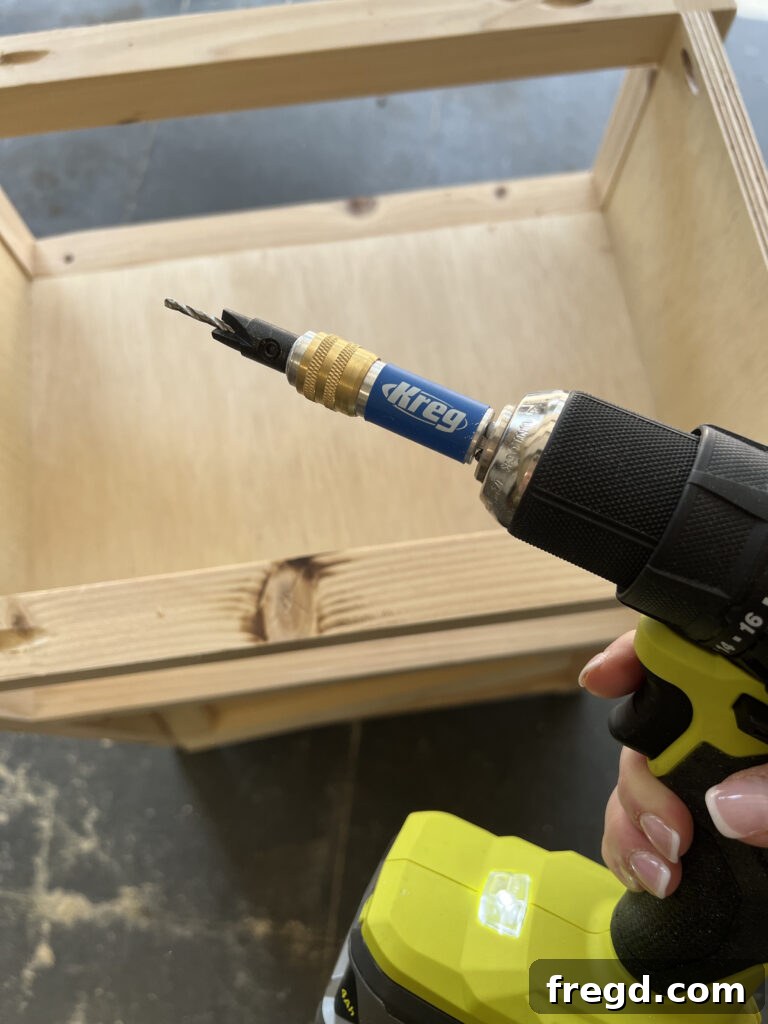
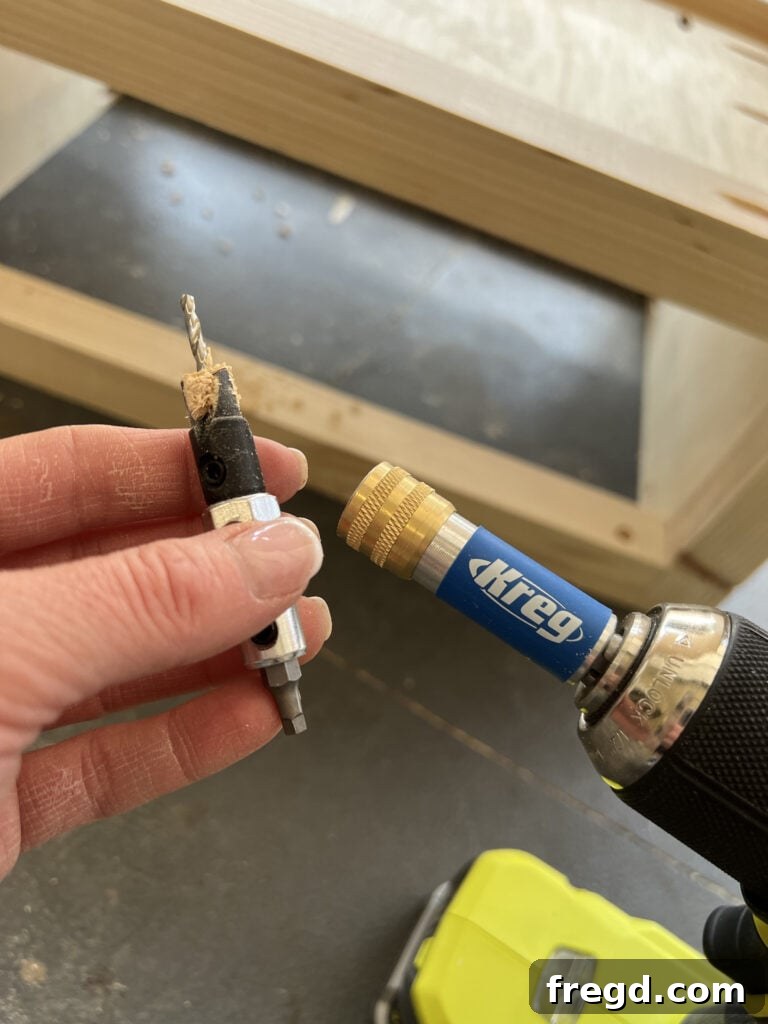
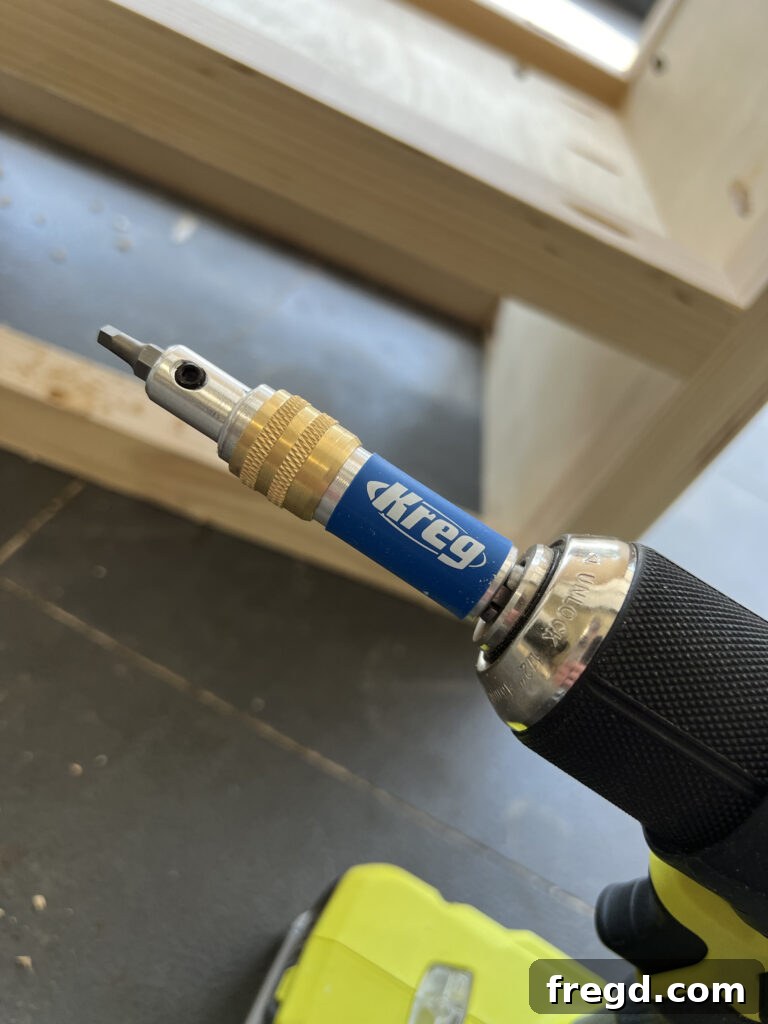
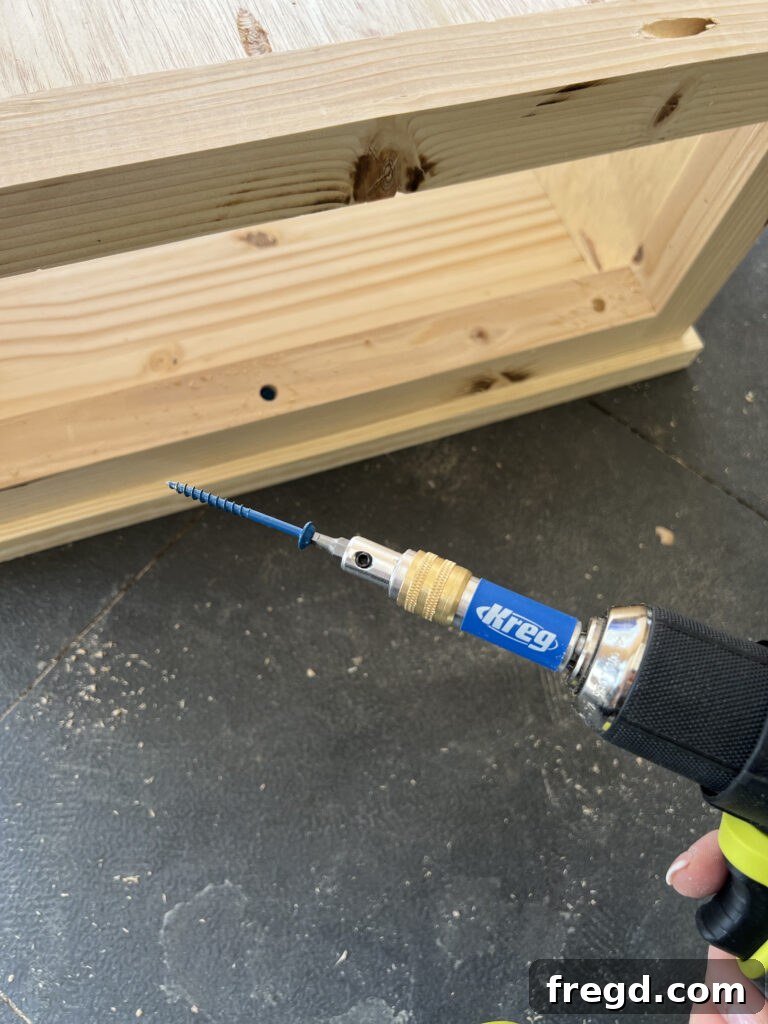
- Kreg Quick-Flip: A brilliant new tool from Kreg that allows you to quickly switch between drilling pilot holes and driving screws, ensuring perfectly counterbored screws for a professional finish.
- Circular Saw or Table Saw: For precise cuts on your plywood and solid wood.
- Drill/Driver: Essential for drilling pocket holes and driving screws.
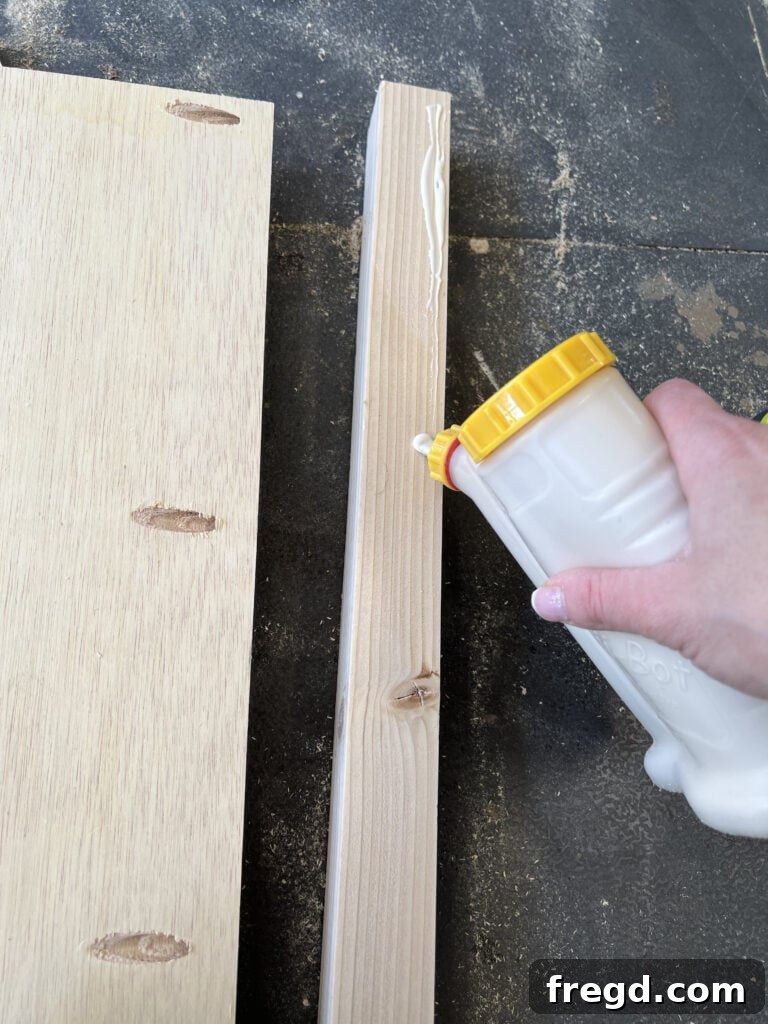
- Wood Glue: For reinforcing all your joints.
- Clamps: To hold pieces securely during assembly and while glue dries.
- Measuring Tape, Pencil, Speed Square: For accurate marking and measuring.
- Safety Glasses & Hearing Protection: Always prioritize safety!
- Staple Gun with 3/4″ Staples: For attaching the back panel and door panel.
- Sandpaper or Orbital Sander: For smoothing surfaces before finishing.
Materials:
- 3/4” Hardwood Plywood: Used for the nightstand sides and shelves. Hardwood plywood offers superior strength and a smoother finish compared to standard plywood.
- 2×2 Boards: For the legs and horizontal supports. (See cost-saving tip below for how to create these from 2x6s).
- 1” Laminated Pine Project Panel: For the nightstand top, chosen for its thickness and smooth surface.
- 1/4” Hardwood Plywood: For the back panel of the nightstand and the door panel.
- 1×2 Boards: For the door frame.
- 1.25” Pocket Hole Screws: For general assembly of plywood components.
- 1.5” Pocket Hole Screws: For attaching 2×2 horizontal supports.
- 2” Pocket Hole Screws: For securing the nightstand top.
- 2.5” Pocket Hole Screws: For specific structural connections with 2x2s.
- Hinges: For the cabinet door.
- Door Pulls: To complete the door functionality and aesthetic.
- Stain or Paint: Your choice for the final finish.
- Protective Top Coat (Optional): To seal and protect your finish.
Smart Savings: Ripping Your Own 2x2s
In today’s market, the cost of lumber can significantly impact your project budget. To help keep these nightstands as inexpensive as possible, we opted for a smart cost-saving technique: ripping our 2×2 boards from a single 2×6 board. This often proves more economical than purchasing pre-cut 2x2s separately. If you have access to a table saw, this is a straightforward process, though always remember to use proper safety precautions and push sticks. Alternatively, if you prefer convenience or do not have the necessary tools, you can certainly purchase the 2×2 boards ready-made. Always compare prices at your local lumber yard to determine the most cost-effective approach for your specific build.
Step-by-Step Construction Guide
Let’s get building! Follow these detailed steps to construct your beautiful Modern Farmhouse nightstand. Remember to always measure twice and cut once for the best results.
Step 1: Constructing the Side Panels and Legs
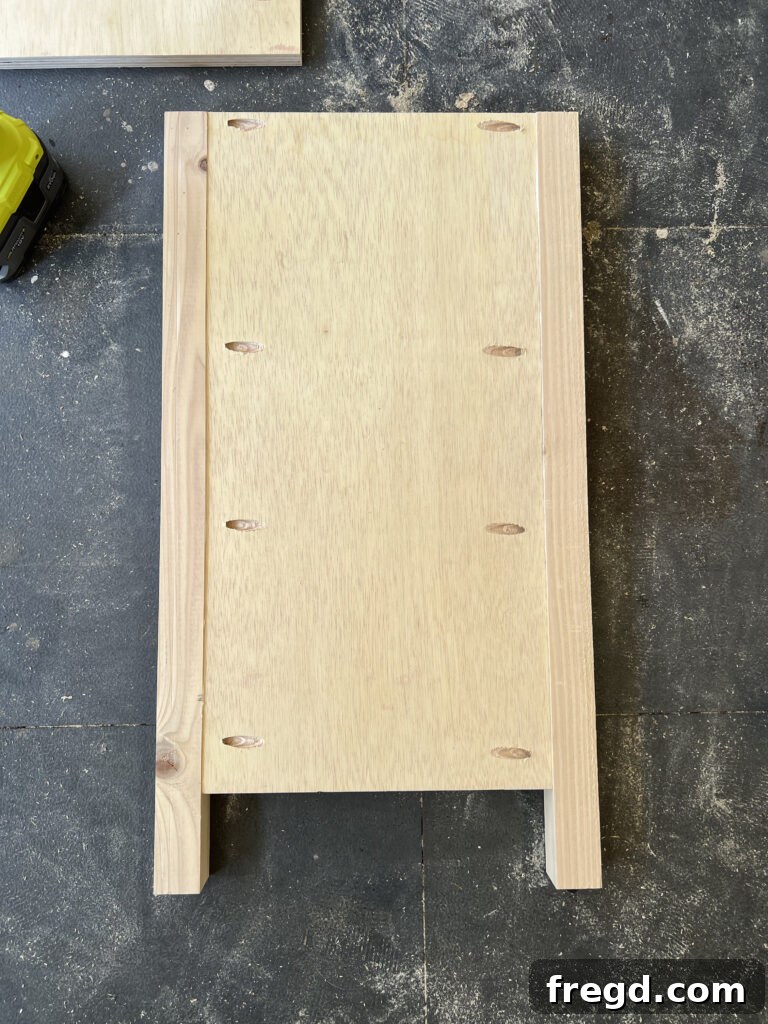
Begin by preparing the side panels of your nightstand. These are crafted from 3/4” hardwood plywood. Accurately cut each side panel to the dimensions specified in the free plans. Once cut, use your Kreg Jig 720 PRO to add 3/4” pocket holes along both long edges of each plywood side. The precision of the 720 PRO makes this task quick and easy, ensuring strong, concealed joints. It’s vital to leave approximately 7 inches of space between the uppermost pocket hole and the one below it. This strategic placement ensures that these pocket holes remain hidden once the nightstand assembly is complete, contributing to a clean, professional appearance.
Next, position your 2×2 legs. The top of each leg should be perfectly flush with the top edge of the plywood panels. Additionally, ensure that the inside edge of each plywood panel aligns flush with the inside edge of its corresponding leg. This precise alignment is crucial for the overall structural integrity and aesthetic consistency of your nightstand. Use wood glue and 1.25” pocket hole screws to firmly attach the legs to the plywood side panels. Clamp the pieces securely while the glue dries to prevent any shifting.
Step 2: Installing the Shelves
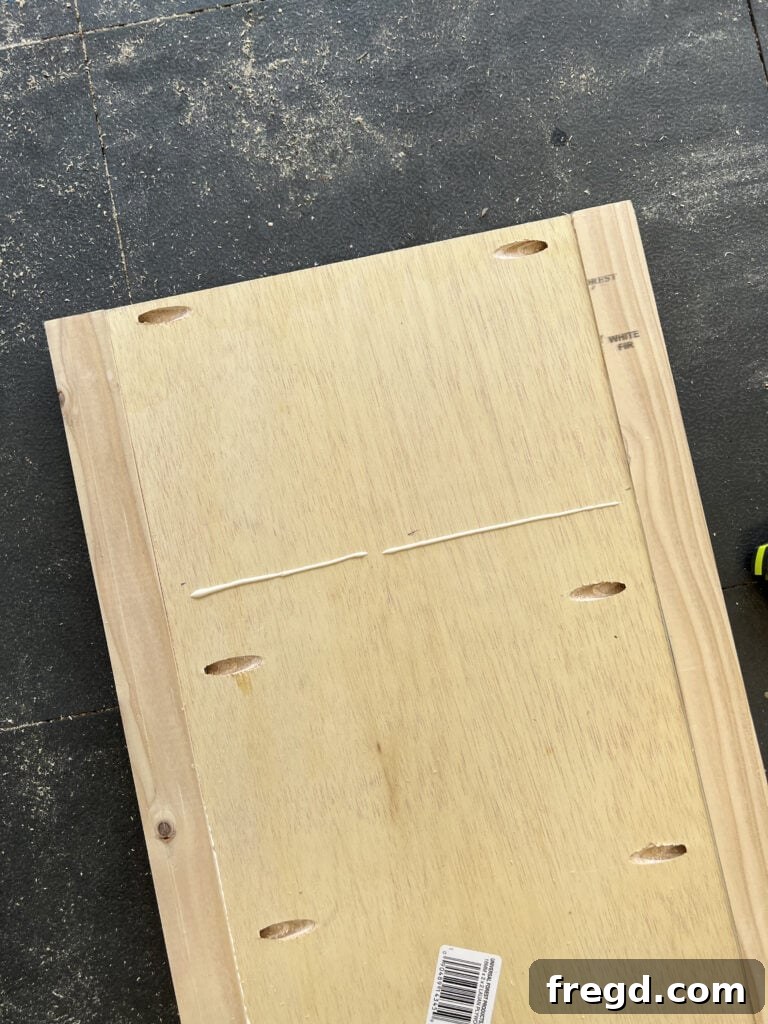
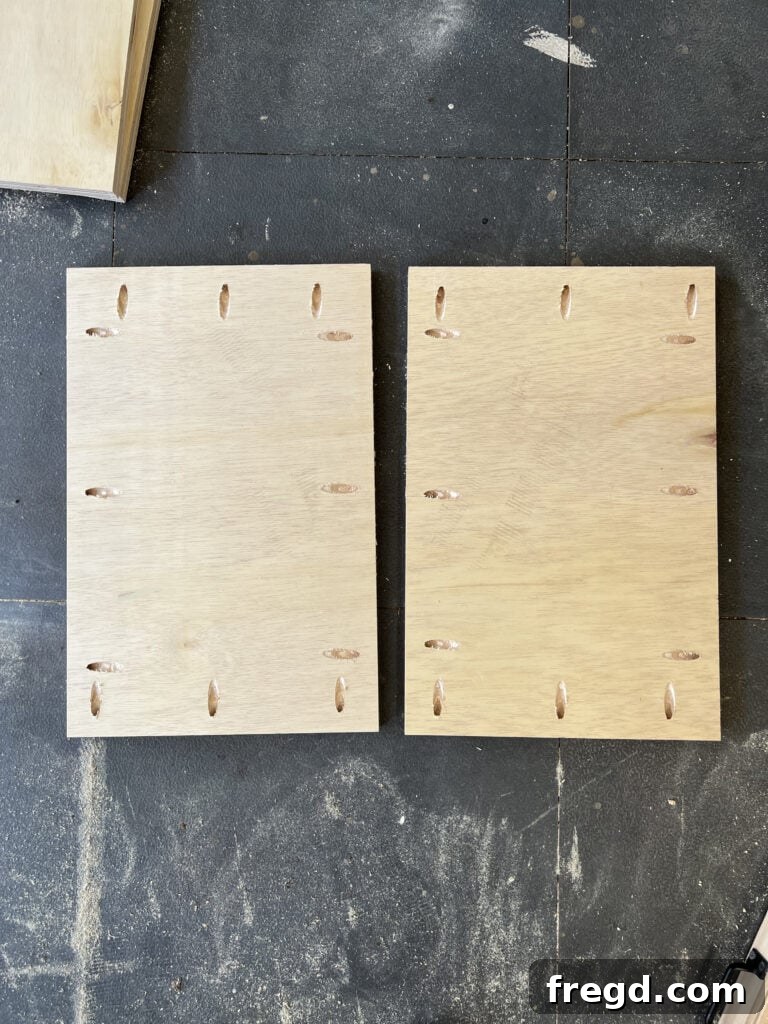
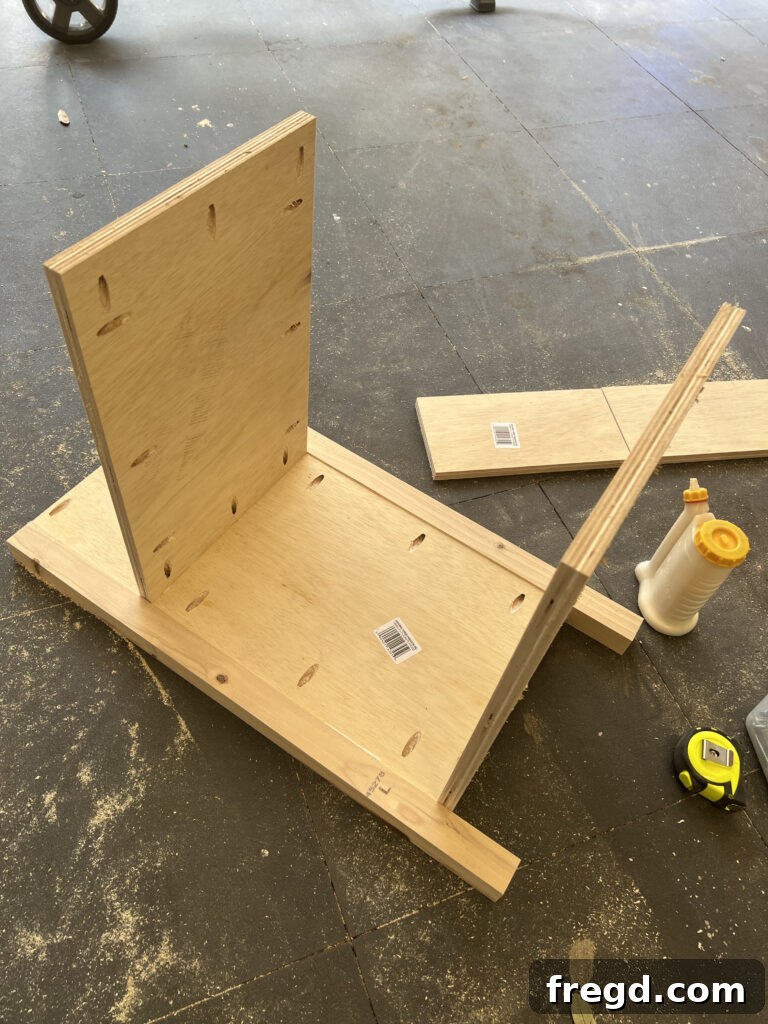
With the side panels and legs assembled, it’s time to integrate the shelves. The shelf boards are also crafted from 3/4” hardwood plywood. Carefully cut both shelf pieces to the precise dimensions provided in the plans. For these shelves, you will add 3/4” pocket holes along all four sides of each board. This allows for secure attachment from multiple angles, increasing stability. Apply a generous amount of wood glue to the edges where the shelves will meet the side panels, then secure them using 1.25” pocket hole screws. Wood glue is essential here as it adds significant strength to your joints, preventing any wobbling over time.
Pay close attention to the positioning of each shelf: the bottom shelf board should line up flush with the very bottom edges of the plywood side panels. The top shelf, which creates the open cubby, will be positioned 7 inches down from the top edge of the plywood sides. This specific spacing not only provides functional storage but also maintains the balanced aesthetic of the nightstand. Use clamps to hold the shelves in place while you drive the screws and allow the glue to set properly.
Step 3: Attaching the Horizontal Support Boards
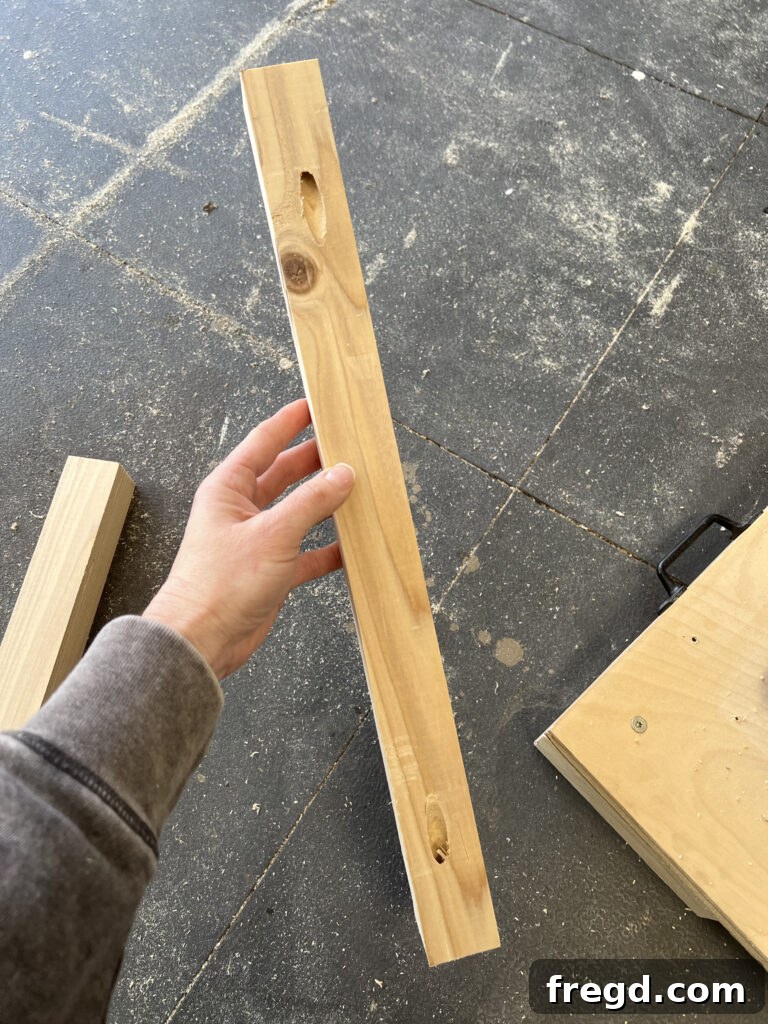
Now, it’s time to add the 2×2 horizontal support boards that tie the entire structure together, providing crucial stability and a frame for the nightstand top. Cut all your 2×2 support boards to the specified lengths. On each end of these 2×2 boards, create 1.5” pocket holes. When assembling, ensure these pocket holes face downwards, as this keeps them concealed from view for a cleaner finish.
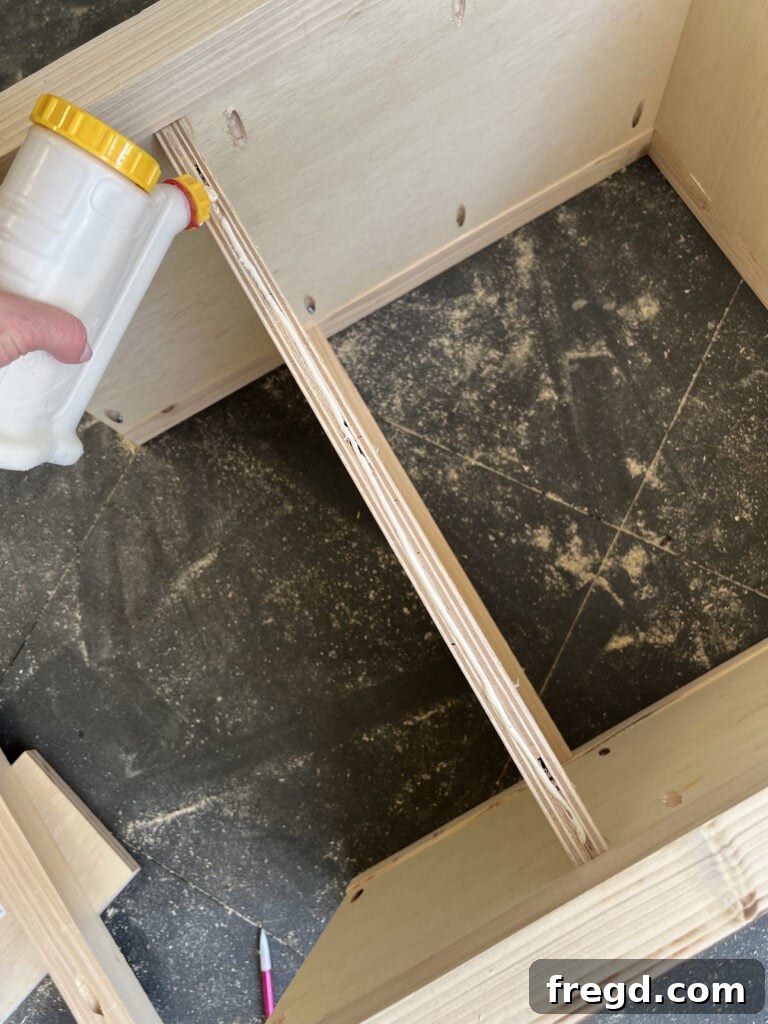
Apply wood glue to the ends of each support board before attaching them. Secure them to the side boards using 2.5” pocket hole screws. The top horizontal support board should align perfectly flush with the very top edge of the side panels. The other two support boards will align flush with the top and bottom shelf boards respectively. This careful alignment ensures a sturdy, square frame that will beautifully support the nightstand top and provide structural integrity for the entire piece. Use a square to check for right angles as you attach these crucial components.
Step 4: Securing the Nightstand Top
The nightstand top is a key element that defines the piece’s aesthetic and functionality. For this project, we selected a 1” thick laminated pine project panel, known for its smooth surface and durability. Carefully center the top panel over the assembled nightstand frame, ensuring a consistent 1/2” overhang along all sides. This small detail provides a refined, finished look.
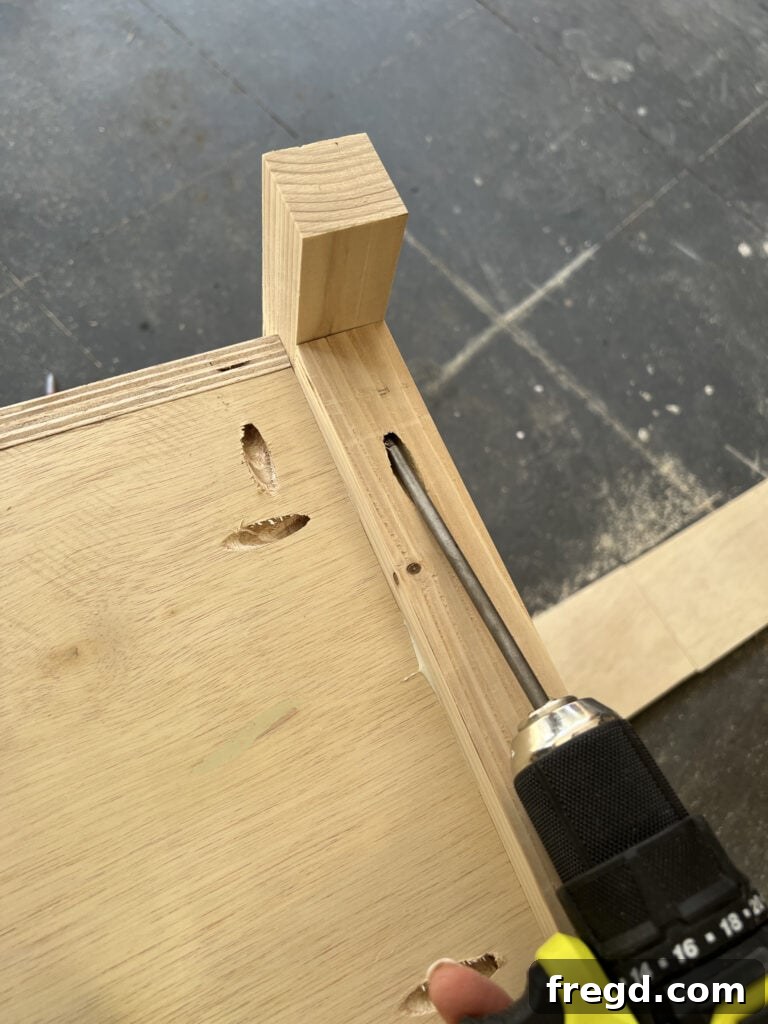
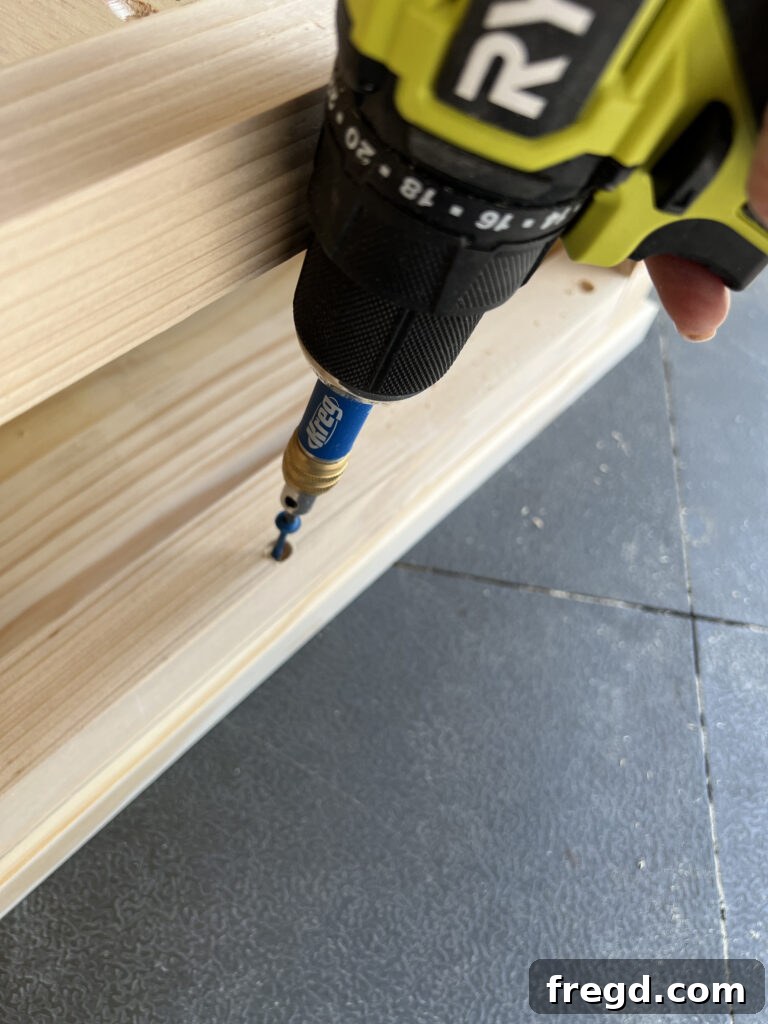
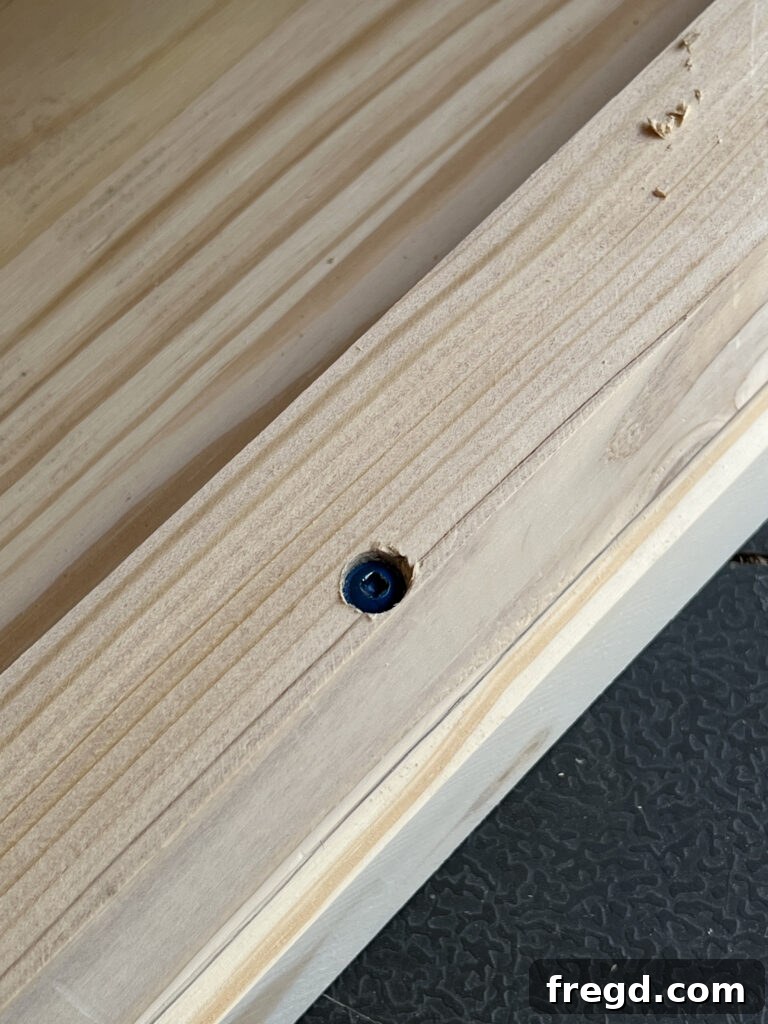
To attach the top, you’ll use wood glue for maximum adhesion and 2” pocket hole screws. This is where the new Kreg Quick-Flip tool truly shines! This innovative accessory simplifies the process of creating professional, counterbored screw installations. First, use the drill bit side of the Quick-Flip to drill precise pilot holes through the nightstand frame and into the underside of the top panel. The pilot hole prevents wood splitting and guides the screw accurately. Once the pilot holes are drilled, simply flip the inner mechanism of the Quick-Flip to switch to its square bit driver side. This seamless transition allows you to immediately drive the 2” screws through the frame and into the top, creating a perfectly flush, counterbored finish. This method not only provides a strong connection but also leaves no visible screw heads, enhancing the clean lines of your modern farmhouse piece. The Kreg Quick-Flip is an amazing tool that delivers a truly professional result with incredible ease.
Step 5: Adding the Back Panel
The back panel not only encloses the nightstand but also significantly contributes to its overall rigidity and squareness. Cut the back of the nightstand from 1/4” hardwood plywood to the exact dimensions provided in the plans. Position the plywood panel flush with the back edges of the nightstand frame. Apply a thin bead of wood glue around the perimeter of the frame where the back panel will sit. Then, use a staple gun with 3/4” staples to firmly attach the back panel to the nightstand frame. Ensure staples are evenly spaced for a secure hold. This step adds immense stability, preventing any racking or twisting of the completed piece, and gives the nightstand a finished, enclosed look, perfect for a modern farmhouse aesthetic.
Step 6: Building and Attaching the Door
The cabinet door adds both functionality and a touch of custom flair to your nightstand. Start by constructing the door frame. Cut your 1×2 boards to the sizes specified in the free plans for the door stiles and rails. On each end of your shorter 1×2 boards (the rails), add 3/4” pocket holes. These will allow you to create strong, concealed joints for your door frame.
Apply wood glue to the ends of the shorter boards and attach them to the longer 1×2 boards (the stiles) using 1.25” pocket hole screws. Ensure that the corners are perfectly flush and square to form a sturdy and true door frame. Use clamps or a corner clamping jig to hold the frame square while you drive the screws.
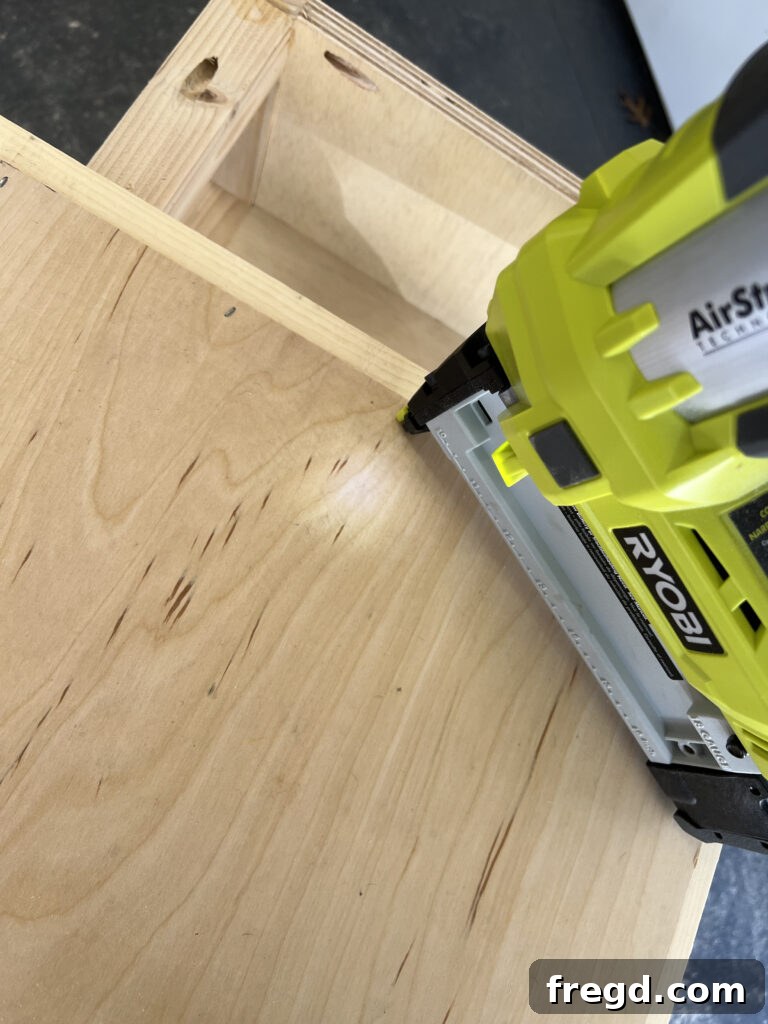
Next, cut the panel for the door using 1/4 inch hardwood plywood to fit precisely within the recess of your assembled door frame. Apply wood glue to the back edges of the door frame where the panel will sit, then carefully attach the plywood panel evenly to the back of the door frame using 3/4” staples. This creates a solid, flat surface for the door. Once the door is complete, you can install your chosen hinges and door pulls according to their manufacturer’s instructions. Test the door to ensure smooth opening and closing.
Finishing Touches: Stain, Paint & Hardware
With the construction complete, your nightstand is now ready for the exciting stage of finishing! This is where you truly personalize your piece and bring out its character. Before applying any finish, it’s crucial to thoroughly sand all surfaces, starting with a coarser grit (like 120) and progressing to a finer grit (like 220) for a silky-smooth feel. Remove all dust with a tack cloth before proceeding.
For a warm, inviting modern farmhouse look, we opted for a unique stain combination. We stained the entire piece with Varathane Golden Oak, then added just a small amount of Varathane Willow Grey mixed in. This blend creates a beautiful, aged wood tone that perfectly complements the style. Feel free to experiment with different stains or paints to match your existing decor or create a bold statement. Whether you prefer a distressed look, a solid color, or a natural wood finish, ensure you apply it according to the product’s instructions and consider a protective top coat for added durability.
Finally, it’s time to install the hardware. We sourced high-quality hinges and stylish door pulls that perfectly enhance the modern farmhouse aesthetic. You can find the exact hinges we used right HERE on Amazon, and the coordinating door pulls are available HERE on Amazon. Install the hinges first, ensuring the door swings smoothly, then attach the door pull in your desired location. This final step adds functionality and completes the bespoke look of your DIY nightstand.
Styling Your Space: Complementary Decor Finds
Once your DIY Modern Farmhouse Nightstand is complete, the fun continues with styling your bedroom! A nightstand isn’t just a functional piece; it’s a key element in tying your entire room together. For Brooks’ room, we carefully selected pieces that perfectly complement the nightstand’s aesthetic, creating a cohesive and inviting modern farmhouse sanctuary.
We found his stylish and comfortable bed on Wayfair, which perfectly anchors the room and pairs beautifully with the nightstand’s design. You can find the exact bed we chose HERE! But the real secret to a perfectly made and effortlessly charming bed is the bedding itself. We absolutely love the bedding from Beddy’s! For those of you who haven’t discovered Beddy’s yet, you absolutely *must* check them out. As a mom of six, I cannot emphasize enough how much I adore their bedding. It’s incredibly well-made, undeniably cute, and the best part? The bed actually looks made with minimal effort! This is a game-changer for busy households and makes morning routines so much easier. You can see the specific Franklin Luxe Beddy’s set we got for Brooks here! The combination of the nightstand, bed, and bedding has truly transformed his room into a cozy and stylish retreat.
We truly love the way this entire room turned out, creating a harmonious and functional space!
Download Your Free Nightstand Plans!
Ready to start building? We’ve made it easy for you with detailed, free printable plans. These plans include a cut list, diagrams, and specific measurements to guide you through every step of this project. Click the link below to download your plans and get started on your own Modern Farmhouse Nightstand today!
DOWNLOAD FREE PLANS HERE!
Share Your Creation with #SHANTY2CHIC!
We absolutely love seeing your projects come to life! Once you’ve completed your DIY Modern Farmhouse Nightstand, please share your incredible builds with us on social media using the hashtag #SHANTY2CHIC. Join our community of builders and inspire others with your woodworking talent. Happy Building!
Explore More DIY Nightstand Projects by Shanty2chic
If you enjoyed building this nightstand, you might be interested in some of our other popular DIY nightstand plans. Whether you’re looking for different styles or additional storage solutions, Shanty2chic has a project for every skill level and aesthetic preference.
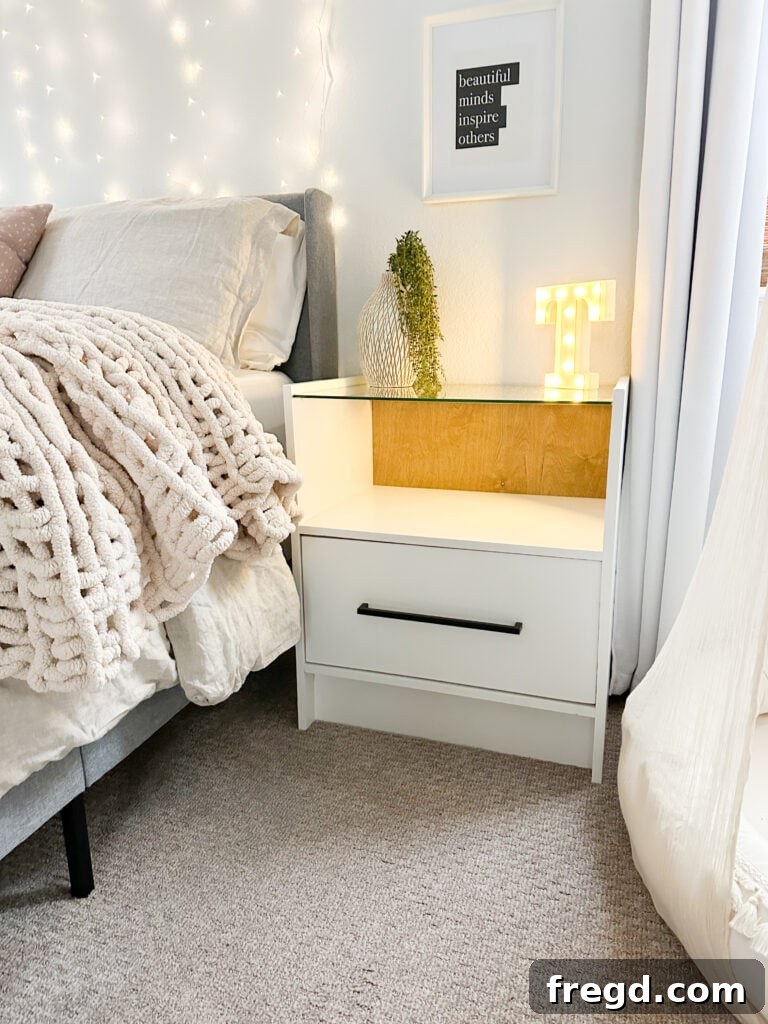
Glass Top Nightstand
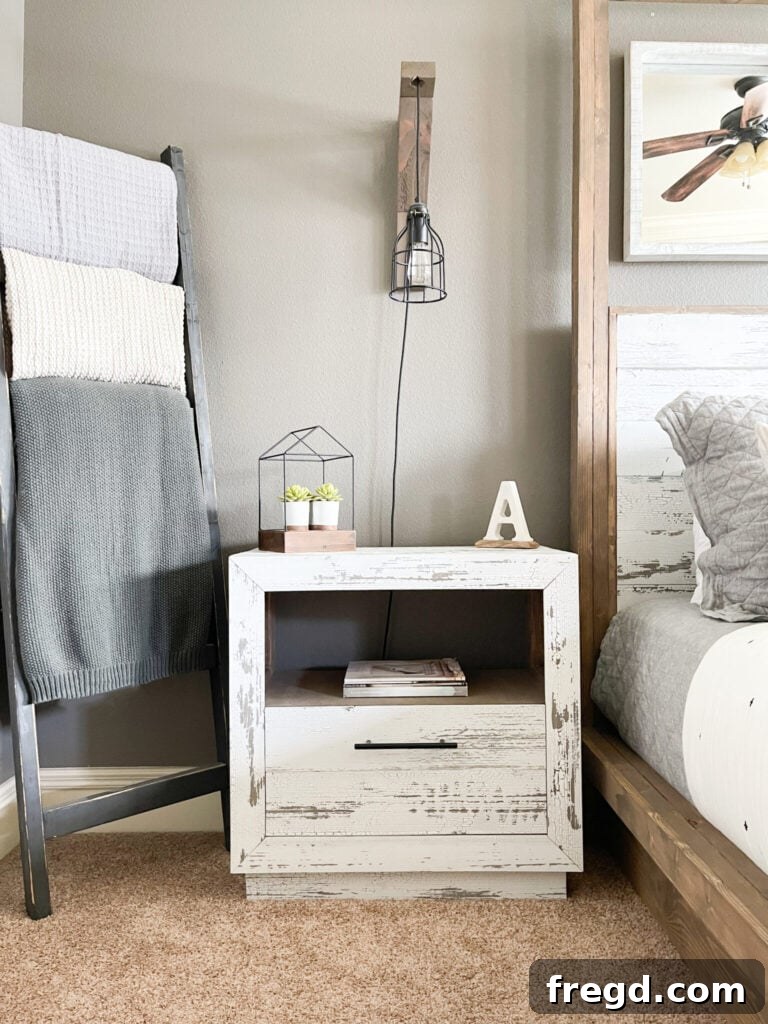
Nightstand with Drawer
Rustic Modern Nightstand