
DIY Cedar Window Box Planters: Elevate Your Home’s Curb Appeal on a Budget
Oh hey friends! Happy Monday!
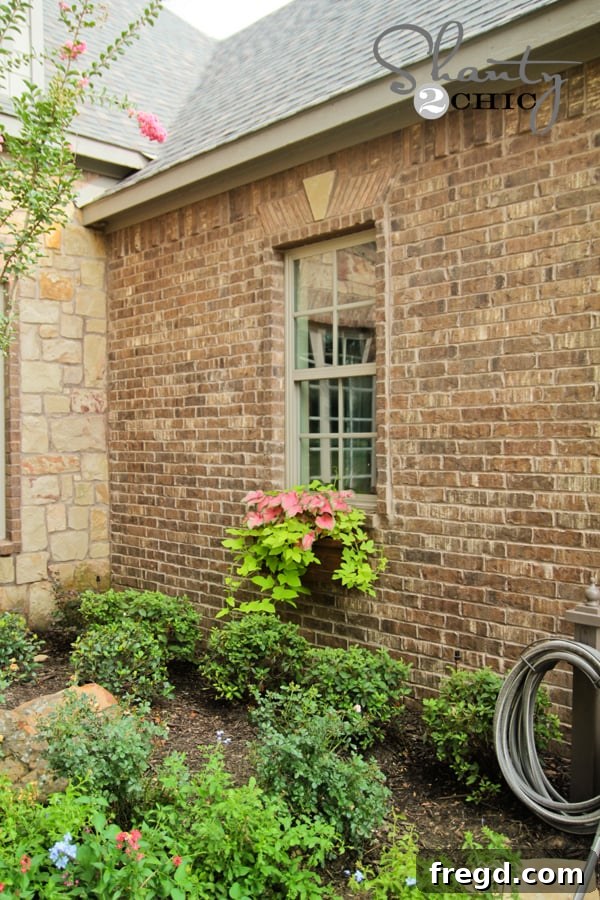
Transforming the exterior of your home doesn’t have to break the bank, and nothing adds charm and a touch of natural beauty quite like a set of custom-built window box planters. A couple of weeks ago, I embarked on this rewarding DIY project, crafting these stunning cedar window boxes that have utterly revitalized the look of my windows. Today, I’m thrilled to walk you through the entire process, sharing exactly how you can create these fantastic additions for your own home. Here is how they turned out!
I absolutely LOVE them! They add so much character and curb appeal to those otherwise plain windows, and the best part? They were a breeze to make! Seriously, if you’re looking for a weekend project that delivers stunning results without requiring advanced carpentry skills, this is it. Plus, I managed to make each one for under $20 in wood, proving that beauty and durability don’t have to come with a hefty price tag. It’s an incredibly cost-effective way to enhance your home’s aesthetic.
Here is what I did to bring these beautiful window boxes to life!
The Foundation: Design Around Your Liners
My first and perhaps most crucial step was to find suitable window box liners. I discovered these fantastic plastic liners at The Home Depot, and they became the cornerstone of my design. Building your window boxes around pre-made liners offers several significant advantages:
Firstly, it makes changing out your plants incredibly easy as the seasons change or as you simply desire a fresh look. No more digging directly into the wooden box! Secondly, these liners provide a vital barrier between the damp soil and your beautiful cedar wood. This helps prevent the wood from rotting prematurely due to constant moisture exposure, significantly extending the lifespan of your window boxes. It’s a win-win situation for both your plants and your investment!
Gathering Your Materials and Tools
Before diving into construction, it’s essential to gather all your materials and tools. For this project, I opted for cedar wood, known for its natural resistance to rot, decay, and insect infestations, making it an excellent choice for outdoor applications. Plus, its beautiful grain and aromatic scent are an added bonus.
Materials Needed Per Window Box:
- **Cedar Fence Panel (for Base and Ends):** One 5/8″ x 6″ x 6′ cedar fence panel. These are surprisingly affordable, costing under $2 each.
- **Cedar Board (for Long Sides):** One 1″ x 8″ x 8′ cedar board. The length will depend on the size of your chosen liner.
- **Cedar Board (for Bottom Trim):** One 1″ x 3″ x 8′ cedar board.
- **Cedar Board (for Top Trim and Small Side Pieces):** One 1″ x 2″ x 8′ cedar board.
- **Adhesive:** Gorilla Wood Glue (or another high-quality, waterproof wood glue suitable for exterior use).
- **Fasteners:** Exterior-grade finish nails (ensure they are galvanized or stainless steel to prevent rust and corrosion).
- **Wood Stain:** Rust-Oleum Dark Walnut Ultimate Wood Stain (or your preferred exterior wood stain color).
- **Protective Finish:** Spar Varnish (essential for weather protection).
- **Mounting Hardware (if attaching to brick/siding):** Galvanized L-brackets (from the roofing section of your hardware store), along with appropriate screws and anchors for your wall type. **Important:** Always choose galvanized brackets over zinc, as zinc will corrode over time when exposed to the elements.
- **Plastic Window Box Liners:** The specific size you found and designed around.
Tools You’ll Need:
- **Saw:** A miter saw or circular saw for precise, straight cuts.
- **Nailer:** My favorite Ryobi AirStrike nailer for quick and easy fastening. A cordless finish nailer saves a ton of time and effort compared to hammering.
- **Measuring Tape and Pencil:** For accurate measurements and marking cuts.
- **Safety Glasses:** Always protect your eyes when working with power tools.
- **Clamps:** Helpful for holding pieces together while glue dries and nails are applied.
- **Brushes/Rags:** For applying stain and varnish.
- **Hammer Drill (for brick installation):** If you’re attaching to brick, a hammer drill is indispensable. Luckily, Ryobi has excellent options if you don’t already own one.
- **Masonry Drill Bits:** For drilling into brick.
- **Level:** To ensure your window boxes are perfectly straight when installed.
Step-by-Step Construction Guide
1. Building the Base and End Pieces
For the foundational structure of the box, I first used a 5/8″ x 6″ x 6′ cedar fence panel. You will need one of these panels per window box. The key here is to precisely measure the dimensions required to snugly fit your chosen plastic liner. This step ensures a perfect interior fit, which is crucial for the liner system to work effectively. Once your measurements are confirmed, cut the base piece and the two end pieces from this cedar panel. It’s often helpful to create a diagram to visualize your cuts before making them. Here are the initial cuts and how I assembled Step 1, creating the base and the two short end pieces of the box:
I used a combination of Gorilla Wood Glue and finish nails for this entire construction. The glue provides a strong, waterproof bond, while the nails offer immediate holding power, allowing the glue to set properly. This dual approach ensures a robust and durable structure that will withstand outdoor conditions.
Speaking of nails, I heavily relied on my favorite Ryobi AirStrike nailer for this part. It makes the assembly process incredibly fast and effortless, driving nails with precision and speed, saving your arm from countless hammer swings!
2. Attaching the Long Sides
Now for the long sides of the window box! For these crucial pieces, I used a 1″ x 8″ x 8′ cedar board. Again, precise measurements are paramount here. You’ll want to cut two pieces to the exact length of your assembled base, ensuring they will create a seamless fit. Here are the measurements for those, demonstrating how they integrate with the end pieces:
Just like with the base and end pieces, I attached these two long side pieces using generous amounts of Gorilla Wood Glue and finish nails. Apply a bead of glue along the edges before nailing to ensure maximum strength and weather resistance. Clamp the pieces if needed to hold them tight while you nail. This creates the main rectangular body of your window box, ready for its decorative trim.
Almost done with the basic structure!
3. Adding the Decorative Trim
My last step in the construction phase is adding the trim, which truly elevates the look of the window boxes from simple boxes to elegant decorative pieces. The trim adds a finished aesthetic and helps define the planter’s shape.
For the bottom trim piece that runs along the front and sides, I used a 1″ x 3″ x 8′ cedar board. This slightly wider trim provides a nice visual weight to the base of the box. For the top front trim piece and the smaller side trim pieces, I used a 1″ x 2″ x 8′ cedar board. This creates a subtle difference in depth and adds more dimension.
For the small side trim pieces, specifically, they were all cut to 7.25″ in length. This measurement ensures they fit perfectly on the ends, wrapping around the box. When attaching the trim, I made sure to keep the back of the box flush. This design choice is important because it allows the window box to sit perfectly flat and tight against the wall once installed, minimizing gaps and creating a clean, integrated look.
That’s the entire structural build! Now onto the crucial finishing steps to protect your beautiful cedar.
4. The Finishing Touches: Staining and Sealing
My final step in preparing the window boxes was giving the whole thing a protective and beautifying coat of my very favorite wood stain and a robust weather sealant. These steps are absolutely critical for any outdoor wooden project, especially one that will be exposed to the elements year-round.
I started with the Rust-Oleum Dark Walnut Ultimate Wood Stain. This stain not only imparts a rich, deep color that beautifully highlights the cedar grain but also offers initial protection against moisture and UV rays. Apply the stain evenly with a brush or rag, allowing it to penetrate the wood, then wipe off any excess according to the product instructions. The transformation in appearance is immediate and striking.
Rust-Oleum Dark Walnut Ultimate Wood Stain
Since these window boxes will be sitting in the elements—facing sun, rain, and fluctuating temperatures—I also gave them three generous coats of Spar Varnish. Spar varnish is specifically designed for marine applications and outdoor use, offering superior protection against UV damage, moisture, and mildew. This stuff is simple to apply: just use a good quality brush, applying thin, even coats, and allowing ample drying time between each application as specified by the manufacturer. The three coats create a durable, weather-resistant shield that will keep your cedar boxes looking fantastic for years to come.
Installation: Mounting Your Window Boxes Securely
Once your window boxes are completely dry and cured from the finishing process, it’s time for installation. I attached mine to a brick wall, which requires specific tools and hardware to ensure a secure and lasting mount.
To drill into brick, you absolutely need a hammer drill. A regular drill simply won’t suffice for masonry. Luckily, if you don’t have one in your toolkit, brands like Ryobi offer excellent hammer drills that are perfect for DIY projects like this, making the task manageable and efficient.
I used galvanized L-brackets, which I found in the ROOFING section of my local hardware store, to securely attach the window boxes to the wall. It’s vital to use galvanized brackets because they are coated to resist corrosion and rust, which is crucial for outdoor exposure. Avoid zinc brackets, as they will corrode and weaken over time when exposed to the elements, potentially leading to your beautiful window boxes falling down. First, attach the L-brackets to the brick wall using appropriate masonry screws and anchors. Ensure they are level and spaced correctly to support the weight of your filled window box. Then, position each cedar box onto the L-brackets and secure them firmly to the brackets with screws from the inside of the box. Double-check that everything is level and robust.
Here is a shot from below, illustrating how the brackets support the box discreetly and effectively:
Planting and Enjoying Your Window Boxes
And now for the truly satisfying part: planting! You can clearly see in the image how I filled the plastic liner up with soil and plants, and then simply dropped it into the cedar box. This method is incredibly EASY and efficient! The beauty of this liner system truly shines here. When you’re ready to change out the plants—perhaps for a new season or just a change of scenery—all you have to do is pull that liner out, refill it with fresh potting mix and new plants, and then drop it back into your beautifully crafted cedar box. It’s an absolute game-changer for effortless plant maintenance and ensures your window boxes always look vibrant and fresh. I LOVE this feature!
For those of you wondering about my specific plant choices, I filled mine with sun caladiums and sweet potato vine. This combination offers a beautiful contrast of lush foliage and trailing elements, perfect for creating a full and vibrant display. When choosing your plants, consider your window’s sun exposure (full sun, partial shade, etc.) and select plants that thrive in those conditions. Think about varying heights, textures, and colors to create an eye-catching arrangement that enhances your home’s exterior.
A Few Final Shots of the Finished Project
Here are a few final shots to inspire you and showcase the completed window boxes from different angles. Notice how they perfectly frame the windows and add a burst of greenery and color against the brick facade. The natural warmth of the stained cedar truly complements the house, making the entire exterior feel more inviting and polished.
What do you think of these DIY cedar window boxes? I’m confident that with this detailed guide, you can create equally beautiful and long-lasting planters for your own home.
This project is not only satisfying but also a testament to how simple tools and readily available materials can result in stunning home improvements. The combination of durable cedar, protective finishes, and convenient liners makes these window boxes a worthwhile investment for any homeowner looking to boost their curb appeal and enjoy the beauty of seasonal plantings with minimal fuss.
I would LOVE for you to pin these ideas and SHARE them with your peeps below! If you undertake this project, please share your results! Have an awesome Wednesday, and happy building!
~Whitney