
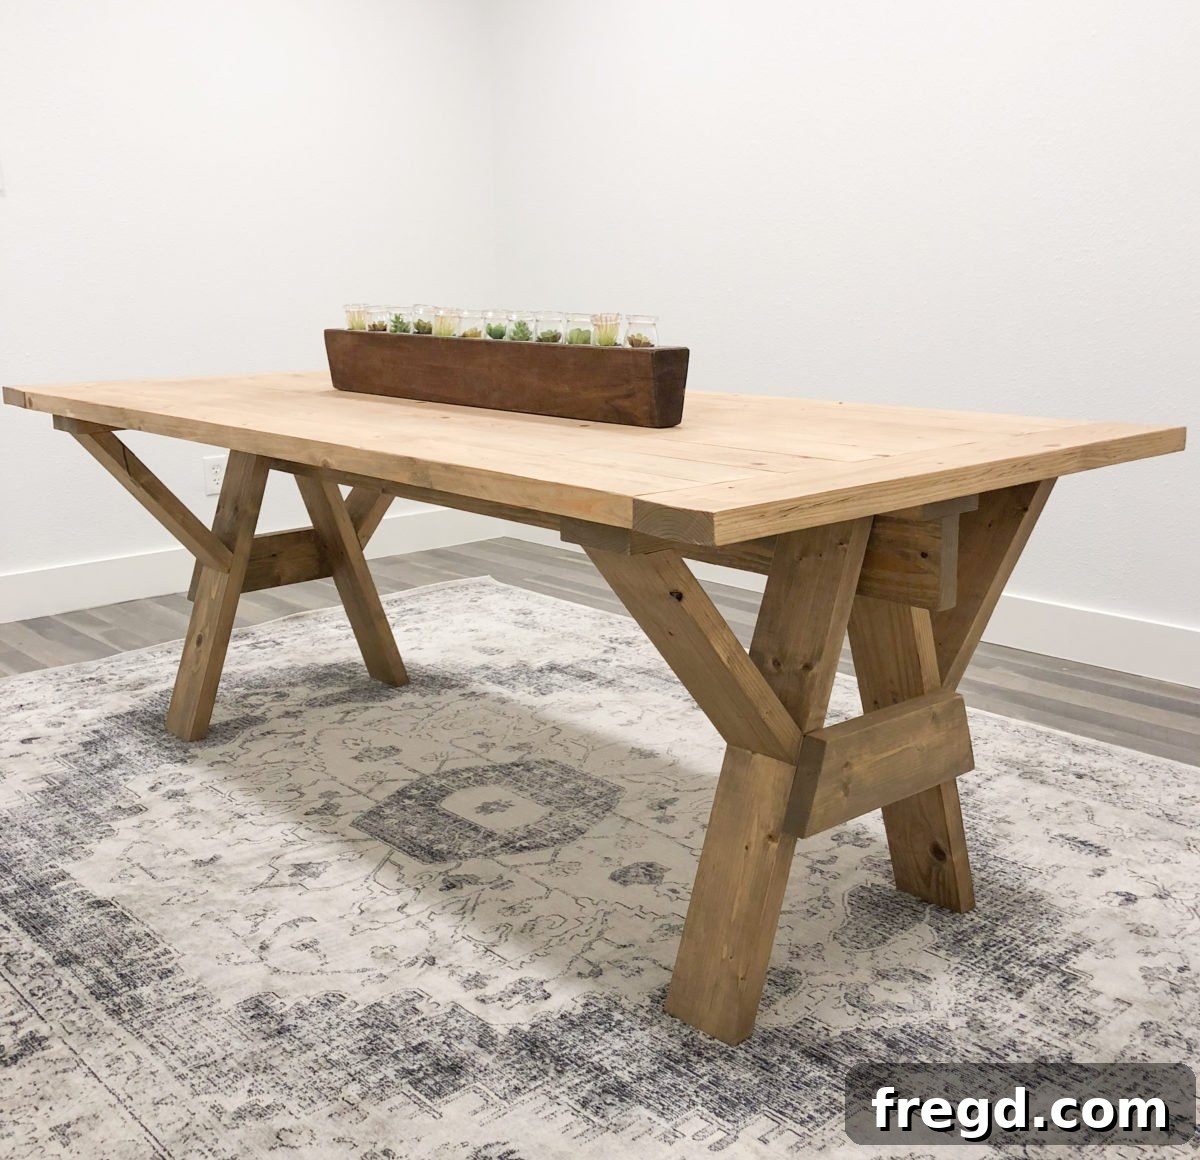
Build Your Own Modern Farmhouse Sawhorse Dining Table for Under $80
Welcome, woodworking enthusiasts and DIY lovers! If you’ve ever admired the charm and inviting appeal of a farmhouse dining table but cringed at the price tag, you’re in for a treat. We’re thrilled to share our latest project: a stunning modern farmhouse dining table featuring a unique sawhorse base that you can build for around $80 in lumber! That’s right, an elegant, custom-built centerpiece for your dining space without breaking the bank.
This comprehensive guide will walk you through every step of constructing your very own dining table, from preparing the lumber to applying the perfect finish. We’ll cover essential tools, provide helpful tips, and ensure you have all the information needed to successfully complete this rewarding project. Get ready to transform your dining area with a touch of personalized rustic elegance!
Why a DIY Sawhorse Farmhouse Table?
Choosing to build your own dining table offers numerous advantages beyond just cost savings. This particular design blends the timeless appeal of farmhouse aesthetics with a contemporary sawhorse base, creating a versatile piece that complements a wide range of interior styles.
Unbeatable Value and Quality
The allure of this project begins with its incredible affordability. By sourcing readily available lumber and employing smart construction techniques, you can achieve a high-quality, durable table that would cost hundreds, if not thousands, of dollars in retail stores. Furthermore, building it yourself allows you to control the quality of materials and craftsmanship, ensuring a piece that will stand the test of time and countless family meals.
Personalized Style and Satisfaction
A DIY table means you get to choose every detail, from the exact dimensions to the final stain color. This project’s modern farmhouse design offers a clean, sophisticated look with the rustic warmth characteristic of farmhouse furniture. Beyond the aesthetic, there’s immense satisfaction in creating something beautiful and functional with your own hands. It’s more than just a table; it’s a testament to your creativity and skill, destined to become a conversation starter in your home.
Essential Tools and Materials for Your Sawhorse Table
Before diving into construction, gathering your tools and materials is paramount. This project primarily utilizes standard woodworking tools and common lumber, making it accessible for many DIYers. Precision in measurement and cutting will be your best friends for a professional-looking result.
Lumber Selection and Preparation
The foundation of your table will be 2x6x8 framing lumber. We recommend starting with 13 of these boards. A crucial step for achieving the desired look and structural integrity is to rip each 2×6 board down to a consistent 5″ width. This can be done with a table saw, ensuring clean, straight edges for a seamless tabletop. When selecting your lumber, look for straight boards with minimal knots, warps, or defects. High-quality lumber will yield a flatter tabletop and a sturdier base. If you don’t have a table saw, some lumber yards can rip boards for you, or consider alternative joinery methods if ripping isn’t an option.
Key Fasteners and Adhesives
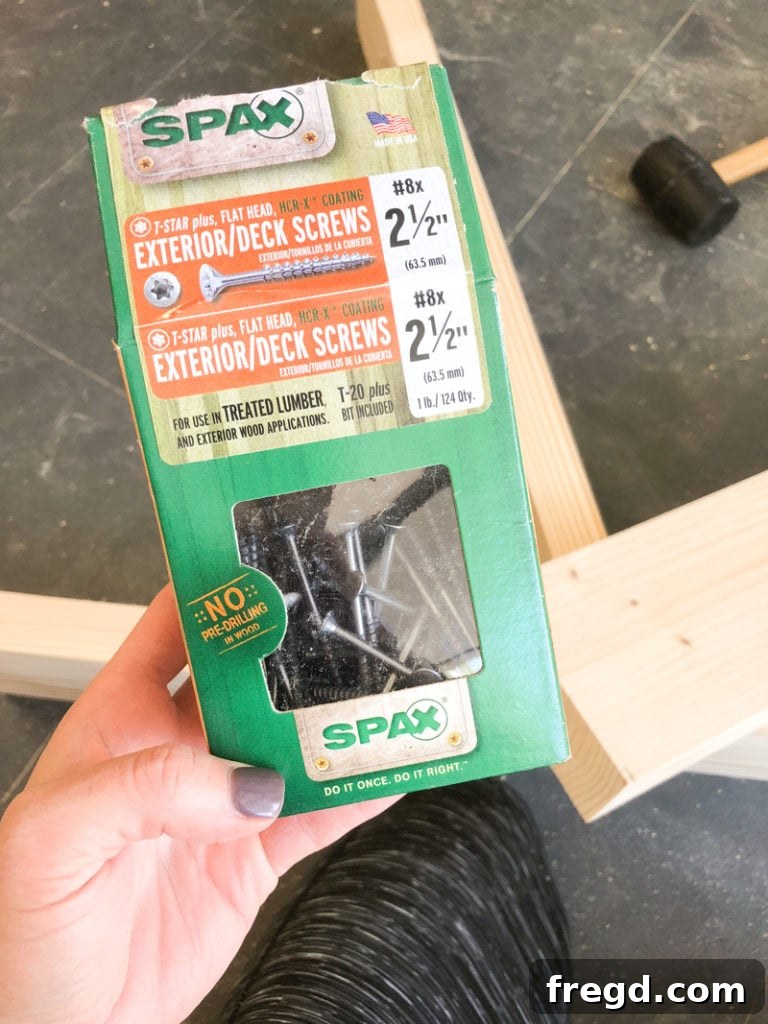
For strong and concealed joints, Kreg Pocket Hole Screws (2.5″) are indispensable, especially for the tabletop and certain base connections. You’ll also need a good supply of 2.5″ Spax screws, known for their superior holding power and ease of driving without pre-drilling. For additional support and structural integrity, particularly for the braces, a quantity of 2″ finish nails and high-quality wood glue are essential. Wood glue provides an incredibly strong bond, often stronger than the wood itself, and should be used generously on all structural joints.
Recommended Woodworking Tools
While a basic set of tools can get you started, a few specialized items will significantly enhance your experience and the quality of your build:
- Kreg Pocket Hole Jig: Absolutely necessary for creating strong pocket hole joints.
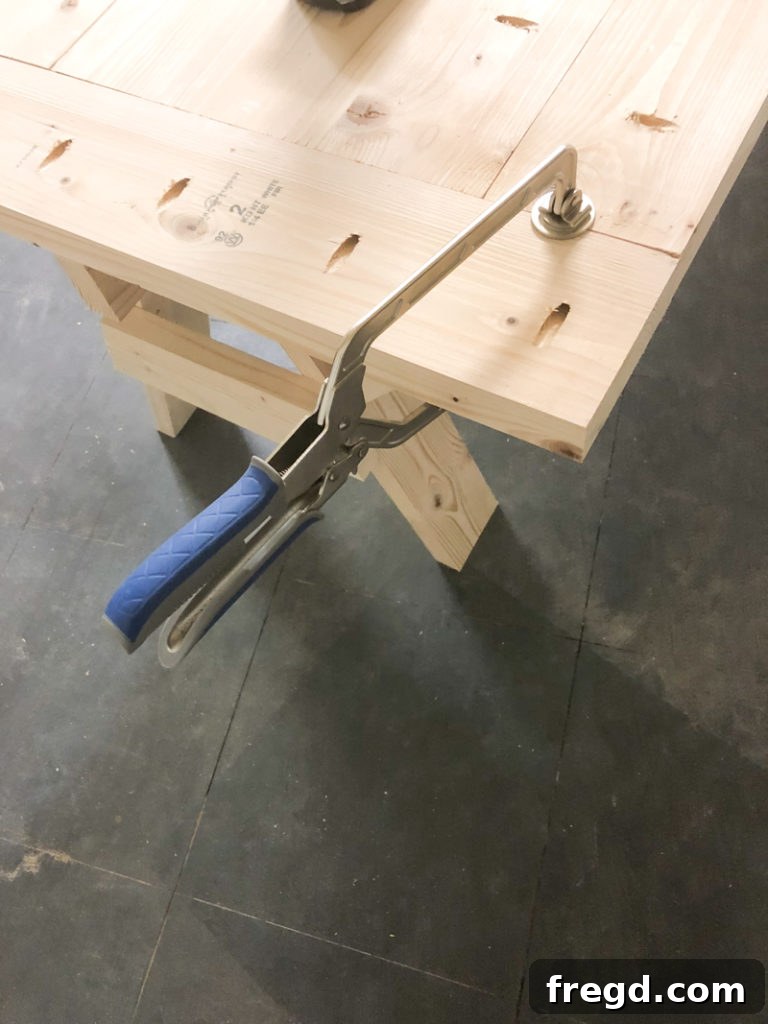
- Kreg Face Clamp: This tool is a game-changer for tabletop assembly and attaching breadboards. It applies pressure across the face of boards, helping to flatten them and hold them flush during assembly. This ensures a smooth, even surface. Find it HERE on Amazon.
- GluBot: Applying wood glue cleanly and efficiently can be messy. The GluBot is a fantastic tool that minimizes mess and saves time by dispensing glue precisely where you need it. See it HERE on Amazon!
- Miter Saw or Circular Saw: For making accurate cuts, especially the angled cuts for the legs.
- Drill/Driver: Essential for driving screws and pre-drilling holes.
- Measuring Tape, Pencil, and Speed Square: For precise measurements and markings.
- Orbital Sander: For smoothing the wood surfaces before finishing.
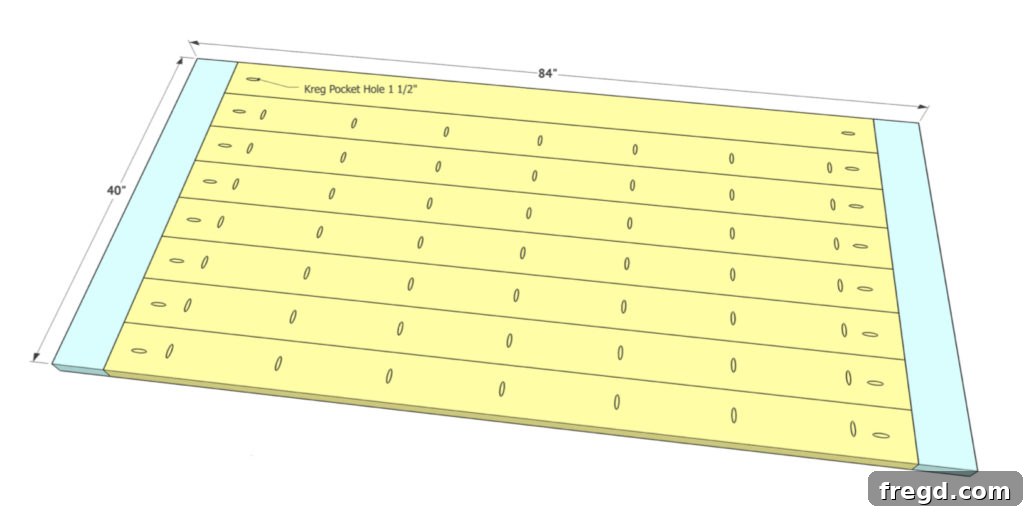
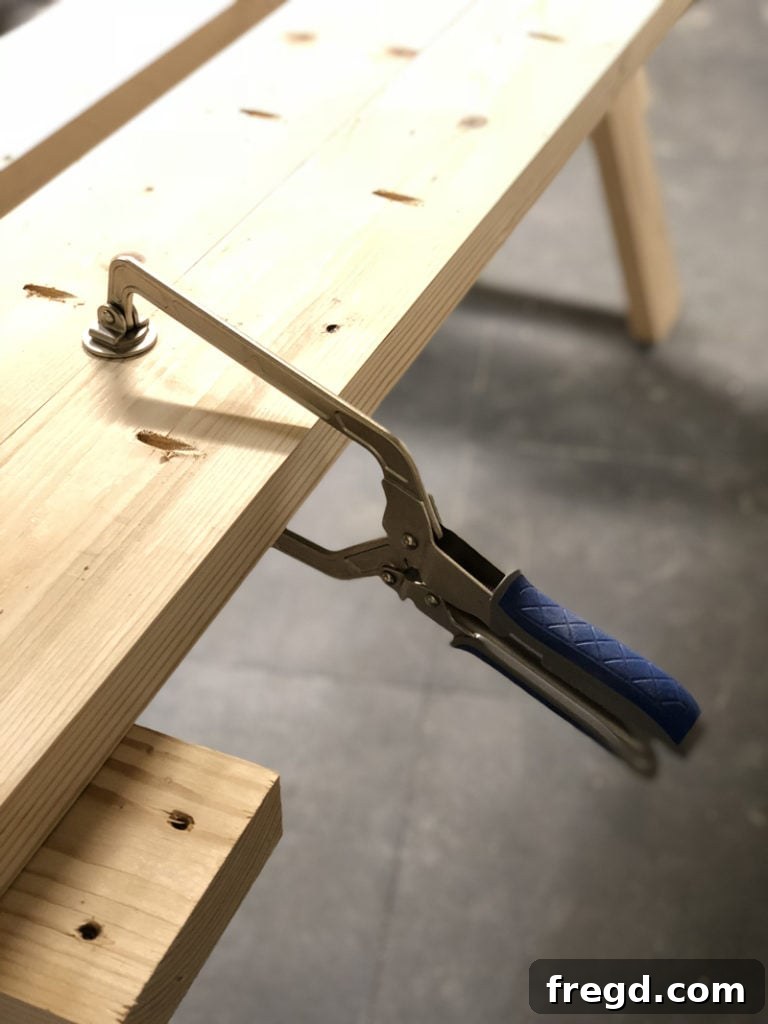
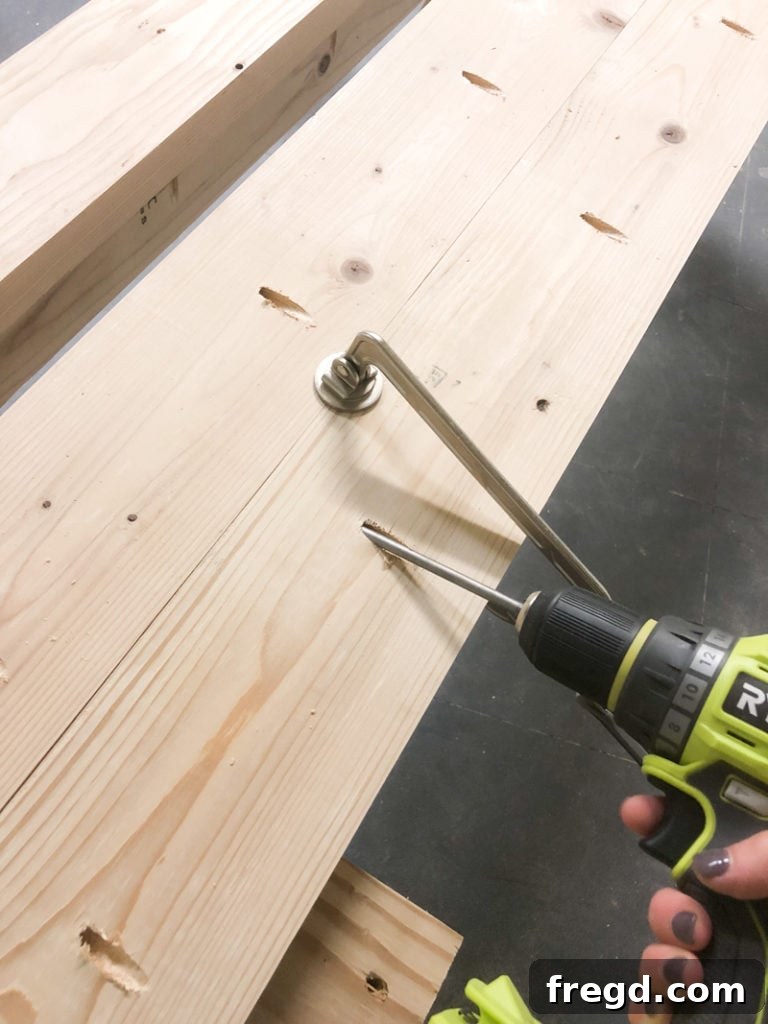
Step-by-Step Construction Guide
Let’s roll up our sleeves and start building! Following these steps carefully will ensure a successful and sturdy dining table.
Crafting the Robust Tabletop
The tabletop is the heart of your dining table, and its construction requires attention to detail for a flat, stable, and aesthetically pleasing surface.
- Prepare the Lumber: Begin by taking your 2×6 boards and ripping them down to exactly 5″ wide. This consistent width is crucial for a cohesive tabletop. Once ripped, lightly sand the edges and faces of the boards to prepare them for joining.
- Create Pocket Holes: On one long side of all but one of your plank boards, drill 1.5″ pocket holes. Also, add pocket holes to the ends of each plank board. These will be used to attach the breadboards later. The pocket holes provide a strong, hidden connection.
- Assemble the Planks: Begin attaching the ripped plank boards together using 2.5″ pocket hole screws. It’s helpful to work on a flat surface. Apply wood glue along the edges of the boards before joining. Use clamps, especially a Kreg Face Clamp, to hold the boards flush while you drive the screws. This prevents boards from shifting or bowing, ensuring a smooth surface.
- Attach the Breadboards: Once all the main plank boards are securely joined, line up the boards on each end of the tabletop. Mark the exact measurement for your breadboards. These end pieces not only add to the farmhouse aesthetic but also help to prevent warping of the main tabletop. Attach the breadboards using 2.5″ pocket hole screws through the pre-drilled pocket holes on the ends of your planks. Again, use clamps to hold everything tightly while securing.
Building the Sturdy Sawhorse Bases
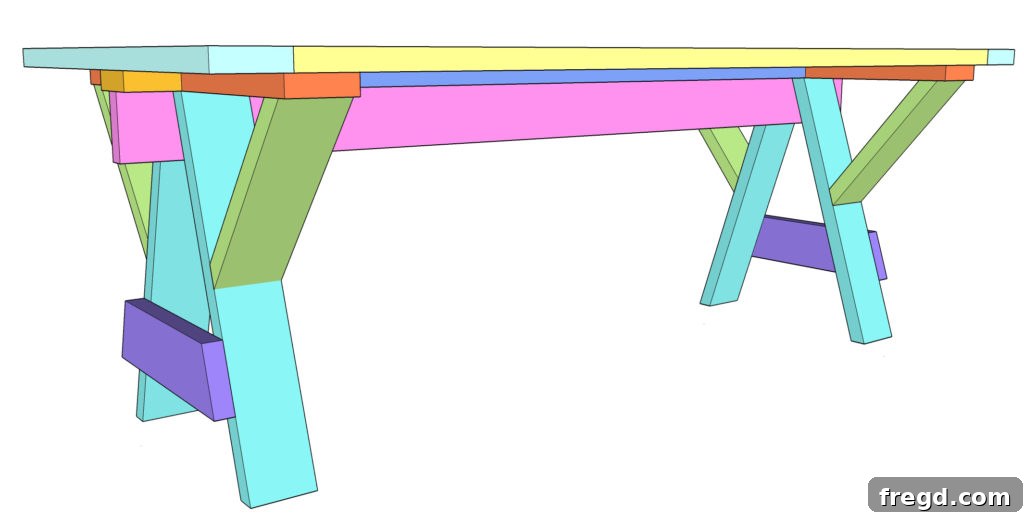
The sawhorse bases are the defining feature of this table, offering both stability and a modern, minimalist look. You will construct two identical bases.
For most of the base assembly, we recommend using 2.5″ Spax screws for their excellent grip and ease of use. You can find them HERE.
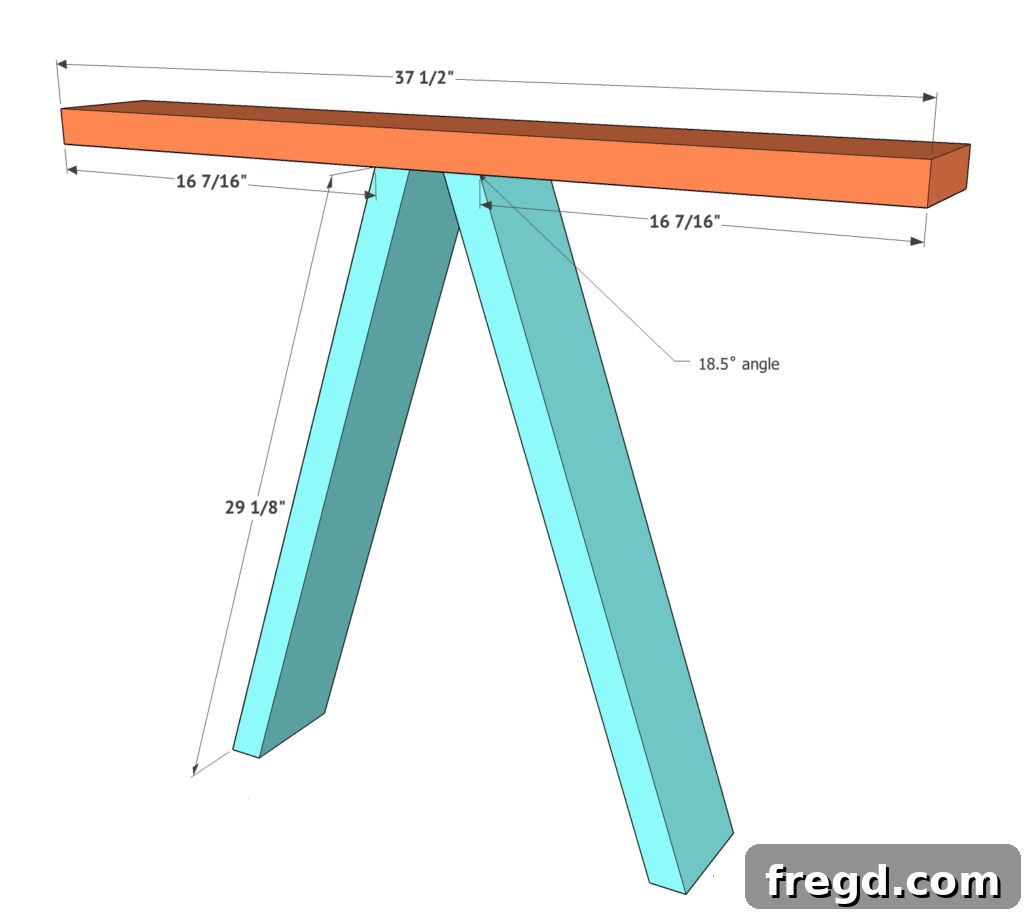
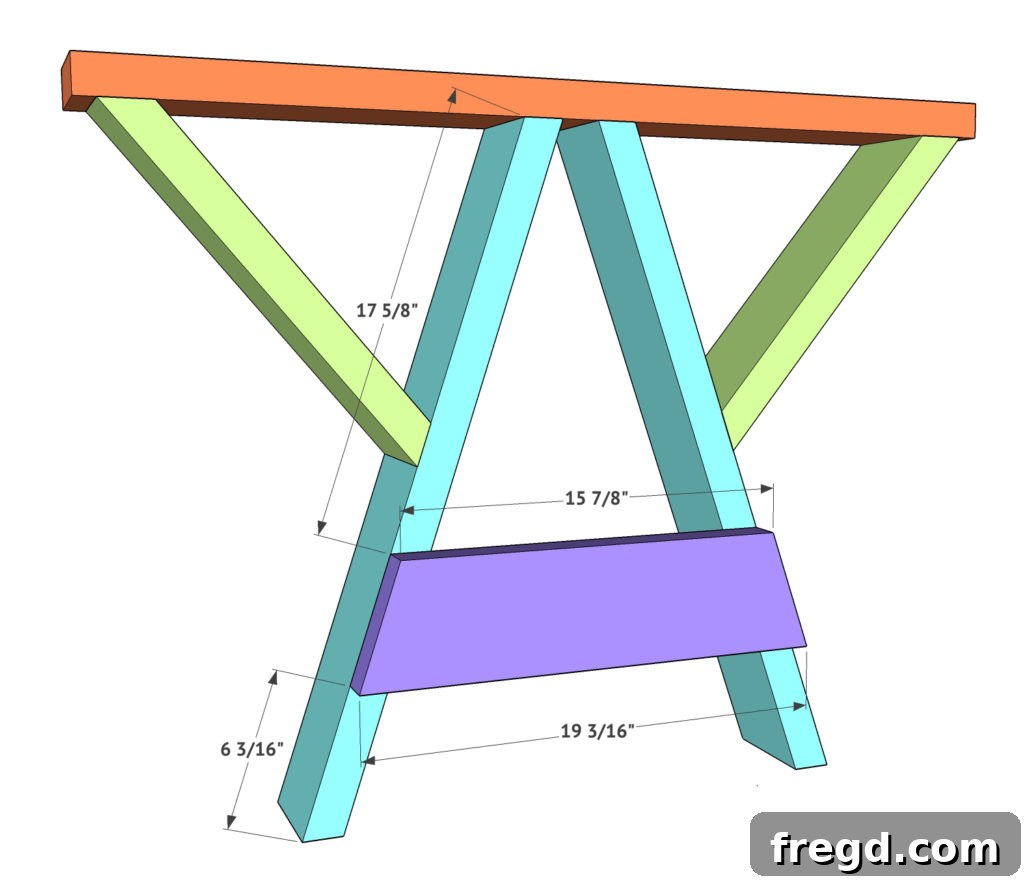
- Cut the Leg Pieces: Begin by cutting your leg pieces. Each leg will have an 18.5° angle cut parallel to each other on both ends. This specific angle is crucial for the splayed sawhorse look and stability. Use a miter saw for precise, repeatable cuts.
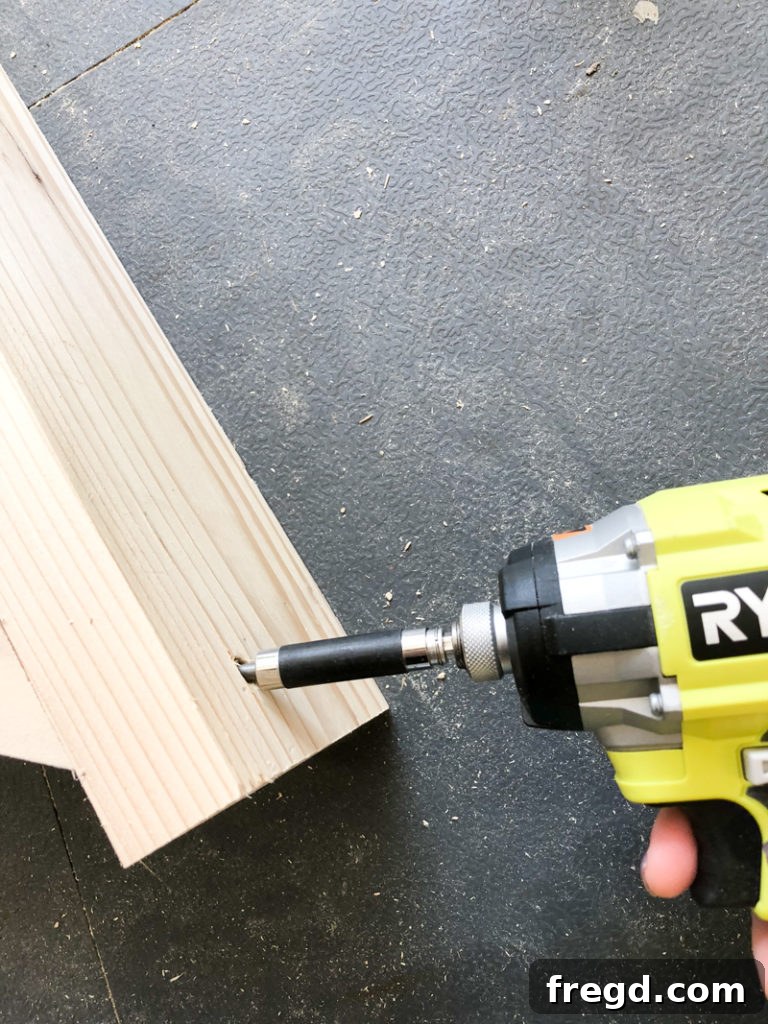
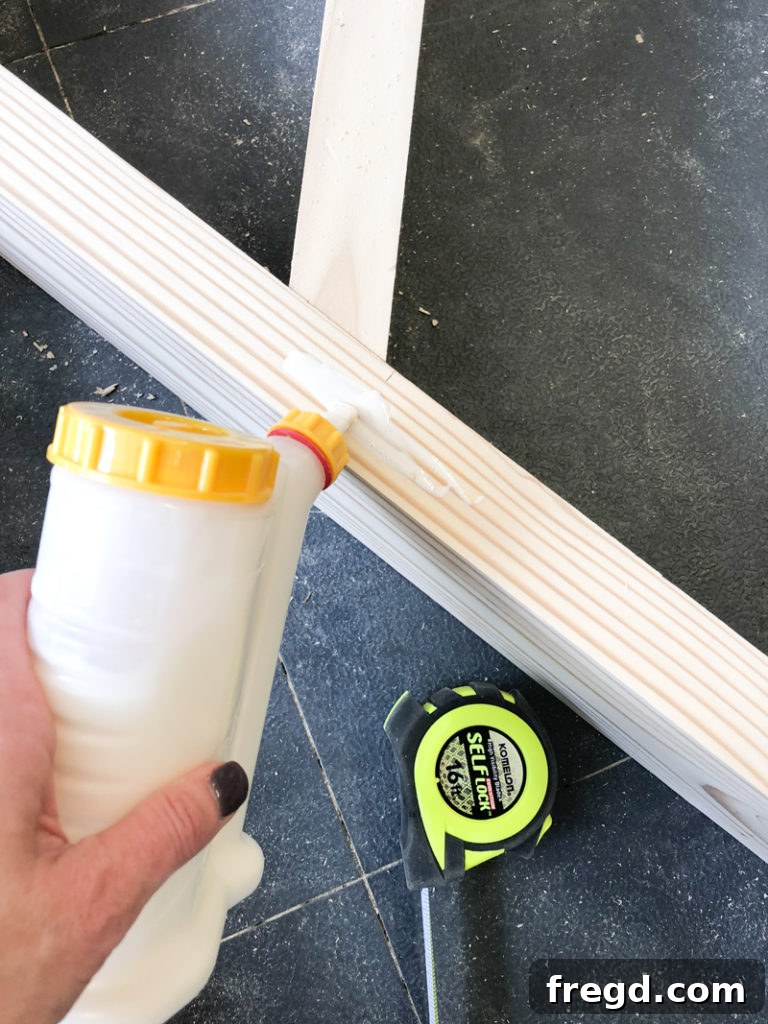
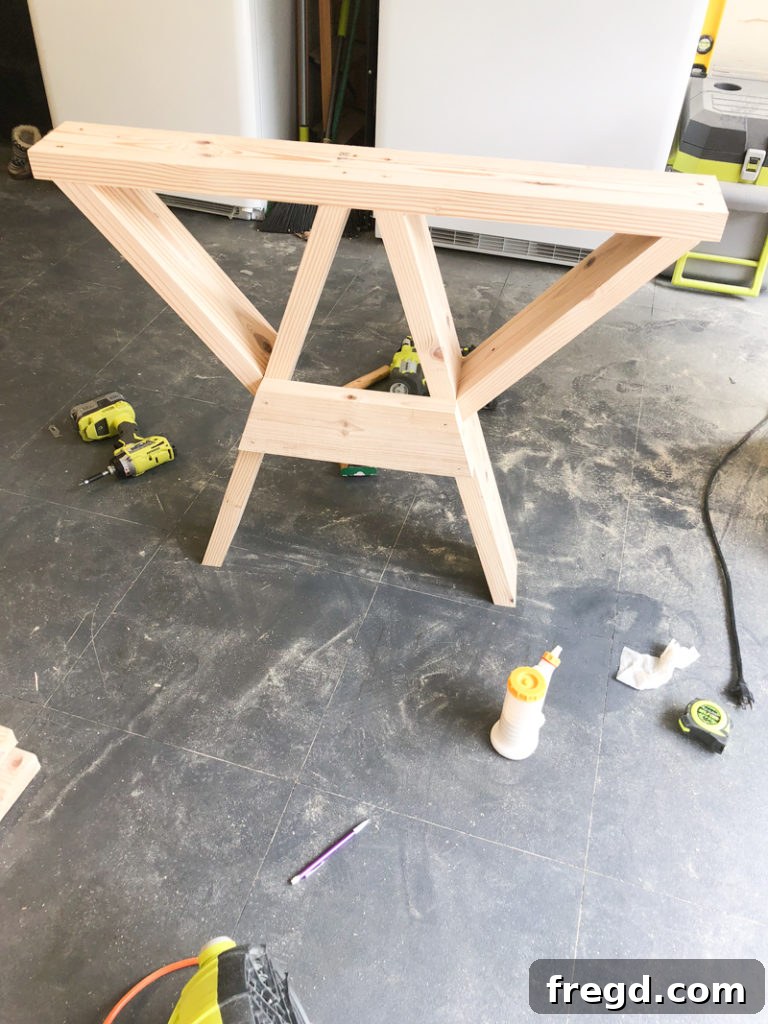
- Assemble the Main Leg Structure: With your legs cut, mark their precise placement on the top runner board using a pencil. Apply a generous amount of wood glue to the ends of the legs where they meet the runner. Then, attach them securely with 2″ or 2.5″ Spax screws, driving through the runner and into each leg. Ensure the legs are square and the angles are consistent for both base assemblies.
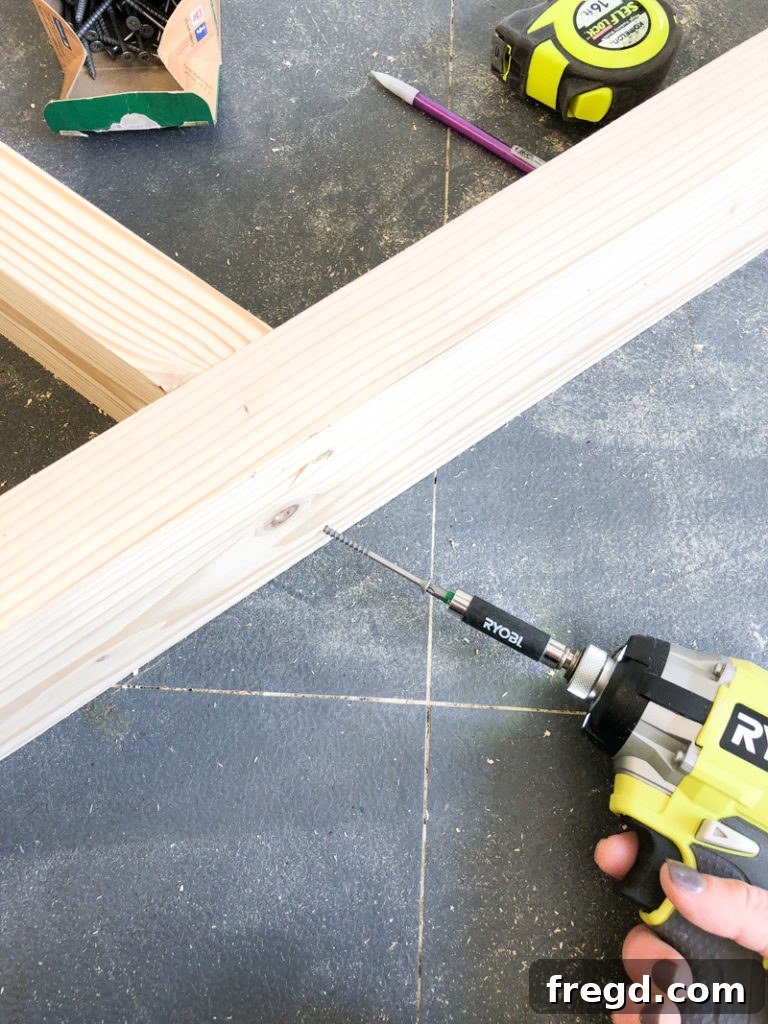
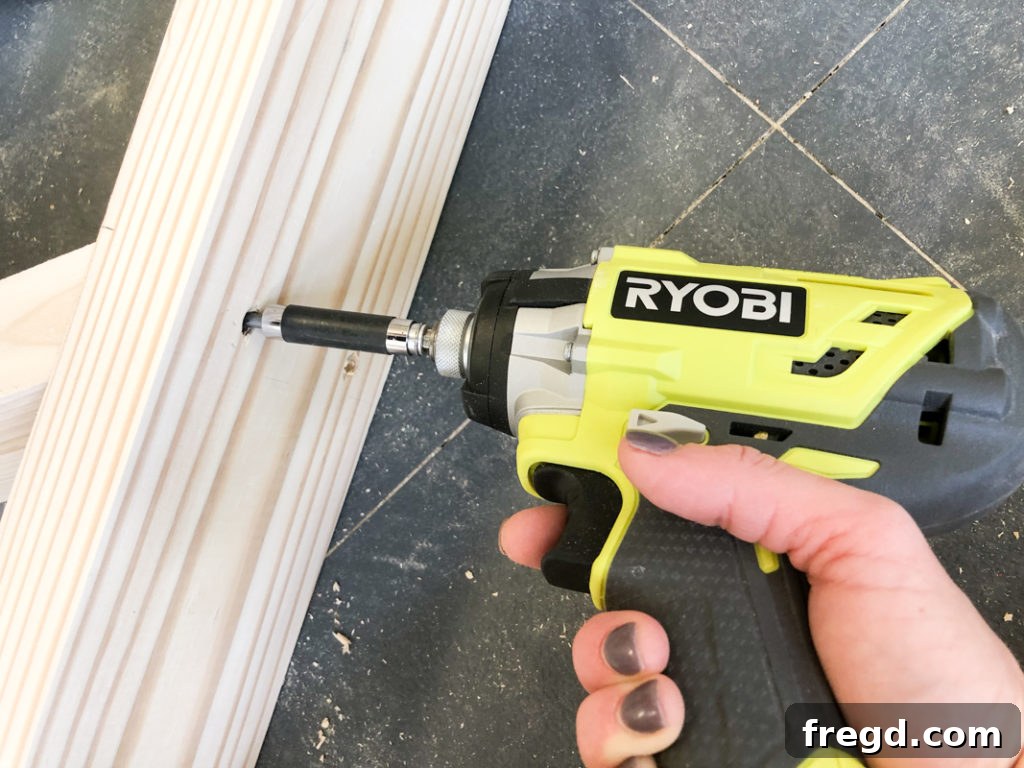
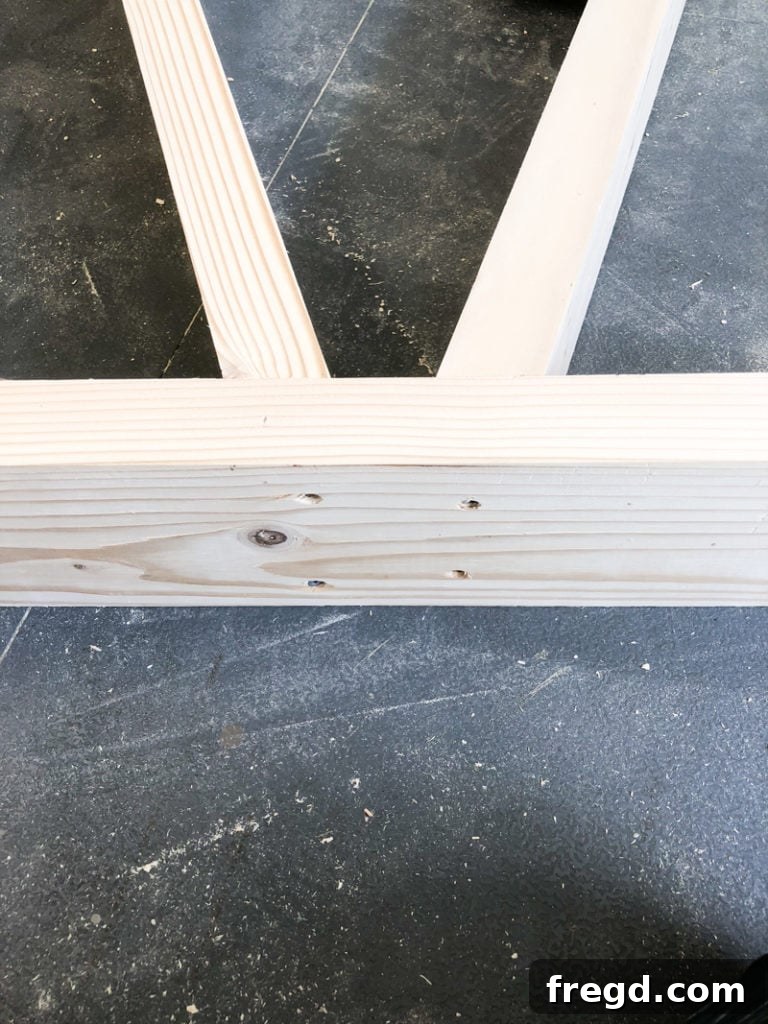
Using a GluBot (available on Amazon) during this stage will make applying wood glue much cleaner and more efficient!
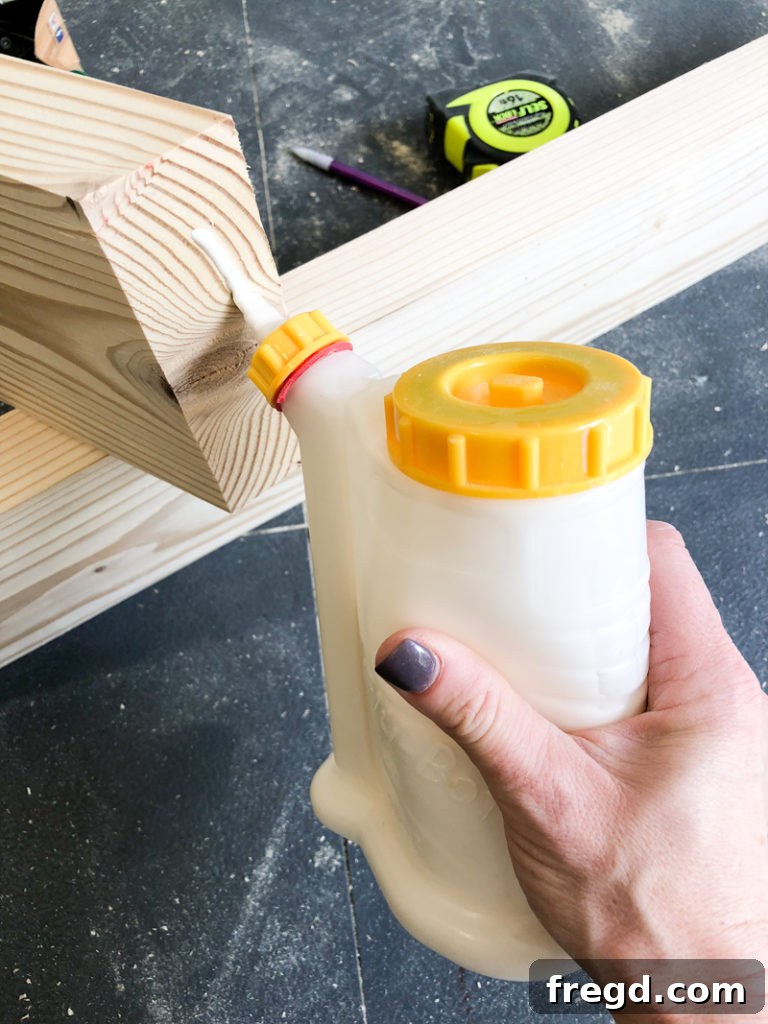
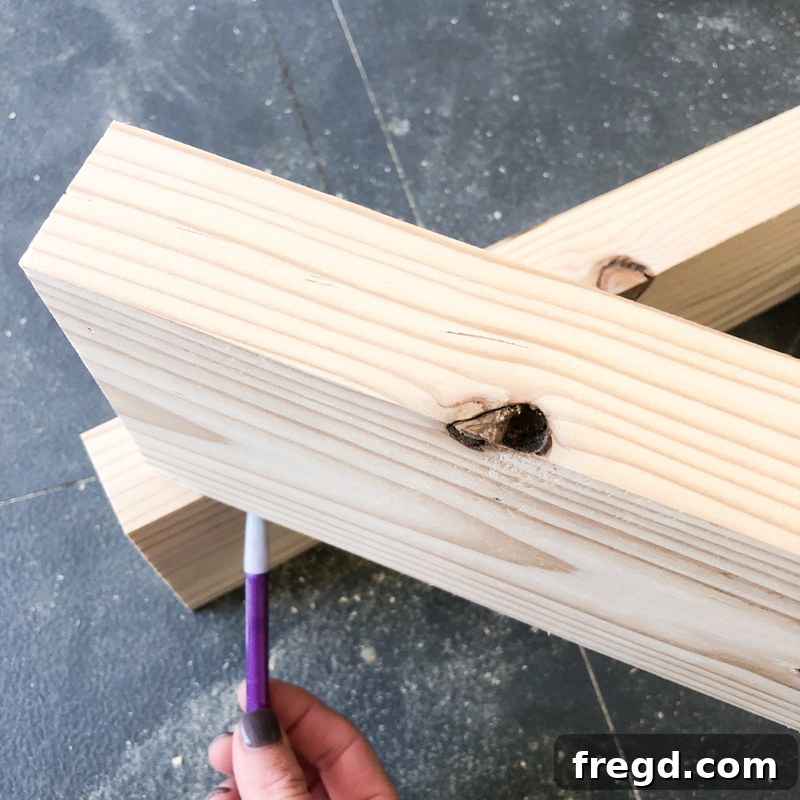
- Integrate Diagonal Braces for Stability: Next, add the diagonal braces. The simplest way to determine the correct angles for these pieces is to hold the board in place against your assembled legs and runner. Use a pencil to mark the exact cut lines directly on the board. Cut these angles, apply wood glue, and attach the braces using 2″ finish nails. For extra support, you can also drive Spax screws at an angle through the top runner and through the legs into the diagonal braces. These braces significantly enhance the rigidity of the sawhorse bases.
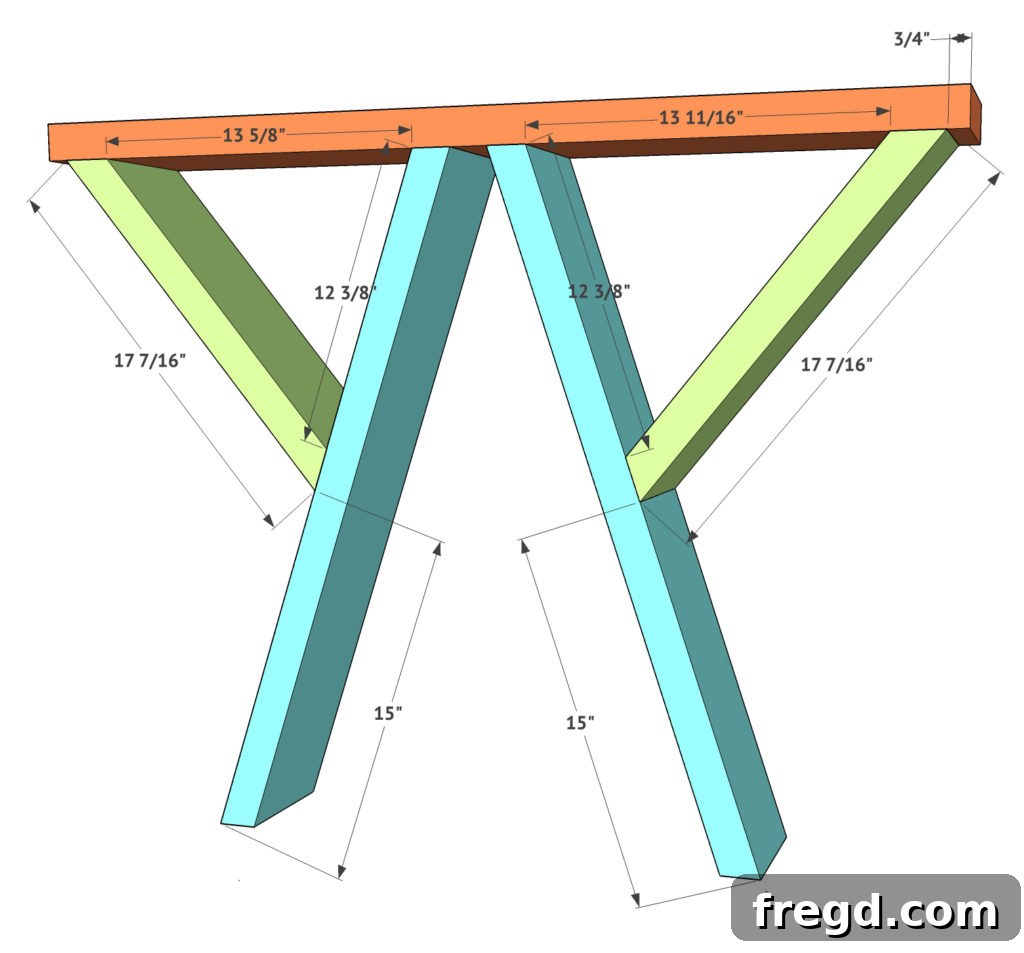
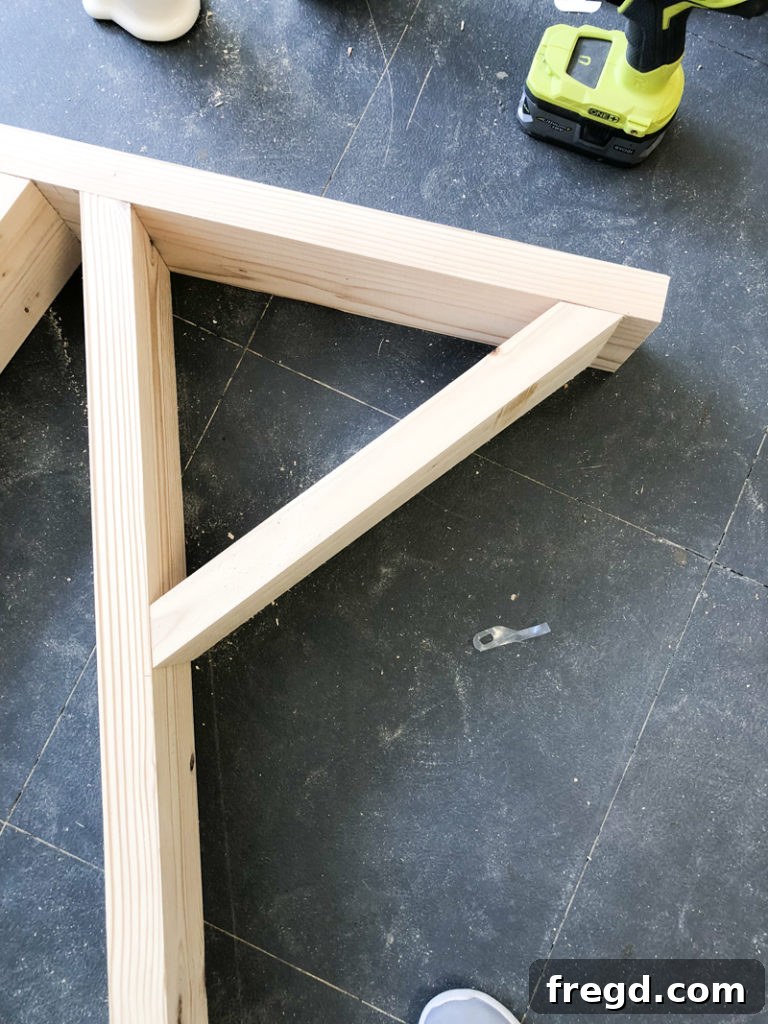
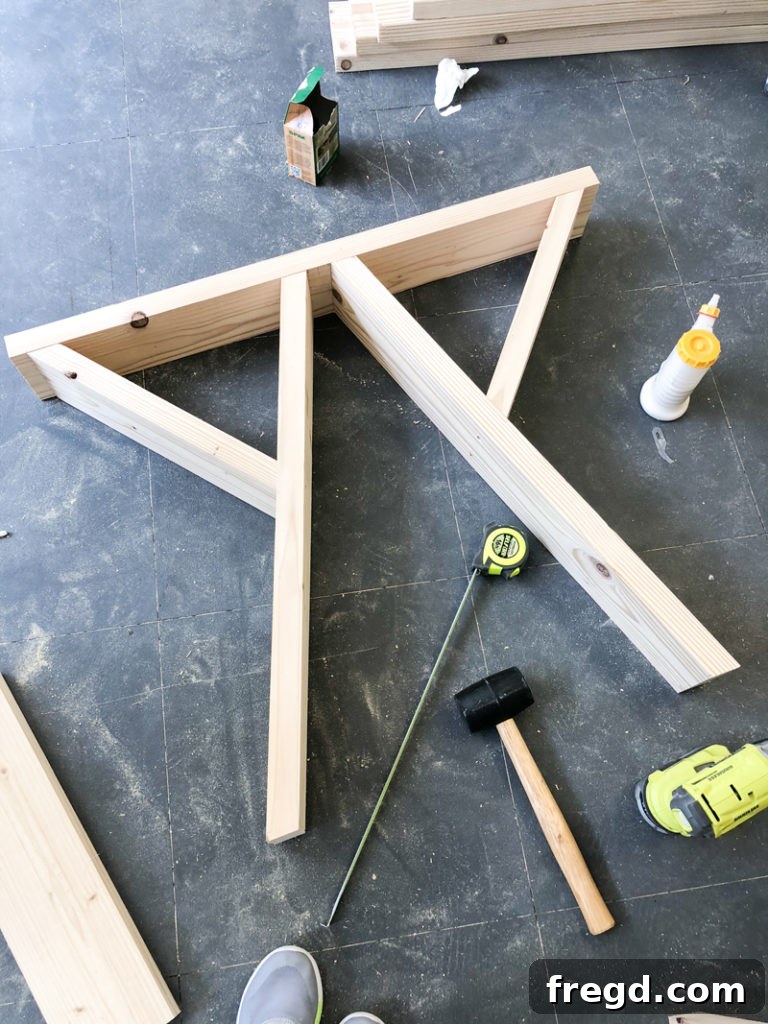
- Install Leg Braces: The leg braces are the horizontal supports connecting the splayed legs. Similar to the diagonal braces, the easiest way to get an accurate measurement and cut is to hold the board in place and draw lines along the edges of the legs. Cut these pieces, apply wood glue, and attach them using 2″ finish nails, driving through the supports and into each leg. These braces further strengthen the entire base structure.
Connecting the Base Assemblies
Now that both sawhorse bases are complete, it’s time to connect them and form the complete table base.
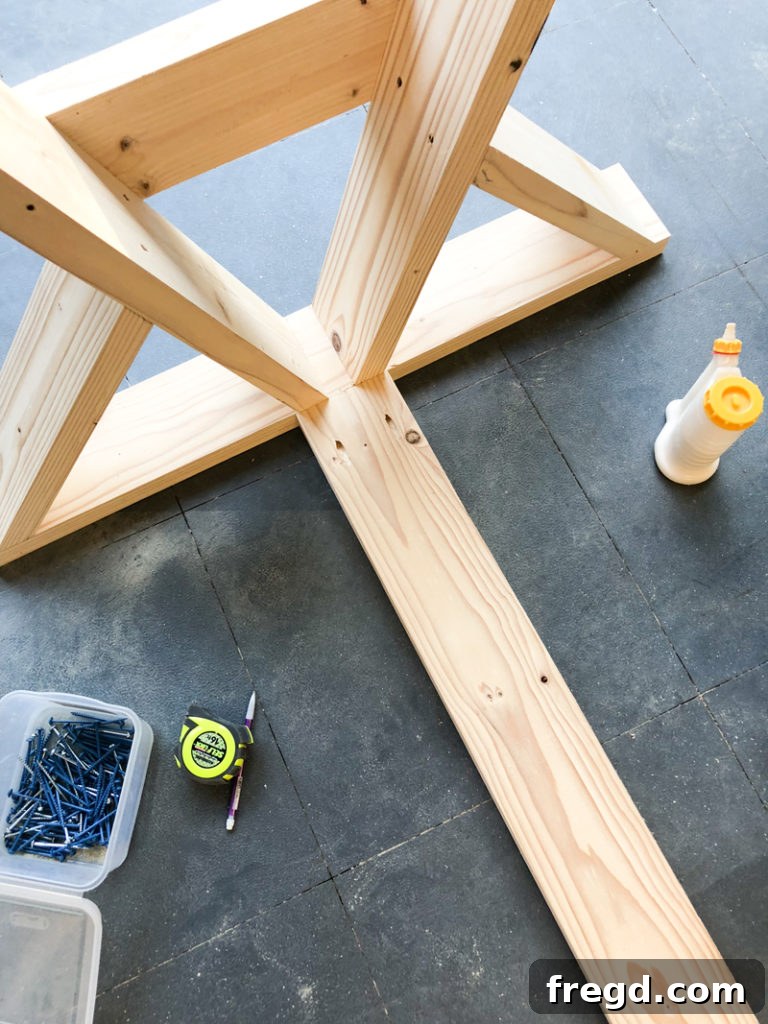
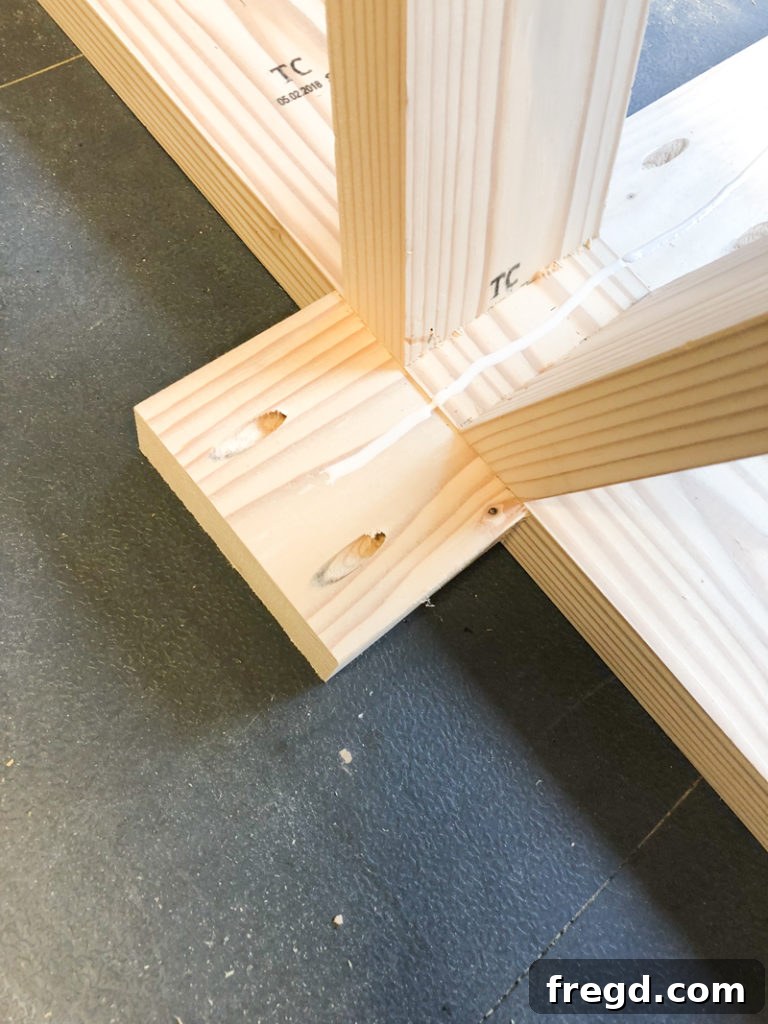
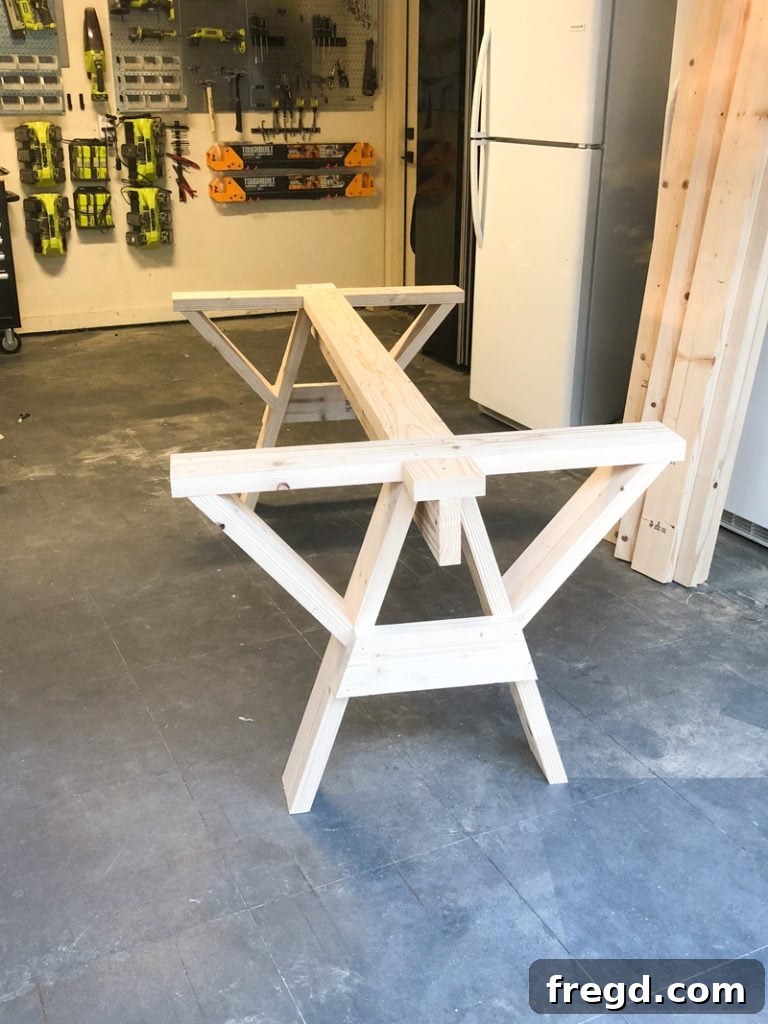
- The Central Runner: Attach the two leg assemblies together using a central runner board. Drill 1.5″ pocket holes at both ends of this runner. Apply wood glue to the ends and attach it to the center of both leg assemblies using 2.5″ pocket hole screws. If you don’t have large clamps to hold the assemblies in place, a helpful trick is to turn the leg assemblies upside down and lay the runner brace flat on the floor for easier attachment. This ensures a stable and square connection between the two bases.
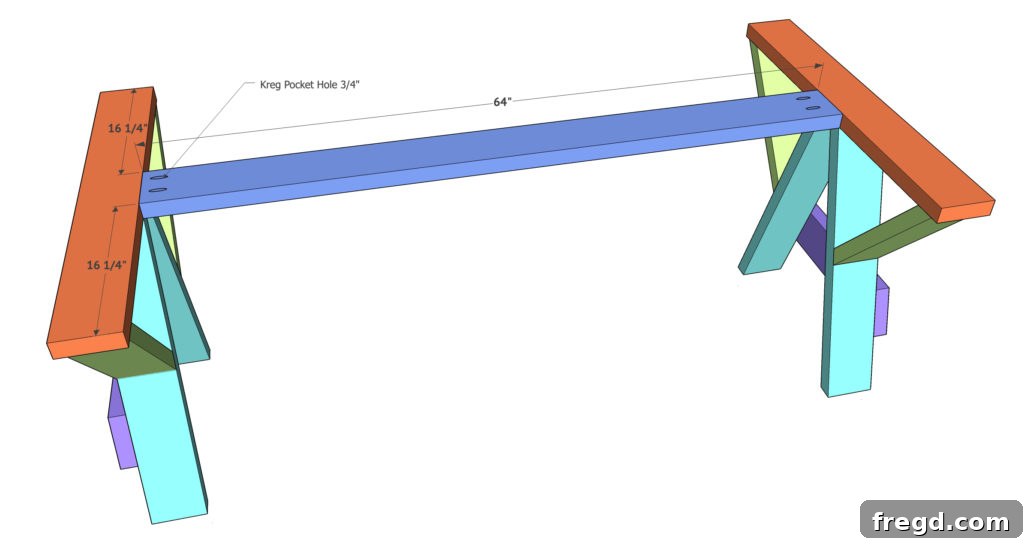
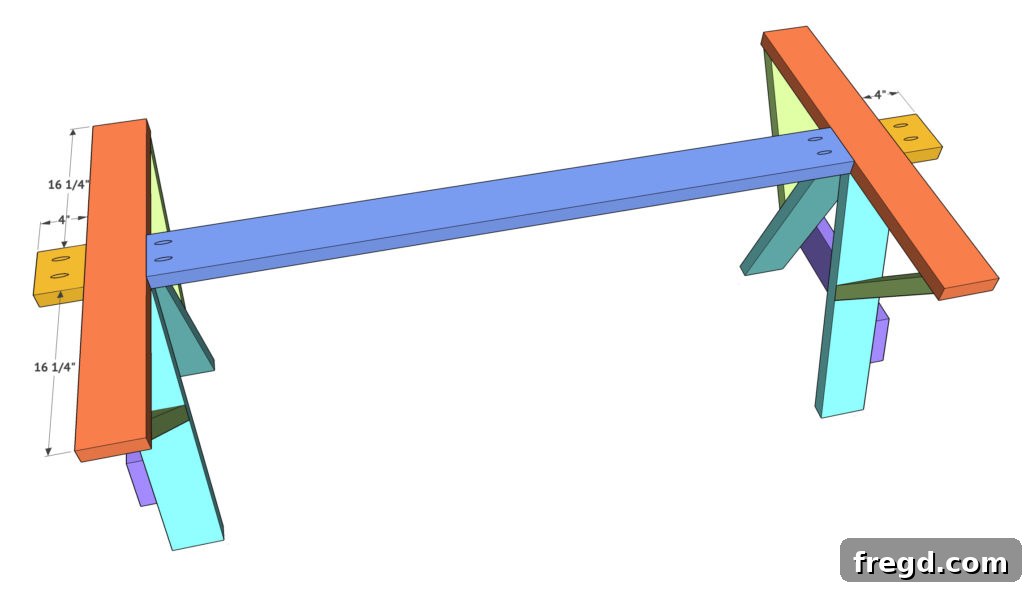
- Adding End Supports: Next, cut small end support pieces. These pieces provide additional structural integrity and will help support the breadboards of your tabletop. Drill 1.5″ pocket holes into these supports, apply wood glue, and attach them using 2.5″ pocket hole screws.
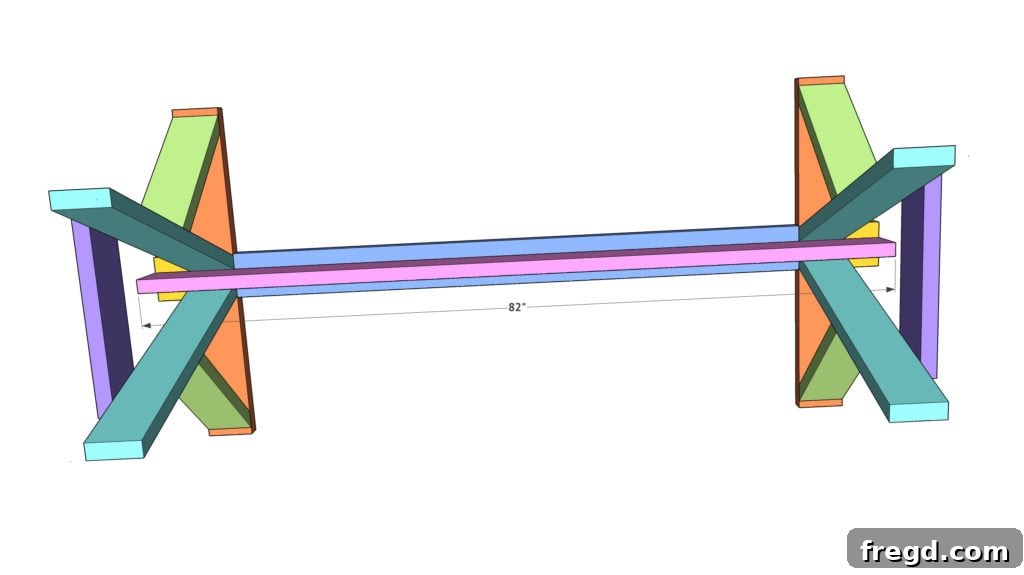
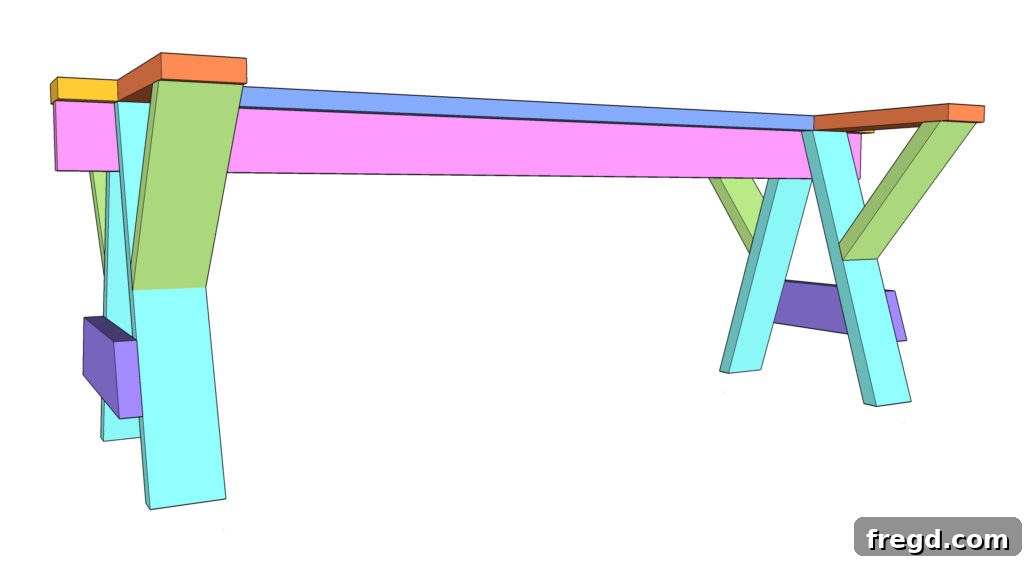
- Attaching the Long Runner: The long runner sits between each leg assembly, flush with the bottom of the top runner. This piece ties the entire base together, adding immense strength. Apply wood glue and attach this runner using 2.5″ Spax screws, driving them through the top runner and small side pieces into the long bottom runner. This creates a robust and stable foundation for your tabletop.
Attaching the Tabletop and Finishing Touches
With the base complete, the final steps involve securing the tabletop and applying a beautiful finish that highlights the wood’s natural grain.
Securing the Tabletop
- Final Attachment: To attach the tabletop, lay it upside down on a clean, flat floor or workbench. Then, carefully turn the assembled table base upside down and center it on top of the tabletop. This positioning makes driving screws easier and more accurate. Important: Do NOT use wood glue to attach the tabletop to the base. Wood expands and contracts with changes in humidity, and gluing the top to the base can lead to cracking. Instead, attach the top through the supports and runners of the base into the tabletop using 2.5″ Spax screws. This allows for slight movement while keeping the top securely fastened.
The Art of Staining
Now for the exciting part – bringing out the beauty of the wood with a captivating finish!
- Surface Preparation: Before staining, ensure your entire table is thoroughly sanded. Start with a medium-grit sandpaper (e.g., 120-grit) to remove any imperfections, then move to a finer grit (e.g., 180 or 220-grit) for a smooth finish. Clean off all dust with a tack cloth or vacuum before applying stain.
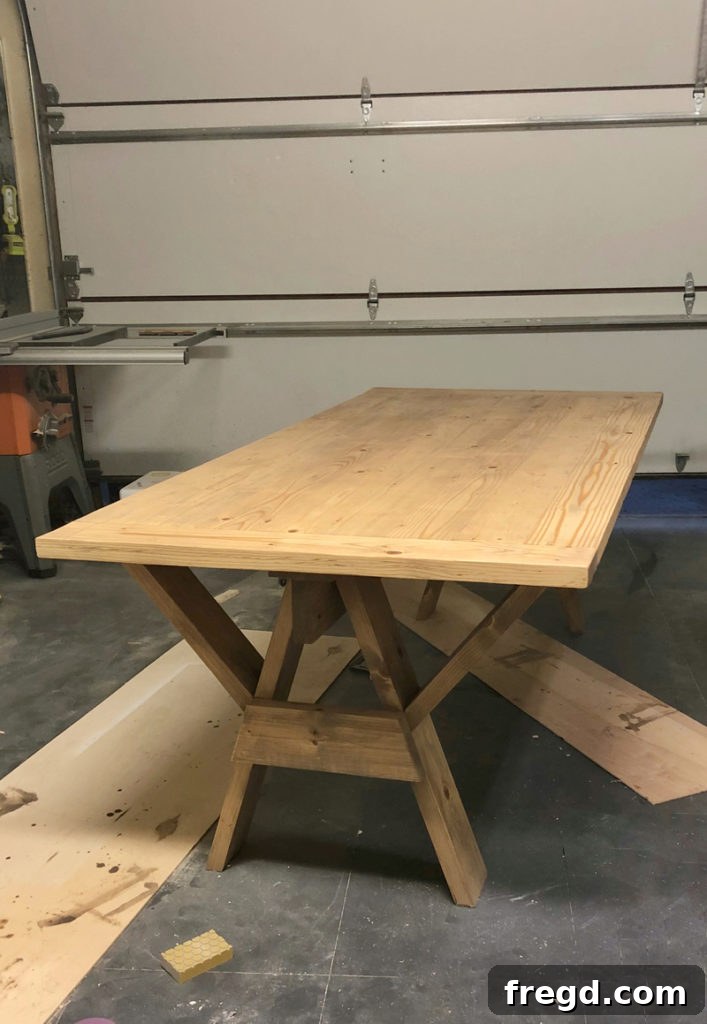
- Mixing and Applying the Stain: We achieved a gorgeous, rich finish by mixing Varathane Briarsmoke and Varathane Natural stains in a 50/50 ratio. Simply pour equal parts of both into a pan or can and stir thoroughly. Apply the stain as you normally would, working in sections and wiping off excess after a few minutes to achieve your desired depth of color. This custom mix creates a beautiful, warm, and inviting tone that perfectly complements the modern farmhouse style. You can find Varathane stains at Home Depot or HERE on Amazon!
- Protective Top Coat: For long-lasting durability and protection against spills and daily wear, apply several coats of a clear protective finish, such as polyurethane or a water-based topcoat, following the manufacturer’s instructions. Lightly sand with very fine-grit sandpaper (e.g., 320-grit) between coats for a silky smooth feel.
Your New Farmhouse Dining Table Awaits!
And there you have it! A magnificent, custom-built modern farmhouse dining table, crafted with your own hands and designed to be the focal point of countless cherished memories. This project is a testament to the fact that high-quality, stylish furniture doesn’t have to come with a hefty price tag. We’ve built this table for our office, and it has already served us well for many meals and gatherings.
We encourage you to embark on this rewarding DIY journey. The pride of sitting down at a table you built yourself is truly unmatched. Ready to get started? Click the link below to save and print the FREE plans for this modern farmhouse dining table and begin your build today!
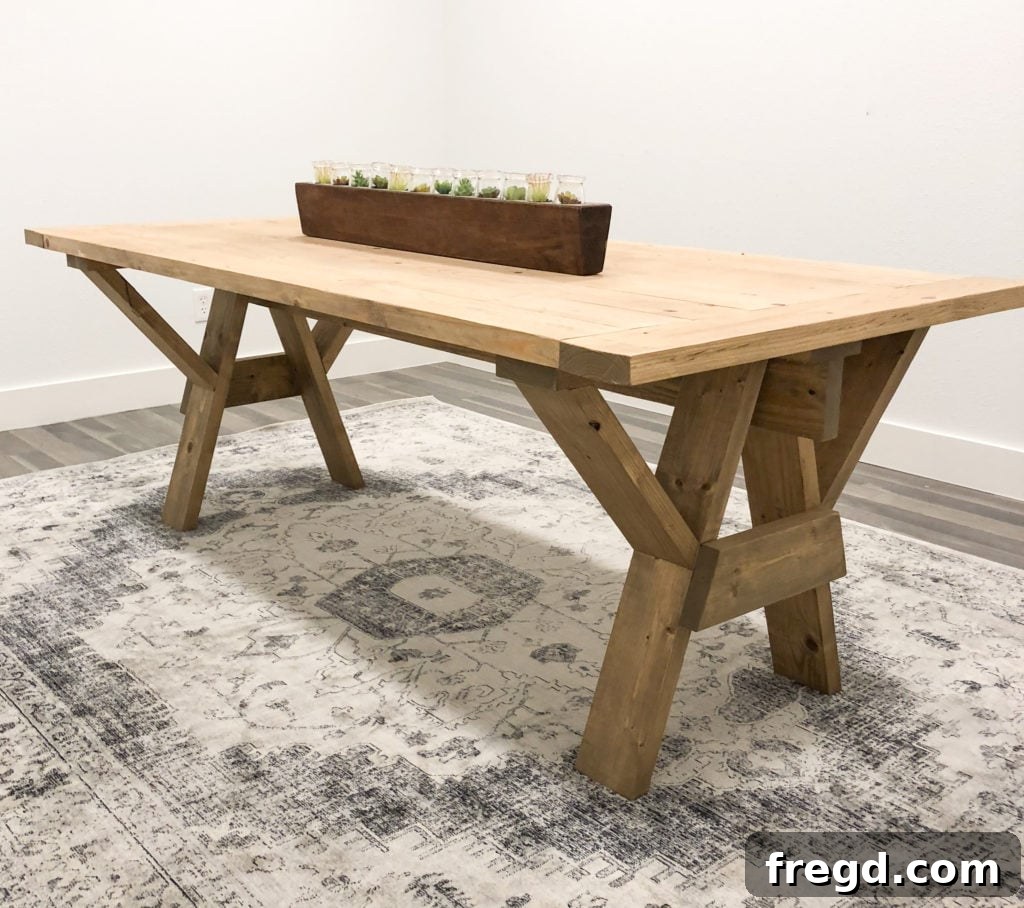
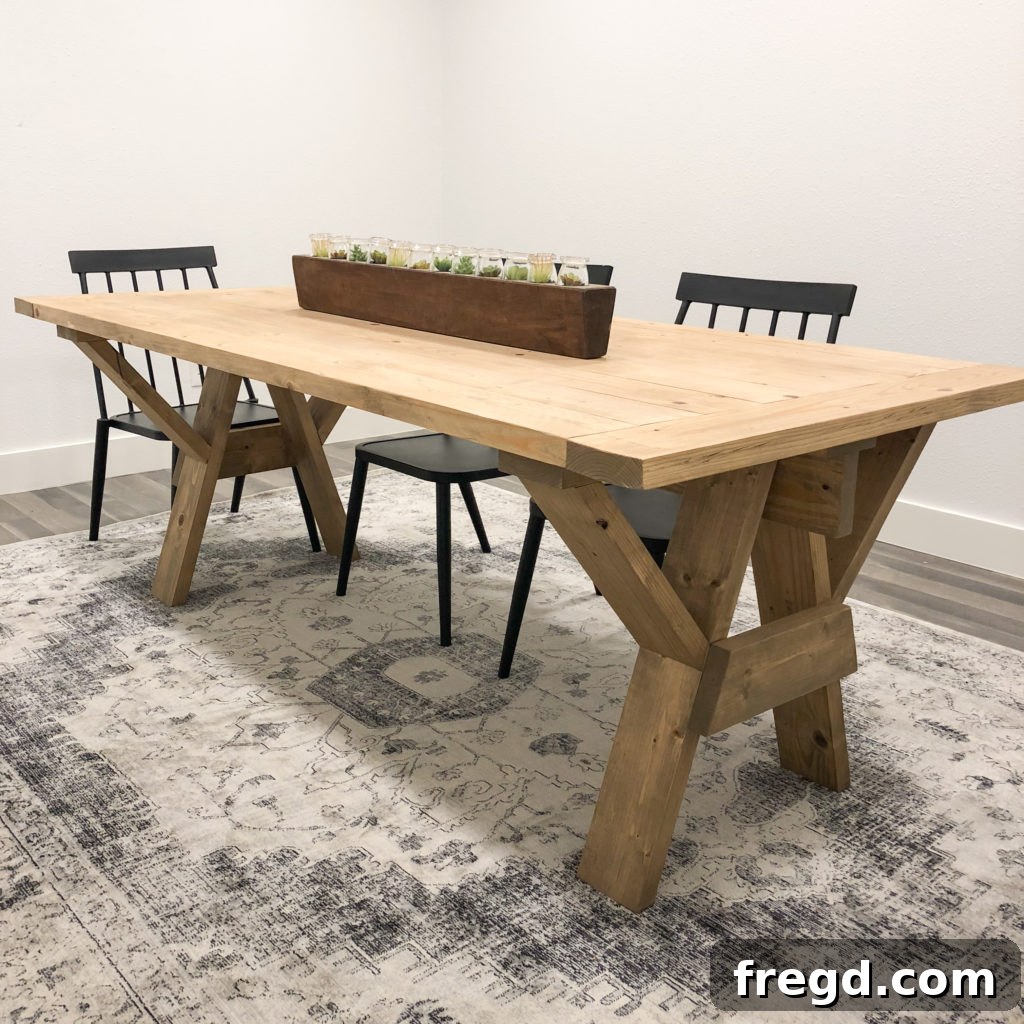
Explore our complete collection of free dining table plans for more inspiration!
Sawhorse Base Farmhouse Table
Cutest farmhouse dining table you can build for under $80 in lumber! Click HERE to print these plans!
Supply List
- 13 – 2x6x8 Framing Lumber (rip each board to 5″ wide)
- Several – Kreg Pocket Hole Screws (2.5″)
- 1 – Wood Glue
- Several – 2″ and 2.5″ Finish Nails
- Several – 2.5″ Spax Screws (for base assembly)
- Varathane Briarsmoke Stain
- Varathane Natural Stain
Instructions (Summary)
-
Create the tabletop by ripping 2×6 boards to 5″, adding 1.5″ pocket holes, and attaching planks together with 2.5″ pocket hole screws. Then, attach breadboards with 2.5″ pocket hole screws.
-
Build two identical base assemblies. Cut leg pieces with 18.5˚ parallel angles. Mark and attach legs to the top runner board using Spax screws and wood glue.
-
Add diagonal braces to each base. Determine angles by holding boards in place and marking. Attach with wood glue and 2″ finish nails, or add Spax screws for extra support.
-
Mark and cut leg braces. Attach these boards using wood glue and 2″ finish nails through supports and into each leg.
-
Connect the leg assemblies with a central runner. Add 1.5″ pocket holes to the runner ends and attach to the center of both leg assemblies using wood glue and 2.5″ pocket hole screws.
-
Cut small end supports and attach them using wood glue and 2.5″ pocket hole screws through 1.5″ pocket holes. These support the breadboards.
-
Attach the long runner between each leg assembly, flush with the bottom of the top runner. Secure with 2.5″ Spax screws and wood glue.
-
Finally, attach the tabletop. Lay the tabletop upside down and place the base assembly upside down on top. Attach through supports and runners into the top using 2.5″ Spax screws (no wood glue for the top). Prepare for finishing.