
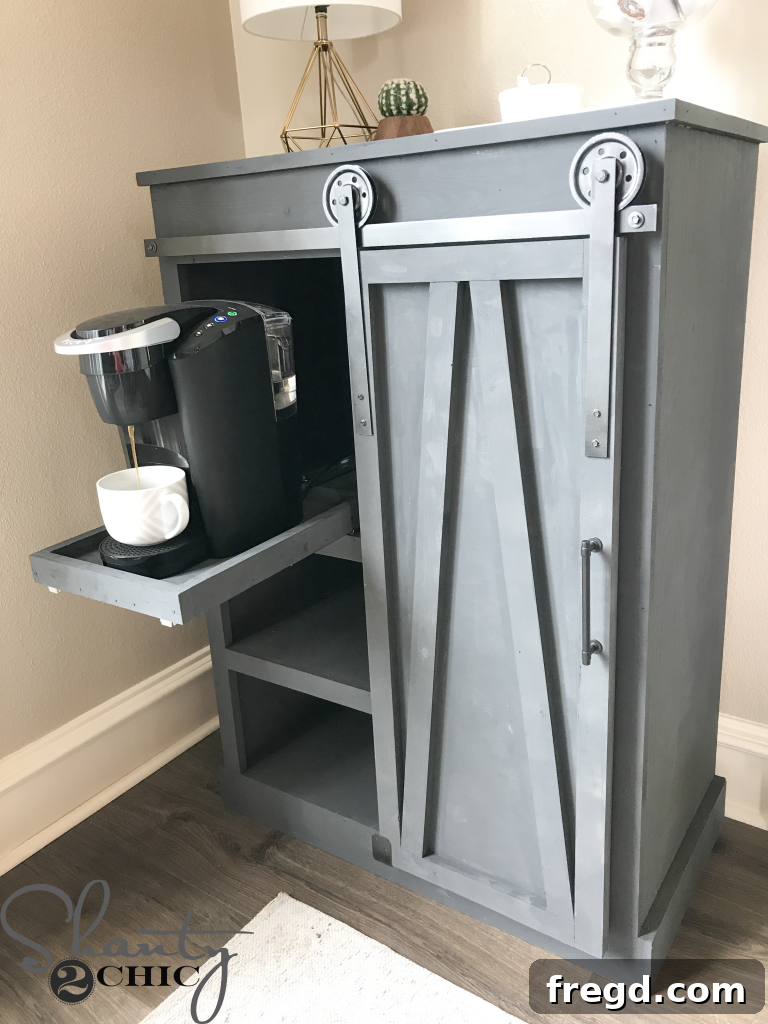
Transform your coffee routine and reclaim valuable counter space with our step-by-step guide to building a stunning DIY Barn Door Coffee Cabinet. This unique storage solution, designed to elegantly house your coffee maker and all your K-Cup® pods, brings rustic charm and smart functionality to any home. Whether you’re a seasoned DIY enthusiast or just starting your woodworking journey, our comprehensive plans and how-to video make this project achievable and incredibly rewarding. Get ready to create a dedicated coffee station that combines style, efficiency, and the undeniable joy of a perfectly organized space!
We extend our sincere gratitude to Keurig Green Mountain® for their partnership in making this incredible DIY Barn Door Coffee Cabinet project a reality. Our passion for coffee is well-known, and our love for Keurig® coffee makers is just as strong – we simply can’t imagine our mornings without them! So, when Keurig® challenged us to design and build a custom piece for their newest innovation, we were beyond thrilled to accept. This collaboration allowed us to merge our crafting expertise with our daily coffee ritual, resulting in a cabinet that truly elevates the home coffee experience.
Let us introduce you to the star of our new coffee station: the innovative Keurig® K-Compact™ coffee maker, available exclusively at Walmart! Keurig® has been incredibly responsive to its customers’ feedback, recognizing that maximizing counter space is a top priority for many households. The K-Compact™ is the perfect answer to this need, offering a brilliantly compact design without compromising on performance. Its sleek profile makes it an ideal fit for smaller kitchens, apartments, or anyone looking to free up precious counter real estate. It’s not just compact; it’s also the slimmest Keurig® model featuring a convenient removable water reservoir.
Beyond its space-saving attributes, the Keurig® K-Compact™ coffee maker delivers a premium brewing experience. It can brew 6, 8, or 10 oz. cups of your favorite beverage in under a minute, ensuring your morning caffeine fix is never far away. The generous 36 oz. water reservoir means fewer refills, making your daily routine smoother and more efficient. This energy-efficient brewer also includes an automatic off feature, saving power and providing peace of mind. Plus, its removable drip tray is a thoughtful addition, accommodating travel mugs up to 7 inches tall – perfect for coffee on the go. At an incredibly accessible price point of just $59.00, the Keurig® K-Compact™ has quickly become one of our most highly recommended coffee makers, offering exceptional value and unparalleled convenience for any coffee enthusiast.

Building Your DIY Barn Door Coffee Cabinet: A Comprehensive Guide
Inspired by the “saving space” ethos of the Keurig® K-Compact™, we meticulously designed and constructed a slim, stylish DIY Barn Door Coffee Cabinet. This handcrafted cabinet is more than just a place to put your coffee maker; it’s a complete coffee station built specifically to complement the compact dimensions of the new brewer. Beyond the designated space for your Keurig®, we’ve integrated clever extra storage for all your beloved K-Cup® pods – because a well-stocked coffee bar is a happy coffee bar! (We’re partial to The Original Donut Shop®, if you’re asking!)
Now, let’s grab a fresh cup of coffee and dive into the exciting build process. We invite you to join us in our workshop as we reveal exactly how we brought this adorable yet highly functional coffee cabinet to life. From initial cuts to the final decorative touches, we’ll guide you through every step, ensuring you have all the information and confidence you need to replicate this project in your own home.
For a dynamic visual walkthrough of the entire construction, simply click HERE or the image above to watch our detailed how-to video. Seeing each step in action can be incredibly helpful and motivating! Ready to get started? We’ve made it even easier for you. You can download the FREE Printable Plans HERE (or by clicking the image below), allowing you to follow along with precise measurements and diagrams as you read through our detailed instructions below. Let’s create something amazing!
Constructing the Cabinet Box and Shelves
The foundation of your DIY Barn Door Coffee Cabinet begins with the precise cutting and assembly of the main cabinet box and its internal shelves. Accuracy at this stage is crucial for a professional-looking finish and proper functionality. Start by carefully measuring and cutting all the necessary plywood pieces for the cabinet’s sides, top, bottom, and internal shelves. Always double-check your measurements against the free printable plans to avoid any errors.
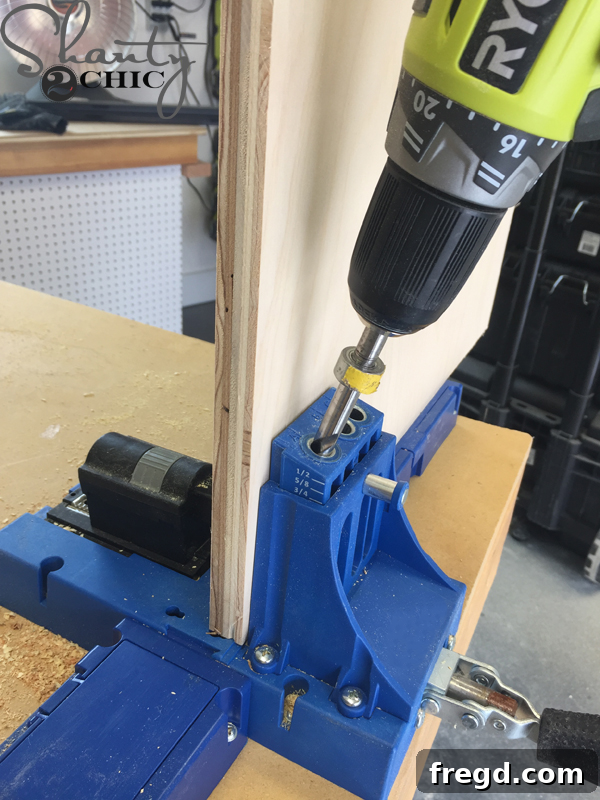
Once your plywood pieces are cut, it’s time to prepare them for assembly using pocket holes. Pocket holes create strong, hidden joints that are ideal for cabinet construction. Using a pocket hole jig, drill 3/4″ pocket holes into the designated ends of the shelf boards. The printable plans provide specific guidance on the exact placement of these pocket holes to ensure optimal strength and alignment within the cabinet structure. Proper placement will prevent visible screws and ensure a clean, sturdy build.
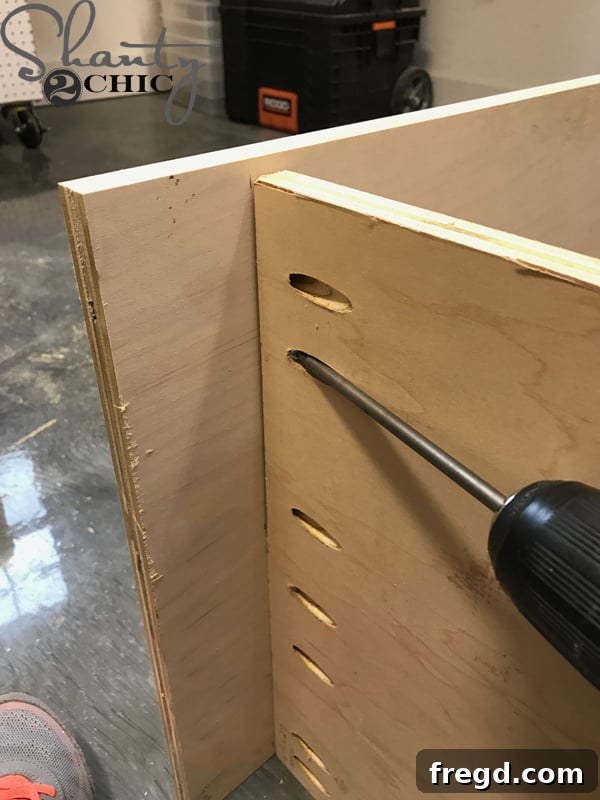
With the pocket holes drilled, you can now attach the shelves to the side panels of the cabinet. Apply a thin, even layer of wood glue to the edges of the shelves where they will meet the side panels. Wood glue provides incredible strength and helps prevent any future movement in the joints. Secure the shelves in place using 1 1/4″ pocket hole screws. Drive the screws firmly but carefully, ensuring the joints are tight and flush. This combination of wood glue and pocket hole screws creates an exceptionally durable and long-lasting cabinet structure, capable of holding your Keurig® and a plentiful supply of K-Cups®.
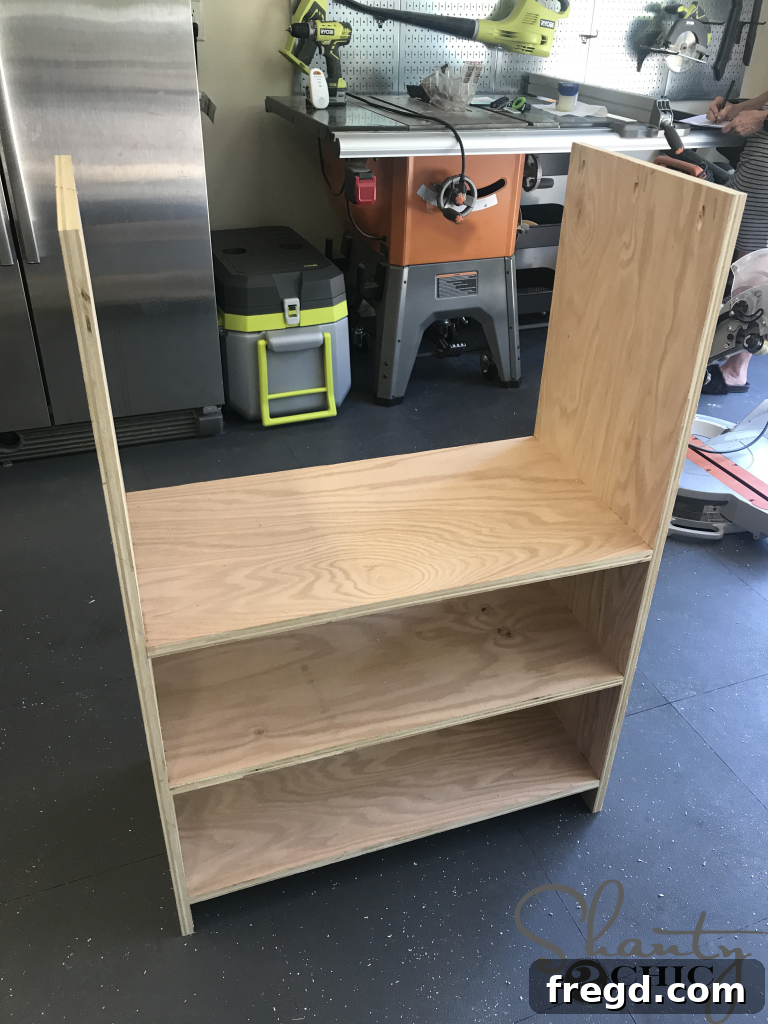
At this stage, your cabinet box should be taking shape, resembling the initial framework for your ultimate coffee station. Review your work to ensure all shelves are level and joints are secure. This foundational step is critical, so take your time and verify everything is correctly aligned and tightly joined.
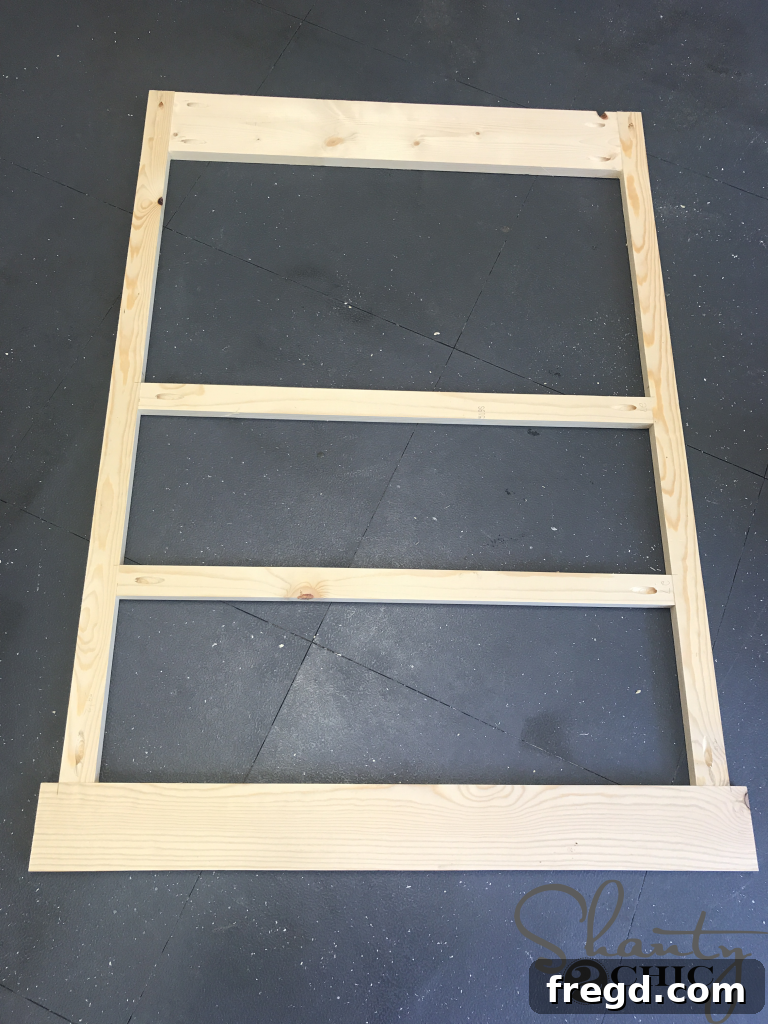
Once the main cabinet box is fully assembled and stable, the next step is to create and attach the face frame. The face frame adds a finished look to the front of the cabinet, covers the plywood edges, and provides structural integrity. Begin by measuring and cutting your face frame pieces precisely to fit the front opening of your assembled cabinet. Then, drill 3/4″ pocket holes in the designated face frame boards as indicated in your plans. Assemble the face frame components using both wood glue and 1 1/4″ pocket hole screws, ensuring all joints are flush and square. A well-built face frame significantly enhances the overall aesthetic and durability of your DIY Barn Door Coffee Cabinet.
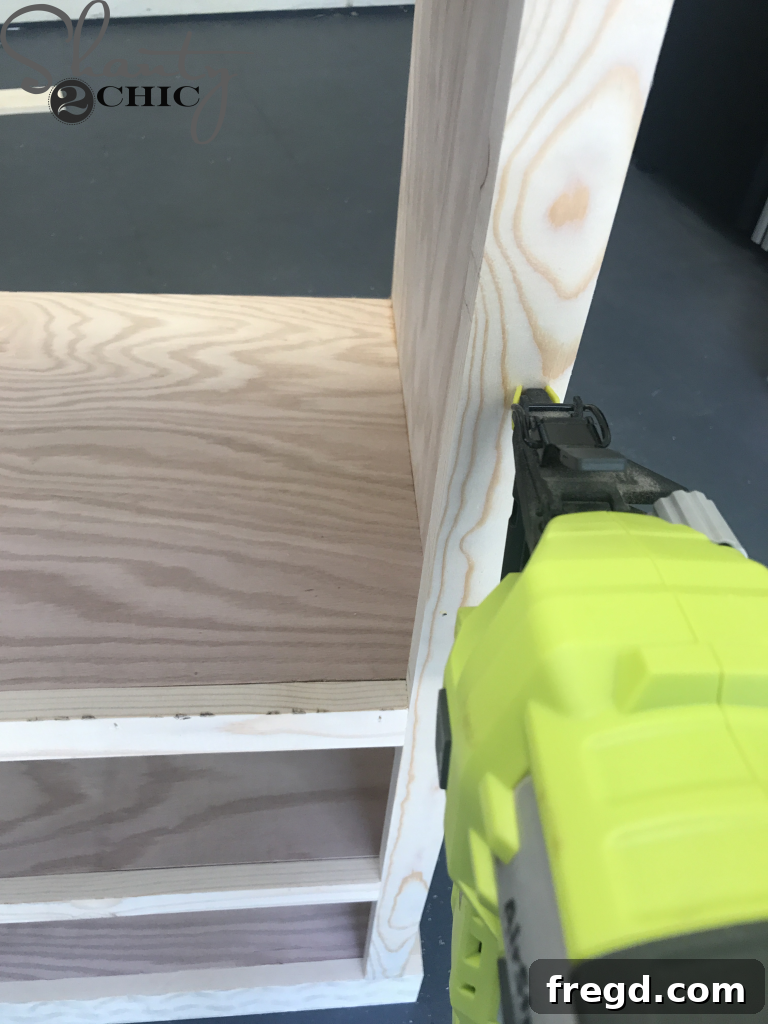
With the face frame assembled, it’s time to attach it securely to the front of your cabinet box. Apply a bead of wood glue along the edges of the cabinet box where the face frame will sit. Carefully position the face frame onto the cabinet, ensuring it’s perfectly aligned and flush on all sides. Then, use your brad nailer to attach the face frame with 1 1/4″ brad nails. The brad nails will hold the face frame in place while the wood glue dries, creating a strong and seamless bond. Be sure to drive the nails in a pattern that provides ample holding power but is also easy to fill and sand later for a smooth finish.
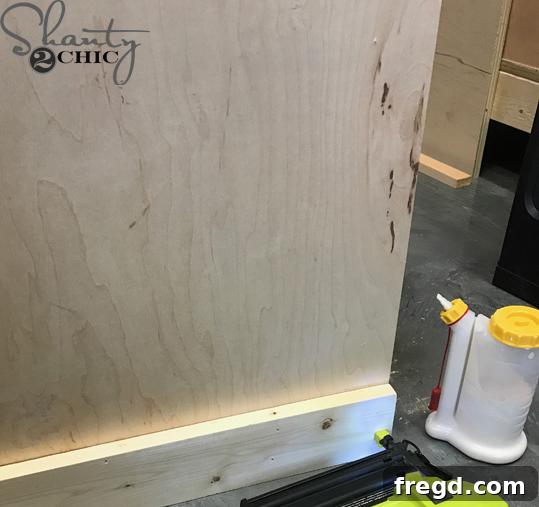
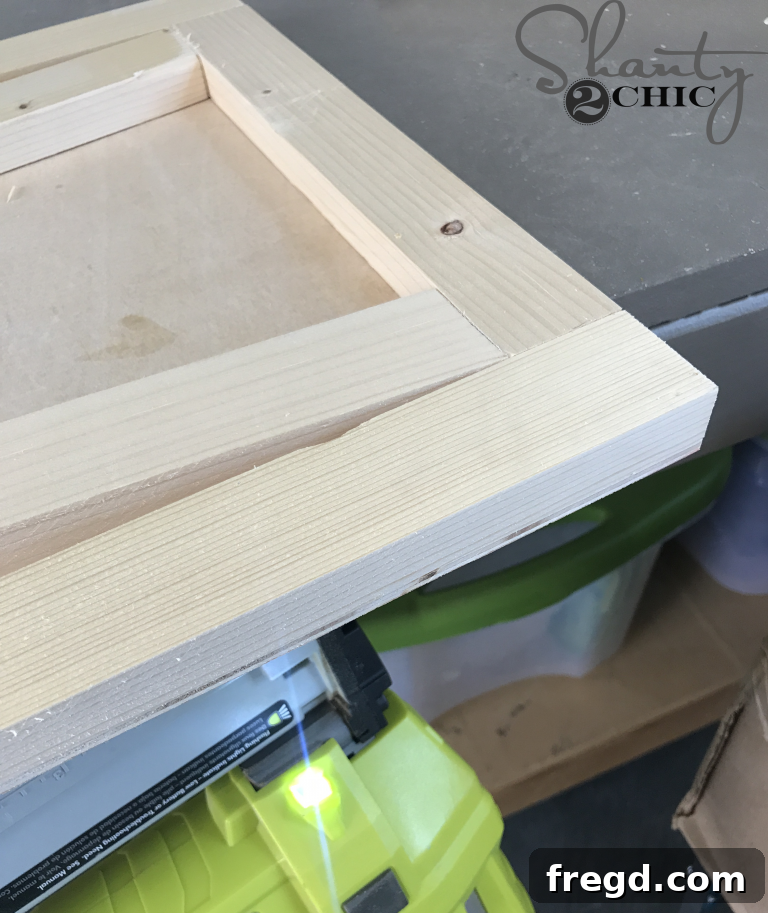
You’ll notice that the bottom piece of the face frame is designed to overhang by 3/4″ on each side. This intentional overhang is crucial for accommodating the side trim pieces that will be added next, creating a clean and cohesive look. Now, cut your side trim pieces to the specified size according to the plans. Apply wood glue to the edges where they will meet the cabinet and face frame, then attach them securely with 1 1/4″ brad nails. These trim pieces not only add a decorative touch but also further enhance the structural integrity of your DIY Barn Door Coffee Cabinet.
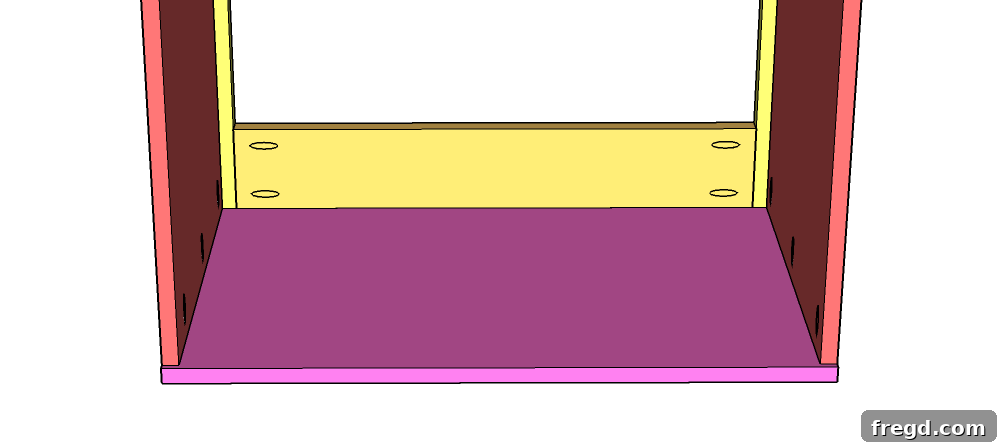
Next, carefully flip the entire cabinet upside down and position it on top of the pre-cut top panel of the cabinet. This ensures a stable base for attaching the upper sections. Align the front of the cabinet box flush with the front of the face frame, and ensure there is a 1/4″ overhang on the back side. This overhang is specifically designed to accommodate the backing panel that will be added later, creating a flush and finished back. Attach the side pieces to the top panel using 1 1/4″ pocket hole screws and wood glue. The combination of glue and screws provides maximum strength, ensuring the top of your DIY Barn Door Coffee Cabinet is robust and perfectly integrated.
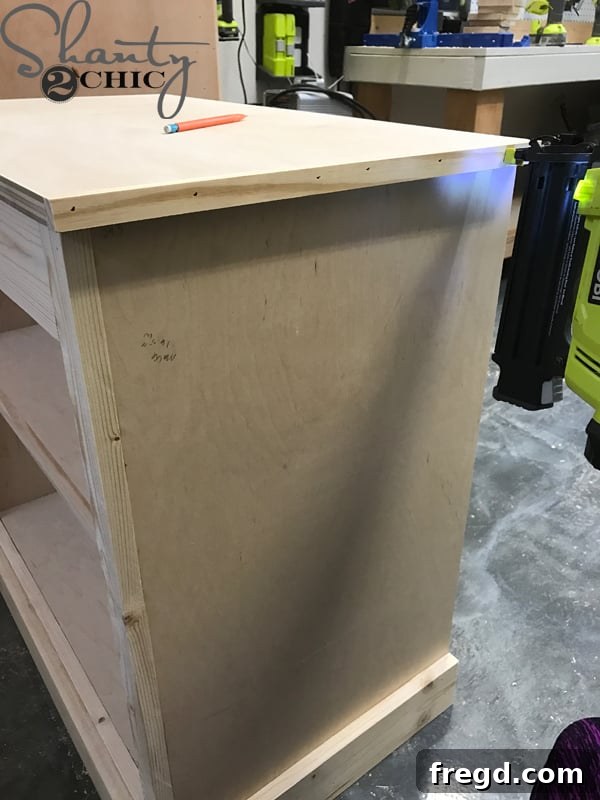
Flip the cabinet right-side-up once more. Now, measure and cut the top side trim pieces to size, ensuring they fit snugly along the top edges. Apply wood glue and secure these side trim pieces with 1″ brad nails. Finally, measure and cut the front trim piece for the top. Attach it in the same manner, using wood glue and 1″ brad nails. These finishing trim pieces provide a polished look, concealing any raw edges and adding a refined touch to the overall design of your DIY Barn Door Coffee Cabinet.
Crafting the Sliding Barn Door and Hidden Drawer
Now for the truly exciting part: bringing the signature features of this coffee cabinet to life – the clever hidden pull-out drawer and the charming sliding barn door! These elements not only add immense functionality for K-Cup® storage but also define the unique aesthetic of your DIY coffee station. Let’s start with the construction of the versatile pull-out drawer, designed to keep your coffee pods neatly organized and out of sight until needed.
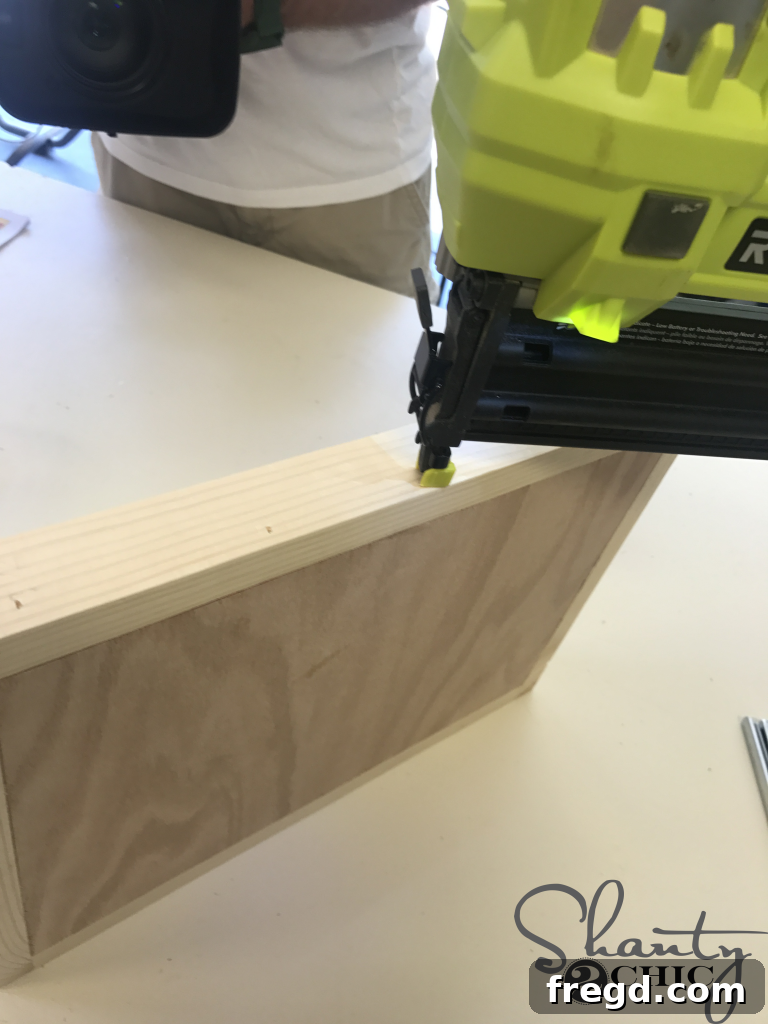
To construct the hidden drawer, begin by cutting all the necessary pieces according to the plans. These typically include a plywood bottom and four trim pieces for the sides. Attach the side trim pieces to the plywood bottom using 1 1/4″ brad nails and wood glue for a strong, lasting bond. Ensure that the bottom edge of the trim pieces is flush with the bottom of the plywood drawer panel. This precise alignment is essential for smooth operation once the drawer slides are installed. A perfectly crafted drawer will seamlessly blend into your DIY Barn Door Coffee Cabinet when closed, offering discrete storage for your coffee essentials.
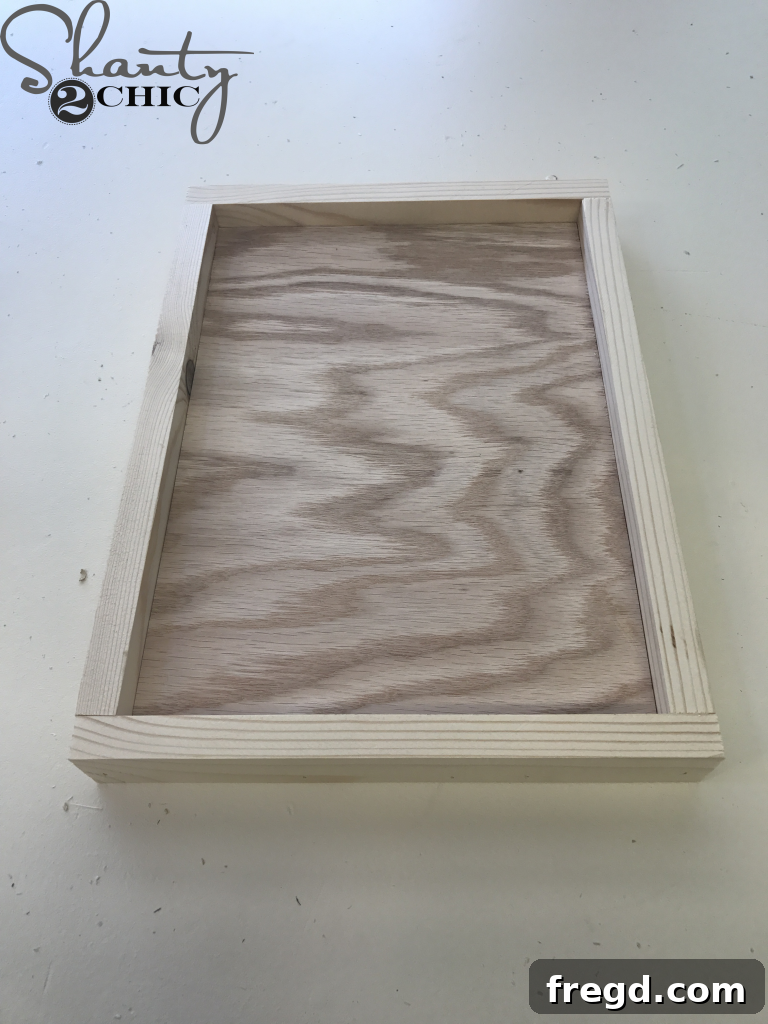
Congratulations, your hidden drawer is now complete and ready for installation! The simplicity of its design belies the functionality it will add to your custom coffee cabinet, providing an ideal spot to stash away K-Cups®, stirring sticks, or other small accessories, keeping your coffee station clutter-free and organized. With the drawer itself built, the next crucial step is installing the drawer slides to ensure effortless operation.
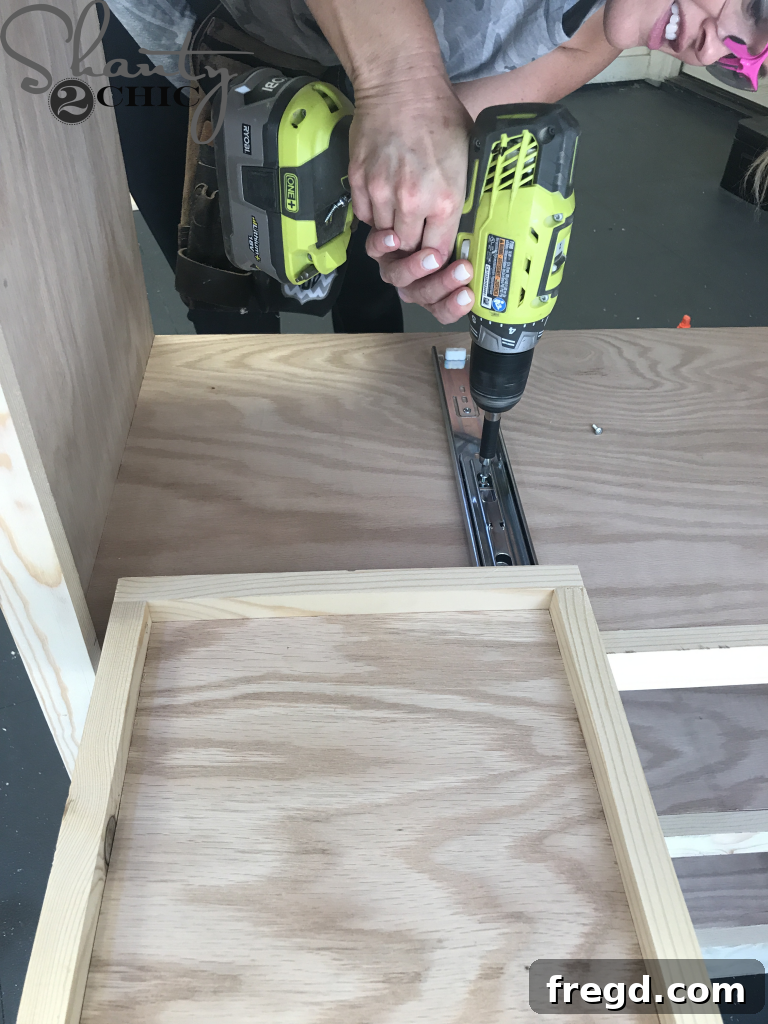
Installing drawer slides can sometimes be tricky, but a “dry fit” method makes it much easier and ensures perfect alignment. First, attach the upper portion of the drawer slides directly to the bottom edges of your newly constructed drawer. Next, with the bottom part of the slides still separated, gently slide them over the top portions (which are now attached to the drawer). Carefully position the drawer into its intended hidden spot within the cabinet, where it will sit when fully closed. This is where an extra pair of hands can be invaluable! Have someone hold the drawer in this closed position. Now, slide the drawer open, allowing the bottom parts of the slides to extend out. With the drawer extended, you can accurately mark where to attach the bottom slide pieces to the underside of the cabinet shelf. Once marked, detach the bottom slides from the drawer and screw them securely into the cabinet. Then, re-insert the drawer, and it should slide smoothly into place. For those wondering, we used high-quality, full-extension drawer slides, which you can find similar to ours HERE on Amazon, ensuring full access to your K-Cup® collection.
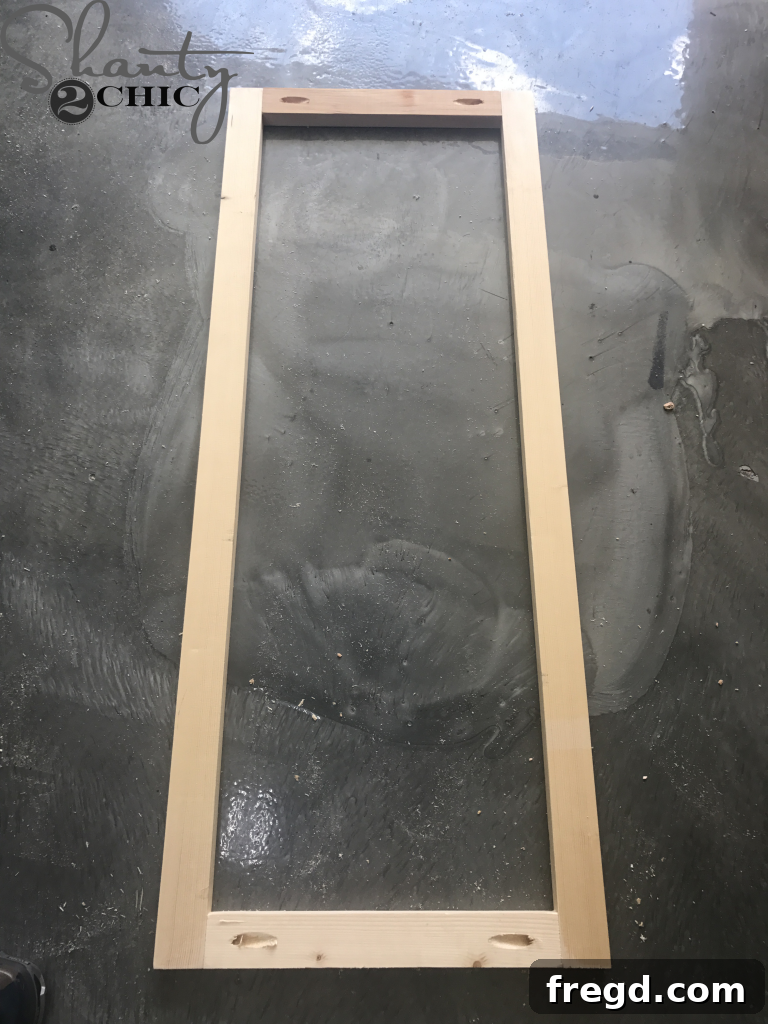
The final and most visually striking piece to build for your DIY Barn Door Coffee Cabinet is the barn door itself. This door will serve as both a functional cover for your coffee maker and a beautiful design element. Start by cutting all the pieces for the door frame according to your plans. Using your pocket hole jig, drill 3/4″ pocket holes into the ends of the top and bottom frame pieces. Then, attach these top and bottom pieces to the side pieces using 1 1/4″ pocket hole screws and wood glue. Ensure that your frame is perfectly square and all joints are tight before proceeding, as this will impact the alignment and smooth operation of the barn door.
Adding the Diagonal Pieces to Your Barn Door
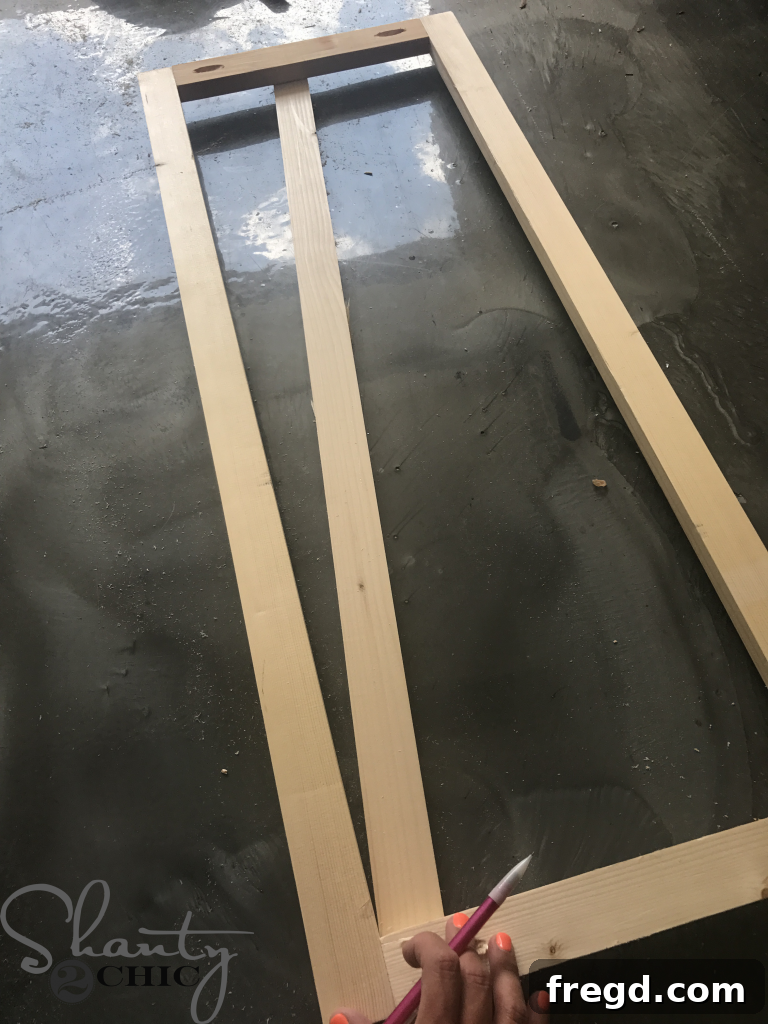
The diagonal pieces are what give the barn door its distinctive, rustic character. Measuring and cutting these angles accurately can seem daunting, but we have a fool-proof tip to ensure a perfect fit every single time. Instead of relying solely on angle measurements, use this direct marking technique. First, position the door frame (without the back panel attached yet) flat on your workbench. Lay one of your pre-cut diagonal pieces directly on top of the door frame in its intended position. Using a pencil, precisely mark where the diagonal piece overlaps the frame edges. This visual method eliminates guesswork and accounts for any minor variations in your frame dimensions.
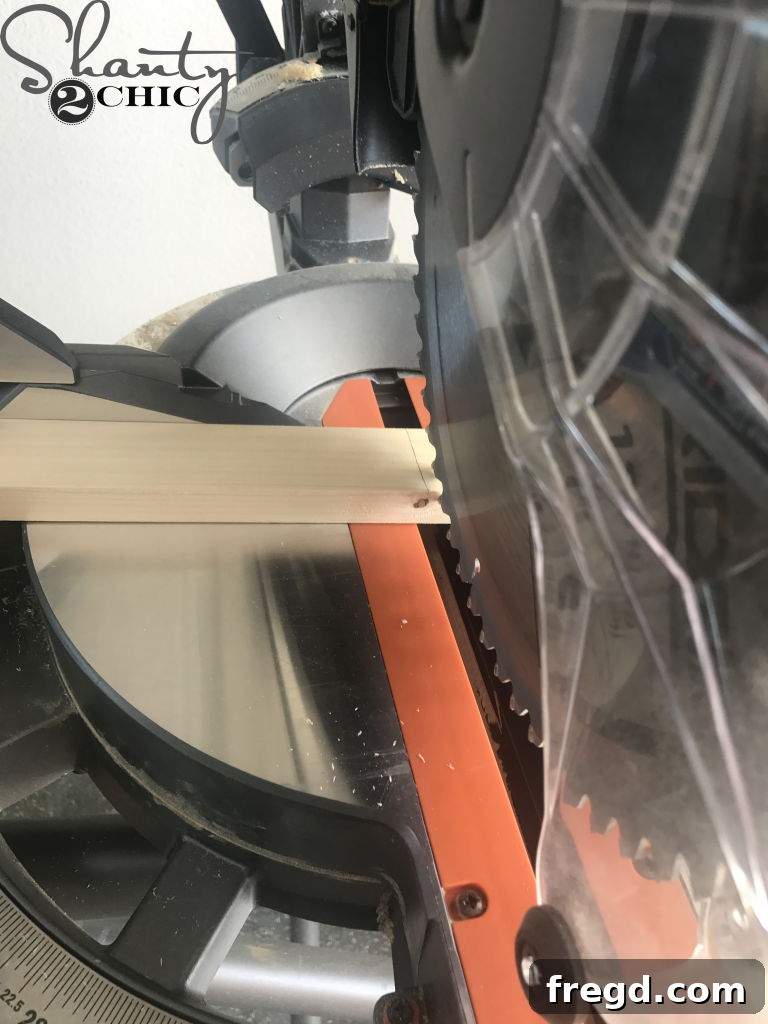
Once you’ve marked the diagonal piece, take it to your saw. Adjust the saw blade to align perfectly with the pencil marks you just made. Make your cut slowly and carefully to achieve a clean, accurate angle. This method guarantees that your diagonal pieces will fit snugly within your door frame, giving your DIY Barn Door Coffee Cabinet a truly professional and custom-built appearance.
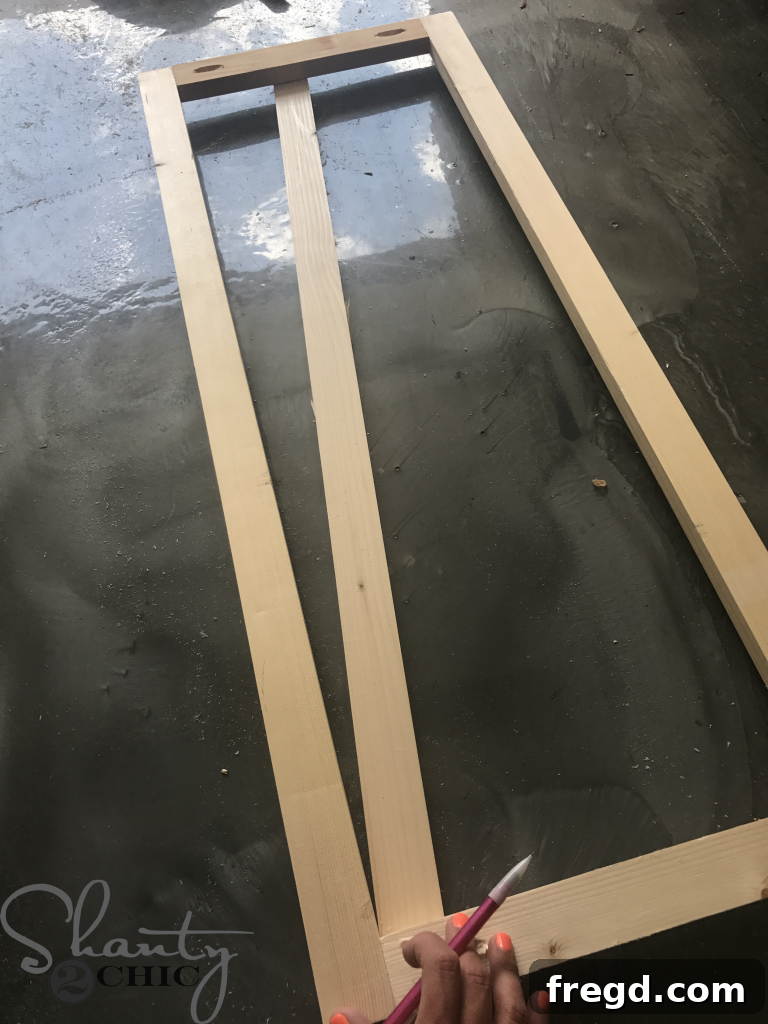
By following this simple marking and cutting technique, you will achieve perfectly fitted diagonal pieces with ease. This method is incredibly reliable and removes the frustration often associated with compound angle cuts, making the barn door construction a smooth and enjoyable process for even novice woodworkers. Repeat this process for all diagonal pieces required for your door, ensuring each one is custom-fitted.
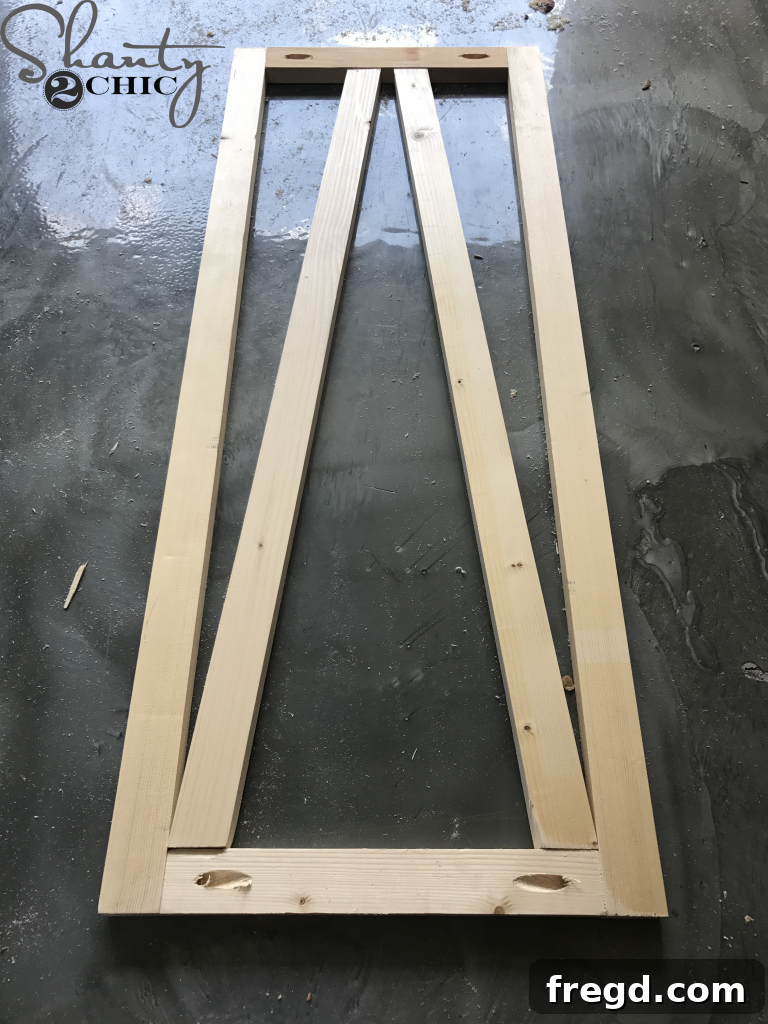
After cutting all your diagonal pieces, lay them out on the door frame to double-check their fit. Do not attach them yet, as we will first secure the back panel of the door. This sequence ensures a cleaner look and stronger construction for your sliding barn door, a key feature of your personalized coffee station.
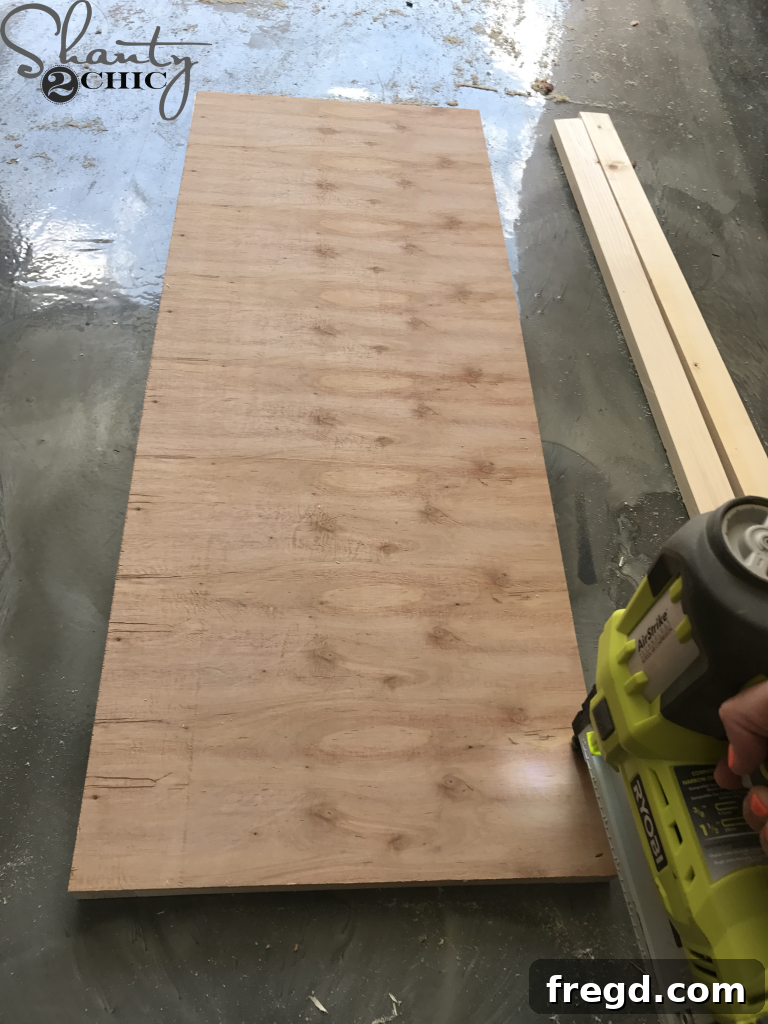
Now, attach the back panel of the door to the door frame. Apply wood glue generously along the edges of the frame where the back panel will sit. Carefully place the back panel onto the frame, ensuring it is flush on all sides. Secure it with 5/8″ brad nails, spacing them evenly around the perimeter. This back panel provides structural support and a solid surface for attaching the diagonal pieces from behind, making for a cleaner front appearance for your DIY Barn Door Coffee Cabinet.
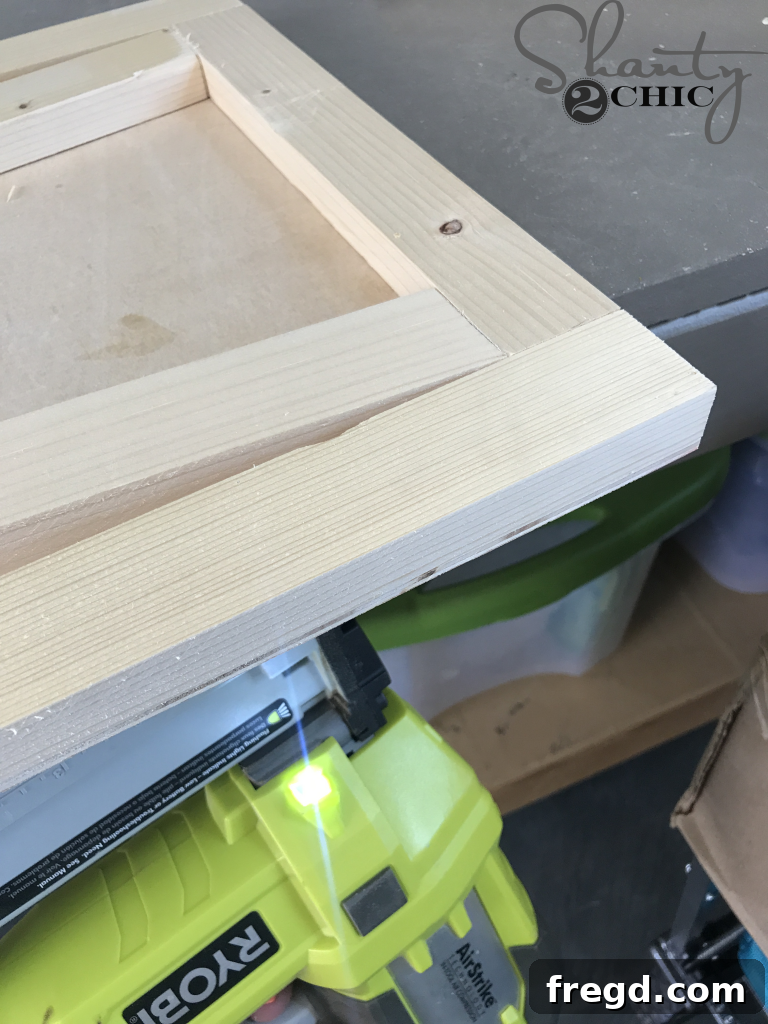
With the back panel firmly in place, it’s time to attach the diagonal pieces. Flip the door upright and carefully position the diagonal pieces into their pre-fitted slots on the front of the door. Here’s an invaluable tip to make this step easy and safe: lay the door on a workbench such that the diagonal pieces slightly overhang the edge. This clever positioning allows you to run your brad nailer precisely along the workbench’s edge, ensuring that each nail drives directly into the diagonal pieces from the back of the door, creating a strong, secure, and aesthetically pleasing joint. This method prevents nails from poking through the front and helps you achieve a clean, professional finish on your barn door.
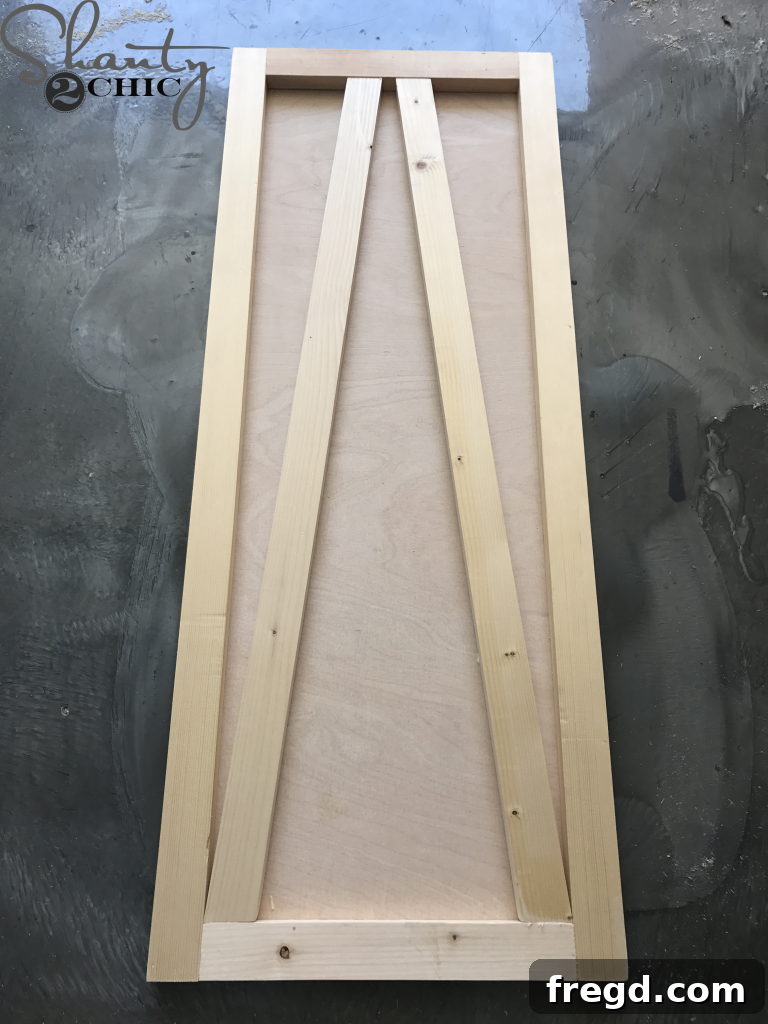
Your barn door is now complete, showcasing its distinctive diagonal design and sturdy construction! This iconic element will undoubtedly be a conversation starter and a testament to your DIY skills. Take a moment to admire your craftsmanship before moving on to the final installation steps that will bring your DIY Barn Door Coffee Cabinet to life as a fully functional piece of furniture.
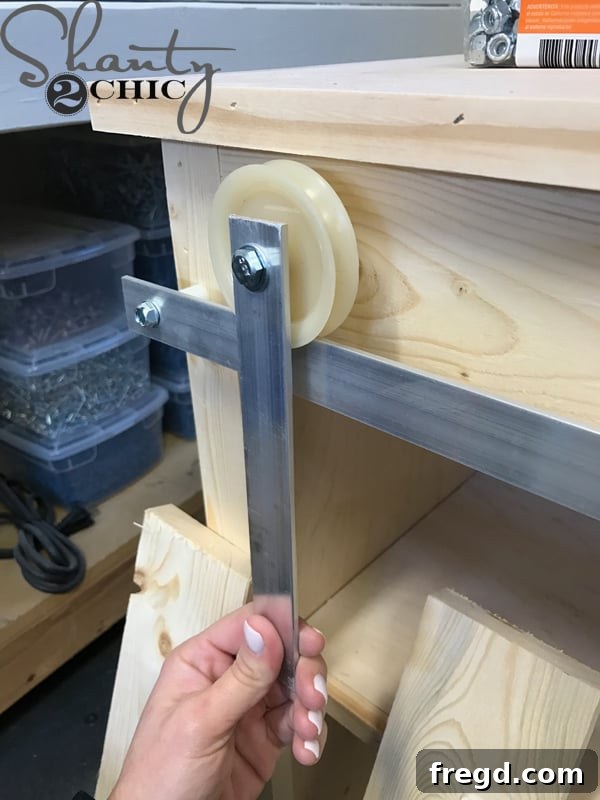
The next exciting step is to attach the barn door hardware to both the cabinet and the newly built door. Instead of purchasing expensive pre-made hardware, we opted for a budget-friendly approach, crafting our own barn door hardware for an incredible cost of just $20! You can find our detailed how-to guide for making your own hardware HERE. For this particular project, we chose to use simple wheels instead of the pulley wheels featured in our original hardware tutorial, as they better suited the compact design and desired aesthetic of this DIY Barn Door Coffee Cabinet. Once the hardware is installed, the door will glide smoothly, revealing and concealing your coffee maker with ease.
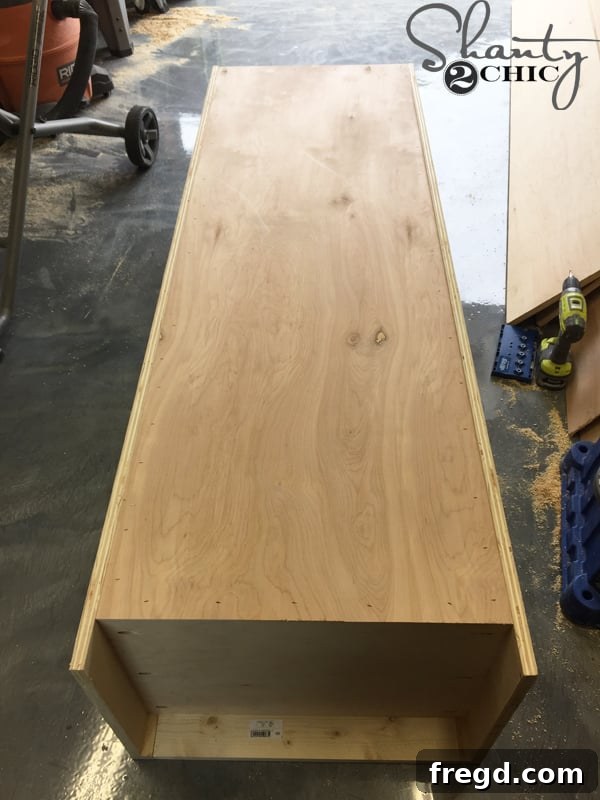
Finally, complete the structural build by attaching the plywood back panel to your cabinet. This panel not only encloses the cabinet but also provides additional stability. Use wood glue and small nails or screws to secure it firmly around the perimeter. With the back panel in place, the core construction of your DIY Barn Door Coffee Cabinet is officially done! You’ve successfully built a functional and stylish piece of furniture from scratch, ready for its finishing touches and the starring role in your coffee nook.
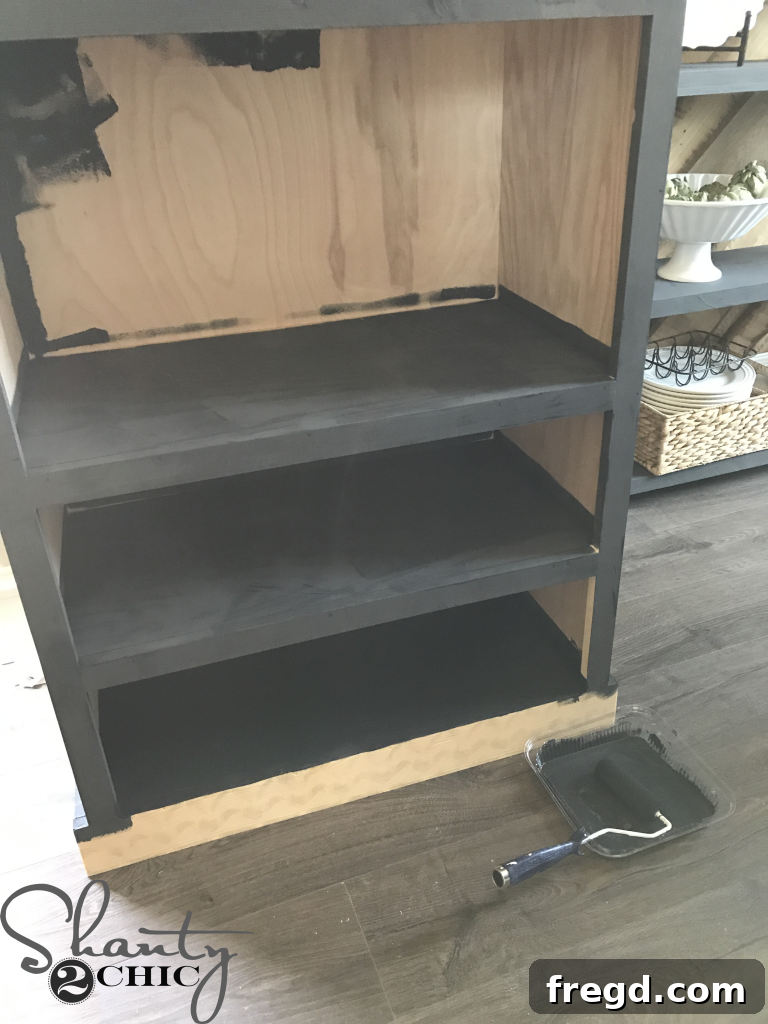
Finishing Your Cabinet with Charcoal Chalked Paint
To give our DIY Barn Door Coffee Cabinet its sophisticated and inviting appearance, we chose to apply two coats of beautiful Charcoal Chalked Paint. Chalked paint is an excellent choice for DIY furniture projects as it often requires minimal prep work, such as sanding or priming, and provides a lovely, matte finish with a soft, velvety texture. The charcoal color adds a touch of modern farmhouse elegance, perfectly complementing the rustic barn door aesthetic and making it a versatile addition to various home decor styles.
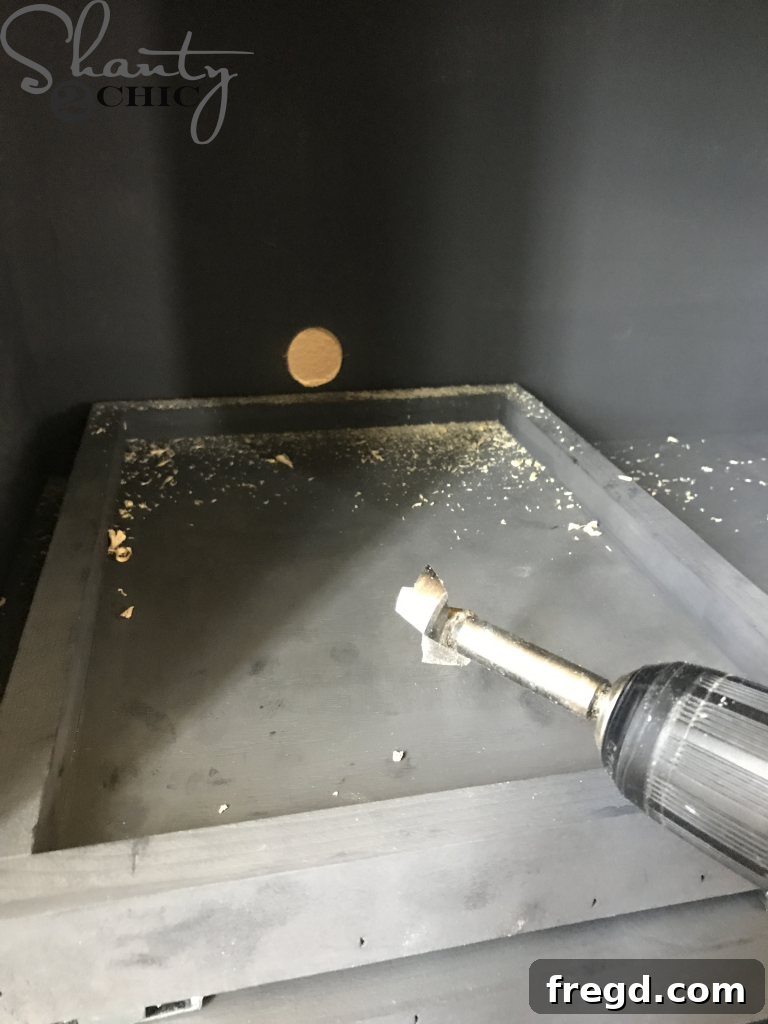
Optimizing for Your Keurig® K-Compact™ Brewer
To ensure seamless integration of your new Keurig® K-Compact™ brewer, a small but essential modification is needed for the power cord. Using a 1″ Forstner bit, carefully drill a hole through the cabinet’s back panel. Position this hole strategically just above the pull-out drawer. This placement ensures the power cord can pass through neatly without interfering with the drawer’s operation or being visible from the front, maintaining the clean lines and functionality of your custom-built coffee station.
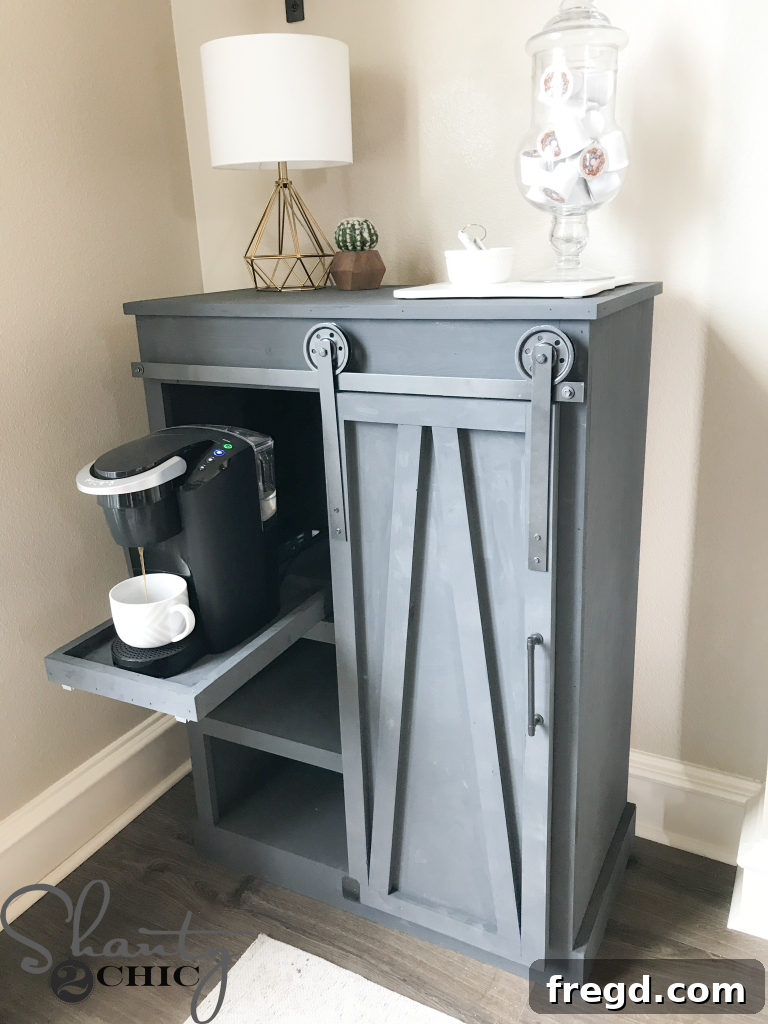
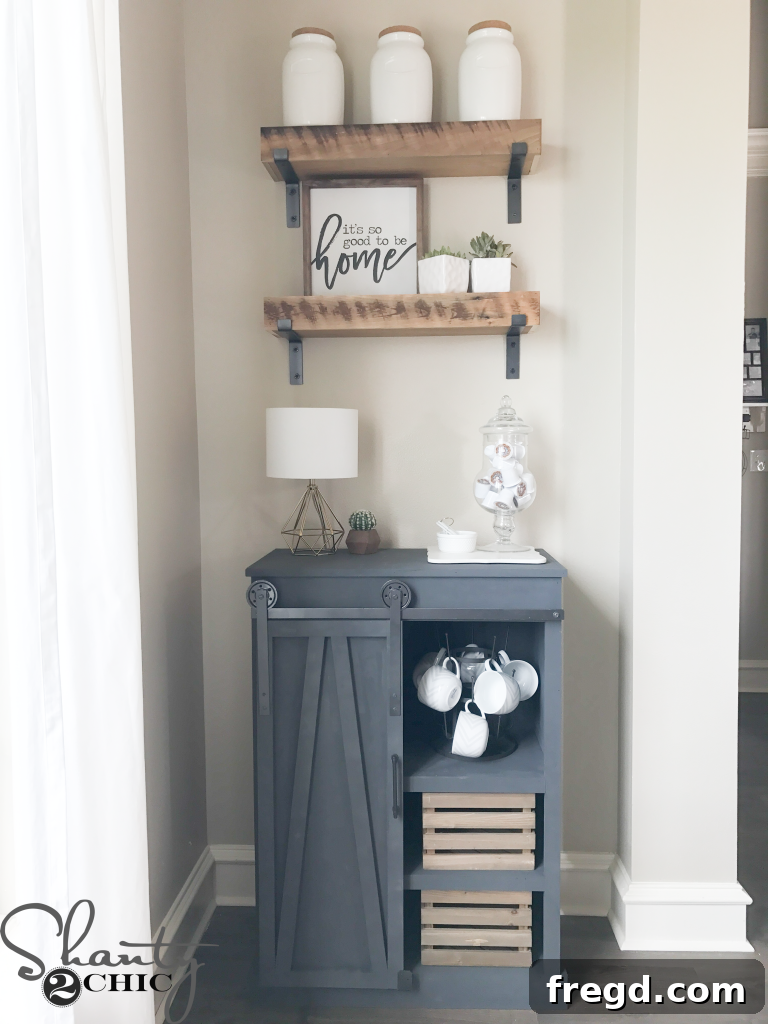
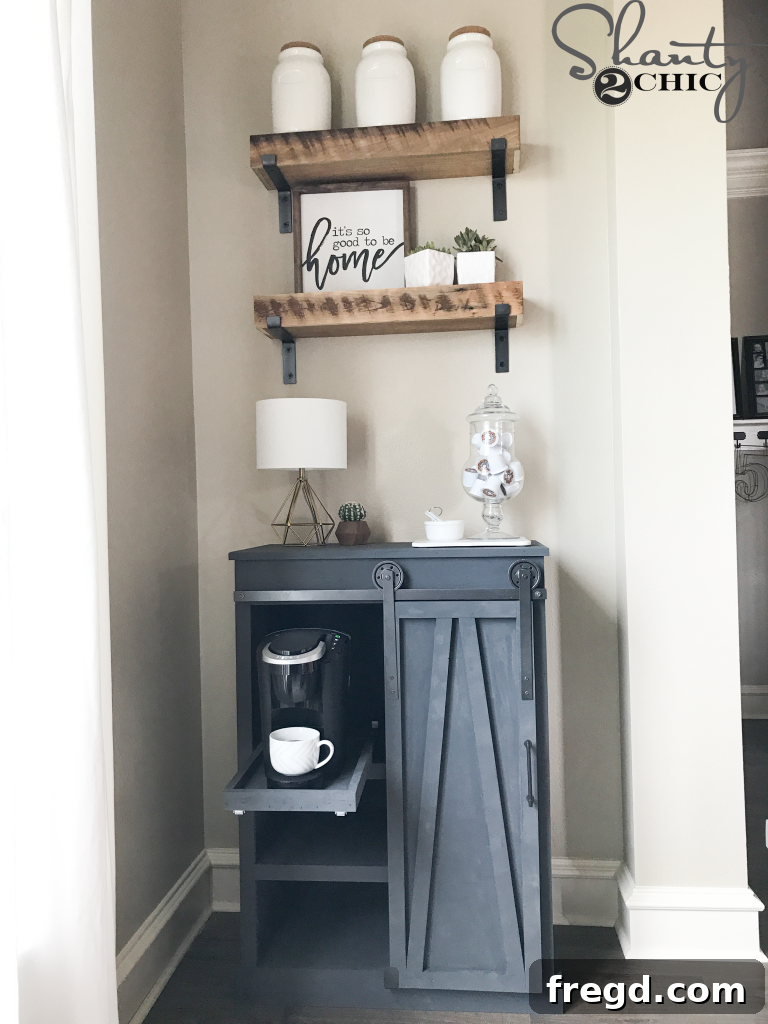
And just like that, it’s COFFEE time! Your beautiful new DIY Barn Door Coffee Cabinet is complete, perfectly customized to house your Keurig® K-Compact™ and organize all your K-Cups®. Step back and admire your handiwork, knowing that you’ve created a stylish and highly functional focal point for your kitchen or dining area.
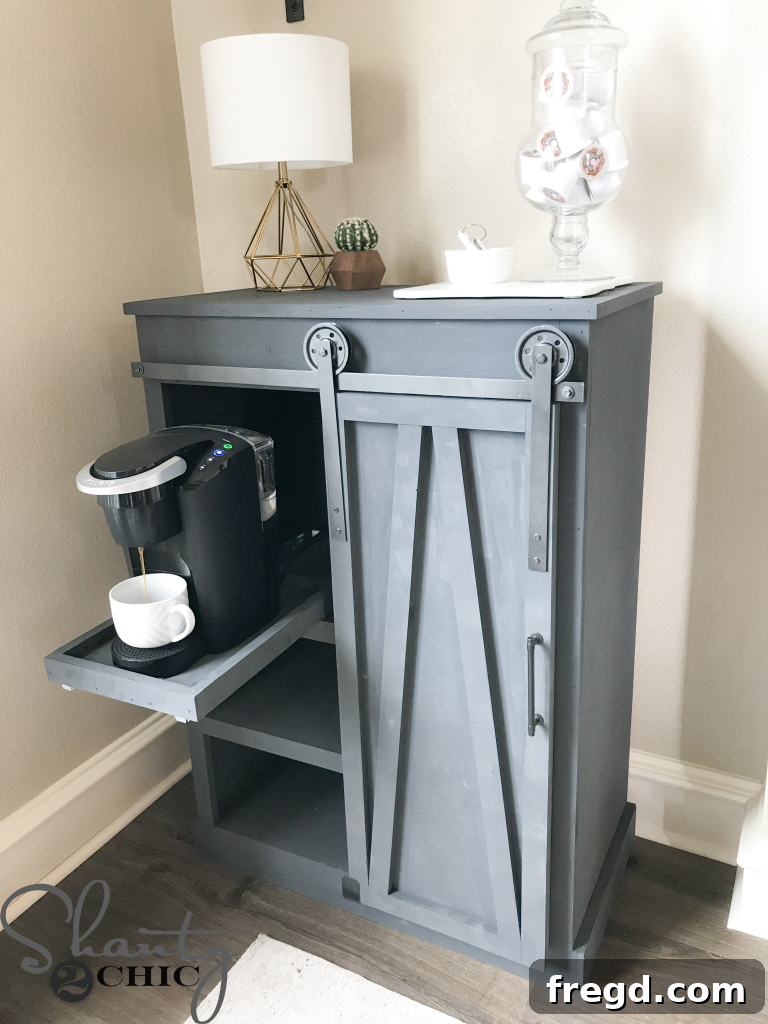
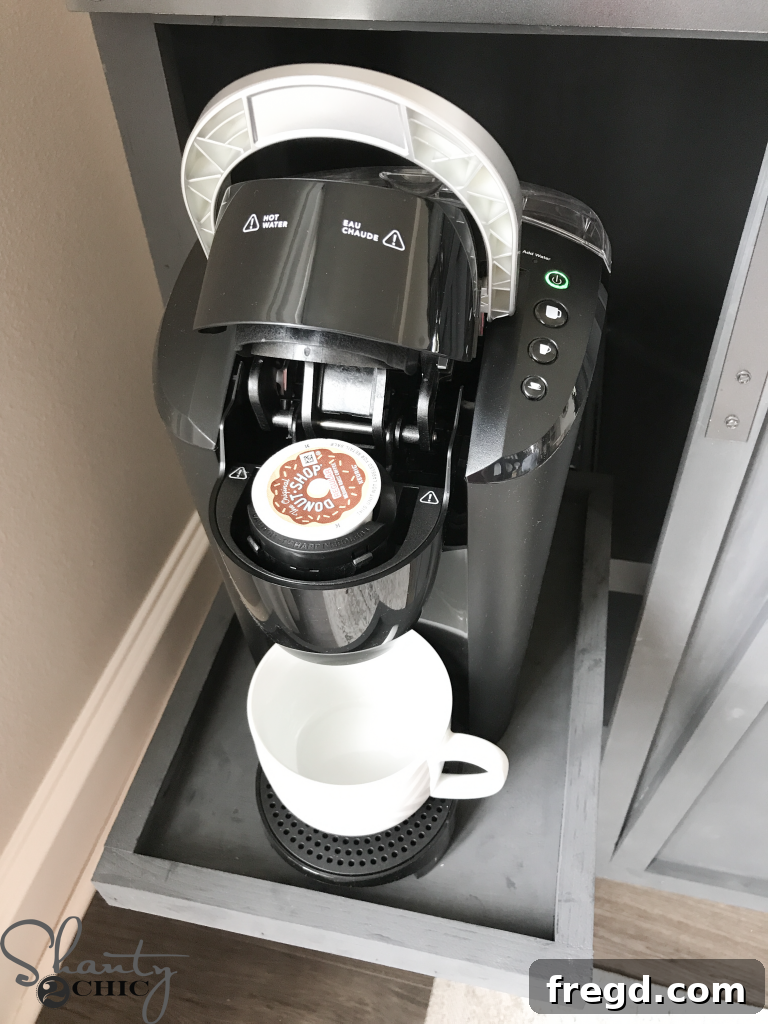
One press of the button…
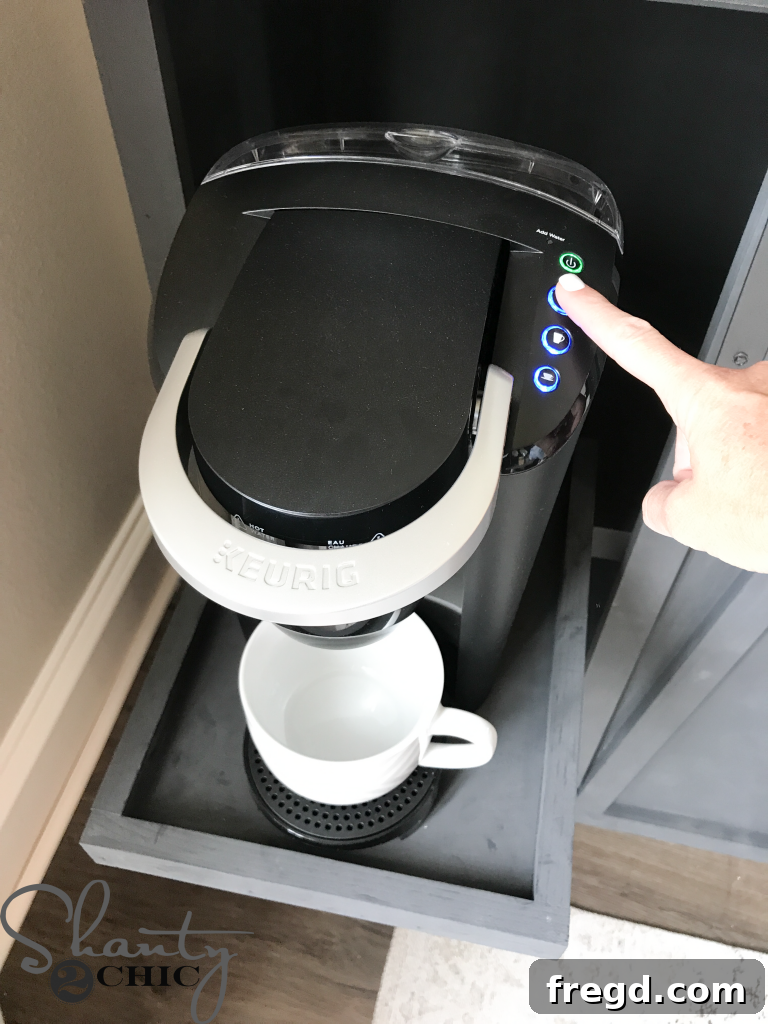
Two moments of anticipation…
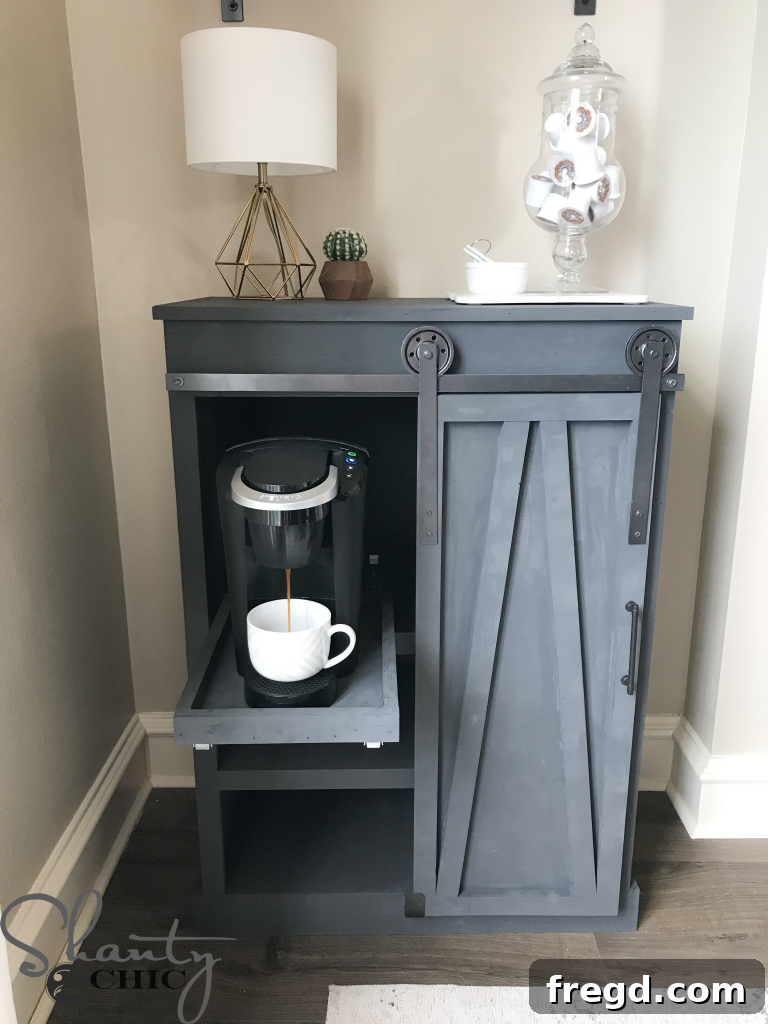
Perfect Coffee, every time!
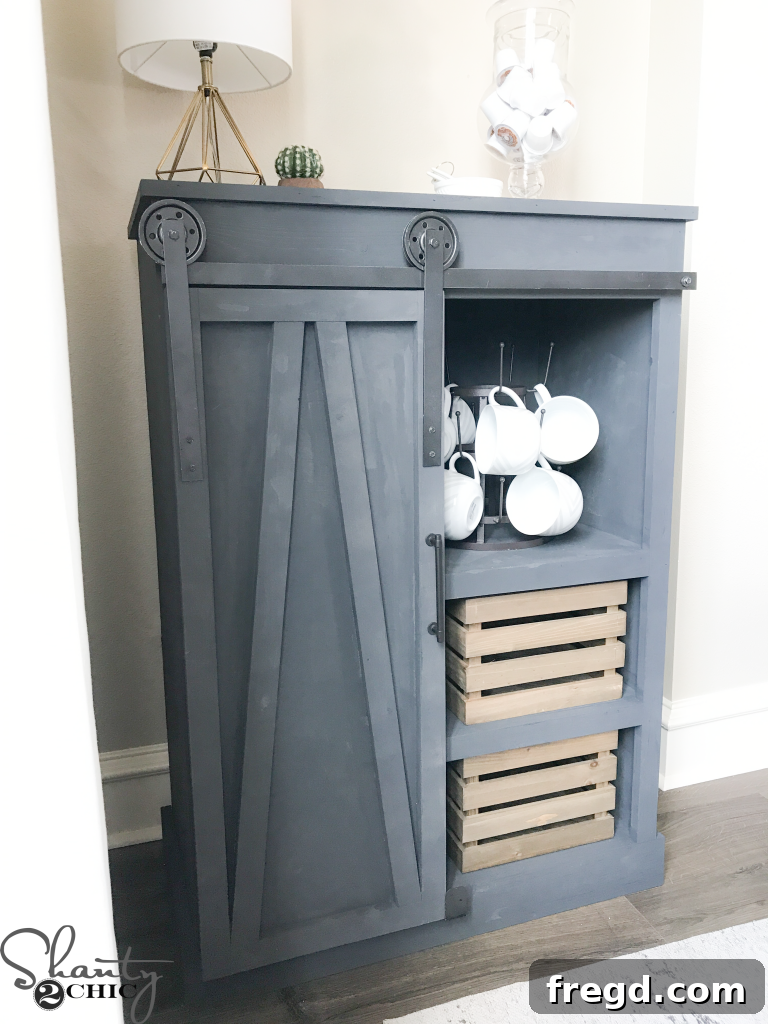
Then, with a gentle push, simply shut the barn door, effortlessly concealing your Keurig® and maintaining a tidy, uncluttered look in your kitchen. This discreet storage solution is perfect for those who appreciate a clean aesthetic and functional design. Your coffee station is now both beautiful and highly practical, ready for your daily brewing ritual and impressive to any guest.
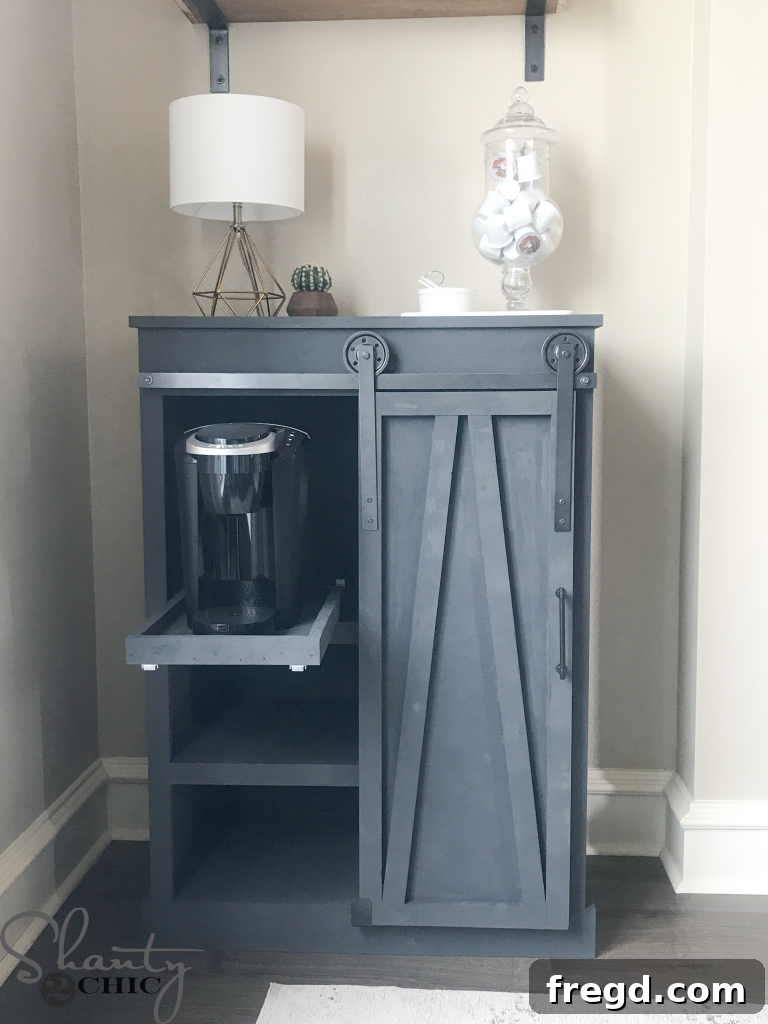
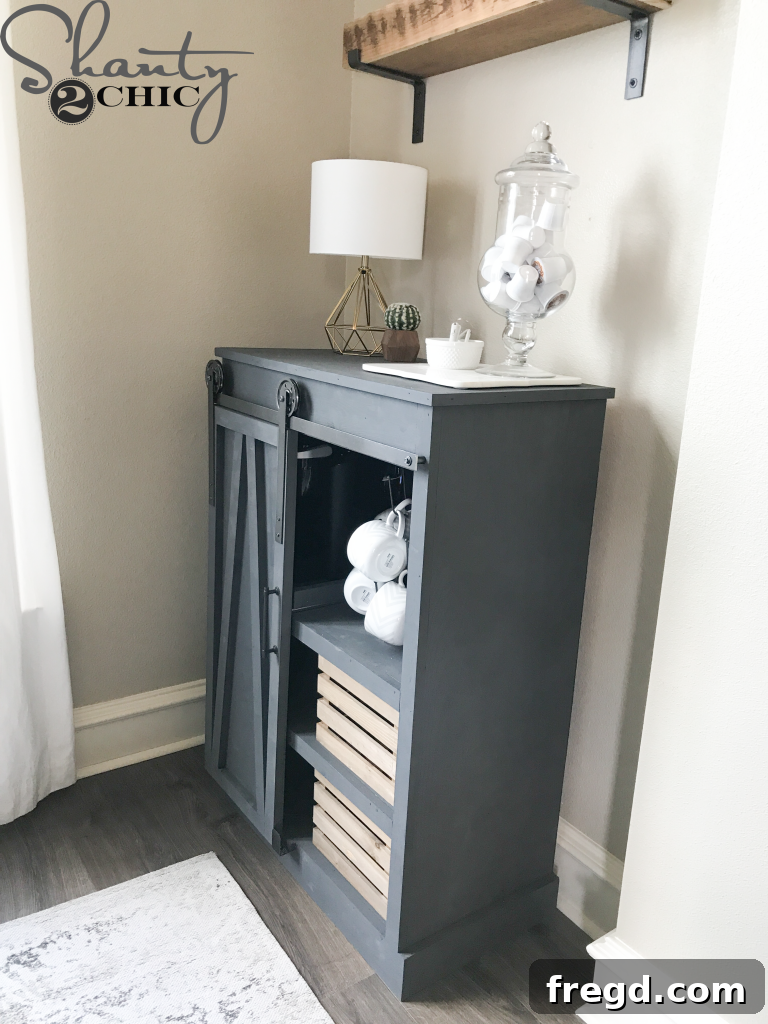
For more exciting product releases, brewing tips, and engaging content, make sure to connect with Keurig® and Green Mountain Coffee® on their social media channels. Stay updated on all their new products, promotions, and inspiration to enhance your coffee experience!
Instagram: @keurig, @greenmtncoffee
Facebook: @Keurig, @GreenMountainCoffee
Twitter: @Keurig, @GreenMtnCoffee
Thank you so much for joining us on this creative journey! We hope this detailed guide inspires you to build your very own DIY Barn Door Coffee Cabinet and enjoy the satisfaction of a handmade, perfectly organized coffee station. We wish you happy building… and even happier brewing! Cheers to stylish and functional living!