
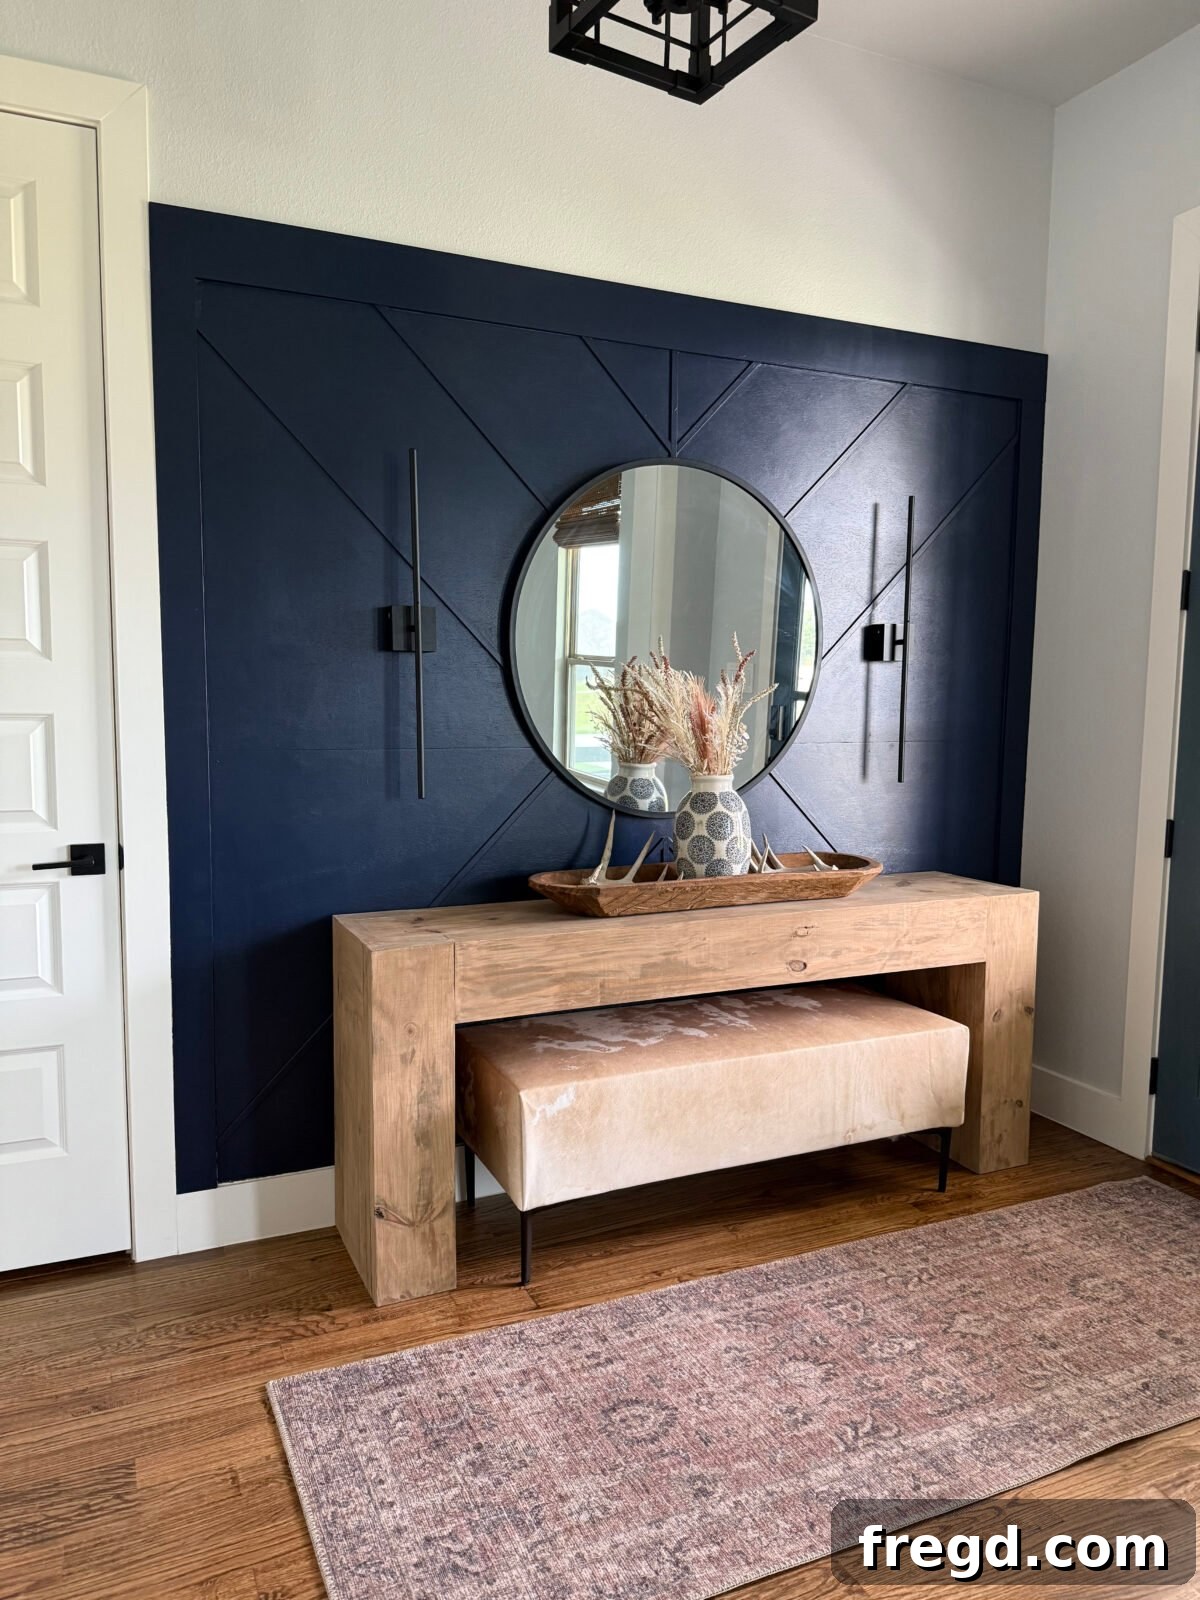
Transforming a living space often involves big dreams, but for renters, those dreams can quickly collide with the realities of leases and landlord rules. What if you could infuse your home with bold style and architectural interest without glue, without screws, and without the fear of losing your security deposit? Introducing the ultimate renter-friendly accent wall – a DIY masterpiece that promises monumental impact with zero permanent commitment. Crafted by Shanty2Chic, this easy-to-follow tutorial empowers you to create stunning visual depth and personality in any room, all while keeping your landlord happy.
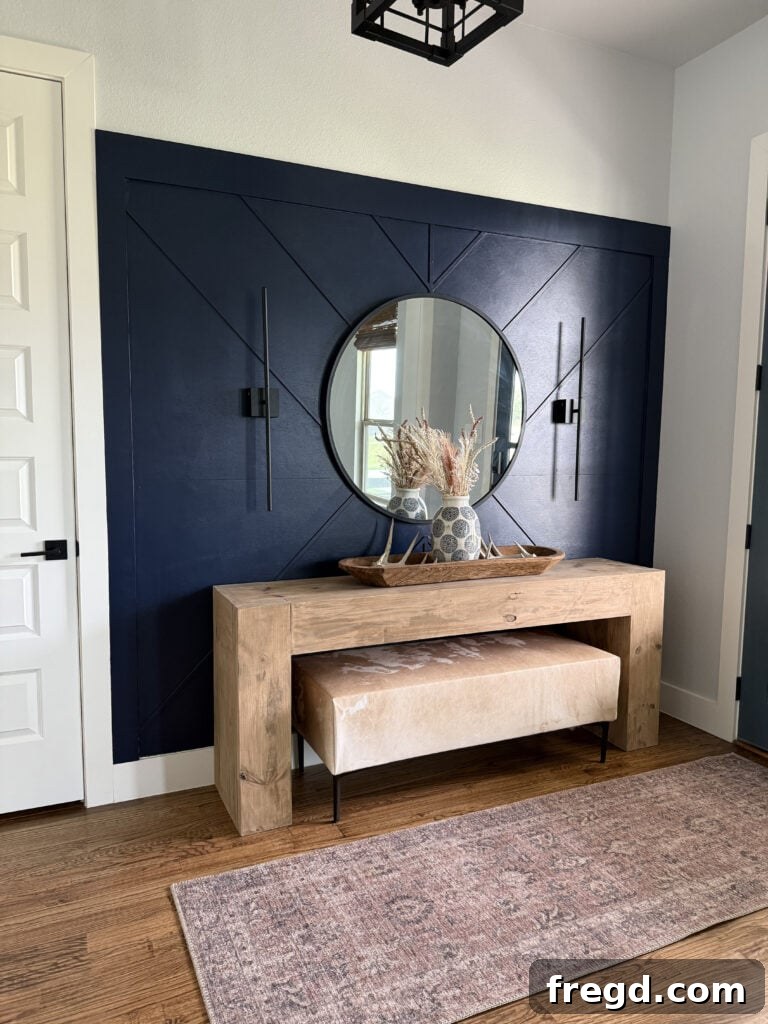
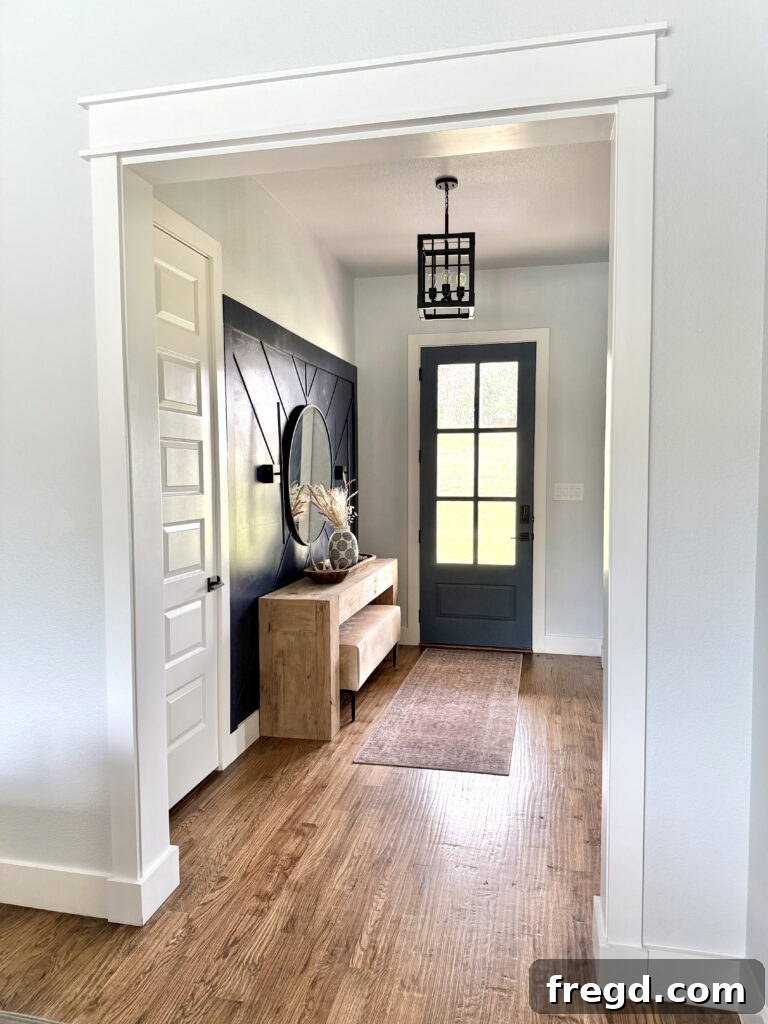
Almost two years into our new home, the journey of making it truly “ours” has been a delightful series of DIY projects. Each small update, each custom touch, has contributed to a space that feels increasingly warm, personal, and layered with dimension. From cozy nooks to vibrant focal points, I’ve been slowly but surely infusing personality into every corner. One particular area that consistently caught my eye, begging for a touch of drama and distinction, was the entryway.
My vision for this space was clear: something undeniably bold, distinctly modern, and impeccably stylish. However, a crucial caveat remained – I wasn’t ready to commit to anything permanent. This desire for high-impact yet low-commitment design is precisely how this innovative, renter-friendly, and completely removable wall treatment came to life. It’s a game-changer for anyone navigating the limitations of a rental property or simply hesitant to make permanent alterations to their walls. This DIY project eliminates the need for any adhesives or screws, offering a stress-free path to a beautifully personalized home.
Why This Project Is Perfect for Renters (and Anyone Avoiding Permanent Changes)
While my current living situation isn’t a rental, the core philosophy behind this accent wall was forged with renters and apartment dwellers firmly in mind. The desire to create something beautiful yet non-permanent was paramount. I deliberately opted against using strong adhesives or invasive screws, anticipating my own tendency to redesign and redecorate over time. This foresight means the entire wall treatment is incredibly easy to modify or remove should tastes change or a move become necessary. By exclusively using finish nails and pin nails for attachment, any potential damage is minimal and easily remedied. A little spackle and light sanding are all that’s needed to conceal the small nail holes, leaving no sticky residue often associated with peel-and-stick wallpaper or other adhesive products.
This ingenious approach makes it an ideal solution for anyone looking to personalize their space without incurring the wrath of a landlord or permanently altering the existing structure of their plain walls. It’s a fantastic, sophisticated alternative to traditional stick-on wallpaper, especially if you’re yearning for something with more tactile texture, architectural interest, and genuine depth. Imagine transforming a bland entryway, a sterile bedroom, or a long hallway in your rental home into a captivating focal point without a single worry about damaging the property.
If you’re seeking to infuse visual interest, character, and an instant focal point into your living space without the burden of a permanent commitment, this removable wall treatment is truly an ideal choice. It elevates otherwise overlooked areas, turning them into stylish statements that reflect your personal aesthetic. The beauty lies in its versatility and ease of removal, offering creative freedom that was once unimaginable for renters. So, stop dreaming and start building!
You can even watch me bring this stunning wall to life on our Instagram channel here, seeing each step in action. And don’t forget to download the comprehensive, free printable plans to guide you through every detail of your own project!
Click here to jump directly to the free printable plans and supply list!
What You’ll Need
Before diving into any DIY project, especially one as transformative as an accent wall, gathering all your tools and supplies is crucial. This ensures a smooth workflow, prevents frustrating delays, and ultimately leads to a more polished final result. Here’s a comprehensive list of everything you’ll need to create your own renter-friendly modern accent wall:
Tools:
- Miter Saw: Essential for precise, angled cuts on your trim pieces, ensuring clean seams.
- Drill: Useful for creating pilot holes, especially before using a jigsaw for outlet cutouts.
- Finish Nailer: For securely attaching the heavier MDF trim and plywood panels to the wall studs.
- Pin Nailer: Ideal for the delicate screen moulding, leaving tiny, almost invisible holes.
- Circular Saw: Perfect for cutting large plywood sheets down to size quickly and accurately.
- Jigsaw: Indispensable for making curved or intricate cuts, like the one needed for an electrical outlet.
- Stud Finder: Absolutely critical for locating wall studs, which you’ll use to securely fasten your wall treatment without permanent damage.
- Tape Measure: For all your measuring needs – precision is key in this project!
- Level: To ensure all your trim and panels are perfectly straight and plumb, creating a professional look.
- Sander: For smoothing out wood filler and preparing the surface for a flawless paint finish.
Supplies:
- 2 – 1/2″ x 48″x 96″ Hardwood Plywood: These will form the base panels of your accent wall, providing a smooth surface for the decorative trim.
- 1 – 1x6x10 Primed MDF: Used for the main framing of the accent wall, providing a robust and smooth border.
- 1 – 1x4x8 Primed MDF: For additional framing or specific trim details as needed in the design.
- 6 – 1/4″ x 3/4″ x 96″ Screen Moulding: The star of the show for creating the intricate geometric pattern.
- 2 ½” finish nails: For the MDF trim and plywood panels, offering strong hold into studs.
- 1” pin nails: Essential for attaching the delicate screen moulding without splitting the wood or leaving noticeable holes.
- Wood filler: To conceal all nail holes, ensuring a perfectly smooth and seamless finish.
- Painter’s tape: To protect adjacent walls and ceilings during the painting process, ensuring crisp lines.
- Paint (Tinted to Naval by Sherwin Williams): The chosen color to bring your accent wall to life.
Step-by-Step: How I Brought This Renter-Friendly Accent Wall to Life
Embarking on a DIY project can feel daunting, but with a clear, step-by-step guide, even complex transformations become achievable. Follow these detailed instructions to create your own stunning, renter-friendly accent wall, designed for maximum impact with minimal commitment.
Step 1: Frame It Out with MDF Trim
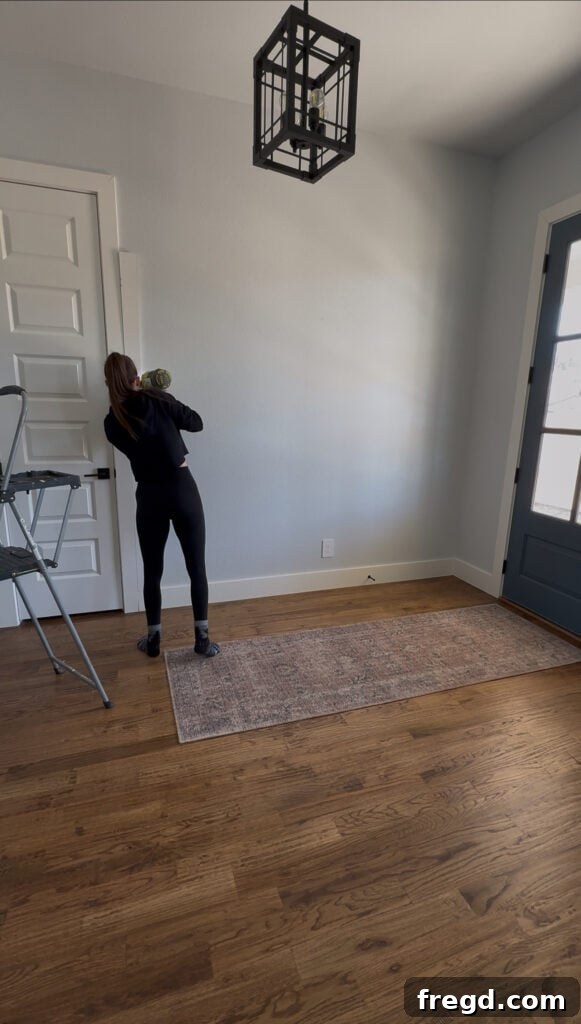
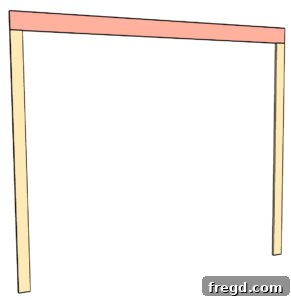
The journey began by establishing a clear, defined boundary for the accent wall. I meticulously cut the MDF trim pieces to the exact size needed to frame the chosen area, starting with the outside vertical edges of the wall. This initial framing is crucial as it creates a sophisticated, built-in look, making the entire treatment feel intentional and polished. Use your tape measure and level to ensure these pieces are perfectly plumb. Accuracy here will influence the entire wall’s aesthetic.
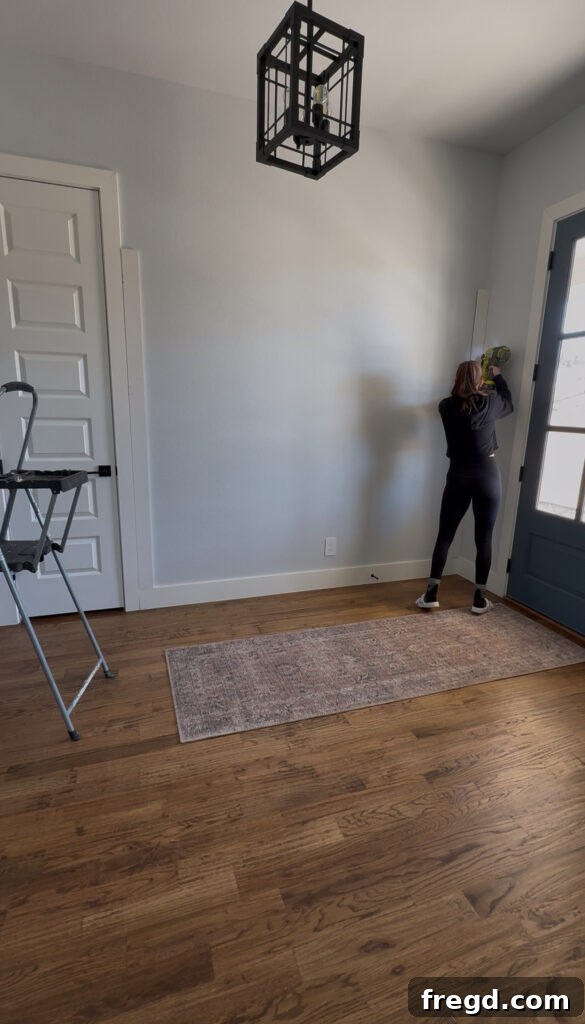
To secure the trim, I used 2½” finish nails. Remember, the goal here is no glue and no screws for easy removal. The trick for stability is to strategically hit the wall studs wherever possible. Use your stud finder diligently to mark these locations. This method provides ample hold while ensuring minimal, easily repairable damage later on. Even without hitting every stud, the sheer number of finish nails distributes the load effectively.
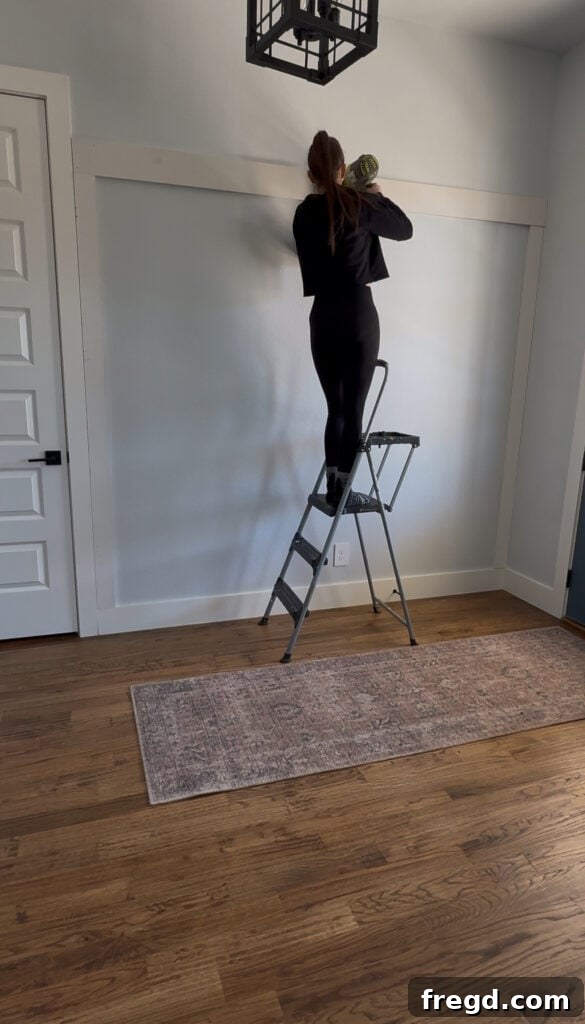
Once both vertical trim pieces were securely attached and perfectly aligned, I measured the distance between them at the top. This measurement guided the cut for the horizontal top trim piece. This piece was then fastened to the wall using the same 2½” finish nails, carefully hitting studs where possible. With the frame complete, the canvas for our accent wall was ready.
Step 2: Add the Plywood Panels
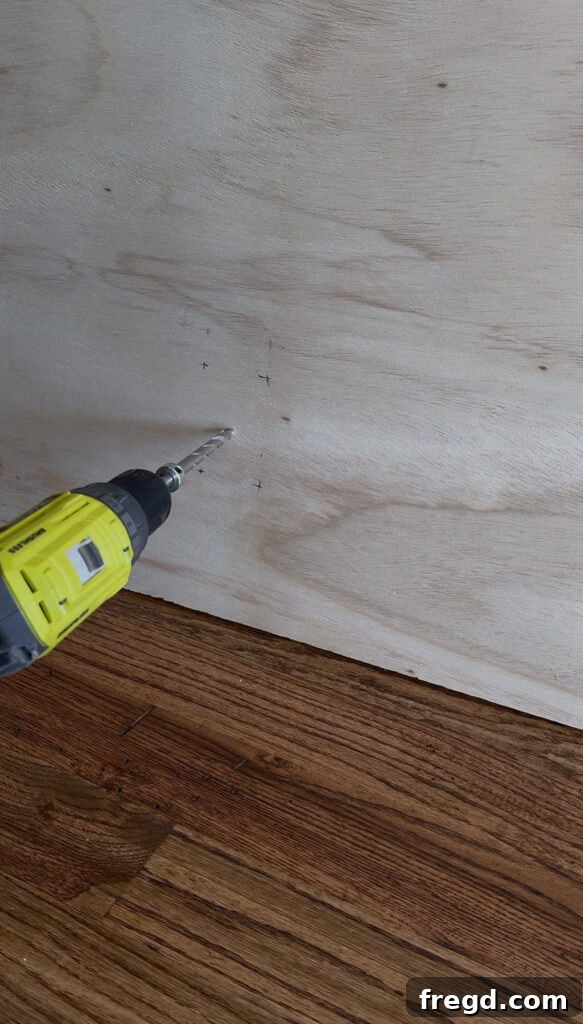
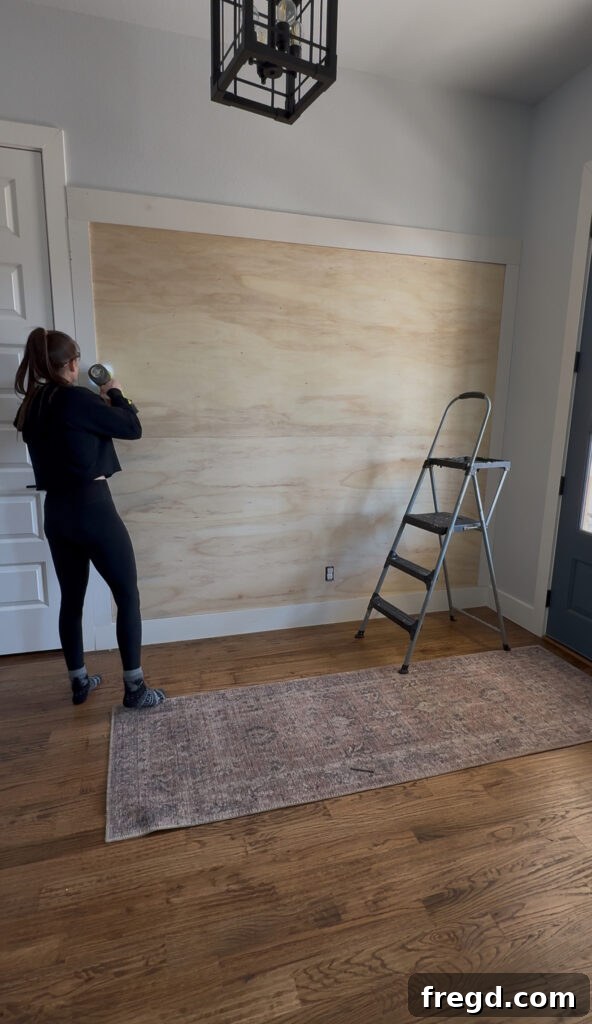
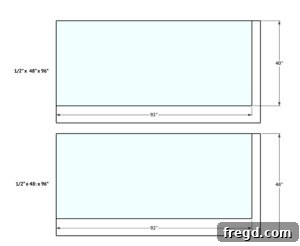
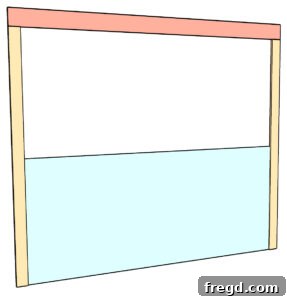
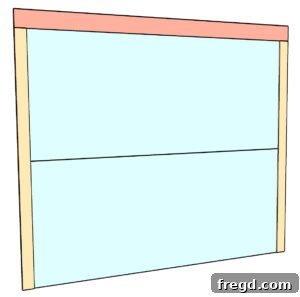
The next layer involved the plywood panels, which form the solid backdrop for our intricate decorative trim. I carefully cut two 4×8′ sheets of hardwood plywood to precisely fit within the newly established MDF trim frame. Precise measurements are key here to ensure a snug and professional fit. If you have an outlet within your accent wall area, this step requires extra attention. First, *always turn off the breaker to the outlet for safety*. Then, remove the wall plate. Carefully measure the exact location and dimensions of the outlet on your plywood sheet. Mark it clearly. Using your drill, create a pilot hole within the marked area, then switch to your jigsaw to carefully cut out the opening. This ensures a clean and exact fit around the electrical box.
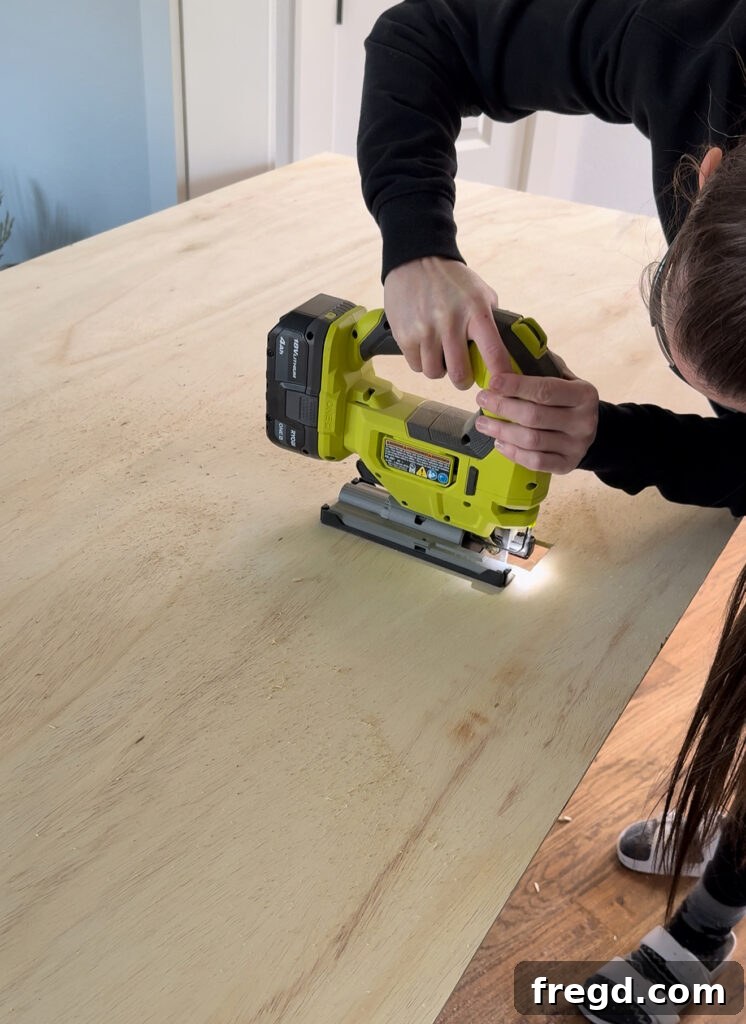
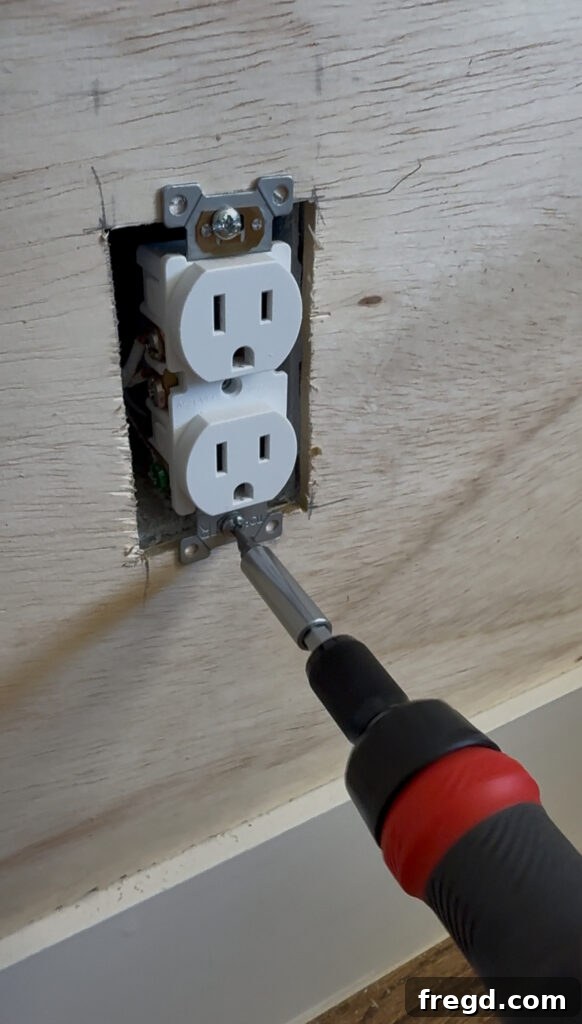
Once the cutout is perfect, gently pull the electrical outlet forward slightly. Carefully slide the plywood panel into place behind the outlet, ensuring it sits flush within your MDF frame. Reattach the outlet securely, then use your finish nailer to fasten the plywood panel into the wall studs. This provides a strong, stable base without damaging the original drywall. Repeat the process for any remaining plywood panels, ensuring a seamless and flush installation from top to bottom.
Step 3: Start the Decorative Trim – Center First
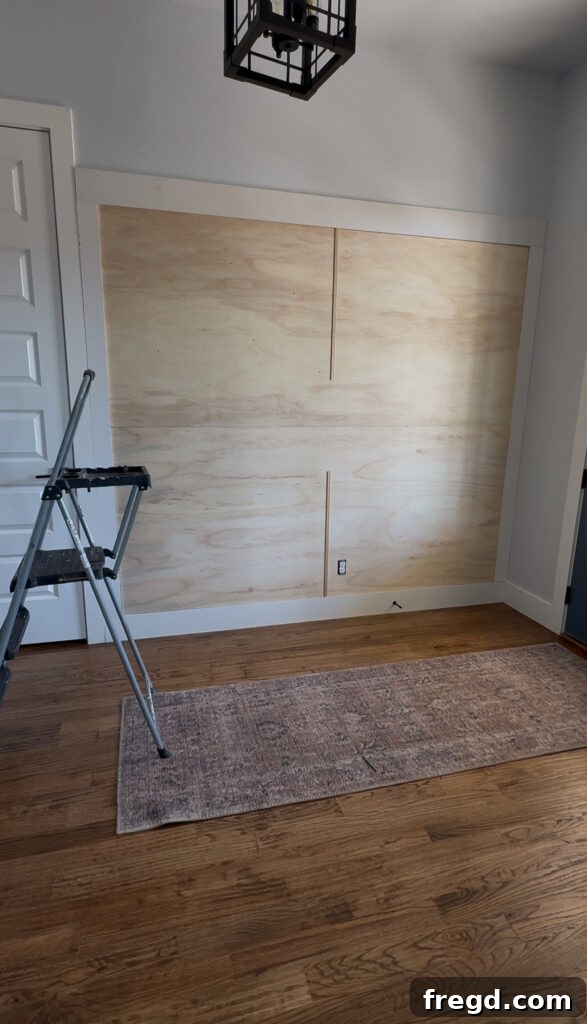
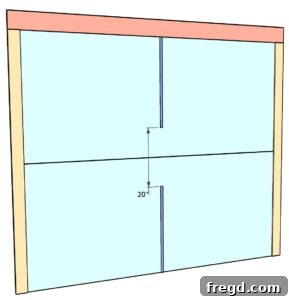
Now for the truly creative and visually impactful part: adding the decorative screen moulding. I started by cutting the ¾” screen moulding pieces to serve as the vertical centerlines of the design. This strategic beginning is key to maintaining symmetry and balance across the entire accent wall. Once cut, these center pieces were carefully positioned and attached to the plywood panels using 1-inch pin nails. Pin nails are perfect for this delicate trim as they leave incredibly small holes that are easy to fill and virtually disappear, making for a cleaner finish.
Step 4: Diagonal Trim for the Win
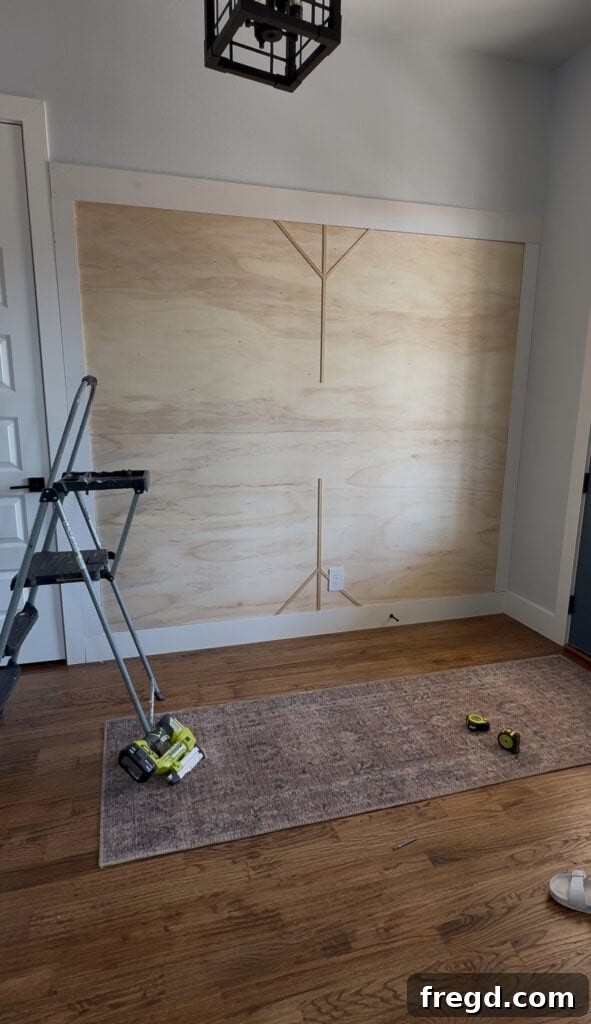
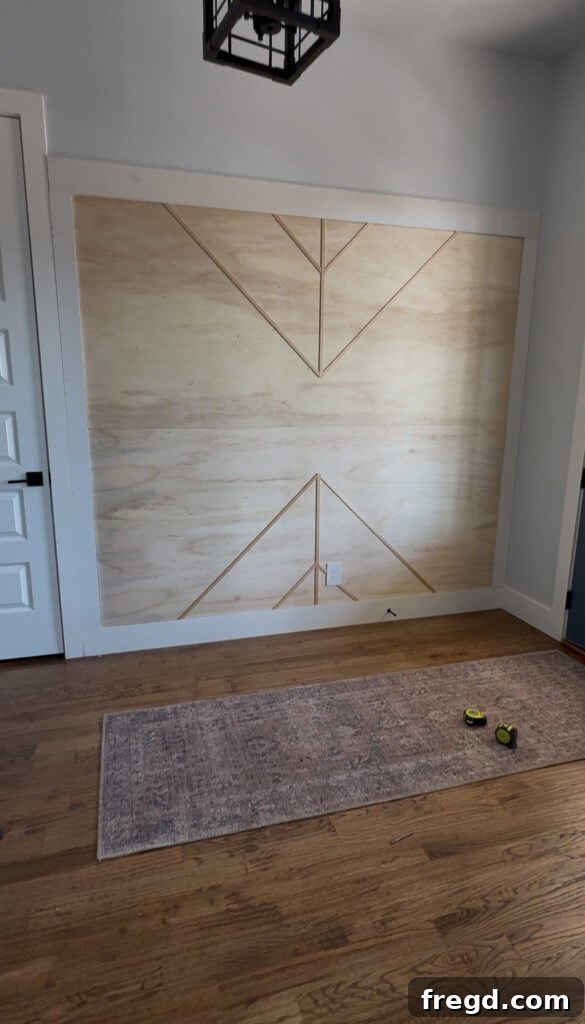
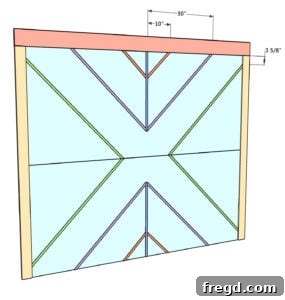
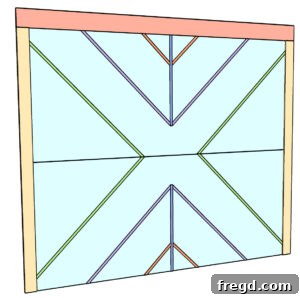
This is where the magic truly unfolds, and the geometric pattern begins to emerge, adding incredible visual texture and depth. I meticulously measured and cut all the diagonal trim pieces. The crucial detail here is that each end of these pieces must be mitered at a precise 45-degree angle, from long point to long point. This creates perfect joins and a seamless flow in the pattern. Take your time with these cuts; accuracy ensures the clean, modern look. Once all the diagonal pieces were perfectly cut and dry-fitted to ensure they lined up, I attached them to the plywood panels using the same 1-inch pin nails. The satisfaction of watching the intricate pattern build out, piece by piece, is immense. It’s this precise diagonal arrangement that transforms a simple wall into a captivating work of art.
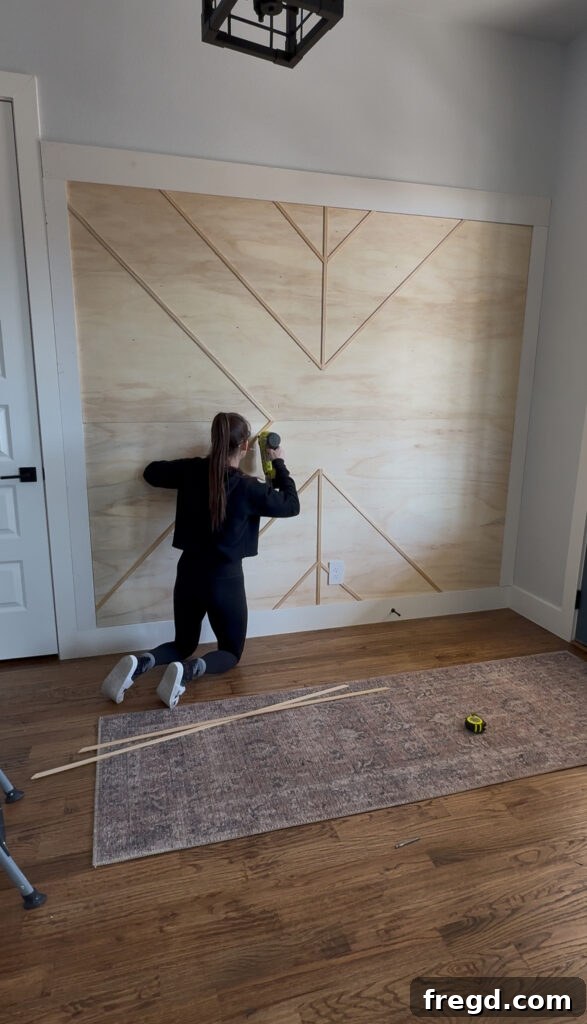
Step 5: Fill, Sand, and Prep to Paint
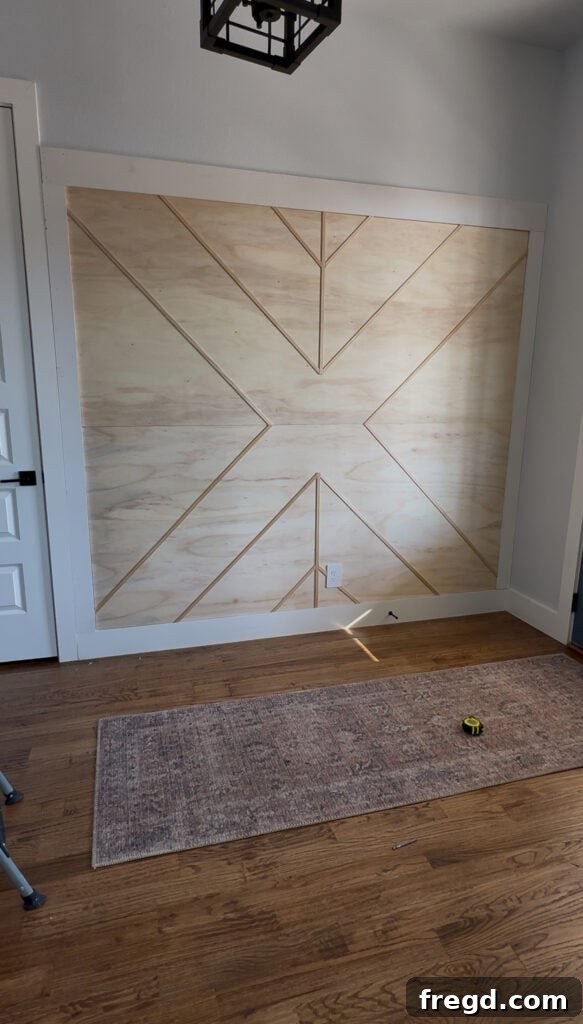
This step, though often tempting to rush, is absolutely non-negotiable for achieving a professional, high-end finish. I meticulously filled every single nail hole, both from the finish nails and the pin nails, with wood filler. Allow the filler to dry completely according to product instructions. Once dry, I gave the entire wall treatment a thorough sanding. Start with a medium-grit sandpaper to remove any excess filler and smooth out imperfections, then follow with a fine-grit sandpaper for a silky-smooth surface. This attention to detail makes a significant difference in the final appearance of your painted wall and is the secret to a flawless finish. More importantly for renters, it’s the critical step that ensures easy nail hole removal and repair later if you decide to take the wall down, leaving your original wall pristine.
Step 6: Paint It Bold
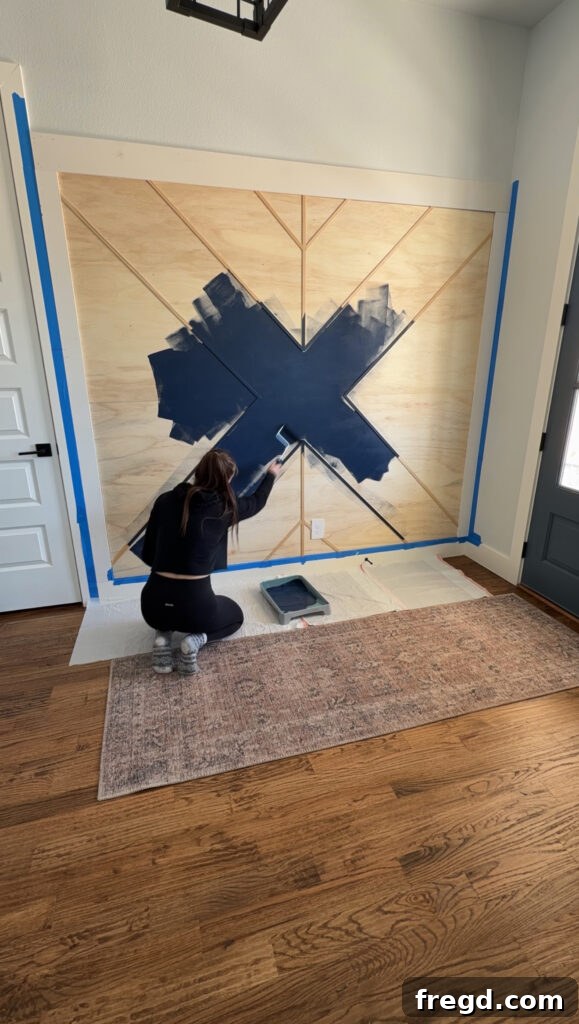
With the prep work complete, it’s time to bring the wall to life with color! I carefully taped off the surrounding walls, ceiling, and baseboards with painter’s tape to ensure perfectly crisp lines. Then, I applied three coats of Sherwin Williams Naval. This rich, deep navy hue was chosen specifically for its ability to add a dramatic yet sophisticated flair to the entryway. Each coat was applied evenly, allowing adequate drying time between applications to achieve a smooth, consistent finish. The dark color not only made the wall pop but also beautifully emphasized the intricate geometric pattern and the dynamic dimension created by the screen moulding. For best results, use a high-quality paint brush for cutting in along edges and a roller for the flat surfaces. You can find our absolute favorite paint that I used for this wall here.
The Styling Moment
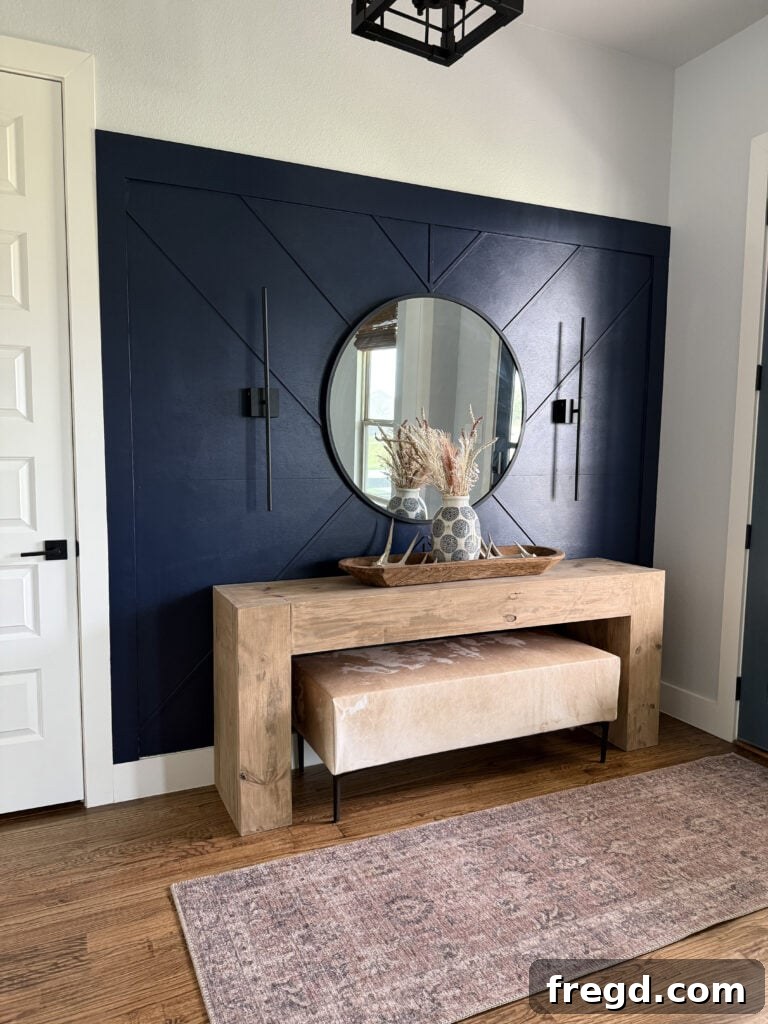
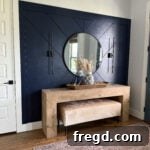
With the paint perfectly dry and the dramatic new backdrop established, it was time for the final, most personal touch: styling the space. This is where the room truly transitions from a project to a personalized sanctuary. I curated a collection of my favorite DIY decorations and thoughtful accents to complement the striking accent wall. A handmade console table, lovingly crafted, provided a functional and aesthetic anchor. Beside it, a cozy cowhide bench invited comfort and added a touch of rustic modernism. Above the console, a sleek round mirror was hung, reflecting light and visually expanding the space, while a pair of wireless sconces provided that essential ambient glow, adding warmth and sophistication without the need for electrical wiring. The transformation was truly remarkable.
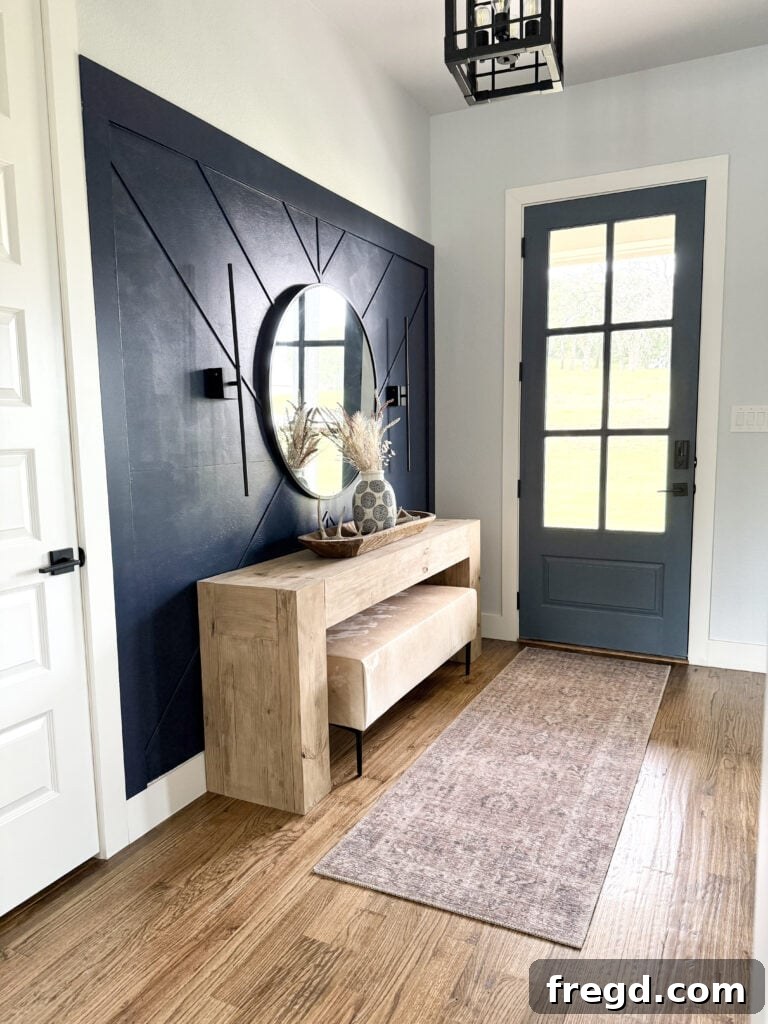
The entryway now feels like an entirely new space – vibrant, modern, incredibly welcoming, and brimming with personalized inspiration. It’s a testament to the power of thoughtful design and DIY ingenuity. The best part? This entire dramatic overhaul was achieved without tearing up a single inch of drywall or making any irreversible changes. It stands as a perfect example of how you can create a high-impact, custom look in any home, regardless of whether you own or rent.
Final Thoughts
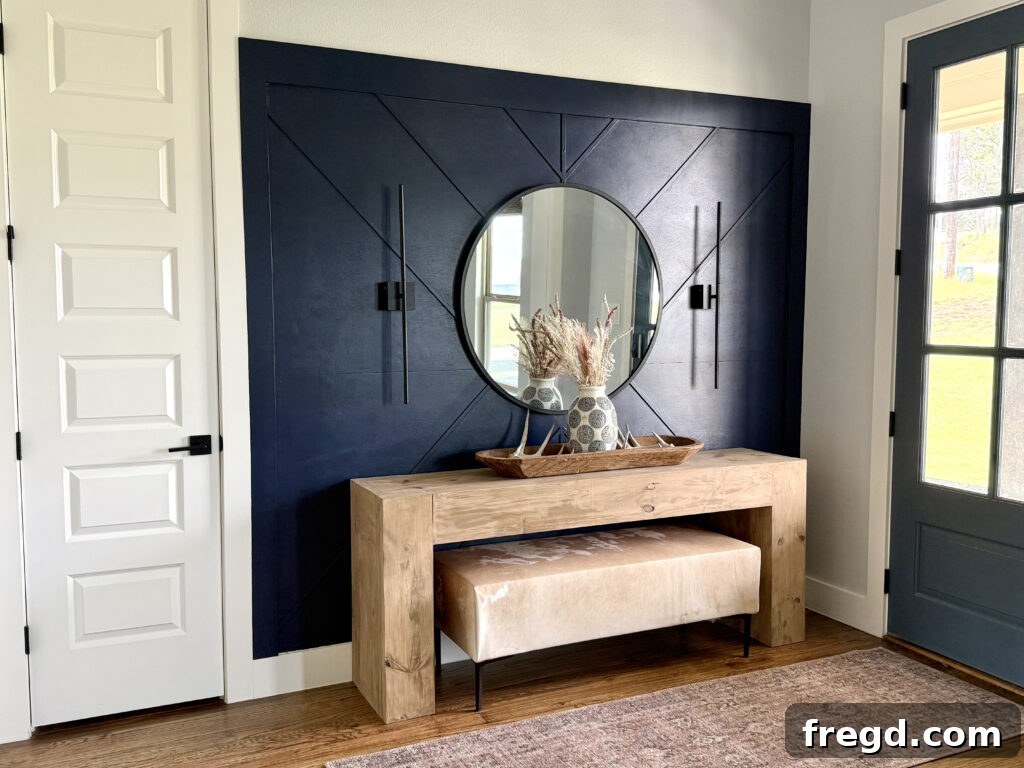
This renter-friendly accent wall project serves as a powerful testament to the idea that you absolutely do not need glue, screws, or an exorbitant budget to achieve a sophisticated, high-end look in your home. It perfectly encapsulates the essence of smart, accessible DIY: creating something stunning, completely removable, and utterly transformative. The inherent versatility of this project means its application is limited only by your imagination. It can breathe new life into a dull hallway, add character to a minimalist bedroom, inspire creativity in a home office, or elevate any rental space you’re yearning to personalize.
For too long, renters have felt restricted by plain, uninspiring walls, often dreaming of bold transformations they believed were out of reach. This DIY solution shatters those limitations, offering a practical, beautiful, and stress-free way to make a space truly reflect your style. The freedom to create, knowing you can easily revert the changes when the time comes, is truly empowering. So, if you’ve been staring at those blank canvases around your home, longing for a touch of drama and personality, consider this your unequivocal sign to take the leap. Embrace the power of temporary decor and unleash your inner designer!
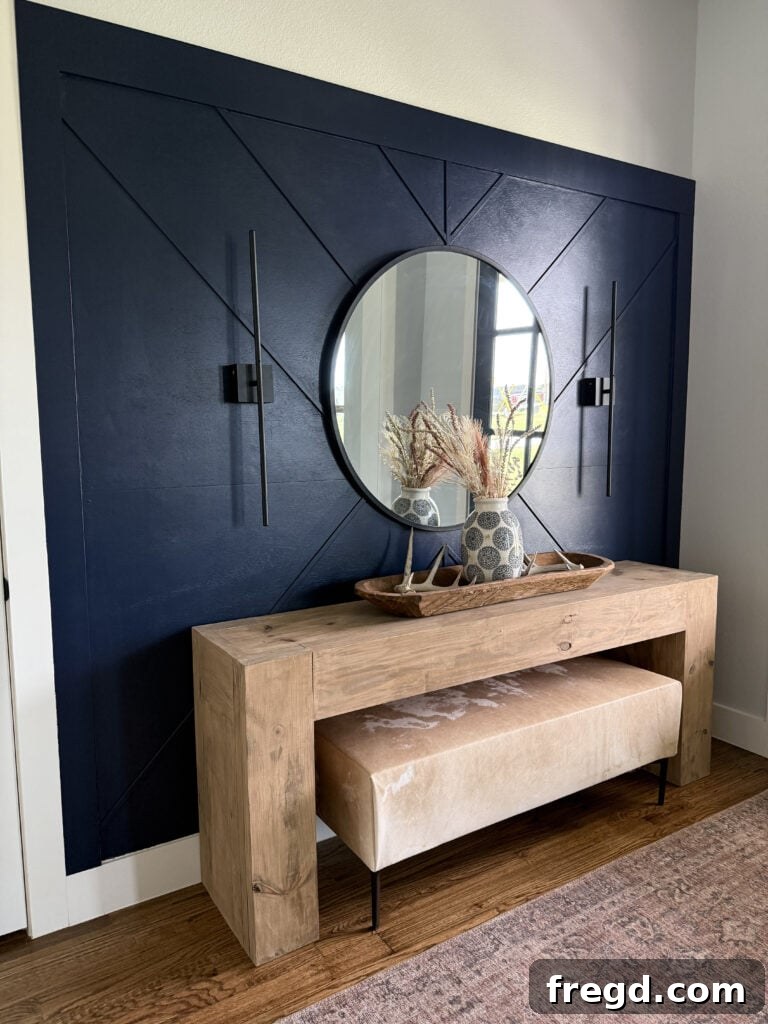
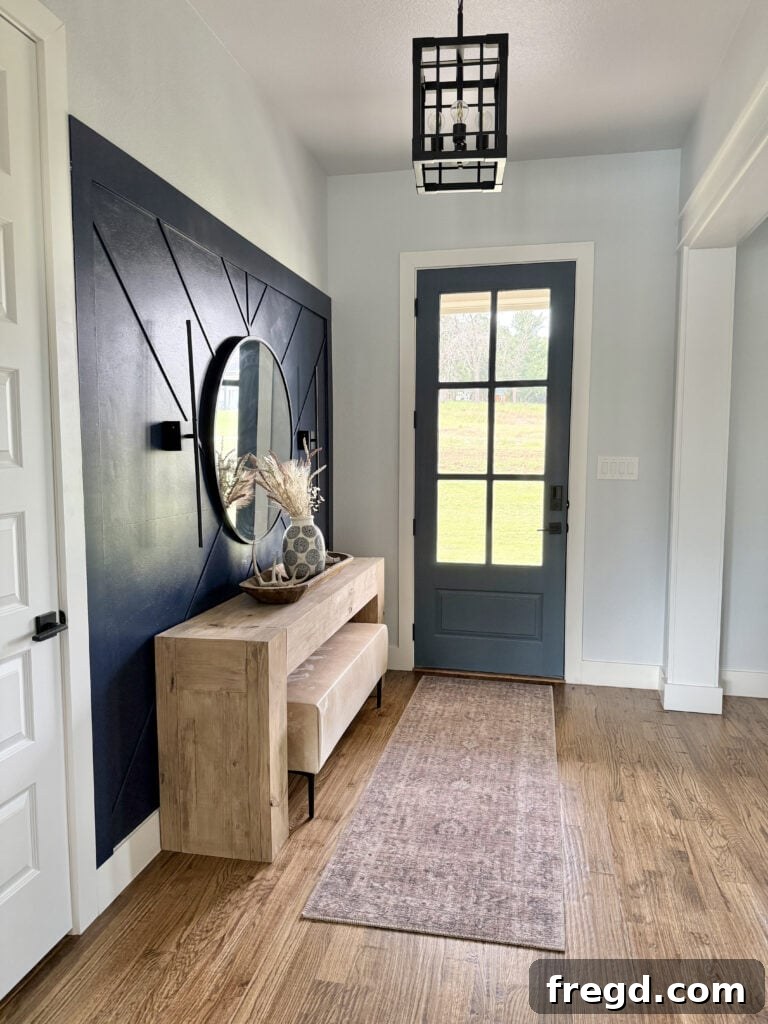
I genuinely love seeing your creative projects come to life! If you decide to tackle this accent wall, please let me know. Tag me in your social media posts using #shanty2chic so I can admire and share your DIY magic with our community!
Information On Everything In My Entryway
Curious about the other elements that bring this entryway to life? Here’s a breakdown of the specific pieces and where to find plans or purchase them:
- Cowhide Bench – Free Plans Coming Soon! (Keep an eye out for this exciting release!)
- Modern Console Table – Free Plans! (Build your own stylish console with our easy-to-follow guide.)
- Round Mirror (A timeless piece that adds elegance and light.)
- Light Sconces (Battery-operated for hassle-free installation and flexible placement.)
- Rug (Grounds the space and adds texture and warmth.)
- How I Cased My Openings – Free Plans! (Learn to add architectural detail to your doorways.)
Check out some of our other DIY Wall Treatments
If you’re inspired to explore more ways to transform your walls, here are a few other popular DIY wall treatment projects we’ve shared:
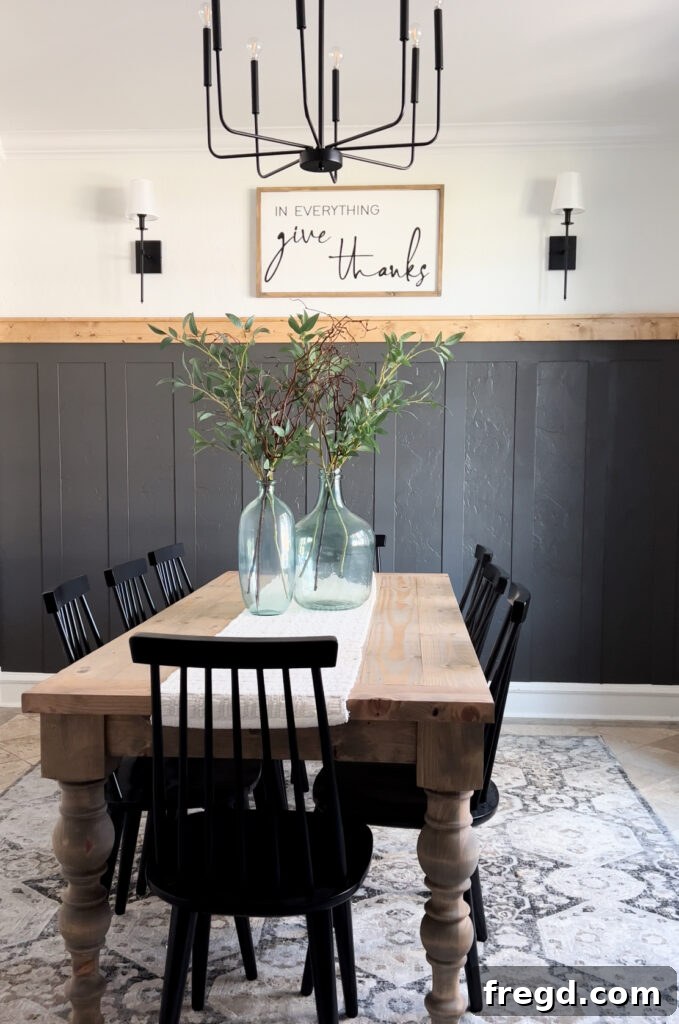
Modern Board and Batten: A classic and versatile wall treatment that adds significant architectural character and charm to any room.
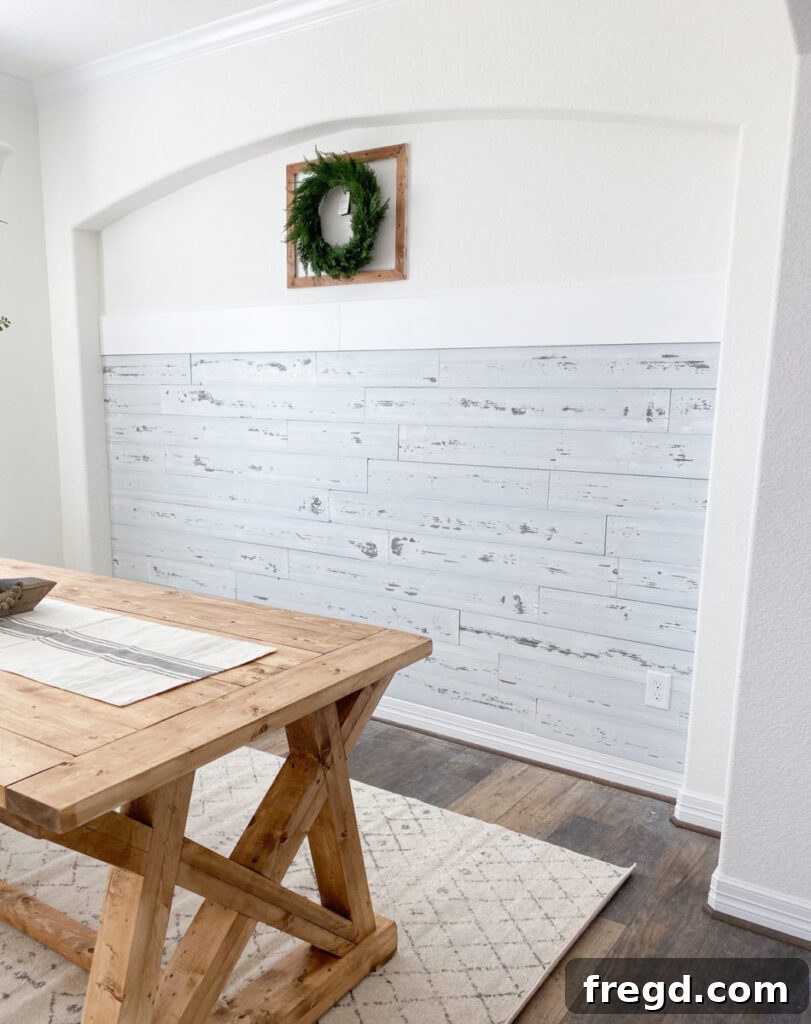
Wood Planked Wall: Achieve a rustic, farmhouse, or coastal vibe with this surprisingly easy and impactful wood plank treatment.
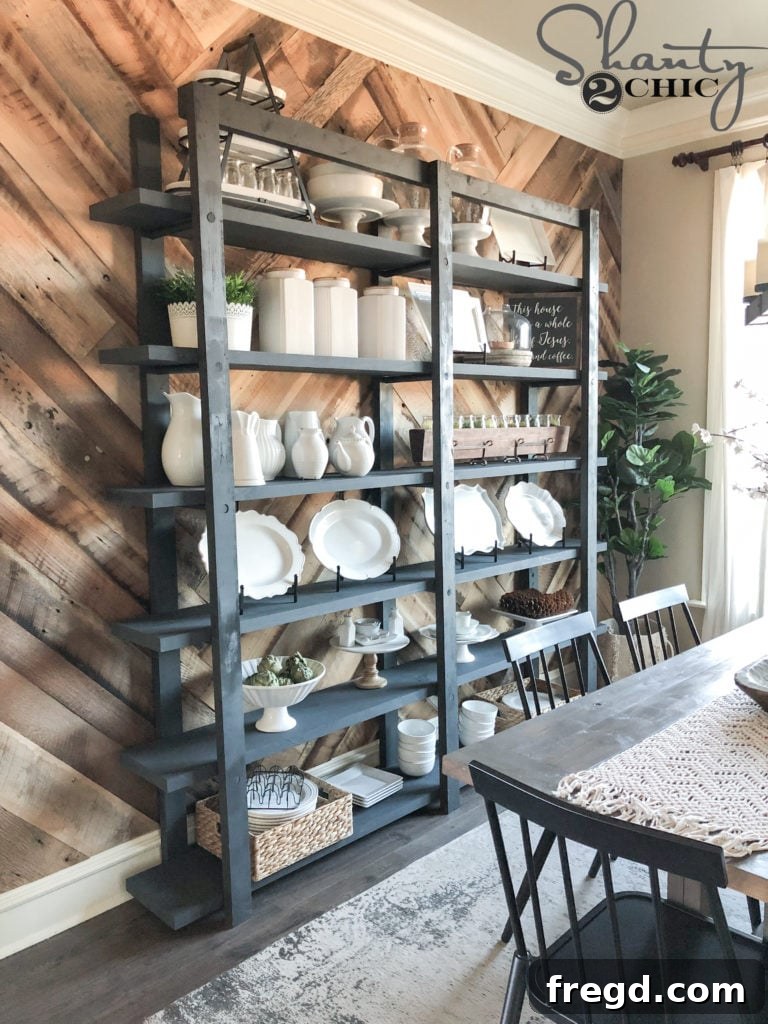
Barn Wood Herringbone Wall: For those seeking a bold, textural statement, this herringbone pattern using barn wood offers unique character and warmth.
Modern Accent Wall DIY Plans
Transform your space with a renter-friendly accent wall – no glue, no screws, big impact! This easy DIY tutorial offers a perfect solution for adding style without permanent commitment. Click here to download the full set of free printable plans, including a detailed shopping list and cut diagram!
Tools Required
- Miter Saw
- Drill
- Finish Nailer
- Pin Nailer
- Circular Saw
- Jigsaw
- Stud Finder
- Tape Measure
- Level
- Sander
Supply List
- 2 – 1/2″ x 48″x 96″ Hardwood Plywood
- 1 – 1x6x10 Primed MDF
- 2 – 1x4x8 Primed MDF
- 6 – 1/4″ x 3/4″ x 96″ Screen Moulding
- 2 1/2″ Finish Nails
- 1″ Pin Nails
- Wood Filler
- Painter’s Tape
- Paint (e.g., Sherwin Williams Naval)
Instructions
Cut List
-
Cut List 1: Refer to the full printable plans for precise dimensions and angles.

-
Cut List 2: Additional cut details can be found in the downloadable plans.
-
Measure and cut the side and top trim pieces to size from your MDF. Attach them securely to the studs behind the wall using 2 1/2″ finish nails. Use a level to ensure perfect alignment.
-
Cut the hardwood plywood sheets to fit precisely within your MDF frame. If an electrical outlet is present, carefully measure, mark, and cut the opening using a drill and jigsaw (after turning off power). Attach the first plywood panel to the wall studs with 2 1/2″ finish nails.
-
Repeat the previous step to attach the second sheet of plywood to the wall, ensuring a snug fit and secure fastening.
-
Cut the vertical screen molding pieces to size. Center them on the plywood panels to create your initial design grid and attach them using 1″ pin nails. Starting from the center helps maintain symmetry.
-
Measure and cut all the diagonal screen molding pieces. Each piece requires a 45° angle cut on both ends, measured long point to long point, to ensure a perfect mitered joint. Attach these molding pieces with 1″ pin nails, carefully building out your geometric pattern.
-
Fill all nail holes with wood filler, allow to dry, then thoroughly sand the entire wall treatment until smooth. Apply painter’s tape to protect surrounding areas. Caulk any gaps for a seamless finish, then prime and apply your chosen paint color. Don’t forget to share your amazing builds with us on social media using #shanty2chic so we can celebrate your DIY success!
Happy Building!