
Mastering the Art of Distressed Paint: A Simple Wax Resist Method for Shabby Chic Finishes
Hey there, DIY enthusiasts! Are you looking to add a touch of timeless charm, rustic elegance, or vintage appeal to your home decor? Look no further than the incredibly popular and surprisingly simple distressed paint technique. This method allows you to transform ordinary pieces into unique, character-filled treasures that tell a story. Today, I’m thrilled to share a fantastic, straightforward approach to achieving that perfect aged look using a common household item: wax! It’s a game-changer for anyone wanting to master the art of distressed finishes, perfect for furniture makeovers, wall art, or any wooden surface needing a touch of vintage flair.
Unlocking the Charm: Why Distressed Finishes Are So Popular
The allure of distressed furniture lies in its ability to evoke a sense of history and warmth. It’s a style that fits seamlessly into various decor themes, from the cozy farmhouse aesthetic to elegant shabby chic, industrial, and even eclectic interiors. A beautifully distressed piece doesn’t just look old; it looks lived-in, loved, and full of character. It adds depth and texture, breaking up the monotony of flat, single-color surfaces. This technique is especially perfect for giving new life to old, forgotten pieces, or even for adding instant antique appeal to brand new items. It’s an incredibly forgiving process, making it ideal for beginners and seasoned crafters alike who wish to achieve a custom, hand-finished look.
Gathering Your Essential Tools & Materials for a Perfect Distressed Look
Before diving into the creative process, gathering all your supplies ensures a smooth and enjoyable experience. Here’s what you’ll need to create your stunning distressed finish with the wax resist method:
- Base Coat Paint: This is the underlying color that will peek through your top coat, giving your piece its aged appeal. Spray paint (like Rust-Oleum London Gray for a beautiful brown undertone) is excellent for speed and ease, but any latex or acrylic paint can also be used.
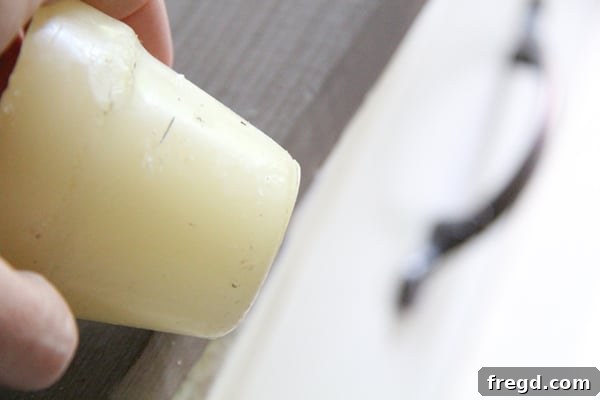
- A Simple Candle: Any standard household candle will do the trick. This is our secret weapon for the wax resist method, creating a barrier that prevents the top coat from adhering.
- Top Coat Paint: Your primary color. Latex or acrylic paint is highly recommended here for best results and adhesion over the wax. Choose a color that contrasts beautifully with your base coat.
- Fine-Grit Sanding Block (e.g., 220-grit): Essential for gently sanding away the top coat to reveal your base color and create that authentic distressed texture.
- Paint Brushes or Rollers: Depending on your chosen paint types and the size and intricacy of your project.
- Drop Cloths or Cardboard: Crucial for protecting your workspace from paint spills and drips.
- Painter’s Tape (Optional): Useful if you need to mask off certain areas you don’t want painted or distressed.
- Cleaning Supplies: Rags, mild soap, and water for thorough surface preparation.
- Safety Gear (Optional but Recommended): Gloves, safety glasses, and a respirator if working with spray paint in a poorly ventilated area, ensuring a safe crafting environment.
Step-by-Step Guide: Creating Your Distressed Masterpiece
Preparation: The Foundation of a Flawless Finish
As with any successful painting project, proper preparation is the cornerstone. Begin by thoroughly cleaning your surface. Remove any dirt, dust, grease, or grime that could impede paint adhesion. For previously painted or glossy surfaces, a light sanding with a medium-grit sandpaper (around 120-grit) can help create a ‘tooth’ for the new paint to grip onto. After sanding, wipe away all dust with a tack cloth or a damp rag and let it dry completely. Ensure your workspace is well-ventilated and protected with drop cloths or old newspapers to catch any paint overspray or drips.
Step 1: Laying Down Your Base Coat – The First Layer of Character
This is where the magic truly begins! Your base coat is the foundational color that will ultimately peek through, giving your piece its aged, weathered appeal. For this particular project, I aimed for a rustic brown undertone, which was achieved beautifully with Rust-Oleum London Gray Spray Paint. Despite its name, this particular shade often yields a fantastic earthy brown hue that perfectly mimics aged wood or a worn primer when distressed. Spray paint offers unparalleled speed and ease of application, drying quickly and providing a remarkably smooth, even finish. If spray paint isn’t your preference, a latex or acrylic paint applied with a brush or roller will also work effectively. Ensure complete and even coverage with your chosen base coat. Once applied, allow it to dry thoroughly according to the manufacturer’s instructions, which is crucial for preventing issues in subsequent steps. Patience here ensures optimal results.
Step 2: The Magic of Wax Application – Creating Resist Points
Once your base coat is completely dry and cured, it’s time for our clever wax resist technique. Take your simple candle and generously rub it along all the edges, corners, and any other areas where natural wear and tear would typically occur over time. Think about where a piece of furniture would naturally get bumped, chipped, or rubbed over years of use – these are your target zones. Don’t be afraid to add some random wax spots or streaks on the flatter surfaces of your board as well; this creates a more varied, authentic, and organic-looking distress. The wax acts as a physical barrier, preventing the subsequent top coat from adhering firmly to these specific spots. This crucial step will later allow us to easily sand away the top layer to reveal the beautiful base color beneath, creating that sought-after aged appearance. This step is quick, easy, and incredibly satisfying as you strategically plan your distressing!
Step 3: Applying Your Top Coat – The Main Color Story
With the wax meticulously applied, you’re now ready to put on your top coat – this is the primary color you want your finished piece to display. For this layer, latex or acrylic paints are highly recommended. They provide excellent coverage, dry quickly, and are formulated to adhere well to most surfaces, even those with a thin layer of wax. While spray paint was efficient for the base, it might not offer the same predictable results over wax for the top coat. Apply your first coat evenly, ensuring good coverage over the entire surface, including the waxed areas. Don’t worry if the wax areas look a little bumpy or less adhered; they are designed to be sanded away later. Allow this first coat to dry completely according to manufacturer guidelines before proceeding.
Once the first coat is dry to the touch, apply a second coat for full opacity, depth of color, and a more robust finish. This ensures a rich, solid background before we start the distressing process. Again, let this second coat dry really, really well. Rushing the drying time can lead to messy results or uneven peeling during the crucial sanding stage, so patience is a virtue here.
Step 4: Revealing the Distress – The Sanding Process
This is truly the most fun and rewarding part of the entire process! Grab your fine-grit sanding block, ideally around 220-grit, which provides gentle abrasion without creating deep scratches. Begin to gently sand down your entire board. You’ll notice that where the wax was applied under your top coat, the paint will magically begin to peel, flake, or rub away with surprising ease, effortlessly exposing your beautiful base coat underneath. This is the wax doing its job perfectly! Focus your sanding efforts on the areas where you initially applied the wax – the edges, corners, and those random spots – to create natural-looking wear patterns. Keep sanding and experimenting with pressure and technique until you are absolutely happy with the amount and pattern of distress. Remember, there’s no right or wrong amount; it’s all about personal preference and achieving the custom, aged look you desire. This step allows for immense creativity and customization, making each piece truly unique.
Tips for Achieving Perfect Distressed Finishes Every Time
To elevate your distressed painting projects and ensure stunning, professional-looking results, consider these additional tips and techniques:
- Experiment with Wax Application: Don’t limit yourself to just the edges. Try rubbing the candle in circular motions or creating deliberate, natural-looking streaks to mimic unique wear patterns. The more varied and organic your wax application, the more authentic and natural your distress will look.
- Choose Contrasting Colors: For the most dramatic and visually appealing distressed look, select a base coat and top coat that offer good contrast. A light top coat over a dark base, or vice versa, will make the distressed areas pop and add depth.
- Vary Your Sanding Pressure: Apply slightly more pressure for larger, more pronounced areas of exposed base coat, and a lighter, gentler pressure for subtle, feathered wear. A light touch creates soft, diffused edges, while firmer pressure yields more defined chips and scrapes.
- Consider a Topcoat/Sealer: Once you’re completely happy with your distressed finish, consider applying a clear protective topcoat. Options include a matte, satin, or gloss polycrylic, or even a furniture wax. This step will seal the paint, protect your beautiful work from daily wear, and prevent further unintended distressing from everyday use.
- Don’t Over-Distress: Less can often be more when it comes to distressing. Step back periodically to assess your progress and ensure you’re not overdoing it. It’s much easier to add more distressing than it is to repair an over-sanded or overly distressed area.
- Clean as You Go: Keep a clean, dry cloth or a shop vacuum handy to wipe away sanding dust as you work. This allows you to clearly see the progress of your distressing and prevent dust from interfering with your finish.
Troubleshooting Common Distressing Issues
Even with a seemingly simple technique, you might encounter a few hiccups along the way. Here’s how to effectively tackle common distressing issues:
- Paint Isn’t Peeling Easily: This issue usually indicates that not enough wax was applied in certain areas, or the top coat dried too firmly over the wax, creating a strong bond. Try applying slightly more pressure with your sanding block. If it’s still stubborn, you might need to use a slightly coarser grit sandpaper (e.g., 180-grit) very carefully in those specific areas, then switch back to your 220-grit for blending.
- Too Much Base Coat Exposed: If you’ve accidentally sanded away too much of your top coat, exposing more base color than desired, don’t fret! You can lightly repaint the overly distressed area with your top coat color, let it dry completely, and then carefully re-distress with a much lighter touch to achieve a more controlled look.
- Wax Marks Showing Through Top Coat: If your initial wax layer was too thick or uneven, it might create noticeable ridges or texture under your top coat. For future projects, try to apply a thinner, more even layer of wax. For current projects, very light sanding over the affected area might help to blend the texture, or a slightly thicker second top coat could help obscure minor imperfections.
Beyond the Board: Inspiring Distressed Project Ideas
This wax resist distressed paint method isn’t just for small decorative boards! It’s an incredibly versatile technique that can be applied to a myriad of projects around your home, instantly adding character and charm. Imagine transforming:
- Furniture: Dressers, nightstands, coffee tables, dining chairs, and cabinets can all benefit from an instant antique or shabby chic upgrade.
- Picture Frames: Give new frames a vintage look or refresh old, outdated ones with a charming distressed finish.
- Decorative Boxes or Trays: Add a touch of rustic elegance to functional or decorative storage items.
- Shelves: Create custom wall shelves that look like they’ve been cherished and used for decades.
- Planters: Achieve a charming farmhouse feel for your indoor or outdoor plant pots and containers.
I’ve personally used this very method to create beautiful results, such as my rustic key hook project, which you can check out HERE for more inspiration on how to apply this technique to functional home decor items!
Conclusion: Your Journey to Beautiful Distressed Finishes Awaits!
There you have it – a simple yet incredibly effective method for achieving stunning distressed paint finishes that bring character and history to any piece. This wax resist technique is not only easy to learn but also immensely satisfying, allowing you to bring a custom, high-end, and charming look to your projects without breaking the bank. The possibilities are truly endless, and each piece you create will have its own unique charm and story. It’s time to unleash your inner artist and start transforming your home with beautiful, aged finishes that reflect your personal style. So, gather your supplies, embrace the creativity, and get ready to paint!
Thanks so much for stopping by and diving into the wonderful world of distressed painting with me. I hope you feel inspired and ready to tackle your next DIY project!
~Whitney