
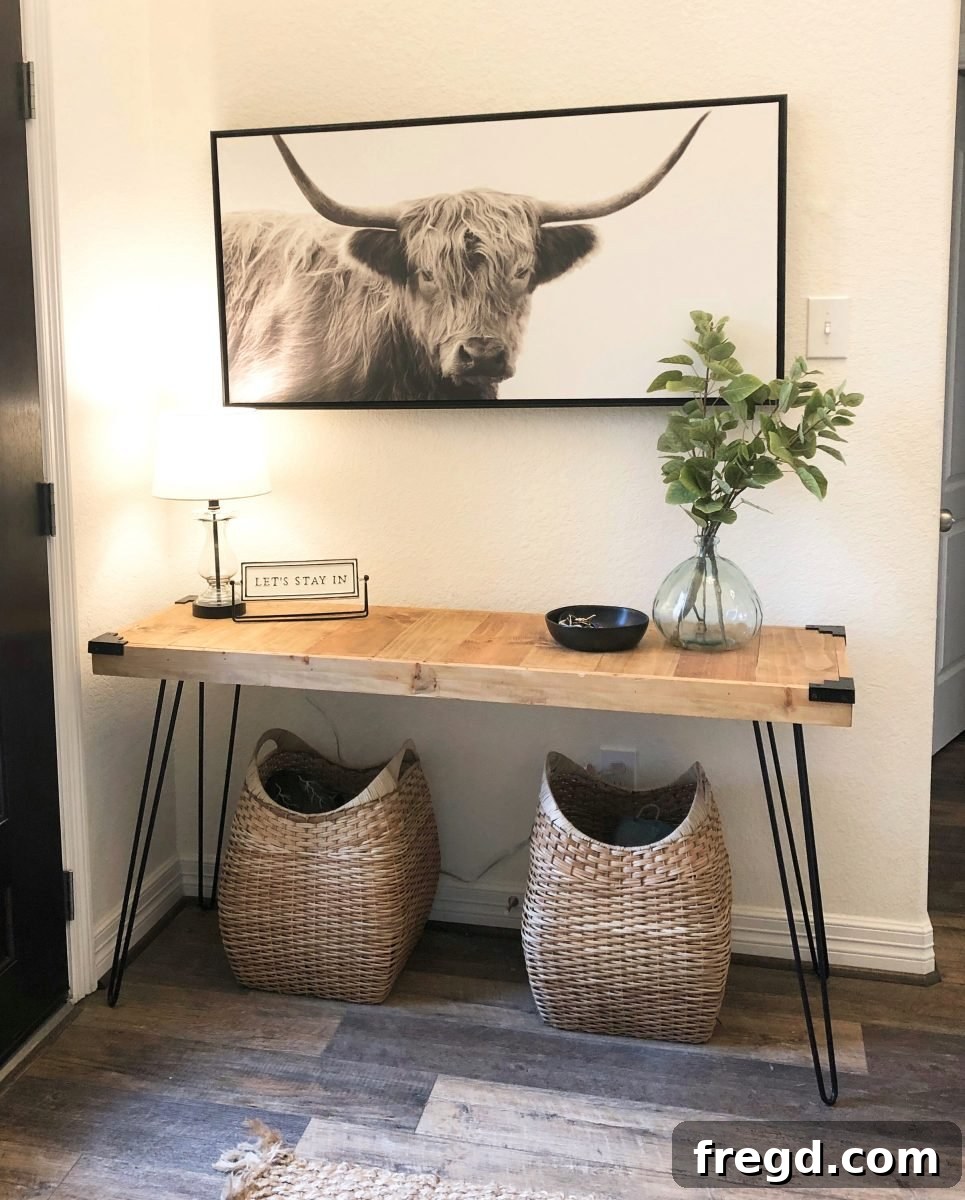
Transforming a house into a home is a rewarding journey, and among our most cherished DIY projects for my sister’s new abode was crafting this exquisite Hairpin Console Table. It’s a piece that perfectly blends simplicity with sophisticated chic, proving that stylish furniture doesn’t have to come with a hefty price tag. The table’s open base design offers practical storage solutions, providing ample space for decorative baskets to neatly tuck away essentials, making it an ideal addition to virtually any room in your home. This project is surprisingly straightforward, requiring a minimal number of boards and basic tools, making it an accessible and enjoyable build for DIY enthusiasts of all skill levels. If you’ve been dreaming of adding a touch of modern elegance to your entryway, living room, or hallway, this DIY hairpin console table is the perfect weekend endeavor. We invite you to dive into this guide and discover how you can create this beautiful and functional piece for your own space.
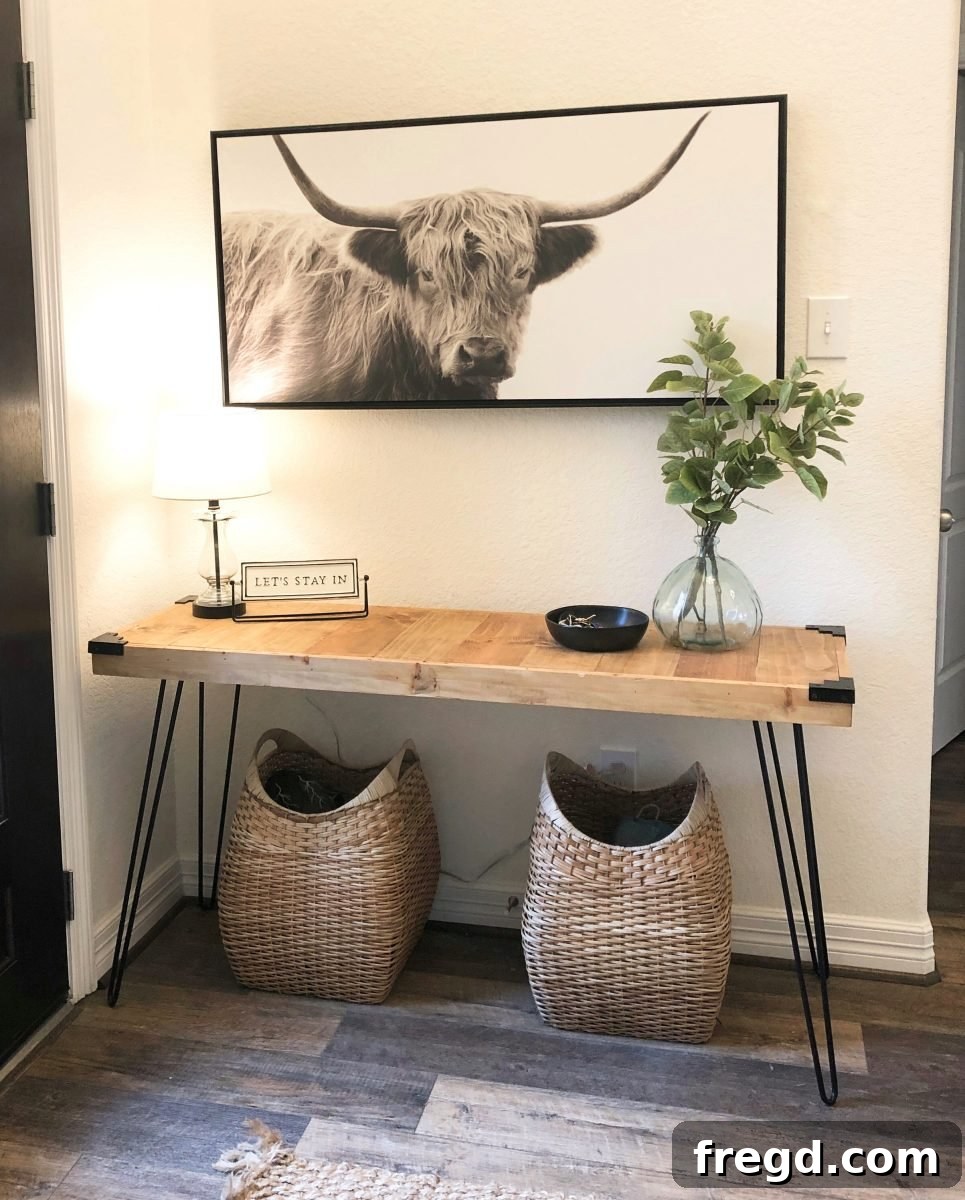
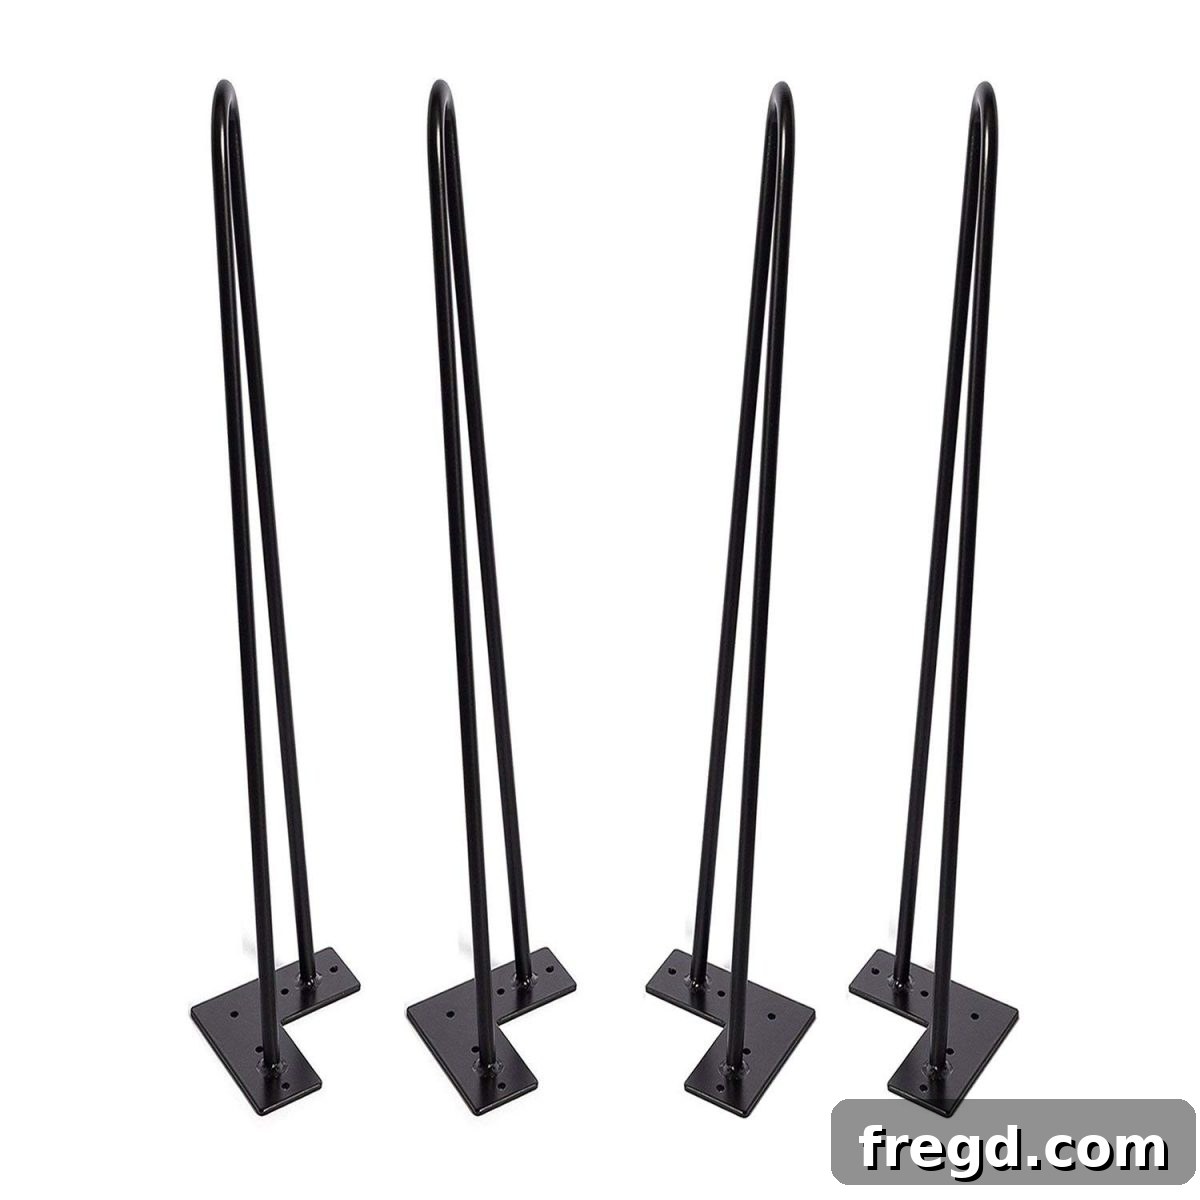
There’s immense satisfaction in creating something beautiful and functional with your own hands, and this modern console table is a testament to that. We absolutely adore how this charming piece seamlessly integrates into our sister’s new home, adding both character and utility. The secret to its striking appearance lies largely in the hardware choices. The sleek hairpin legs, a hallmark of mid-century modern design, were an incredible find at an unbeatable price. Their minimalist profile provides a light, airy feel, preventing the table from overwhelming a space. You can discover these versatile and affordable hairpin legs and give your project that distinctive modern flair.
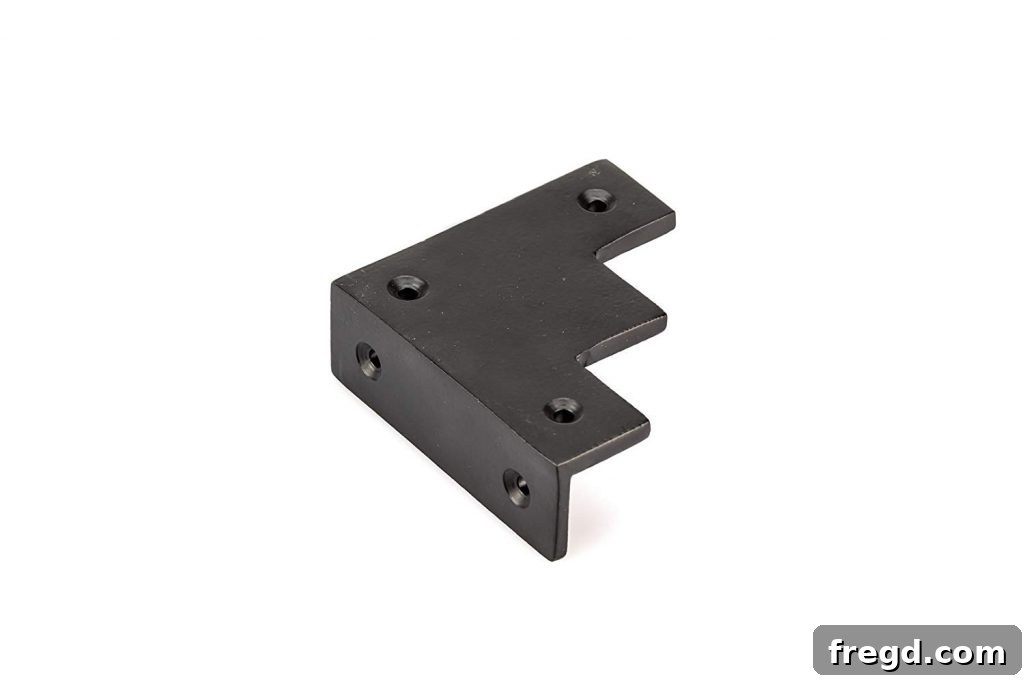
Beyond the legs, the sophisticated corner pieces contribute significantly to the table’s refined aesthetic. While they might be a slight investment, we felt they were well worth the splurge given the overall cost-effectiveness of this DIY project. These small details elevate the entire piece, transforming simple wood into a high-end looking furniture item. Finding these specific corner brackets on Amazon was a game-changer, adding that extra touch of polished elegance. When embarking on your own DIY furniture projects, remember that hardware isn’t just functional; it’s a powerful design element that can dramatically influence the final look and feel of your creation. Don’t hesitate to invest in quality hardware that complements your design vision.
DIY Hairpin Console Table Step by Steps
Building your own hairpin console table is a fulfilling experience that results in a unique piece tailored to your style. Follow these detailed steps to construct a sturdy and beautiful console table that will enhance any room.
Step 1: Prepare the Plywood Base
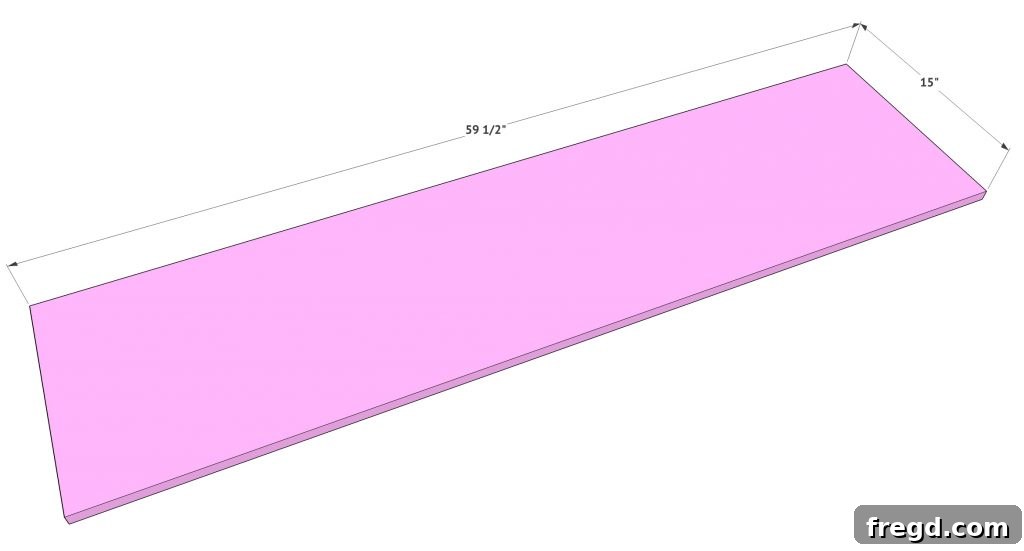
The foundation of your console table’s top begins with a piece of 3/4-inch plywood. This material serves as a robust base for the decorative planks and trim that will cover it, so the specific type of plywood isn’t as critical since it won’t be visible in the final product. Using a miter saw or circular saw, carefully cut your plywood board to the precise dimensions outlined in your plans. Accuracy in this step is crucial for ensuring a straight and even tabletop. Before proceeding, ensure all edges are smooth by lightly sanding them, preparing the surface for subsequent layers.
Step 2: Attach the Top Planks
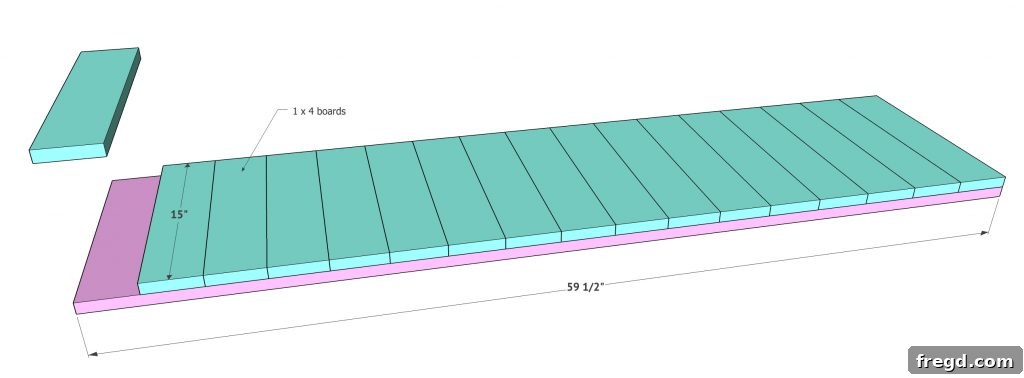
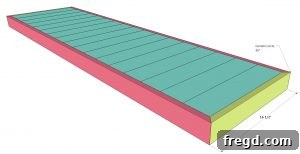
Once your plywood base is ready, it’s time to add the decorative top planks. For this project, we used 1×4 boards, each meticulously cut to a length of 15 inches. These planks will form the visible surface of your console table, so selecting good quality, straight boards will yield the best results. Before attaching, arrange your cut planks on top of the plywood base to ensure they fit perfectly and achieve your desired pattern. Apply a generous amount of wood glue to the back of each plank, then carefully place it flush against the plywood. Secure each plank firmly using 1.25-inch brad nails. The combination of wood glue and brad nails creates a strong, lasting bond, ensuring your tabletop is both beautiful and durable. Wipe away any excess glue immediately.
Step 3: Create the Long Trim Pieces
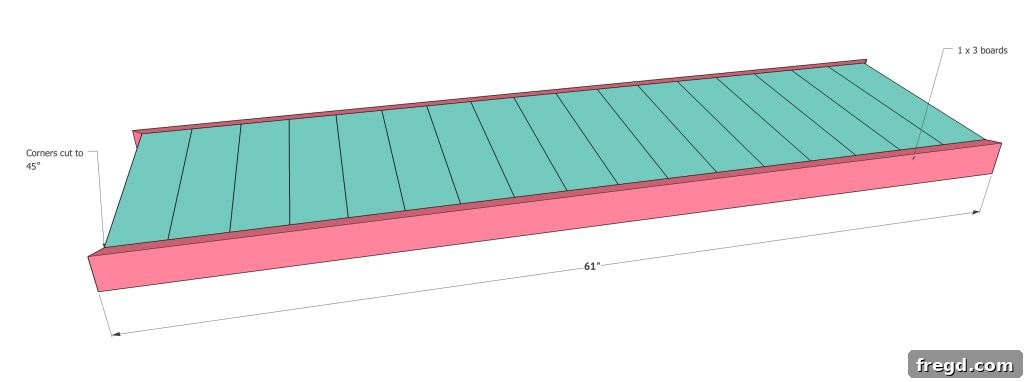
With the top planks in place, the next step is to frame your tabletop with trim pieces, which will give it a finished, professional look. Using 1×3 boards, measure and cut the longer trim pieces for the sides of your table. Each corner should be cut at a precise 45-degree angle to create clean, mitered joints that meet seamlessly. This attention to detail is crucial for achieving a high-quality finish. Apply wood glue to the back of each trim piece and carefully position it so that the top edge of the trim is flush with the top surface of your planks. Secure these longer trim pieces using 1.25-inch brad nails, driving them through the trim boards and into both the planks and the plywood base for maximum stability. Allow the glue to dry completely before moving on to the next step.
Step 4: Add the Shorter Trim Pieces
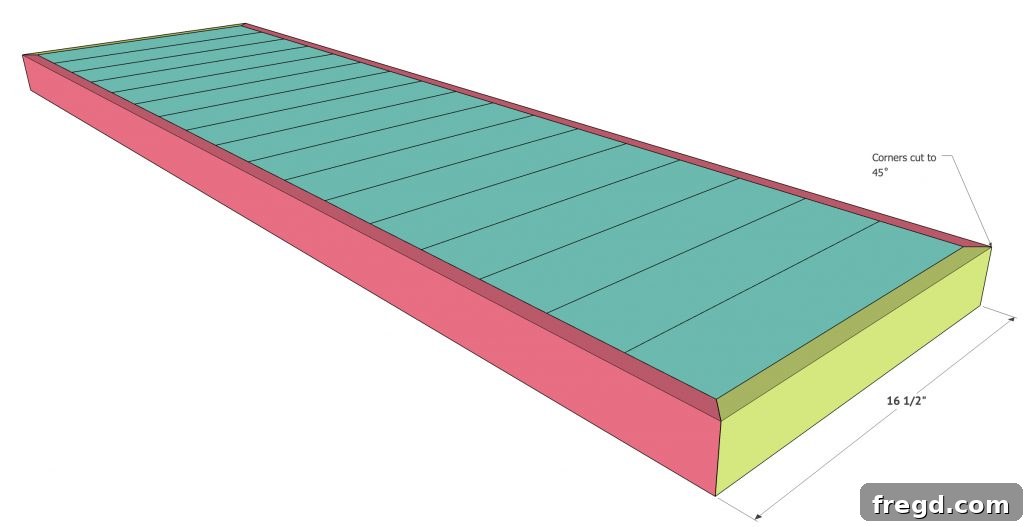
Following the installation of the longer trim pieces, proceed to attach the shorter trim segments to complete the frame of your tabletop. These pieces are also cut from 1×3 boards, measured to fit snugly between the longer trim pieces, with their corners also cut at a 45-degree angle to perfectly match the mitered joints. This continuous trim creates a cohesive and polished edge around the entire table. As with the previous step, apply wood glue to the back of each shorter trim piece and carefully align them flush with the top of the planks. Secure them in place using 1.25-inch brad nails, ensuring they penetrate through the trim, planks, and into the plywood base. Once all trim pieces are attached, your tabletop will have a solid and professional appearance, ready for the final touches.
Step 5: Finish and Install Hardware
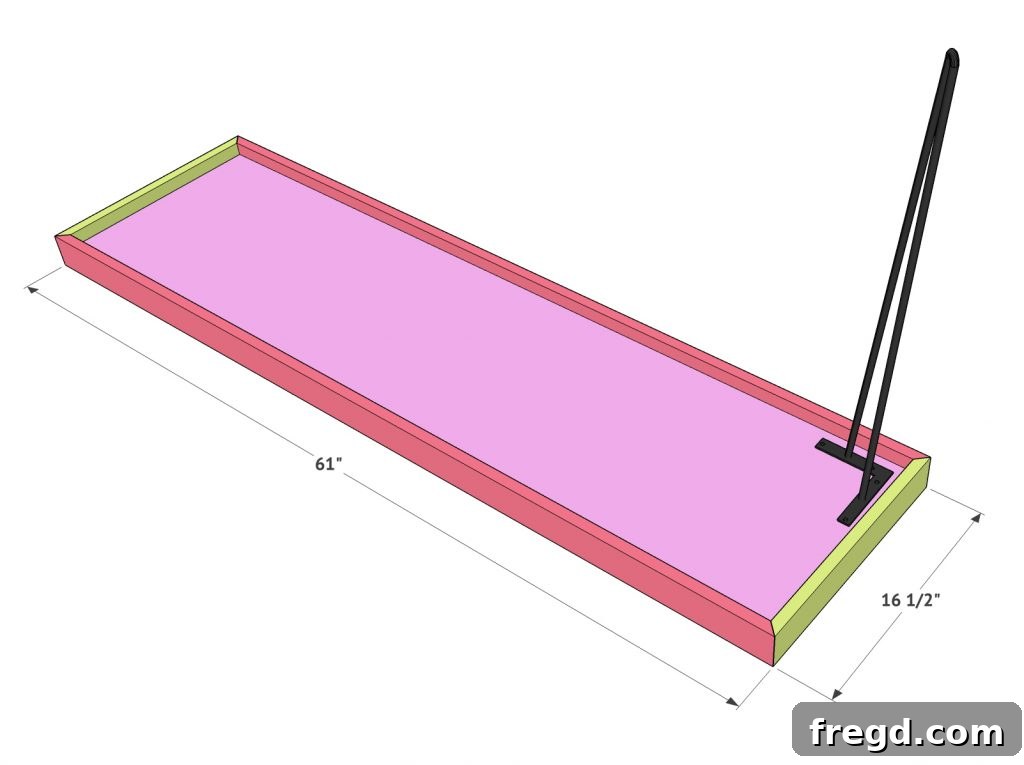
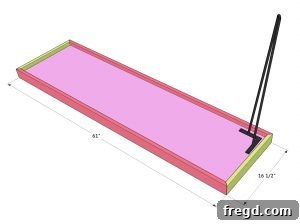
The final step brings your console table to life! Before attaching the legs and any additional hardware, it’s essential to apply your desired finish to the tabletop. This includes sanding the entire surface thoroughly to achieve a smooth finish, filling any nail holes with wood filler, and then sanding again. Once perfectly smooth, you can choose to paint your tabletop in a color that complements your decor, or stain it to highlight the natural beauty of the wood grain. Allow the finish to cure completely according to manufacturer instructions. After the finish has dried, carefully attach the hairpin legs to the underside of the table, ensuring they are evenly spaced and securely fastened. Finally, install any decorative corner pieces or other hardware, taking care to position them precisely. This stage allows for personalization, transforming your handcrafted piece into a stunning focal point.
Gathering Your Materials and Tools
Every successful DIY project starts with the right materials and a well-equipped toolkit. For this stylish hairpin console table, the beauty lies in its simplicity and the readily available supplies. Choosing quality wood ensures a durable and beautiful end product, while having the correct tools makes the building process smooth and efficient. Here’s what you’ll need to create your own:
Supply List
- 3 1 x 4 x 8 pine or whitewood boards (for the top planks)
- 2 1 x 3 x 8 pine or whitewood boards (for the trim)
- 1 3/4″ plywood panel (approx. 15″ x 59.5″ depending on desired table dimensions)
- Wood glue (for strong, lasting bonds)
- 1.25″ finish or brad nails (for secure fastening)
- Hairpin legs (available online, ensure desired height and finish)
- Decorative corner brackets (optional, but highly recommended for added flair)
- Sandpaper or electric sander (for smooth finishes)
- Miter saw or circular saw (for precise cuts)
- Brad nailer (makes attaching planks and trim quick and easy)
- Measuring tape and pencil (for accurate measurements)
- Safety glasses and hearing protection (always prioritize safety!)
- Wood filler (optional, for filling nail holes)
- Paint or wood stain & sealer (for desired finish)
Choosing pine or whitewood for your planks and trim is an excellent choice for DIY furniture. These woods are affordable, easy to work with, and take paint or stain beautifully, allowing for a wide range of aesthetic outcomes. The 3/4″ plywood provides a sturdy, flat base, ensuring your tabletop remains stable. When selecting your hairpin legs and corner hardware, consider the overall style you’re aiming for. Black, raw steel, or brass hairpin legs can dramatically change the look, while decorative corner brackets add a touch of industrial, modern, or even rustic charm. Remember, investing in good quality wood glue and proper nails is paramount for the longevity of your handmade console table. And never forget your safety gear!
Styling Your New Console Table
Once your DIY hairpin console table is complete, the real fun begins: styling it to reflect your personal taste and complement your home decor. A console table is incredibly versatile, making it perfect for various spaces from the entryway to the living room or even a spacious hallway. Its open base is not just a design feature but a functional opportunity for creative storage. For instance, the cute cow print we found at Target (though now sold out, similar options are available) adds a playful yet sophisticated touch, creating a focal point above or beside the table. You can opt for abstract art, a large mirror, or a gallery wall to achieve a similar effect.
Beneath the table, the open space is ideal for incorporating decorative baskets, much like the ones we discovered at Kirkland’s. These baskets are perfect for discreetly storing items such as blankets, magazines, remote controls, or even shoes in an entryway. Choose baskets made from natural materials like wicker, rattan, or seagrass for a bohemian or farmhouse feel, or go for sleek metal or fabric bins for a more modern aesthetic. On the tabletop itself, consider a curated collection of items: a stack of stylish coffee table books, a small vase with fresh flowers or greenery, a unique sculptural object, or a warm ambient lamp. The key is to balance functionality with aesthetics, creating a vignette that is both visually appealing and serves a purpose. Don’t be afraid to experiment with different arrangements until you find what speaks to you and your space.
Free Plans!
To make this exciting DIY project even more accessible, we’re providing free, printable plans. These comprehensive plans include detailed measurements, cut lists, and additional diagrams to guide you through each step of the build with confidence. Whether you’re a seasoned woodworker or just starting your DIY journey, these plans will ensure you have all the necessary information to construct your own beautiful hairpin console table successfully. Click the link below to download your free plans and start building today!
DIY Hairpin Console Table Project Overview

★
★
★
★
DIY Hairpin Console Table
Supply List
- 3 1 x 4 x 8 pine or whitewood boards
- 2 1 x 3 x 8 pine or whitewood boards
- 1 3/4″ plywood panel 15″ x 59.5″
- Wood glue
- 1.25″ finish or brad nails
- Hairpin legs (4)
- Decorative corner brackets (4)
- Sandpaper or electric sander
- Miter saw or circular saw
- Brad nailer
Instructions
-
The base of the table top is created with 3/4” plywood. You can use any plywood for this part because it will be covered completely with trim. Cut the board to size (15″ x 59.5″ as per plans).

-
Now it’s time to attach the planks to the top of the plywood. These are 1×4 boards we cut to 15” long each. After making the cuts, attach each board flush on the plywood using wood glue and 1.25” brad nails.
-
Measure and cut for the trim pieces next. These are 1×3 boards. Each corner is cut at a 45˚ angle. Attach each longer trim piece using wood glue and 1.25” brad nails through the trim boards and into the planks and plywood. Make sure the top of the trim boards are flush with the top of the planks.
-
Now attach the smaller trim pieces. These are also 1×3 boards cut to size, with 45˚ angles on the corners. Attach them using wood glue and 1.25” brad nails through the trim and into the planks and plywood.
-
The final step is attaching your legs and hardware. You want to be sure and paint or stain your table top before putting the hardware on. Ensure the finish is completely dry before assembly.
We hope this detailed guide empowers you to embark on your own DIY Hairpin Console Table project. It’s a fantastic way to add a custom, high-end piece of furniture to your home without the designer price tag. The versatility of this design allows it to adapt to various decors, and the satisfaction of building it yourself is truly unmatched. Remember to gather your tools, follow the steps carefully, and most importantly, enjoy the process of creating something beautiful and functional. Happy building!