
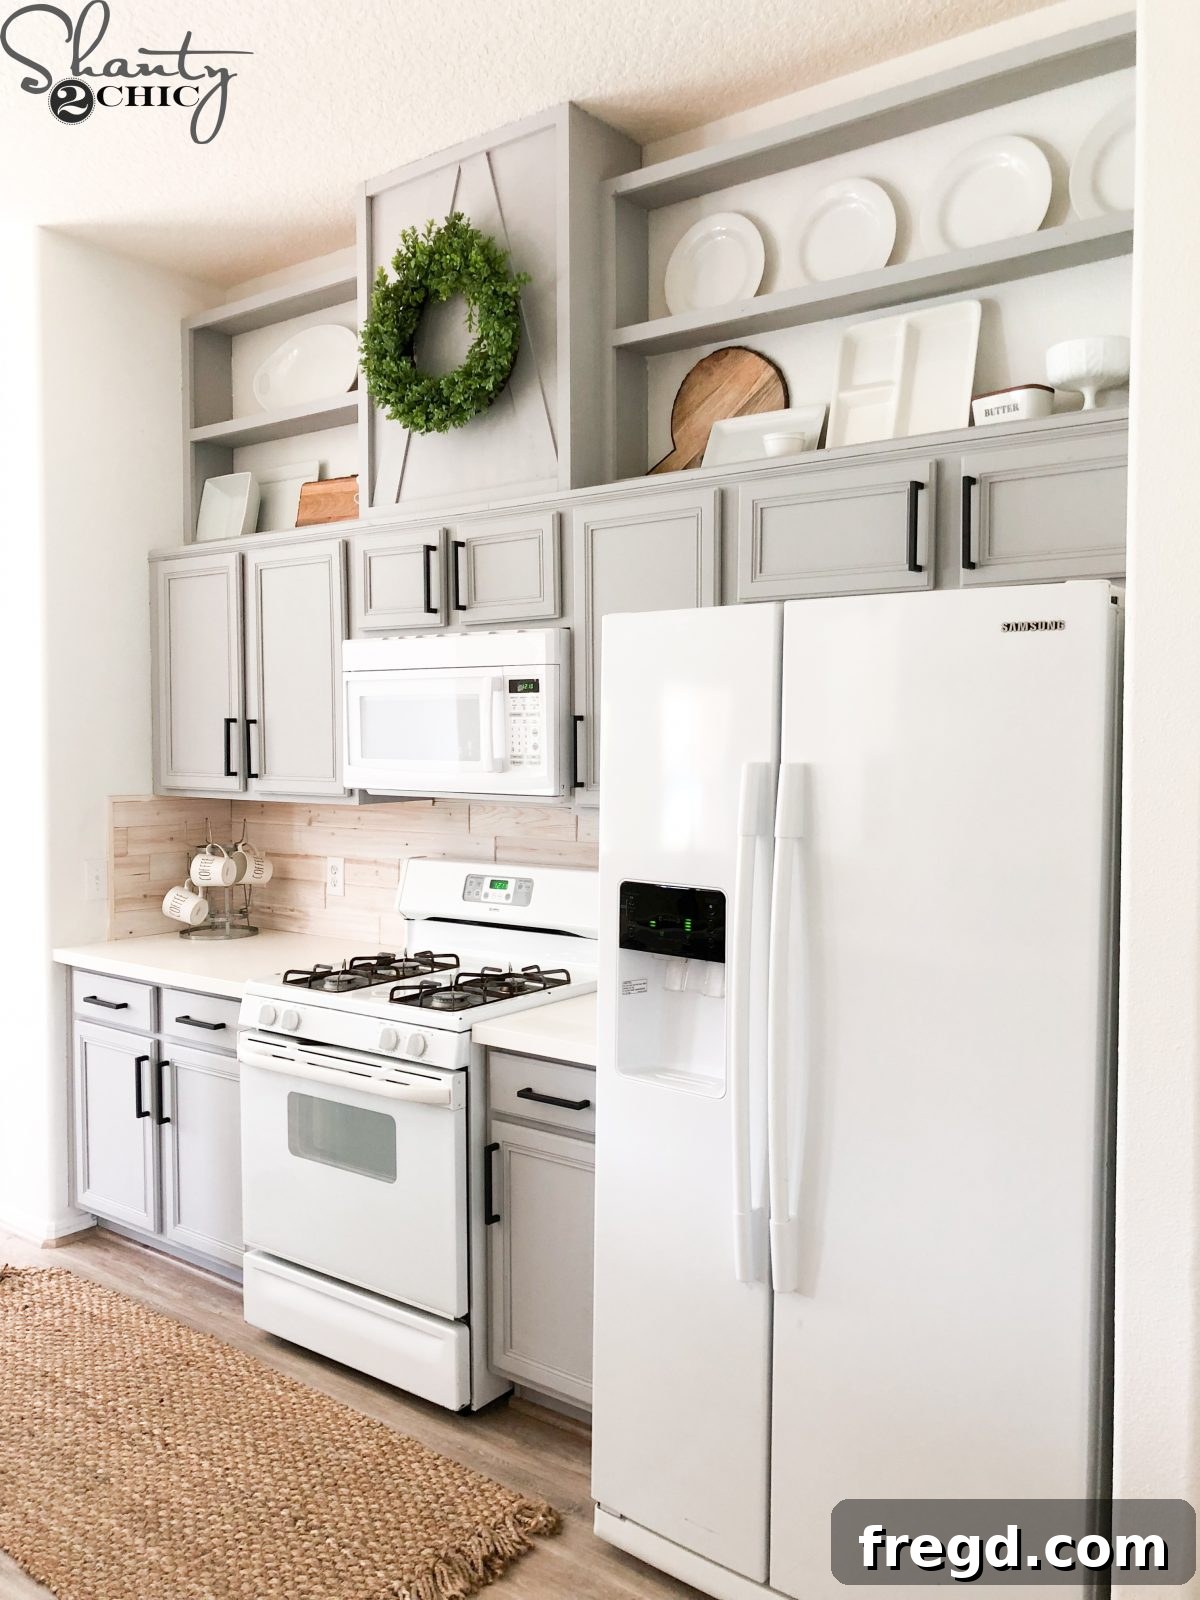
Transform Your Kitchen: A Comprehensive Guide to Adding Height to Builder-Grade Cabinets
Welcome back to another exciting installment of our Shanty House Crash series! This project focuses on a brilliant and budget-friendly way to revitalize your kitchen: learning how to make cabinets taller. We’re taking Leasha’s standard builder-grade cabinets and elevating them, literally, to new heights. Instead of incurring the significant expense of replacing entire cabinet sets or even just the doors, we’re showing you a smart alternative that delivers stunning results. With just a few sheets of hardwood plywood, some essential boards, common tools, and a bit of effort, we’ve not only added valuable height and storage to her cabinets but completely transformed the style and functionality of her kitchen. For a comprehensive visual guide that walks you through every step of this amazing process, be sure to watch our detailed video tutorial!
The visual impact of this transformation is truly remarkable, especially considering the minimal financial investment required. It’s a testament to how creative DIY solutions can deliver custom results without breaking the bank.
Before you begin, remember that this specific set of plans was tailored to Leasha’s existing cabinets. While her cabinets represent a standard size, it’s crucial to measure your own kitchen carefully and adjust material quantities and dimensions accordingly. Our plans serve as an excellent reference point, guiding you through the methodology, but personalization is key to a perfect fit for your unique space.
Ready to get started? We’ve outlined a detailed step-by-step process below. Don’t forget that you can access the FREE Printable Plans at the very end of this post, providing all the measurements and diagrams you’ll need!
Step 1 – Preparing the Cabinets and Installing the New Base Trim
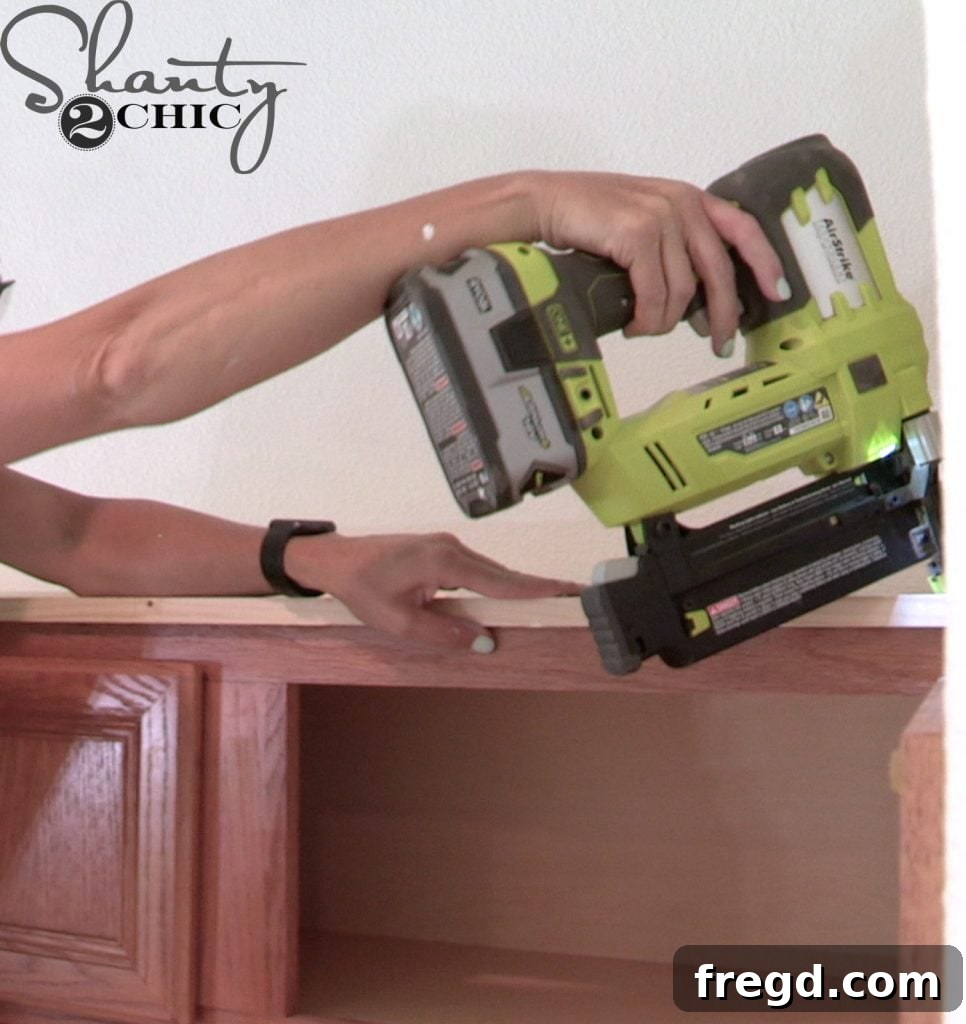
The initial phase of our cabinet height extension project involved carefully removing the existing crown trim from the top of Leasha’s cabinets. This provides a clean slate for our additions. Once the old trim was removed, we precisely cut our edge-glued pine boards to size, ensuring they fit perfectly along the top perimeter of the cabinets. These new base pieces were then securely attached using 1 1/4″ brad nails and a strong wood glue, creating a robust foundation for the new height. We found our Ryobi 18-gauge Brad Nailer to be an invaluable tool for this step, offering quick and secure fastening without splitting the wood. Always ensure your surface is level and clean before attaching the new trim for the best results.
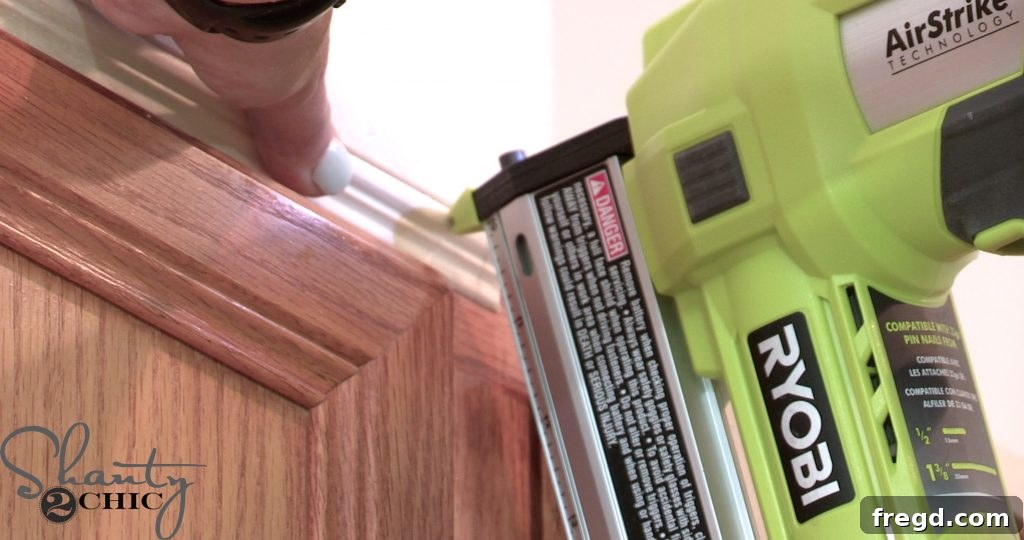
With the primary base piece firmly in place, the next crucial step was to add a smaller piece of trim to the front of the cabinets. This serves a dual purpose: first, it provides a clean, finished edge, and second, it strategically conceals the gap created when the original crown molding was removed. The specific dimensions of this decorative trim piece will depend entirely on the existing spacing between your cabinet doors and the newly installed base piece. Careful measurement here will ensure a seamless and professional transition, making it look as though the cabinets were always this tall.
Step 2 – Constructing the Custom Hood Cabinet
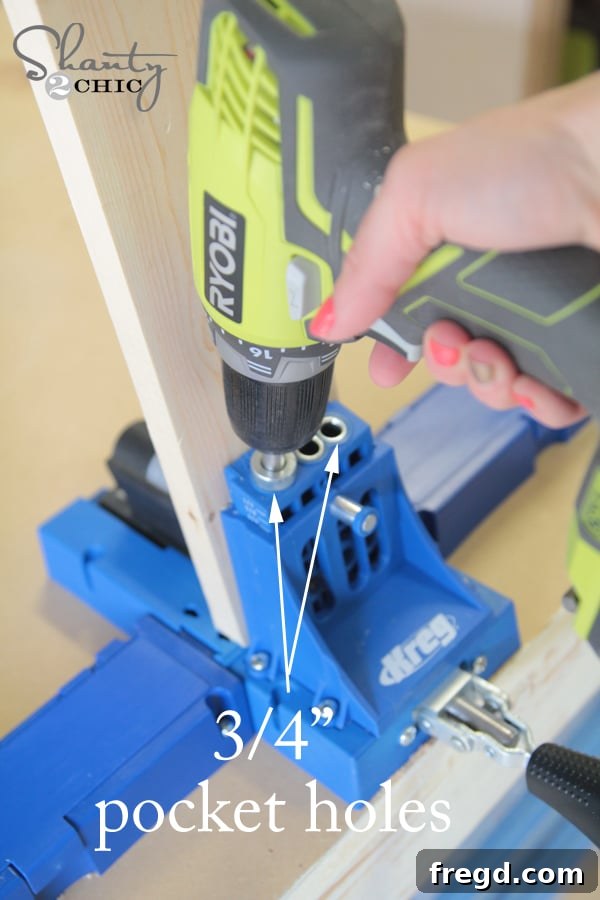
With our base pieces and trim securely attached, we embarked on constructing the central feature of our cabinet extension: the “hood cabinet.” This custom-built box is designed to elegantly conceal an existing hood vent that had been drywalled over, seamlessly integrating it into the kitchen’s new aesthetic. We began by cutting the hood boards to their specified sizes, paying close attention to precision for a snug fit. For robust joinery, we drilled 3/4″ pocket holes into the ends of each support piece and the bottom end of each side piece. If you’re looking for a reliable tool for this, you can find our favorite model of Kreg Jig HERE!
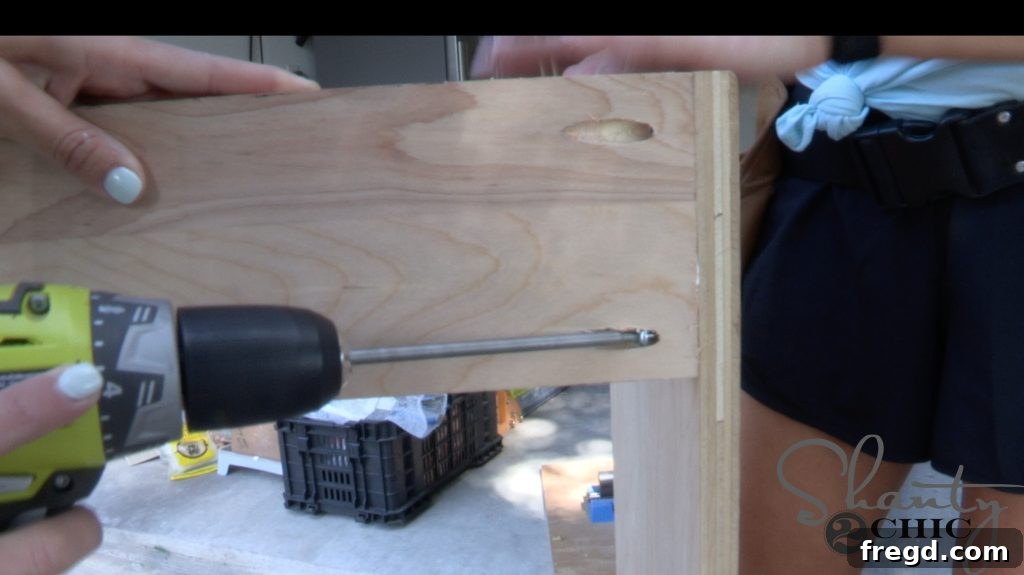
Next, we proceeded to assemble the main structure of the hood cabinet. We attached the support pieces to the front of the side pieces using 1 1/4″ pocket hole screws and a strong wood glue. It is absolutely vital to refer to your detailed plans for the exact placement and orientation of these support pieces to ensure structural integrity and correct alignment. This carefully designed box serves to conceal the existing hood vent. For kitchens without a pre-existing vent in this location, you have the flexibility to add support pieces to the back side of the hood cabinets as well, providing extra stability and allowing for customization, such as adding a solid back panel.
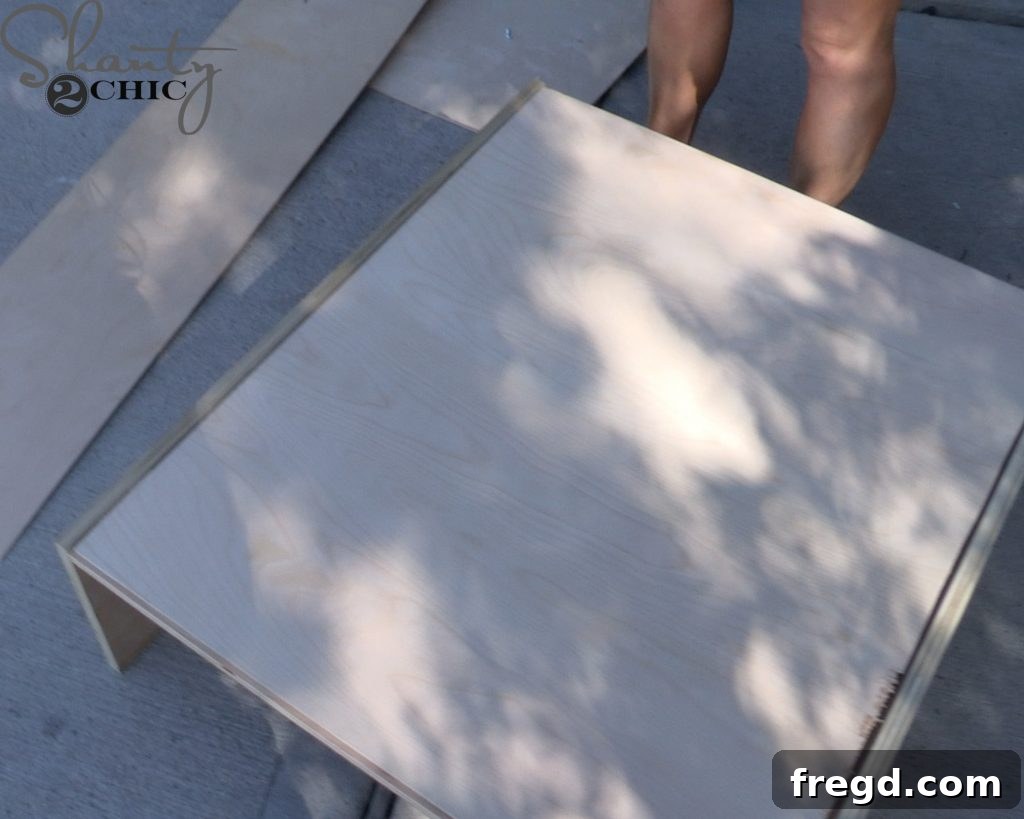
Once the primary frame of the hood cabinet was meticulously assembled and secured, we moved on to encasing it. A piece of 1/4″ hardwood plywood was cut precisely to size, designed to fit snugly over the supports. This plywood forms the visible exterior of the hood cabinet, providing a smooth and professional surface for finishing. We attached it firmly to the underlying supports using a combination of wood glue for maximum adhesion and 3/4″ staples, driven by our reliable Ryobi 18-gauge stapler. This method ensures a strong bond and a clean appearance, ready for the next stage of aesthetic enhancement.
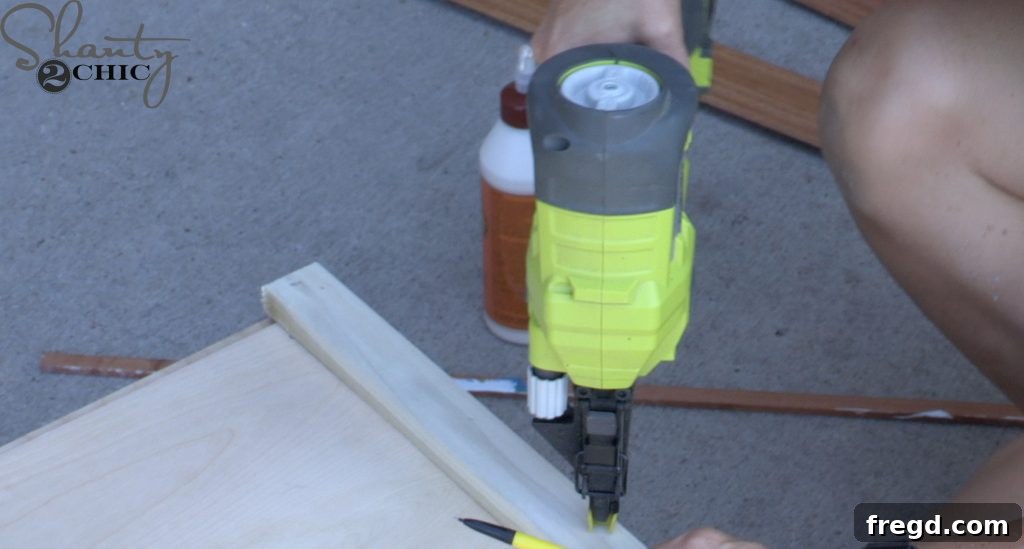
Following the assembly and sheathing of the hood cabinet, the next step involved creating and attaching the face frame. The face frame is critical for giving the cabinet a finished, polished look and for concealing the raw edges of the plywood. We carefully cut the hood face frame pieces to size, ensuring they would perfectly frame the opening and edges of the hood structure. These pieces were then attached to the front of the hood using 1 1/4″ pocket hole screws, strategically placed for strength and invisibility, complemented by wood glue for enduring adhesion. This technique creates a strong, seamless front that will be virtually indistinguishable from custom cabinetry once painted.
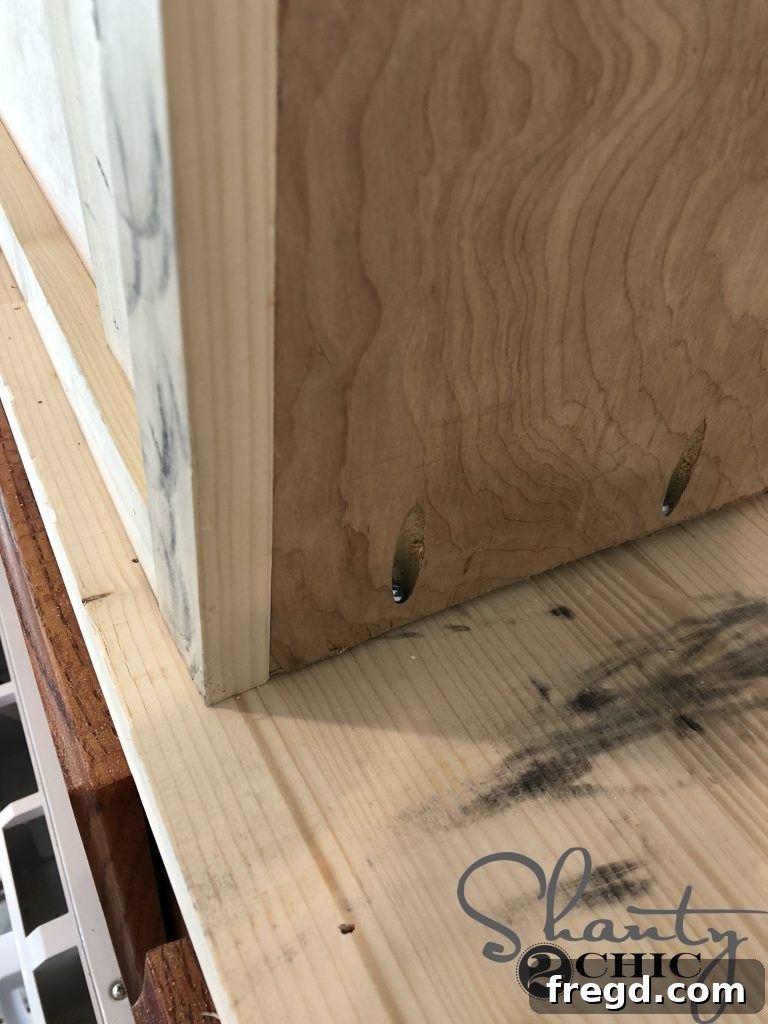
With the hood cabinet now fully assembled and its face frame securely in place, it was time for installation. We carefully brought the completed hood cabinet into the kitchen, gently sliding it into its designated position above the range. Precision is key during this step to ensure it aligns perfectly with the existing cabinetry and the newly installed base trim. Once properly positioned, we attached it to the base piece using 1 1/4″ pocket hole screws and wood glue. This connection provides robust stability, integrating the new hood cabinet seamlessly into the overall structure of the kitchen, ready for its final finishing touches.
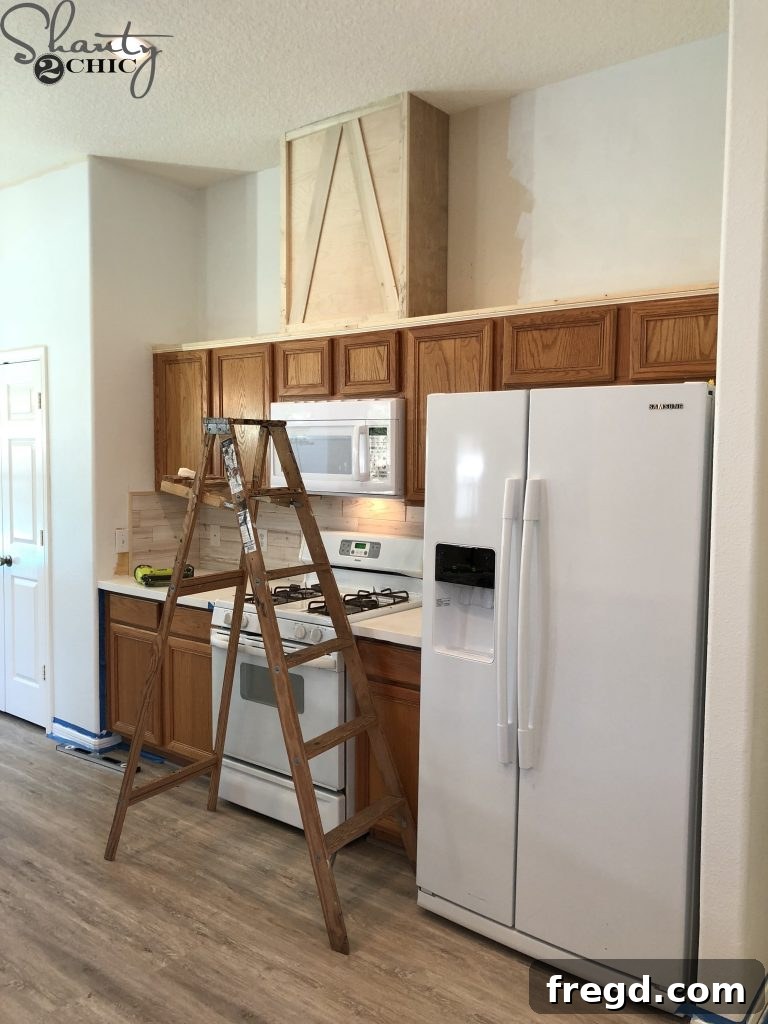
The custom-built Hood Cabinet is now complete and beautifully integrated into the kitchen’s new design!
Step 3 – Crafting the Cabinet Shelf Boxes for Enhanced Storage
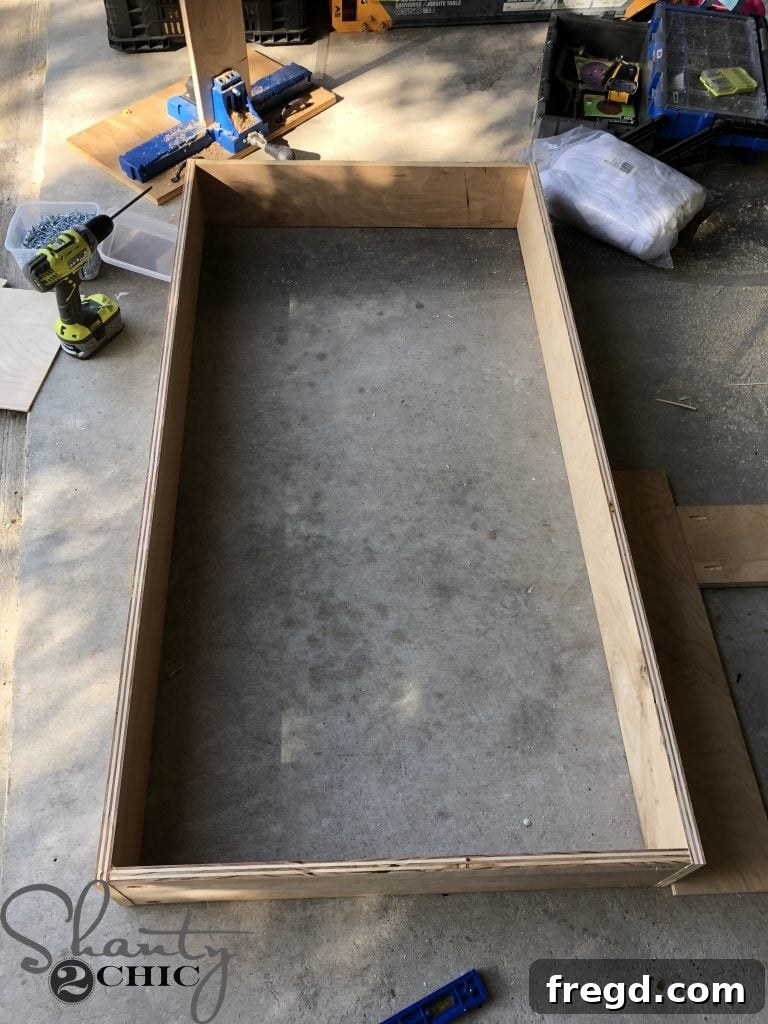
Moving beyond the central hood cabinet, our attention shifted to enhancing the storage and aesthetic appeal of the flanking cabinets by building additional shelf boxes. While these two open cabinet boxes vary in length to fit their respective spaces, their construction method is identical, ensuring consistency in design and ease of assembly. We began by meticulously cutting all the open cabinet pieces to their required dimensions. Subsequently, we drilled 3/4″ pocket holes into the ends of each shelf piece and into the bottom ends of each side piece. This strategic placement of pocket holes ensures strong, concealed joints that contribute to the clean lines of the finished shelves.
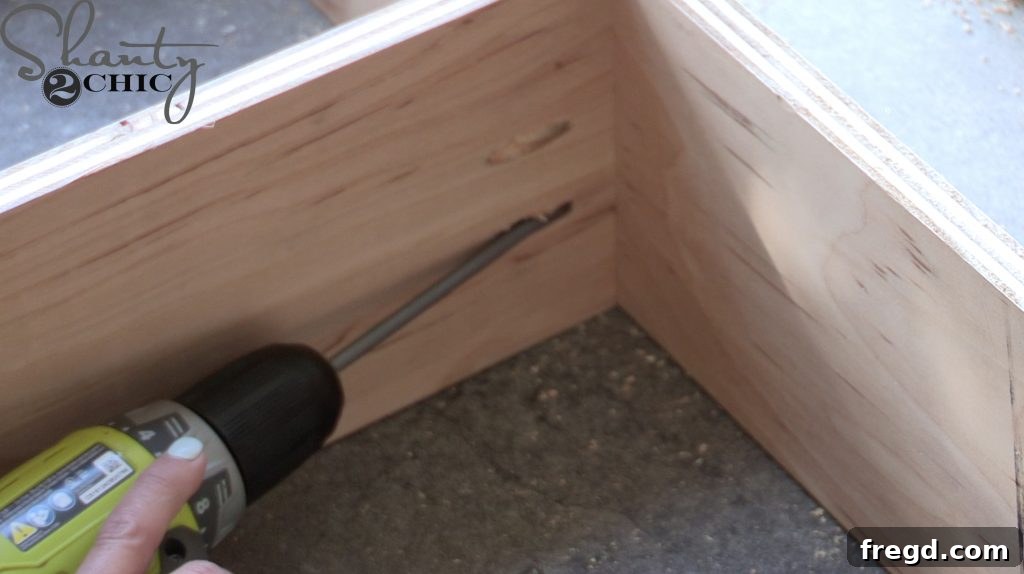
With all components prepped, we proceeded to assemble the shelf boxes. The shelf pieces were securely attached to the side pieces using 1 1/4″ pocket hole screws and a durable wood glue. A critical detail here is the orientation of the pocket holes: for the bottom shelf, the pocket holes should face downwards to be concealed, while for the top shelf, they should face upwards, where they will eventually be hidden by the final crown molding. Equally important, ensure that the pocket holes on the side pieces face inwards towards the shelf, allowing for easy and discreet attachment. This careful attention to detail ensures a clean, professional finish on your new open shelving.
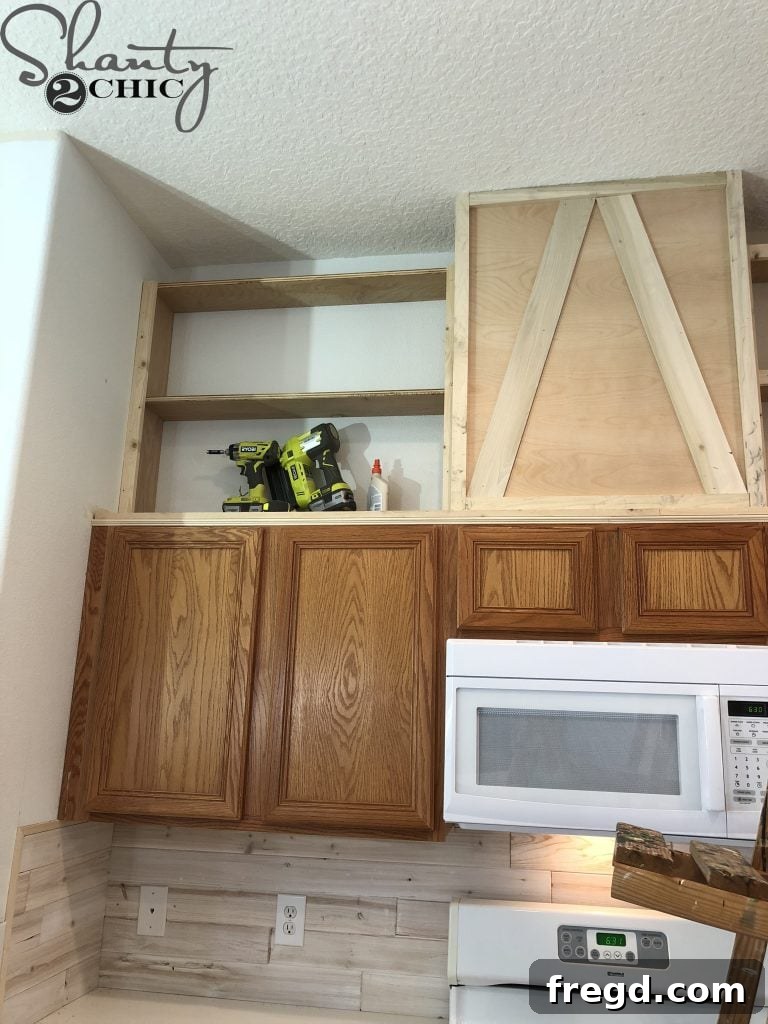
Once the cabinet boxes for the open shelves were fully assembled, we carefully brought them into the kitchen. They were gently slid into their precise positions atop the existing cabinets, ensuring a snug and level fit. Before permanently securing them, we prepared the face frame pieces, cutting them to match the exact dimensions of each open box. These face frame pieces are essential for providing a finished look and concealing any raw edges. We then attached the face frame pieces using 1 1/4″ pocket hole screws and wood glue, creating a strong, seamless facade. This method not only reinforces the structure but also contributes significantly to the custom, built-in appearance of the extended cabinetry.
Step 4 – The Final Touches: Sanding & Painting for a Professional Finish
With all three new cabinet boxes – the central hood cabinet and the two flanking shelf units – now firmly installed, the project moved into its crucial finishing stage. To achieve a flawless, professional look, we meticulously filled all visible screw holes and imperfections with wood filler. For best results, we recommend using a high-quality wood filler like our favorite, which you can find HERE. After allowing the filler to dry completely, we performed a thorough sanding across all new and existing cabinet surfaces. This step is vital for creating a perfectly smooth canvas, free of blemishes, ensuring that the paint adheres beautifully. Finally, we applied a couple of coats of high-quality paint, transforming the entire kitchen with a fresh, cohesive color. Achieving a smooth, durable paint finish is paramount for the longevity and aesthetic appeal of your newly extended cabinets. For those interested, the specific cabinet paint we used for this stunning makeover is available HERE.
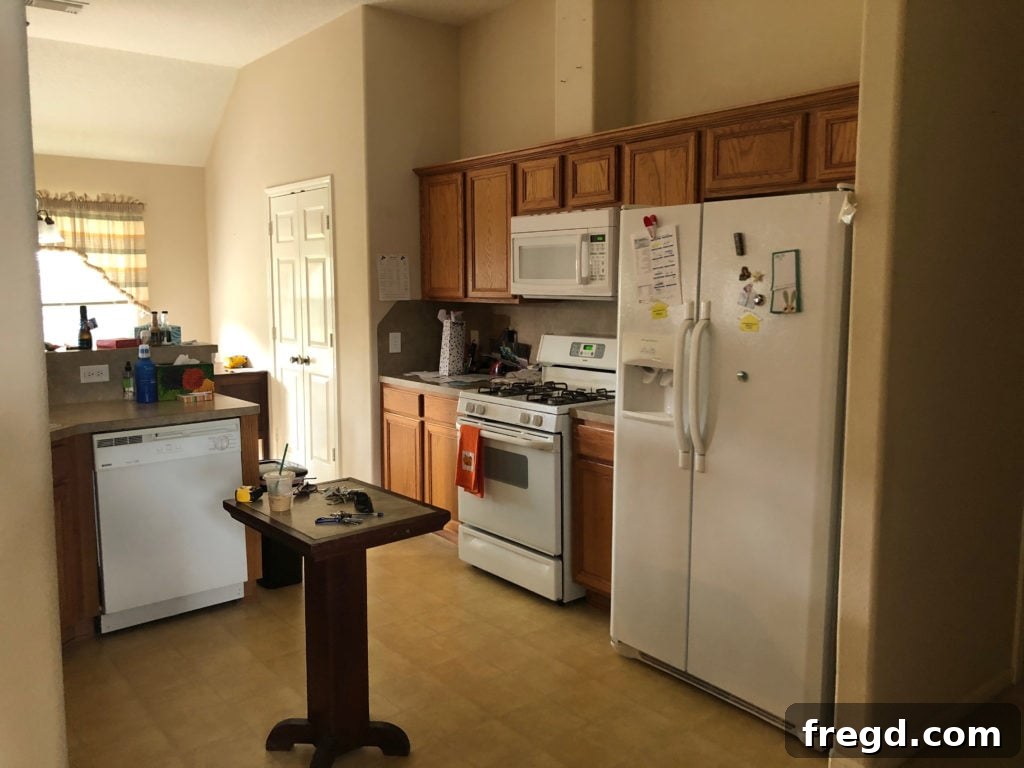
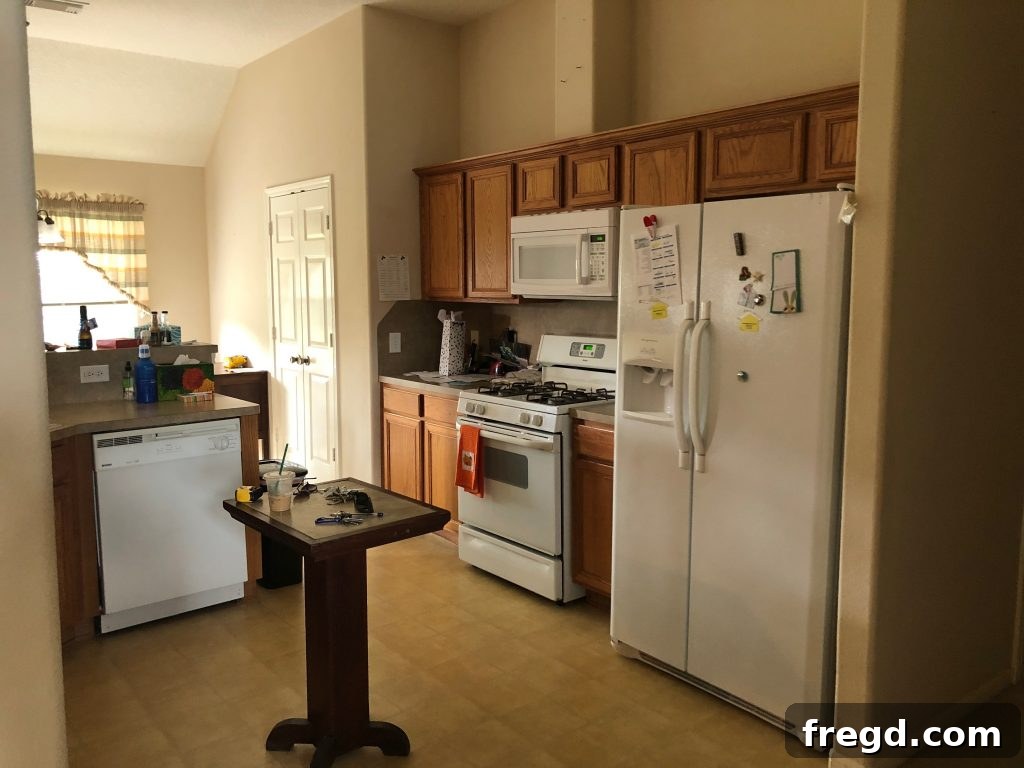
Now, prepare to be amazed by the incredible transformation, starting with the before:
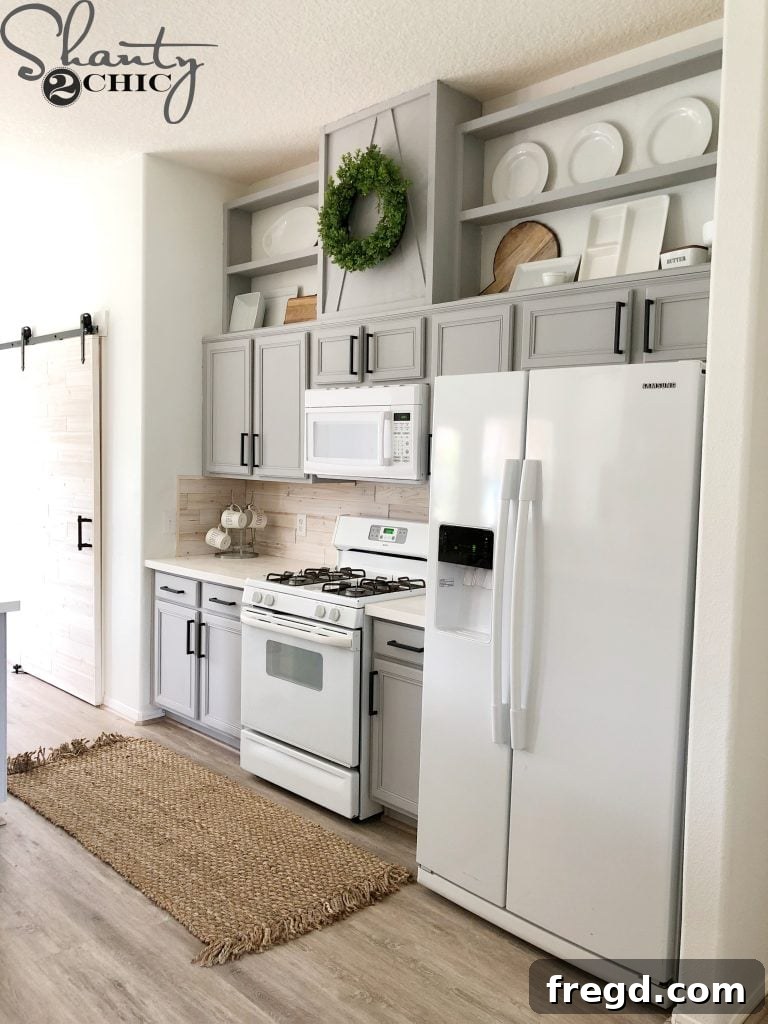
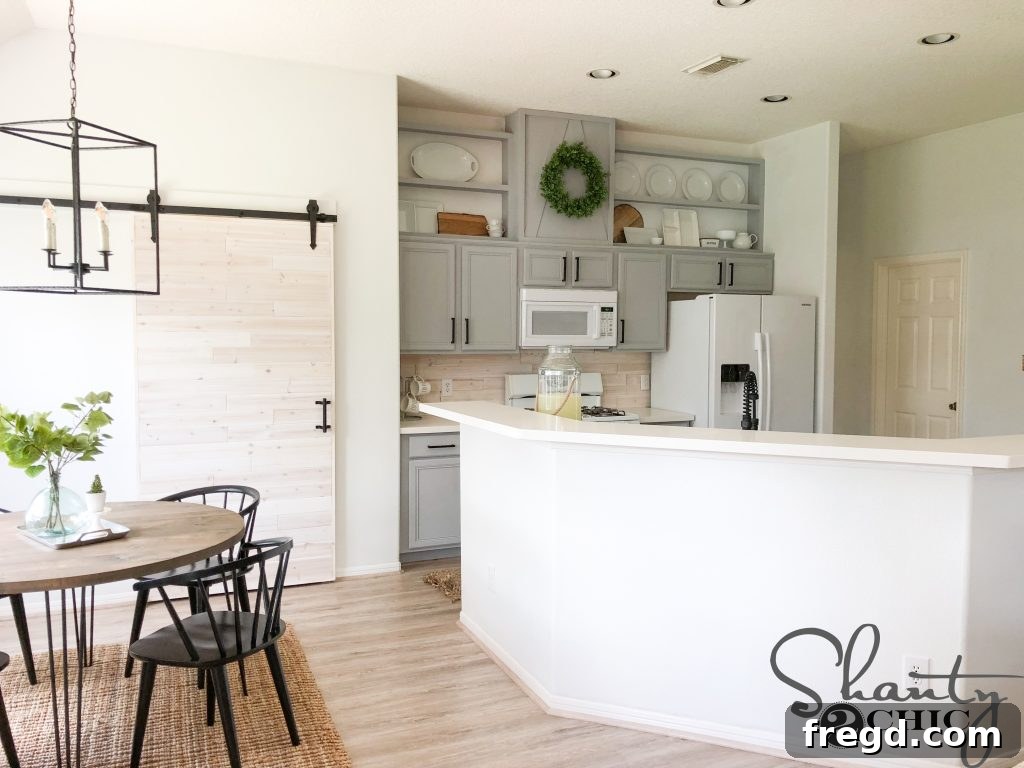
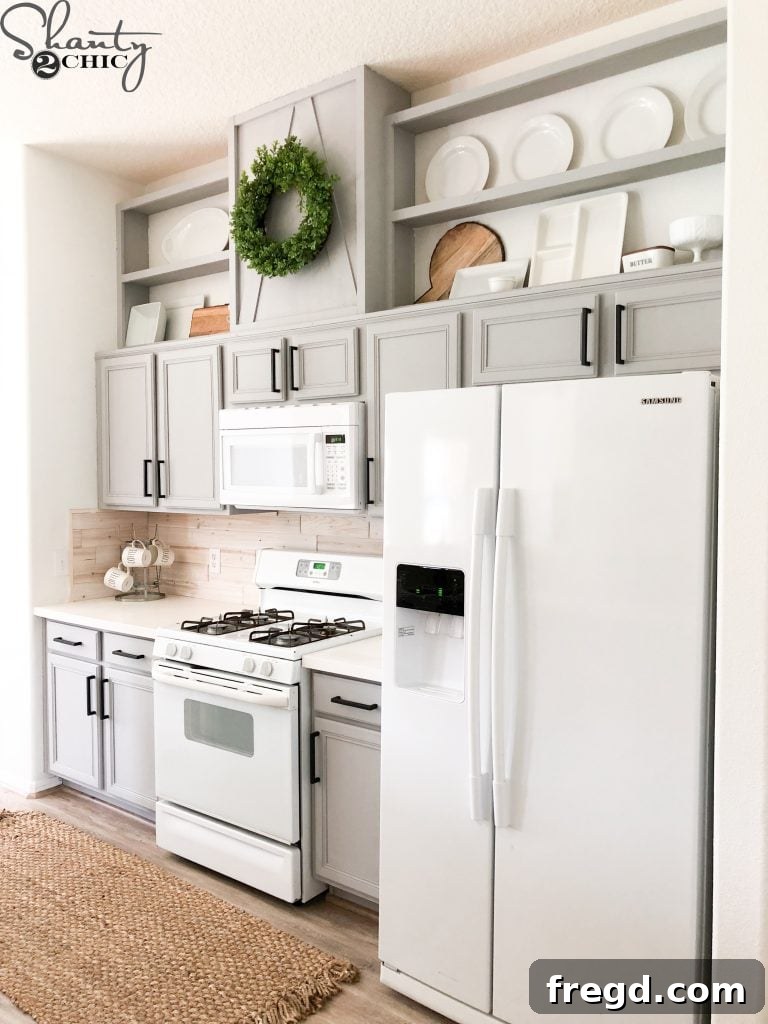
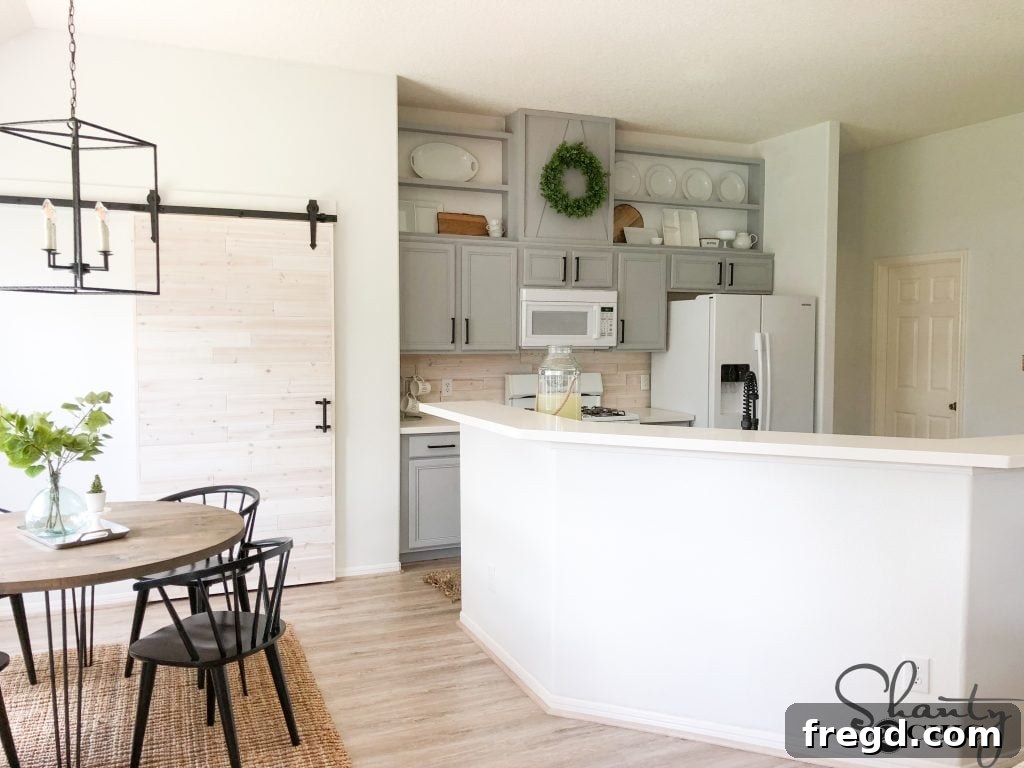
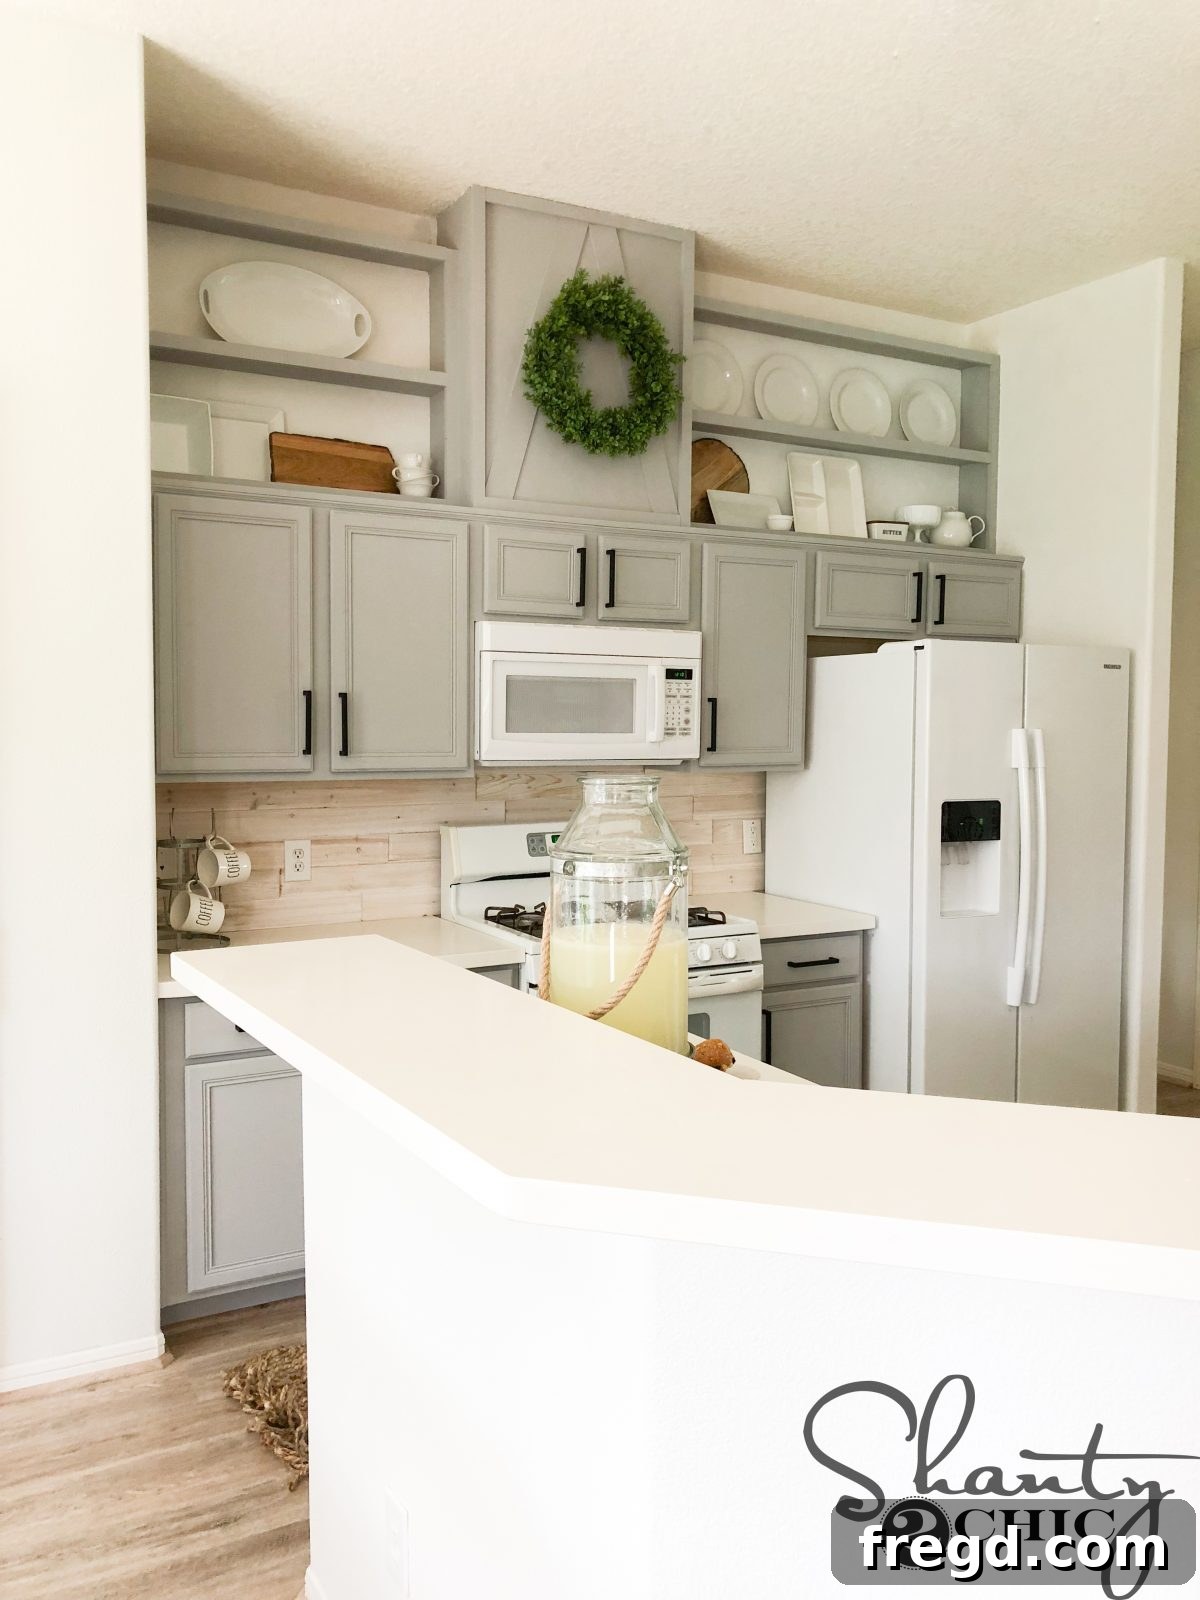
And now, the stunning after!
Why This DIY Project is a Game-Changer for Your Kitchen
We absolutely adore this DIY project! It addresses multiple common kitchen design challenges in one incredibly satisfying swoop. Gone is that awkward three-foot blank space above the cabinets, which often leaves a kitchen feeling unfinished and lacking utility. By extending the cabinet height, we’ve not only maximized valuable vertical storage – perfect for those seldom-used items or decorative pieces – but also dramatically updated the entire style of the kitchen. This project instantly elevates builder-grade cabinets to a custom, high-end look without the custom price tag. It’s a super inexpensive project that delivers immense visual impact and practical benefits, making it an accessible and rewarding DIY for anyone looking to refresh their kitchen on a budget.
Essential Tools and Accessories for Your Project
To help you recreate this stunning kitchen transformation, we’ve linked to all the key products and resources we used below. These are the items that made our DIY cabinet extension project efficient and successful:
Kitchen Faucet
Area Rug
Stylish Mugs
Mug Holder
Cabinet Pulls
Flooring (Specific link not provided in original, but generally refers to overall kitchen flooring)
Cabinet Paint
Kreg Jig
Download Your Free Plans & Explore More DIY Projects!
Ready to tackle this project yourself? Make sure to download your FREE printable plans for making cabinets taller HERE! These detailed plans will guide you through every cut and joint, ensuring a successful DIY.
Don’t miss out on any of our comprehensive how-to videos and exciting home renovation projects! Be sure to subscribe to our Youtube Channel HERE. You can also explore the rest of this amazing #shantyhousecrash series below, featuring a variety of projects to inspire your next home improvement:
- DIY Modern Farmhouse Dining Table – The Leasha Table: Free plans and how-to video available now!
- DIY Driftwood Backsplash: Free plans and how-to video available now!
- How to Add Height to Kitchen Cabinets: Free plans and how-to video available now!
- Custom Cabinet Trim Hack: Free plans and how-to video available now!
- How We Paint Cabinets for a Professional Finish: Free plans and how-to video available now!
- How to Frame and Cover a Crescent Window: Free plans and how-to video available now!
- DIY Round Kitchen Table with Hairpin Legs: Free plans and how-to video available now!
- DIY Industrial Pipe Shelves: Free plans and how-to video available now!
- DIY Sliding Barn Door for Your Pantry: Free plans and how-to video available now!