
After years of envisioning a complete transformation, my master bathroom remodel has finally come to fruition! This project has been a long time in the making, as I hadn’t updated this space since building my home in 2013. The original design, characterized by floor-to-ceiling beige travertine and oil-rubbed bronze fixtures, felt incredibly dated. Moreover, the layout was remarkably cramped, making entry into the shower a tight squeeze. To exacerbate the situation, I made a questionable decision during construction to install an electric shower, a choice I quickly came to regret.
Why a Bathroom Renovation Was Essential
The decision to undertake a master bathroom renovation stemmed primarily from persistent issues with the electric shower. Within the first year of moving into my newly built home, the shower began malfunctioning, frequently shutting off unexpectedly due to power cord problems. Each incident required a tedious and inconvenient process: climbing into the attic above the shower, shutting down the unit, and waiting 48 hours for a hard reset. While initially sporadic, these failures became increasingly common as the years passed, turning what should have been a relaxing shower into a source of constant frustration.
I consulted numerous professionals for a viable solution, but the options were limited and unappealing. I was faced with either running an unsightly conduit strip on the exterior of my home or undertaking a major demolition to completely tear out and replace the wall. Having already resolved never to install another electric shower, I postponed the full renovation until I could allocate a sufficient budget for the comprehensive overhaul this bathroom desperately needed. This was not just about aesthetics; it was fundamentally about restoring functionality and peace of mind to a critical space in my home.
The Catalyst for the Master Bathroom Remodel
The turning point for the renovation arrived unexpectedly in January. I made the significant decision to sell my home and downsize, a plan that coincided precisely with the electric shower giving up the ghost entirely. This convergence of events dramatically accelerated the renovation timeline. Marketing a home with a non-functional master bathroom shower was simply not an option, especially when aiming for a quick and successful sale. The urgency of the situation meant that a project I had put off for years suddenly became a top priority.
Acting swiftly, I reached out to a contractor who had previously delivered exceptional results for a family friend. His reputation for quality workmanship and reliability made him the ideal choice to tackle this extensive project. For those in the local area interested in his services, please don’t hesitate to send an email, and I’ll gladly share his contact information. A key strategy I employed to manage the renovation budget was to procure my own materials. I meticulously selected all the finish-out pieces, and the contractor efficiently handled their pickup. This approach proved to be an excellent way to realize significant savings without compromising on the quality or aesthetic I desired. I am absolutely thrilled with the outcome of my master bathroom and couldn’t wait to share every detail of this stunning transformation with you all!
Master Bathroom Transformation Journey
Embarking on a master bathroom renovation is a journey of vision, planning, and meticulous execution. From the initial demolition to the final reveal, every step was carefully considered to create a space that is not only beautiful but also highly functional and aligned with modern design principles. Here’s an in-depth look at how we transformed an outdated and problematic bathroom into a luxurious and serene oasis.
The Before: Unveiling the Outdated Space
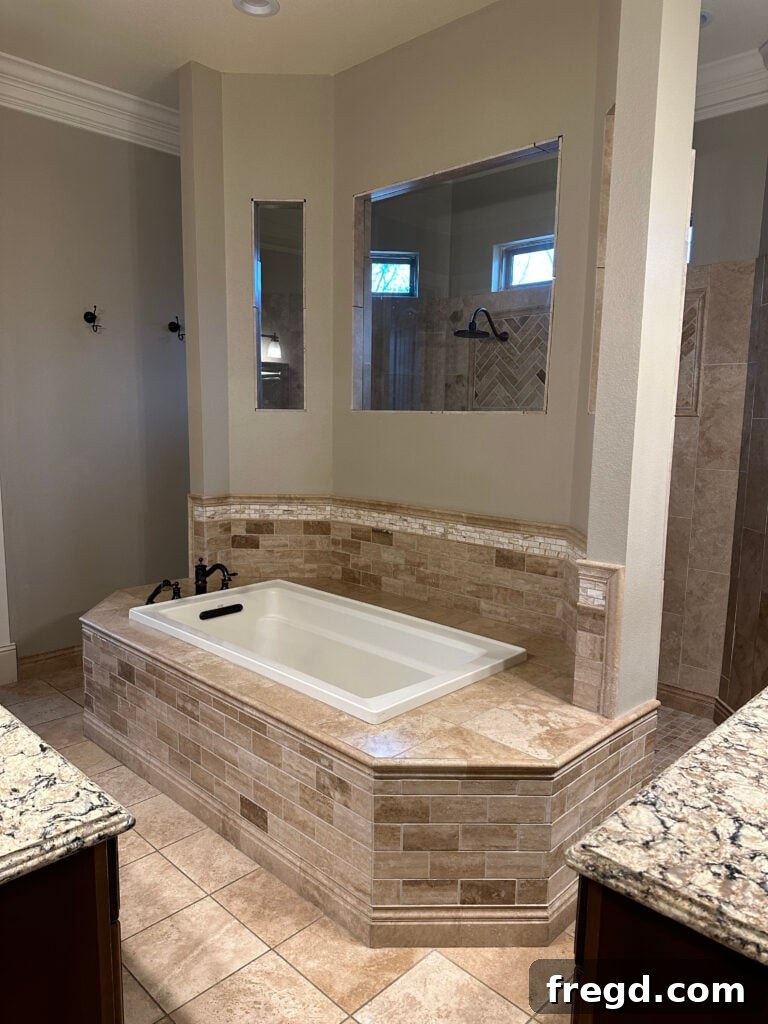
Here she is, captured just moments before the demolition began. The anticipation of seeing the old travertine and granite disappear was palpable! As you can observe to the right of the tub, the original layout presented a significant challenge: a very limited walkway into the shower, exacerbated by the vanity positioned on that wall. This was a critical design flaw I was determined to rectify. My solution involved removing the existing vanity on the right side and installing a spacious double vanity in the location of the other, pre-existing vanity. This strategic adjustment wasn’t a major budgetbuster, as the contractor could conveniently tap into the plumbing already in place, simplifying the installation process and optimizing the use of space.
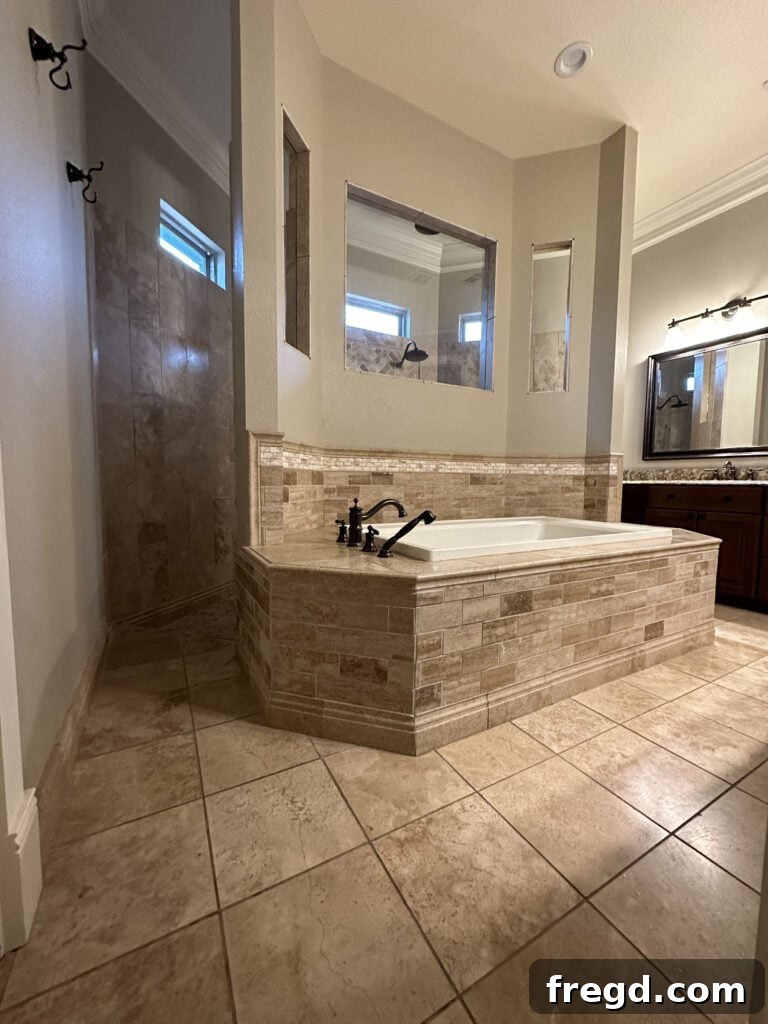
Viewing the space from the other side of the tub reveals a much wider pathway, creating a stark contrast to the cramped shower entry. I initially contemplated incorporating a freestanding tub to address the overall layout issues and infuse a sense of modern luxury. However, this option would have necessitated the costly and labor-intensive process of chipping up the concrete floor to accommodate a new drain. Given that I was preparing to sell the home, the additional expense of a freestanding tub simply wasn’t justified. While it would have been a delightful splurge for personal enjoyment, the practicalities of moving outweighed the desire for this particular upgrade. My goal was to create maximum impact and functionality within a carefully managed budget, ensuring a strong return on investment for the sale.
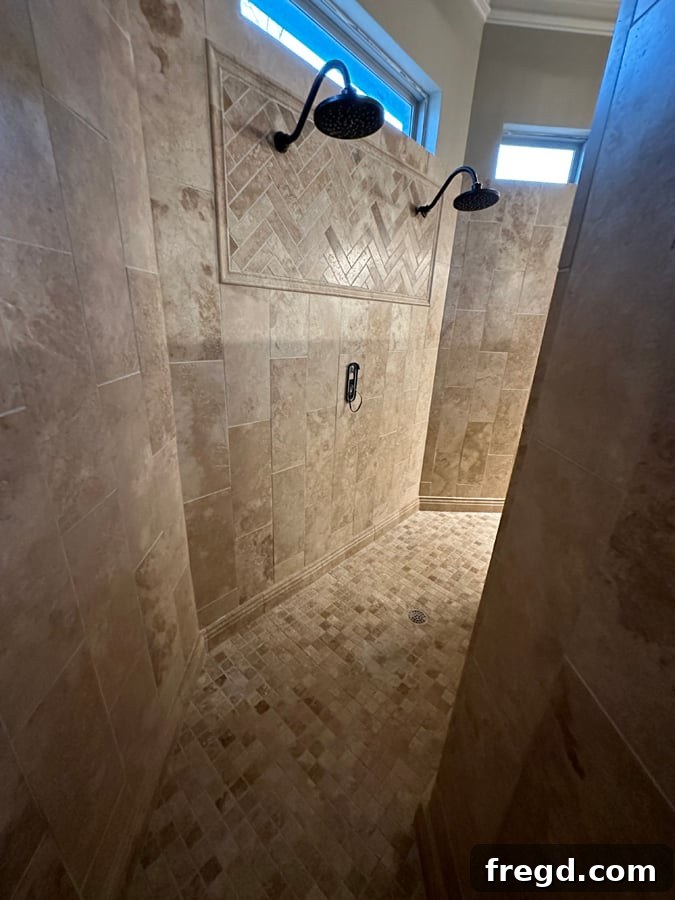
Oh, how I adore this shower! It’s generously sized, incredibly comfortable, and remarkably easy to keep clean. While the bones were fantastic, it definitely needed a modern makeover to align with the new vision for the entire master bathroom. The goal was to preserve its inherent qualities while updating its aesthetic to match the sophisticated, clean lines of the upcoming design. This meant focusing on new tiles, fixtures, and trim to elevate its style without sacrificing its cherished practicality and spaciousness.
Crafting the Vision: Selecting the Perfect Finishes
Choosing the right materials is paramount in any renovation, setting the tone and style for the entire space. For my master bathroom, I envisioned a palette that was fresh, modern, and timeless, incorporating a mix of textures and finishes. Each selection was made with careful consideration for both aesthetics and functionality, ensuring durability and ease of maintenance.
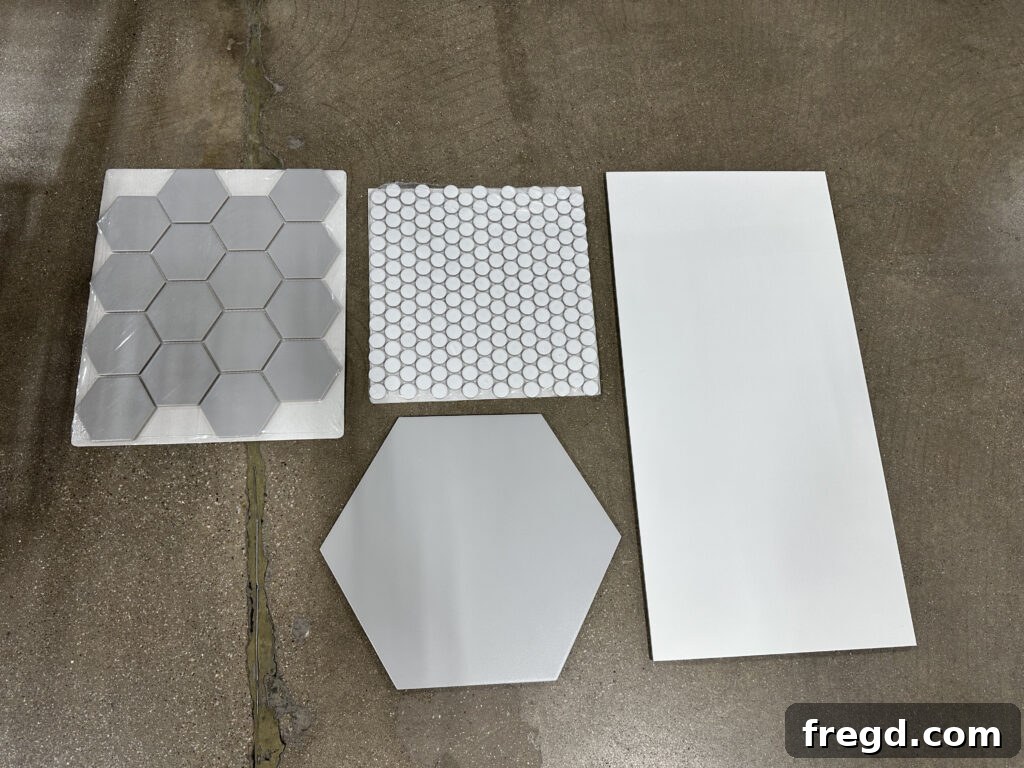
I sourced all the tiles and grout from Floor & Decor. This isn’t a sponsored endorsement; I genuinely appreciate their competitive pricing and extensive variety of styles, which made it easy to find exactly what I was looking for to create a cohesive and elegant design. Their wide selection allowed me to explore numerous options and confidently choose materials that perfectly matched my vision for a modern, refreshed bathroom.
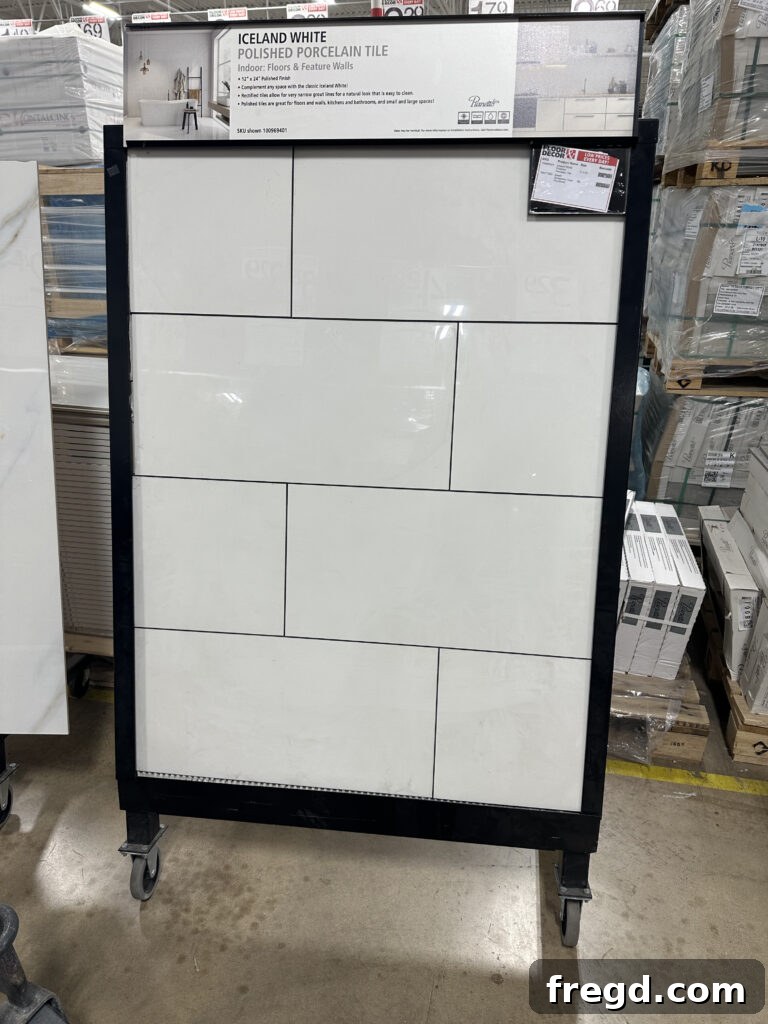
For the shower walls, I opted for Iceland White 12″x24″ subway tile, installed vertically. This choice not only elongates the perception of the walls, creating a sense of height and spaciousness, but also introduces a contemporary flair to the classic subway tile pattern. I extended the use of this elegant tile to the top of the tub deck, ensuring a seamless and sophisticated transition across the primary surfaces of the bathroom. The clean lines and bright white finish provide a perfect backdrop for the accent elements.
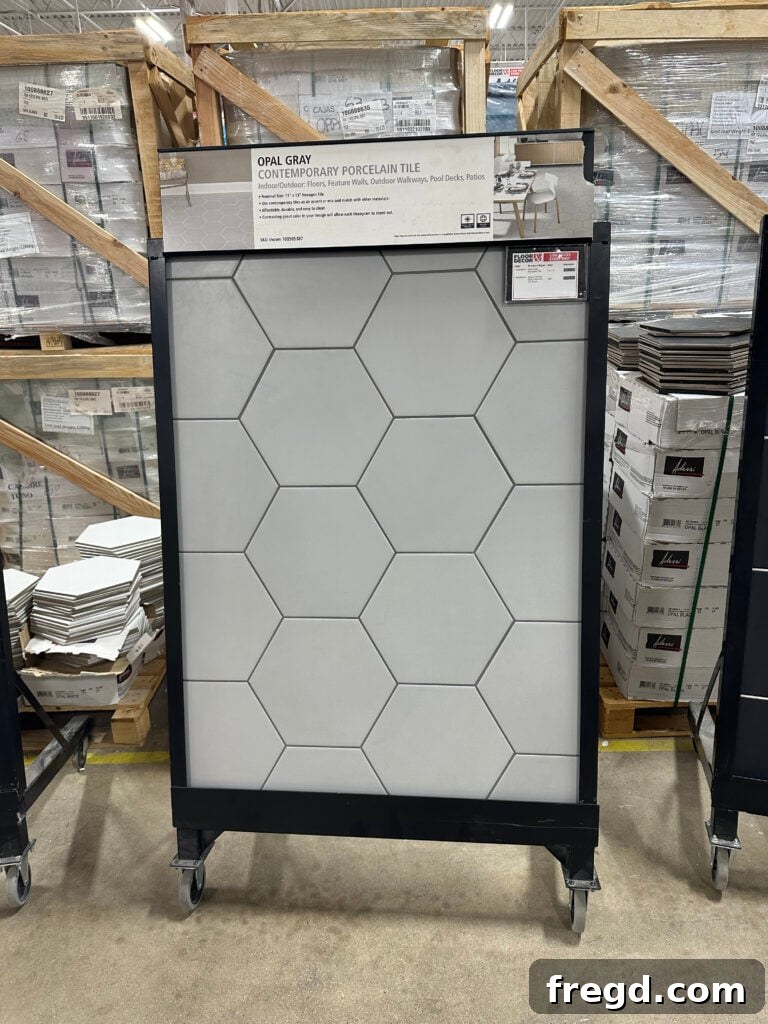
To ground the space, I selected Opal Gray Hex tile for the bathroom floor. Its distinctive hexagonal pattern adds a subtle geometric interest without overwhelming the design, while the sophisticated gray tone provides a contemporary and versatile foundation. Crucially, this tile features a matte finish, making it an ideal and highly practical option for bathroom floors. The matte surface offers enhanced slip resistance, ensuring safety, and also hides water spots and footprints more effectively than glossy alternatives, contributing to a consistently clean and polished appearance.
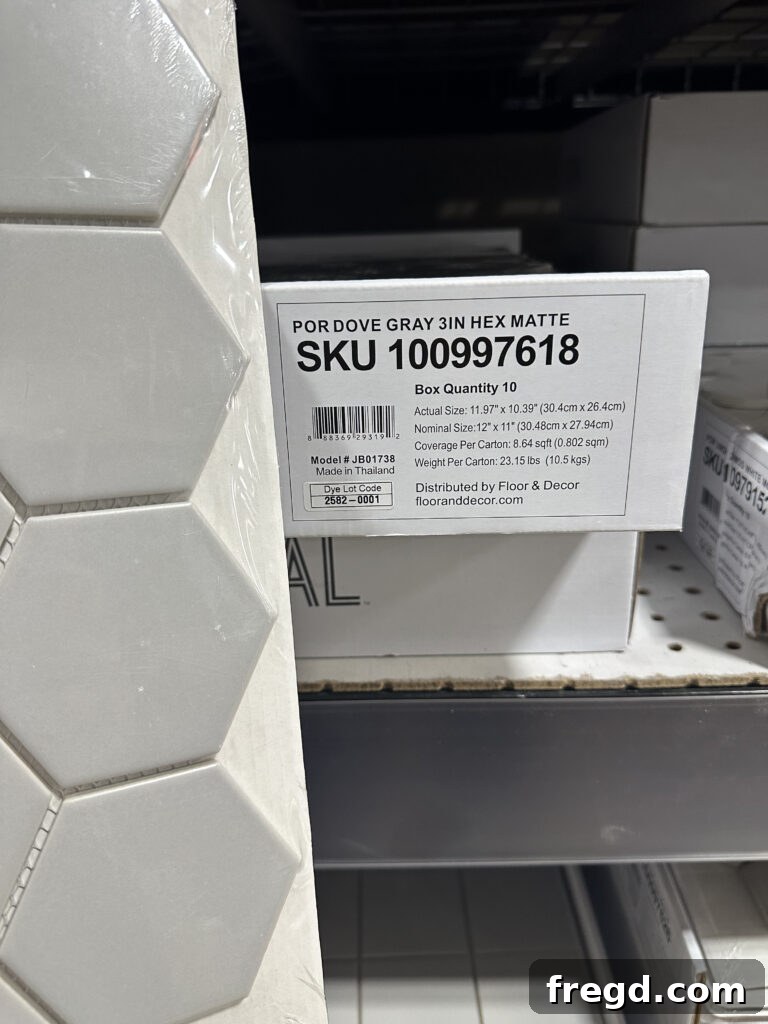
This small Dove Gray hex tile was, by far, my favorite selection for the entire bathroom. Its delicate size and soft gray hue bring a touch of refined elegance and intricate detail to the design. I decided to install it on the shower floor, where its subtle pattern and matte finish not only provide excellent grip but also create a captivating visual contrast with the larger subway tiles on the shower walls. This choice infuses the shower with a spa-like tranquility and a sophisticated texture that elevates the overall aesthetic.
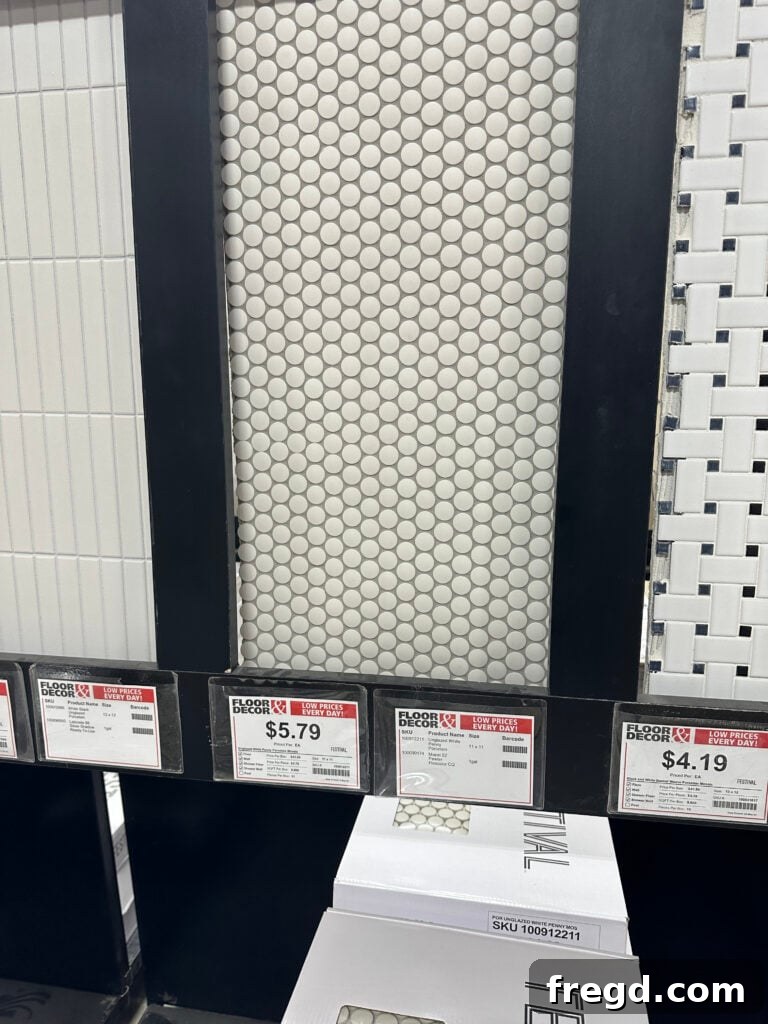
For the tub surround, a classic and charming basic white penny tile emerged as the clear winner. The small, circular mosaic tiles introduce a delightful texture and a hint of vintage charm, perfectly complementing the modern elements throughout the bathroom. Its pristine white color ensures a clean and bright aesthetic around the tub, creating a fresh focal point that ties beautifully into the overall serene and contemporary design of the space. It’s a timeless choice that adds subtle character.
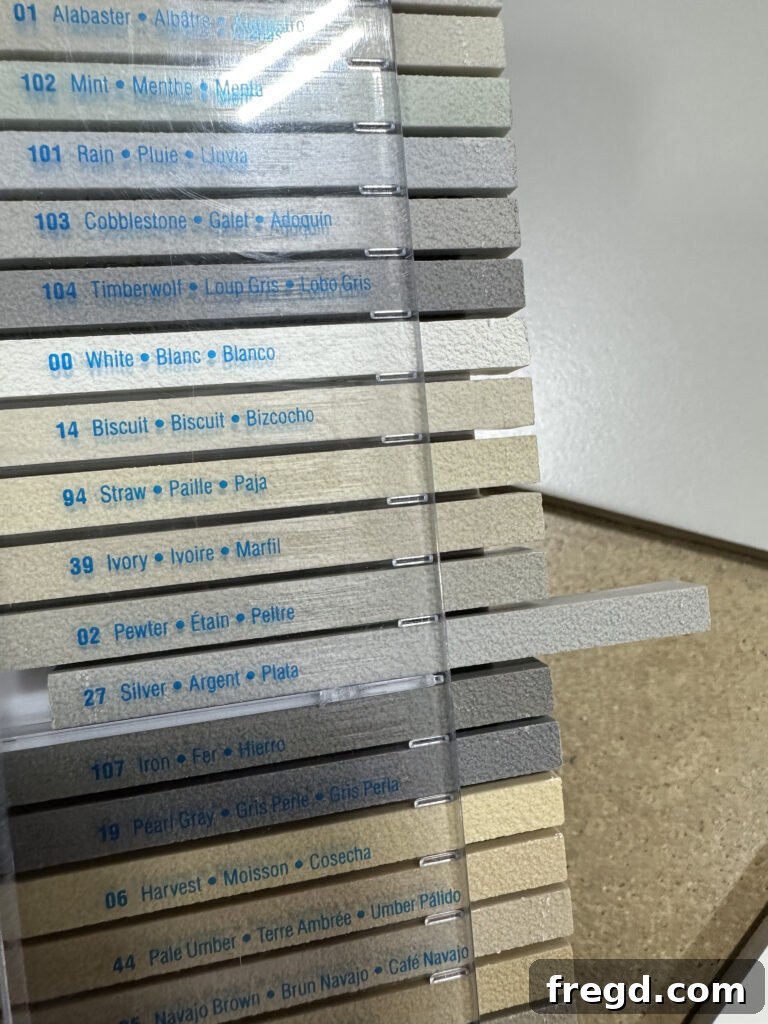
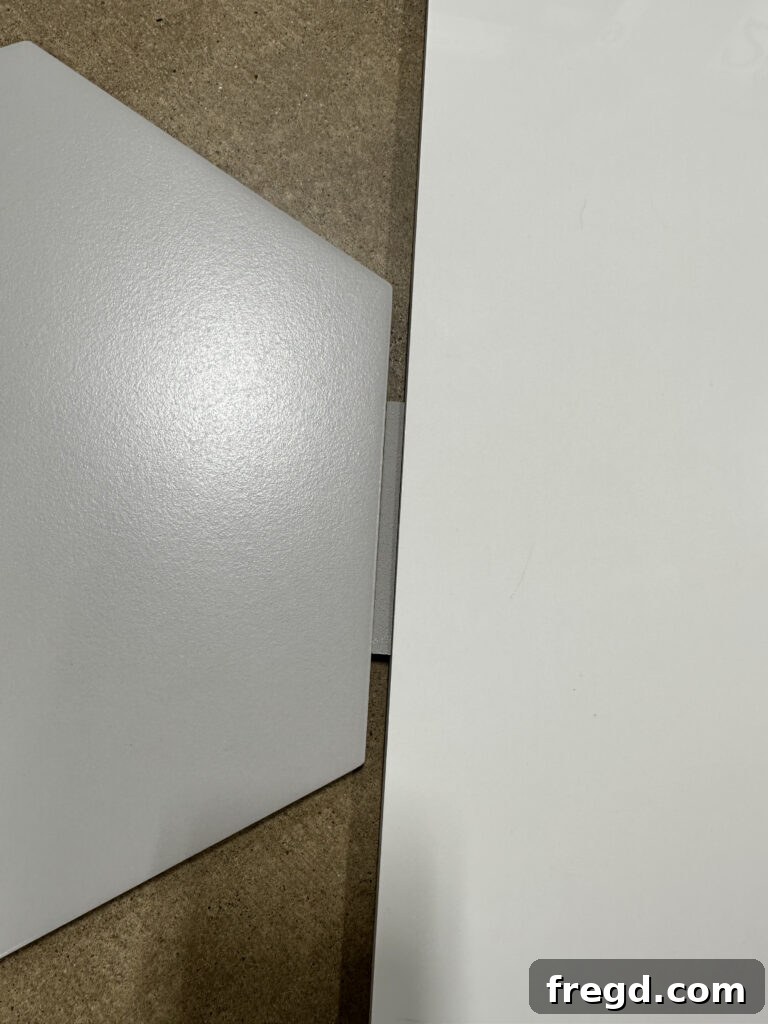
For the grout lines across most of the tiles, I chose Silver grout. This light gray shade offers a soft contrast that subtly highlights the individual tiles without being too stark, contributing to a clean and sophisticated look. However, for the delicate penny tile on the tub surround, I opted for Avalanche grout. This brighter white shade ensures that the intricate pattern of the penny tile stands out beautifully, creating a crisp and luminous finish that enhances its charming aesthetic.
The Renovation Process: From Chaos to Creation
A renovation, by its nature, involves a period of controlled chaos before the beauty emerges. This section details the practical steps of transforming the master bathroom, from the initial dismantling of the old space to the careful construction of the new one, highlighting the key decisions and processes that brought the vision to life.
Demolition: The First Step to a Fresh Start
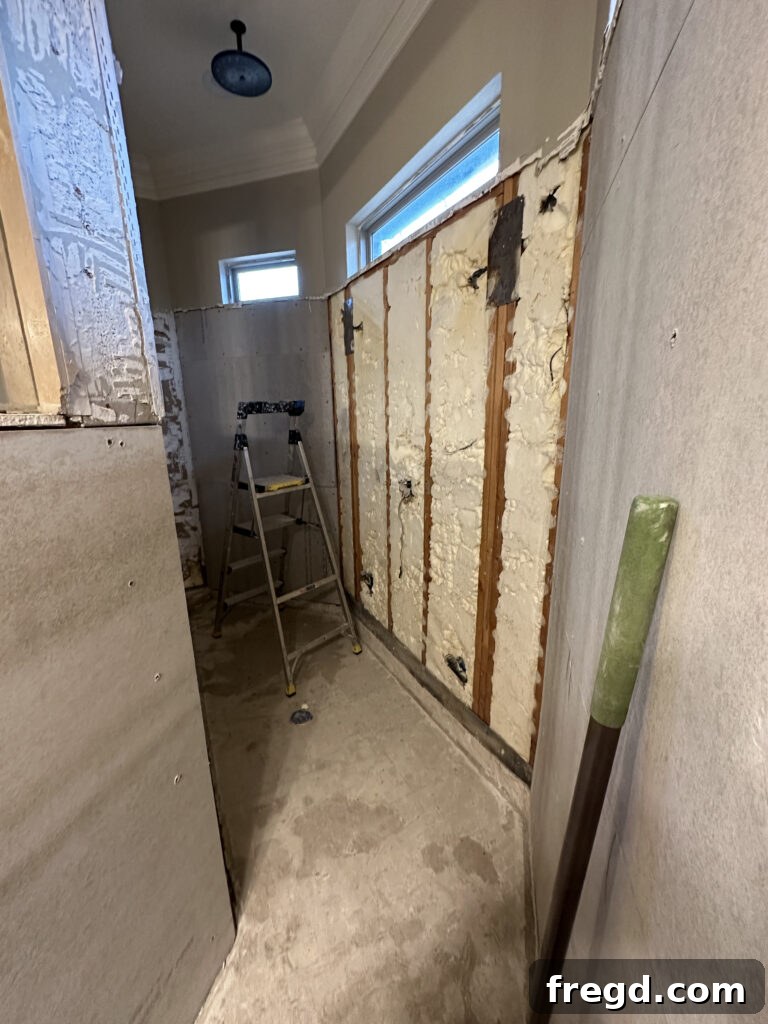
The demolition phase, though undeniably loud and dusty, was executed with impressive speed and efficiency! I was particularly pleased with the contractors’ meticulous attention to cleanliness; they made a point of tidying up the mess at the close of every workday. This commitment to maintaining a relatively clean worksite minimized disruption and made the entire process far more manageable. Watching the old beige travertine and cramped fixtures disappear was incredibly satisfying, paving the way for the fresh, open design to come.
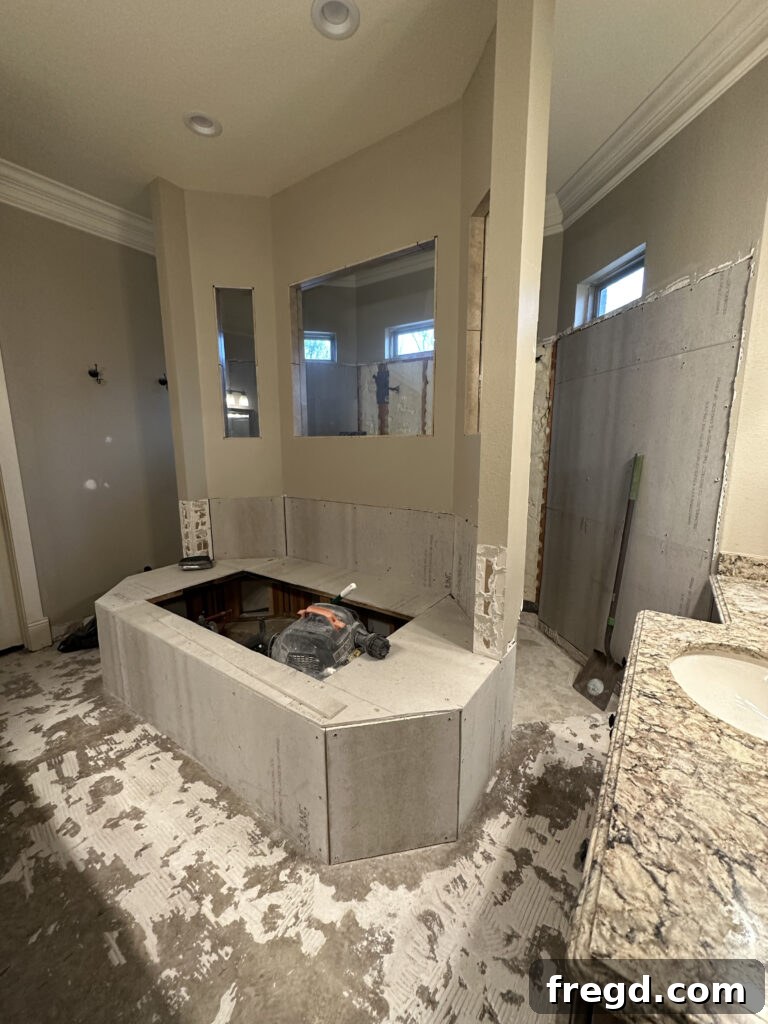
While the vanities remained in place for a bit longer, this image clearly illustrates a critical design flaw of the original layout: how the vanity on the right severely restricted access to the shower entry. This bottleneck created an awkward and cramped pathway, making the entire shower area feel enclosed and impractical. One of the primary objectives of the renovation was to eliminate this constriction, opening up the space and improving flow. Addressing this issue was key to achieving the spacious and functional master bathroom I envisioned.
Rebuilding Our Dream Master Bathroom
With the old layers stripped away, the exciting phase of rebuilding began. This stage involved careful planning and precise execution, bringing all the carefully selected materials and design elements together to create the new, improved master bathroom.
Tile Installation and Design Details
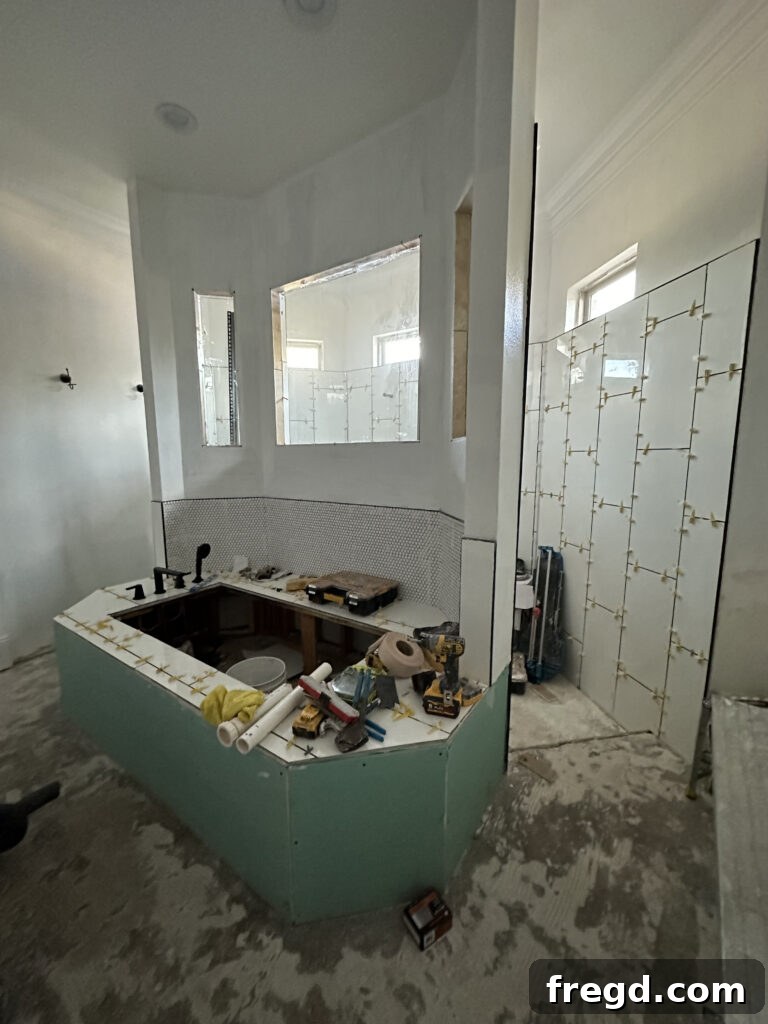
As the new tiles began to emerge, the vision for the bathroom truly started to take shape – and it was already looking fantastic! The careful placement of each tile, from the shower walls to the floor, underscored the precision and craftsmanship involved in the rebuilding process. This stage was particularly exciting, as it marked the transition from demolition’s raw emptiness to the elegant, finished surfaces that define a modern and luxurious bathroom. The initial beauty of the newly laid tiles was a promising sign of the stunning transformation to come.
Modern Trim and Shower Fixtures
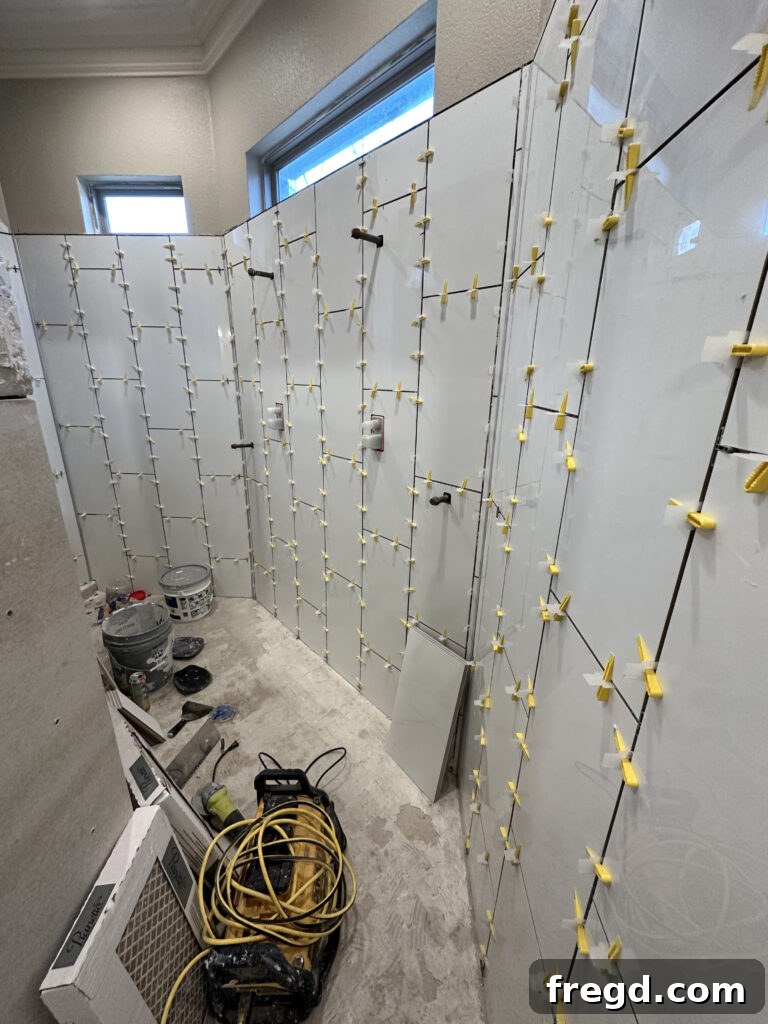
I absolutely adore the dramatic effect of the large subway tiles running vertically on the shower walls! This contemporary installation choice adds significant height and a sleek, sophisticated aesthetic that instantly modernizes the space. Unlike the more traditional horizontal layout, the vertical orientation creates a visually expansive feel, making the shower appear taller and more open. It’s a simple yet powerful design decision that contributes immensely to the clean, streamlined look I was aiming for in this master bathroom renovation.
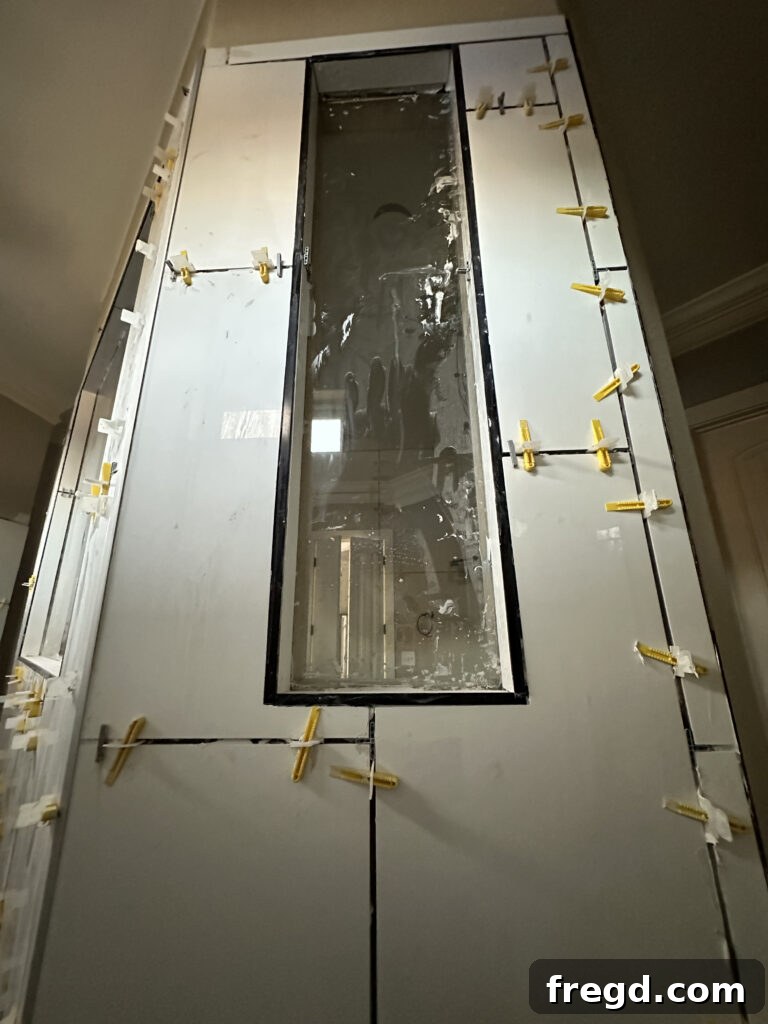
Instead of traditional bullnose tile, I opted for the sleek and contemporary Schluter Edge Trim. This trim, also conveniently available at Floor & Decor, instantly elevates the design with its clean, modern lines. My initial preference was white trim for a seamless look, but it was unfortunately on backorder. Faced with this, I chose the black trim instead, and I have zero regrets! The black trim creates a striking contrast with the light tiles, adding a sophisticated, architectural detail that beautifully frames the shower. It’s a choice that unexpectedly became one of my favorite elements, perfectly encapsulating the modern aesthetic of the renovation.
- Find the Schluter Edge Trim Here
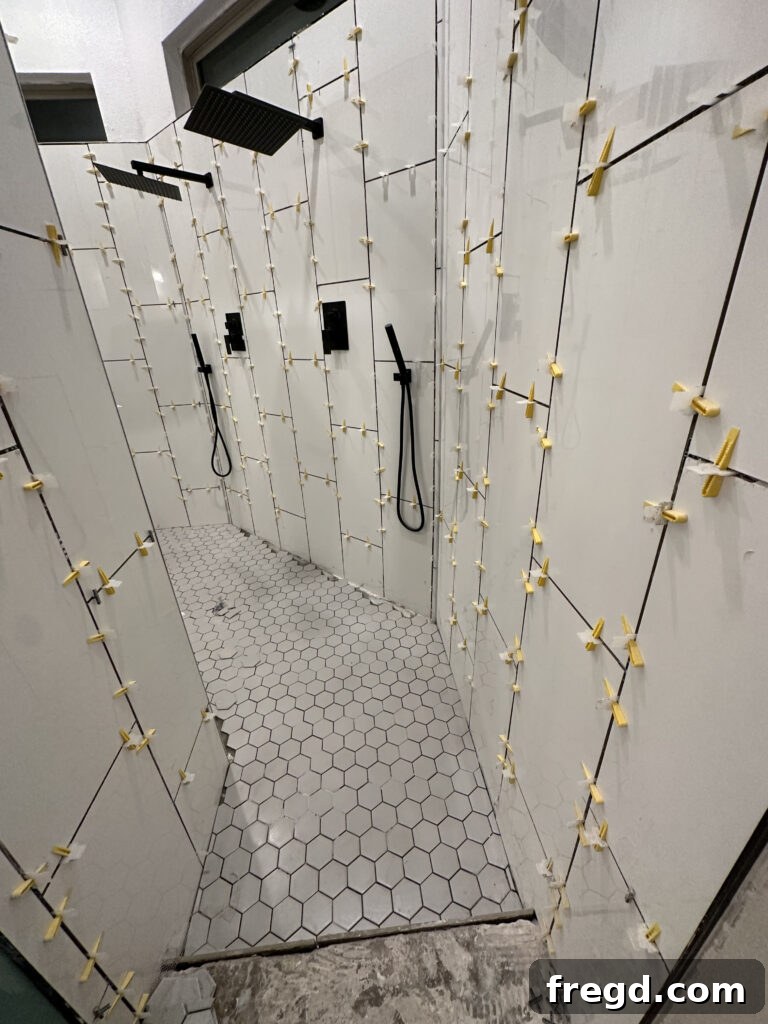
The contrast created by the small gray hex tiles against the pristine white subway tiles in the shower is absolutely perfect, adding depth and visual interest to the space. And let’s talk about those stunning rain shower heads and accompanying body sprayers! I managed to find them at an incredible price point, and the quality is truly outstanding. They not only deliver a luxurious showering experience but also contribute significantly to the modern, spa-like ambiance of the newly renovated master bathroom. This combination of aesthetic appeal and high-performance fixtures truly elevates the daily routine.
- You can find the Rain Shower Heads with the sprayers that I purchased HERE
The Garden Bathtub: A Blend of Splurge and Budget-Savvy Design
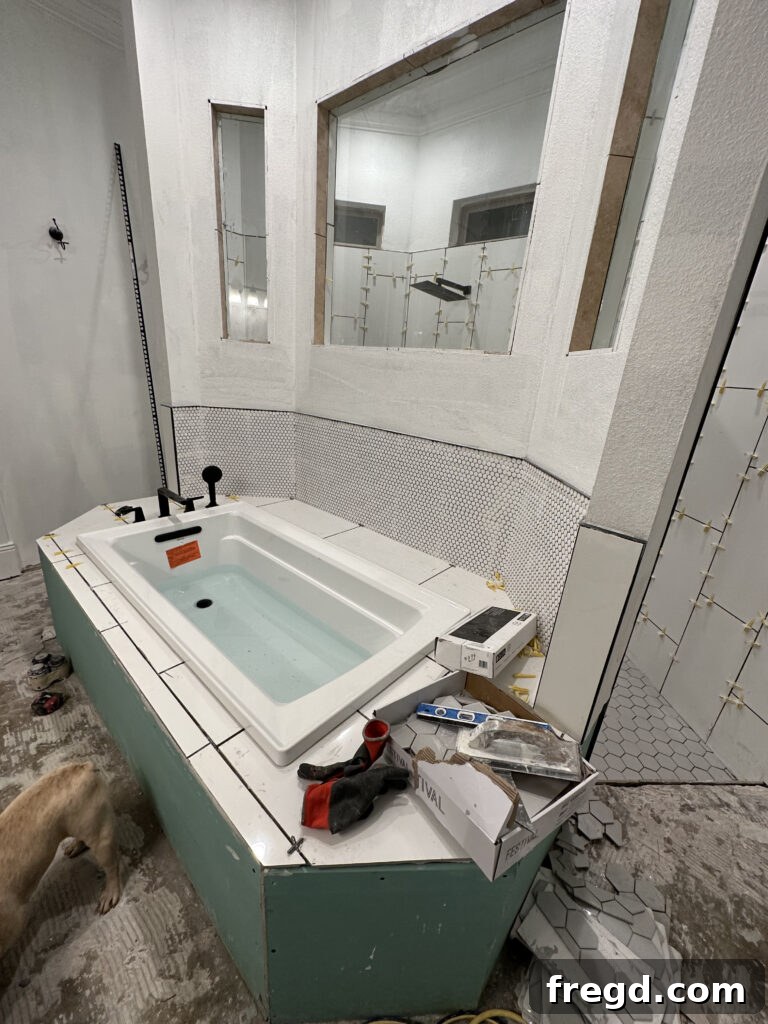
Here’s a detailed look at the tub deck, showcasing the elegant large subway tiles that provide a clean, expansive surface, beautifully complemented by the charming penny tile on the backsplash. While much of the renovation was budget-conscious, I allowed myself one justifiable splurge: the magnificent roman tub faucet. Its exquisite design and superior functionality truly enhance the luxurious feel of the bathtub area. The decision to invest in this high-quality fixture was entirely worth it, as it serves as a stunning focal point and a daily reminder of the quality and elegance incorporated into this master bathroom transformation.
- Find the Roman Tub Faucet and sprayer HERE
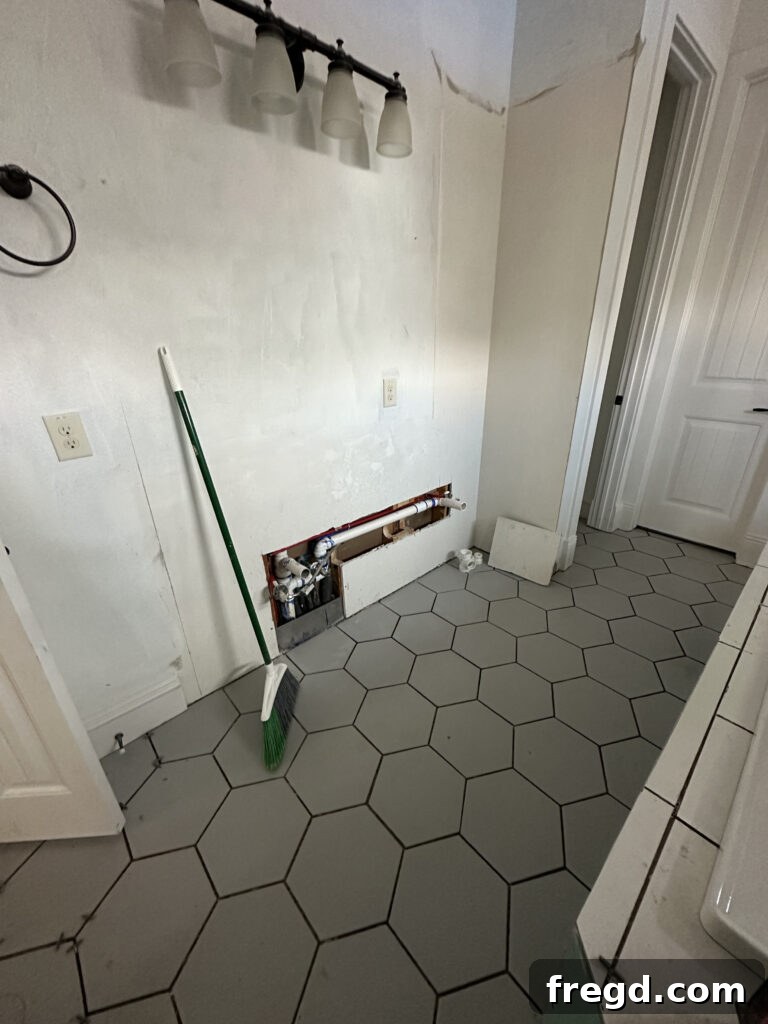
The design elements harmoniously extend to the floor, where the beautiful hex tiles perfectly complement the aesthetic of the tub area. The consistent use of carefully chosen textures and patterns ensures a cohesive flow throughout the entire master bathroom. This deliberate attention to detail, linking different zones of the bathroom through complementary tiling, creates a unified and visually pleasing environment. The result is a space where every element feels intentionally placed, contributing to an overarching sense of elegance and thoughtful design.
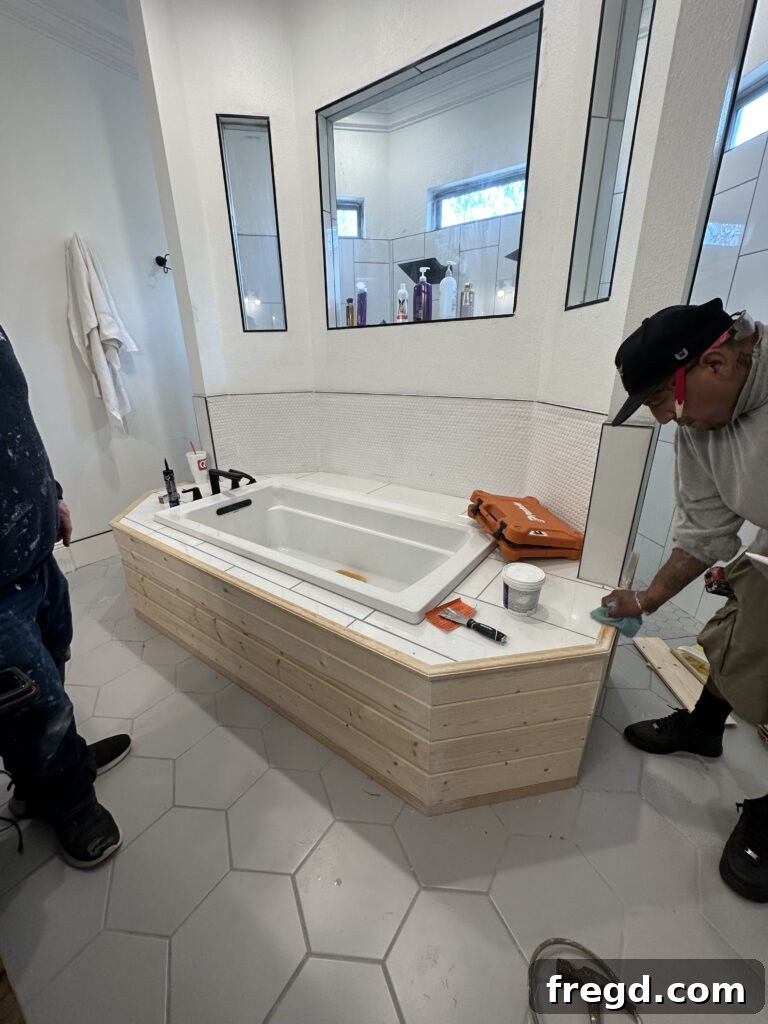
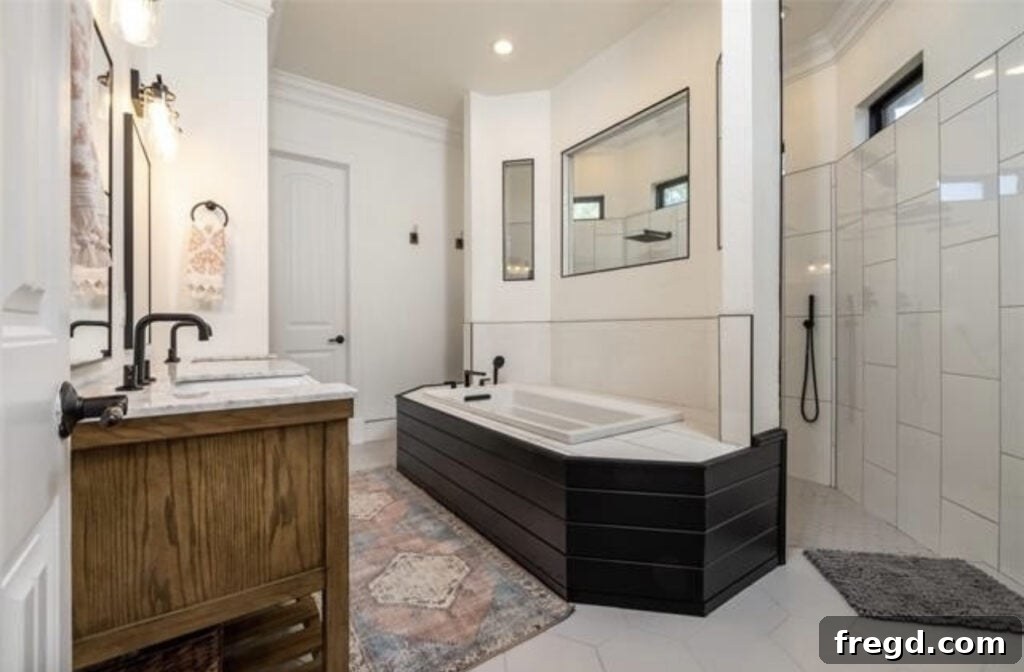
The garden tub skirt initially presented a formidable challenge, almost becoming my nemesis during the planning stages. My first preference was to replace the built-in tub with a sleek freestanding model, but this would have pushed me significantly over budget. Given that the home was slated for sale, I decided against the splurge, prioritizing a smart investment. What started as a budget constraint quickly transformed into one of my favorite updates! Opting for tongue and groove slats, finished with exterior paint, proved to be an ingenious way to achieve a stunning, high-end look while staying well within financial limits. The tub isn’t a high-use item, nor is it a regular splash zone, making this durable and attractive solution perfectly suitable.
This approach provided a much-needed break from the extensive tiling, introducing a textural element that adds immense character and warmth to the space. The result is a beautiful, custom-built appearance that feels both modern and inviting, a testament to how creative problem-solving can yield exceptional design outcomes. I genuinely love how this budget-friendly decision dramatically enhanced the overall aesthetic of the master bathroom.
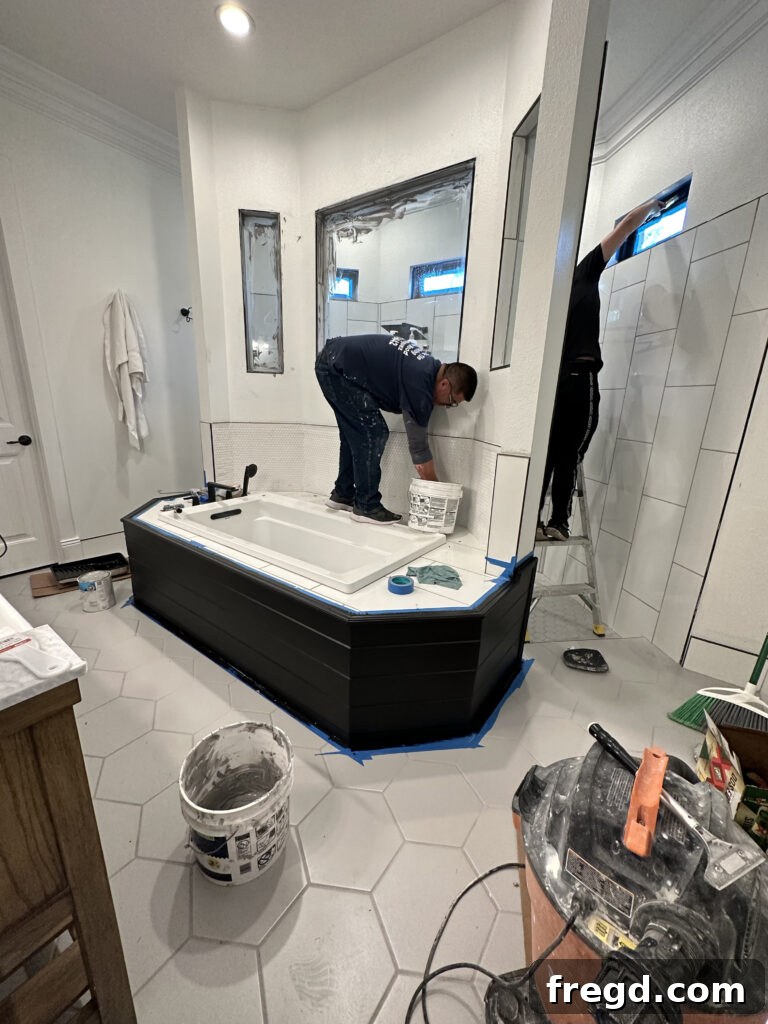
To further enhance the striking visual impact, I instructed the contractors to paint the tub skirt planks in “Tricorn Black” by Sherwin Williams. This bold, sophisticated shade instantly transformed the tub surround into a dramatic focal point, providing a strong contrast against the lighter tiles and walls. I loved the effect so much that I extended this design choice to the window trim within the shower, having it painted to match. This subtle yet powerful detail creates a cohesive and intentional design statement, tying together different elements of the bathroom with a touch of modern elegance and unexpected depth. The black accents truly make the space pop.
Vanity and Final Touches: Smart Budgeting for Big Impact
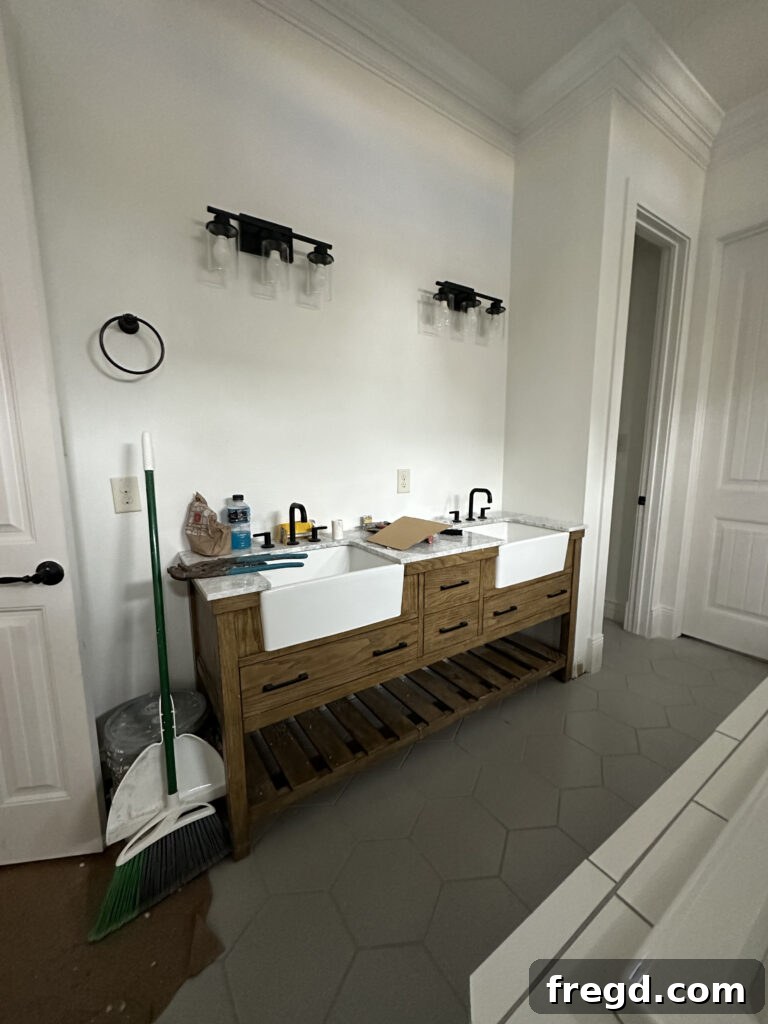
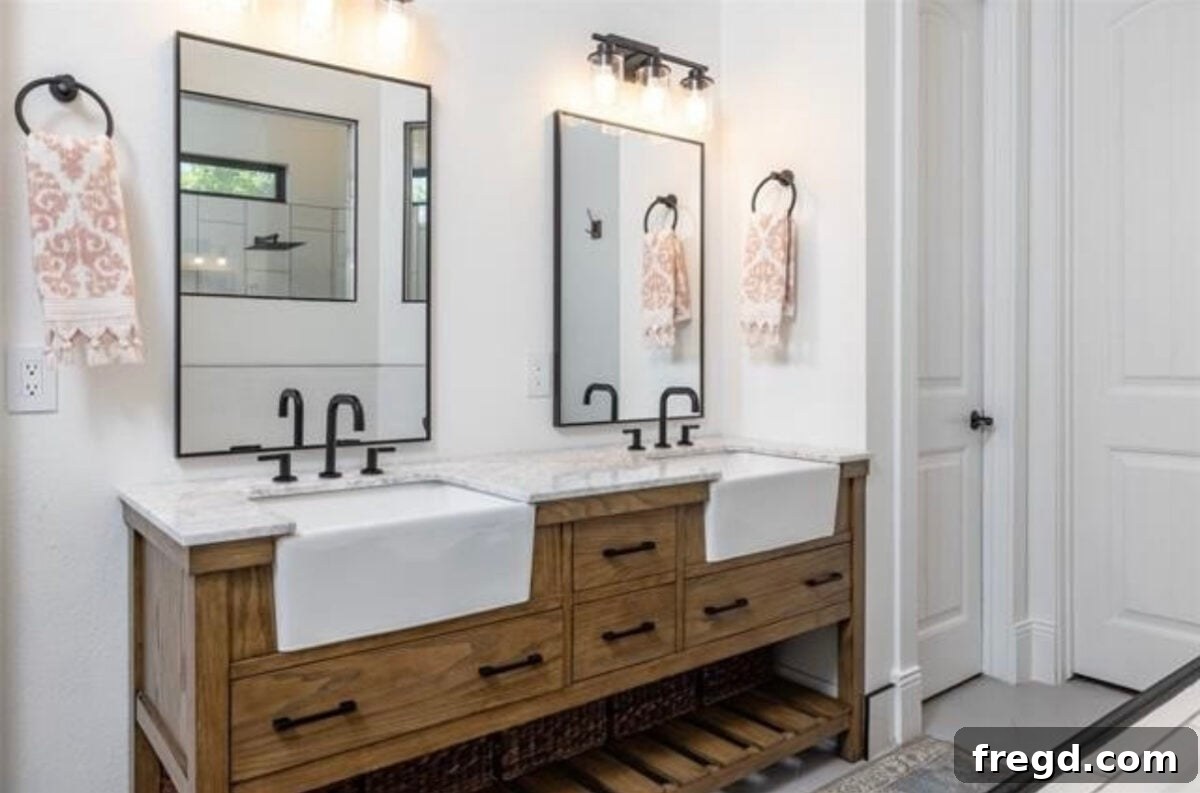
The final significant step in the renovation was the installation of the new double vanity, another area where I deliberately focused on budget savings. The cost of custom cabinets and bespoke countertops can quickly escalate, so I sought an alternative that offered both style and value. I discovered this charming double vanity on Wayfair, and it was a true find: it included the countertop and sinks, offered free shipping, and came in under $1,700 after tax. To my delight, it shipped fully assembled, and the delivery team even rolled it directly into my garage! I was incredibly impressed with the quality of the vanity, the appealing color, and the finish of the countertop.
This single purchase represented a massive saving, allowing me to allocate resources to other areas of the renovation while still achieving a high-end look. The new double vanity not only provides ample storage and counter space but also contributes significantly to the modern and streamlined aesthetic of the master bathroom. It’s a testament to the fact that smart shopping can yield luxurious results without breaking the bank.
- Find the Double Vanity HERE
The Grand Reveal: A Masterpiece Unveiled
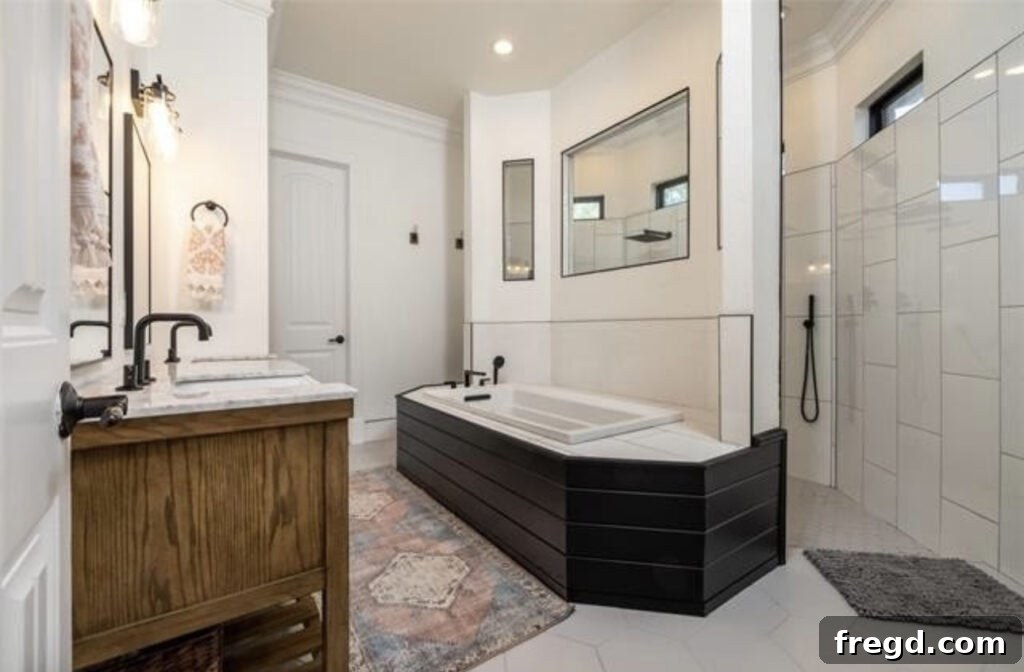
I genuinely could not love my new master bathroom more! Every decision, from the choice of tiles to the carefully selected fixtures, contributed to a harmonious and breathtaking final product. The tongue and groove planks, painted in that dramatic Tricorn Black, unequivocally made the entire space. This budget-savvy solution transformed what could have been a mundane feature into a sophisticated design element, offering a striking contrast and undeniable character that pulls the whole room together. The bathroom now feels luxurious, modern, and incredibly inviting, a complete departure from its outdated predecessor.
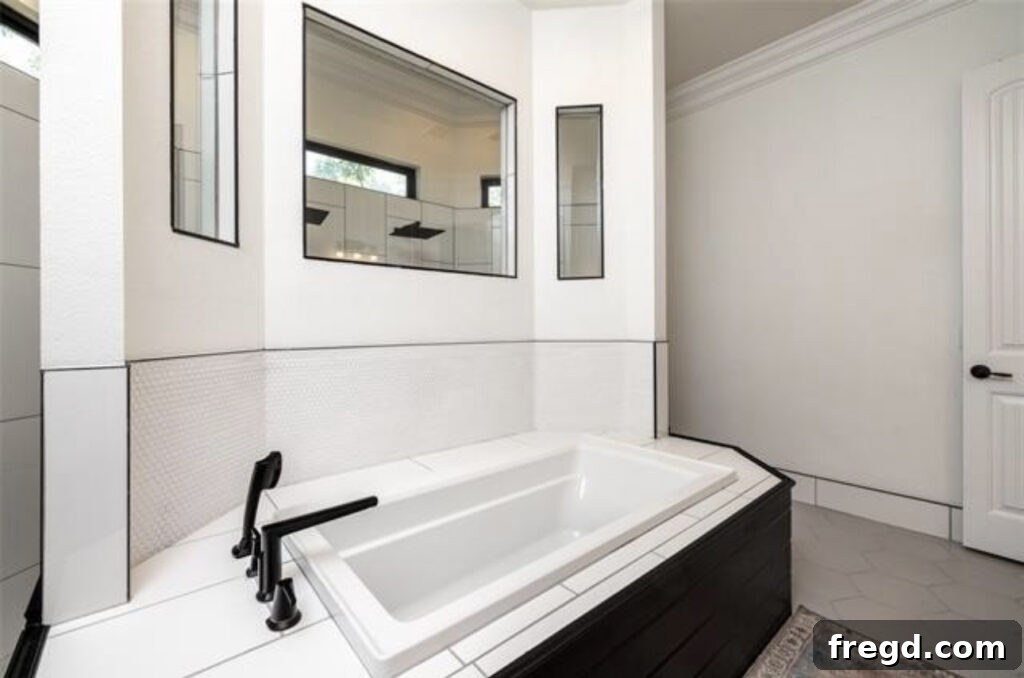
The improvement in functionality and spatial flow is immediately apparent, especially along that previously cramped wall. There is now significantly more walking space leading into the shower, creating an open and welcoming entry point. This strategic adjustment in the layout not only enhances daily convenience but also contributes to the overall feeling of spaciousness and luxury in the master bathroom. The removal of the old vanity and the thoughtful redesign have truly transformed the area, making it far more practical and visually appealing.
- Find the Roman Tub Faucet with Sprayer HERE
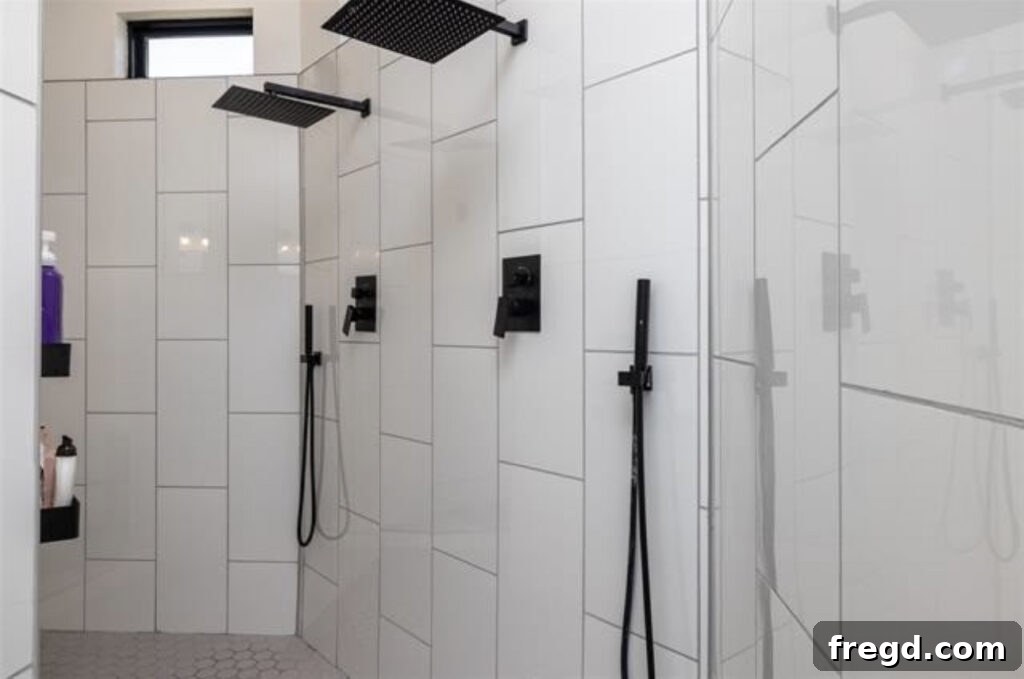
- Find the Rain Shower Heads with Sprayers HERE
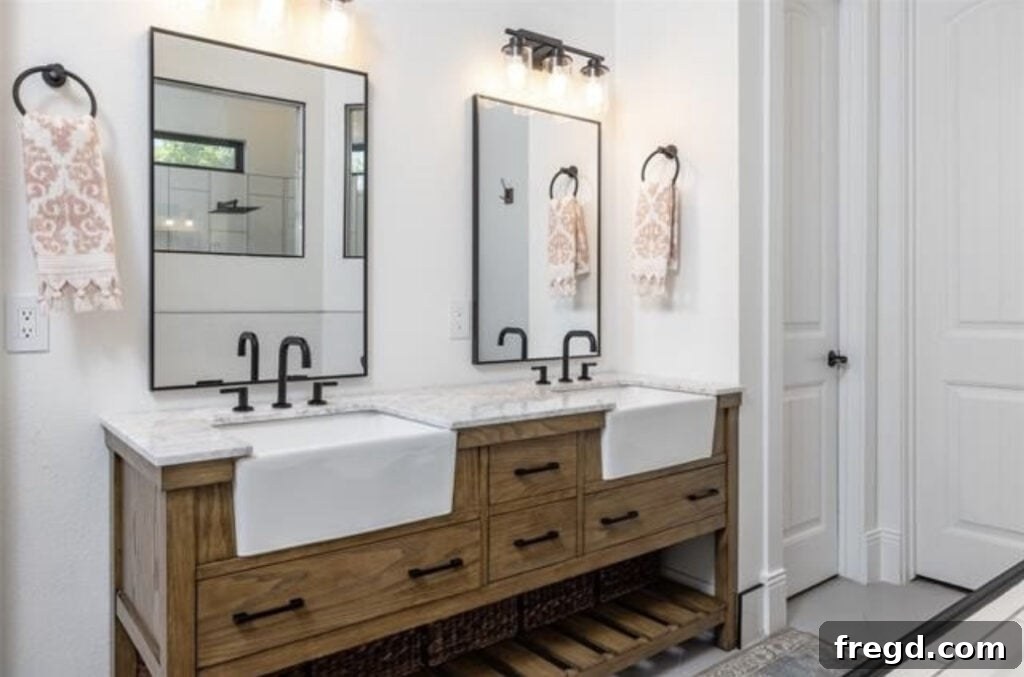
- Find the Mirrors HERE
- Find the Faucets HERE
- Find the Lights HERE
- Find the Hand Towels HERE
- Find the Double Vanity HERE
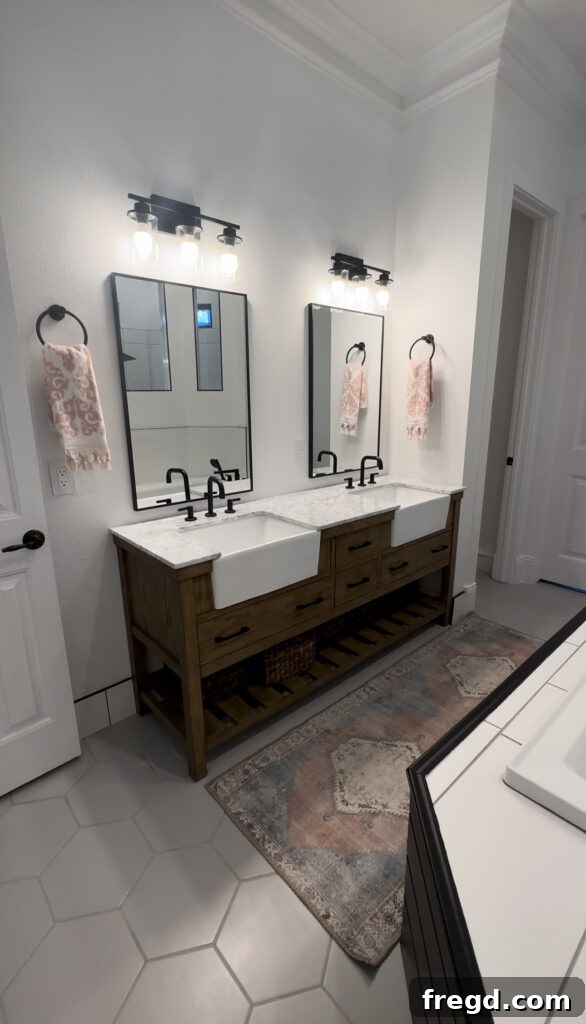
- Find the Runner HERE
I am absolutely thrilled to share the fantastic news: my home sold in a remarkable 8 days after the renovation was complete! This swift sale is a testament to the value and appeal that a well-executed master bathroom remodel can add. I’m incredibly excited for my little family as we prepare to move to our new home. We’ve embraced a new chapter, downsizing slightly and relocating an hour away, just outside city limits. This move brings with it more land for privacy and an exciting new school for my daughter, who is already beaming with anticipation!
I cannot wait to give you all a tour of our new home and embark on fresh decorating projects, perhaps even building some new furniture pieces to personalize our space. It’s a new adventure, and I’m ready to dive into the next phase of home design and living.
Happy Building!
Ashley
Check Out Our Other Inspiring Bathroom Renovations
If you’re looking for more inspiration or tips for your next bathroom project, explore some of our other successful remodels and updates:
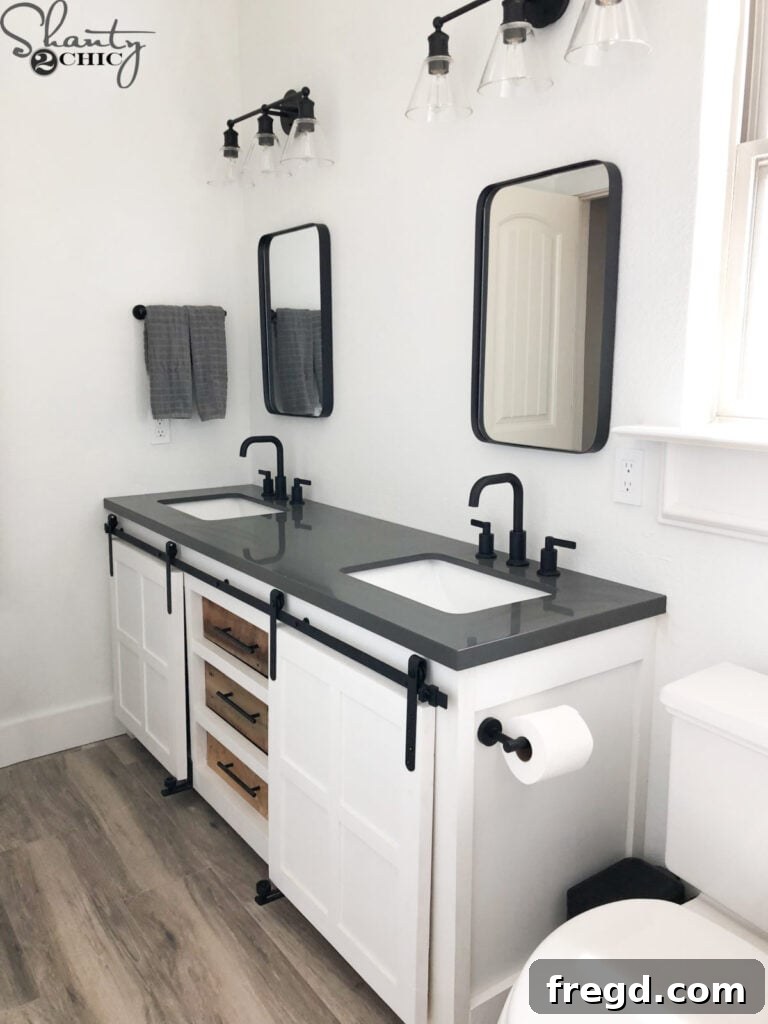
Modern Farmhouse Bathroom Renovation
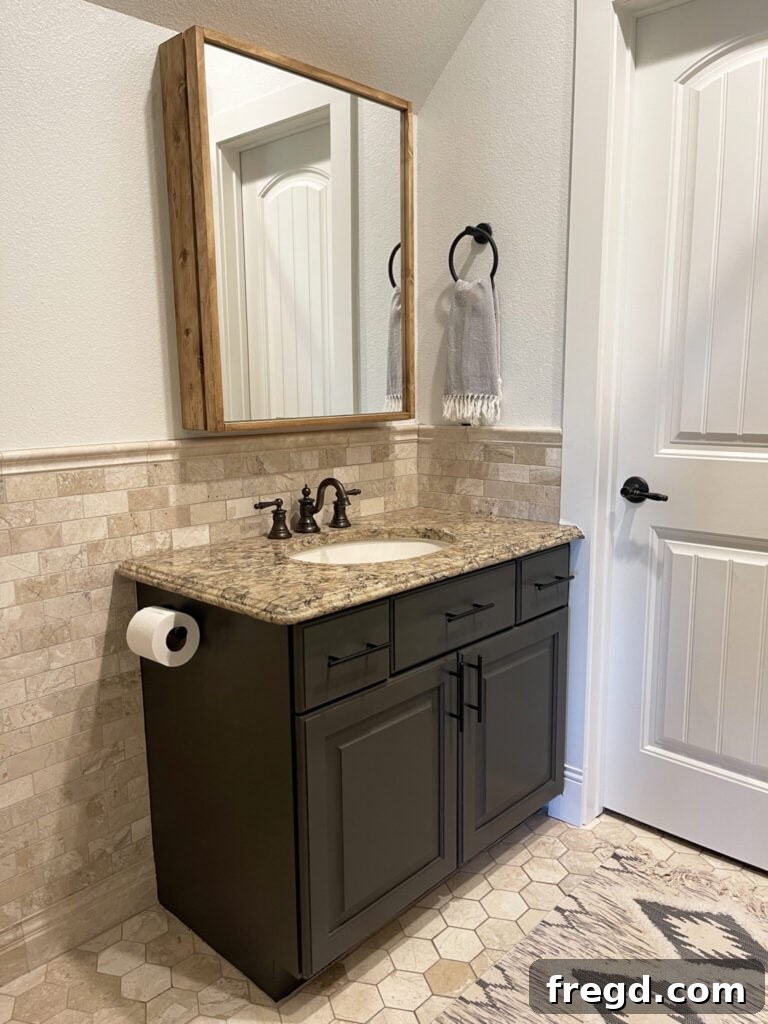
Budget Bathroom Update
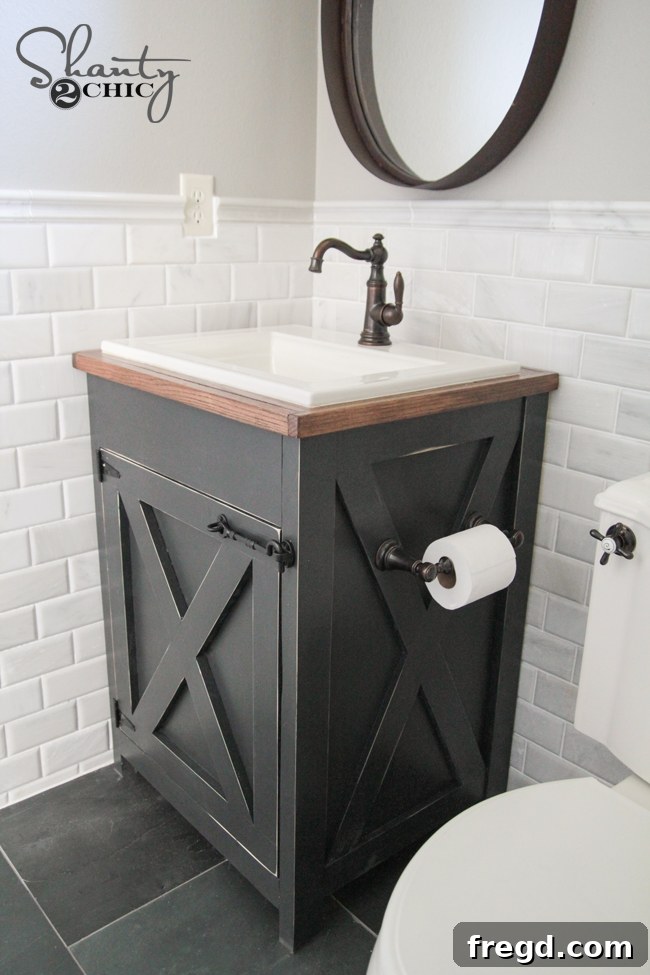
DIY Bathroom Vanity
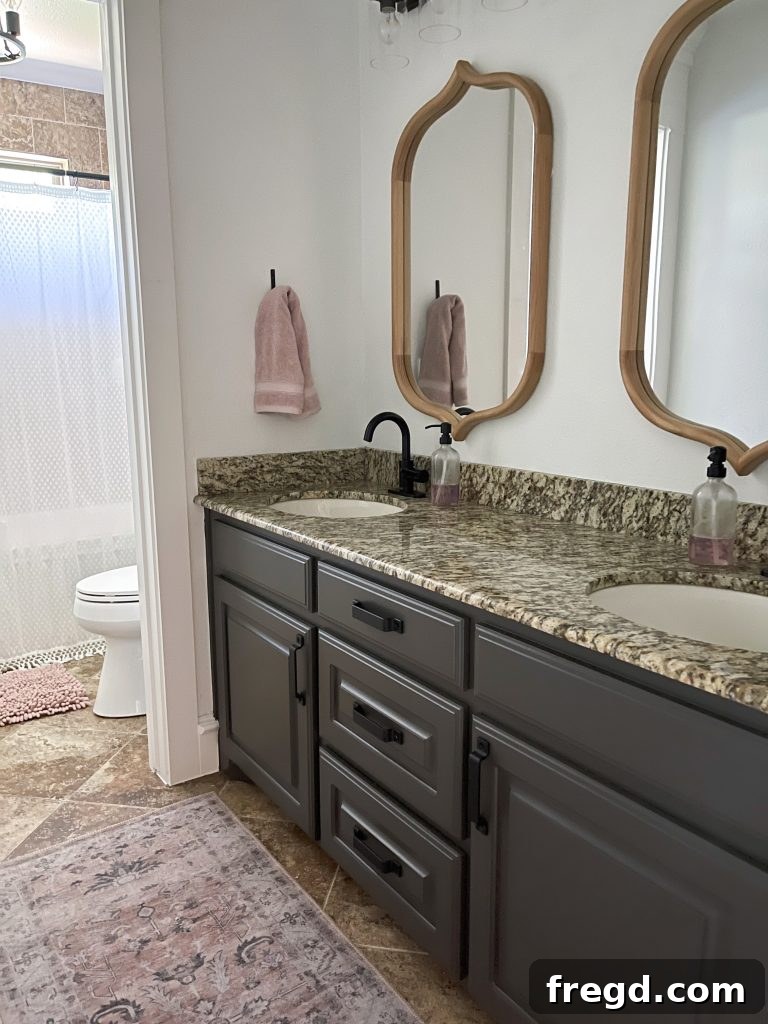
Painting My Bathroom Cabinets