
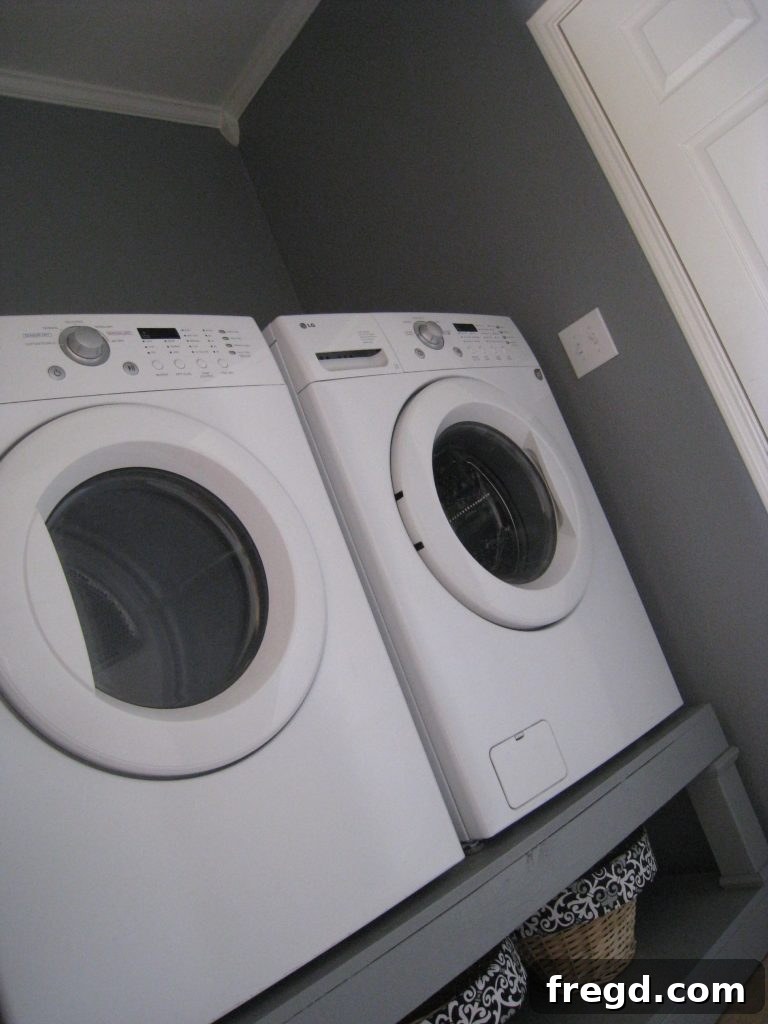
As a passionate home improver, I confess to a somewhat chaotic approach to projects. My enthusiasm often leads me to jump between exciting ideas, tackling whatever sparks joy in the moment. This week, my creative energy honed in on a space often overlooked but essential: our laundry room. What began as a practical necessity quickly evolved into a delightful design challenge, leading to a significant step forward in its ongoing transformation.
The Journey So Far: A Glimpse into Our Laundry Room Makeover
For those who followed our earlier DIY Laundry Room Pedestal project, you might recall the humble beginnings of this space. It was functional, certainly, but lacked the charm and cohesive design I envisioned for a busy area of our home. We started with a very basic setup, dreaming of a more organized, aesthetically pleasing environment.
And this is where we find ourselves now! While the entire laundry room makeover isn’t complete, the progress is undeniable, and the vision is becoming clearer with each passing week. My latest endeavor, and one I’m particularly proud of, was the installation of crown molding. This was my very first foray into working with molding, and I must say, the results have exceeded my expectations, adding a level of sophistication and finish I hadn’t thought possible for a beginner DIYer.
The “Aha!” Moment: Why Crown Molding Became the Perfect Solution
My initial steps in this laundry room renovation included painting the walls in Behr’s “Gray Area,” a wonderfully calming and modern shade, complemented by a crisp white ceiling chosen to seamlessly match our existing trim. However, a significant challenge arose: our walls boast a very thick, distinctive texture. This texture, while adding character in some areas, proved to be an adversary when trying to achieve a perfectly smooth, clean paint line where the wall met the ceiling. No matter how much specialized painter’s tape I tried, achieving that crisp, professional demarcation seemed impossible. This common DIY frustration often leads to a less-than-perfect finish, detracting from the overall aesthetic. That’s when the idea struck me: crown molding wasn’t just an elegant addition; it was the ultimate, stylish solution to my paint line predicament!
Crown molding instantly elevates a room, adding architectural detail and a sense of completeness. For our laundry room, it promised to provide that much-needed visual transition, elegantly concealing any imperfections in the paint line and creating a polished, sophisticated look. It transformed a potential design flaw into an opportunity for a major aesthetic upgrade, truly becoming the focal point that ties the room together.
Simplifying the Installation: DIY Crown Molding Tips and Tricks
A Time-Saving Secret: Pre-Painting Your Crown Molding
One invaluable tip I discovered, which made this DIY crown molding project considerably easier, was painting the molding *before* installation. Applying the paint while the molding pieces were still on a flat surface saved an immense amount of time and effort. It eliminated the tedious task of meticulously taping off walls and ceilings, minimizing drips and ensuring a smooth, even coat without the awkward angles and neck strain associated with overhead painting. This simple step not only resulted in a more professional finish but also significantly sped up the overall process, proving that a little foresight goes a long way in home improvement projects.
The Game-Changer: No-Miter Corner Pieces for Easy Installation
Another truly revolutionary discovery that transformed this potentially daunting project into an accessible DIY task was finding these ingenious “no-miter corner pieces” at Home Depot. For just about $4.00 each, these little beauties are a dream come true for anyone new to trim work. Traditional crown molding installation often requires precise miter cuts at various angles to create seamless corners – a skill that can be quite intimidating and challenging for beginners. These corner blocks, however, completely bypass that complexity. They allowed me to make simple, straight cuts for the trim pieces, eliminating the need for complex miter calculations or specialized saws. It’s a fantastic hack that makes professional-looking trim attainable for any homeowner. Just like the main molding, I also pre-painted these corner pieces for consistency and ease before putting them up.
Securing Your Crown Molding: A Step-by-Step Guide
The actual installation process was surprisingly straightforward. I began by securely attaching the corner pieces. For this, I used a combination of Liquid Nails adhesive for a strong, lasting bond and 2-inch finishing nails to hold them firmly in place while the adhesive cured. This dual-method approach ensures maximum stability. Once the corner pieces were in, I accurately measured the distances between them to cut the straight trim pieces. Precision in measurement is key here to minimize gaps.
With the trim pieces cut to size, I applied a generous bead of Liquid Nails along the back of each one. This adhesive provides critical support, preventing the molding from pulling away from the wall over time and reducing the number of nails needed. After carefully positioning the trim, I secured it further with 2-inch finishing nails, strategically placing them into the wall studs where possible for maximum hold. The combination of adhesive and nails creates a robust installation that will stand the test of time, giving the laundry room a truly professional and finished look.
The Stunning Result: High Impact on a Low Budget
I was genuinely astonished by how quick and easy this crown molding installation turned out to be. Thanks to the pre-painting and those fantastic no-miter corner pieces, the entire process, from start to finish, felt incredibly manageable for a first-timer. And the best part? The cost. Achieving such a significant visual upgrade for such a budget-friendly expense, particularly those key corner pieces, truly underscores the power of smart, accessible DIY. It’s a testament to how thoughtful planning and clever product choices can deliver a high-impact transformation without breaking the bank. This project proves that you don’t need a hefty renovation budget to add elegant architectural details to your home.
Beyond the Laundry Room: A Newfound Confidence for Home Projects
What started out as a practical “cover-up” to disguise a tricky paint line has genuinely transformed into a beloved feature, exceeding all my initial expectations. The addition of crown molding has not only solved a technical challenge but has also instilled a profound sense of completeness and elegance in our laundry room. I absolutely adore the polished look it provides, and the satisfaction of having achieved it myself is immense. This successful DIY project has truly ignited a spark within me, building my confidence to tackle even more ambitious home renovation endeavors. I’m already brimming with ideas and ready to embark on similar projects in other rooms of our home, eager to bring that same level of refined detail to every corner.
Thank you so much for stopping by and sharing in our latest home improvement adventure. Wishing you all a very HAPPY FRIDAY and inspiring your own creative projects!
~Ashley