
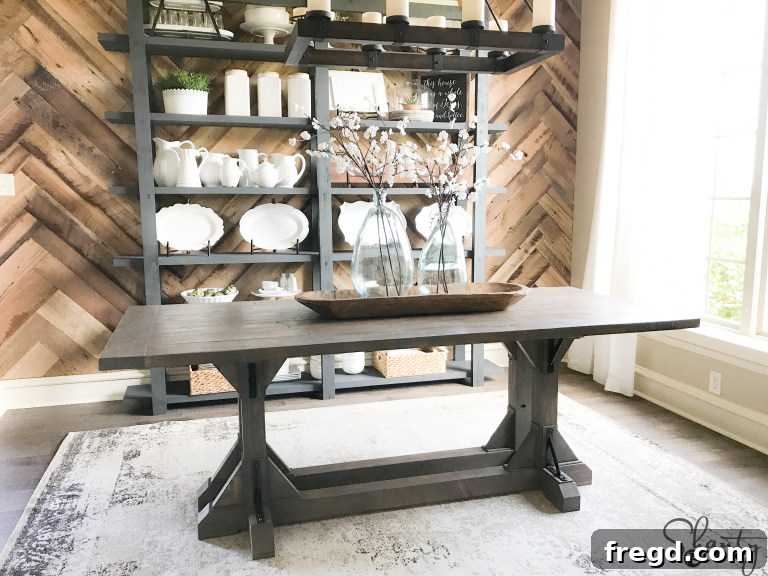
Unlock the secrets to crafting a stunning DIY Dining Table with Industrial Corbels for an incredible budget of around $170. This comprehensive guide, complete with free plans, empowers you to achieve a high-end, custom look using just a few fundamental tools. Imagine the satisfaction of gathering around a table you built yourself – a centerpiece that perfectly blends rustic charm with industrial flair, all while being surprisingly affordable.
We know you’ve been eagerly awaiting these plans! This DIY Industrial Corbel Dining Table was a passion project completed last fall, and we’re thrilled to finally share the detailed instructions. Between other exciting builds and the general whirlwind of creative endeavors, finding dedicated time to compile these plans was a challenge, but the wait is over. Now, you can embark on your own woodworking journey and create a functional piece of art for your home.
- Don’t forget to get the complimentary plans and step-by-step instructions for the matching bench HERE! Completing your dining set with a coordinated bench will elevate the entire aesthetic of your space, creating a cohesive and inviting atmosphere.
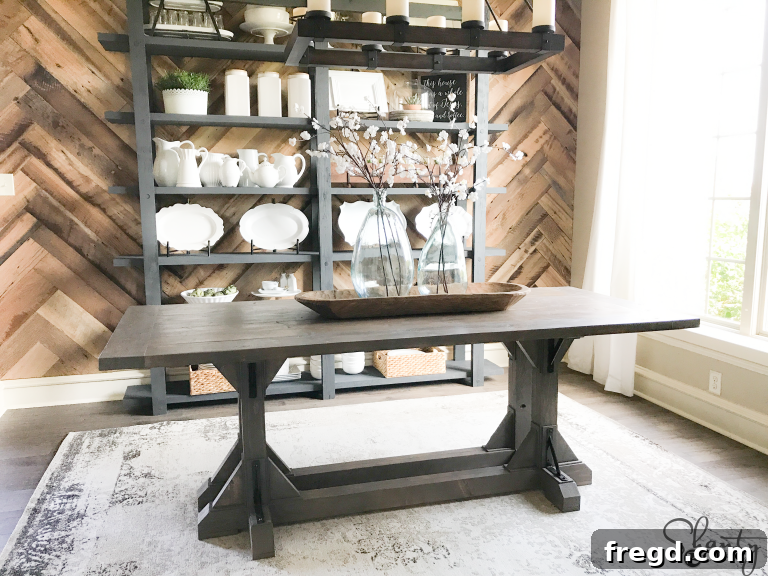
This DIY Dining Table boasts several standout features that make it a truly special addition to any home. First and foremost, we absolutely adore the dynamic interplay between the robust wooden elements and the sleek, industrial metal corbels. This unique combination achieves a perfect balance, lending the table a distinct rustic-industrial vibe while retaining the timeless appeal of a classic farmhouse style. It’s a versatile design that can effortlessly complement various interior aesthetics, from urban lofts to cozy country kitchens.
Another thoughtfully incorporated design feature is the table’s slightly more narrow profile compared to many traditional dining tables. While still comfortably seating six people, its 35-inch width was specifically chosen to optimize space. Our goal was to create a table that would open up our dining room, which is a naturally narrower area. Prior to this design, our old table often made the space feel cramped, especially once benches and additional furniture were introduced. This streamlined design ensures ample seating without overwhelming the room, fostering an airy and comfortable dining experience.
Finally, one of the most compelling aspects of this project is its incredibly low cost. We managed to build this entire table, including all lumber and essential hardware, for an astonishing $166. This makes it an incredibly attractive option for anyone looking to furnish their home with high-quality, custom-built furniture without breaking the bank. The savings achieved through DIY not only make this project accessible but also provide immense satisfaction in creating something beautiful and functional with your own hands.
Join us for a complete tour of this beautifully transformed room, where this stunning dining table takes center stage! Discover how all the elements come together to create a cohesive and inviting space that truly reflects our unique style.
Now, let’s dive into the exciting part: the build itself! You’ll be pleased to discover that this dining table is surprisingly straightforward to construct, making it an excellent project for both seasoned DIYers and enthusiastic beginners. A key recommendation for achieving that professional, high-quality finish is to rip the rounded edges off of your 2x boards. This crucial step creates perfectly flat, straight edges, allowing for seamless, almost invisible joints when laminating and assembling. The result is those gorgeous, chunky, modern-style straight legs and a flawlessly smooth table top that truly elevates the overall aesthetic. We consistently use our trusty table saw for this task, as it provides unparalleled precision and efficiency. If you’re currently without a table saw, consider it a worthy investment for your workshop. Ryobi offers an excellent, entry-level model for just $129. Even with the purchase of a new table saw, your total cost for building this exquisite dining table would still comfortably remain under $300 – a fraction of the price you’d pay for a comparable quality dining table in retail stores. So, if you need a compelling argument to convince your significant other that a new table saw is an absolute necessity for future home projects… you’re very welcome! This project truly demonstrates the value and satisfaction of building your own furniture.
How to Build a DIY Dining Room Table: Your Comprehensive Guide
Supplies: Essential Materials for Your DIY Table
Gathering the right materials is the first crucial step in any successful woodworking project. For this DIY Industrial Corbel Dining Table, we’ve carefully selected lumber and hardware that balance durability with affordability, ensuring your finished piece is both sturdy and budget-friendly. Here’s a detailed list of what you’ll need to acquire:
- 8 – 2x6x8 Whitewood or Pine: These will form the core structural elements of your table, including the main tabletop planks and robust base components. Opt for straight, knot-free boards for the best results.
- 9 – 2x4x8 Whitewood or Pine: Used primarily for the laminated legs and various support pieces in the base. Again, focus on quality and straightness.
- 1 – 1x6x6 Whitewood or Pine: This board will be utilized for the breadboards, providing a clean and finished edge to your tabletop.
- 7 – 1/4″ x 3″ x 4′ Craft Board: These thinner boards are perfect for decorative trim work, adding a refined touch to the table base and concealing pocket holes.
- 2 1/2″ Pocket Hole Screws: Standard Kreg pocket hole screws essential for creating strong, concealed joints in 1 1/2″ thick lumber.
- HD Pocket Hole Screws: Heavy-duty Kreg pocket hole screws, specifically designed for thicker stock (over 1 1/2″ thick) like the laminated legs, providing superior holding power.
- 1 1/4″ Brad Nails: For attaching the lighter trim pieces and wooden corbels, these smaller nails ensure a clean finish with minimal visible holes.
- 2″ Brad Nails: Used for general fastening of trim or other light components where a slightly longer hold is desired.
- 2 1/2″ Wood Screws: Versatile screws for general construction, particularly useful for securing the top frame to the legs, allowing for future disassembly if needed.
- 3″ Wood Screws: Longer screws providing extra strength for critical connections in the base assembly.
- Wood Glue: An absolute must for nearly every joint. Wood glue provides incredible strength, often stronger than the wood itself, creating a bond that holds your table together for years.
- Metal Corbels: The distinctive industrial design element that gives this table its unique character. Choose a style that complements your desired aesthetic.
Tools: The Gear You’ll Need for Success
Having the right tools significantly streamlines the building process and ensures precise results. While some tools are optional, they are highly recommended for achieving a professional finish and making your DIY experience more enjoyable. Here’s what you’ll need in your workshop:
- Miter Saw: Essential for making accurate crosscuts and angled cuts on your lumber, ensuring your pieces fit together perfectly.
- Drill: A cordless drill is indispensable for driving screws, drilling pilot holes, and facilitating pocket hole joinery.
- Kreg Jig: This jig is a game-changer for creating strong, hidden pocket-hole joints, especially for standard 1 1/2″ thick lumber. It simplifies joinery for DIYers significantly.
- Kreg HD (Heavy-Duty): A specialized Kreg Jig designed for drilling pocket holes in thicker materials (over 1 1/2″ thick), which will be crucial for the laminated table legs.
- Brad Nailer: Perfect for quickly and cleanly attaching trim, foot pads, and wooden corbels with minimal visible fasteners. An 18-gauge nailer is ideal for this project.
- Table Saw (optional, but highly recommended): While not strictly mandatory, a table saw allows you to rip straight edges off your 2x lumber, creating a much cleaner and more professional look for your laminated legs and tabletop. It’s an investment that pays dividends in future projects.
To ensure a smooth and accurate build, make sure to download the comprehensive Free Dining Table Plans HERE. These detailed plans provide all the necessary dimensions and diagrams, allowing you to follow along with this tutorial step-by-step and achieve professional-quality results.
Building the DIY Dining Table Base: Foundation of Your Masterpiece
The table base is the foundation of your dining table, providing stability and support. Taking your time during this section ensures a robust and long-lasting piece of furniture. We’ll start by preparing the lumber for the chunky legs and then meticulously assemble the base structure.
Step 1: Laminating 2x4s for Sturdy, Chunky Legs
Creating the substantial, visually impactful legs for this table begins with a crucial step: laminating multiple boards together. This process not only provides the necessary bulk for a truly “chunky” aesthetic but also enhances the stability and strength of the legs, preventing warping over time. It’s a technique that contributes significantly to the custom, high-end feel of the table.
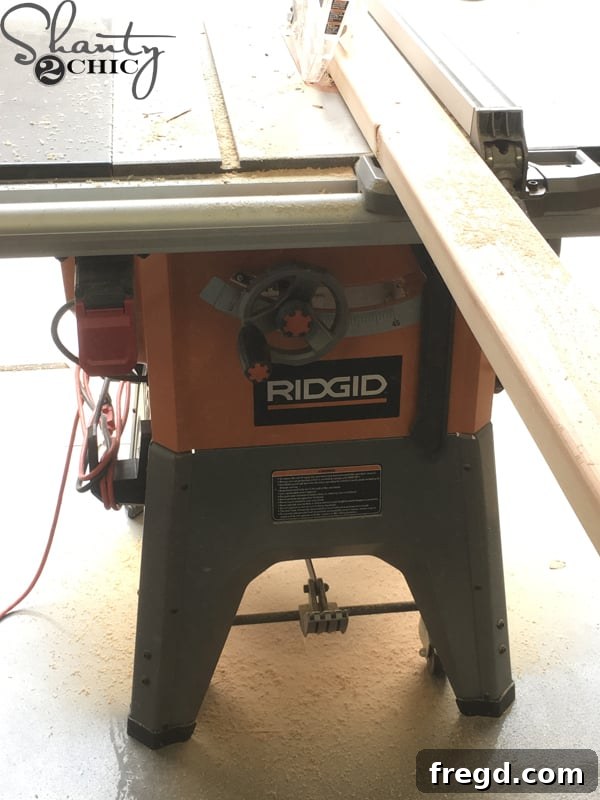
As previously mentioned, the first critical task is to prepare your lumber by ripping off all the rounded edges from the 2x boards. This process, typically done with a table saw, involves shaving a small amount from both sides of each board. By removing these factory-rounded edges, you create perfectly flat, square surfaces that will join together seamlessly, virtually eliminating visible gaps and creating a much more refined finish. After ripping, your 2x4s will now measure approximately 3 inches wide, and your 2x6s will be closer to 5 inches wide. This slight reduction in width is a small trade-off for the vastly improved aesthetic and structural integrity.
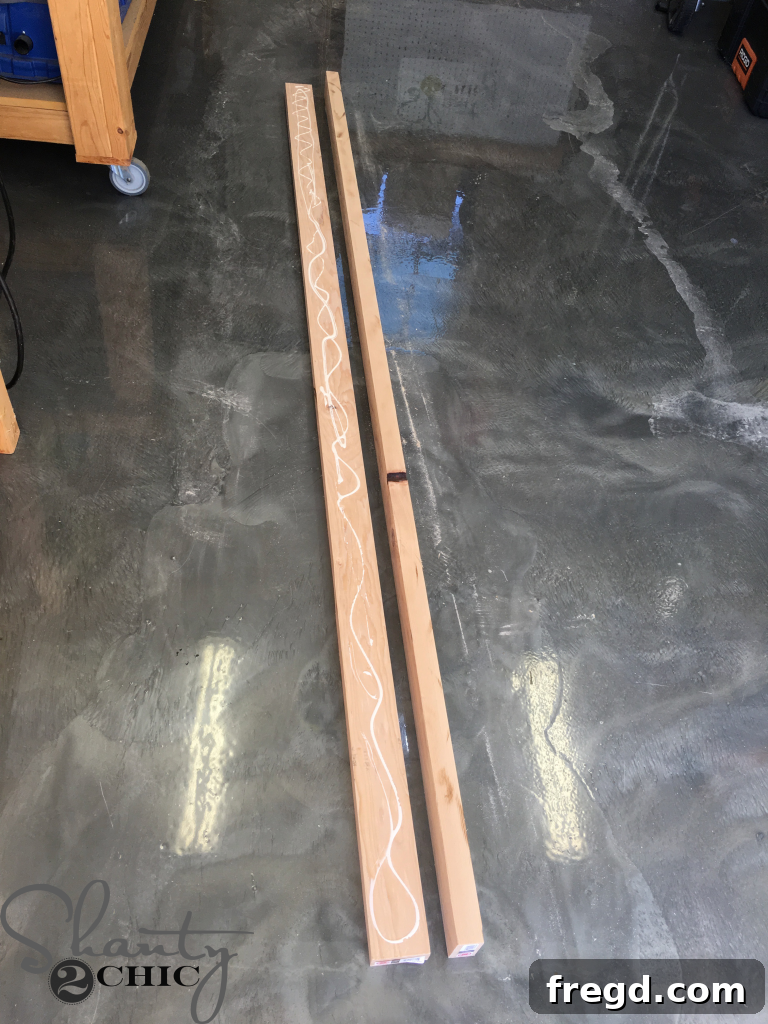
To laminate the boards for your substantial table legs, apply a generous, even layer of high-quality wood glue to one face of a 2×4 board. Ensure full coverage, especially along the edges, for a strong bond. Immediately after, carefully lay a second 2×4 board directly on top, aligning the edges as precisely as possible. The goal is to create a single, thicker piece from two standard boards, forming the core of your leg.
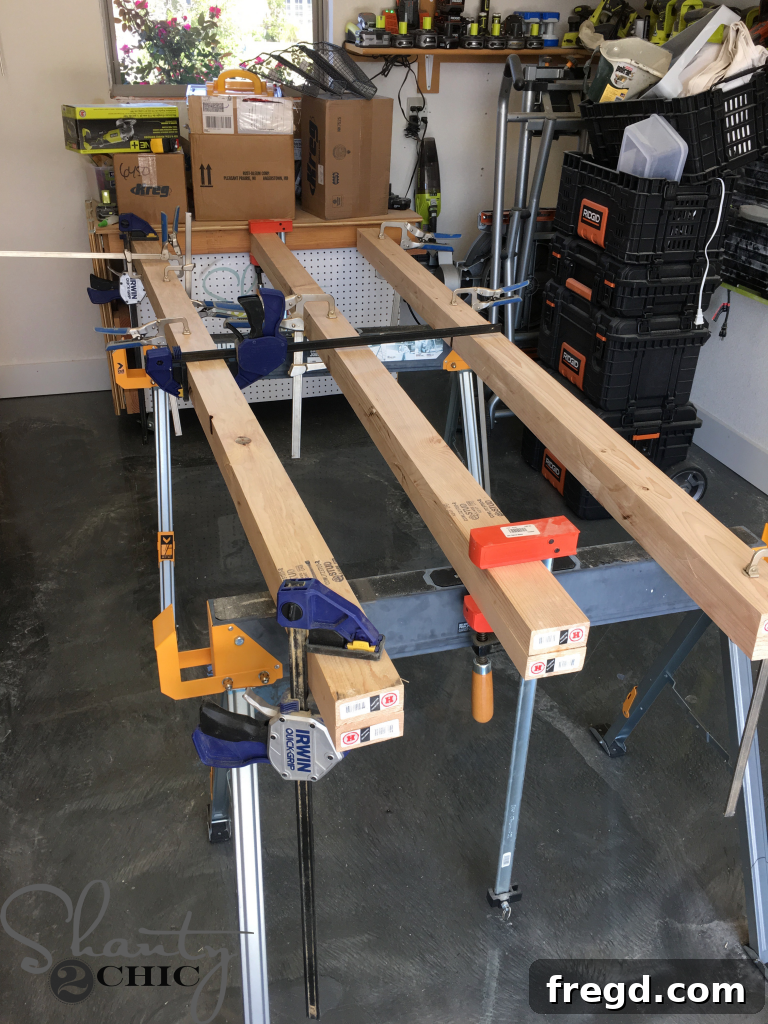
Once the boards are positioned, it’s essential to apply consistent pressure across the entire surface. Use several woodworking clamps to firmly hold the glued boards together. Ensure the clamps are tightened sufficiently to squeeze out any excess glue, but not so much that you dent the wood. Wipe away any glue squeeze-out with a damp cloth immediately, as dried glue can be difficult to stain. Allow the clamped boards to dry undisturbed overnight, giving the wood glue ample time to cure and form a strong, permanent bond. Patience here will pay off with incredibly sturdy legs.
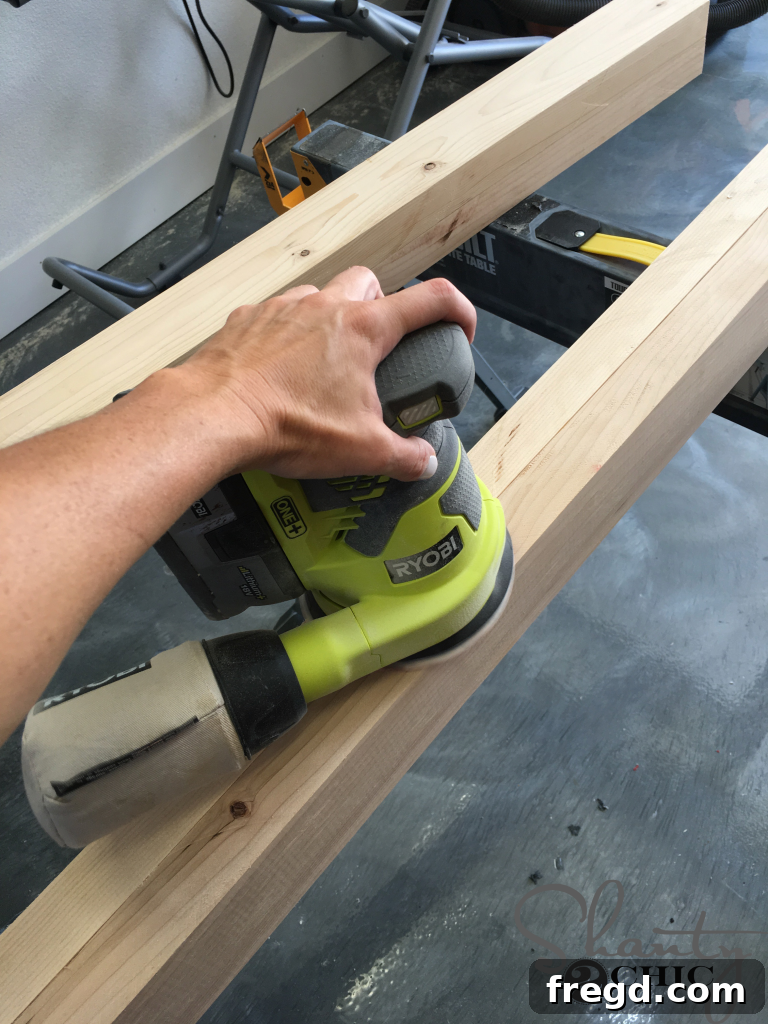
After the glue has thoroughly dried and the clamps have been removed, the next step is to sand the laminated boards. Focus particularly on the joint line where the two boards meet, aiming to create a perfectly smooth, seamless surface. Start with a coarser grit sandpaper (e.g., 80 or 100 grit) to remove any minor imperfections or dried glue remnants, then progressively move to finer grits (e.g., 150 or 220 grit) until the entire surface is silky smooth to the touch. This attention to detail will ensure your finished legs look like solid, single pieces of timber.
Step 2: Precision Cutting for Table Legs
With your laminated boards now prepped and smooth, it’s time to transform them into the precise components for your table’s legs. Accuracy in this step is paramount for a stable and visually appealing table. Always double-check your measurements before making any cuts to prevent costly errors.
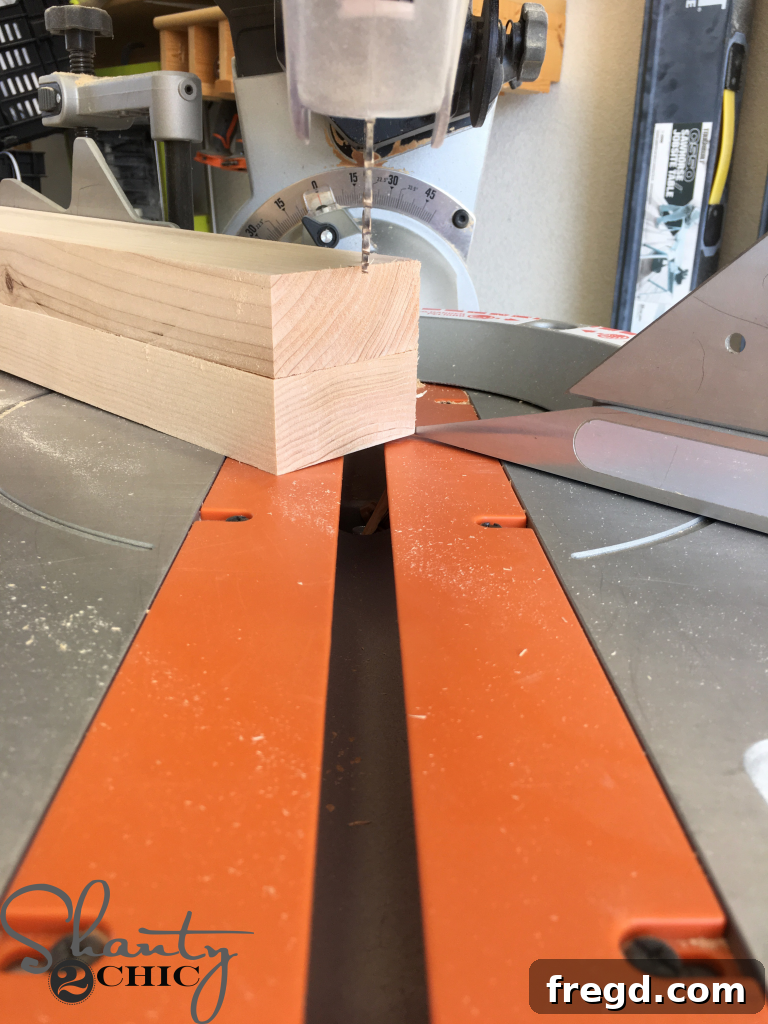
Using your miter saw, carefully make all the necessary cuts for the table legs and other base components. It is absolutely essential to refer to the detailed cut list diagrams provided in the free plans for the exact dimensions and angles required for each piece. Measure twice, cut once! Ensure your blade is sharp and your cuts are clean and precise. Labeling your cut pieces as you go can also save time and prevent confusion during assembly.
Step 3: Drilling Strategic Pocket Holes for Strong Joints
Pocket hole joinery is a fantastic technique for DIY furniture building, offering strong, hidden joints that are relatively easy for beginners to master. For this table, we’ll be using two types of Kreg Jigs to accommodate different wood thicknesses.
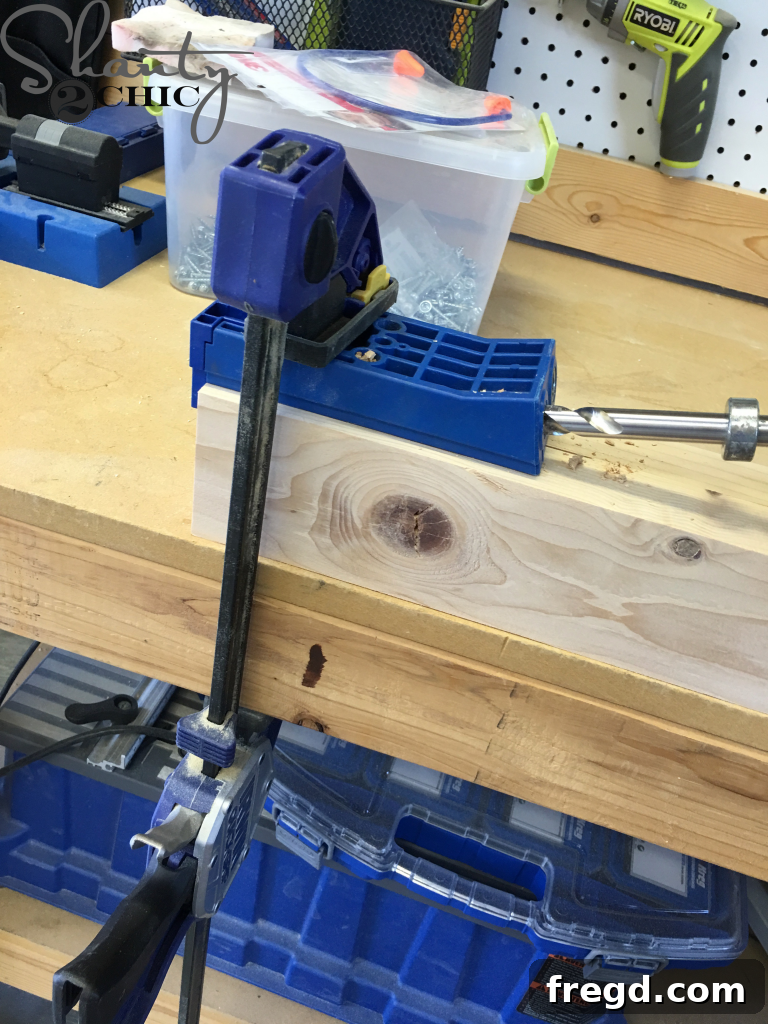
For the laminated pieces, which are thicker than standard 1 1/2″ lumber, you’ll need to use your Kreg HD (Heavy-Duty) jig. This specialized tool is designed to create larger, stronger pocket holes suitable for bigger and thicker stock, ensuring the robust connections needed for the table’s legs and main structural elements. Always follow the manufacturer’s instructions for setting the jig and drill collar depth for optimal results.
- You can find the essential Kreg HD jig to tackle thicker materials for robust joinery here on Amazon.
The Kreg HD is specifically engineered for boards exceeding 1 1/2 inches in thickness, providing the deep, secure pocket holes necessary for maximum stability in your laminated components. Using the correct jig for the corresponding wood thickness is crucial for the integrity and longevity of your table.
Step 4: Assembling the Robust Table Base
With all your pieces cut and pocket holes drilled, it’s time to bring the table base to life. This step requires careful attention to alignment and the combined power of screws and glue for maximum durability. Building the base in stages helps manage the assembly process effectively.
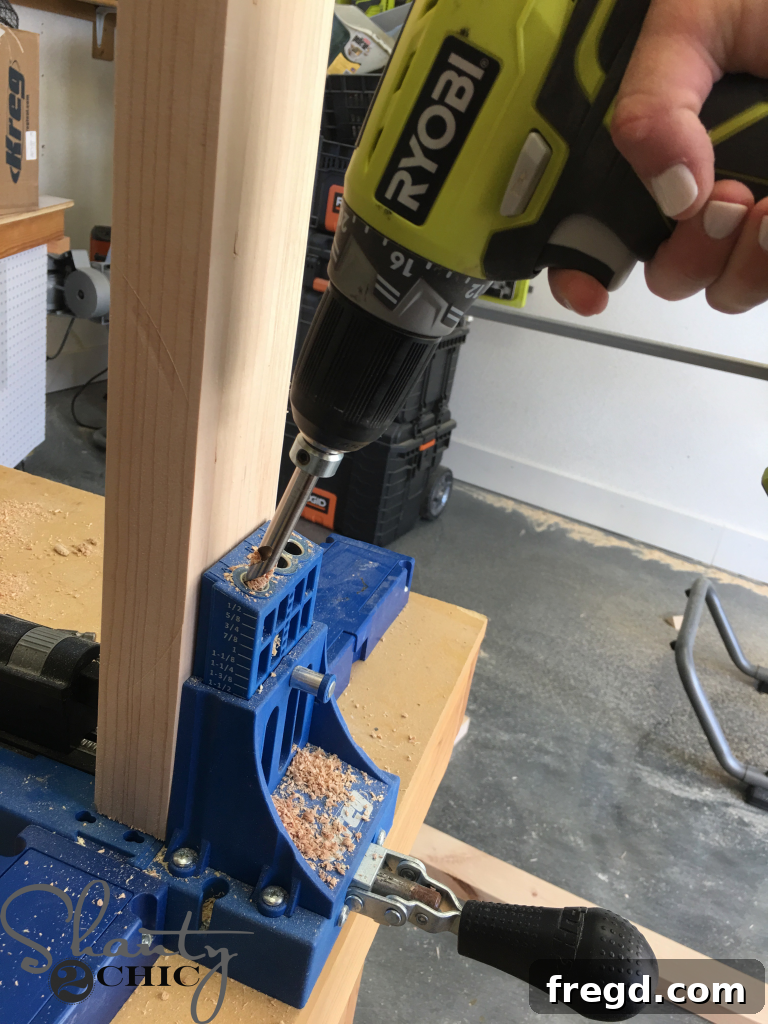
For the remaining standard-thickness boards that make up the base, use your Kreg Jig K5 (or a similar standard Kreg model) to drill the appropriate pocket holes. Ensure the jig is set correctly for 1 1/2″ material thickness. These holes will allow you to securely join components without visible fasteners on the exterior.
- Our favorite Kreg Jig model, the K5, which makes strong, hidden joints easy for any DIY project, can be found HERE on Amazon.
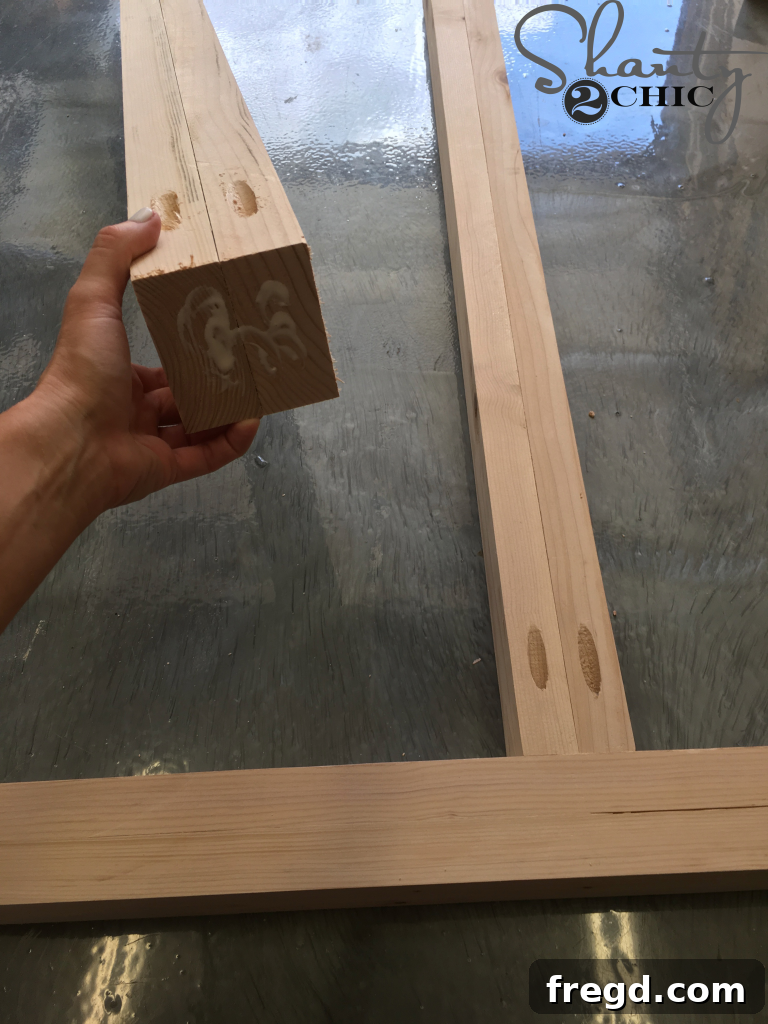
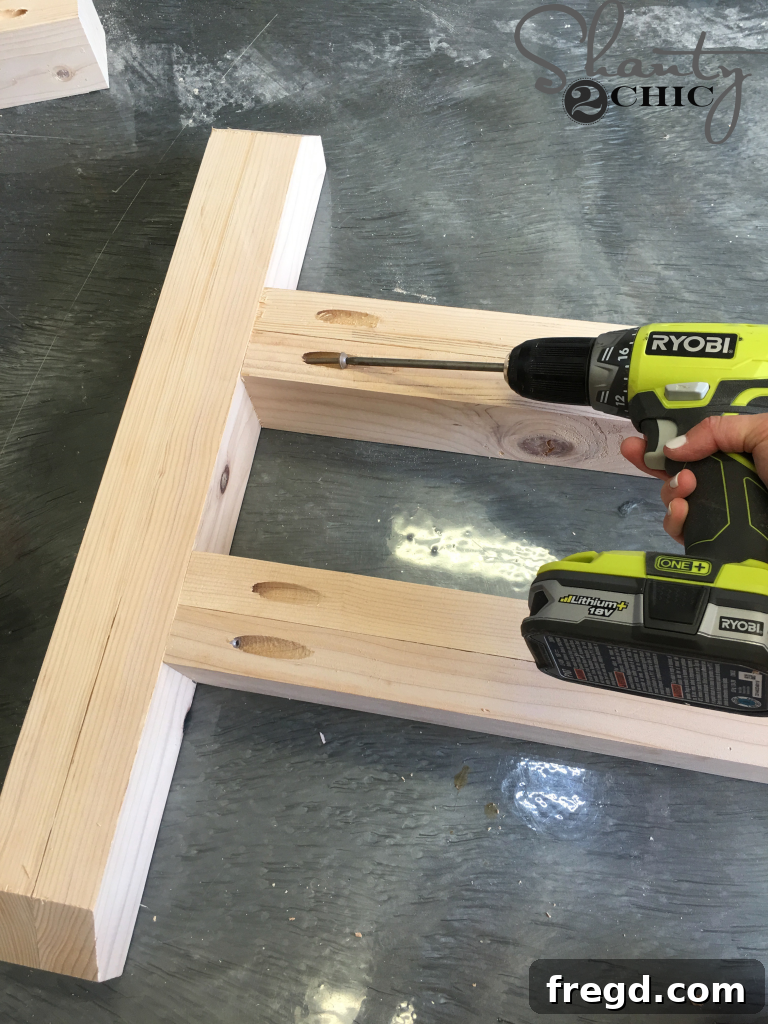
Begin by assembling the bottom section of the table base. This involves attaching the runners to the feet using HD pocket hole screws and a generous amount of wood glue. The pocket holes should be oriented to face upwards, as these will eventually be covered by trim pieces, ensuring a clean and polished look from the outside. Refer meticulously to your plans for the precise placement and spacing of these runners to maintain structural integrity and correct dimensions.
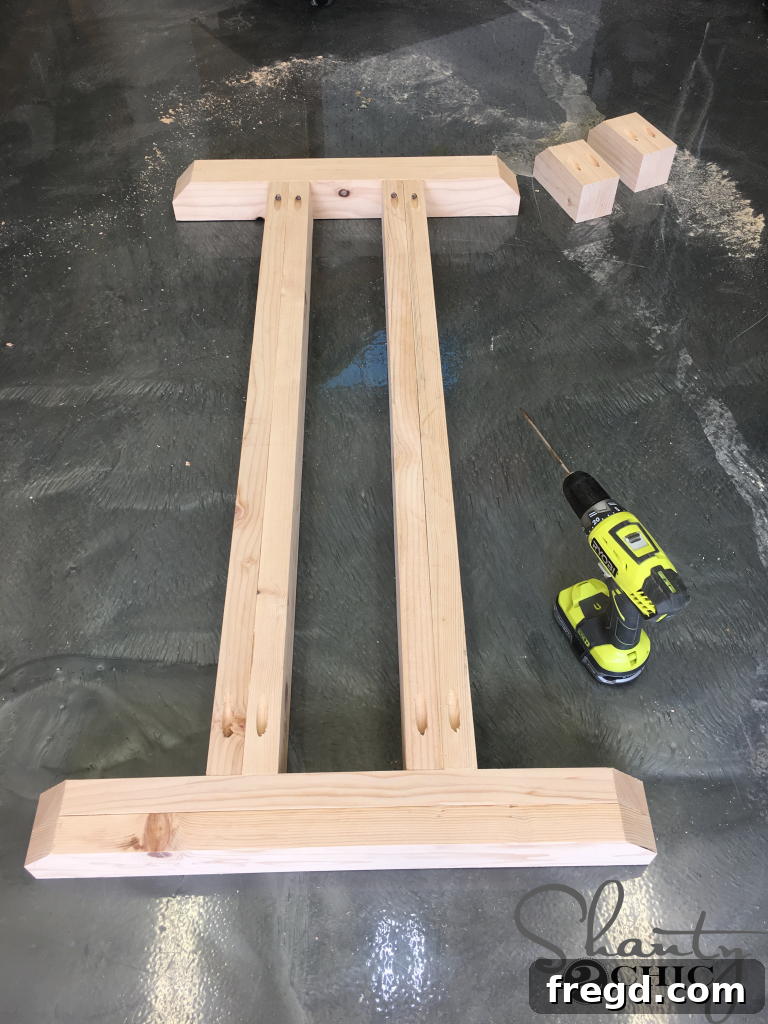
Repeat this attachment process for both ends of the runners, carefully securing them to the corresponding feet. At this stage, your initial base sections should begin to take shape, resembling a sturdy, open frame. Visually inspect for squareness and make any minor adjustments before the glue sets completely. This meticulous attention to detail now will prevent larger issues down the line.
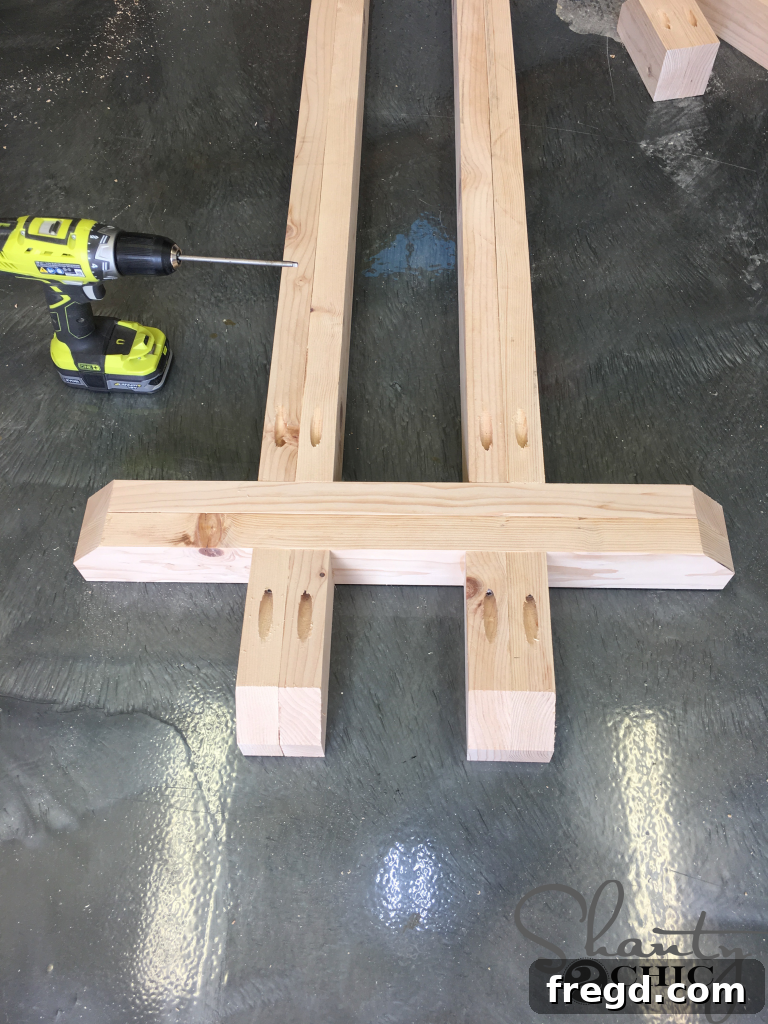
Next, you will attach two feet to each end of the base structure you’ve just created. Use HD pocket hole screws along with wood glue to form exceptionally strong connections. Again, consult your plans for the exact placement and orientation of these feet to ensure proper alignment and the correct overall dimensions of the table base. This step completes the bottom framework, making it ready for the vertical leg components.
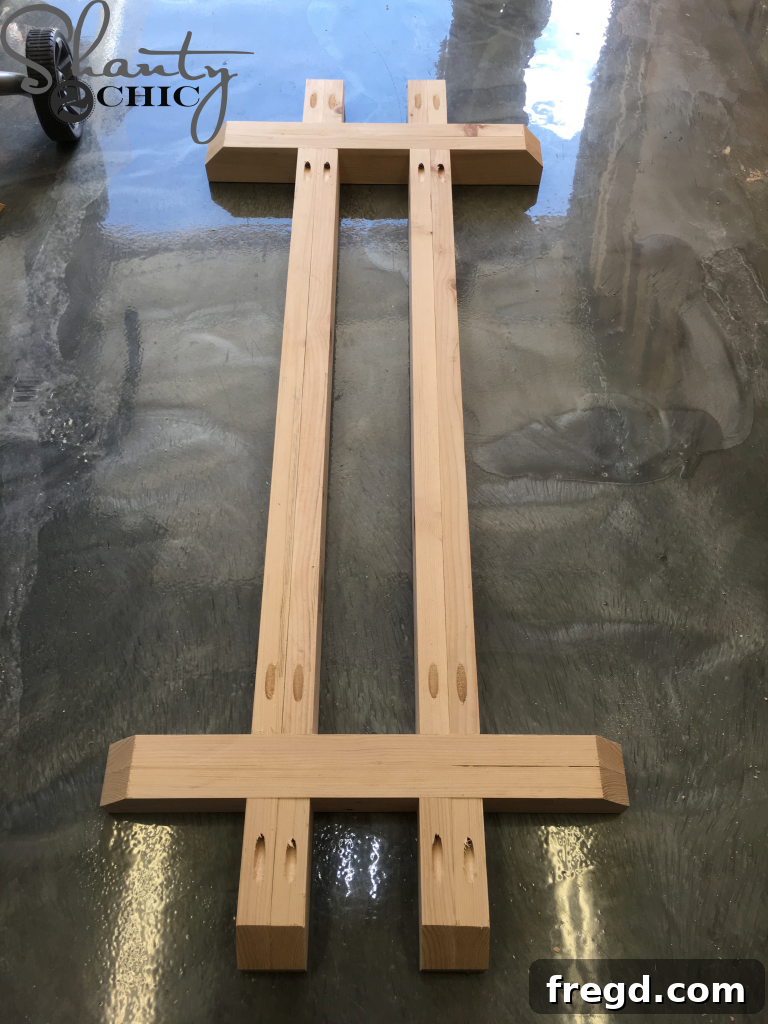
At this point, you should have a solid and complete lower section of the table base. Take a moment to admire your progress and ensure all joints are secure and square. This robust base will confidently support the entire table, so its integrity is paramount. This forms the foundation for the striking leg design.
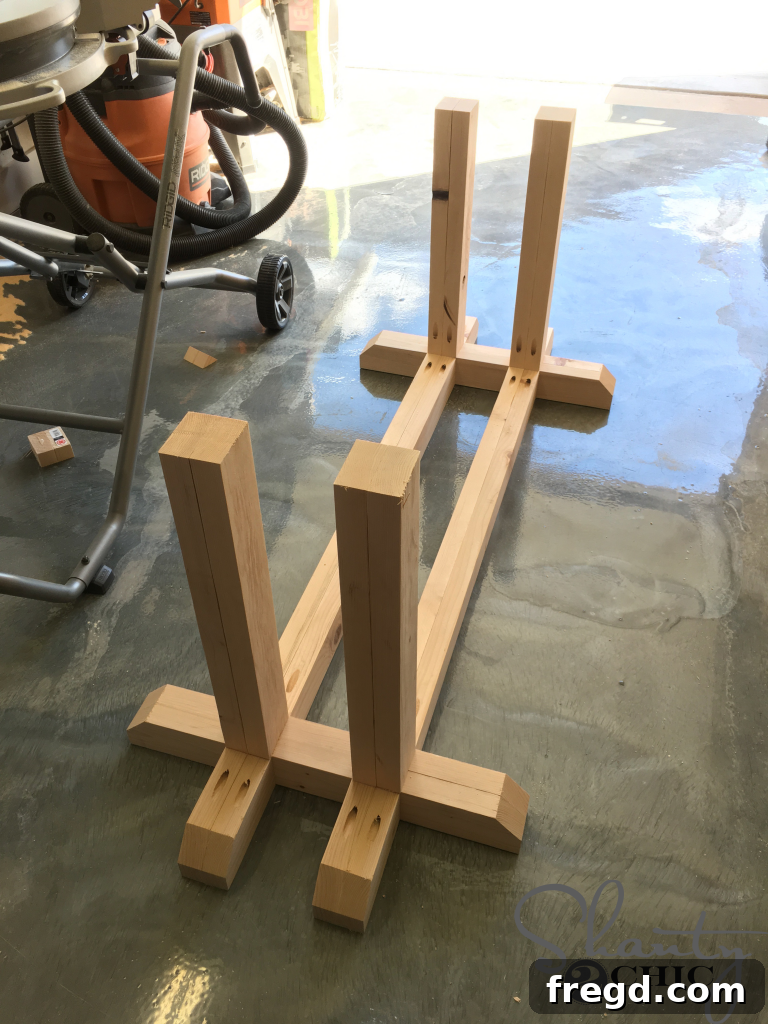
Now, it’s time to introduce the defining feature of your table: the laminated legs. Attach these substantial leg pieces to the top of the feet, utilizing HD pocket hole screws in conjunction with wood glue. The heavy-duty screws are essential here due to the thickness and weight of the laminated legs, providing a steadfast connection. The glue ensures a rigid, long-lasting bond. Carefully align each leg, ensuring it is plumb and square before fastening.
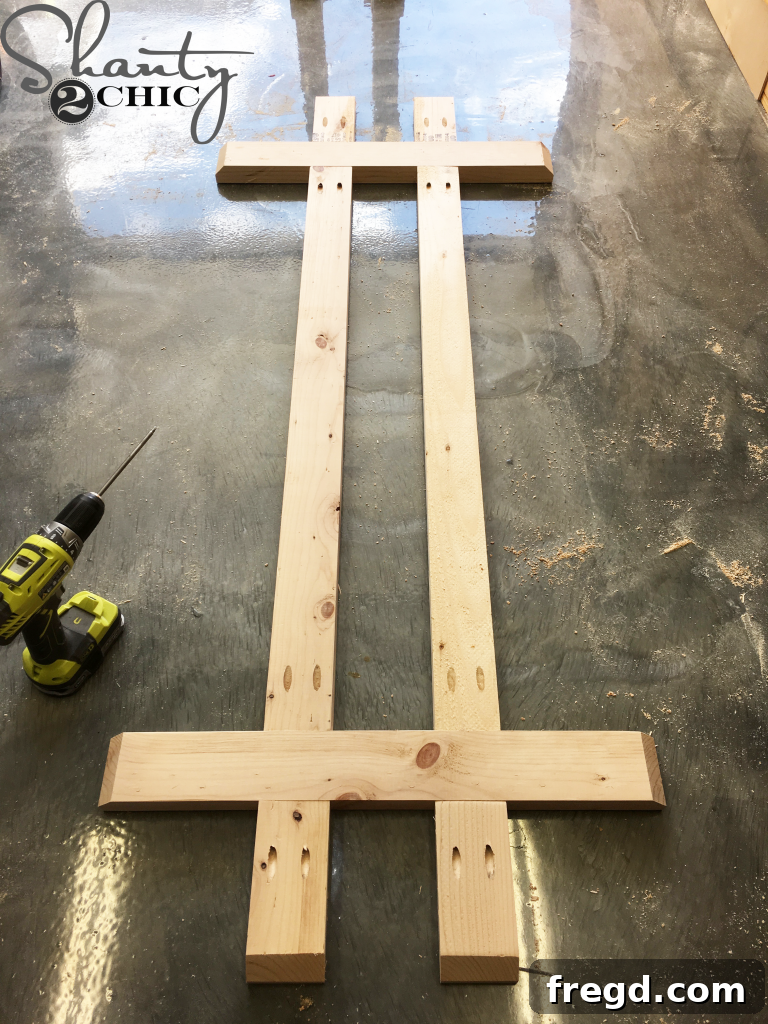
To assemble the upper section of the table base, first connect the runners to the support “arms” using 2 1/2″ pocket hole screws and wood glue. Ensure these connections are flush and square. Subsequently, attach the end supports to complete the rectangular frame. Again, 2 1/2″ pocket hole screws and wood glue are used for these joints, creating a strong and cohesive top frame that will support the table surface. Precision in these connections will contribute to a flat and stable tabletop.
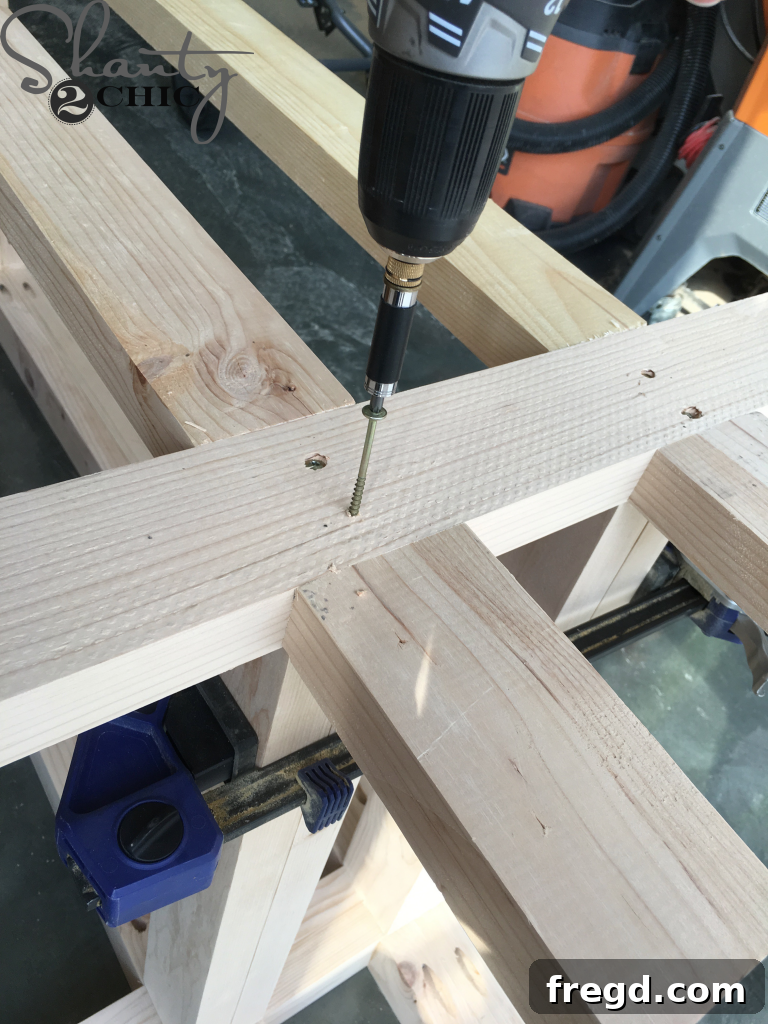
Once the top frame is fully assembled, carefully flip it over. Position this top frame onto the legs, aligning it precisely according to your plans. Secure it in place using 3″ wood screws. Importantly, do NOT use wood glue for these connections. The absence of glue here is a deliberate choice, allowing for easier disassembly of the table at a later stage, should you need to move it or transport it. This practical consideration makes the table more versatile and manageable in the long run.
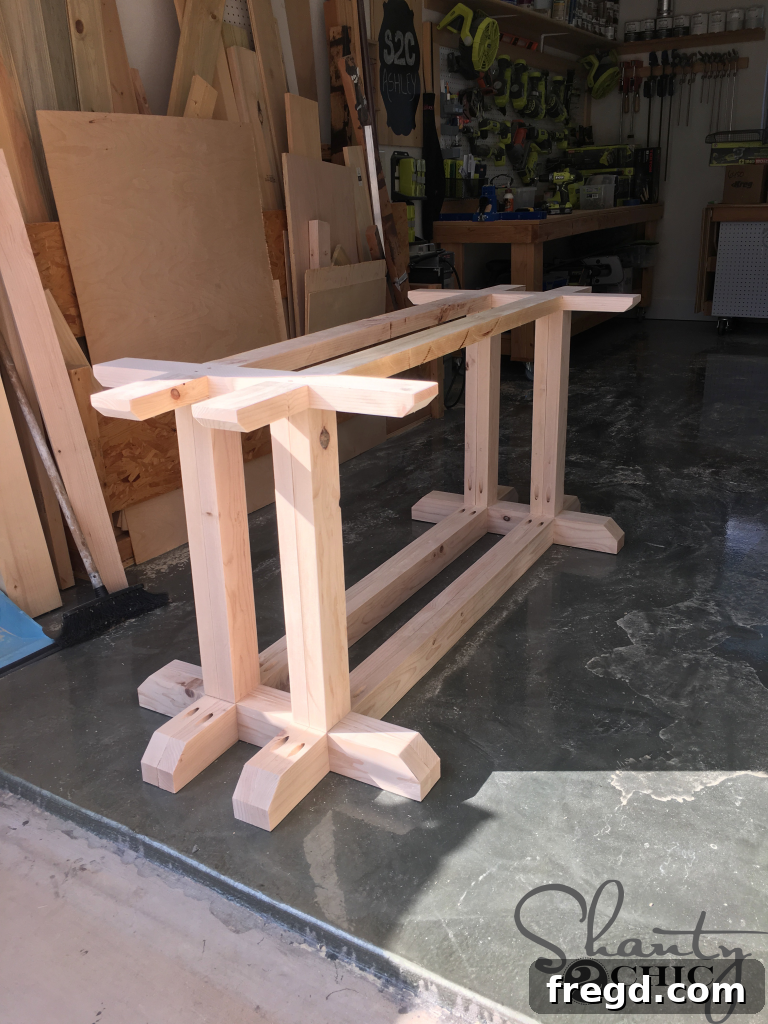
Behold! At this juncture, the main structure of your table base is complete and standing proudly. Doesn’t it already look incredibly chic and ready to support countless family meals and memories? This robust framework is a testament to careful planning and precise execution, forming the core of your industrial farmhouse dining table. The next steps will refine this base with decorative and protective elements.
Step 5: Adding Foot Pads and Decorative Trim
Now that the structural base is complete, it’s time to add the finishing touches that protect your floors and enhance the table’s aesthetic appeal. This involves attaching foot pads and then carefully applying decorative craft board trim and wooden corbels, bringing out the desired industrial farmhouse style.
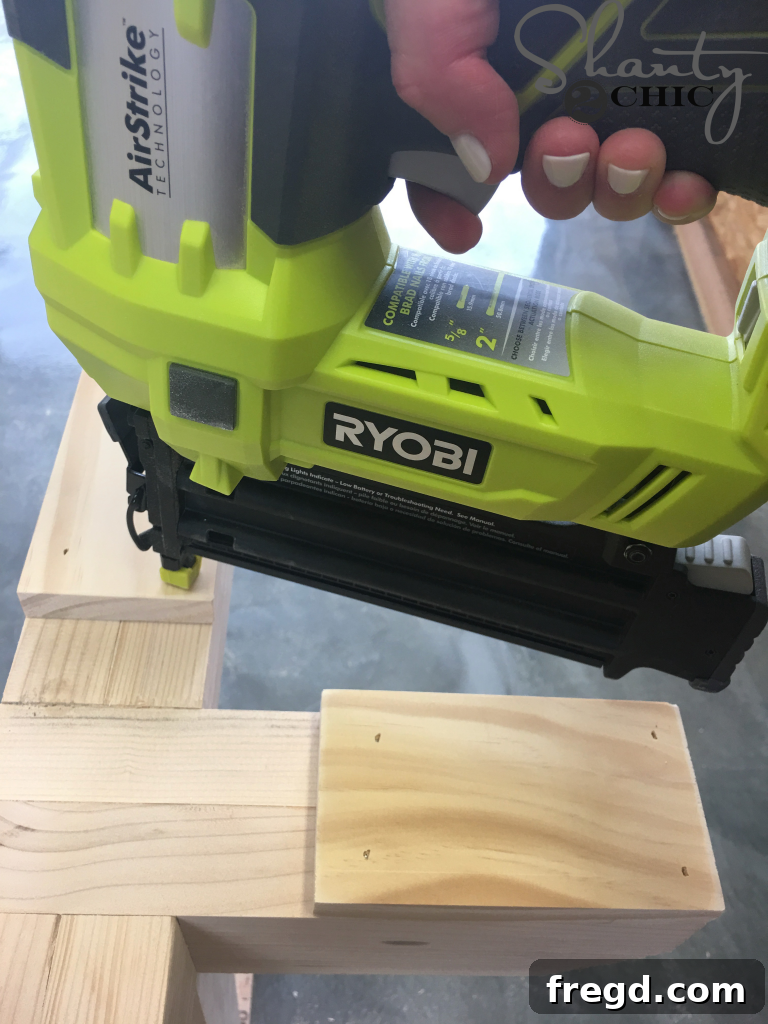
Carefully flip the table base upside down to access the bottom of the feet. Attach the pre-cut foot pads to the end of each foot using 1 1/4″ brad nails and a strong wood glue. The foot pads serve a dual purpose: they protect your flooring from scratches and also provide a more finished, substantial look to the bottom of the legs. We utilized our Ryobi 18-gauge Airstrike nailer for quick and precise attachment, but any brad nailer will work effectively.
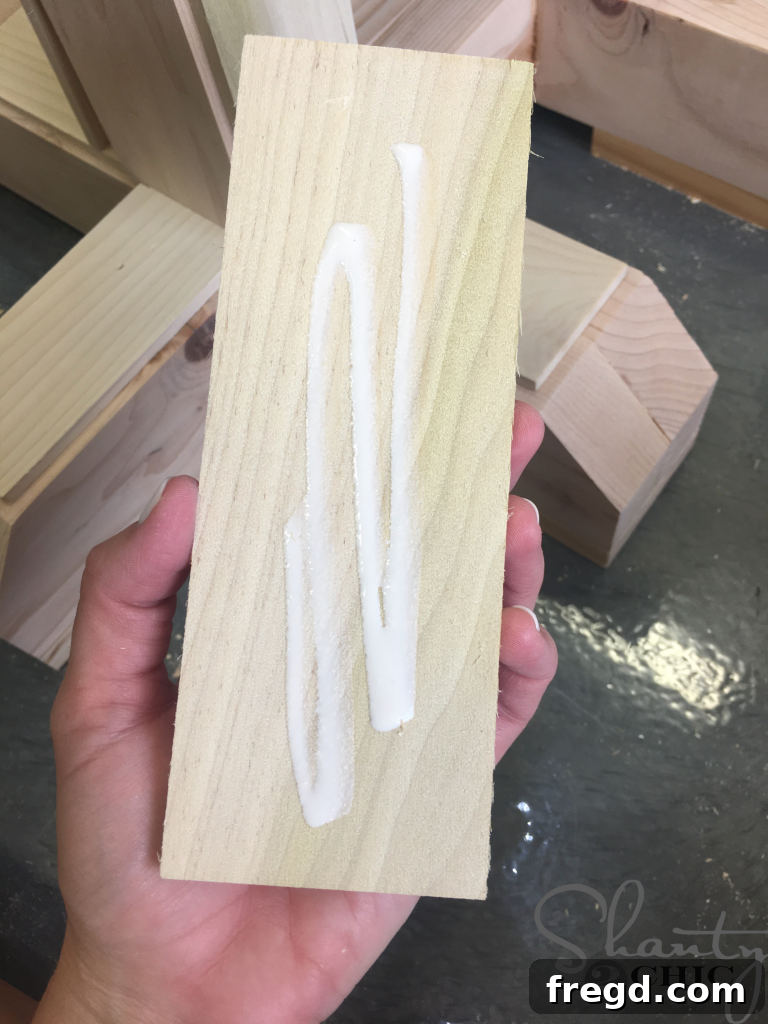
Flip the table back upright. Measure and cut the short craft board pieces to their exact required lengths. Before attaching, apply a thin, even bead of wood glue along the back surface of each trim piece. The glue provides an additional strong bond, ensuring the trim remains securely in place over time.
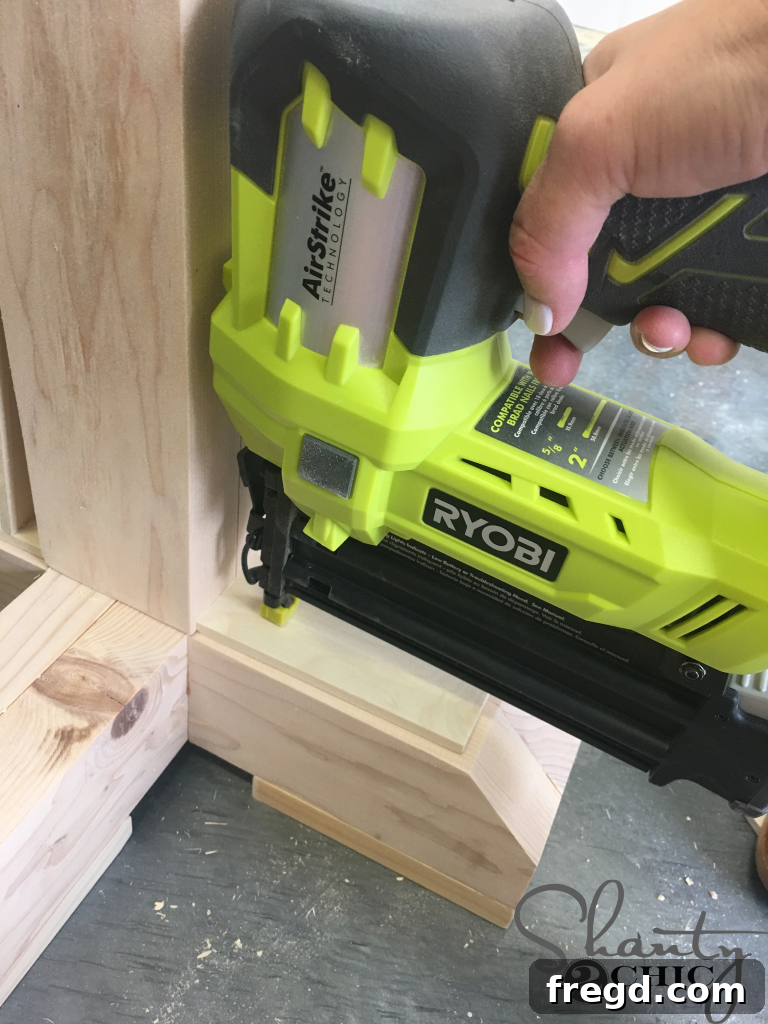
Once glue is applied, carefully position and attach these short craft board pieces to the table base and top frame. Use 1 1/4″ brad nails to secure them in place, ensuring they are flush with the exterior faces of the legs. Every visible side of the legs will receive a craft board trim piece, creating a cohesive and polished look, except for the inner faces of the legs where they meet the runners, which will be covered by the wooden corbels.
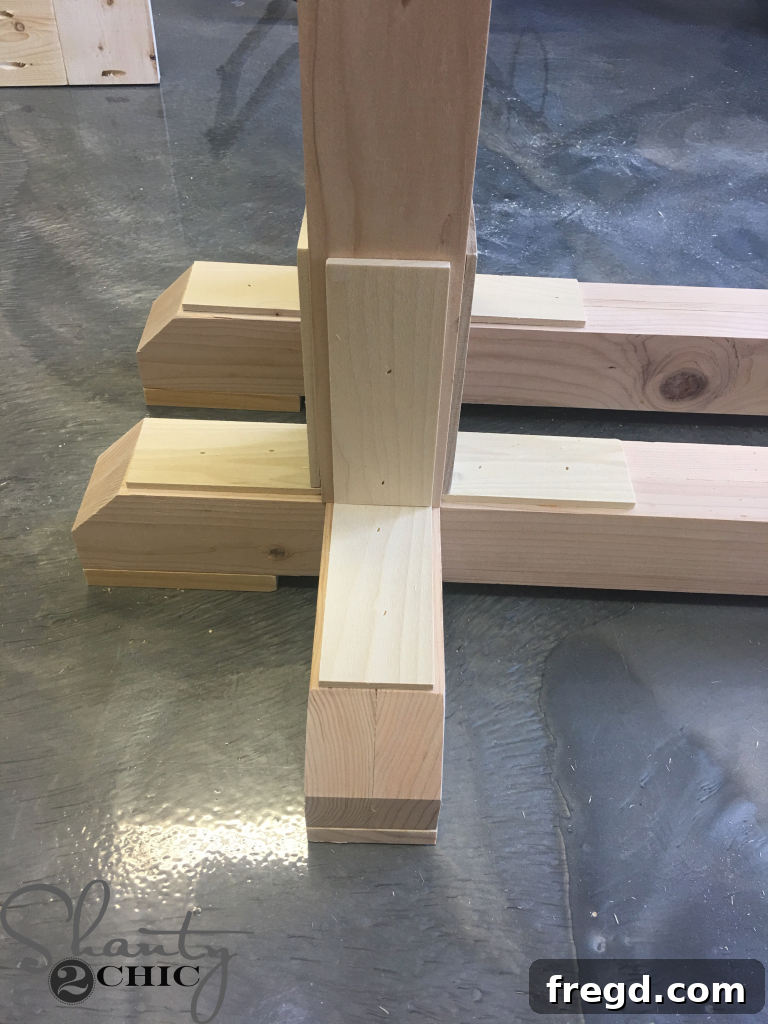
Next, measure and cut the longer craft board pieces to size. These longer pieces will bridge the gap between the short trim pieces, wrapping around the legs and contributing to the paneled look. Attach one long craft board directly on top of each short craft board you just installed, driving nails into both the short trim piece and the side of each leg. Again, use 1 1/4″ brad nails and wood glue for a strong, discreet attachment.
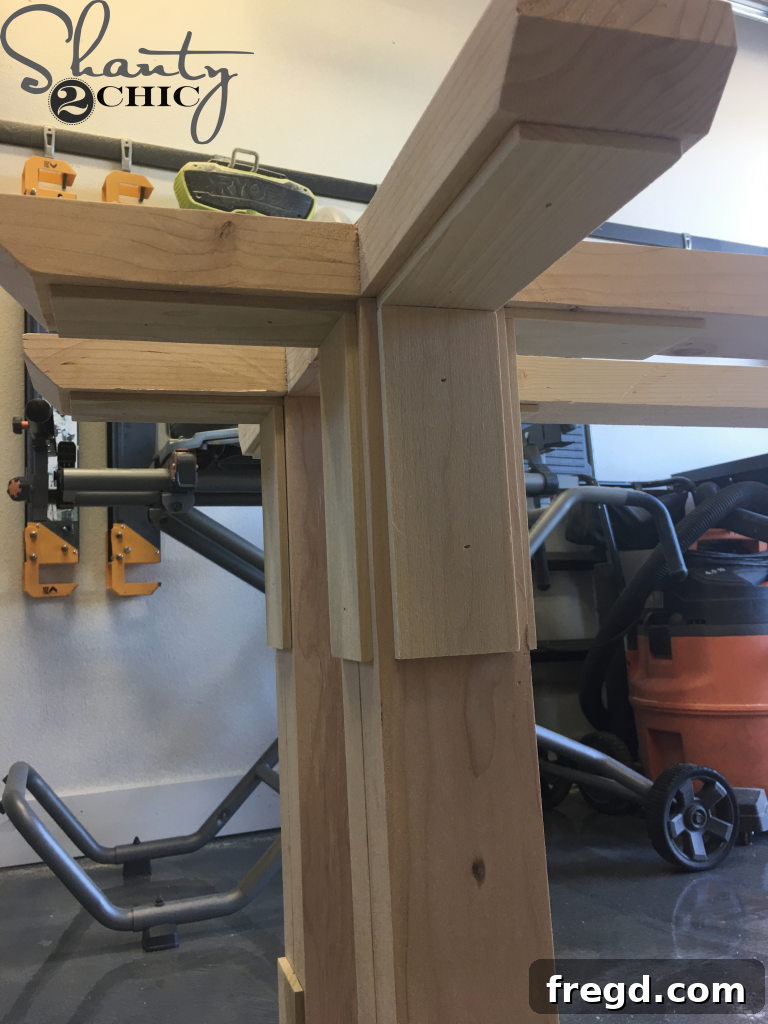
Continue this trimming process by attaching craft board pieces to the top sections of the legs, mimicking the pattern applied to the bottom. This symmetrical application of trim creates a harmonious design and fully encapsulates the laminated leg structure, giving it a complete and intentional appearance. Take care to ensure all trim pieces are perfectly aligned and flush.
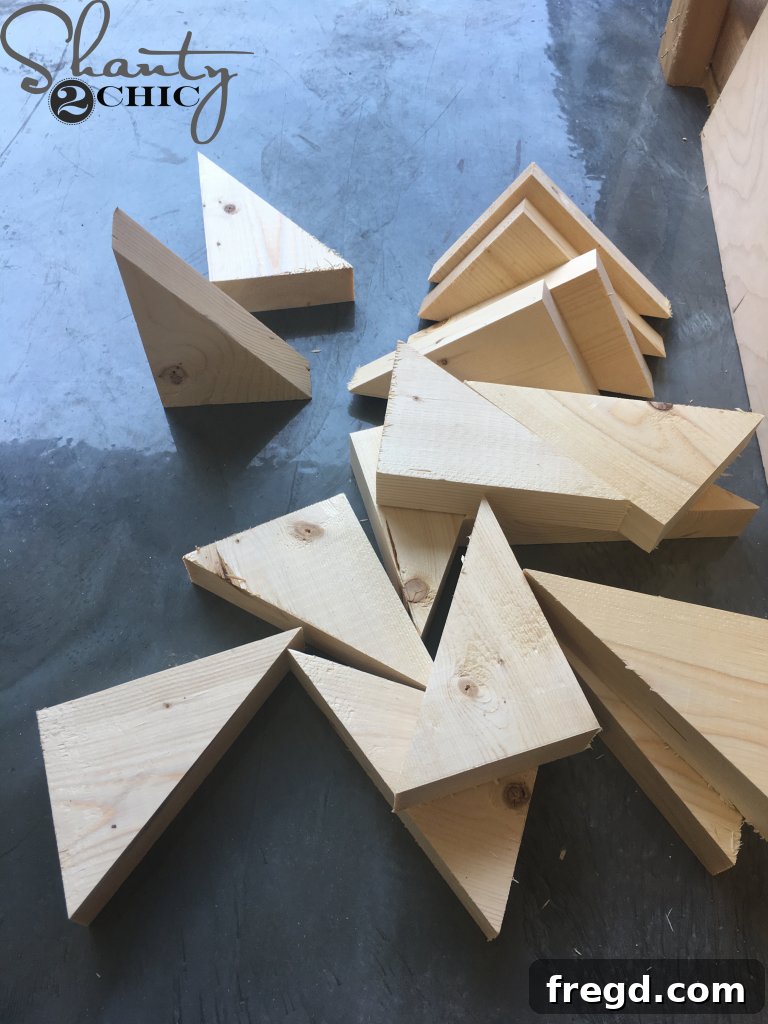
Now for the charming wooden corbels that add to the farmhouse character. Carefully measure and cut all 16 wooden corbels to their specified sizes. These pieces will add both visual interest and a sense of sturdy architectural detail to the table base, enhancing its overall aesthetic. Ensuring consistency in their dimensions will create a balanced and professional look.
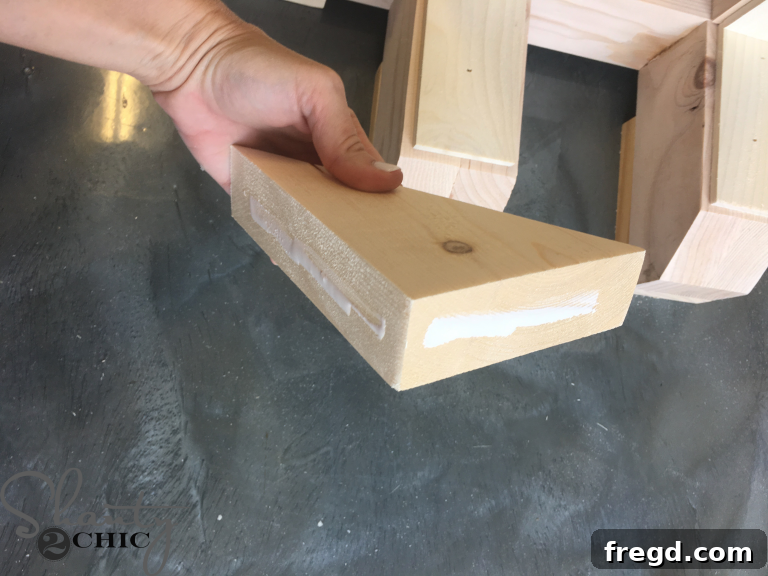
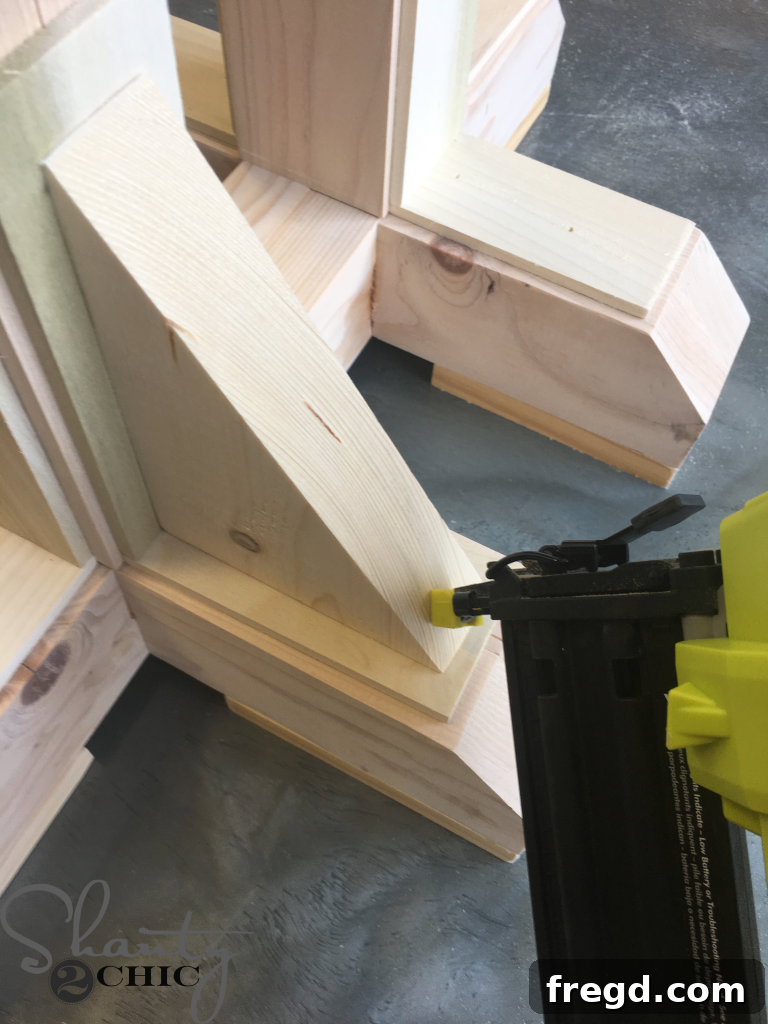
With glue applied, carefully attach one wooden corbel to the outside end of each leg, positioning it underneath the runners. Secure each corbel with 1 1/4″ brad nails and wood glue. When driving the nails, aim them closer to the edges of the corbels. This strategic placement ensures that the nails penetrate through the corbel and into the main table base structure, creating a strong and lasting bond. The corbels enhance the visual weight and classic farmhouse feel of the table.
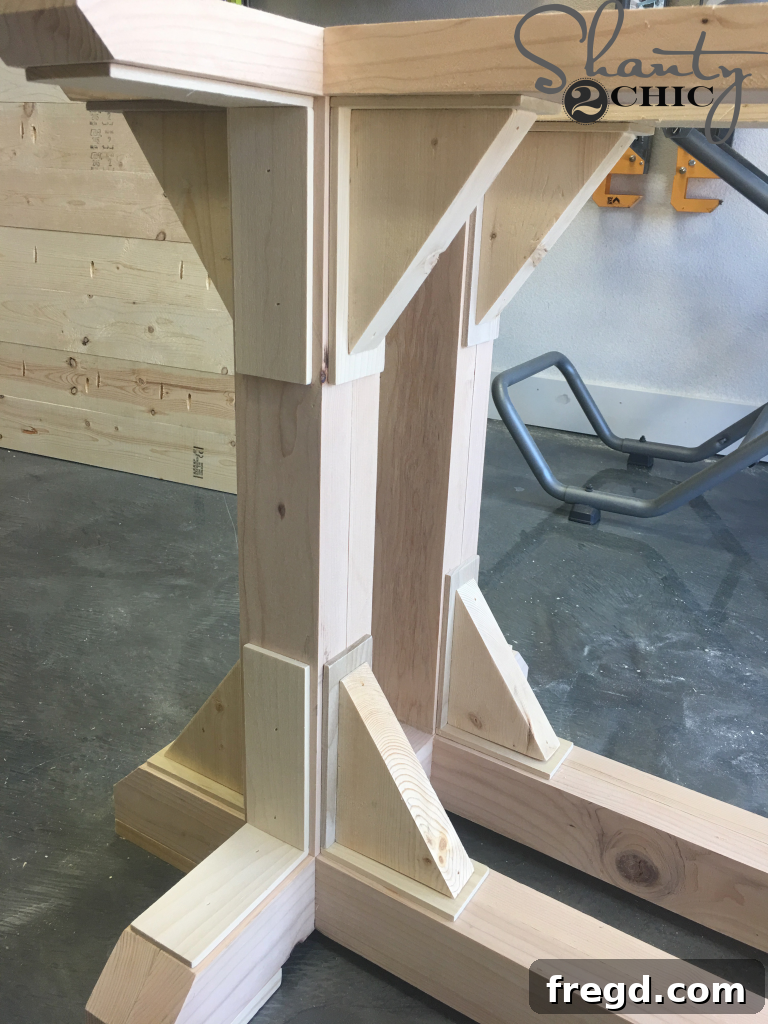
Here you can see one side of the table base with all the wooden corbels beautifully attached. These decorative elements add significant character and reinforce the farmhouse charm, seamlessly blending with the industrial touches that will be added later. The meticulous placement of each corbel creates a sense of balance and craftsmanship.
Building the Table Top: The Heart of Your Dining Table
The tabletop is where aesthetics and functionality truly converge. A well-constructed tabletop is not only beautiful but also durable and smooth, providing an inviting surface for meals and gatherings. We’ll focus on creating a robust and seamless surface.
Step 6: Constructing the Solid Table Top Planks
Creating a beautiful and durable table top requires careful attention to detail, particularly in how the individual planks are joined. This step focuses on assembling the main surface of your dining table, ensuring a flat and robust foundation.
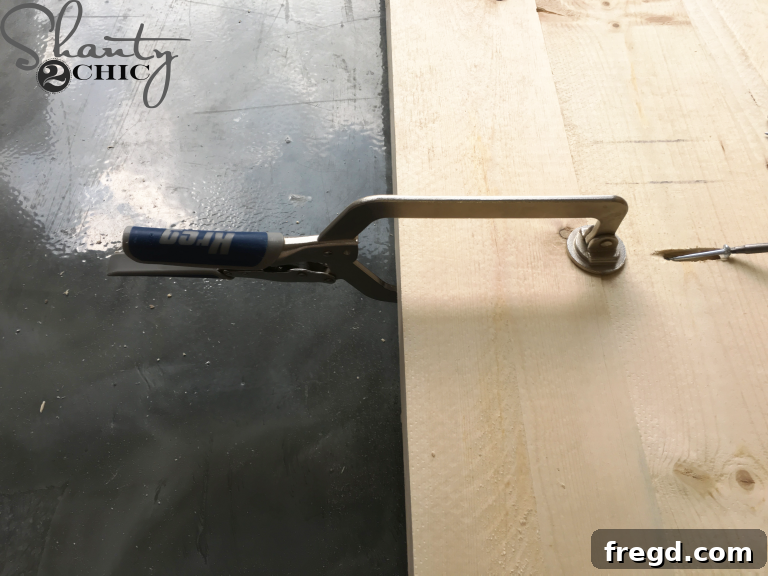
Lay out your table top planks and ensure they are arranged in the desired order, paying attention to grain patterns and any unique characteristics of the wood. Attach these planks together securely using 2 1/2″ pocket hole screws. Drill pocket holes along the long edges of the planks, ensuring proper spacing for maximum strength. Remember to use wood glue in addition to the screws for the strongest possible bond; the glue provides incredible shear strength, while the screws hold everything tight while the glue dries.
Pro Tip: When joining table top planks, achieving a perfectly smooth and level surface is crucial. We highly recommend using a Kreg Face Clamp at every pocket hole joint during assembly. These clamps are designed to hold the edges of the boards flush, preventing them from shifting or bowing as you drive the screws. This technique significantly minimizes the need for extensive sanding later on, ensuring your table top is beautifully flat and seamless.
- Make your table top assembly easier and more precise with Kreg Face Clamps, available HERE on Amazon.
Step 7: Seamlessly Attaching the Bread Boards
The breadboards not only add a finished look to the ends of your table top but also provide structural stability and help minimize wood movement. This step will complete the assembly of your table’s surface.
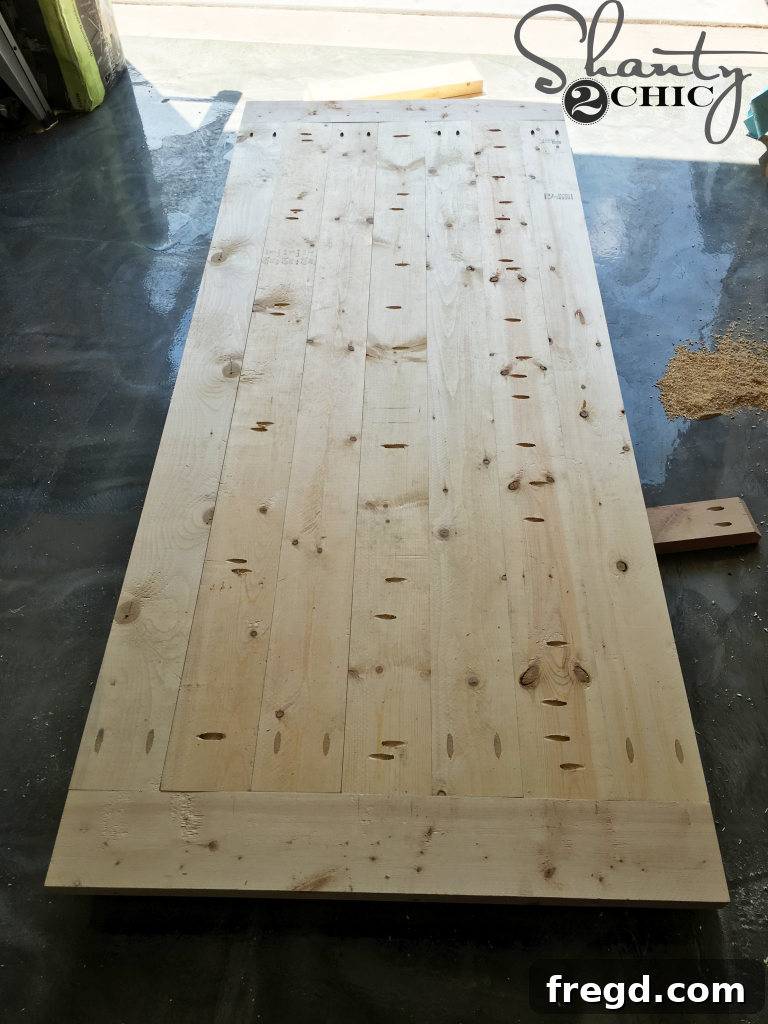
Once all the main table planks are securely attached together, carefully measure the width of your assembled planked top. Then, precisely cut your breadboards to fit these exact dimensions. Breadboards are typically attached to the ends of the table top, running perpendicular to the main planks. Secure them using 2 1/2″ pocket hole screws, driving them through the pre-drilled pocket holes in the ends of the table top planks and into the solid edge of the breadboards. Using wood glue on these joints is also highly recommended for maximum strength and durability.
At this stage, you have a fully assembled table top and a complete table base. You now have a decision to make regarding the final assembly: you can either attach the table top to the base immediately, or you can wait until you’ve moved the table into its final indoor location. We opted to wait until we brought our table inside, as this made the entire piece much easier to maneuver and transport through doorways and into the dining space. This flexibility is particularly useful for larger furniture pieces, preventing potential damage during relocation.
Applying the Finish: Bringing Your Table to Life
The finish is what truly brings out the beauty of the wood and protects your investment for years to come. This section covers the staining and sealing process, which are essential for achieving that desired aesthetic and durability.
Step 8: Applying the Perfect Wood Stain
Staining is a transformative step that not only enhances the natural beauty of the wood grain but also sets the tone for your table’s overall aesthetic. Choosing the right stain can make all the difference in achieving your desired look, from rustic to refined.
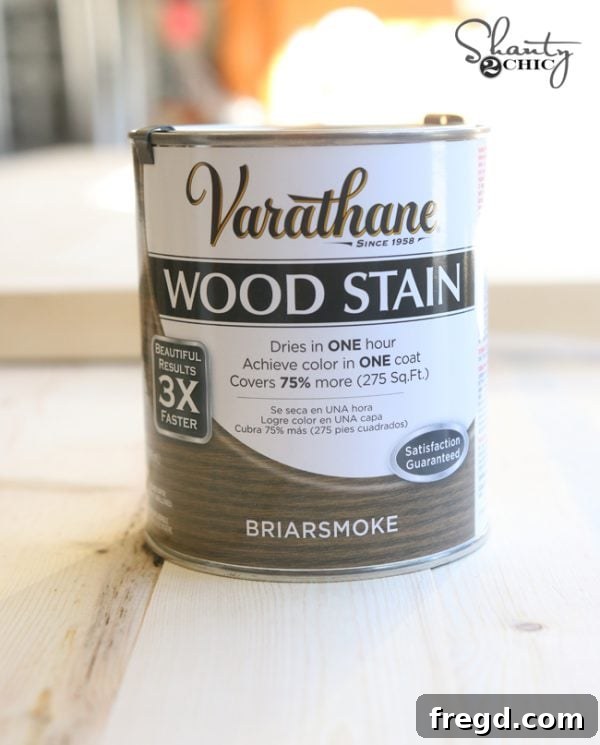
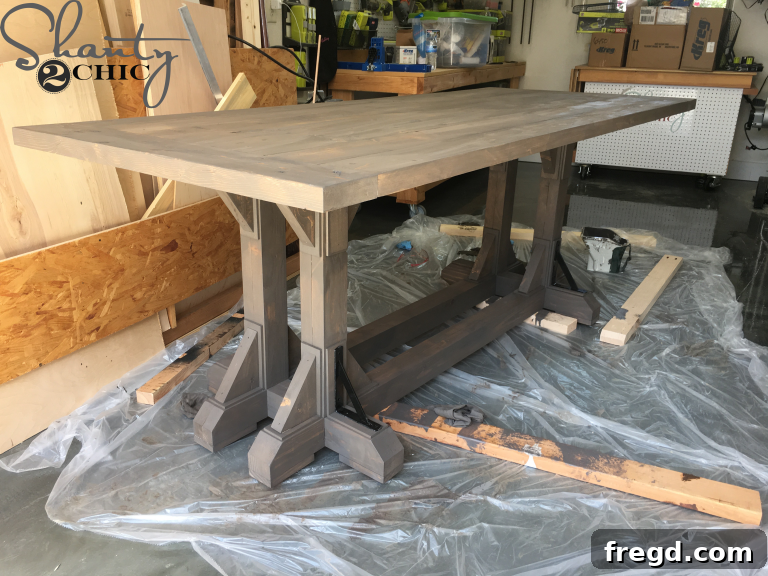
For this project, we chose to apply a single coat of the exquisite Briarsmoke stain by Varathane. This particular shade is renowned for its ability to deliver a sophisticated, weathered look that perfectly complements the industrial farmhouse aesthetic. Its unique blend of grey and brown tones creates depth and character, making the wood grain truly pop while providing a warm, inviting feel.
- You can easily find the beautiful Briarsmoke stain by Varathane, perfect for achieving this rustic-industrial look, here on Amazon.
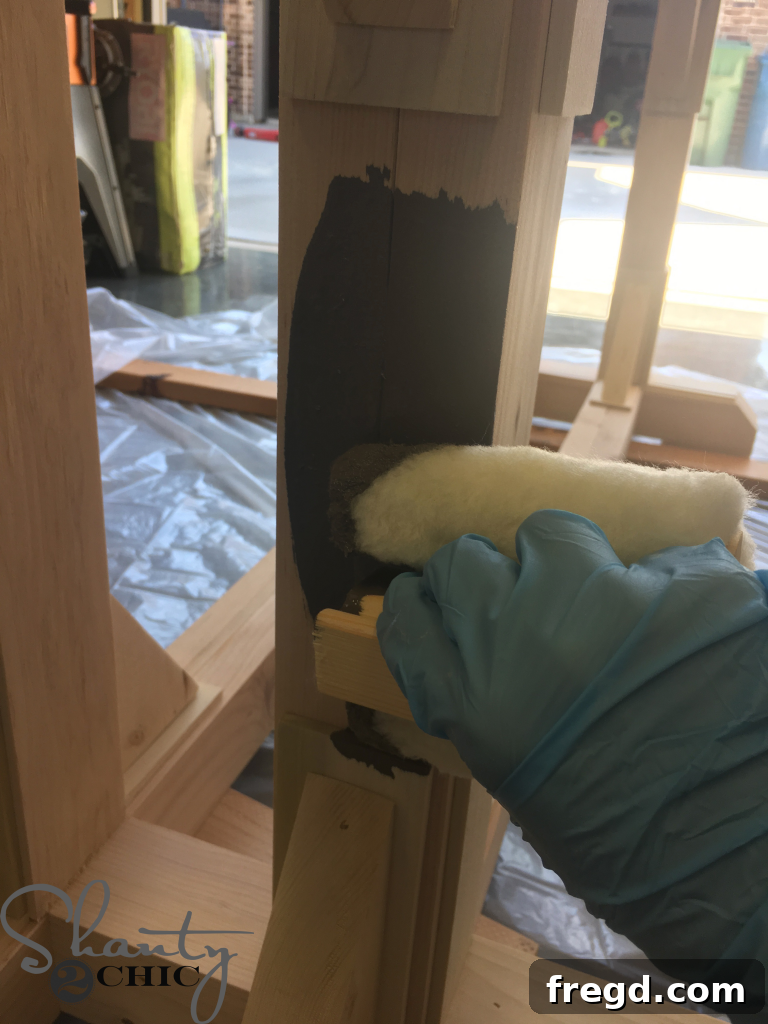
Briarsmoke has quickly become our absolute favorite stain color; it strikes an ideal balance between contemporary grey hues and classic warm browns, making it incredibly versatile for various decor styles. To achieve an even and streak-free application on such a large surface, we highly recommend using a lamb’s wool applicator. These applicators, typically priced around $5 each, allow for smooth, consistent coverage and can significantly speed up the staining process for big pieces. While they are usually single-use, the superior finish and ease of application they offer are well worth it. You can conveniently find these applicators in the stain section of most hardware stores, like Home Depot.
For those who want a more in-depth understanding of the staining process, including tips for preparation, application techniques, and troubleshooting common issues, be sure to check out our detailed “How to Stain Wood” video tutorial! It’s packed with valuable insights to help you achieve a flawless finish.
Step 9: Protecting Your Table with Polyurethane
After achieving your desired stain color, the next critical step is to protect your beautiful new table top with a durable sealant. Polyurethane not only safeguards the wood from spills, scratches, and daily wear and tear but also enhances the depth and richness of the stain, ensuring your table remains stunning for years to come.
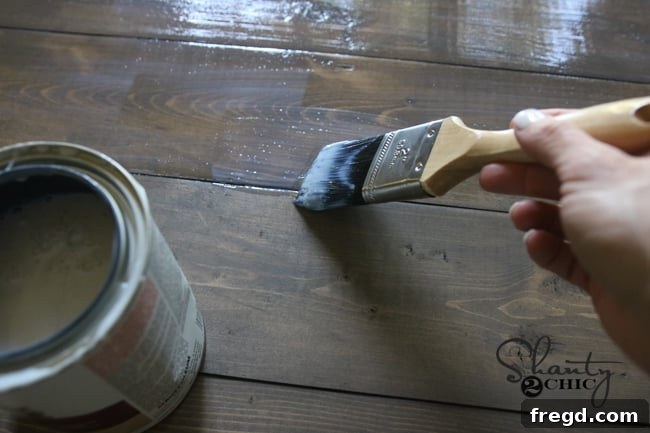
We applied a single coat of our go-to Triple Thick Polyurethane by Varathane, opting for a satin finish. This product is fantastic because, as its name suggests, it provides the protection of multiple coats of traditional polyurethane in just one application, saving you time and effort. The satin finish offers a subtle sheen that looks natural and elegant, without being overly glossy, perfectly complementing the rustic-industrial aesthetic of the table. Ensure you apply it evenly, following the grain of the wood, and allow it to dry completely according to the manufacturer’s instructions.
- For superior protection and a beautiful satin finish, you can easily find the Varathane Triple Thick Polyurethane on Amazon.
Step 10: Installing the Signature Metal Corbels
The final step in constructing your dining table is to attach the industrial metal corbels, which are a defining feature of this design. These elements provide a striking contrast to the warm wood, cementing the table’s unique industrial farmhouse character. This is where the table truly comes to life, showcasing its full design intent.
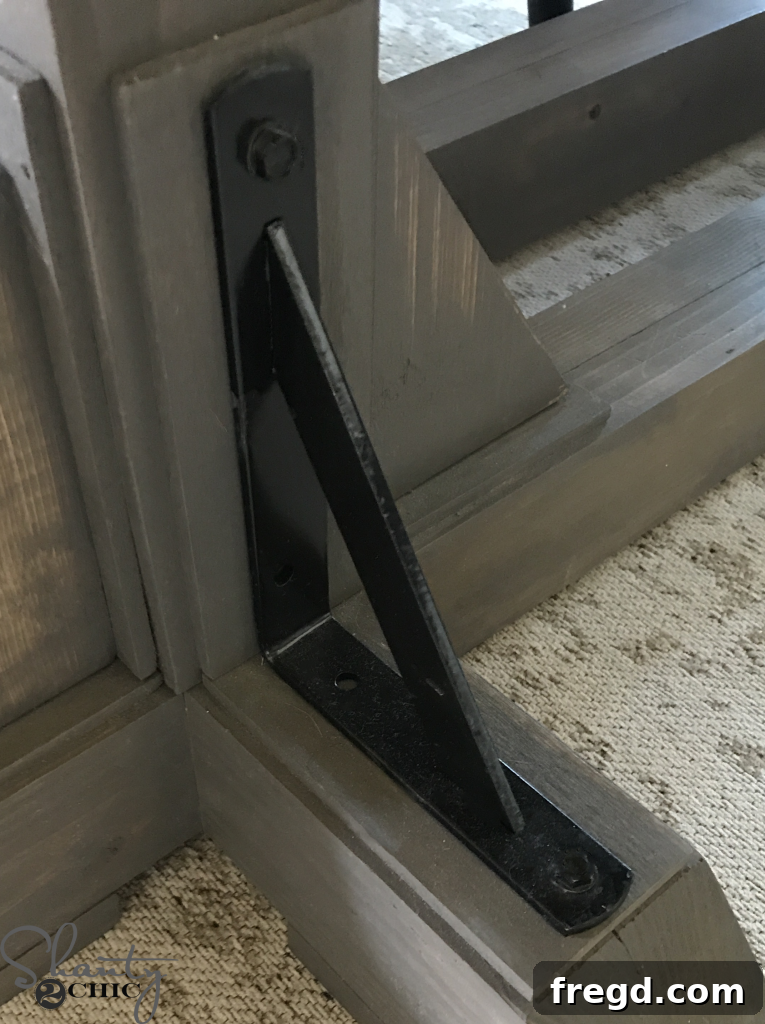
Once both the stain and polyurethane had completely dried and cured, we brought the table base and top indoors. This was the ideal time to securely attach the table top to its base, aligning it precisely and fastening it with the 3″ wood screws (remember, no glue here, allowing for future disassembly). Then, the moment arrived to install the eight metal brackets, which serve as the iconic industrial corbels. We attached them firmly using hex screws, strategically placing them to enhance both the aesthetic and the perception of structural support.
To ensure a cohesive and polished look, we took an extra step: we used black acrylic paint to carefully color the heads of the hex screws black. This small detail ensures that the fasteners blend seamlessly with the dark metal of the corbels, creating a truly professional and finished appearance. These metal corbels were an incredible find, and we sourced them for this project.
- These distinctive metal brackets, which are integral to the industrial aesthetic of this table, were purchased on Amazon.
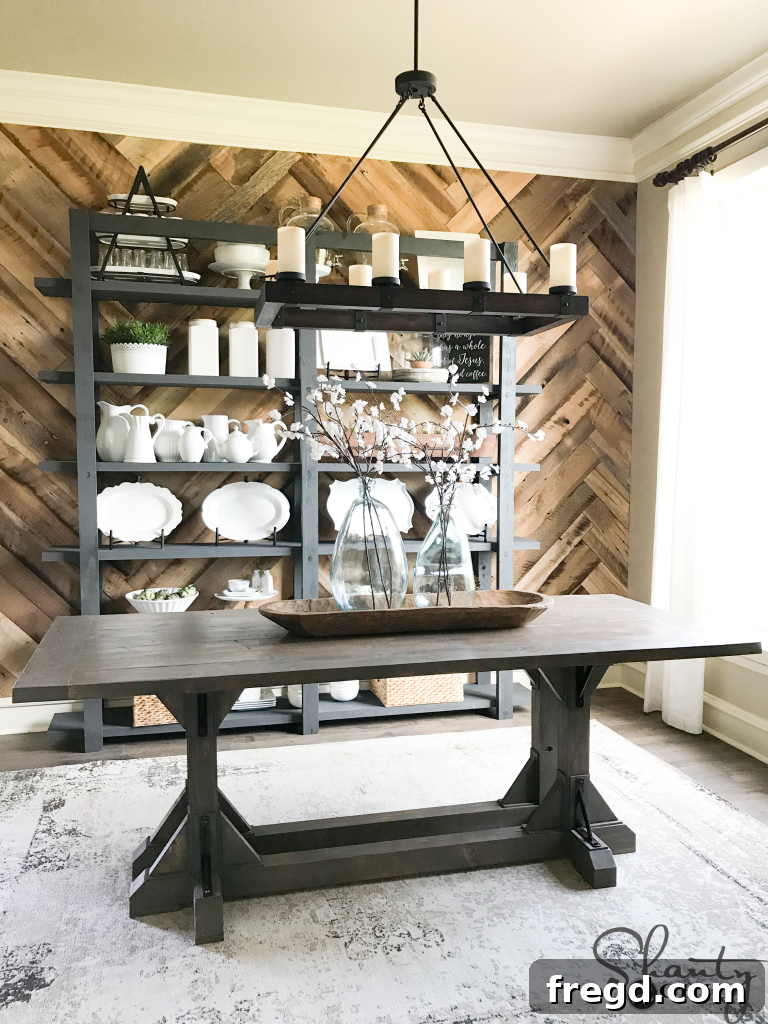
And just like that, the journey from raw lumber to a stunning, custom-built dining table was complete! The transformation is truly satisfying. To style our newly finished table, we added a charming bread bowl as a rustic centerpiece, complemented by a pair of elegant vases holding fresh stems. These simple touches enhance the table’s character and make the dining space feel even more inviting.
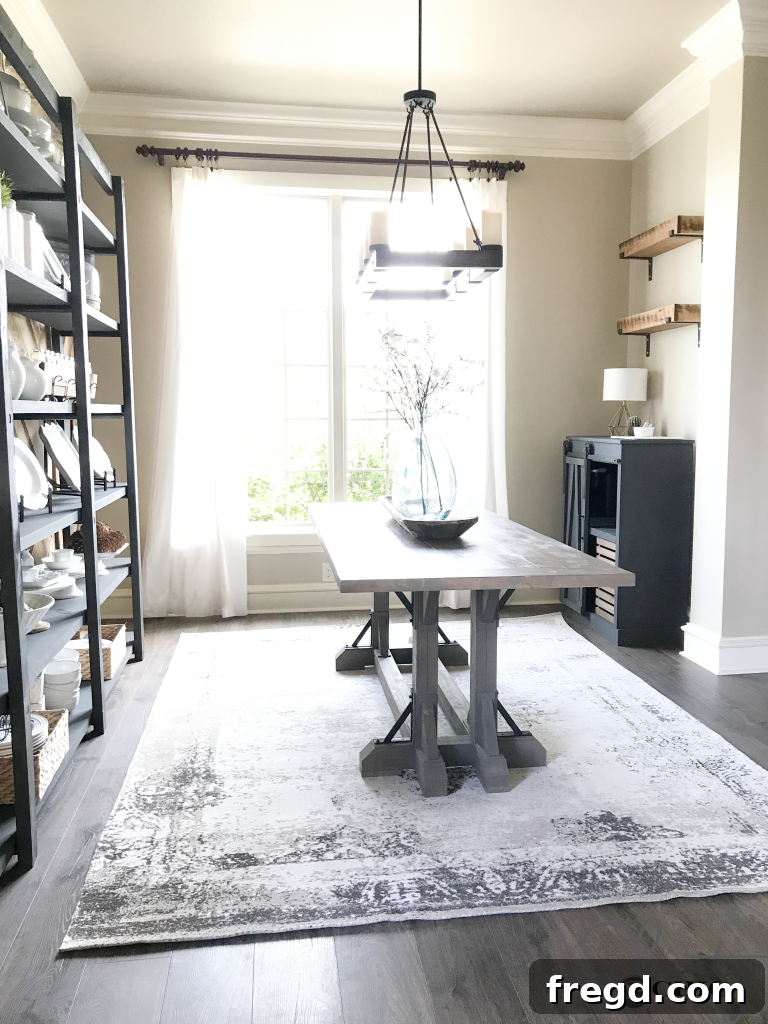
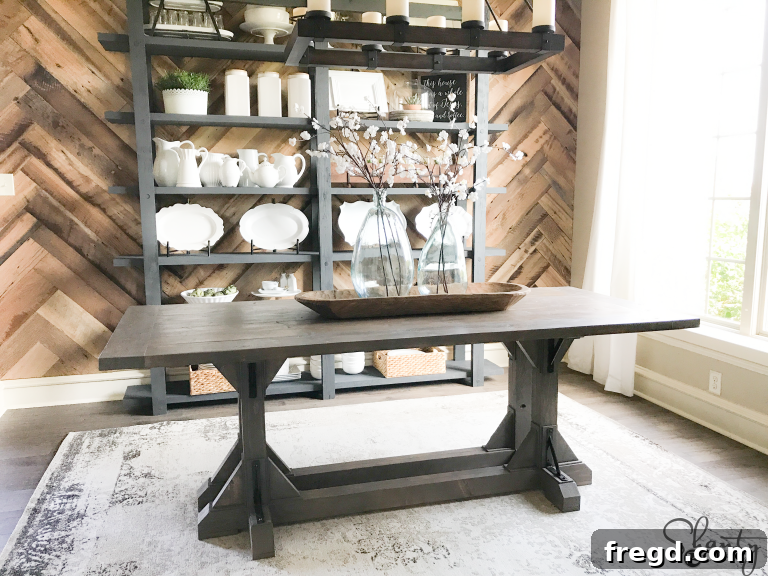
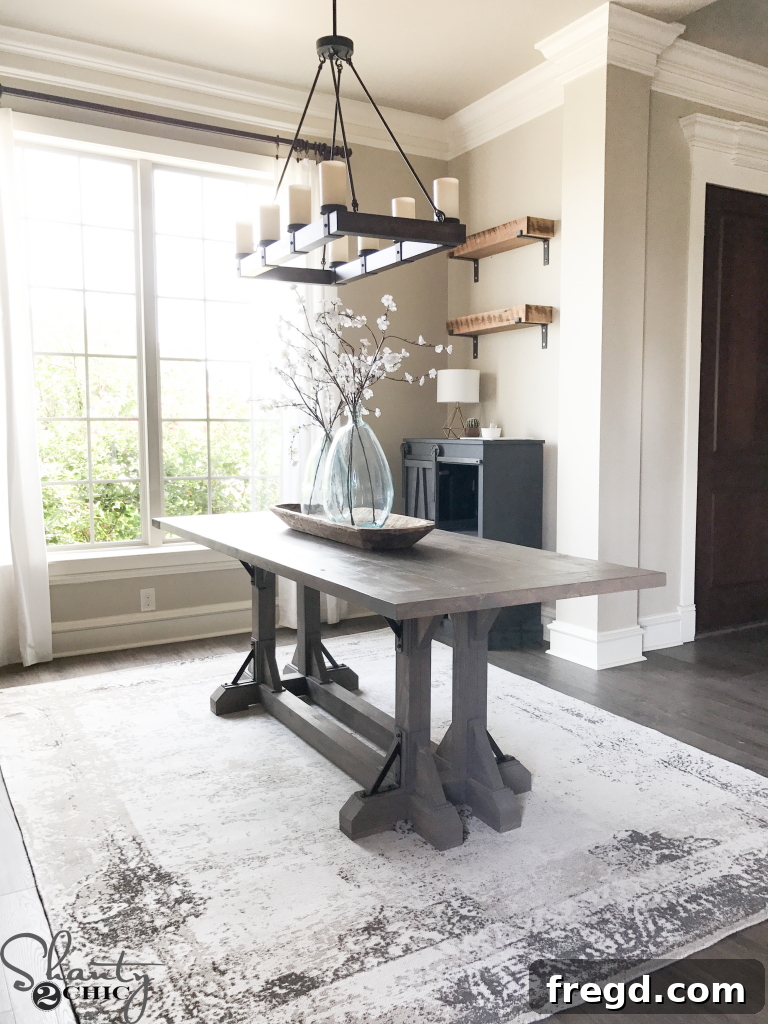
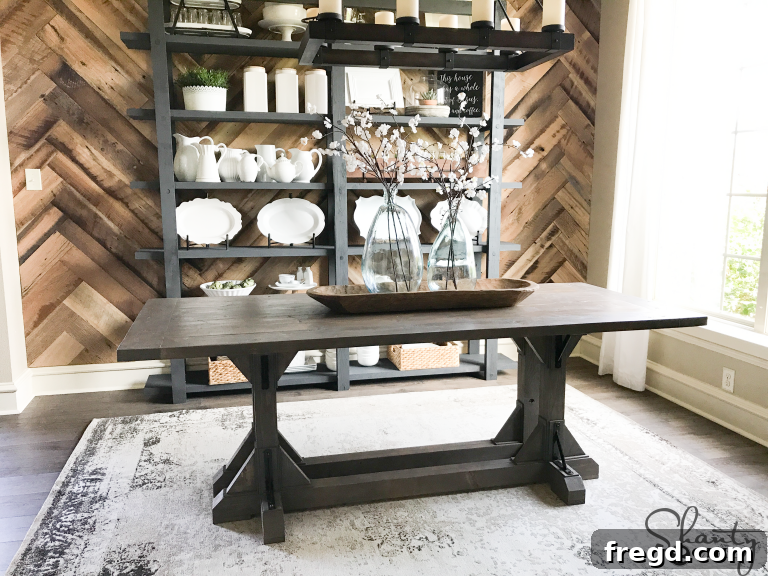
Complete Your Look: Room Decor and Finishing Touches
Beyond the stunning dining table, every element in this room contributes to its cohesive and inviting industrial farmhouse appeal. If you’re looking to replicate the full aesthetic or simply find inspiration for other pieces, here’s where you can discover details about the complementary items:
Vases: Find the elegant vases that adorn our table HERE.
Stems: The beautiful decorative stems that bring a touch of nature to the centerpiece can be found HERE.
Bread Bowl: This unique and charming bread bowl was a special find from a vintage shop in Tennessee, adding authentic character to the space.
Chandelier: Illuminate your dining area with a similar statement chandelier, available HERE.
Rug: Anchor your dining room with a stylish rug that complements the overall design. Our chosen rug can be found HERE.
Plate Rack: Stay tuned! Free plans for this elegant plate rack are coming soon, allowing you to build your own custom storage and display solution.
Items on Plate Rack: We’ll be sharing detailed information about the charming items displayed on our plate rack very soon!
Herringbone Wall Treatment: Learn how to create this stunning DIY barn wood herringbone wall treatment that adds texture and visual interest to the room HERE.
Curtains: Find the perfect window treatments to complete your room’s ambiance HERE.
Paint Colors: The soothing Wall color is ‘Soft Stones’ by Valspar, and the crisp Trim color is ‘Ivory Lace’ by Valspar, creating a balanced backdrop for the furniture.
Flooring: Discover details about our beautiful and durable flooring choice HERE.
Looking for more inspiration to furnish your dining area? Be sure to check out our complete collection of DIY dining table plans to discover a variety of styles and designs that will perfectly suit your needs and elevate your home decor!