
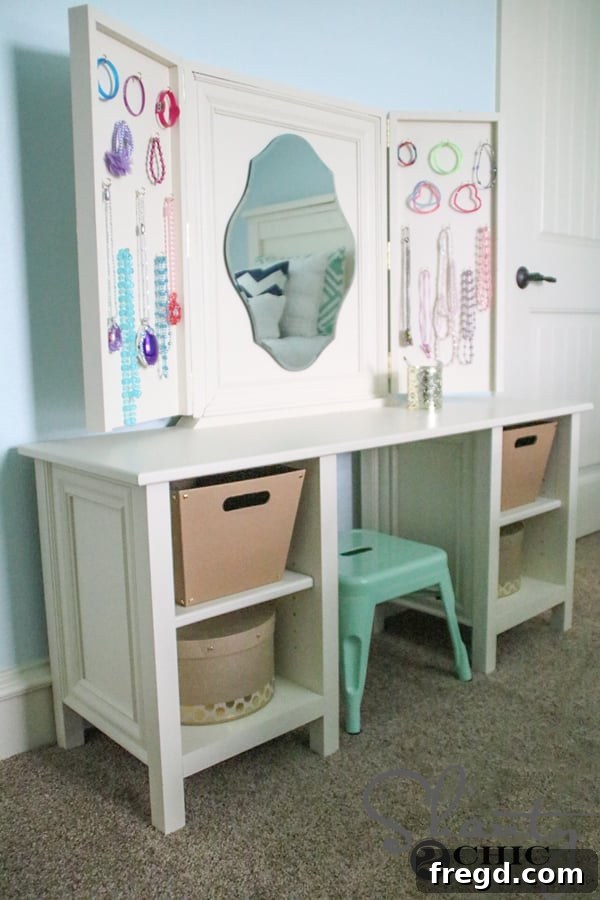
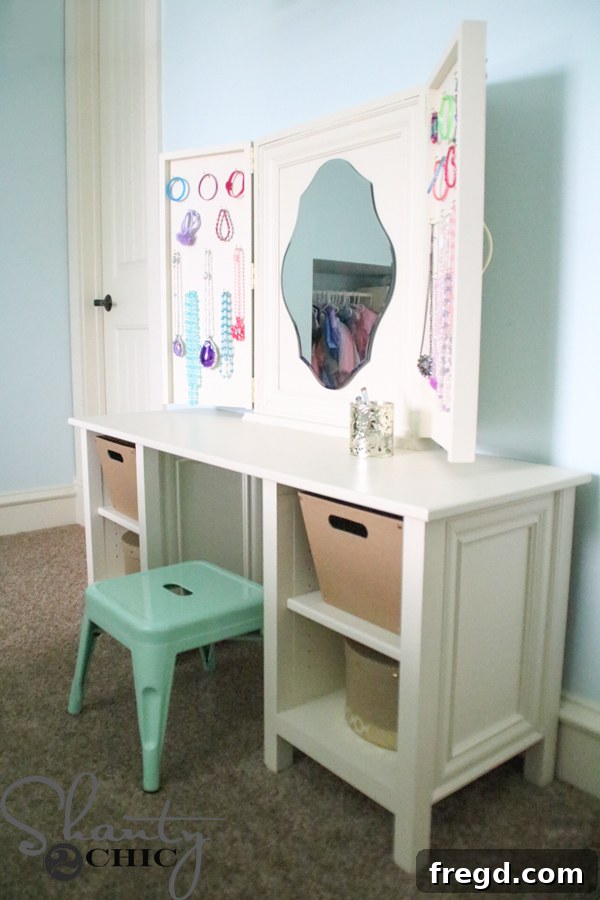
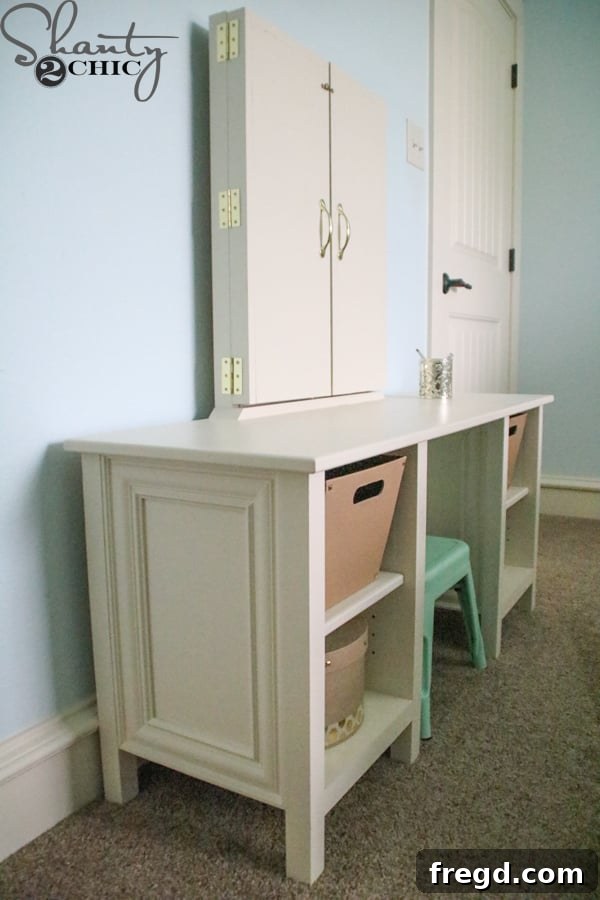
Hey there, fellow DIY enthusiasts! This week, I realized a major oversight – I never got around to sharing the detailed plans for the fantastic DIY Kids Vanity I crafted for my daughter! In the rush to complete and hide it before Christmas, the excitement overshadowed sharing the build plans and the grand reveal with all of you. After spending countless hours browsing online for high-quality, solid wood vanities for kids, I kept coming up short. Everything I found seemed to be either exorbitantly priced or constructed from flimsy, subpar materials.
That’s when inspiration struck: why buy when you can build? I decided to take matters into my own hands, and the result was truly rewarding. Not only was I able to construct a piece that was far more beautiful and sturdy than anything I discovered online, but it also only cost me approximately $150! This figure is remarkably close to the price tag of those “wood” vanities that were, frankly, quite disappointing in quality. The satisfaction of creating something custom, durable, and budget-friendly for my little one was immense. And now, I’m thrilled to finally unveil it to you!
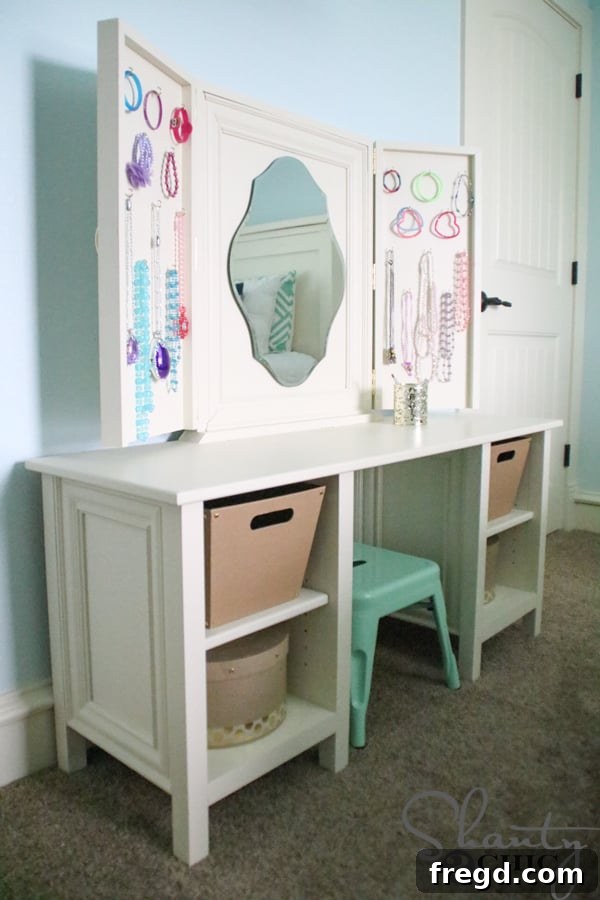
DIY Kids Vanity: Build a Dream Playtime Station & Desk
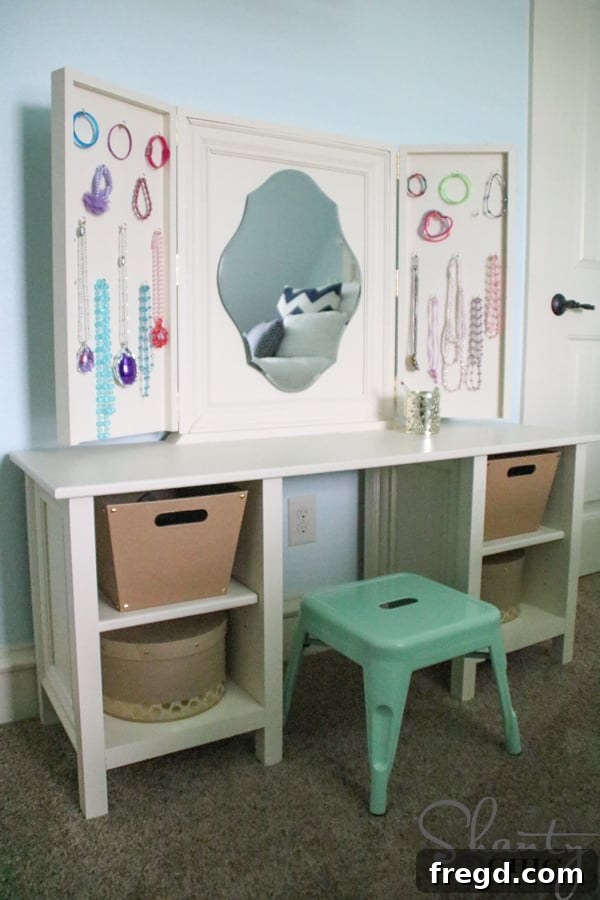
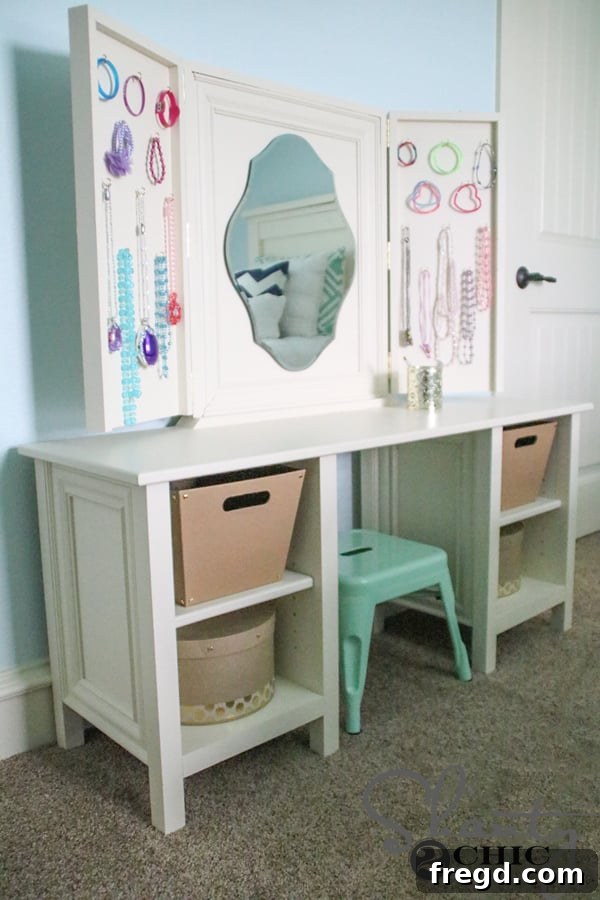
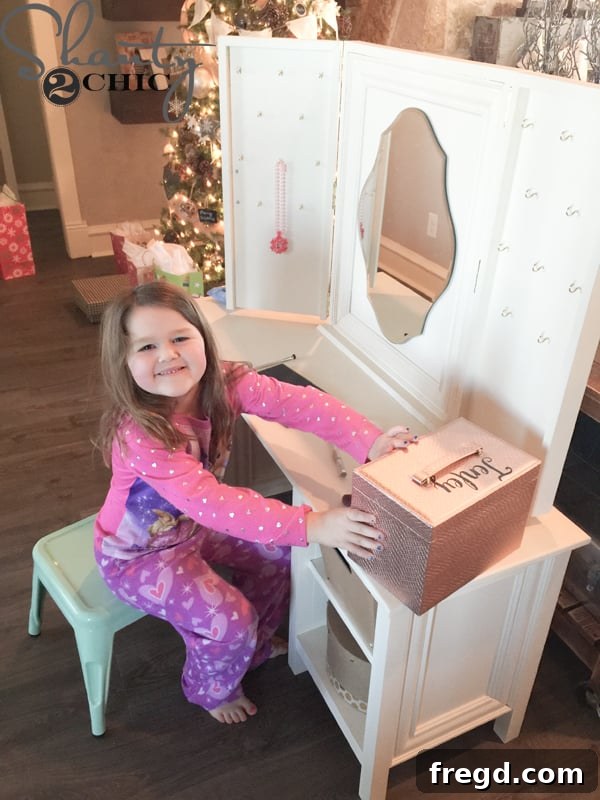
Since its completion, this vanity has become a constant source of joy for my daughter. Even six months later, she still plays with it every single day, immersing herself in imaginative worlds. Witnessing her happiness truly warms my heart! I meticulously designed this piece to seamlessly blend with the existing decor of her room, ensuring it looks like a cherished piece of furniture rather than a mere toy. This project falls into the intermediate skill level for DIYers, but for those looking for a simpler build or a multi-functional piece, you can easily omit the top mirror section to create a stylish and practical student desk.
Why Build Your Own Kids Vanity? The Benefits of a DIY Approach
In a world saturated with mass-produced furniture, building your own children’s vanity offers a multitude of benefits that extend far beyond cost savings. When I first embarked on this project, my primary motivation was to find a durable, high-quality wooden vanity. However, the market was flooded with options made from particle board or MDF, often disguised as “wood” vanities, that simply wouldn’t stand the test of time or enthusiastic child’s play. By choosing to build, you gain complete control over the materials, ensuring a sturdy construction that will last for years to come – perhaps even becoming a cherished heirloom.
Furthermore, a DIY project allows for unparalleled customization. You can select the exact wood type, finishes, and hardware that complement your child’s room aesthetic perfectly, creating a truly personalized space. The sense of accomplishment you’ll feel, knowing you’ve crafted something beautiful and functional with your own hands, is incredibly rewarding. For your child, it’s not just a piece of furniture; it’s a tangible representation of your love and effort, sparking creativity and imaginative play. This vanity is not just a place for dress-up; it’s a dedicated space for art, homework, and dreaming big, growing with your child through various stages of their development.
Get Started: Download Your Free DIY Kids Vanity Plans!
Ready to embark on this rewarding woodworking journey? The first step is to grab the comprehensive plans I’ve put together. These plans provide all the necessary measurements and detailed diagrams to guide you through each stage of the build. Don’t worry about guesswork; everything you need for a successful project is laid out clearly. Whether you’re a seasoned woodworker or looking to tackle an intermediate-level project, these plans will be your invaluable companion.
You can easily access and print the complete plans by clicking HERE or by selecting the image below. Having a printed copy handy as you work will make following the steps much smoother and more enjoyable.
Gather Your Materials & Essential Tools
Before diving into the build, it’s crucial to have all your materials and tools prepared. This project primarily utilizes plywood, along with various trim pieces and standard woodworking hardware. For specific dimensions and quantities, always refer to the detailed plans. Here’s a general overview of what you’ll need:
Key Materials:
- Plywood (for main vanity body, top, shelves, mirror/door panels)
- 2×2 lumber (for legs)
- 1×2 lumber (for trim pieces)
- Screen mold (for decorative edges)
- Casing (for decorative accents and hiding pocket holes)
- Wood glue
- 1 1/4″ brad nails
- 3/4″ pocket hole screws
- Hinges (for mirror doors)
- Decorative pulls (for doors)
- Gold cup hooks (for jewelry storage)
- Wood filler (for nail holes)
- Sandpaper
- Primer and paint (e.g., Valspar Ivory Lace)
Essential Tools:
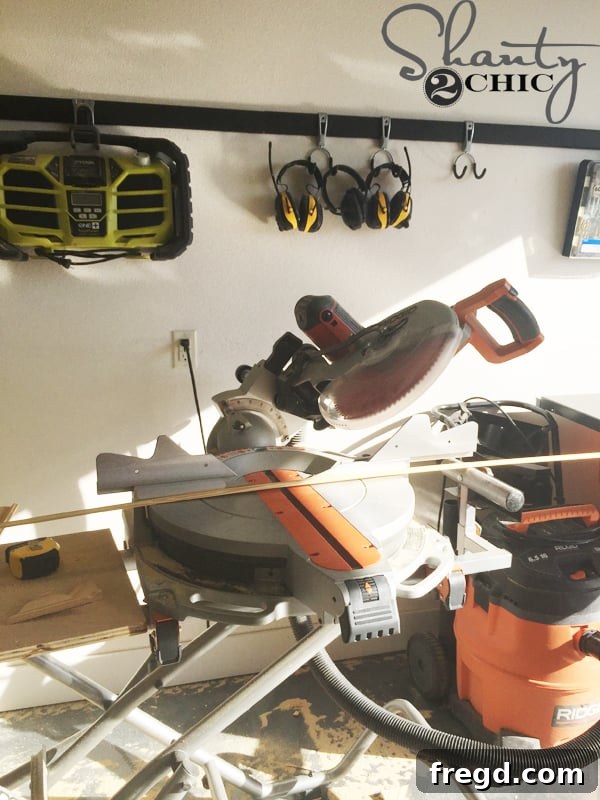
- Miter saw (for accurate cross cuts and angled cuts)
- Table saw or circular saw (for ripping plywood, or have your lumber store do it)
- Kreg K5 Pocket-Hole Jig (for strong, concealed joinery) – You can find the Kreg K5 HERE on Amazon.
- Kreg Shelf Pin Jig (for adjustable shelves) – You can find the Kreg Shelf Pin Jig HERE on Amazon.
- Drill/driver (for pocket holes, screws, and hardware)
- Brad nailer (for attaching trim and casing)
- Measuring tape and pencil
- Clamps (essential for holding pieces during assembly)
- Safety glasses and hearing protection
Step-by-Step Construction Guide: Building Your DIY Kids Vanity
Let’s get down to building! Follow these steps carefully, referring to your plans for precise measurements and angles. Accuracy at each stage will ensure a smooth assembly and a professional-looking finished product.
1. Prepare Your Plywood
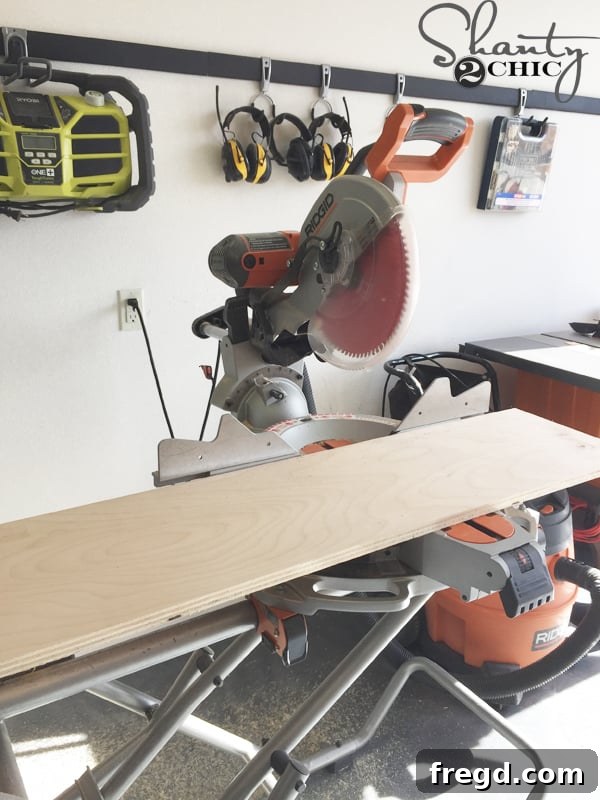
Begin by having your larger plywood sheets ripped down to the required widths at your local lumber store. This saves you time and ensures perfectly straight cuts. Once home, use your miter saw to make all the necessary cross cuts according to the dimensions in your plans. Precision here sets the stage for the entire project.
2. Drill Pocket Holes for the Vanity Base
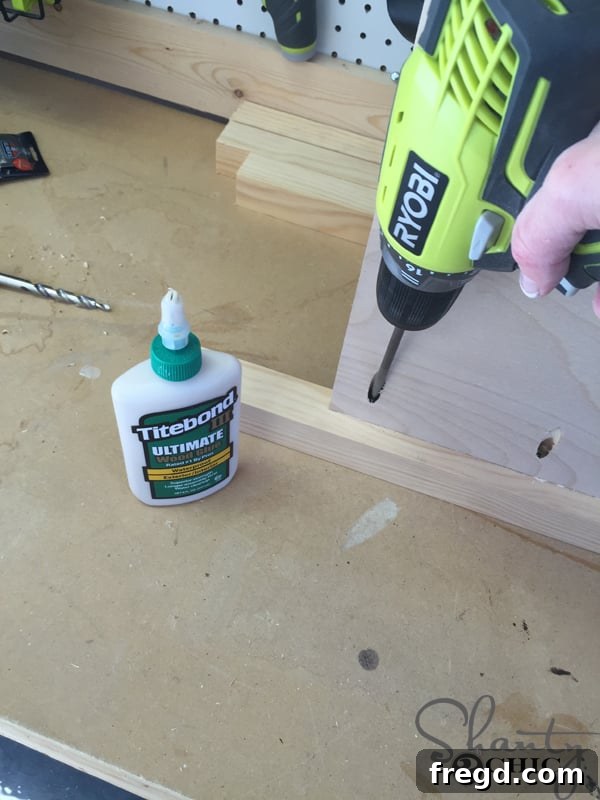
Using your Kreg K5 Pocket-Hole Jig, drill 3/4″ pocket holes into the designated side pieces that will form the base of the vanity. Pocket holes provide incredibly strong joints while remaining hidden, contributing to the clean, furniture-grade finish of your vanity. Ensure you’re drilling into the correct edges as indicated in the plans.
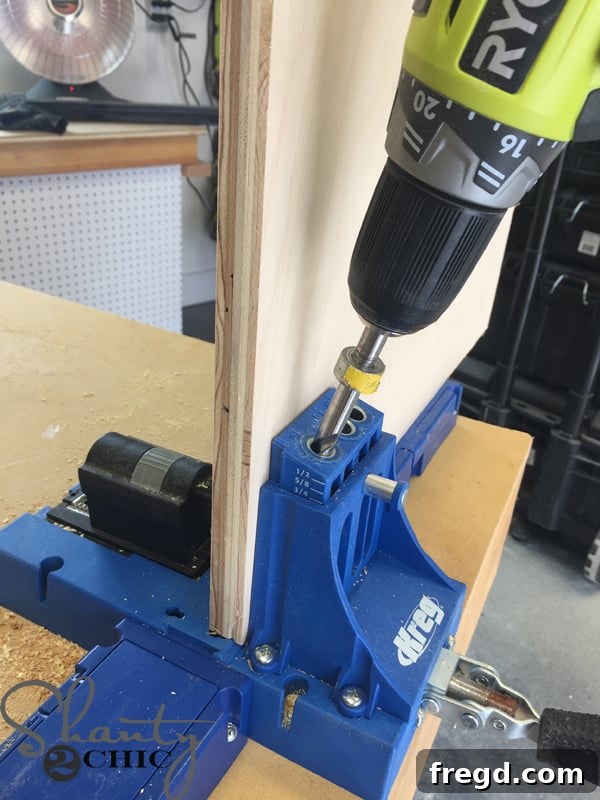
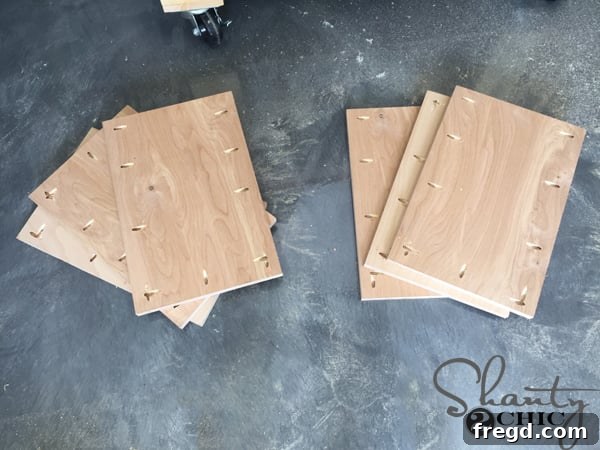
After drilling, you’ll have your plywood pieces ready with the essential pocket holes. These will be crucial for joining the main components of the vanity base securely.
3. Create Adjustable Shelf Pin Holes
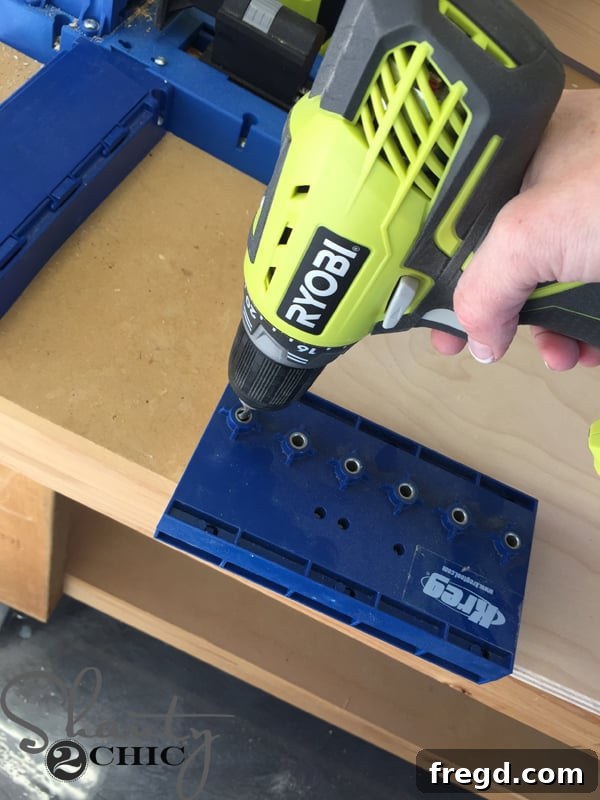
Next, use your Kreg Shelf Pin Jig to drill shelf pin holes into the inside faces of the side pieces. These holes will allow you to install adjustable shelves later, providing flexible storage options for your child’s treasures, whether it’s books, toys, or craft supplies. Ensure these are accurately spaced and aligned.
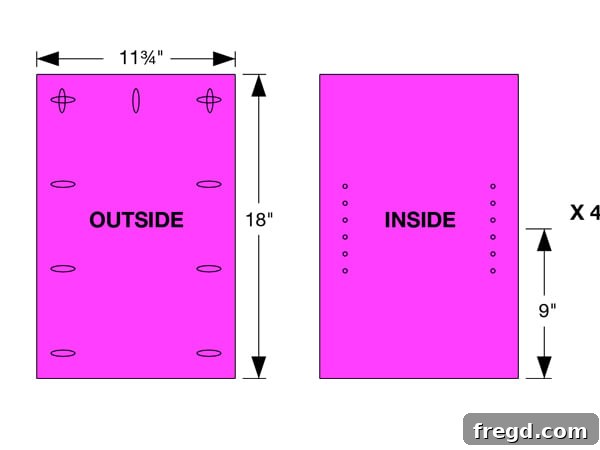
At this point, you should have four identical pieces, each featuring pocket holes on one side and the newly drilled shelf pin holes on the opposite side. These pieces form the structural core of your vanity’s storage cubbies.
4. Cut and Attach the Legs
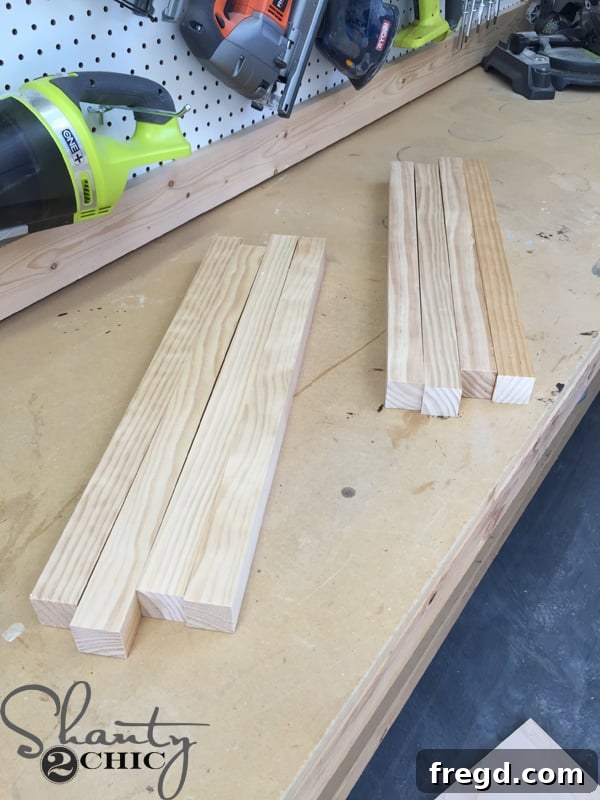
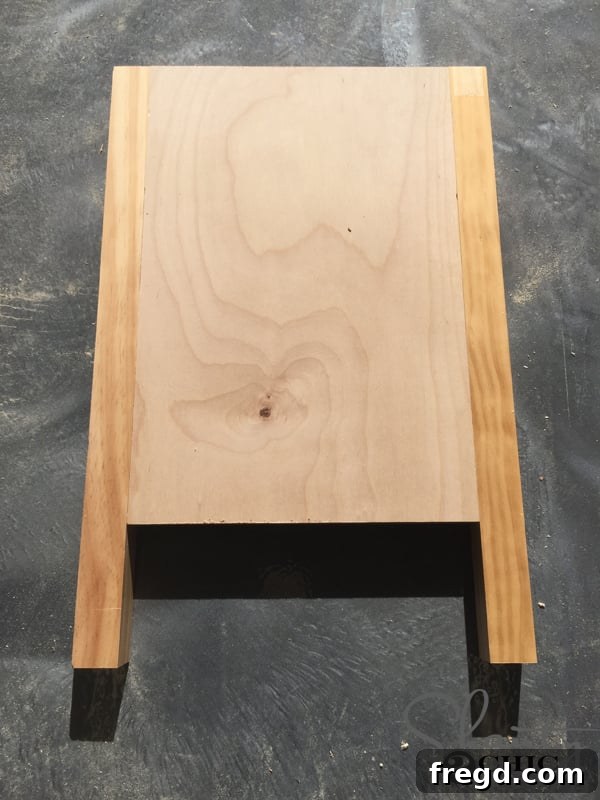
Proceed to cut the 2×2 lumber to the specified lengths for the vanity legs according to your plans. Once cut, attach these legs to the plywood side pieces. Crucially, the side of the plywood with the shelf pin holes should be flush with the outer edge of the 2×2 leg. This deliberate placement leaves a small recess on the other side, which will later be perfectly covered by decorative casing, neatly concealing all pocket holes for a polished look.
After attaching the legs, you will have four complete side units. Each unit will have a distinct “outside” appearance with the leg attached flush…
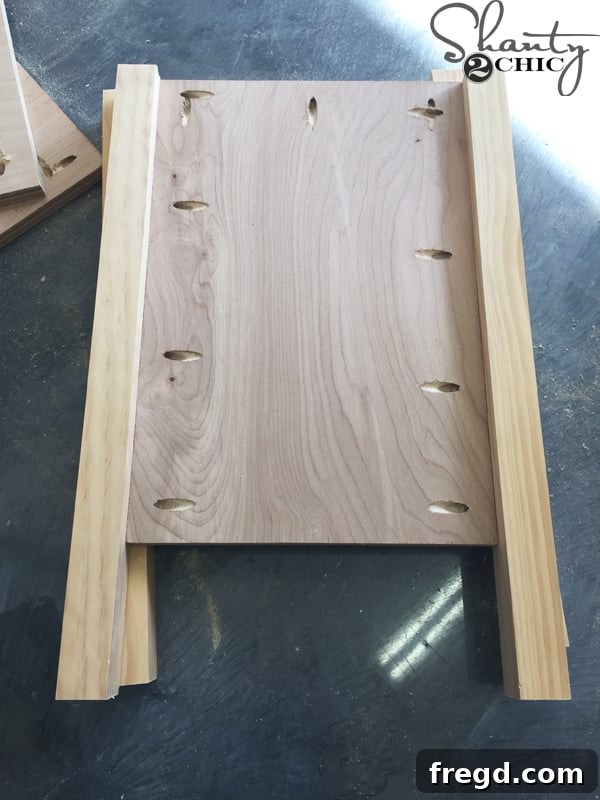
…and an “inside” appearance showcasing the shelf pin holes.
5. Assemble the Cubby Bases
Now, connect two of the side pieces you’ve just assembled with a back piece for the vanity’s cubby section. Ensure that the pocket holes are facing towards the back, where they will remain out of sight. Use wood glue and pocket hole screws for a strong bond.
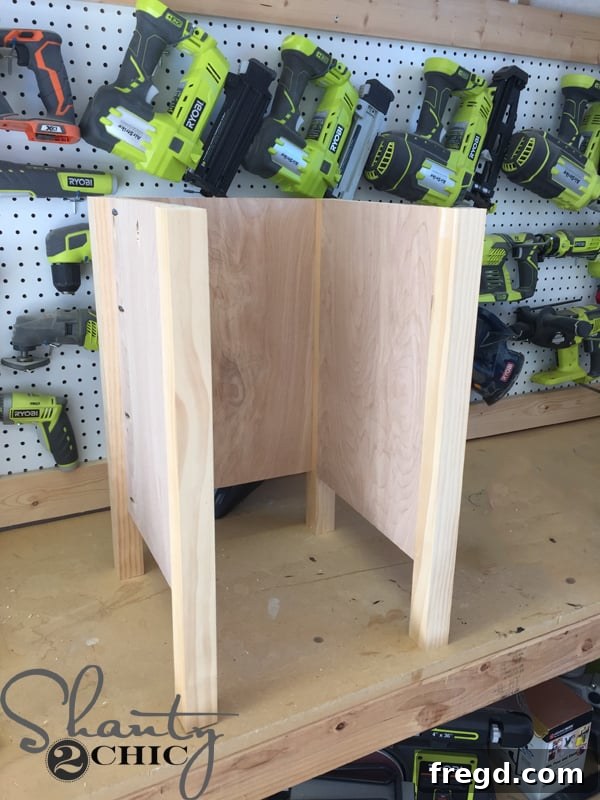
Measure and cut the bottom piece for this cubby to fit snugly. Drill 3/4″ pocket holes on all four sides of this bottom piece as indicated in the plans. Attach it securely with wood glue and pocket hole screws.
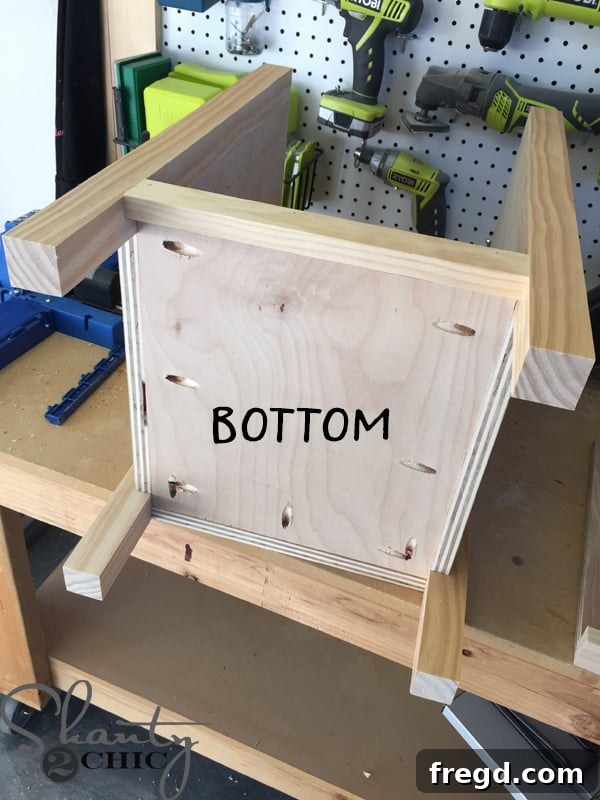
Next, enhance the front of the cubby by attaching a 1×2 trim piece. Use 1 1/4″ brad nails and wood glue to secure it. This trim piece not only adds a finished look but also strengthens the structure.
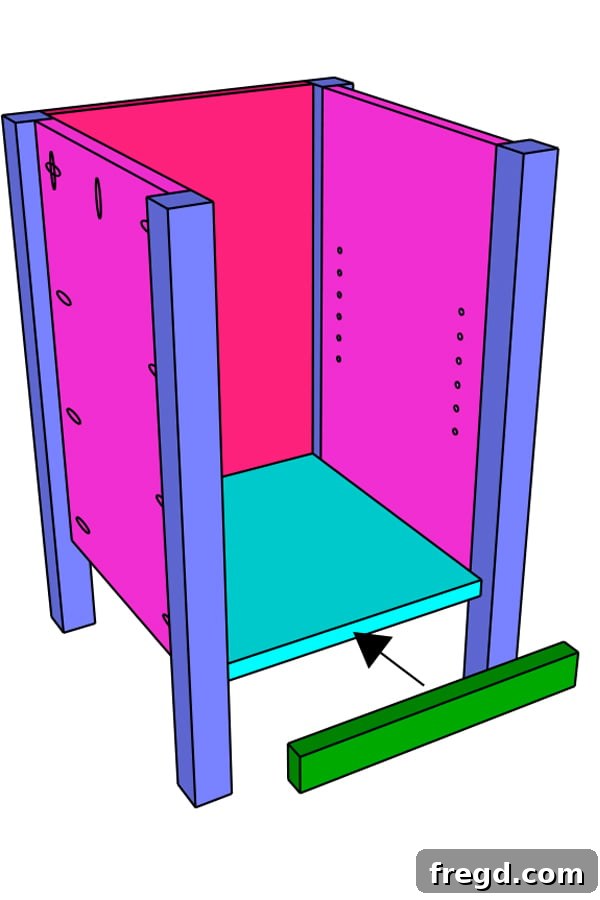
At this stage, your cubby base should be taking shape, looking clean and sturdy.
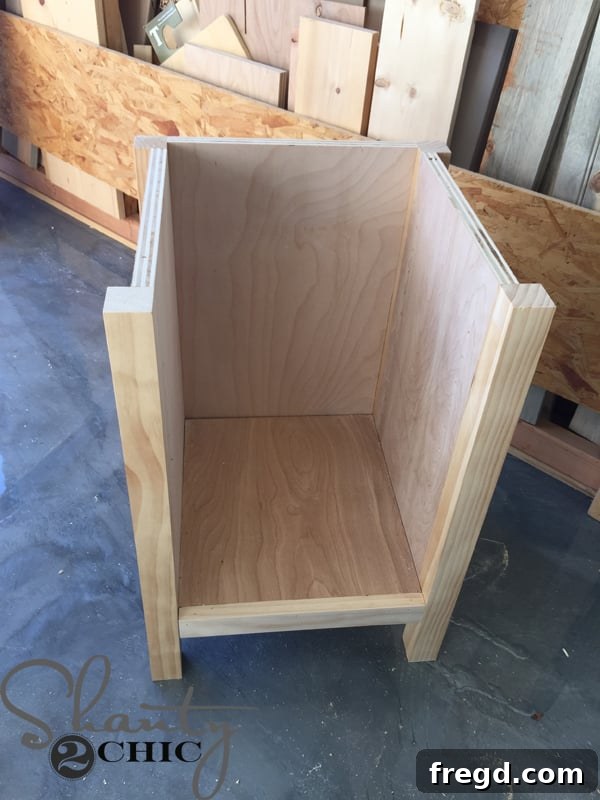
Repeat these steps to build the second cubby base, mirroring the first. You will have two identical units that will form the two ends of your vanity.
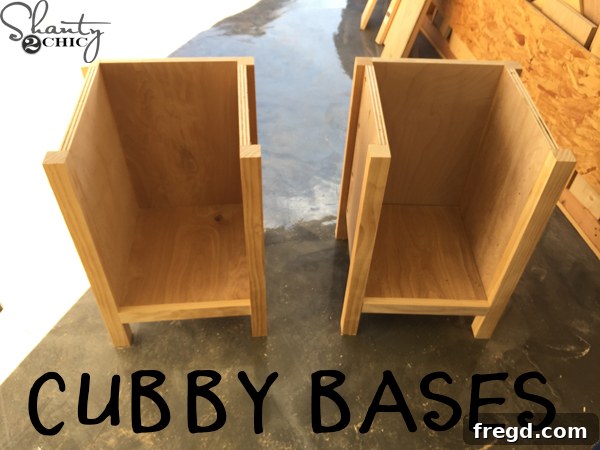
6. Attach the Vanity Top
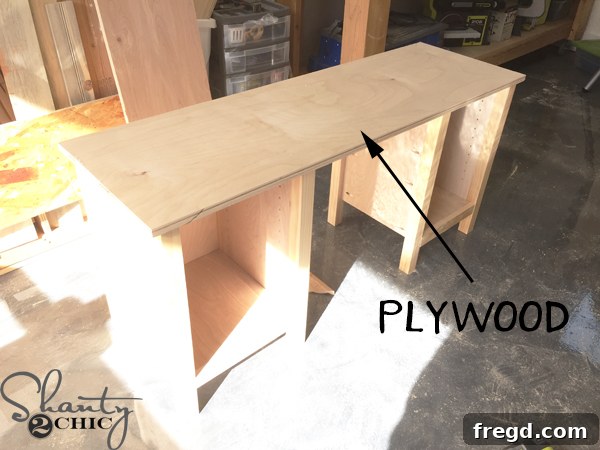
Cut the main plywood top for the vanity according to your plans. Position it over the two assembled cubby bases. Securely attach the top using wood glue and 1 1/4″ pocket hole screws. Drive screws along the sides, back, and from the inside of the cubby bases up into the top for maximum stability. Ensure the back edge of the plywood top is flush with the back of the vanity structure.
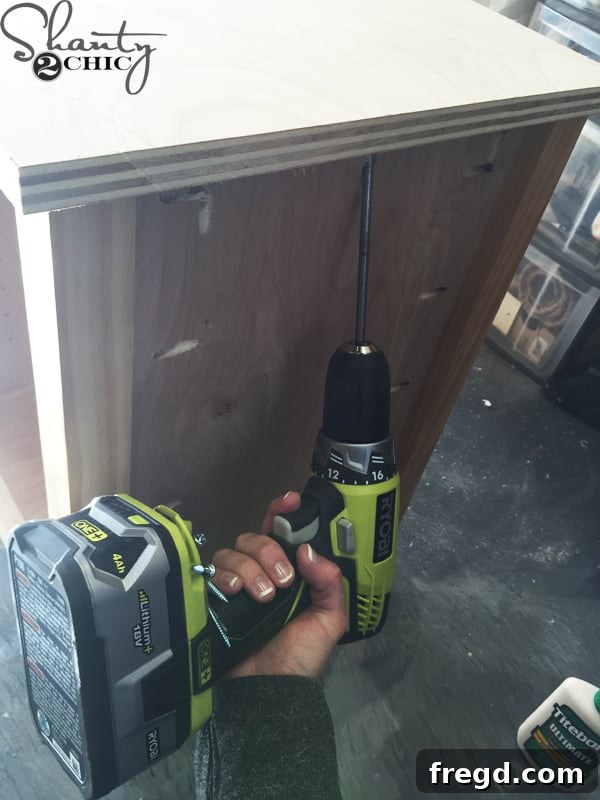
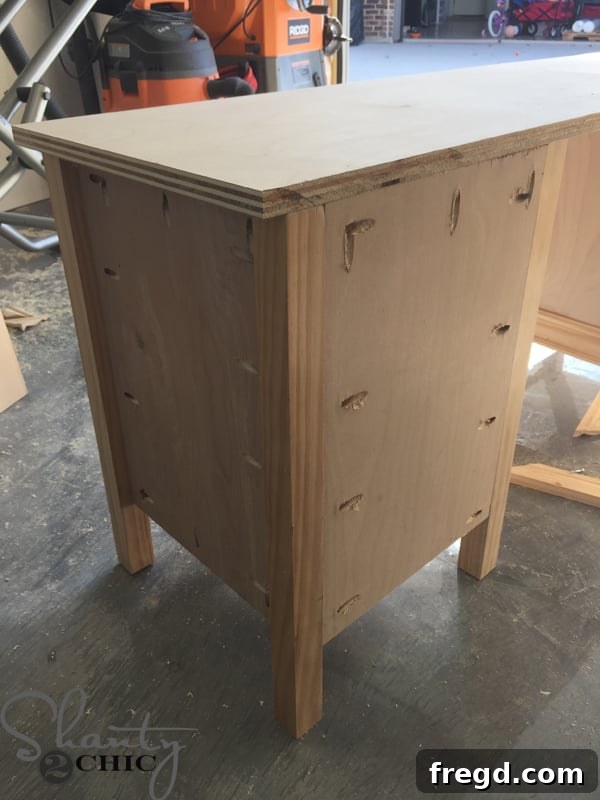
With the main structure complete, your vanity now has a solid foundation and a generous top surface.
Adding Decorative Touches: Trim, Casing, and Moldings
Now, it’s time to elevate the vanity’s aesthetic with decorative moldings and casing. These elements not only add character and detail but also serve the practical purpose of concealing unsightly pocket holes and plywood edges.
7. Install Screen Mold
Measure the areas where the screen mold will be applied. This delicate trim often frames the top and other exposed edges. For perfectly mitered corners, cut your first 45-degree angle on one end of a piece of screen mold. Then, hold it in place against the vanity and mark where your next cut should be. This method ensures a perfect fit every time, minimizing gaps.
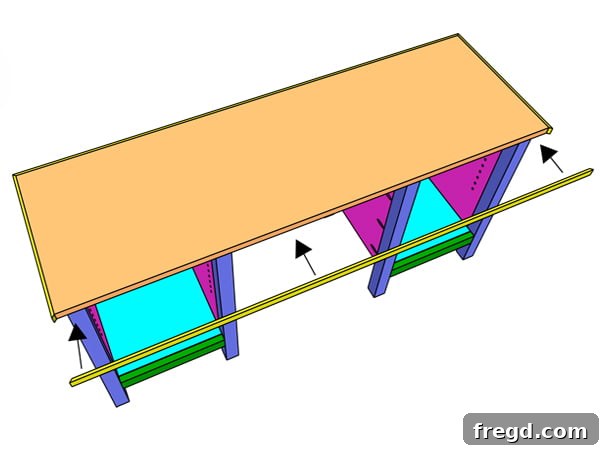
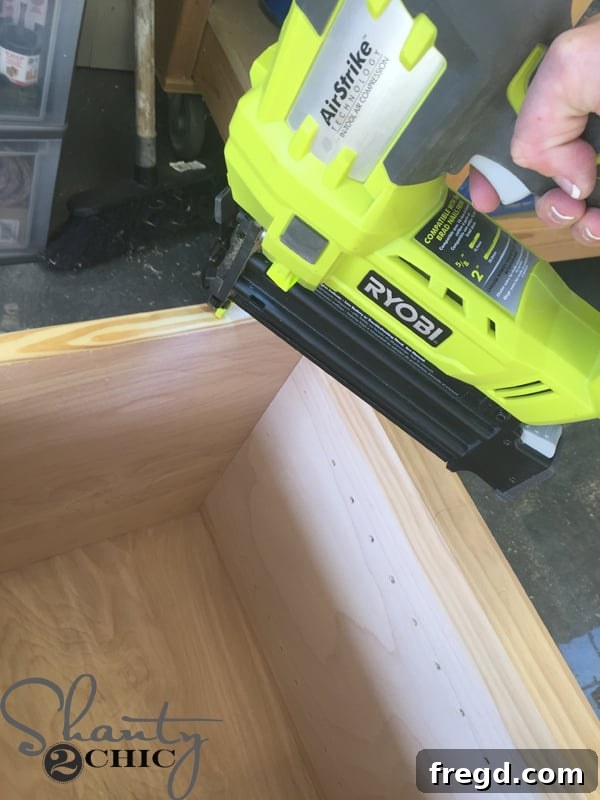
Attach the screen mold using 3/4″ brad nails and wood glue. A crucial tip here: when nailing the molding, keep your nails about an inch away from the very ends to prevent the wood from splitting, especially with delicate trim like screen mold.
8. Apply Casing to Cubbies
Next up: casing! This is where those hidden pocket holes disappear and the vanity takes on a true furniture feel. For the top casing piece on the cubby, measure the distance from one side to the other. Cut both ends at a 45-degree angle. A pro tip for a flawless fit is to cut the piece slightly longer than needed initially, then make tiny shaving cuts off one end until you achieve a perfectly snug fit. Attach with 3/4″ brad nails and wood glue.
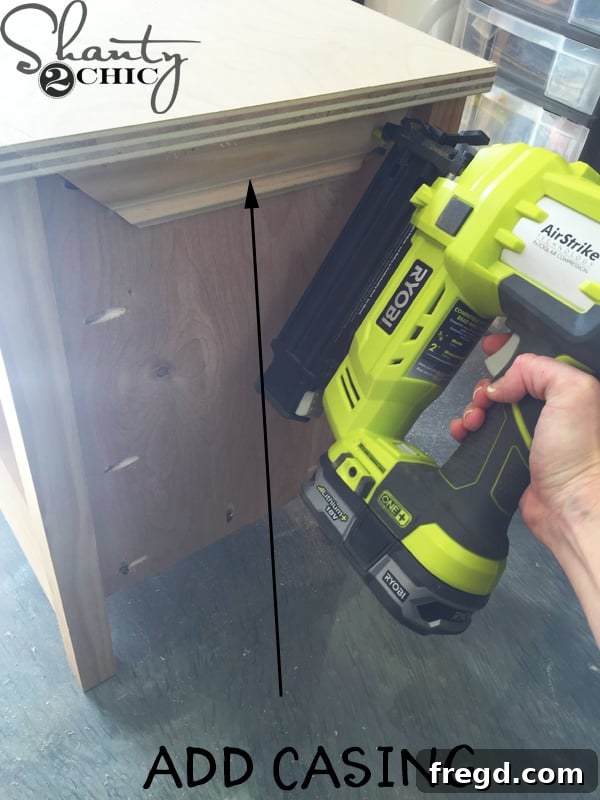
Follow the same process to add the bottom casing piece to the cubby, ensuring clean mitered corners and a secure attachment.
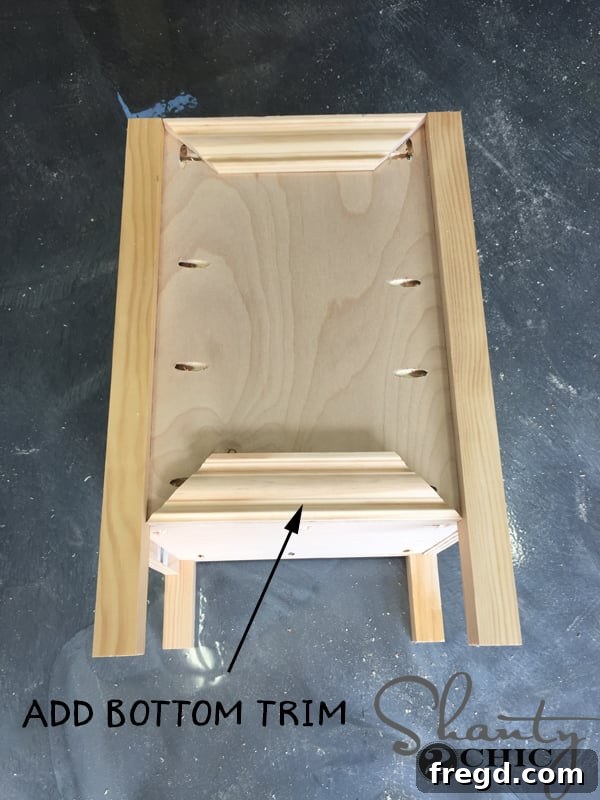
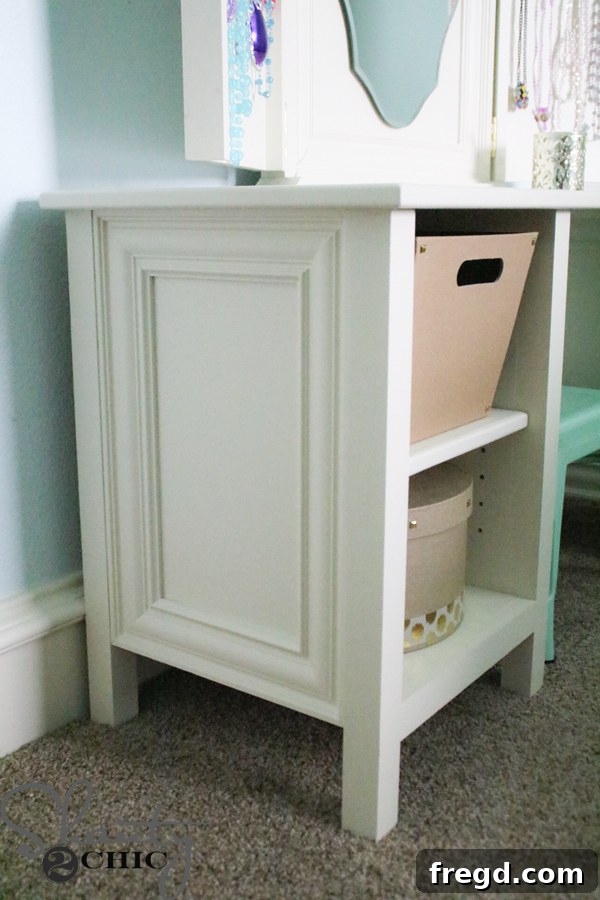
Finally, complete the casing by adding the side pieces. This not only enhances the decorative appeal of the vanity but, more importantly, effectively conceals all the pocket holes, contributing to a professional and seamless finish.
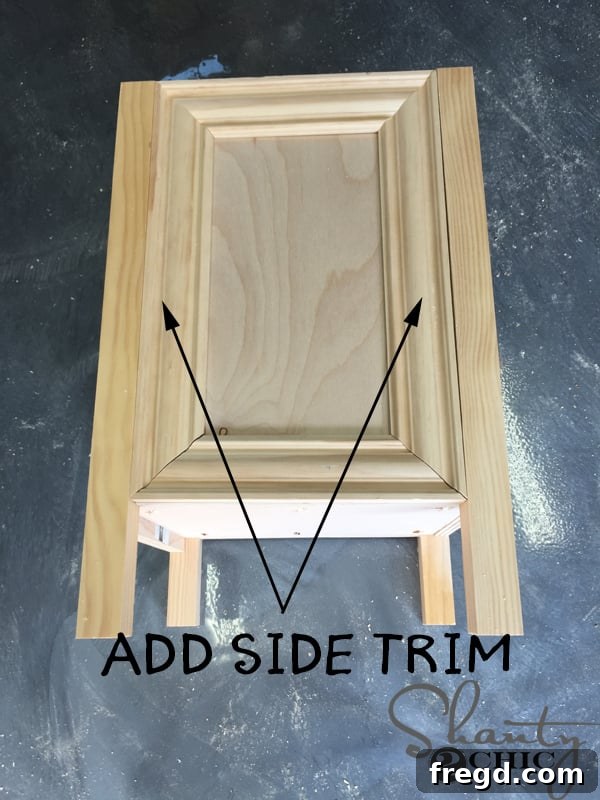
Apply casing to the inside leg pieces and the other outside leg pieces as well. Once all the casing is installed, the base of your vanity is complete! At this stage, if you prefer, you could add the shelves and stop here to create a charming and functional student desk, perfect for homework or creative projects.
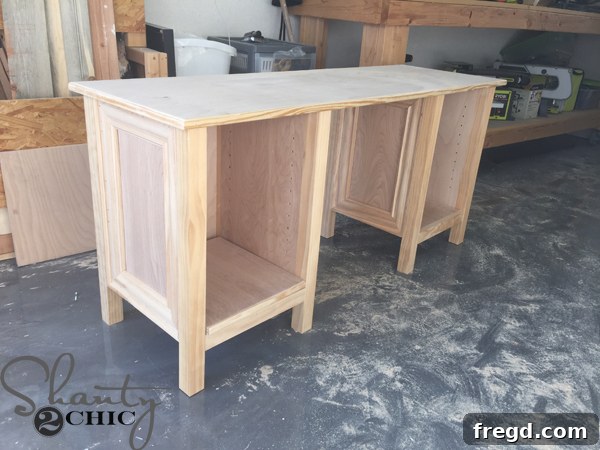
Building the Jewelry Case and Mirror Frame
For those building the full vanity with the mirror and integrated jewelry storage, the next steps involve creating this unique and functional top section.
9. Construct the Jewelry Case Base
Cut a 1×3 piece of lumber to form the base for the jewelry case. Both ends of this piece should have 45-degree angled cuts, as detailed in your plans. This will provide a neat transition to the main vanity top.
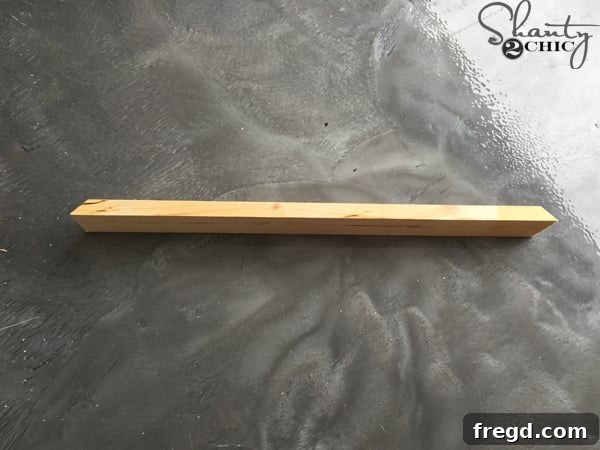
Attach this 1×3 base piece to the top of the main vanity table. It should be flush with the plywood top, allowing the existing screen mold to slightly overhang, creating a finished edge. Use wood glue and screws from underneath for a strong, invisible connection.
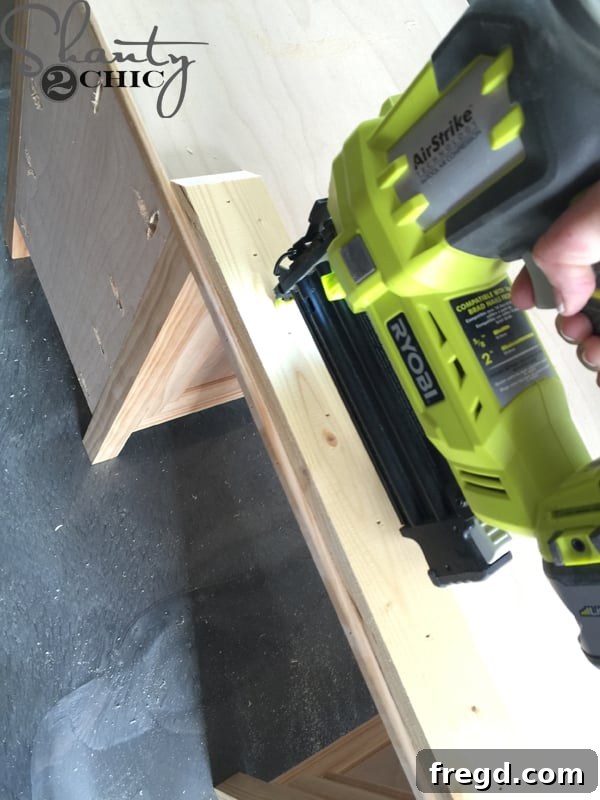
10. Prepare Mirror and Door Panels
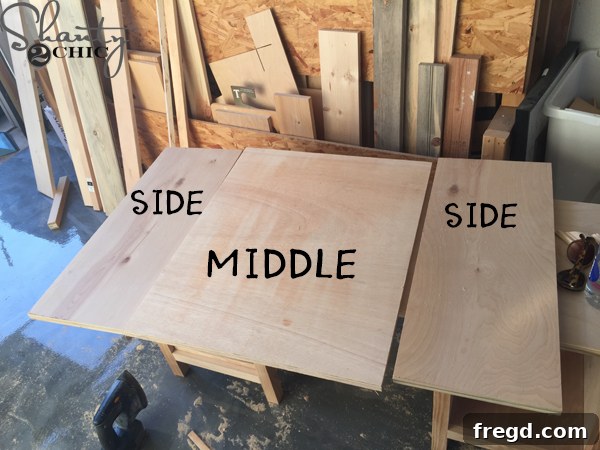
Next, cut the plywood pieces that will form the central mirror panel and the two side doors of the jewelry case. Precision is key here for proper door alignment later.
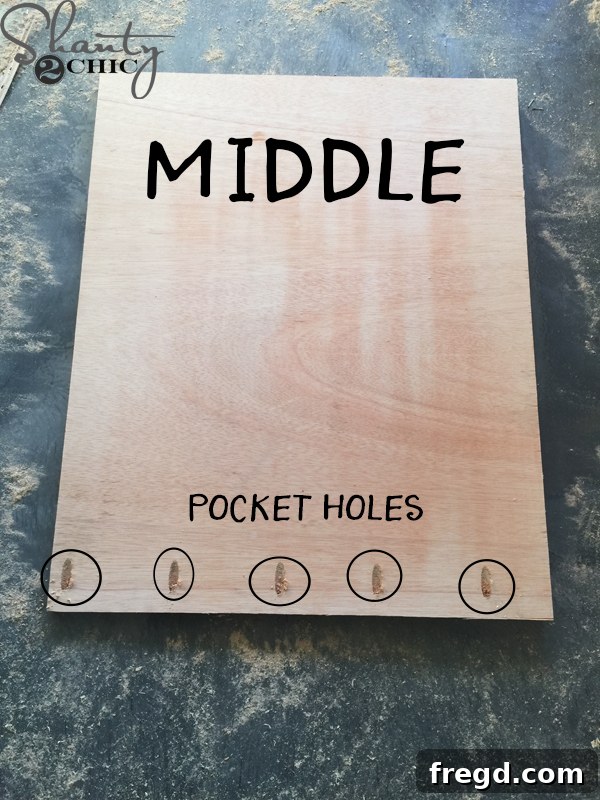
On one end of the middle board (for the mirror), drill 3/4″ pocket holes. These will be used to attach it to the 1×3 base you just installed.
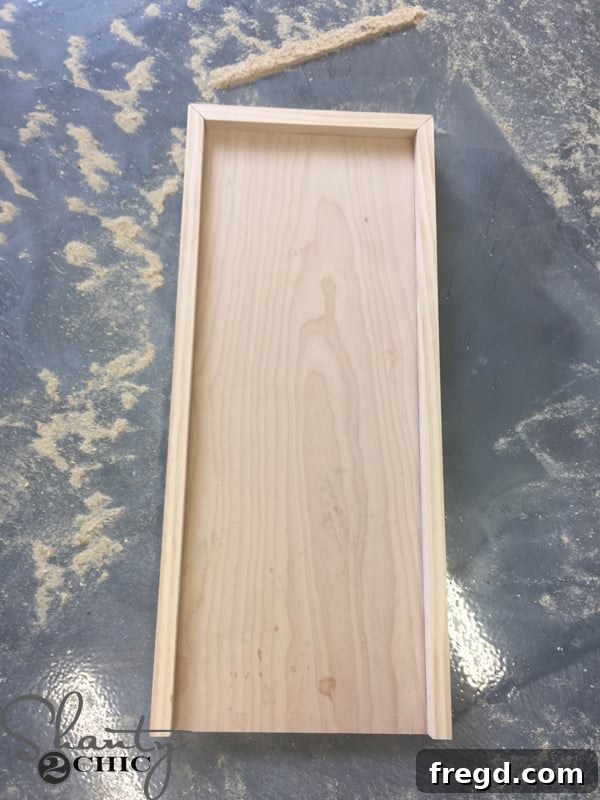
Cut casing to fit flush with the outside edges of the middle plywood piece (the mirror frame). Attach this casing to the board using 3/4″ brad nails and wood glue. This adds a nice frame effect for the mirror.
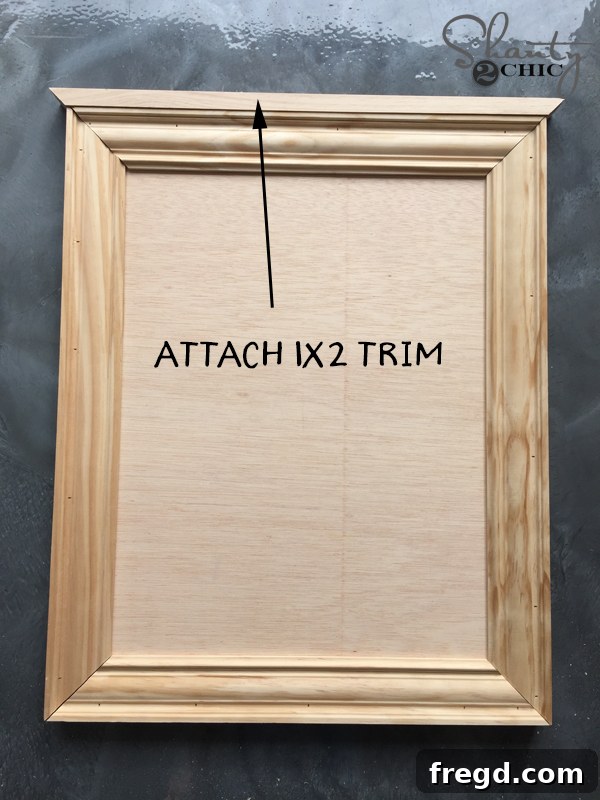
Then, attach 1×2 trim pieces to the outside edges of the middle mirror section. Use 1 1/4″ brad nails and wood glue. These trim pieces should be flush with the back of the plywood. For the easiest installation and a perfect fit, first cut the top 1×2 piece to size. Then, make 45-degree cuts on one end of the side pieces, hold them up against the plywood, and mark where the straight cut should be on the other end.
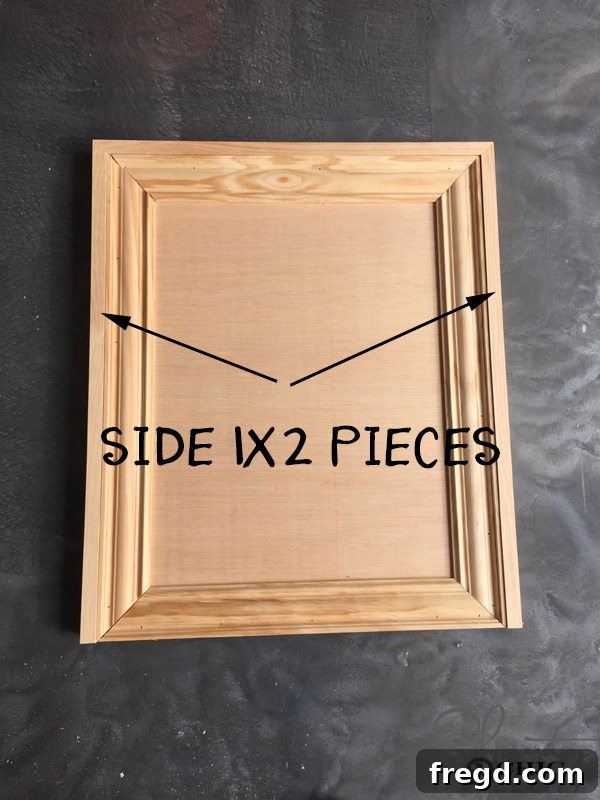
Attach 1×2 trim to the door pieces in the same manner. Ensure the 1x2s are flush with the back of the plywood. Note: we are not adding casing to the doors here, as it would reduce the interior space too much, making it difficult for jewelry to hang freely.
11. Attach the Mirror Piece to the Vanity
Now, attach the central mirror piece to the 1×3 base on the vanity top. The back of the plywood mirror piece should be flush with the back of the 1×3 base board. Use pocket hole screws from the underside of the 1×3 and into the mirror piece.
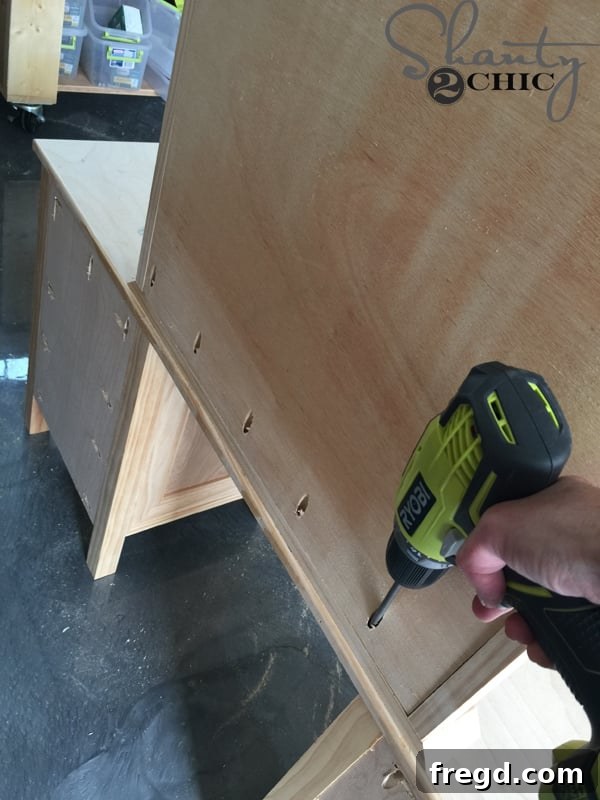
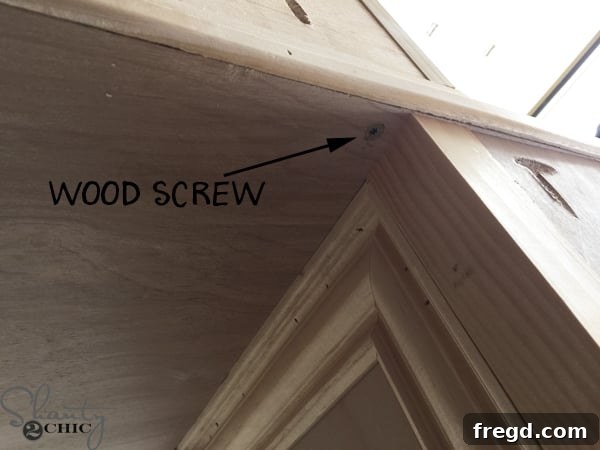
To further reinforce the mirror base, I added extra wood screws from underneath the vanity top, driven up into the 1×3 base and then into the mirror panel. While the vanity will likely be against a wall, making this less critical, it’s always better to be safe and ensure maximum stability for a piece that children will interact with daily.
12. Craft the Adjustable Shelves
Finally, cut the shelf pieces to fit inside the cubbies. It’s important that these aren’t a super snug fit; you want them to be easily movable up and down within the cubby using shelf pins, allowing for versatile storage configurations.
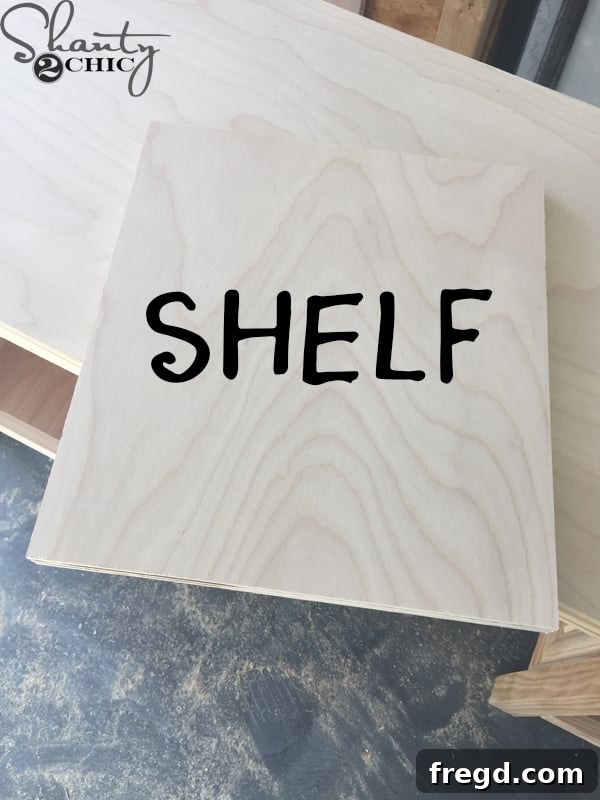
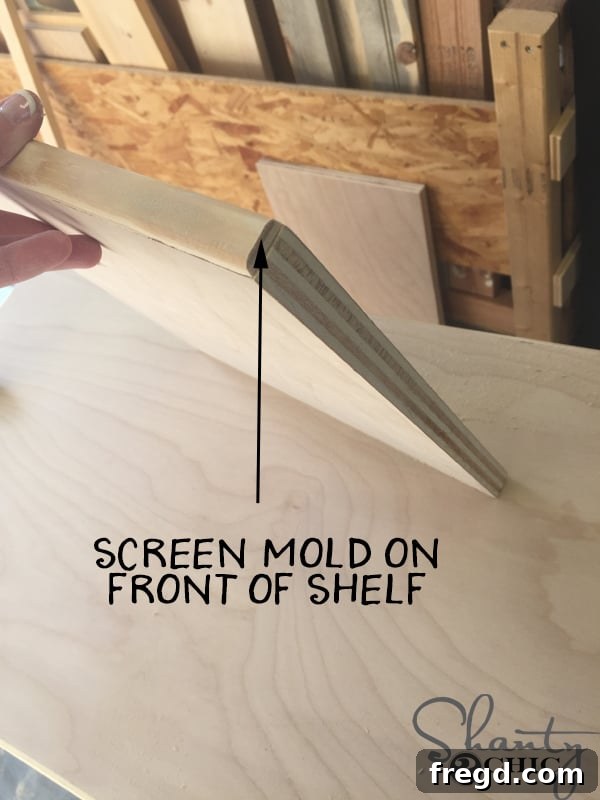
To give the shelves a polished look and hide the rough plywood edges, attach screen mold to the front edge of each shelf. Use wood glue and 3/4″ brad nails for a secure and neat attachment.
The Grand Finish: Painting, Hardware & Storage Solutions
With the construction complete, it’s time to bring your DIY kids vanity to life with paint and thoughtful details.
Painting and Hardware Installation
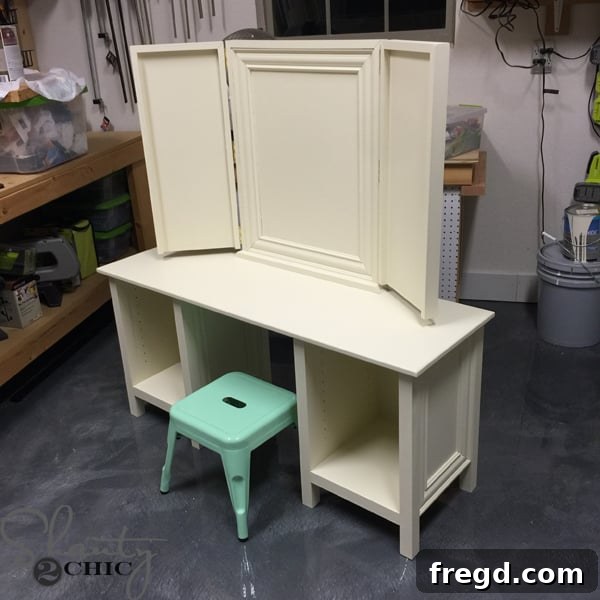
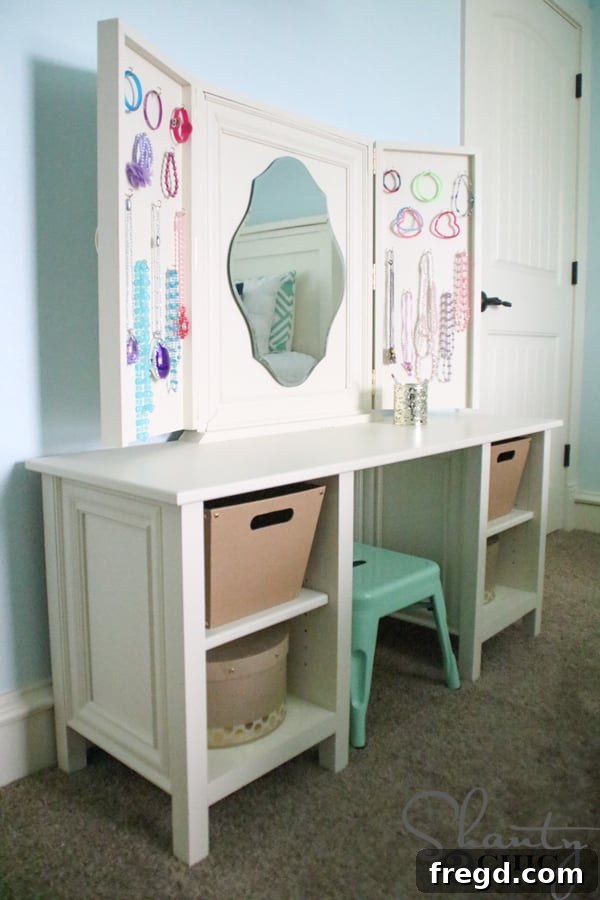
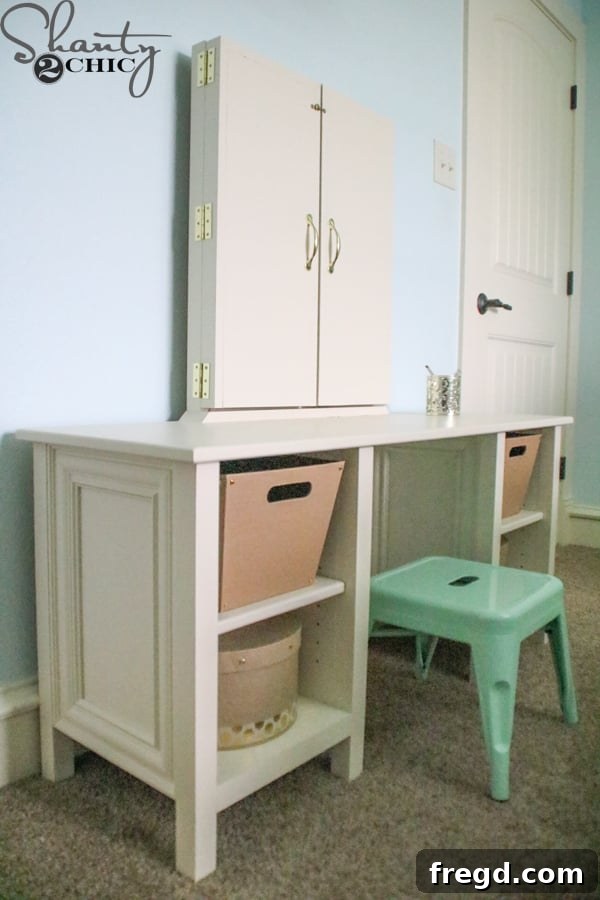
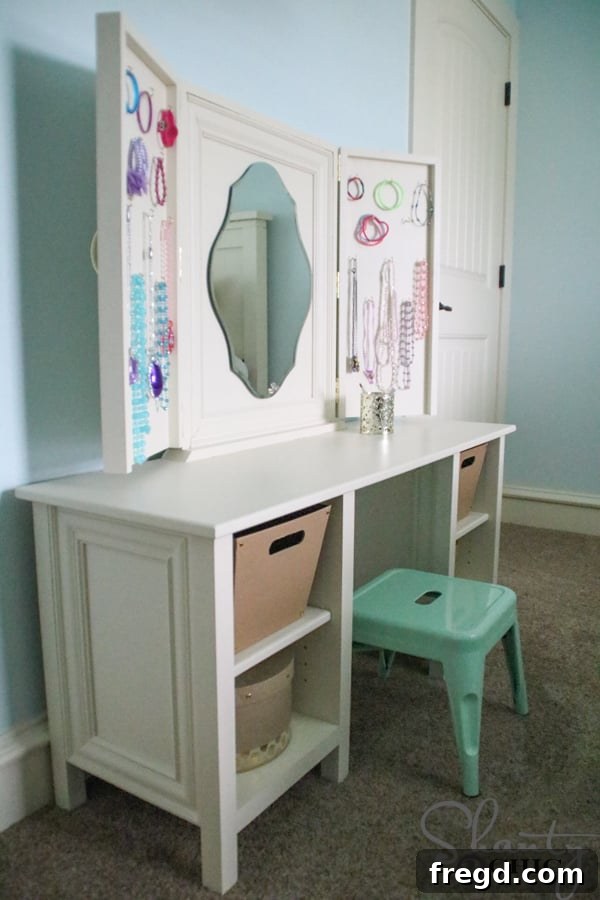
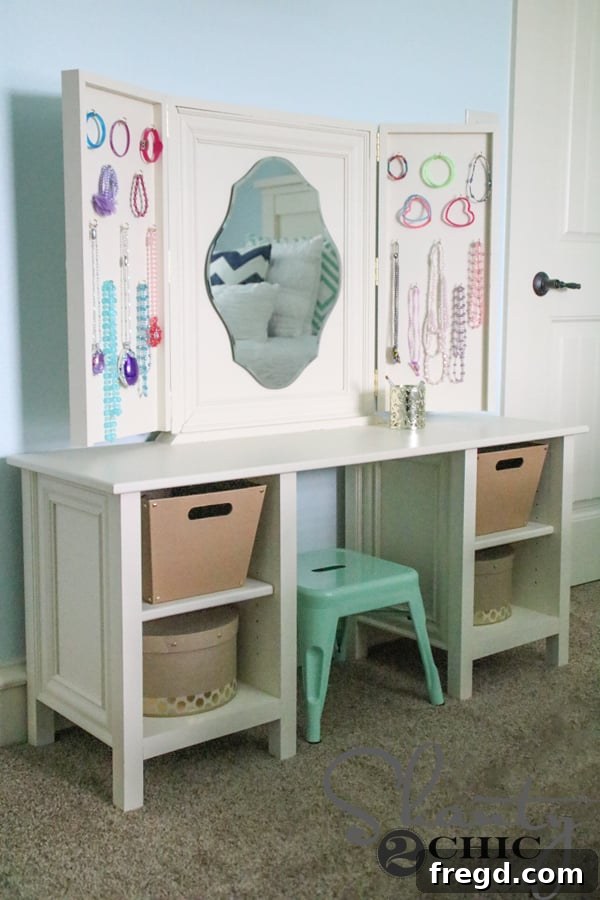
I applied two coats of Valspar’s Ivory Lace paint to match my daughter’s room trim and bed, creating a cohesive and elegant look. Once the paint was dry, I carefully attached the doors to the mirror piece using beautiful gold hinges. To complete the look, I added a charming gold pull to each door, making them easy for little hands to open and close. For seating, I found that incredibly cute stool from Target, which complements the vanity perfectly. You can find a similar one HERE!
Smart Jewelry Storage
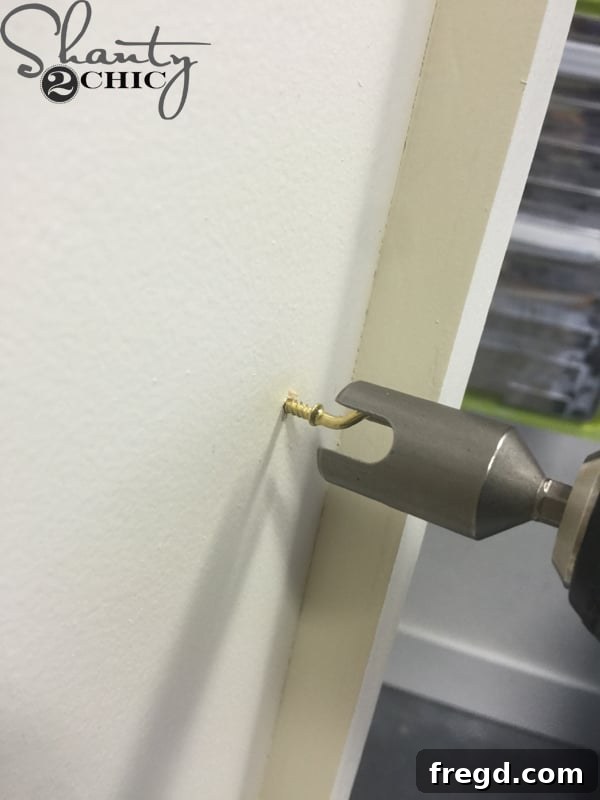
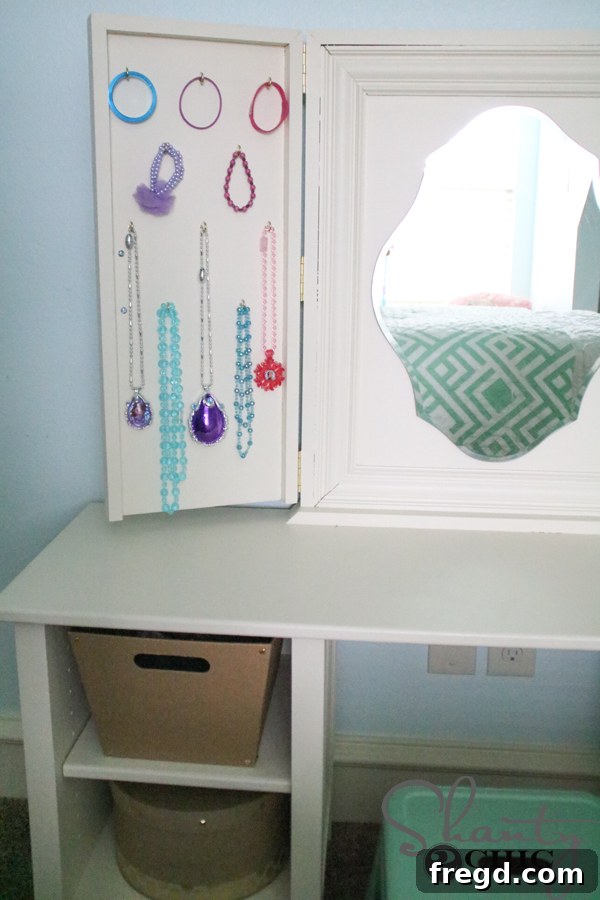
To maximize the functionality of the jewelry case doors, I used my Ryobi Wing Nut/Bolt Driver to easily attach gold cup hooks to the inside surfaces. These hooks provide dedicated spots for necklaces and bracelets.
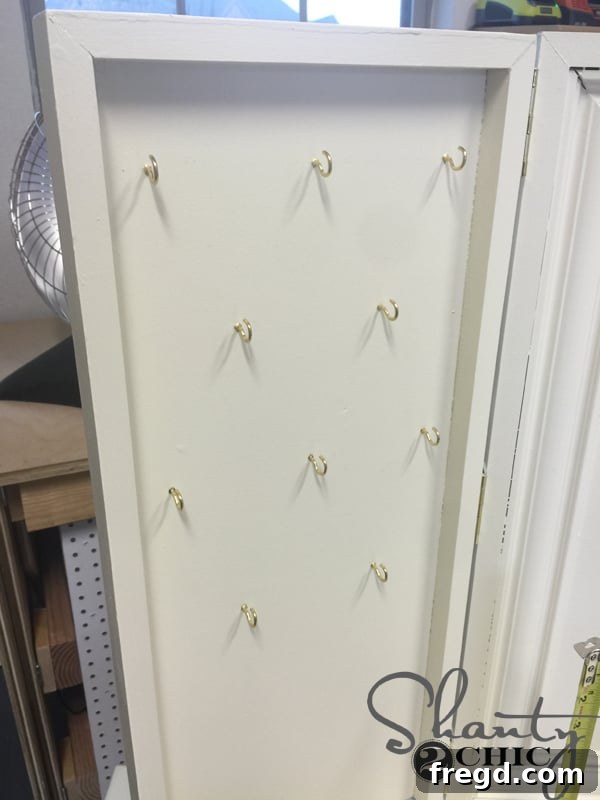
I strategically alternated the height of the hooks, creating more space for longer necklaces and ensuring that everything hangs neatly without tangling. This thoughtful design makes it easy for children to organize and access their favorite accessories.
Creative & Cost-Effective Storage Bins
For the cubbies, I discovered these fantastic cardboard totes at Hobby Lobby. They were a steal at about $4 each and fit perfectly into the cubby spaces! To add a touch of glamour and customize them, I hot-glued gold studs to each corner. This simple embellishment took mere minutes but transformed ordinary cardboard boxes into stylish storage solutions that look far more expensive than they were.
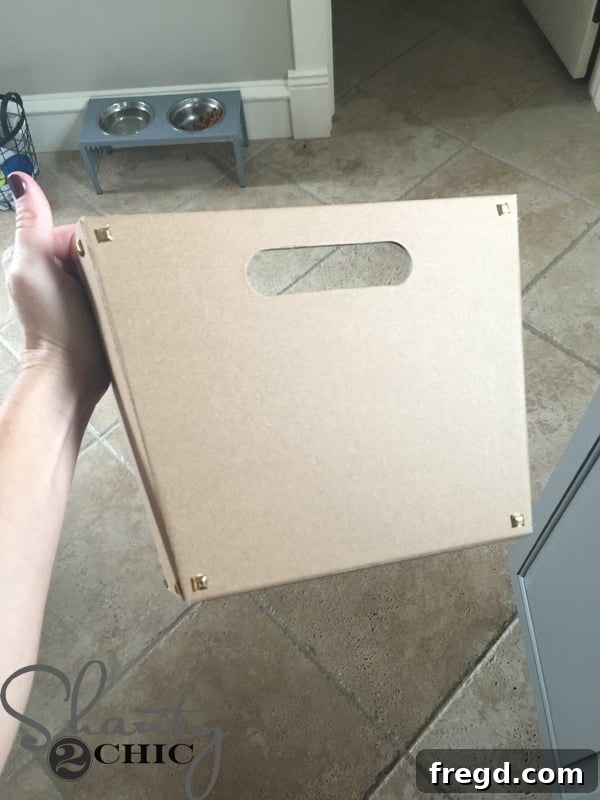
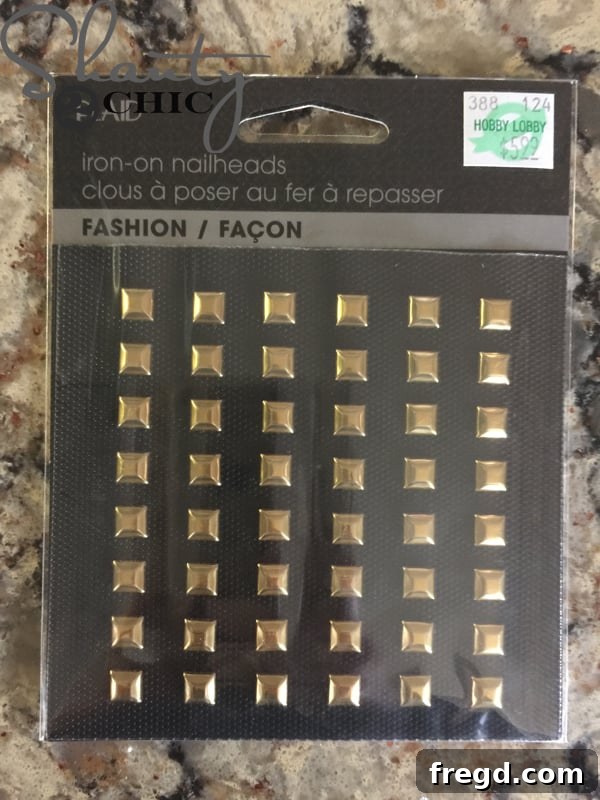
I also found charming cardboard hat boxes, also around $4 each, which are perfect for storing smaller items or accessories.
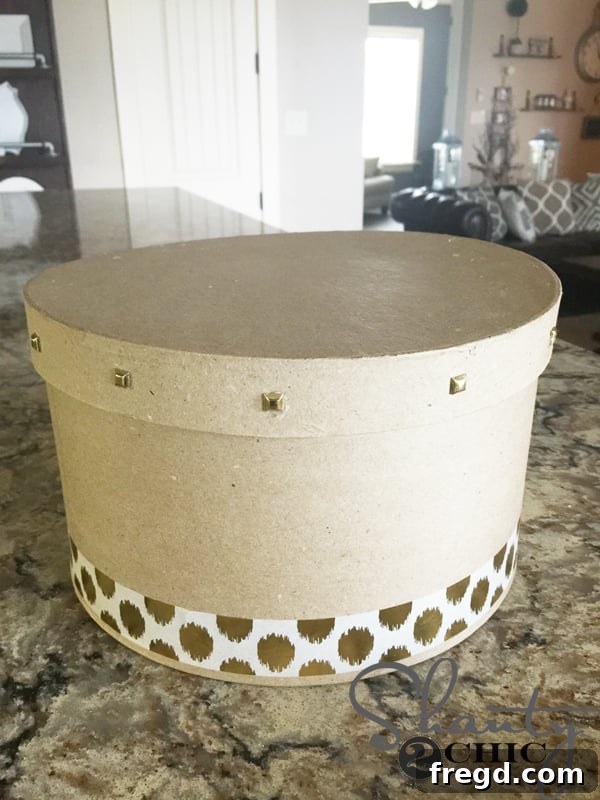
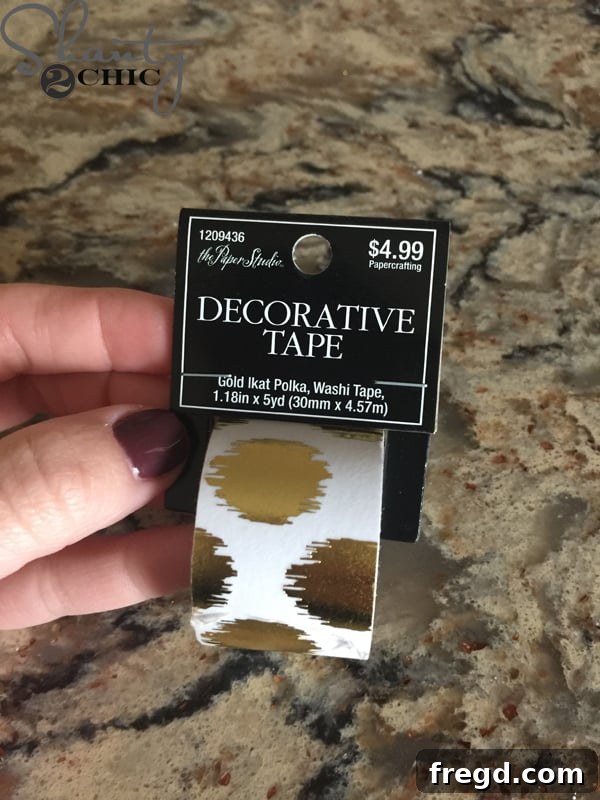
These hat boxes were further embellished with decorative tape and a few more gold studs. This quick customization added personality and saved a significant amount of money compared to buying pre-made storage tubs. All these clever storage finds were sourced from Hobby Lobby, proving that stylish organization doesn’t have to break the bank!
And that, my friends, was the entire building and decorating process!
To ensure the doors stay neatly closed, I found a lovely gold clasp at Home Depot. Not only is it practical, but my daughter thinks it adds a “pretty cool” touch to her special vanity!
Final Thoughts & Customization Ideas
The verdict is in: she absolutely LOVED it! This DIY kids vanity was designed with a child’s stature in mind, making it perfectly sized for little ones. However, modifying it to suit an adult’s needs is incredibly straightforward. To convert it into a full-sized adult vanity or a standard desk, I would simply adjust the overall height to approximately 30 inches, which is the ergonomic standard for most desks. You might also consider increasing the width of the central opening to allow for a wider chair or more comfortable legroom.
This project is not just about building a piece of furniture; it’s about creating a special space that sparks imagination and provides practical storage. Whether you stick to the original plans or customize it to your heart’s content, the joy of a handmade item is truly unmatched. I hope this detailed guide inspires you to take on your next DIY challenge and create something wonderful for your home and your loved ones.
Thanks so much for stopping by and taking the time to explore this project!
Happy Building!