
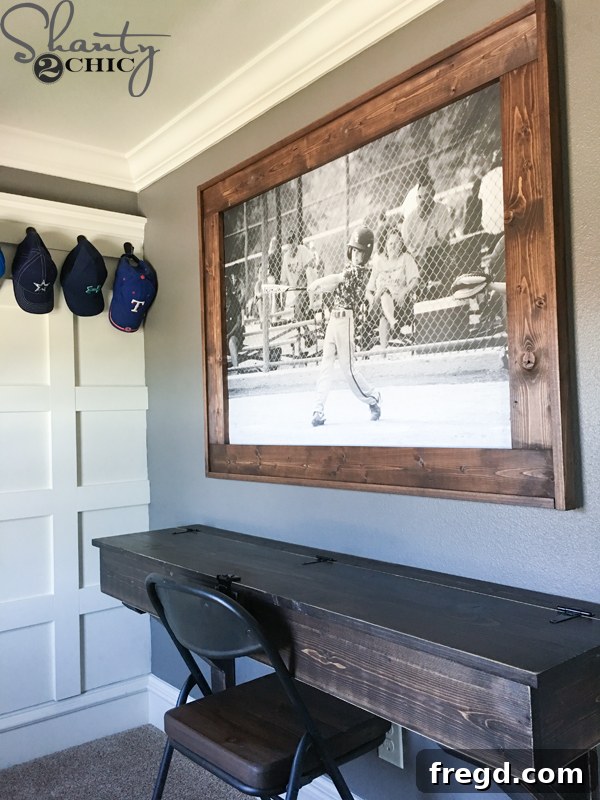
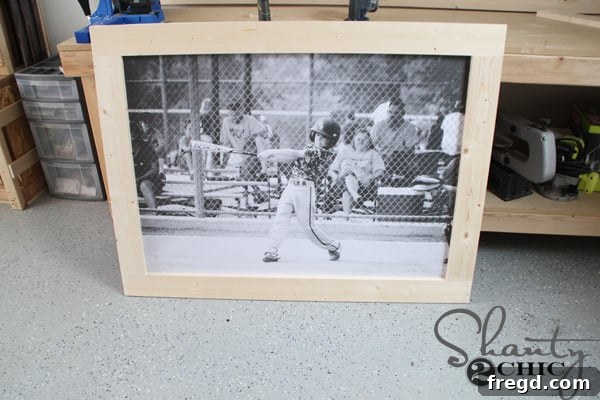
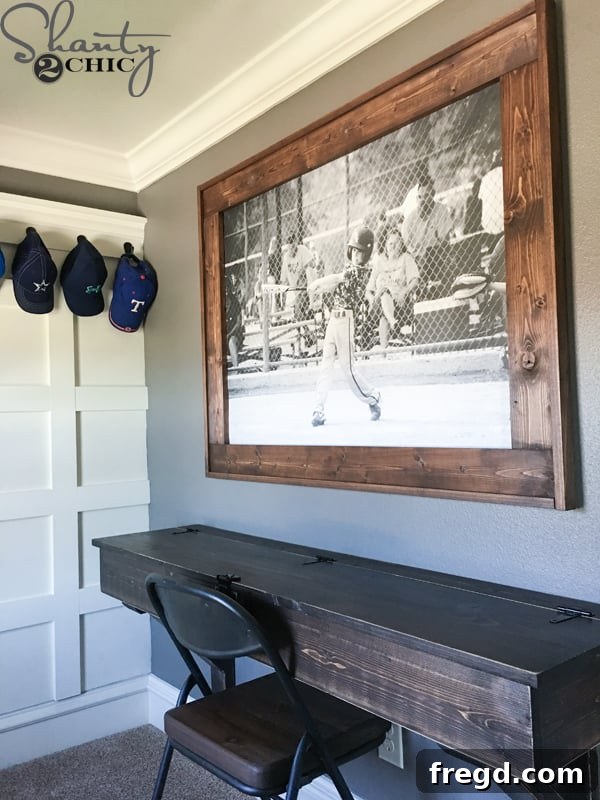
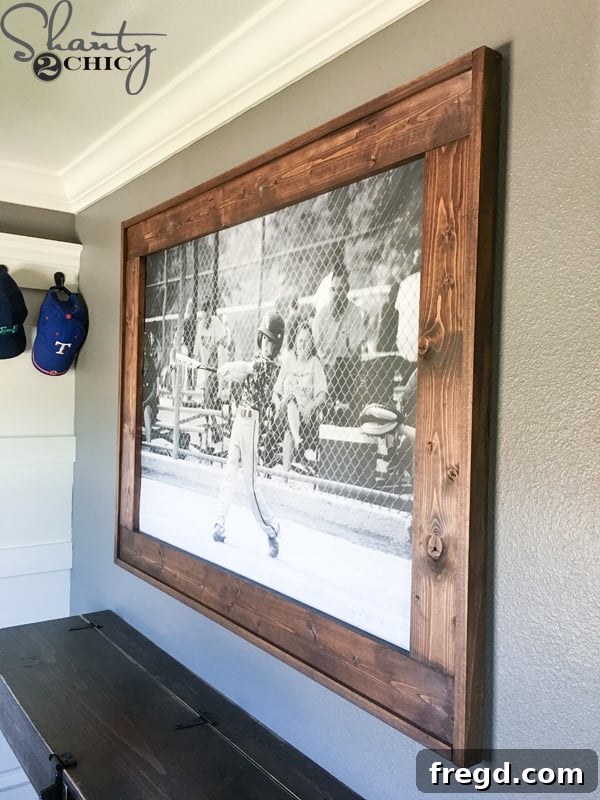
This DIY Engineer Print Frame is probably one of the easiest projects I have done and it makes such a huge statement in a room! It also only cost me about $20 to make – HECK YAH!
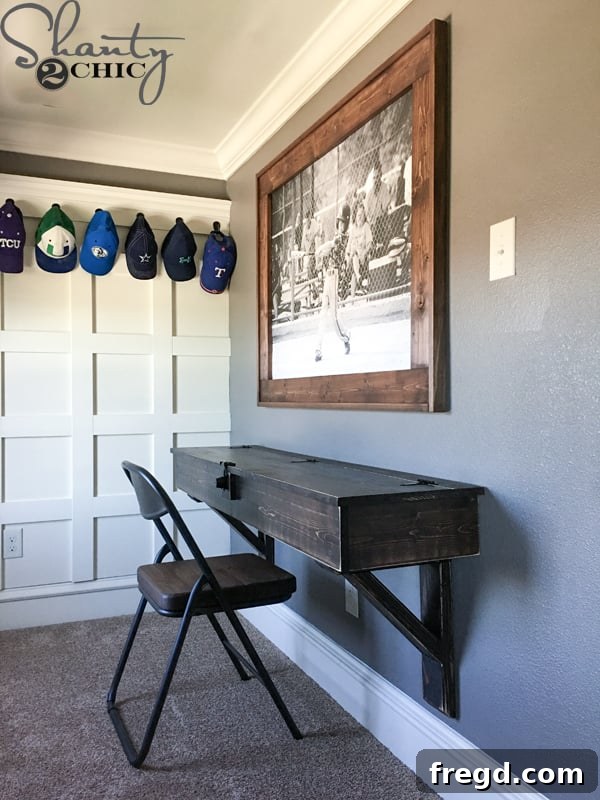
DIY Engineer Print Frame: Create Stunning Large-Scale Wall Art for Under $20
Are you dreaming of transforming a blank wall into a captivating focal point without breaking the bank? This DIY Engineer Print Frame project is your answer! It’s an incredibly straightforward build that creates a massive visual impact in any room, all while keeping your budget happily intact. Imagine crafting an impressive, oversized piece of custom wall art for an astonishingly low cost – often under $20! Get ready to infuse your space with personalized style and a touch of professional elegance, proving that impactful home decor doesn’t require a hefty price tag.
Why Engineer Prints Are a Game-Changer for Affordable Wall Art
Engineer prints, traditionally known for their use in architectural and engineering blueprints, have emerged as a secret weapon for savvy DIY decorators. These large-format, black-and-white prints offer a distinct, minimalist aesthetic that can emulate high-end gallery art at a fraction of the cost. Unlike conventional photo prints, which can become prohibitively expensive at larger sizes, engineer prints allow you to blow up your favorite images to stunning dimensions like 3’x4′ (or even larger!) for just a few dollars. Their graphic quality and matte finish lend themselves beautifully to a range of interior styles, from modern and industrial to farmhouse chic, offering a versatile foundation for your creative vision. They provide an accessible way to make a bold statement with personalized imagery.
The Inspiration: Personalizing a Baseball-Themed Room
The catalyst for this particular project stemmed from my son’s desire for a baseball-themed bedroom. What better way to honor his passion and personalize his space than with a colossal, eye-catching print of him in action? Envision a giant 3’x4′ photograph of a cherished moment – perhaps a child’s sports achievement, a memorable family vacation, or even a beloved pet – proudly showcased as the central element of a room. This project extends beyond mere construction; it’s about immortalizing a memory, celebrating individual interests, and injecting a profound personal touch into your home decor that mass-produced items simply cannot replicate. It delivers both aesthetic appeal and sentimental value, truly making it a rewarding endeavor for both the creator and the lucky recipient!
Gathering Your Supplies: Essential Materials for Your DIY Frame
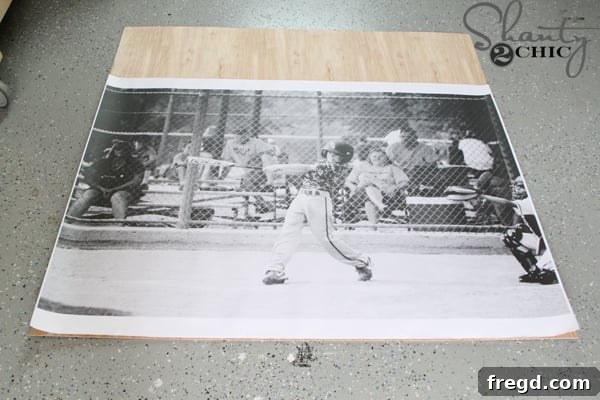
One of the most appealing aspects of this project is the relative simplicity and availability of its materials. Most components can be easily sourced from your local hardware store, lumberyard, or even by creatively repurposing existing scraps. Below is a comprehensive list of everything you’ll need to construct your impressive engineer print frame:
- 1 scrap piece of 1/4″ plywood (at least 36″x48″ in size): This will serve as the lightweight yet sturdy backing for your engineer print. Prioritize a piece that is flat and free from significant imperfections. If scrap isn’t available, a full sheet of 1/4″ plywood is typically affordable, and many stores offer cutting services.
- 1 engineer print (e.g., 36″x48″): This is the centerpiece of your artwork. Select a high-resolution image that will translate well into black and white and scale effectively to a large format. Retailers like Staples are renowned for their cost-effective and convenient engineer print services.
- Double-sided tape: Crucial for the initial, temporary attachment of your print to the plywood. Opt for a robust, archival-safe tape if possible, though standard craft double-sided tape will suffice for this preliminary step.
- 2 – 1×4 common (or pine) boards @8ft. long: These boards will form the main structural frame. Common pine is an excellent choice due to its affordability, workability, and availability.
- 2 – 1×2 pine boards @8ft. long (I used premium pine): These smaller boards add a decorative layered effect, creating visual depth and giving your frame a more finished, substantial presence. Premium pine often boasts a smoother texture and fewer knots.
- Kreg Jig and 1 1/4″ pocket screws: A Kreg Jig is an invaluable tool for creating strong, concealed joints, resulting in a clean and professional frame assembly. If a Kreg Jig isn’t accessible, alternative joining methods such as mitered corners or reinforced butt joints with corner braces can be used, though pocket holes offer superior strength and a cleaner aesthetic.
- Nailer/Stapler (with 1 1/4″ brad nails and 3/4″ staples): A powered nailer or stapler significantly expedites the process of attaching the decorative trim and the plywood backing. However, a hammer and appropriate finish nails (1 1/4″ and 3/4″) can certainly be used with a bit more manual effort.
- Wood stain or paint for the finish: Your choice of finish allows for personalized customization. Wood stain enhances the natural grain and adds warmth, while paint offers endless color possibilities to match your decor.
- 3″ Screws to hang: Long, sturdy screws are essential for securely mounting your large and potentially heavy frame directly into wall studs.
- Drill: A fundamental tool for driving screws and pre-drilling pilot holes.
- Wood glue: An indispensable component for reinforcing joints, ensuring long-term stability and durability of your frame.
- Measuring tape and pencil: For achieving precise measurements, which are critical for a professional-looking result.
- Saw (circular saw, miter saw, or hand saw): Required for accurately cutting your wood boards and plywood to the specified dimensions.
- Scissors or utility knife: For cleanly trimming the edges of your engineer print.
- Wood filler (optional but highly recommended): Ideal for patching any nail holes, screw holes, or minor imperfections for a flawless finish.
- Clean cloths: For the smooth and even application of stain and for wiping away any excess.
Pro Tip for Budget-Savvy DIYers:
To further reduce costs, consider exploring options for scrap wood. Local lumberyards, workshops, or even construction sites (always ask for permission first!) often have usable pieces of plywood or pine that you can acquire for free or at a significantly reduced price. Online marketplaces like Craigslist or Facebook Marketplace can also be excellent resources for finding inexpensive or free lumber, giving your project an even more budget-friendly edge.
Step-by-Step Guide: Crafting Your Impressive Engineer Print Frame
Let’s meticulously walk through the construction process. By following these detailed steps, you’ll ensure a stunning, durable, and professional-looking result for your oversized wall art.
1. Preparing Your Engineer Print
The journey begins with selecting the perfect image. For this project, I personally captured the photograph, ensuring it possessed clarity and a strong composition suitable for large-scale display. Once your chosen image is ready, the next critical step is to have it printed as an engineer print. Services like Staples’ Copy & Print are highly recommended for their convenience, affordability, and often same-day pickup options. For my 36″x48″ print, the cost was approximately $8 – an exceptional value for such a substantial piece of art! When ordering, double-check that your image resolution is adequate to prevent pixelation at this size and specify the exact dimensions needed. The incredible ease and low cost of this printing method truly revolutionize accessible DIY home decor.
Order your engineer print from Staples HERE.
2. Sourcing and Preparing the Plywood Backing
Next, you’ll need a piece of 1/4″ plywood that measures at least 36″x48″. The choice of 1/4″ plywood is strategic, as its lightweight nature makes the completed frame manageable for hanging. Finding a scrap piece is an excellent way to keep your project costs minimal. Before cutting, ensure your plywood is thoroughly clean, dry, and as flat as possible. Any significant warping or bowing could compromise the final aesthetic of your mounted print. If necessary, a light sanding of the surface can create optimal conditions for adhesion.
3. Trimming the Print and Precisely Cutting the Plywood
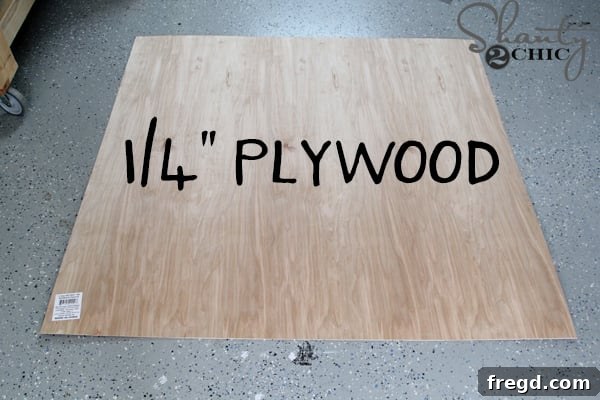
Carefully unroll your engineer print onto a clean, flat surface. Most engineer prints come with a white border, which should be meticulously trimmed off to achieve a crisp, professional, and borderless appearance for your artwork. Utilize sharp scissors or a utility knife alongside a straight edge for precise cuts along the perimeter of the printed image. Once your print is trimmed to its final dimensions, measure it accurately. Then, cut your 1/4″ plywood to precisely match these exact dimensions. It’s crucial to remember that your 1×4 pine boards will constitute the outer frame, so ensure the plywood dimensions perfectly correspond to the trimmed print and will integrate seamlessly with the subsequent frame structure. Precision in this step is paramount for a flawless end result.
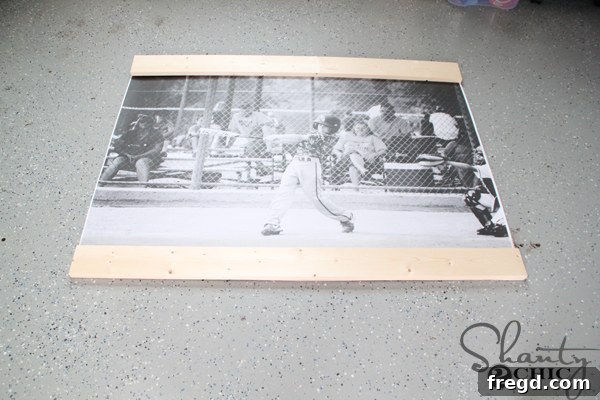
4. Attaching the Engineer Print to the Plywood Backing
Position your freshly cut plywood on a clean, stable workbench. Carefully lay your trimmed engineer print onto the plywood, ensuring it is perfectly centered and aligned. Take your time during this placement to minimize any skewing. Once you are completely satisfied with its position, use double-sided tape to secure the print to the plywood. Apply generous strips of tape around all edges and a few additional strips across the middle of the print. This widespread application helps prevent any bubbling, creasing, or shifting of the print. It’s important to note that this attachment is primarily temporary; the main 1×4 wooden frame will ultimately provide the primary, firm hold of the print against the plywood. The tape’s role is to keep the print smooth and perfectly aligned as you proceed with the frame construction.
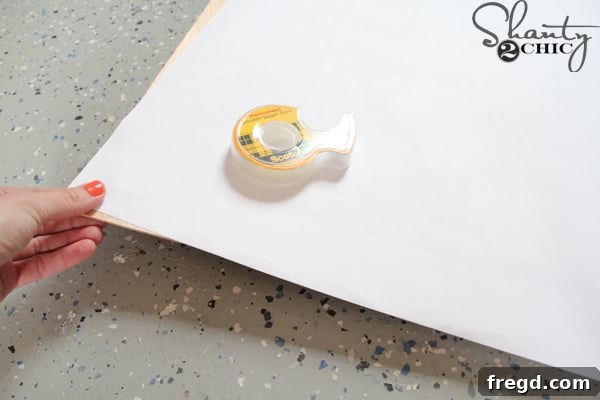
5. Constructing the Main Frame with 1×4 Boards
Now, let’s construct the robust outer framework for your engineer print. You’ll utilize your two 8-foot 1×4 boards for this stage. Begin by accurately measuring and cutting the top and bottom pieces of your frame. For my 36″x48″ print, these pieces were precisely 48″ long. Subsequently, measure and cut the two side pieces; in my case, these were 29″. Achieving precise, square cuts is paramount for tight, professional-looking joints in your final frame. Once all your pieces are cut, it’s time to create pocket holes. Using your Kreg Jig, drill 3/4″ pocket holes into both ends of the two side 1×4 boards. These strategically placed pocket holes are instrumental in creating exceptionally strong and virtually invisible joints during the frame assembly, contributing significantly to a clean, high-quality finish. If you are new to using a Kreg Jig, numerous online resources and video tutorials are available to guide you through the proper setup and technique.
Find the Kreg Jig K5 jig on Amazon HERE.
Watch our How to Use a Kreg Jig video tutorial HERE.
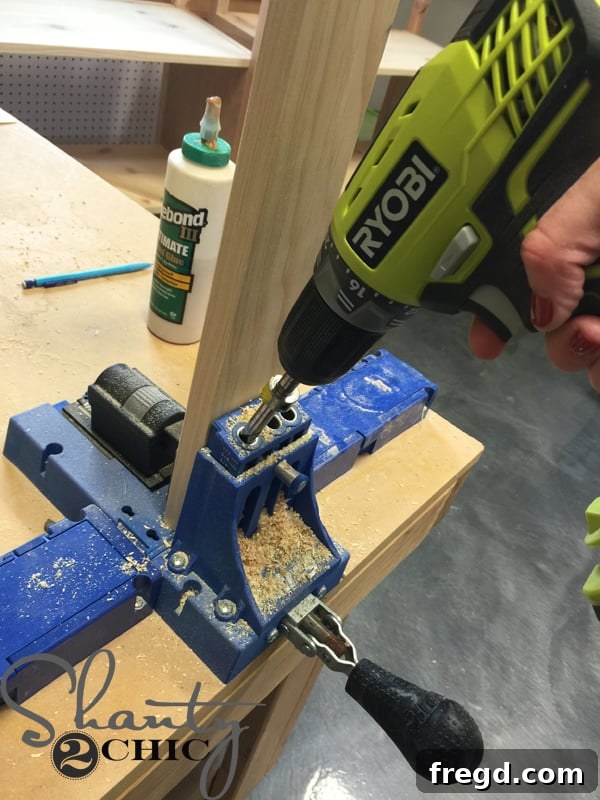
6. Assembling the Main Frame Structure
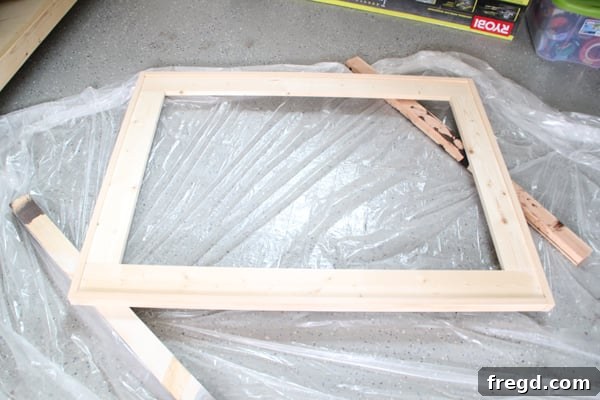
With your pocket holes precisely drilled, the next step is to assemble the 1×4 frame. Lay out your cut pieces on a flat, level surface, ensuring proper orientation. Join them together using 1 1/4″ pocket hole screws. For enhanced strength and long-term durability, apply a small, even bead of wood glue to each joint surface before driving the screws. It is highly recommended to use clamps to hold the pieces tightly together while driving the screws, which helps ensure perfectly flush and square connections. The pocket holes should be positioned on the back side of the frame, facing inwards, making them completely concealed once your artwork is displayed. Dedicate time to verify that all corners are perfectly square, as this significantly contributes to the overall professional appearance of your finished frame.
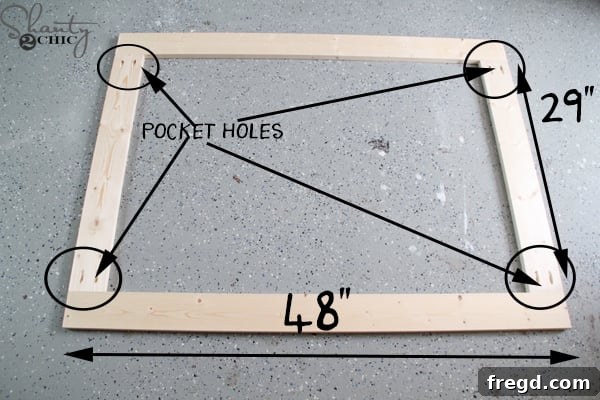
7. Adding the Decorative 1×2 Border Elements
This stage introduces a vital decorative and functional layer to your frame. The 1×2 border will not only create an attractive layered aesthetic but also form the crucial lip that securely holds your engineer print and plywood backing. Before making any permanent attachments, temporarily fit the assembled 1×4 frame over your engineer print and plywood backing. This dry fit allows you to visualize the final alignment and accurately measure for your 1×2 pieces. The top and bottom 1×2 pieces will correspond in length to your top and bottom 1×4 frame pieces (e.g., 48″). Subsequently, measure and precisely cut the side 1×2 pieces to fit snugly between the top and bottom 1x2s. Crucially, remember that the finishing treatment (stain or paint) will be applied to the frame before it is permanently attached to the picture, so maintain their separation for now.
8. Gluing and Nailing the 1×2 Pieces into Place
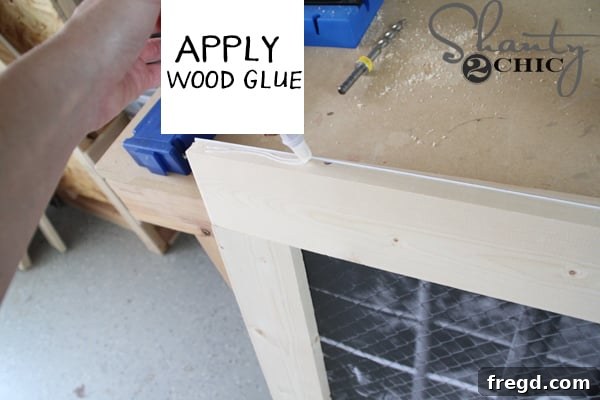
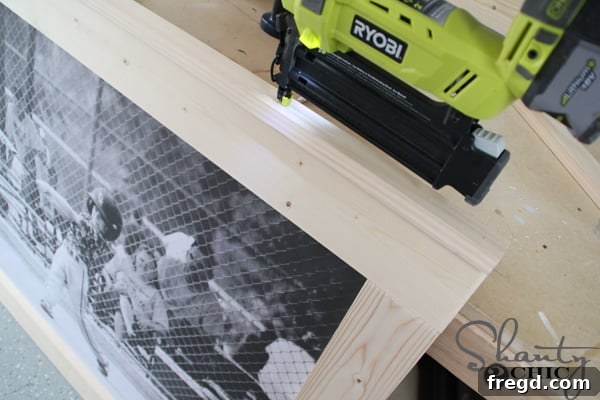
To secure the 1×2 decorative border, apply a thin, consistent bead of wood glue along the top edge of the 1×4 frame pieces. Then, meticulously position the 1×2 pieces onto the glued surfaces. The alignment here is critical for the frame’s overall appearance and function: the outside edge of the 1×2 piece should be flush with the outside edge of the 1×4 frame, creating a subtle recess that will perfectly cradle the plywood backing. Concurrently, the back edge of the 1×2 should align flush with where the back of the plywood will sit, forming a secure shelf. Using 1 1/4″ brad nails (either with a power nailer for efficiency or a hammer for traditional craftsmanship), secure the 1x2s in place, spacing the fasteners approximately every 6-8 inches for optimal hold. Promptly wipe away any excess wood glue with a damp cloth to ensure a clean finish.
9. Applying the Finishing Touches to Your Custom Frame
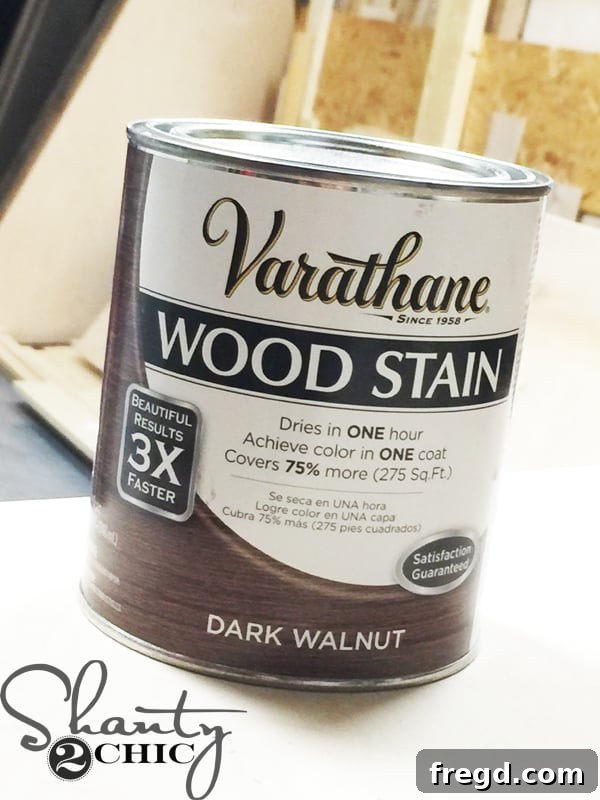
With your frame structure expertly assembled, it’s now primed for its transformative finish! This stage offers a wonderful opportunity for personalization. For my project, I selected a rich, deep finish using Varathane Dark Walnut stain. This particular stain is a personal favorite due to its ability to impart a beautiful, profound color in a single coat, significantly streamlining the finishing process. Apply the stain evenly to all surfaces of the frame using a clean, lint-free cloth, always working in the direction of the wood grain. Allow the stain to penetrate the wood for approximately 5 minutes, then meticulously wipe off any excess with a fresh, clean cloth to ensure a uniform blend and prevent blotchiness. The frame should be dry to the touch within about an hour, but always consult the manufacturer’s specific instructions for complete curing times before proceeding to the next step.
Alternatively, you have the creative freedom to paint your frame to perfectly complement your room’s color scheme, apply a whitewash for a charming rustic appeal, or even use a clear protective coat to highlight the natural beauty of the wood grain. Regardless of your chosen finish, ensure it is thoroughly dry and fully cured before advancing to the final assembly stage to prevent any potential damage to your delicate engineer print.
10. Final Assembly: Attaching the Print and Plywood to the Frame
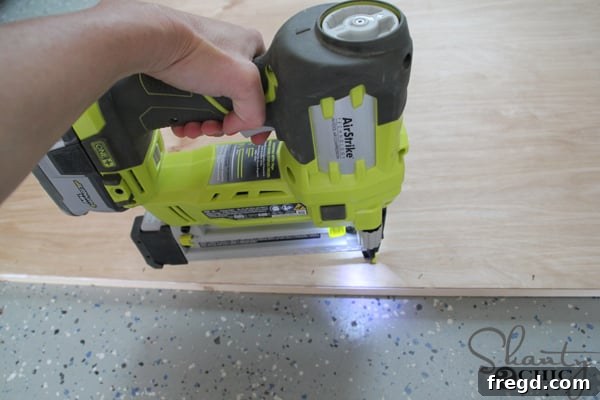
Once your frame’s finish is completely dry and fully cured, it’s time for the exciting culmination: uniting the engineer print (which is already securely taped to the plywood backing) with your beautifully finished frame. Carefully position the plywood backing, with the engineer print facing upwards, into the recess specifically created by your 1×2 border. Take a moment to ensure the print is perfectly centered and lies completely flat without any buckling or wrinkles. Using 3/4″ staples and a stapler (or 3/4″ finish nails and a hammer), attach the plywood firmly to the back edge of the 1×2 border. Distribute your staples or nails every few inches around the entire perimeter to guarantee that the print and plywood are held securely and tautly within the frame. This final, crucial step locks all components into place, resulting in a professional, gallery-ready piece of oversized wall art.
Hanging Your Masterpiece: Securely Displaying Your Large Frame
Congratulations, your stunning DIY engineer print frame is now complete and ready for its grand debut! The final, crucial step is to hang it securely on your wall. Given the significant size and potential weight of this frame, it is absolutely essential to anchor it directly into wall studs for maximum stability and safety. Utilize a reliable stud finder to accurately locate the studs in your desired hanging location. Once the studs are identified, attach the frame to them using robust 3″ screws, driving them directly through the front face of the frame into the center of each stud. While this method will create visible screw holes, rest assured they can be easily and discreetly concealed. After the frame is securely hung and leveled, fill the screw holes with a high-quality wood filler. Allow the filler to dry completely according to manufacturer instructions, then gently dab a small amount of your matching stain (or paint) over the filled areas to seamlessly blend them with the frame. Always use a spirit level during installation to ensure your magnificent piece of art hangs perfectly straight.
The Big Reveal: A Room Transformed with Custom Art
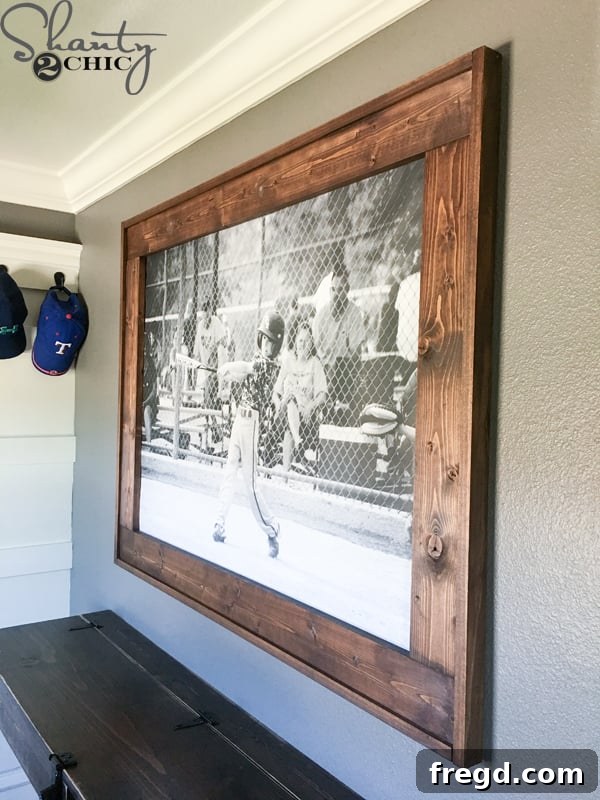
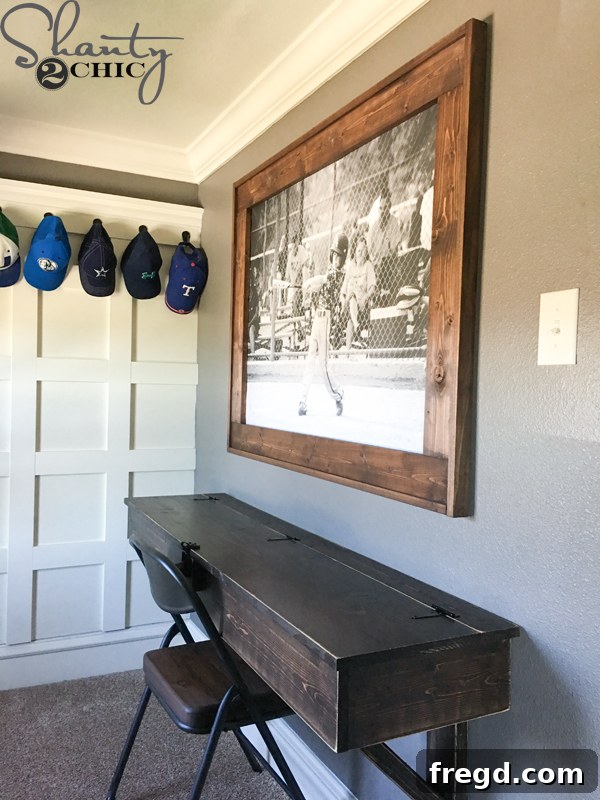
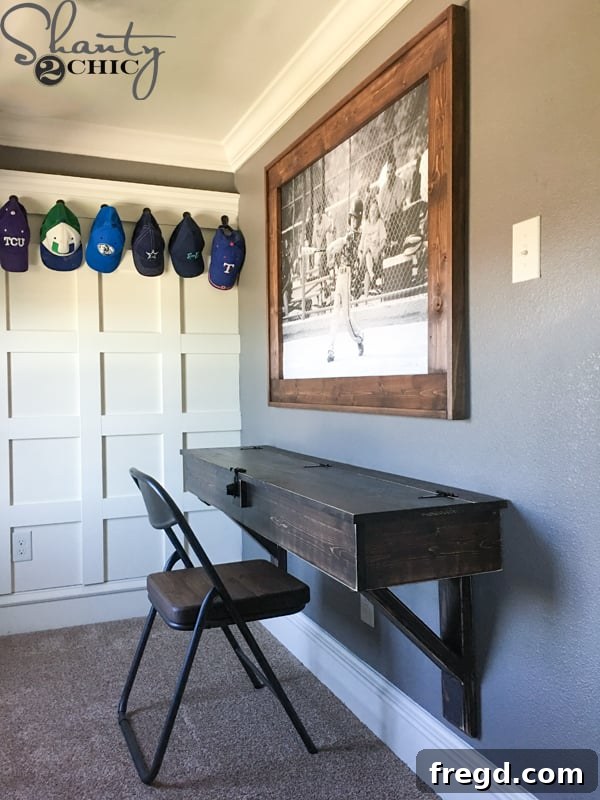
Stepping back to admire your finished handiwork is, without a doubt, the most gratifying aspect of any DIY endeavor. This oversized engineer print frame instantaneously elevates and transforms the entire room, establishing a captivating focal point that is both deeply personal and effortlessly stylish. Witnessing my son’s enthusiastic reaction to his custom baseball-themed print truly made every step of the process incredibly worthwhile. It instills an immense sense of accomplishment to create something so impactful with your own hands, especially when it’s achieved at such an remarkably affordable price point. This project stands as a testament to how accessible materials, combined with a touch of creativity and diligent effort, can yield extraordinary results in enhancing your home’s decor.
Extend the Decor: More Inspiring DIY Room Ideas!
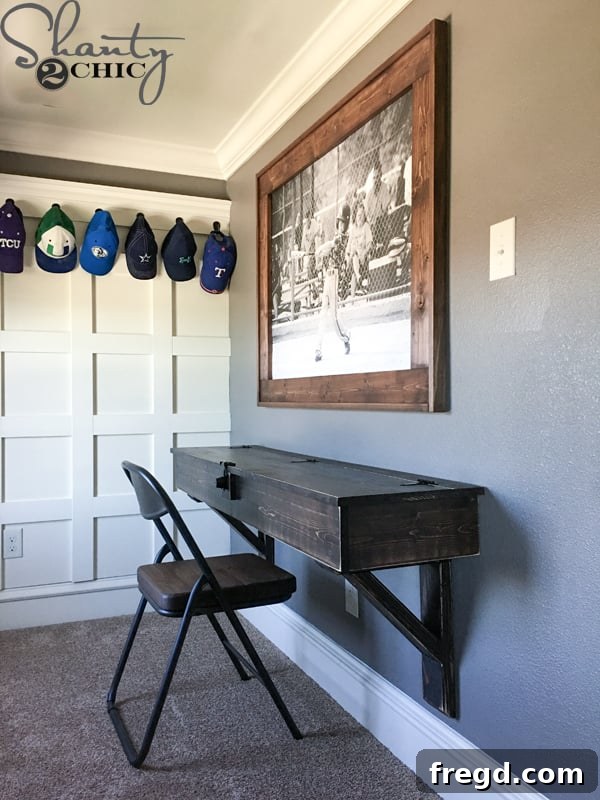
This engineer print frame, while impactful, is merely one component of my son’s meticulously customized room. Virtually every element you see featured here is a testament to the power of DIY, underscoring the fact that a truly unique and deeply personalized living space is entirely within your reach. I’m excited to share the detailed plans for the floating desk in the near future. In the interim, I invite you to delve into these other fantastic DIY tutorials linked below. Click on the respective links to discover how you can replicate these projects and infuse even more handcrafted charm and bespoke character into your own home!
DIY Locker System
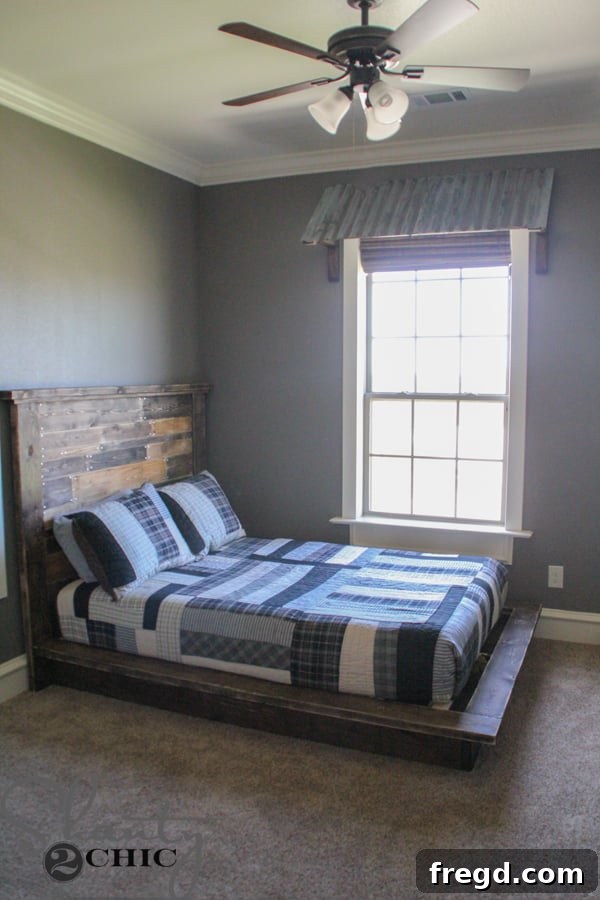
Metal Awnings Tutorial
Platform Bed Tutorial
Headboard Tutorial
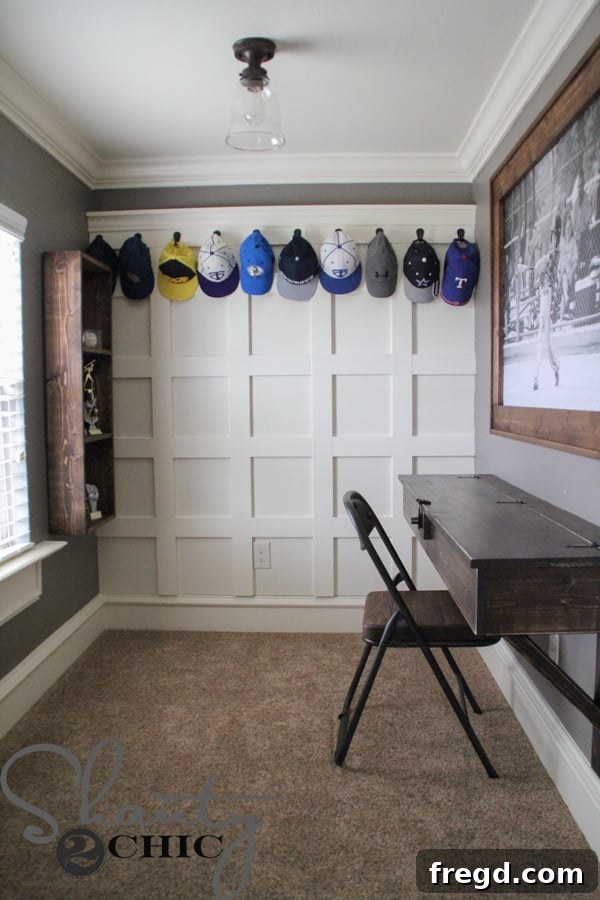
Trophy Case Tutorial
Board and Batten Hat Rack
Conclusion: Your Affordable Path to Stunning Wall Art
Creating this DIY Engineer Print Frame is an incredibly fulfilling project that powerfully demonstrates you don’t need a substantial budget to achieve impressive, custom home decor. With a modest investment of time, readily available materials, and the comprehensive guidance provided in this article, you possess everything needed to craft a personalized piece of oversized wall art that will undoubtedly make a significant statement in any room. Whether destined for a child’s bedroom, a cozy living area, or an inspiring home office, an engineer print frame offers an unparalleled combination of affordability and creative freedom. So, gather your tools, select your most cherished image, and prepare to be genuinely impressed with the beautiful and impactful piece you can construct with your own hands. Happy crafting!
Thanks so much for stopping by!
~Ashley