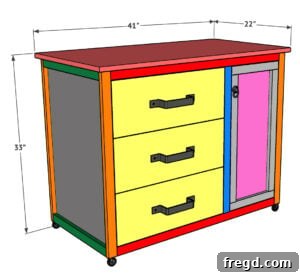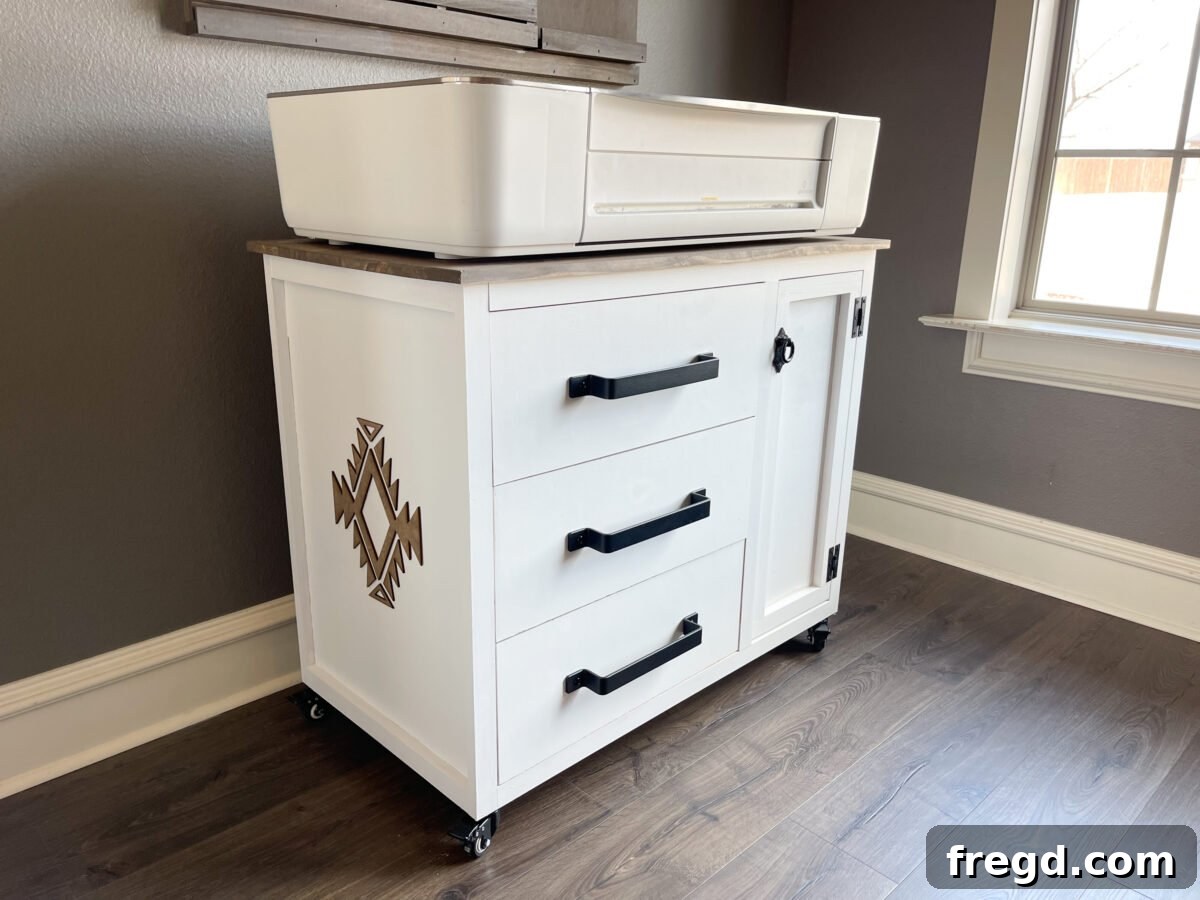
DIY Craft Cabinet: The Ultimate Storage Solution for Your Craft Room or Home Office
Are you yearning for a perfectly organized craft space or a functional workstation for your laser cutter? Look no further! This comprehensive guide provides everything you need to build your very own DIY Craft Cabinet. With free, detailed plans, a step-by-step tutorial, and just a few basic power tools, you can create a custom storage solution that transforms your creative haven.
For any dedicated crafter, artist, or maker, efficient storage is paramount. Cluttered workspaces stifle creativity and make finding supplies a frustrating endeavor. This DIY Craft Cabinet addresses those challenges head-on, offering a versatile design that integrates seamlessly into various home office or craft room setups. It’s not just a cabinet; it’s a dedicated command center for your projects.
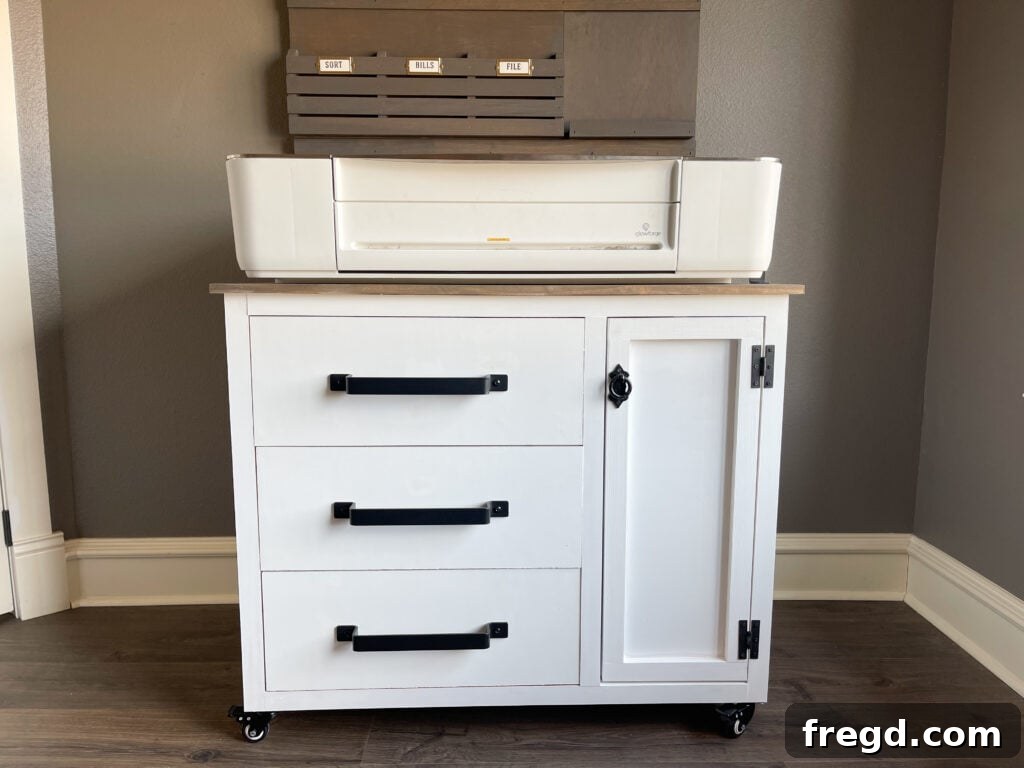
Specifically designed with laser cutter users in mind, this cabinet provides specialized storage for machines like the Glowforge Pro. However, its ingenious layout makes it adaptable for virtually any craft. Imagine deep drawers perfectly sized for proof-grade materials, and a dedicated compartment for an air filter or other essential equipment. Even if you don’t own a laser cutter, this piece makes an ideal craft cabinet for small spaces, offering maximum storage without occupying excessive floor area.
This project is surprisingly simple to build, making it accessible for woodworkers of all skill levels. And the best part? We’re providing free printable plans to guide you every step of the way. These plans include precise measurements and detailed diagrams, ensuring a smooth and successful build.
Click here to jump directly to the free printable plans and start your build today!
Follow along with our detailed tutorial below, packed with helpful tips and visuals to ensure your DIY Craft Cabinet is a masterpiece of organization.
Table of Contents
- Project Overview & Why You Need This Cabinet
- Essential Tools for This Project
- Comprehensive Supply List
- Detailed Cut Lists for Your Cabinet
- Building the Sturdy Cabinet Frame
- Constructing and Attaching the Face Frame
- Adding the Decorative Side Trim
- Crafting and Installing the Functional Drawers
- Assembling and Hanging the Cabinet Door
- Securing the Cabinet Top Panel
- The Finishing Touches: Personalization & Hardware
- Unleashing the Versatility: More Storage Ideas
Project Overview & Why You Need This Cabinet
This DIY Craft Cabinet isn’t just another piece of furniture; it’s a strategically designed storage solution that brings order and efficiency to your creative endeavors. When designing this piece, the primary goals were maximizing storage capacity, ensuring ease of mobility, and maintaining a compact footprint. The result is a highly functional cabinet that excels in organization and adaptability.
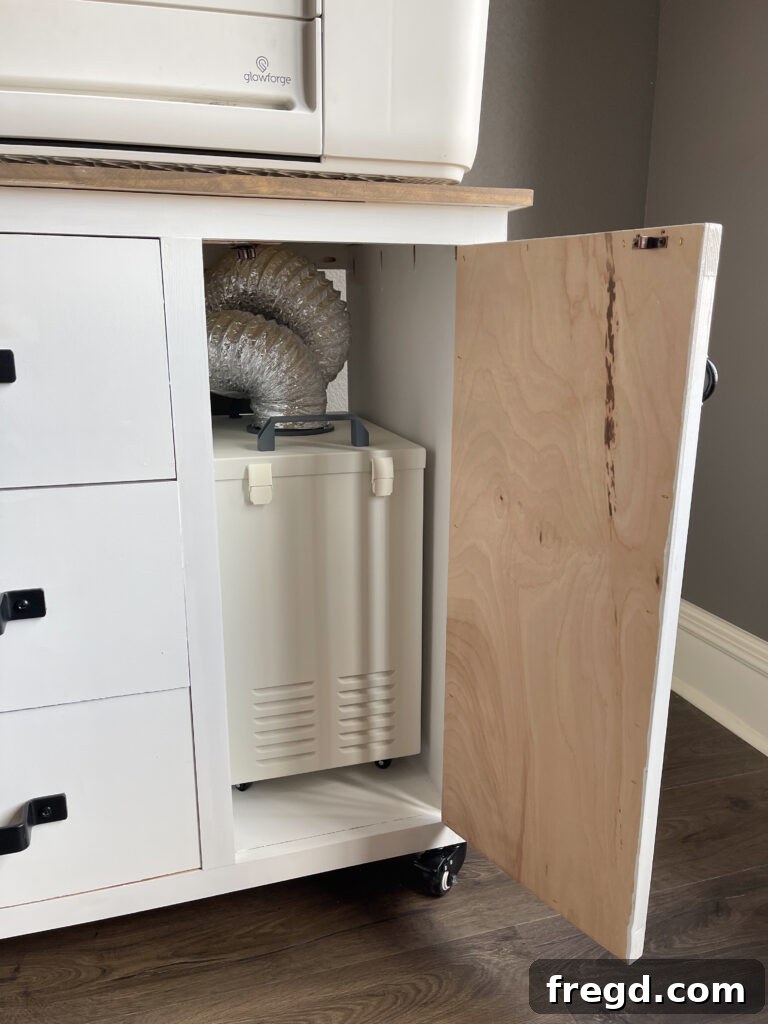
For those with a Glowforge Pro or similar laser cutter, this cabinet provides a perfect home. The spacious drawers are intentionally designed to accommodate standard 20-inch proof-grade panels, keeping your materials flat, protected, and easily accessible. The large cabinet door area is specifically configured to house the air filter system, maintaining a clean and clear workspace. No more working on the floor or struggling with inadequate setups!
Beyond laser cutting, imagine a world where every craft supply has its designated spot. This cabinet offers that reality. Its robust construction and thoughtful design make it ideal for storing a wide array of items, from fabric and yarn to paints, tools, and paper crafts. The mobility provided by optional casters means you can easily move your workstation wherever creativity strikes, or tuck it away when not in use. This isn’t just about building a cabinet; it’s about building a more enjoyable and productive crafting experience.
Essential Tools for This Project
Gathering the right tools before you begin is crucial for a smooth and efficient build. While some tools are optional, they can significantly enhance precision and ease of construction. Here’s what you’ll need:
- Miter Saw: Essential for accurate crosscuts and angle cuts.
- Drill: For pilot holes, driving screws, and general assembly.
- Kreg Jig: Indispensable for creating strong, concealed pocket-hole joints, giving your cabinet a clean finish.
- Table Saw (optional): Great for ripping large sheets of plywood accurately. If you don’t have one, the Kreg Accu-Cut is an excellent alternative for precise panel cuts.
- Brad Nailer: For quickly and securely attaching trim and thinner panels.
- Stapler (optional): Useful for attaching drawer bottoms and door panels, offering a strong hold.
- Pin Nailer (optional): Ideal for delicate trim work and attaching drawer faces without leaving noticeable nail holes.
- Measuring Tape: For all your sizing needs.
- Pencil: For marking cuts and drilling locations.
- Safety Glasses and Hearing Protection: Always prioritize safety when working with power tools.
Comprehensive Supply List
Having all your materials on hand before you start will prevent interruptions and keep your project on schedule. Here’s a detailed list of the lumber, hardware, and fasteners required for your DIY Craft Cabinet:
- 3 – 1x4x8 Pine or Common Boards: For the face frames and side trim.
- 1 – 3/4″x48″x96″ Hardwood Plywood (Birch recommended): For the main cabinet structure, including sides, bottom, and divider.
- 1 – 1/2″x48″x48″ Hardwood Plywood (Birch recommended): For the drawer components.
- 1 – 1/4″x48″x48″ Hardwood Plywood (Birch recommended): For the drawer bottoms and door panel.
- 1 – 3/4″x24″x48″ Laminated Pine: For the durable top surface of the cabinet.
- 1 1/4″ Pocket Hole Screws: For assembling the cabinet frame and face frames.
- 1 1/4″ Brad Nails: For attaching face frames and side trim.
- 5/8″ Brad Nails: For assembling the drawer boxes.
- 3/4″ Staples (optional): For attaching drawer bottoms and door panels.
- 1″ Pin Nails: For securing drawer faces.
- 3 Drawer Slides: Choose good quality, full-extension slides for smooth drawer operation.
- 3 Drawer Pulls: Select hardware that matches your aesthetic.
- 1 Cabinet Pull: Purchased from Hobby Lobby (or a similar craft store).
- 2 Cabinet Hinges: For the cabinet door.
- 4 – 2″ Casters: For mobility, allowing you to easily move the cabinet around your workspace.
- Wood Glue: Essential for strong, lasting joints throughout the build.
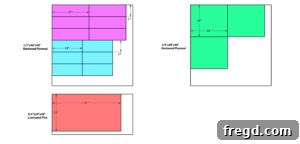
Detailed Cut Lists for Your Cabinet
Precision in cutting is key to a professional-looking finished product. Before you start assembling, refer to these detailed cut lists to prepare all your lumber. It’s always a good practice to double-check your measurements and make clean, accurate cuts.
Cut List 1: Plywood Panels
These cuts primarily come from your 3/4″ hardwood plywood and form the core structure of your cabinet.
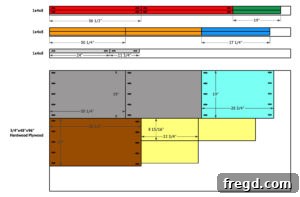
Cut List 2: Drawer and Door Components
This list covers the cuts for your drawers (from 1/2″ plywood) and door panel (from 1/4″ plywood), as well as the laminated pine top.
Building the Sturdy Cabinet Frame
The cabinet frame forms the backbone of your storage unit. Taking your time and ensuring accuracy in these initial steps will pay dividends in the overall stability and appearance of your finished cabinet.
Step 1: Preparing and Assembling the Main Panels
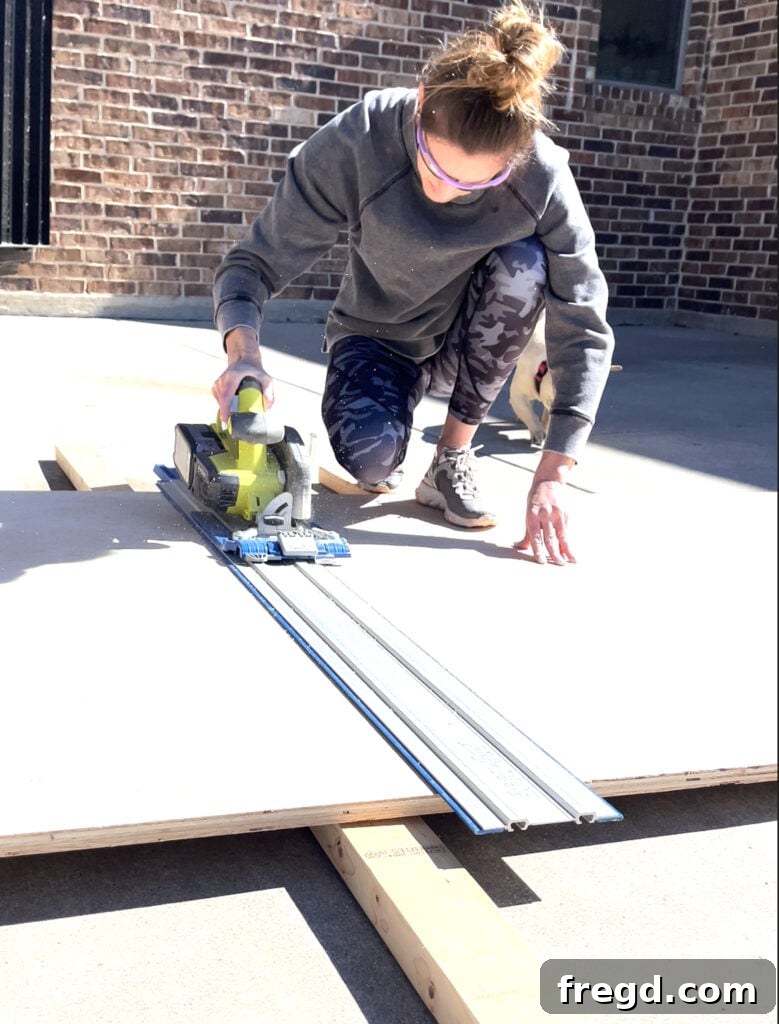
Begin by accurately cutting your 3/4″ plywood panels according to Cut List 1. If you don’t have a table saw, a tool like the Kreg Accu-Cut is an excellent, cost-effective alternative that ensures clean, straight edges every time, vital for a professional look.
- Learn more about the Kreg Accu-Cut here.
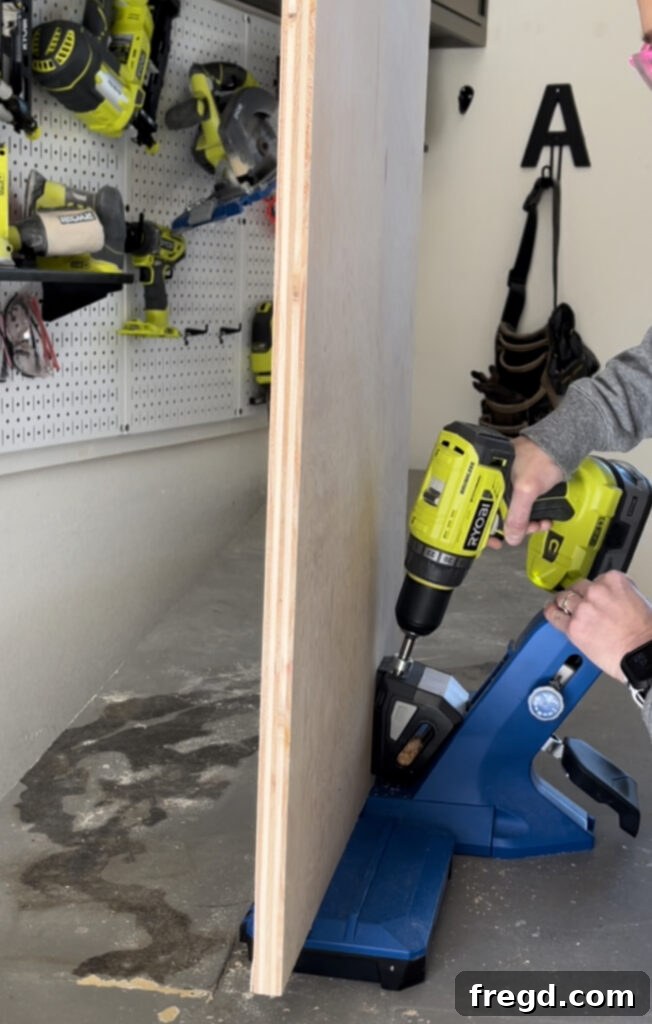
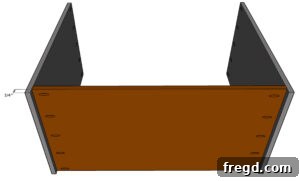
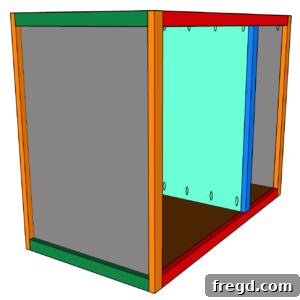
Once your panels are cut, grab your Kreg Jig. Drill 3/4″ pocket holes into both ends of the bottom panel. Also, drill 3/4″ pocket holes into the top ends of the two side panels. These pocket holes will create incredibly strong and hidden joints for your cabinet frame.
- Find our favorite Kreg Jig model here.
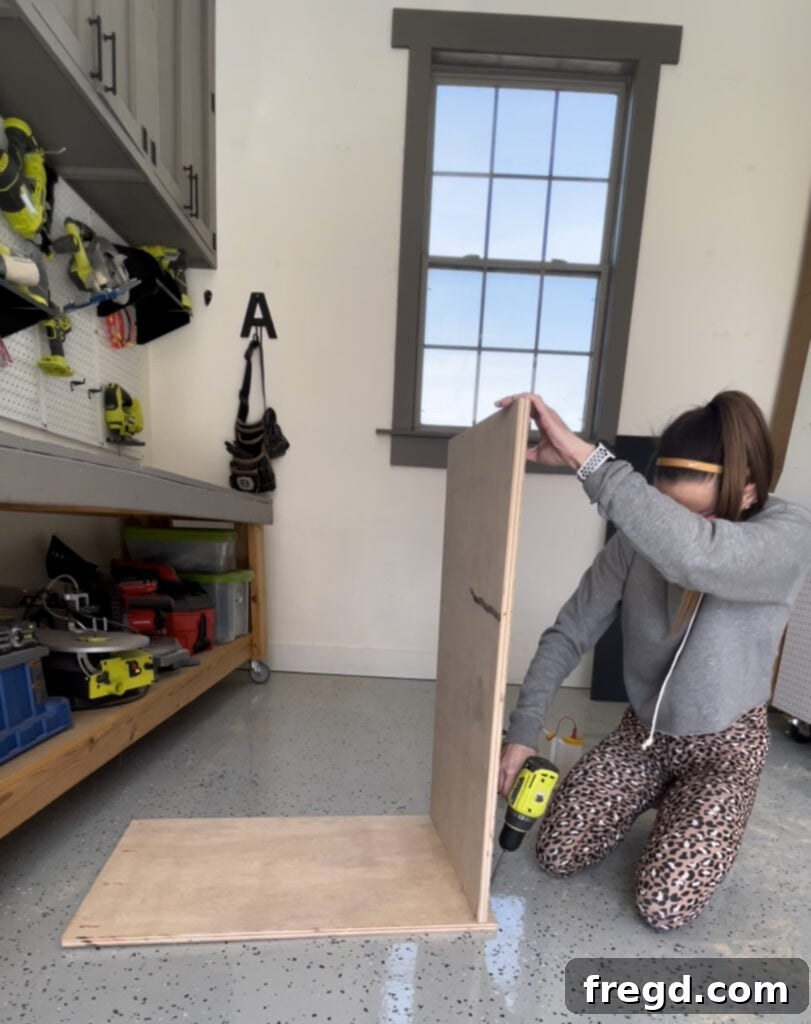
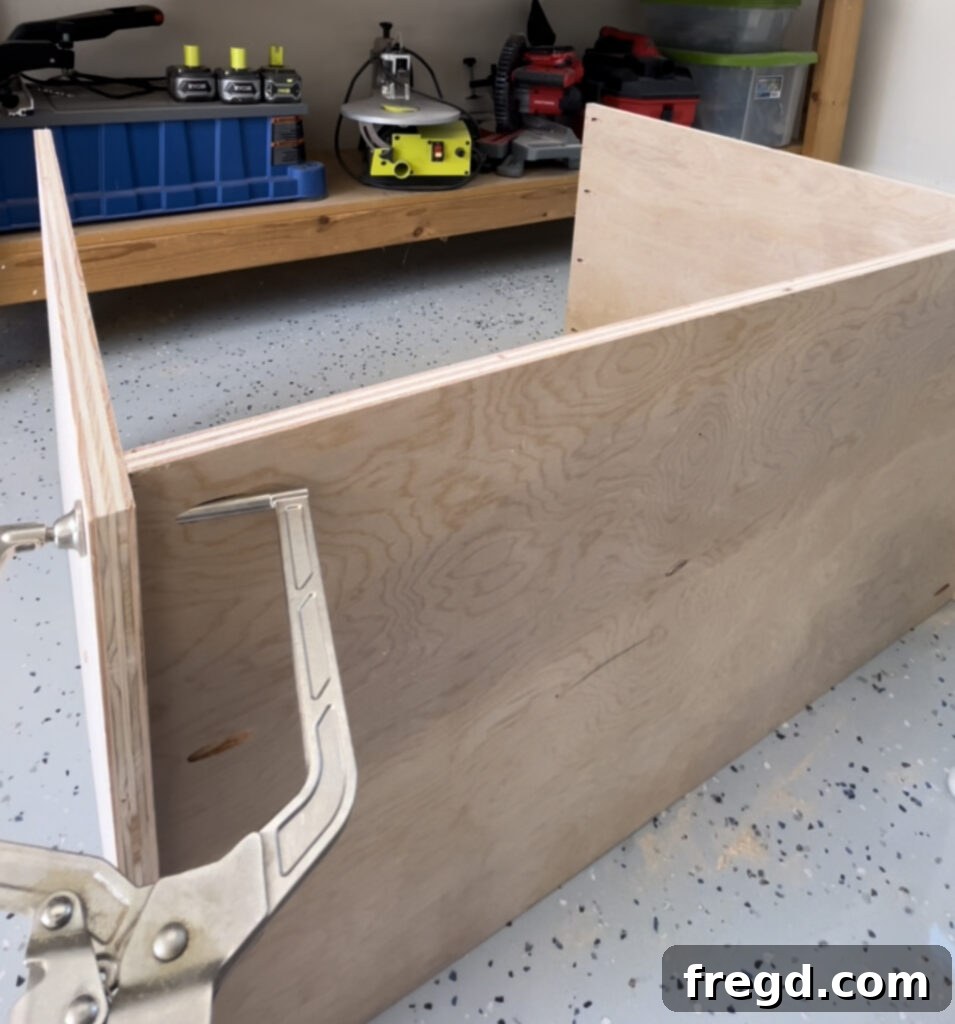
Next, apply a bead of wood glue along the edges where the side panels will meet the bottom panel. Using Kreg Right Angle Clamps or similar clamps to hold the pieces flush, attach the side panels to the bottom panel with 1 1/4″ pocket hole screws. Ensure a 3/4″ space is left at the bottom edge of the side panels; this space will be crucial for attaching casters later and giving the cabinet a finished base.
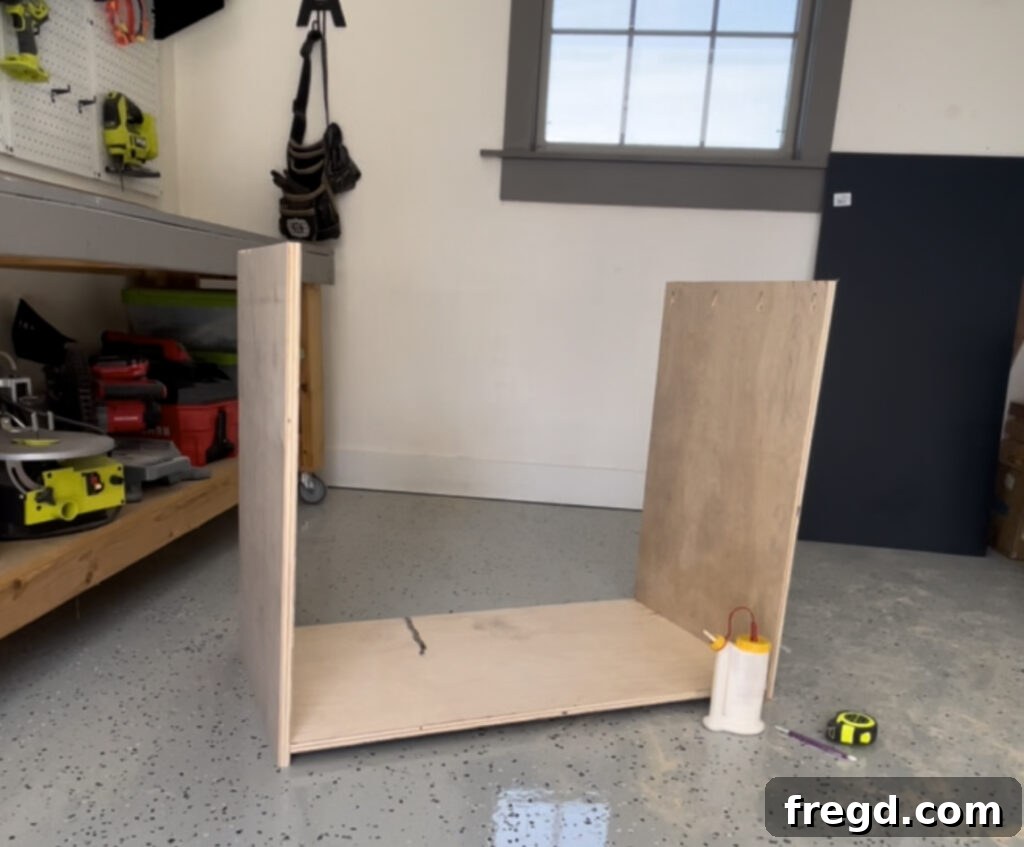
- The Kreg Right Angle Clamp is a game-changer for flush alignment. Find it here.
Step 2: Integrating the Middle Divider
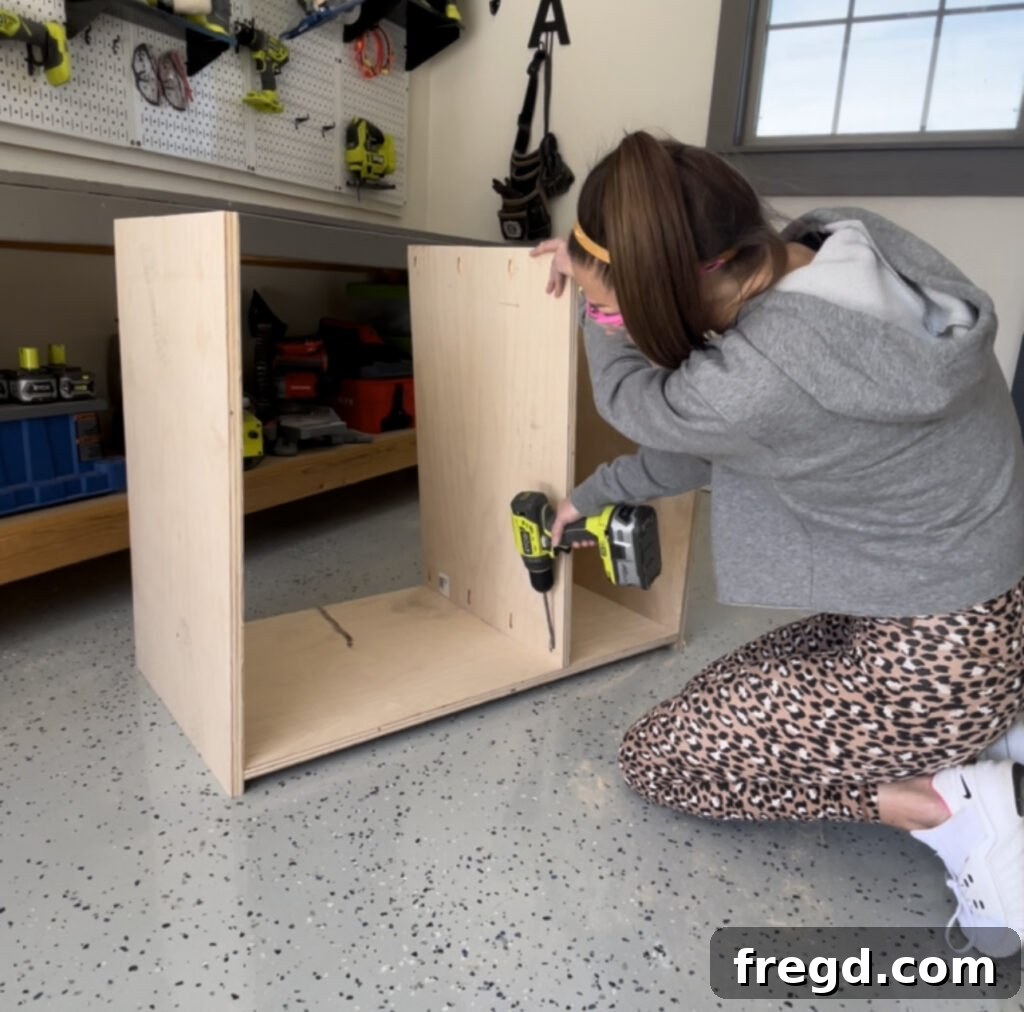
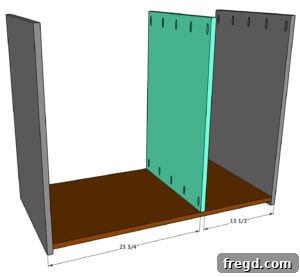
The middle divider adds structural integrity and separates the drawer section from the cabinet door compartment. Cut the middle divider panel to the dimensions specified in Cut List 1. Drill 3/4″ pocket holes into both ends of the divider. Apply wood glue to the bottom edge and ends, then attach it to the bottom panel using 1 1/4″ pocket hole screws. Ensure it is centered or positioned as per your plans to create the desired compartments.
Constructing and Attaching the Face Frame
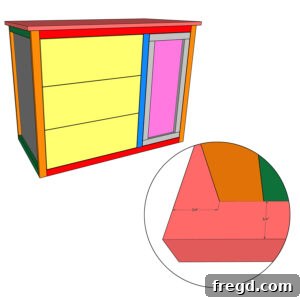
The face frame not only enhances the cabinet’s aesthetic appeal but also adds significant rigidity and provides a solid surface for attaching drawer slides and hinges. It’s built from 1×4 pine boards, giving a robust and professional finish.
Step 1: Assembling the Face Frame Pieces
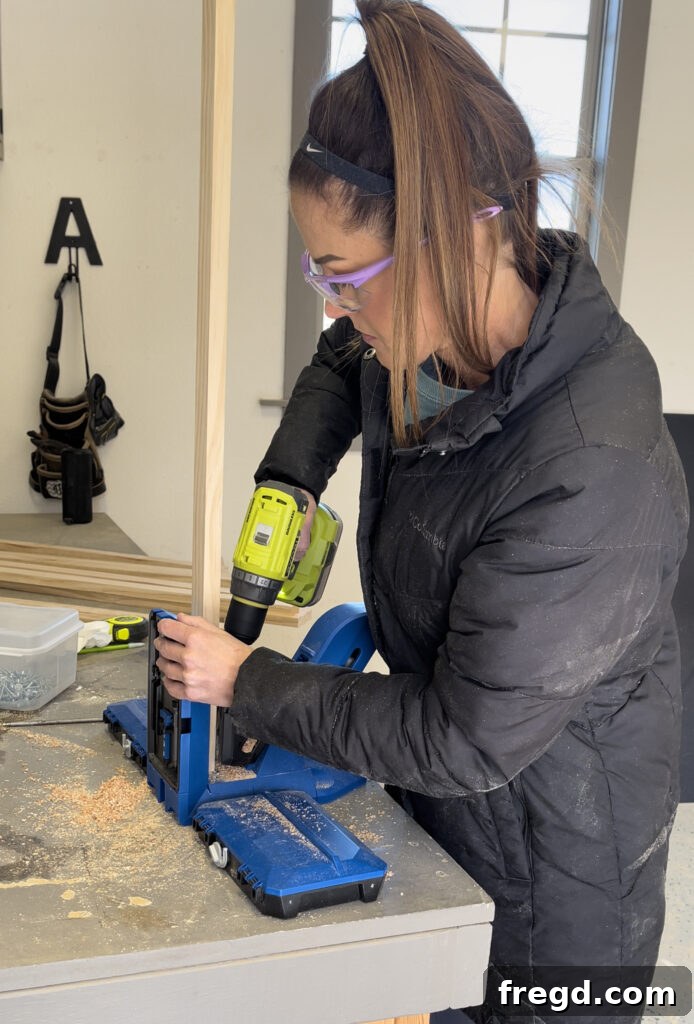
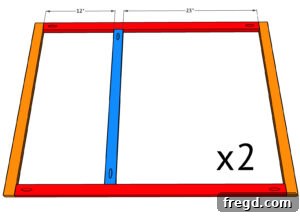
Cut your 1×4 pine boards into the various face frame pieces as per your free plans. For the top, bottom, and middle horizontal pieces, drill 3/4″ pocket holes at both ends. These holes will allow you to create strong, seamless joints.
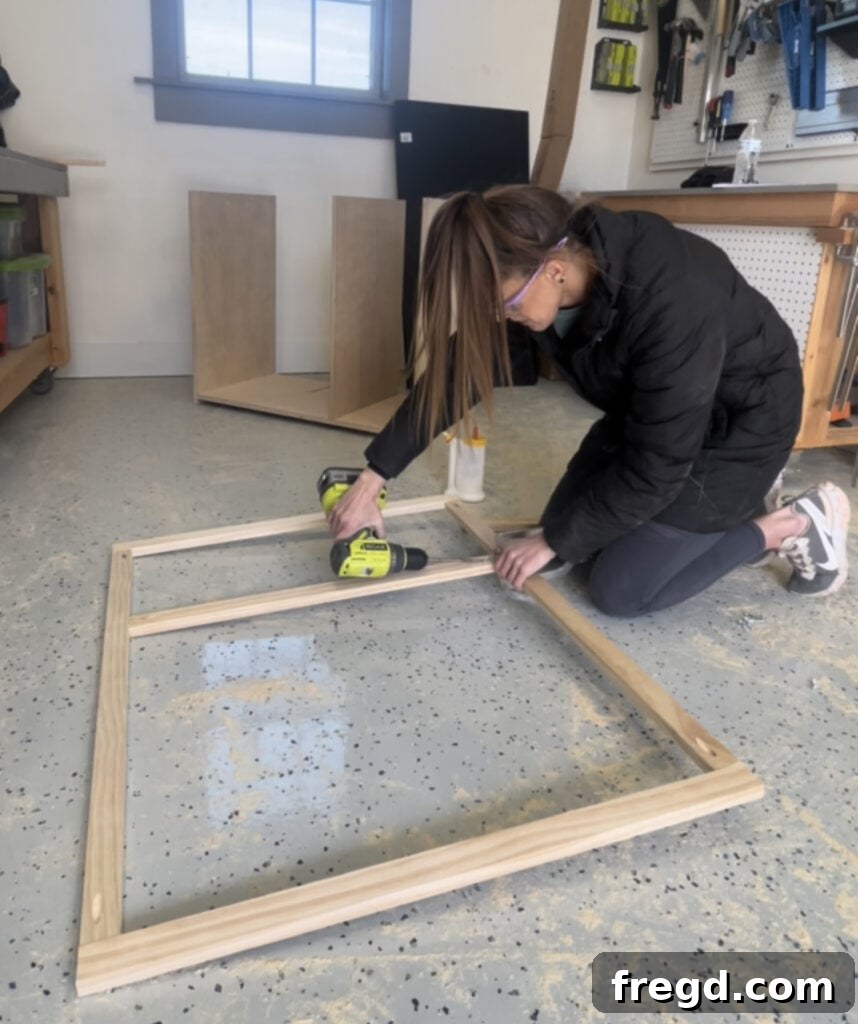
Apply wood glue to the mating surfaces and assemble the face frame pieces using 1 1/4″ pocket hole screws. You will need to build two identical face frame assemblies: one for the front and one for the back of the cabinet. This step is where precision in cutting and assembly truly shines, creating clean, square frames.
Step 2: Attaching the Face Frames to the Cabinet
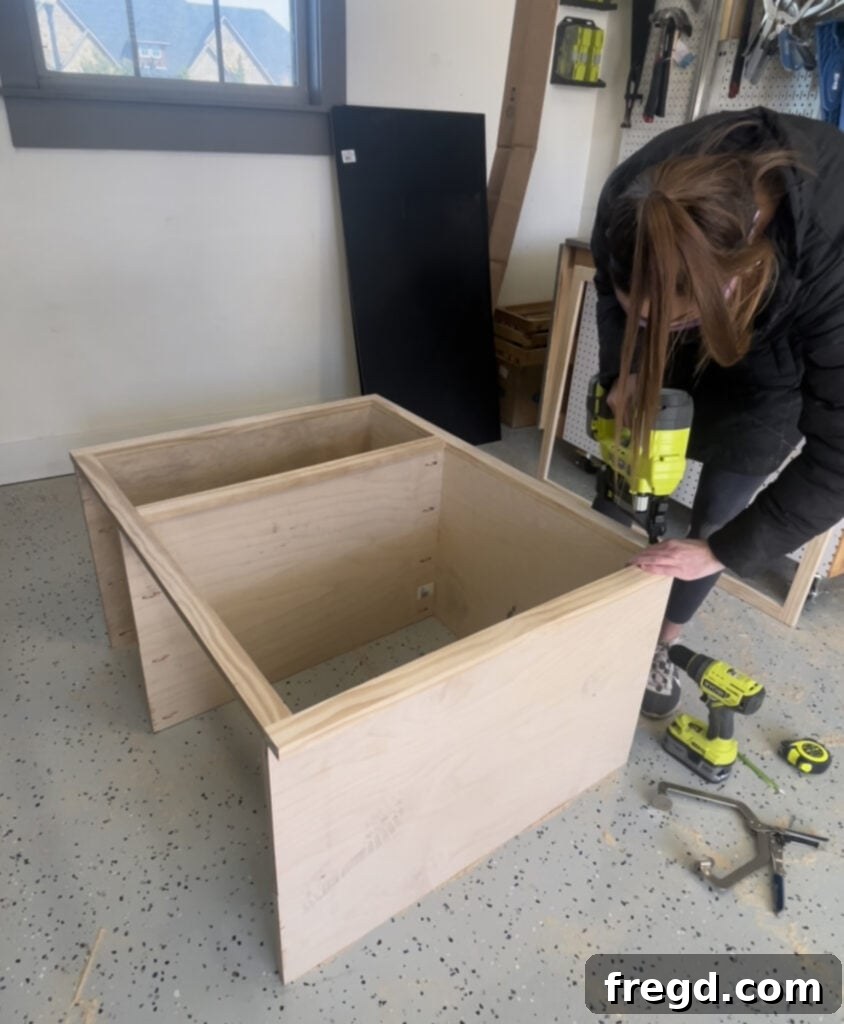
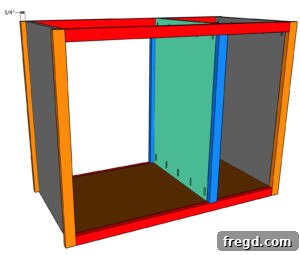
With your face frames assembled, it’s time to attach them to the main cabinet body. Apply wood glue to the edges of the cabinet where the face frame will sit. Carefully align the face frame with the front of the cabinet, ensuring the side face frame pieces are flush with the inside edges of the plywood side panels. Secure the face frame in place using 1 1/4″ brad nails. Repeat this process for the back of the cabinet, attaching the second face frame assembly.
Adding the Decorative Side Trim
The side trim adds a finished look to your cabinet, covering the exposed plywood edges and tying the overall aesthetic together. This simple step significantly enhances the visual appeal of your project.
Step 1: Measuring and Attaching Side Trim Pieces
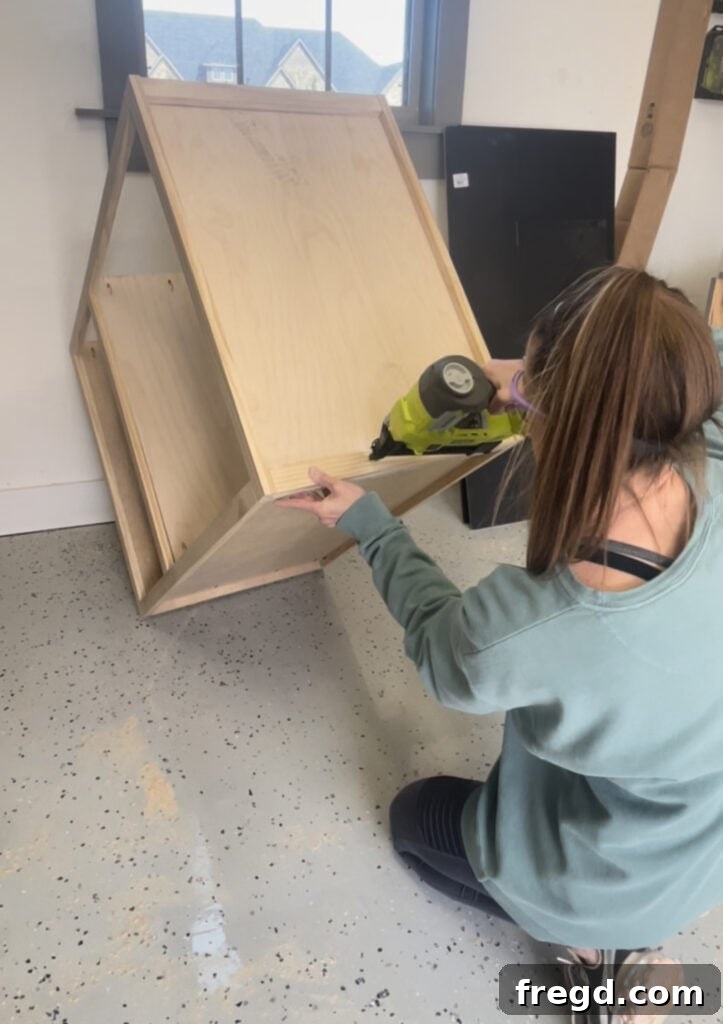
Measure the length of the exposed top and bottom edges of both side panels. Cut the side trim pieces from your 1×4 pine boards to these exact measurements. Apply wood glue to the back of each trim piece and position them carefully, flush with the top and bottom edges of the side panels. Secure them in place using 1 1/4″ brad nails. This step should create a clean, boxed-in look around the base of your cabinet.
Crafting and Installing the Functional Drawers
The drawers are a key feature of this craft cabinet, providing ample space for organizing various supplies. Building and installing them correctly ensures smooth operation and maximum utility.
Step 1: Installing the Drawer Slides
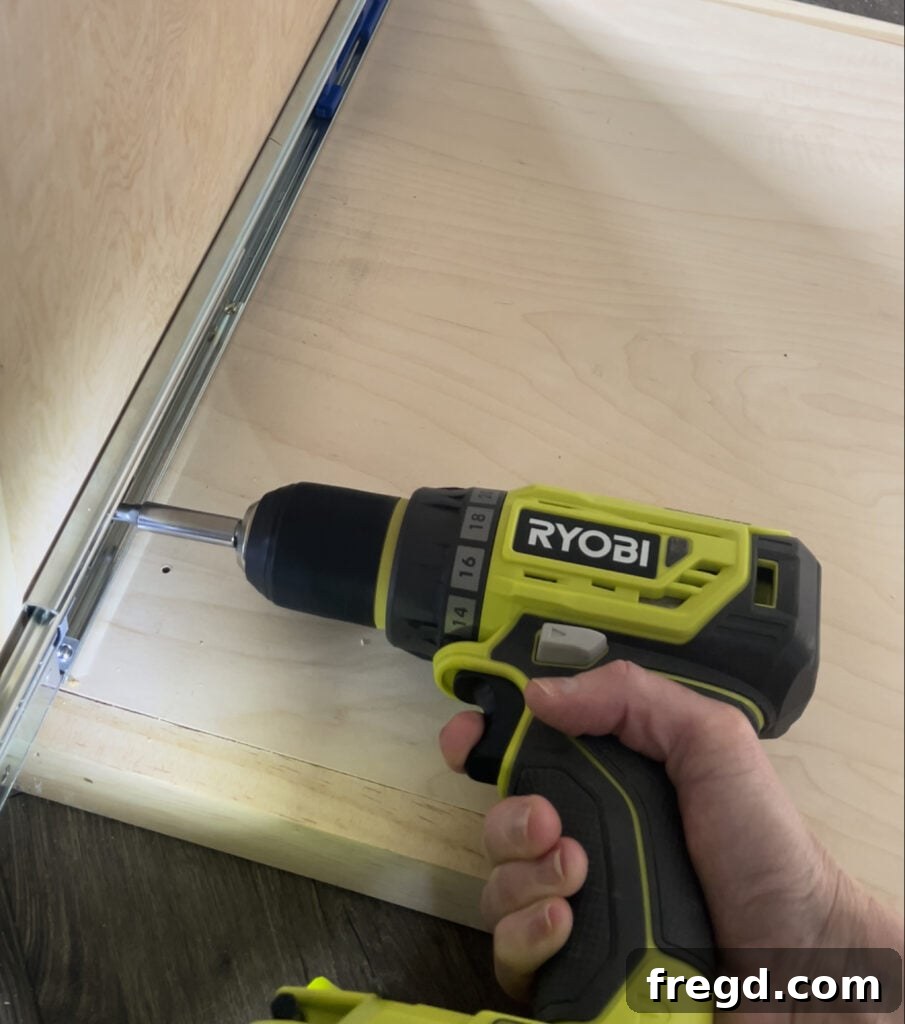
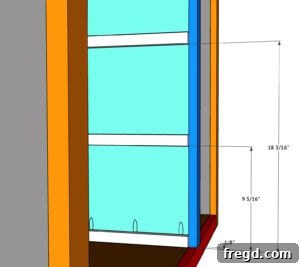
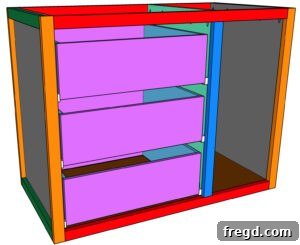
Begin by attaching the cabinet-side portion of your drawer slides to the middle divider and the cabinet side panel. It is crucial to follow the manufacturer’s instructions for proper placement and screw type. Ensure the front edge of each drawer slide is flush with the front of the divider/face frame opening. Precise alignment here is essential for drawers that operate smoothly and close evenly.
Step 2: Assembling the Drawer Boxes
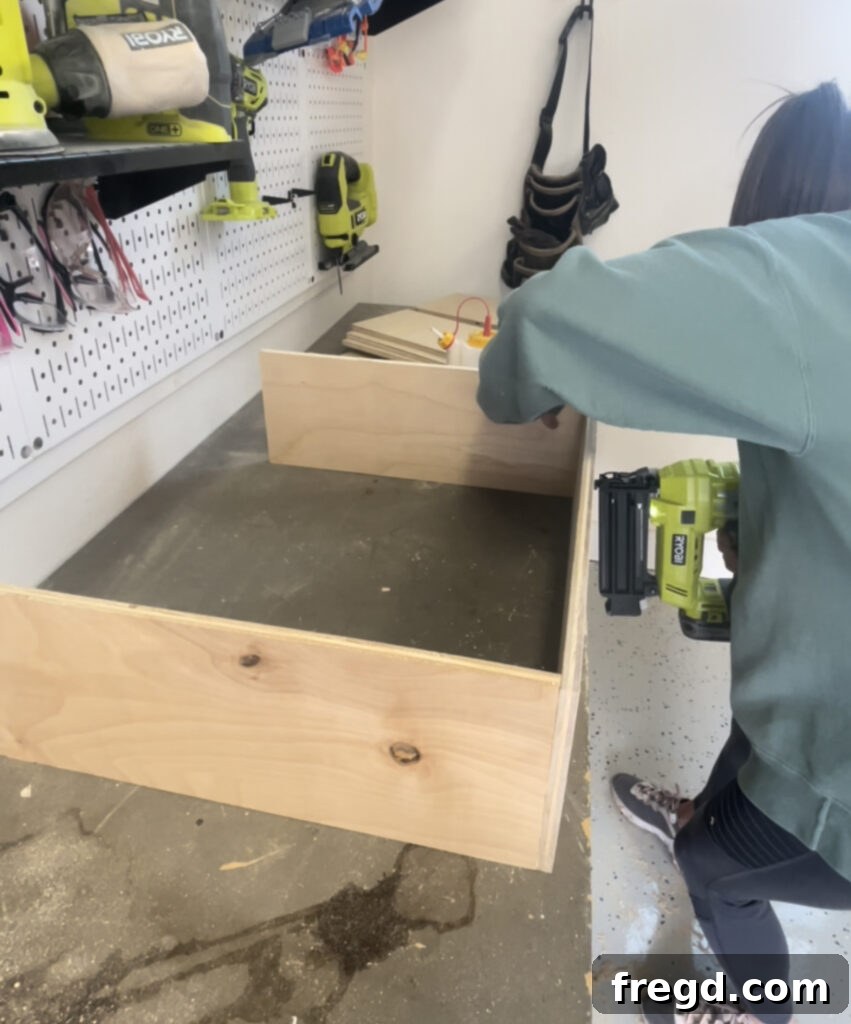
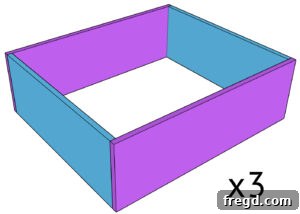
Cut all the drawer pieces from your 1/2″ hardwood plywood according to Cut List 2. Apply wood glue to the edges and assemble the drawer boxes using 5/8″ brad nails. Ensure the corners are square during assembly for optimal fit within the cabinet.
Step 3: Attaching the Drawer Bottoms
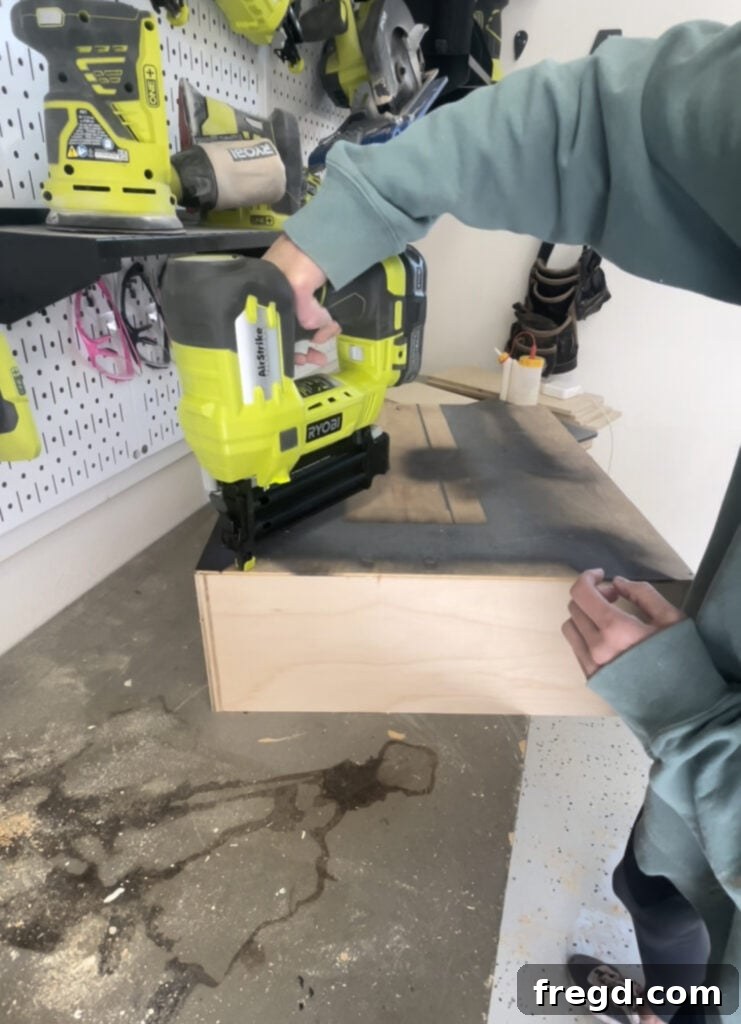
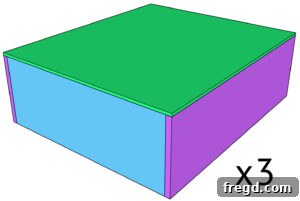
Cut the drawer bottoms from your 1/4″ hardwood plywood as specified in Cut List 2. Apply wood glue to the bottom edges of each assembled drawer box. Place the 1/4″ plywood bottom onto the glue, ensuring it’s flush with all edges. Secure the bottom with 3/4″ staples (or small brad nails). Repeat these steps to build all three drawers.
Step 4: Installing the Completed Drawers
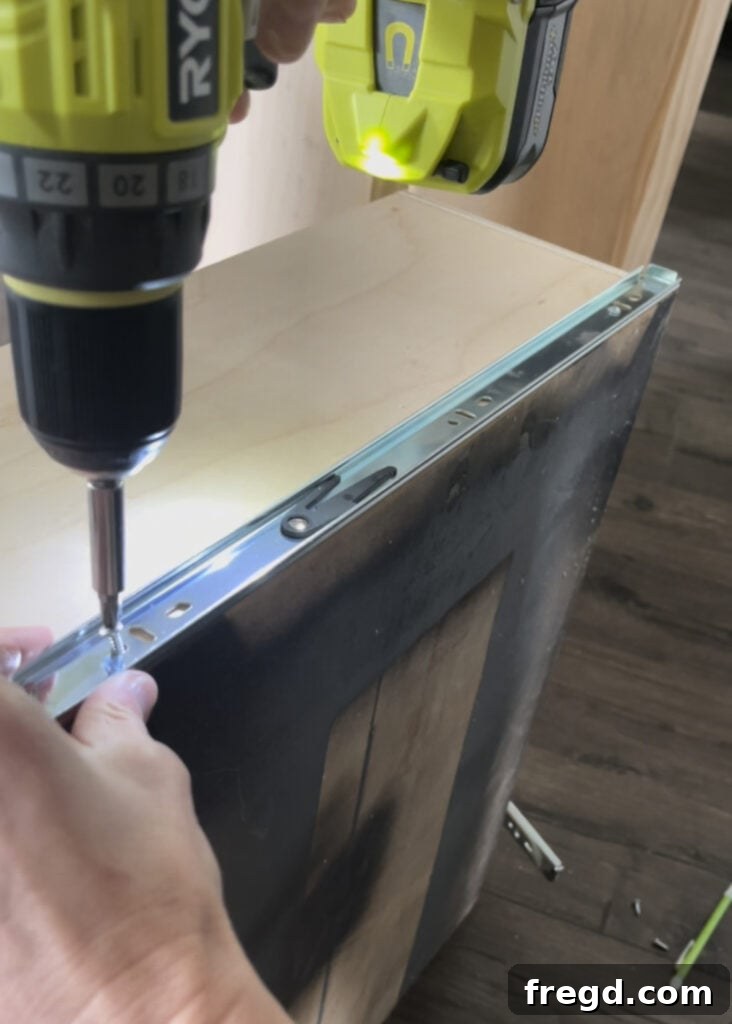
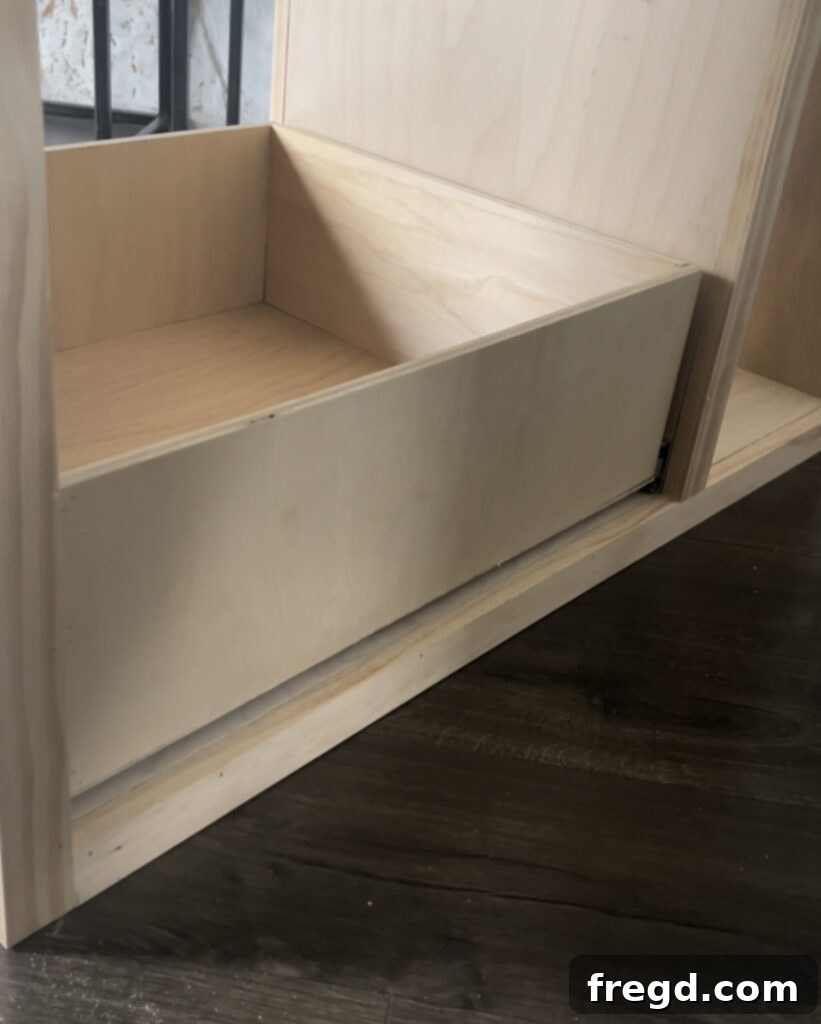
Attach the remaining portions of the drawer slides to the sides of your newly constructed drawer boxes, again following the manufacturer’s guidelines. Once the slides are attached to the drawers, carefully insert each drawer into its respective opening in the cabinet. Test the movement to ensure they slide smoothly and close properly.
Step 5: Attaching the Drawer Faces
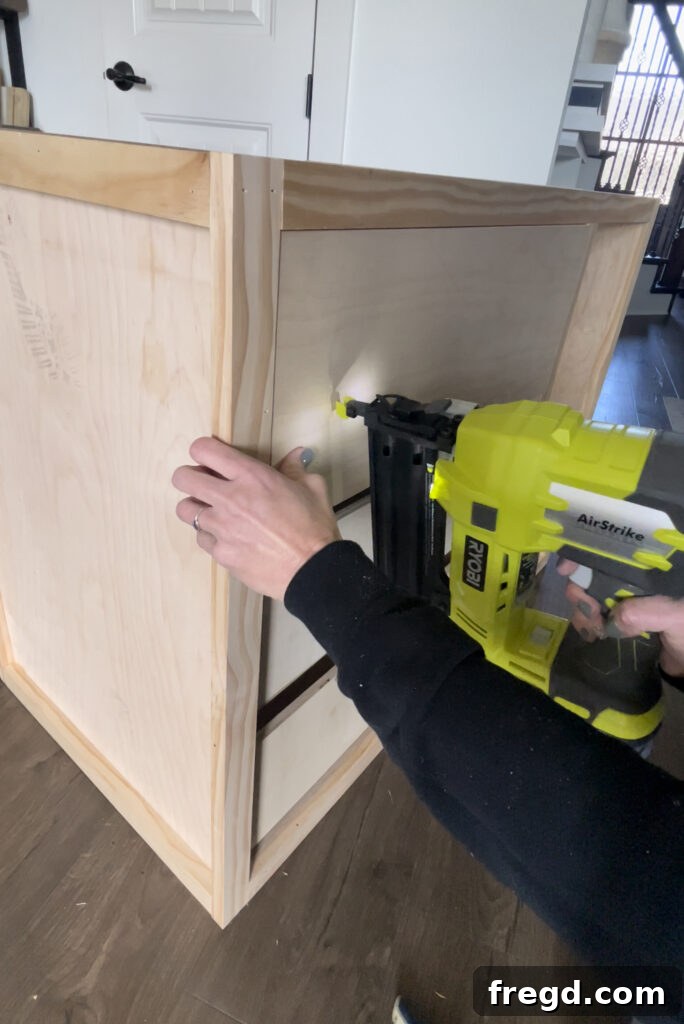
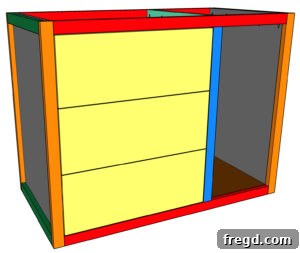
The drawer faces are the visible front of your drawers and contribute significantly to the cabinet’s final appearance. Measure and cut the drawer faces from your 1×4 pine boards as per your plans, ensuring they are sized to leave a consistent 1/8″ gap around all sides once attached. This gap is crucial for smooth opening and closing. Apply wood glue to the back of each drawer face and carefully align it onto the front of its corresponding drawer box. Secure with 1″ pin nails for a clean finish.
Assembling and Hanging the Cabinet Door
The cabinet door provides enclosed storage, perfect for larger items like an air filter or taller craft supplies. Building and installing it correctly ensures a seamless look and functional access.
Step 1: Constructing the Door Frame and Panel
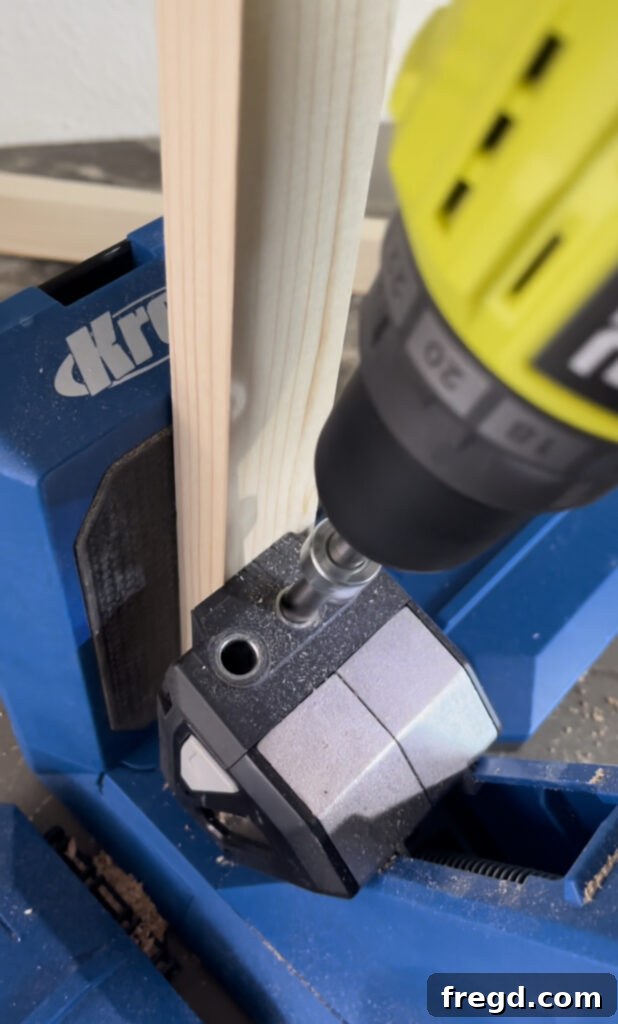
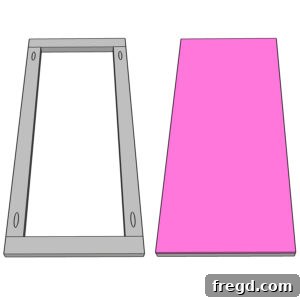
Cut the door frame pieces from your 1×4 pine boards. Drill 3/4″ pocket holes into both ends of the vertical side pieces of the door frame. Apply wood glue and assemble the frame using 1 1/4″ pocket hole screws, ensuring it is square.
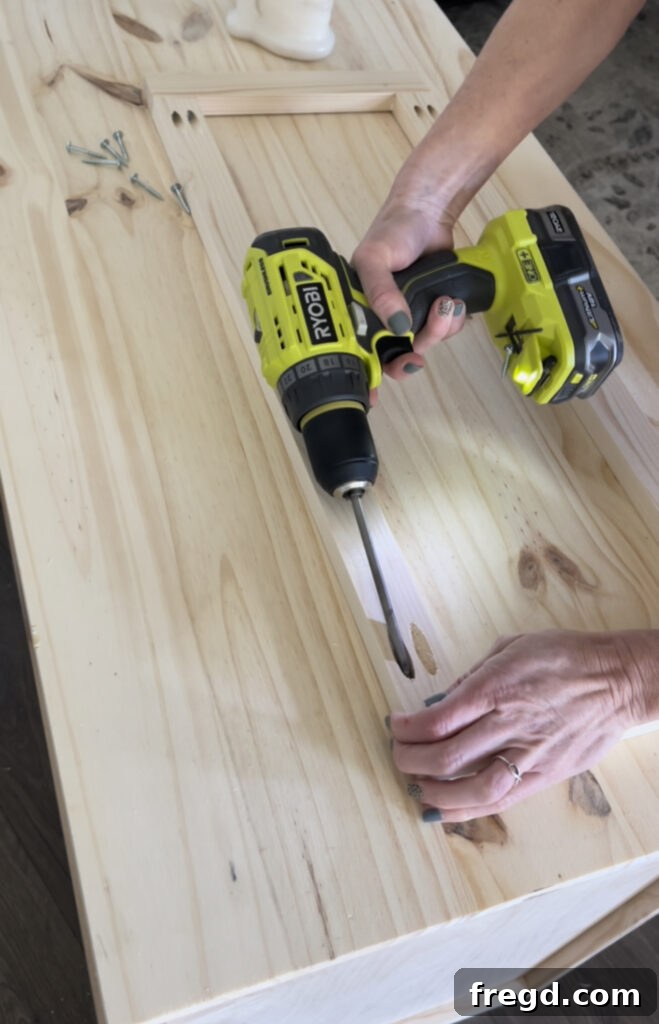
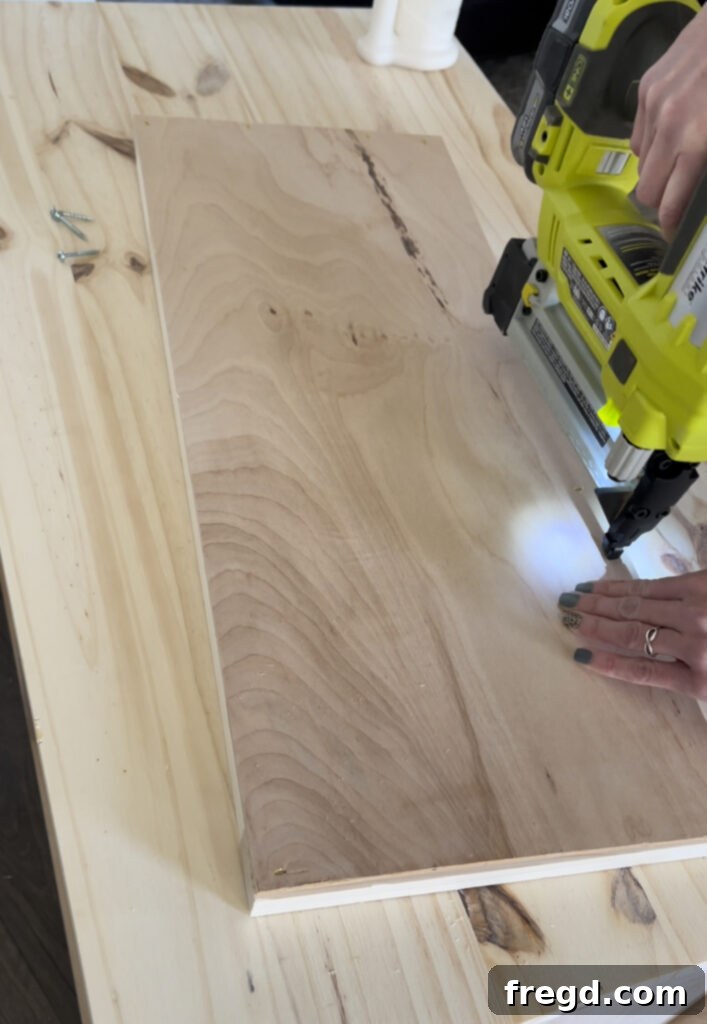
Next, cut the door panel from your 1/4″ hardwood plywood (refer to Cut List 2). Apply wood glue to the back inside edges of the assembled door frame. Position the 1/4″ plywood panel onto the glue, ensuring it’s flush with the outer edges of the frame, and secure it with 3/4″ staples or small brad nails.
Step 2: Attaching the Door to the Cabinet
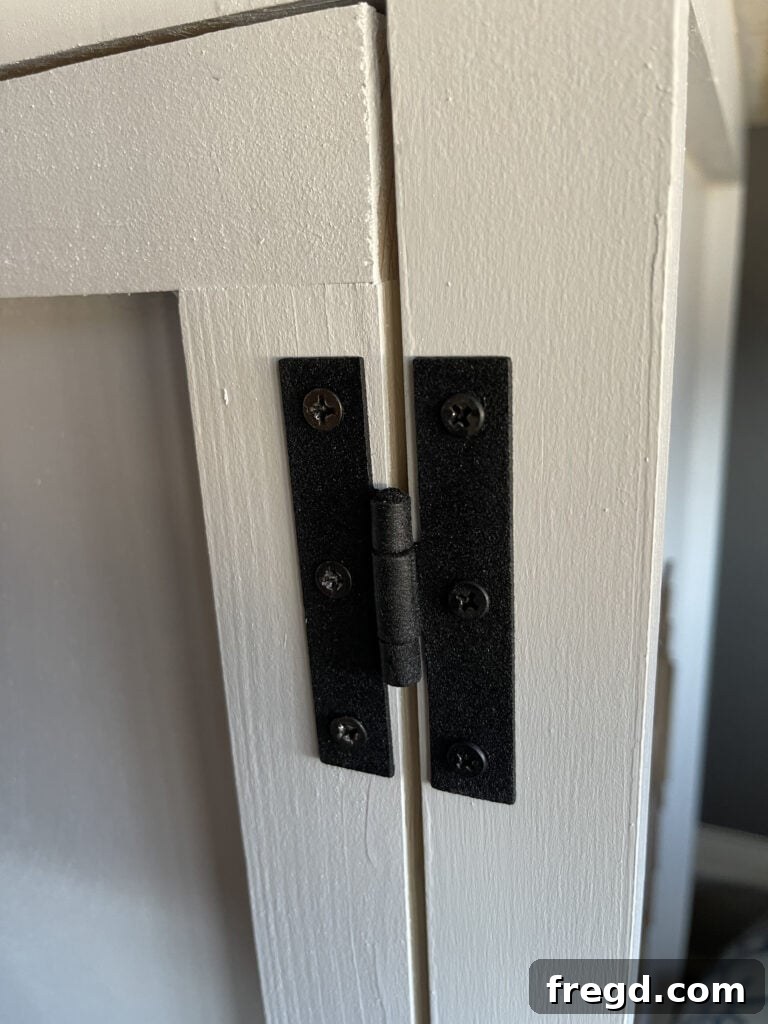
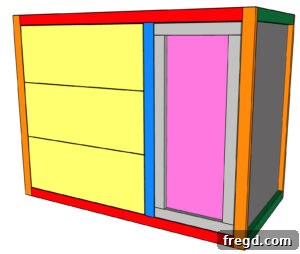
Carefully position the assembled door into its opening on the cabinet. Use cabinet door hinges to attach the door to the face frame, ensuring there is a consistent 1/8″ gap around all sides. This gap is crucial for the door to open and close freely without binding. Take your time with this step to ensure perfect alignment.
Securing the Cabinet Top Panel
The top panel not only provides a spacious work surface but also ties the entire cabinet together, adding strength and a finished look.
Step 1: Attaching the Laminated Pine Top
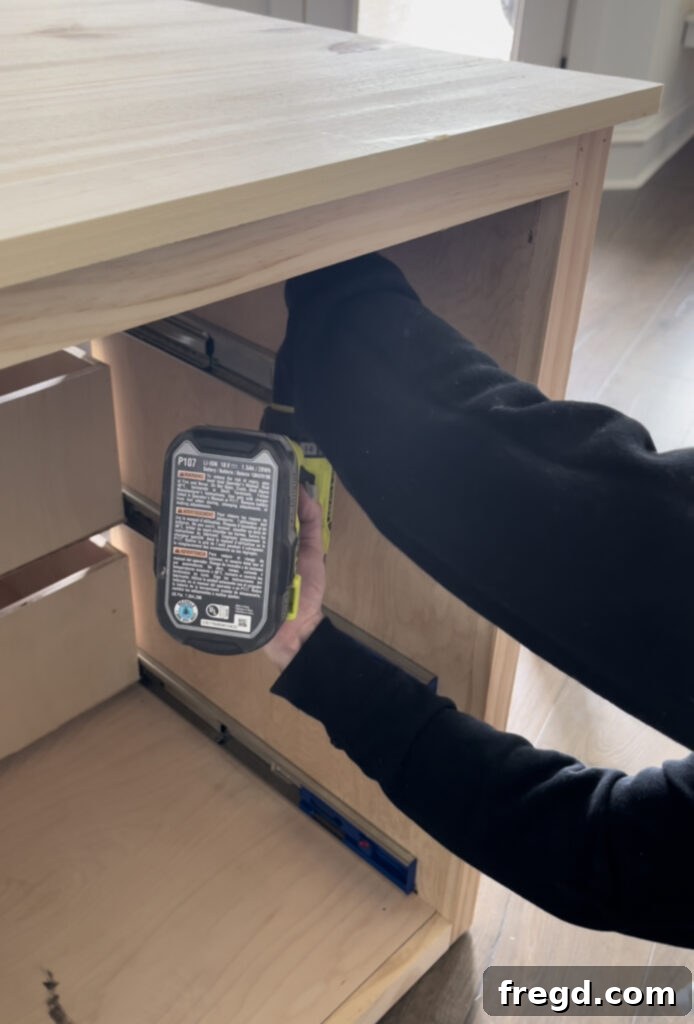
Cut the laminated pine project panel to the size indicated in Cut List 2. This panel will serve as the durable top surface of your cabinet. Drill pocket holes along the top edge of the cabinet frame and divider, ensuring they are placed so the screws will penetrate the center of the top panel. Apply a generous amount of wood glue to the top edges of the cabinet. Carefully position the laminated pine top, ensuring it’s flush or has a slight overhang as desired. Secure it firmly with 1 1/4″ pocket hole screws. This creates a strong, stable work surface.
The Finishing Touches: Personalization & Hardware
Now for the exciting part – bringing your DIY Craft Cabinet to life with finishes and hardware! This is where you can truly personalize the piece to match your style and workspace.
Personalizing Your Cabinet with a Glowforge Design
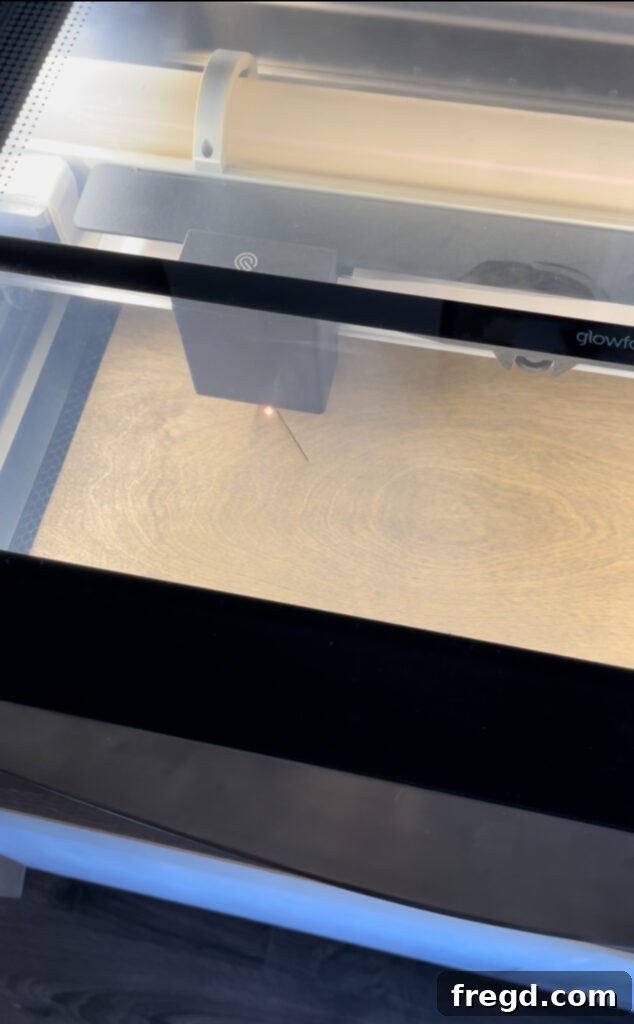
For a truly custom look, consider adding a unique design element to the sides of your cabinet. A laser cutter, like the Glowforge Pro, makes this process incredibly easy and fun. You can stain a proof-grade panel a contrasting color and then use your Glowforge to cut out an intricate design. This creates beautiful, custom inlays or overlays that elevate the cabinet’s aesthetic.
- You can find the design file used for this project here.
- Discover more about the Glowforge 3D Laser Printer and its capabilities here.
- **Special Offer:** Glowforge has provided a unique link for our readers. Purchase a Glowforge through this link to get their best available price!
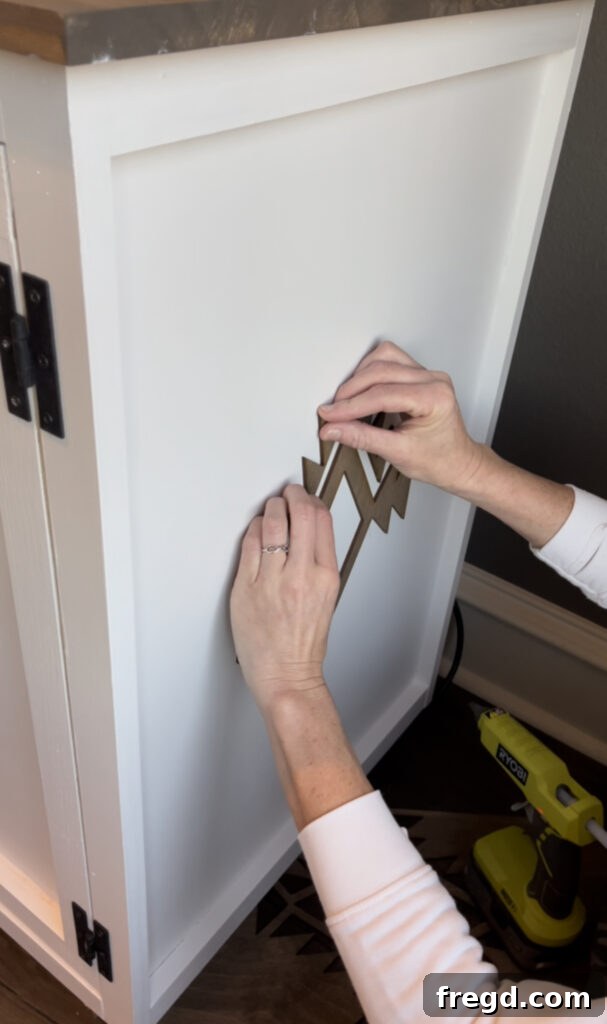
Because laser-cut designs are typically lightweight, a simple application of hot glue is often sufficient to securely attach them to the side of the cabinet, ensuring they stay in place without damaging the underlying surface.
Adding Hardware and Final Touches
Once your cabinet is assembled and any decorative elements are in place, it’s time to apply your chosen finish and attach the hardware. Whether you opt for paint, stain, or a clear coat, ensure the finish is durable and appropriate for a high-traffic craft area. Finally, install your drawer pulls and the cabinet door pull. Don’t forget to attach the 2″ casters to the bottom of the cabinet, making it effortlessly mobile.
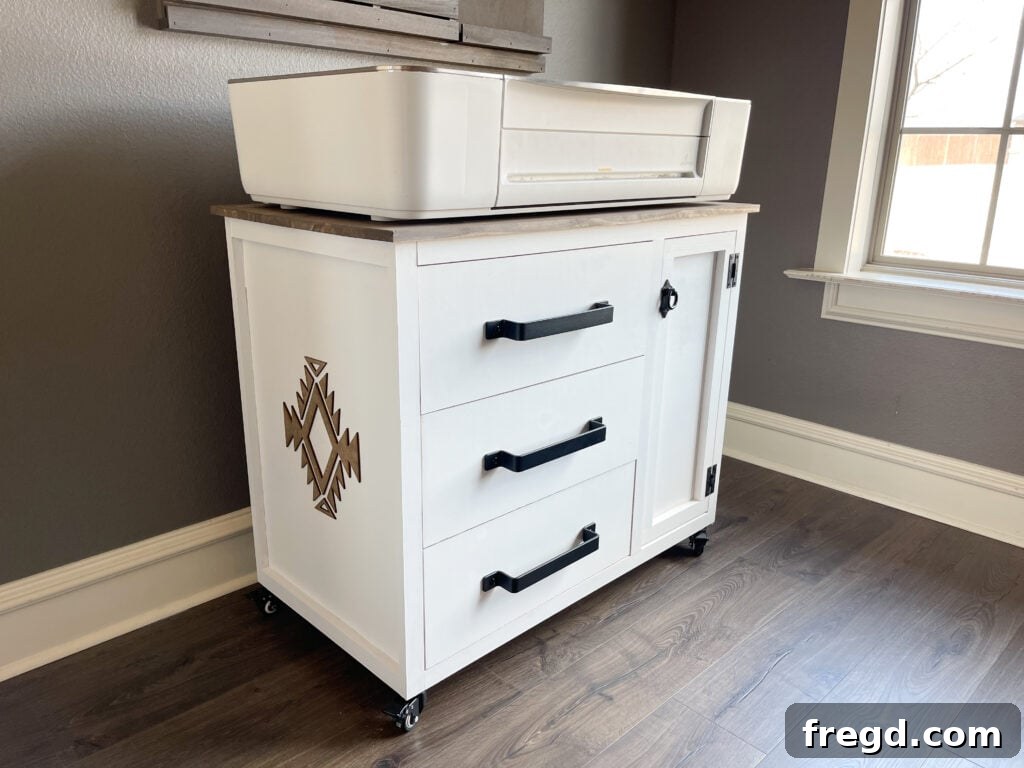
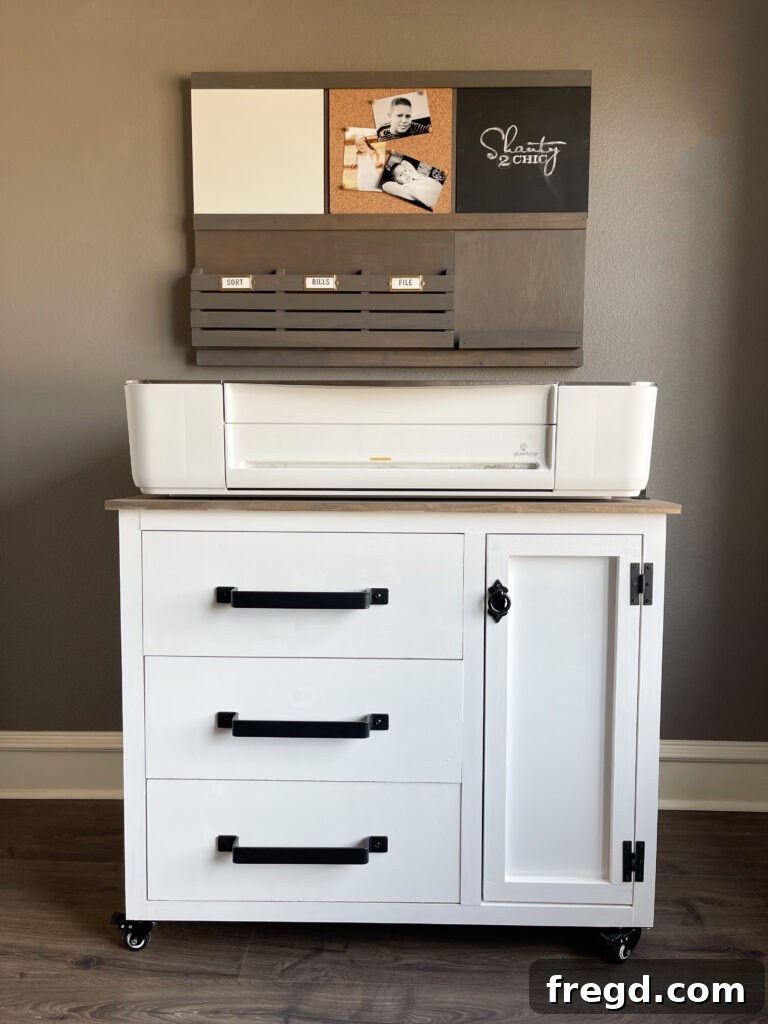
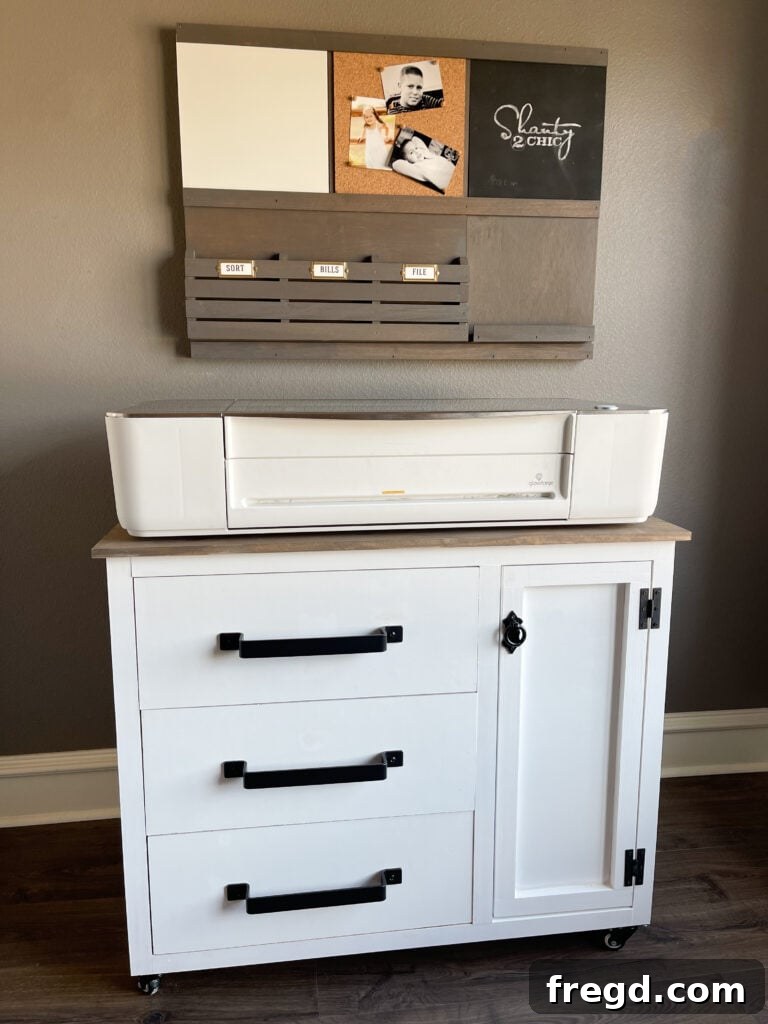
Congratulations! Your new DIY Craft Cabinet is complete and ready to tackle all your storage needs. This robust and beautiful piece is sure to become the centerpiece of your craft room or home office.
- You can find the specific drawer handles used in this project here.
- The cabinet door pull can be found at Hobby Lobby (or similar retailers for a unique touch).
- The 2″ casters for enhanced mobility are available here.
Unleashing the Versatility: More Storage Ideas
While designed with laser cutting in mind, the true beauty of this DIY Craft Cabinet lies in its incredible versatility. This isn’t just a Glowforge stand; it’s a dynamic storage console adaptable to countless crafting passions.
The deep, wide drawers are perfect for organizing a multitude of supplies. Imagine storing rolls of ribbon, stacks of scrapbook paper, an entire collection of markers, scissors, pens, paint tubes, vinyl rolls, and more! The possibilities are truly endless, catering to artists, quilters, jewelry makers, and anyone with a passion for creative hobbies.
The spacious cabinet compartment offers even more potential. You could add adjustable shelving inside to create multiple levels for smaller craft supplies like beads, embroidery floss, or stamps. If you’re a sewing enthusiast, this space is ideal for housing a sewing machine, keeping it protected and readily accessible, with room for notions and fabric scraps. For those who love gift wrapping, remove any internal shelving, and you’ll have the perfect upright storage for wrapping paper rolls, gift bags, and bows.
This piece truly is a universal storage console, designed to evolve with your crafting needs. Don’t hesitate to get creative with its interior configuration and make it uniquely your own!
Make sure to share your incredible builds with us on social media! Use the hashtag #shanty2chic so we can see and share your personalized craft cabinets with our community.
Happy Building!
DIY Craft Cabinet Free Printable Plans
Ready to build this functional and stylish DIY Craft Cabinet? We’ve put together a comprehensive set of free printable plans to guide you through every cut and joint. These plans include detailed dimensions, materials lists, and step-by-step illustrations to ensure your build is a resounding success.
Click here to download and print the full set of plans!
Instructions Overview
Below is a summary of the construction process, highlighting key steps and visual aids from the detailed plans. Refer to the full printable plans for all measurements and precise instructions.
-
Cut List 1: Main Plywood Components
Prepare your 3/4″ hardwood plywood by making these essential cuts for the cabinet sides, bottom, and divider. Accuracy here sets the foundation for your entire project.

-
Cut List 2: Drawers, Door, and Top
Proceed with cutting your 1/2″ plywood for drawer components, 1/4″ plywood for drawer bottoms and the door panel, and the laminated pine for the cabinet top.
-
Building the Cabinet Frame
Cut the bottom and side panels to size. Drill 3/4″ pocket holes at both ends of the bottom board and the top ends of the side pieces. Attach the side panels to the bottom panel with 1 1/4″ pocket hole screws and wood glue, leaving a 3/4″ space at the bottom for casters. Cut the middle divider to size, drill 3/4″ pocket holes at both ends, and attach it to the bottom panel with 1 1/4″ pocket hole screws and wood glue.
-
Building the Face Frame
Cut the face frame pieces to size and drill 3/4″ pocket holes at both ends of the top, bottom, and middle pieces. Attach them together with 1 1/4″ pocket hole screws and wood glue to build two face frame assemblies. Attach these face frames to the front and back of the cabinet with 1 1/4″ brad nails and wood glue, ensuring side pieces are flush with the inside of the side panels.
-
Attaching the Side Trim
Measure and cut the side trim pieces to size. Attach them to the top and bottom of both side panels with 1 1/4″ brad nails and wood glue for a polished finish.
-
Drawers
First, attach the drawer slides to the cabinet divider and side panel, ensuring they are flush with the front of the divider. Cut the drawer pieces to size and assemble them with 5/8″ brad nails and wood glue. Cut and attach the 1/4″ plywood drawer bottoms with 3/4″ staples and wood glue; build three drawers in total. Install the completed drawers with the drawer slides. Finally, measure and cut the drawer faces, then attach them to the front of the drawers with 1″ pin nails and wood glue, leaving a 1/8″ gap around all sides.
-
Door
Cut the door frame pieces to size and drill 3/4″ pocket holes at both ends of the side pieces. Attach them together with 1 1/4″ pocket hole screws and wood glue. Cut the door panel to size and attach it to the back of the frame with 3/4″ staples and wood glue. Attach the completed door to the cabinet with cabinet door hinges, maintaining a 1/8″ gap around all sides.
-
Attaching the Top
Cut the laminated pine project panel to size and attach it to the top of the cabinet using 1 1/4″ pocket hole screws and wood glue. This creates your durable work surface.
-
The Finish!
Complete your cabinet by adding your preferred finish (paint, stain, or clear coat) and attaching all hardware, including drawer pulls, cabinet pull, and casters. Personalize it with unique designs if desired! Be sure to share your finished build on social media using #shanty2chic!