
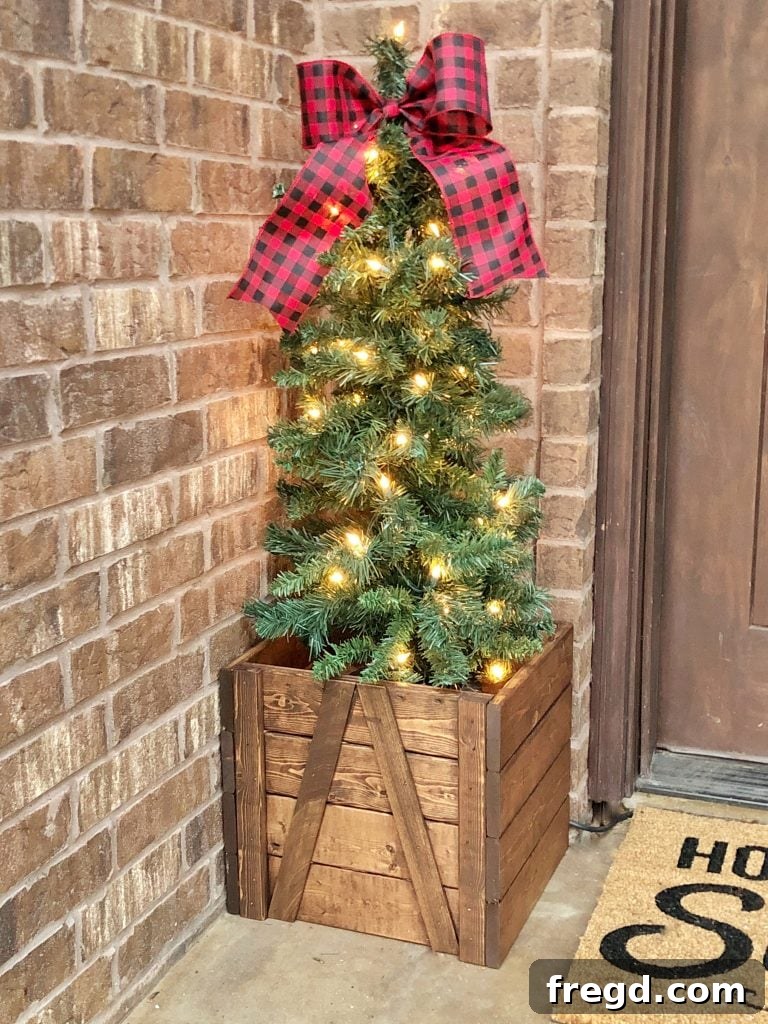
Are you looking to add a touch of rustic charm and elegance to your outdoor living space without breaking the bank? A beautiful, handcrafted planter can instantly elevate your home’s curb appeal, making it feel more inviting and seasonally festive. Imagine transforming your front porch with a stunning piece that not only looks professionally made but also costs less than your weekly coffee budget! This comprehensive guide will show you how to build a gorgeous **DIY Farmhouse Porch Planter** for under $15, using just a few common boards and basic tools. It’s the perfect project to get your front porch holiday-ready, and a versatile addition that will transition seamlessly through every season of the year.
There’s nothing quite like the joy of decorating your front door and porch for special occasions, especially during the festive Christmas season. This year, instead of settling for plain, uninspired porch trees or generic store-bought planters, why not infuse your home with a personal touch? We decided to take our outdoor decor up a notch by designing these incredibly charming and incredibly affordable **DIY $15 Farmhouse Porch Planters**. Crafted from simple furring strips and brought to life with basic power tools, these planters embody that sought-after rustic farmhouse aesthetic. The result? Absolutely adorable planters that are sure to garner compliments!
How to Build Your Own Farmhouse Porch Planter
Building your own porch planter is a rewarding experience that offers significant savings compared to buying retail. Beyond the financial benefits, it allows you to customize dimensions, finishes, and truly make the piece your own. This project is designed to be accessible for beginners, focusing on straightforward cuts and assembly techniques. Let’s gather our materials and tools and get ready to create something beautiful for your home.
Essential Supplies for Your Planter Project
For this budget-friendly DIY project, you’ll be surprised how few materials you need to create a substantial and stylish planter. Most of these items are readily available at any local hardware store. Here’s a detailed list of what you’ll need:
- 3 – 1×4 Furring Strips: These inexpensive, rough-sawn boards are perfect for achieving the rustic farmhouse look. They form the main structural components and visible panels of your planter.
- 1 – 1×2 Furring Strip: This thinner strip will be used for internal bracing and reinforcing the side panels, adding crucial stability without adding bulk.
- 1 – 2×4 (approximately 45 inches in length): This robust piece will be cut into segments to create the foundational supports for the bottom of your planter, ensuring it can hold the weight of soil and plants.
- 1 – 1/4″ x 2′ x 4′ Craft Board (or similar thin plywood): This board will serve as the actual bottom of your planter box, providing a flat surface for drainage and plant placement.
- Wood Glue: A high-quality wood glue is essential for creating strong, lasting joints that withstand outdoor conditions. It provides the primary bond, while nails offer immediate hold.
- 1 1/4″ Brad Nails: These longer brad nails are used for joining the main structural pieces, providing a secure fastening that holds until the glue fully cures.
- 3/4″ Brad Nails: Shorter brad nails are ideal for attaching the decorative trim pieces, where you need less penetration to avoid splitting the thinner wood.
When selecting your furring strips, try to choose pieces that are as straight as possible and free from significant warps or large knots. This will make the cutting and assembly process much smoother and result in a more professional-looking finished product. The beauty of furring strips lies in their affordability and their inherent rustic character, which perfectly suits the farmhouse aesthetic.
Tools You’ll Need
This DIY Farmhouse Porch Planter project is designed to be accessible with a basic set of power tools. If you’re a beginner, these tools are excellent investments for future woodworking endeavors. Here’s what you’ll need:
- Miter Saw: This is your primary tool for making precise, clean crosscuts. Accuracy in your cuts is vital for tight-fitting joints and a square planter. If you don’t have a miter saw, a circular saw with a reliable straight-edge guide or even a hand saw with a miter box can work, though they may require more time and care.
- Brad Nailer: A brad nailer (either pneumatic or cordless electric) will significantly speed up the assembly process, making quick and strong connections. If a brad nailer is unavailable, you can use a hammer and 1 1/4″ and 3/4″ finishing nails, pre-drilling pilot holes to prevent wood splitting, especially in the thinner furring strips.
Safety First: Before operating any power tools, always wear appropriate safety gear, including safety glasses and hearing protection. Ensure your workspace is well-lit, clear of clutter, and you have a stable surface for cutting and assembly. Read and understand your tool manuals before starting, and never operate tools when fatigued or distracted.
Step 1: Building the Side Panels of the Planter
The foundation of your DIY Farmhouse Porch Planter begins with assembling the two main side panels. These panels will define the height and width of your planter and are critical for its overall stability and appearance. Careful measurement and assembly here will pay off in the final product.
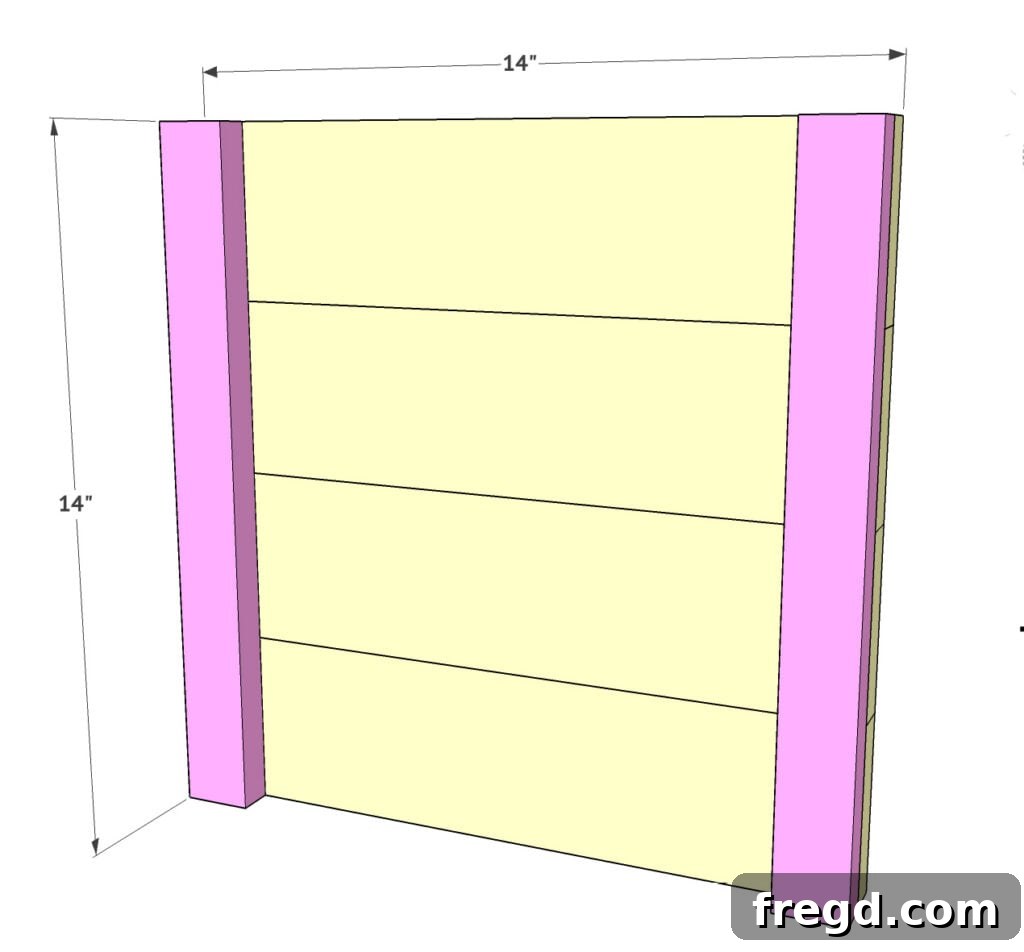
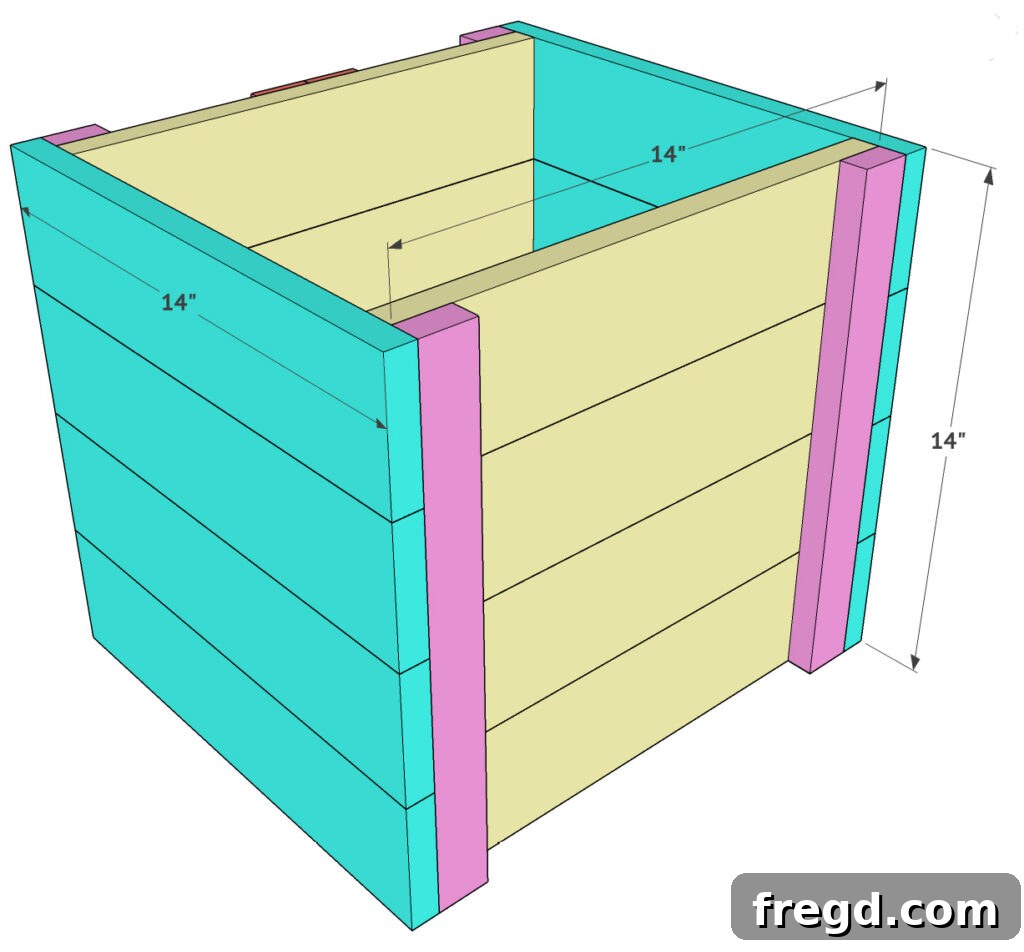
Start by laying four of your 1×4 furring strips side by side on a flat, stable surface. Arrange them so that their ends are perfectly flush. These four boards will constitute one of the larger faces of your planter. Next, take two pieces of your 1×2 furring strip. Apply a consistent bead of wood glue along one edge of each 1×2. Position these glued 1×2 strips flush on each end of the four laid-out 1x4s, ensuring they span across all four 1x4s. The 1x2s act as cleats, holding the 1x4s together. Using your brad nailer, secure the 1×2 boards to the 1×4 boards with 1.25″ brad nails. Drive at least two nails through each 1×2 into each 1×4 to ensure a strong hold. It’s advisable to alternate nailing positions slightly to avoid splitting the wood. Repeat this exact process to construct a second identical side panel. You should now have two sturdy, rectangular panels that will form the long sides of your planter box.
Step 2: Adding the Decorative Trim to the Sides of the Planter Box
With the main side panels complete, it’s time to add a touch of decorative flair that truly defines the farmhouse style. This horizontal trim piece not only enhances the visual appeal but also adds an extra layer of reinforcement to your planter.
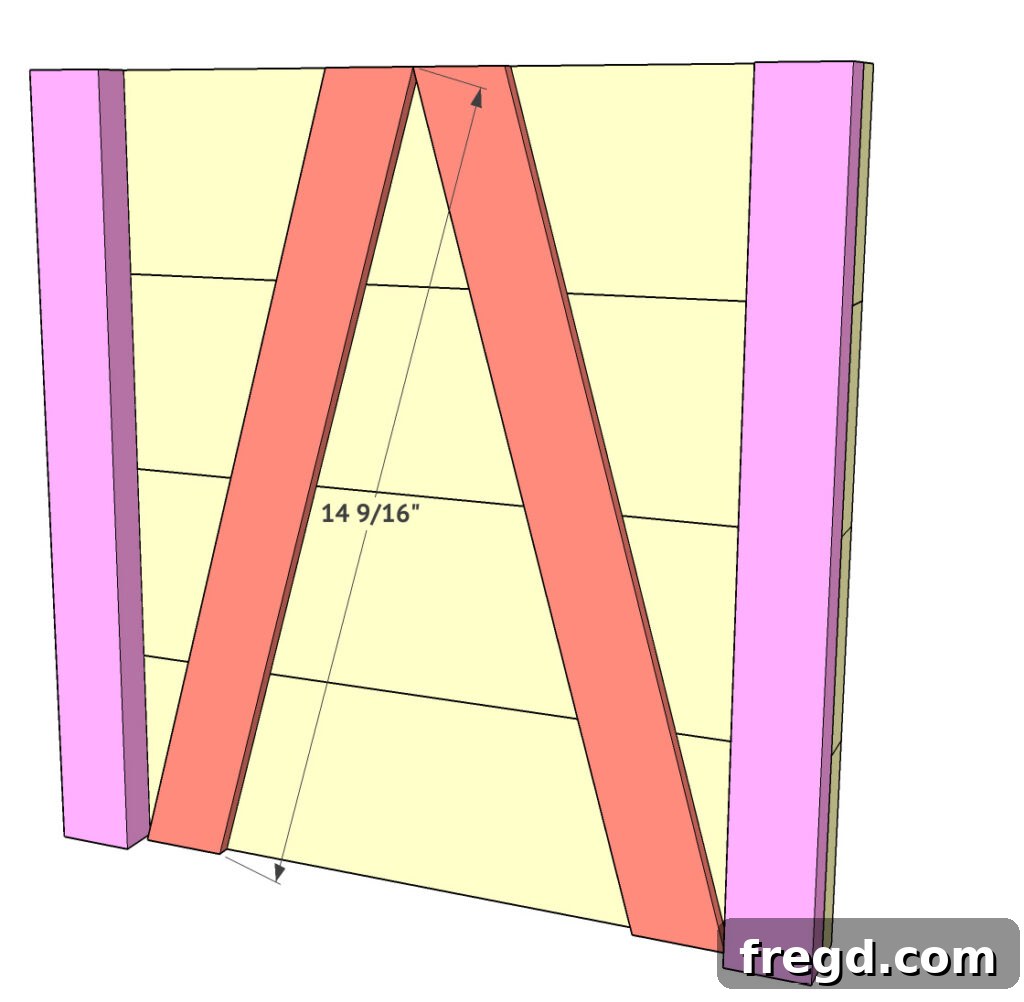
Select one of your assembled side panels. Now, carefully position a full-length 1×4 furring strip (which will serve as your trim piece) horizontally across the panel. For the most precise fit, we recommend lining the trim board up directly on the panel and marking where your cuts will be made. This “cut-to-fit” method helps ensure seamless integration. Once you’ve achieved the perfect length for your trim, apply a generous amount of wood glue to the back surface of the trim board. Place it onto your side panel, typically centered vertically or positioned slightly towards the top, depending on your preferred aesthetic. Using your brad nailer and 3/4″ brad nails, securely attach the trim board to the side panel. Ensure the nails are driven straight and are long enough to grip the underlying 1x4s firmly. If both long sides of your planter will be visible (e.g., if it’s placed in an open area), repeat this process on the second side panel to maintain a consistent look. This trim detail significantly contributes to the rustic charm of your DIY Farmhouse Porch Planter.
Step 3: Assembling the Planter Frame
Now, the individual pieces come together to form the three-dimensional structure of your planter box. This is where your flat panels transform into a functional, sturdy container. Achieving square corners in this step is essential for a professional-looking finish and overall stability.
Begin by taking one of your remaining 1×4 furring strips, which will act as one of the shorter connecting sides of your planter. Apply a consistent line of wood glue to both ends of this 1×4. Carefully align and attach one of your previously built side panels (from Step 1 and 2) to each end of this 1×4. The edges of the side panels should align flush with the ends of the 1×4, forming a U-shape. Use your brad nailer and 1.25″ brad nails to securely fasten these joints. Drive several nails through the side panels into the ends of the 1×4 to create a robust connection. Ensure that the panels are perpendicular to the connecting 1×4 to maintain square corners. Wood glue provides the long-term strength, while the nails hold the pieces firmly in place while the glue dries.
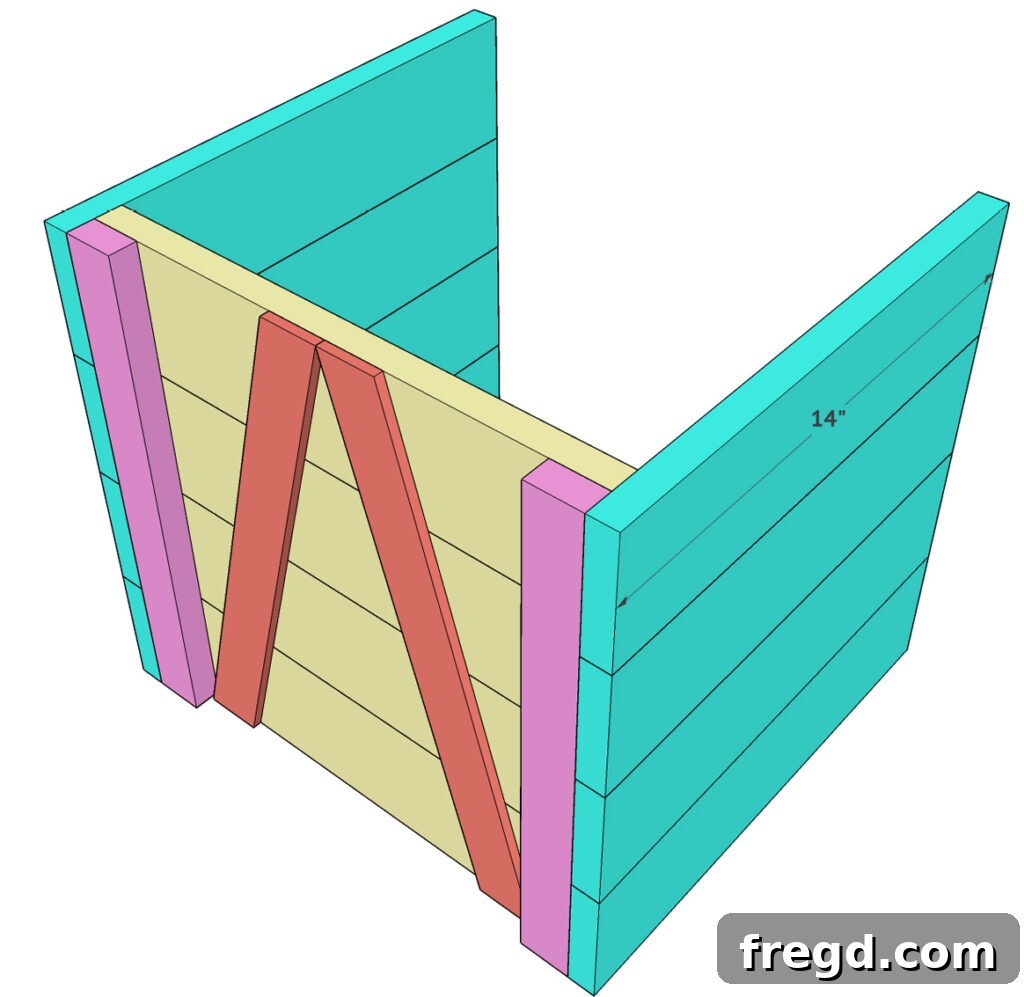
Next, take the other assembled side panel you built in the first two steps. Apply wood glue to the ends of the remaining short 1×4 furring strip, and then attach this entire assembly to the open side of your developing planter frame. Similar to the previous connections, ensure that all joints are properly glued and that the panels align perfectly to maintain the square shape of the planter. Securely fasten all connections using your brad nailer and 1.25″ brad nails, driving them through the long side panels into the ends of the short connecting 1x4s. At this point, you should have a complete, open-top planter box frame. Take a moment to double-check all corners for squareness using a carpenter’s square, and reinforce any joints that feel loose. A strong, square frame is crucial for the longevity and aesthetic appeal of your DIY Farmhouse Porch Planter, especially when it will be filled with heavy soil and plants.
Step 4: Adding the Internal Supports and Bottom
The final structural step involves adding the internal supports that will hold the bottom panel of your planter box. These supports are absolutely essential for bearing the significant weight of potting soil, plants, and water, preventing the bottom from bowing or breaking over time. This is also an excellent opportunity to put any suitable scrap 2x material you have to good use!
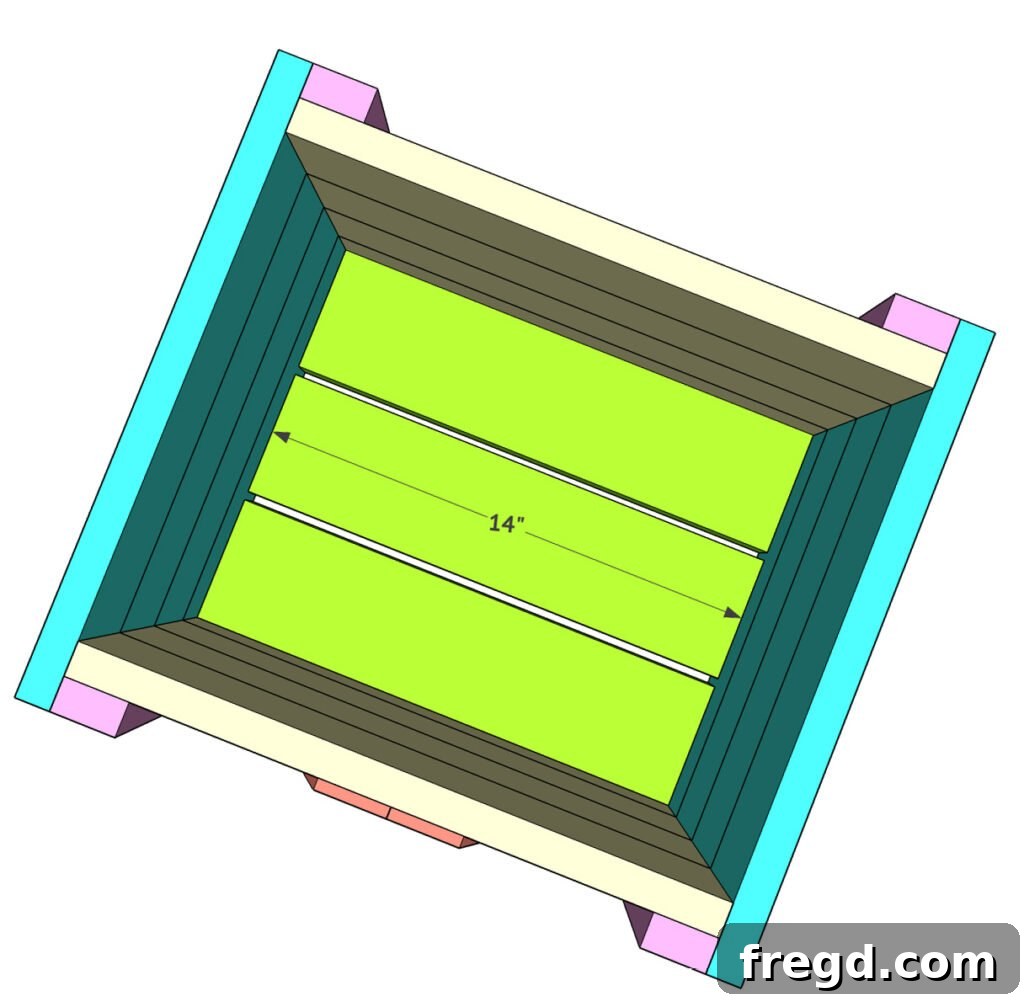
You’ll use your 2×4 material (or 2×6, as mentioned, if you have it) for these robust supports. Cut two pieces from your 2×4 that will fit snugly across the width of the planter box, inside the assembled frame. These supports should be positioned flush with the bottom interior edge of the planter’s sides. Apply a generous amount of wood glue to the ends of each support board. Carefully fit each support board into its designated place, ensuring it sits securely and is perfectly level with the bottom interior edge of the planter. Once positioned correctly, attach them firmly using 1.25″ brad nails. Drive these nails through the exterior sides of the planter and into the ends of each 2x support board. Ensure you drive enough nails (at least two per end) to create a robust and secure connection.
After the internal supports are firmly in place, measure and cut your 1/4″ craft board (or thin plywood) to fit perfectly on top of these supports, forming the actual bottom of your planter. This board can be simply placed on top, allowing for easy removal if needed, or lightly nailed with 3/4″ brad nails for extra security. Critically, before adding any soil or plants, remember to drill several small drainage holes into this bottom piece. Proper drainage is absolutely vital for the health of your plants and to prevent waterlogging, which can lead to root rot and premature deterioration of your wooden planter.
Finishing Touches and Customization for Your Farmhouse Planter
With the construction complete, your DIY Farmhouse Porch Planter is ready for its personal touch! This is where you can truly make it your own and ensure it stands up to the elements. Start by thoroughly sanding all surfaces and edges to remove any splinters or rough spots, creating a smooth, inviting finish.
- Paint: For a classic farmhouse look, exterior-grade white or cream paint works beautifully. Consider a distressed finish by lightly sanding edges after painting for a weathered, vintage feel. Deep grays, blues, or even a soft sage green can also complement various home exteriors.
- Stain: If you love the natural wood grain, opt for an exterior wood stain. Shades like dark walnut, weathered gray, or even a natural cedar tone can enhance the rustic charm. Always apply stain according to the manufacturer’s instructions.
- Sealing: Regardless of whether you paint or stain, applying a high-quality exterior-grade sealant is crucial. This protects the wood from moisture, UV rays, and temperature fluctuations, significantly extending the life of your planter and preserving its beauty for years to come.
Beyond the finish, think about other decorative elements. You could add stenciled numbers or a simple farmhouse-inspired phrase, attach a small metal emblem, or even incorporate decorative rope handles on the sides for an extra touch of rustic appeal. The possibilities are endless when it it comes to customizing your unique outdoor planter.
Styling Your Versatile Farmhouse Porch Planter Through the Seasons
One of the greatest advantages of this DIY Farmhouse Porch Planter is its incredible versatility. It’s not merely a holiday decoration; it’s a year-round statement piece! Here are some ideas to style your planter for every season:
- Winter/Christmas: Embrace the festive spirit by filling your planter with miniature evergreen trees, fragrant pine branches, vibrant holly, or bright red berries. Add battery-operated twinkling lights for a magical glow, and perhaps a cozy plaid bow or rustic ornaments.
- Spring: Welcome the awakening of nature with cheerful tulips, daffodils, pansies, or a lively mix of colorful annuals. Incorporate whimsical elements like faux bird nests, small decorative garden stakes, or pastel ribbons.
- Summer: Showcase lush, heat-tolerant plants such as petunias, geraniums, coleus, or even a small edible herb garden. Consider plants with a cascading habit to spill gracefully over the edges for a full, abundant look.
- Fall: Capture the essence of autumn with vibrant chrysanthemums (mums) in rich oranges, reds, and yellows. Incorporate small pumpkins, gourds, corn stalks, dried hydrangeas, or a bundle of hay for a classic harvest display.
To further protect your beautiful wooden planter from constant moisture exposure from soil and watering, always use an appropriately sized plastic liner or a smaller plastic pot placed inside the wooden planter. This also makes it much easier to swap out seasonal plants. With proper care and creative styling, your DIY Farmhouse Porch Planter will be a cherished focal point of your outdoor decor for many seasons to come.
We absolutely love seeing your completed projects and the unique ways you style them! Once you’ve finished building and personalizing your magnificent new **Farmhouse Porch Planters**, make sure to share them with our community. Just add the hashtag #shanty2chic or tag us in your social media posts so we can admire and share your creative work with fellow DIY enthusiasts!
Ready to get started on this rewarding project? We’ve got you covered with detailed measurements and visual guidance to make your build as smooth as possible. CLICK HERE FOR THE FREE, downloadable Porch Planter PLANS! These comprehensive plans provide all the necessary dimensions and additional step-by-step instructions.
Explore More Inspiring DIY Holiday Projects with Free Plans
If you enjoyed the satisfaction of building this beautiful farmhouse planter, you’ll love our other budget-friendly DIY projects! We are passionate about empowering you to create a beautiful, personalized home without overspending. Dive into our extensive collection of free plans and discover your next inspiring project. Whether you’re looking to add more holiday cheer or year-round charm to your living spaces, we have something for every skill level. Here are a few more popular projects to spark your creativity:
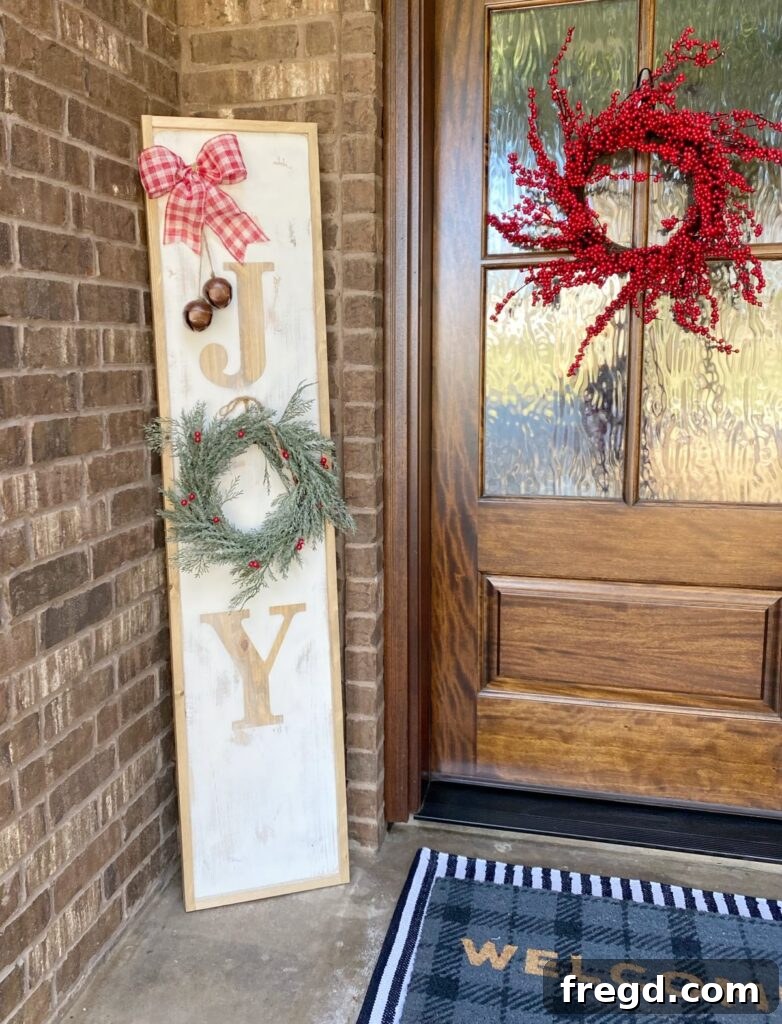
DIY Porch Sign
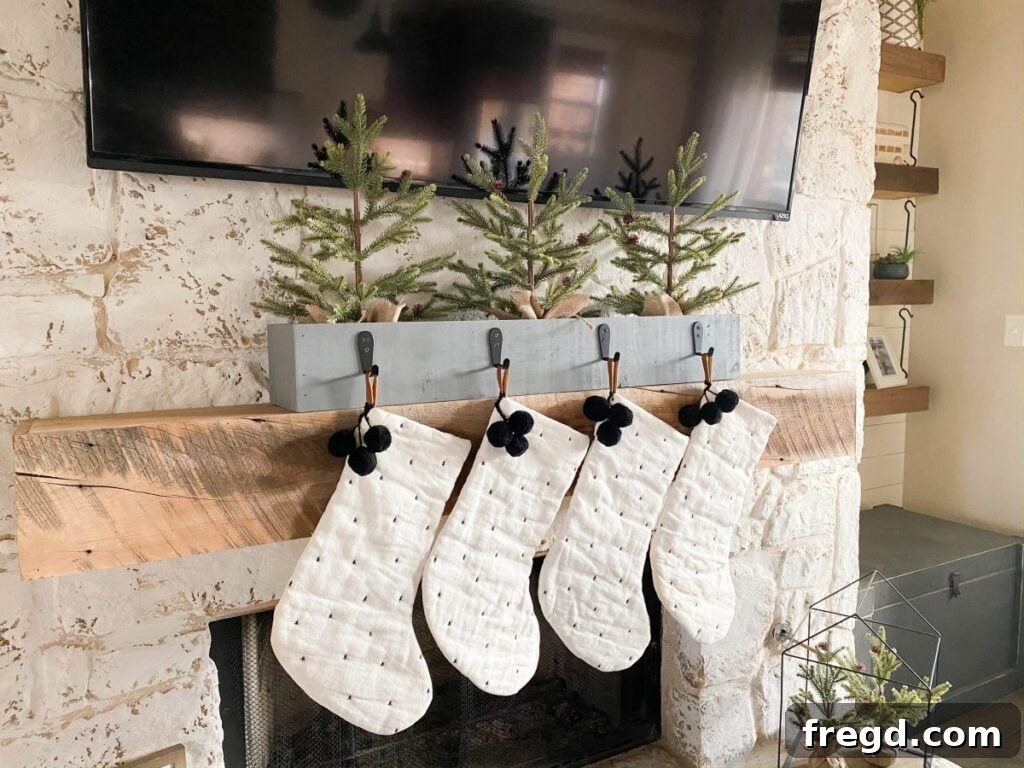
DIY Stocking Holder
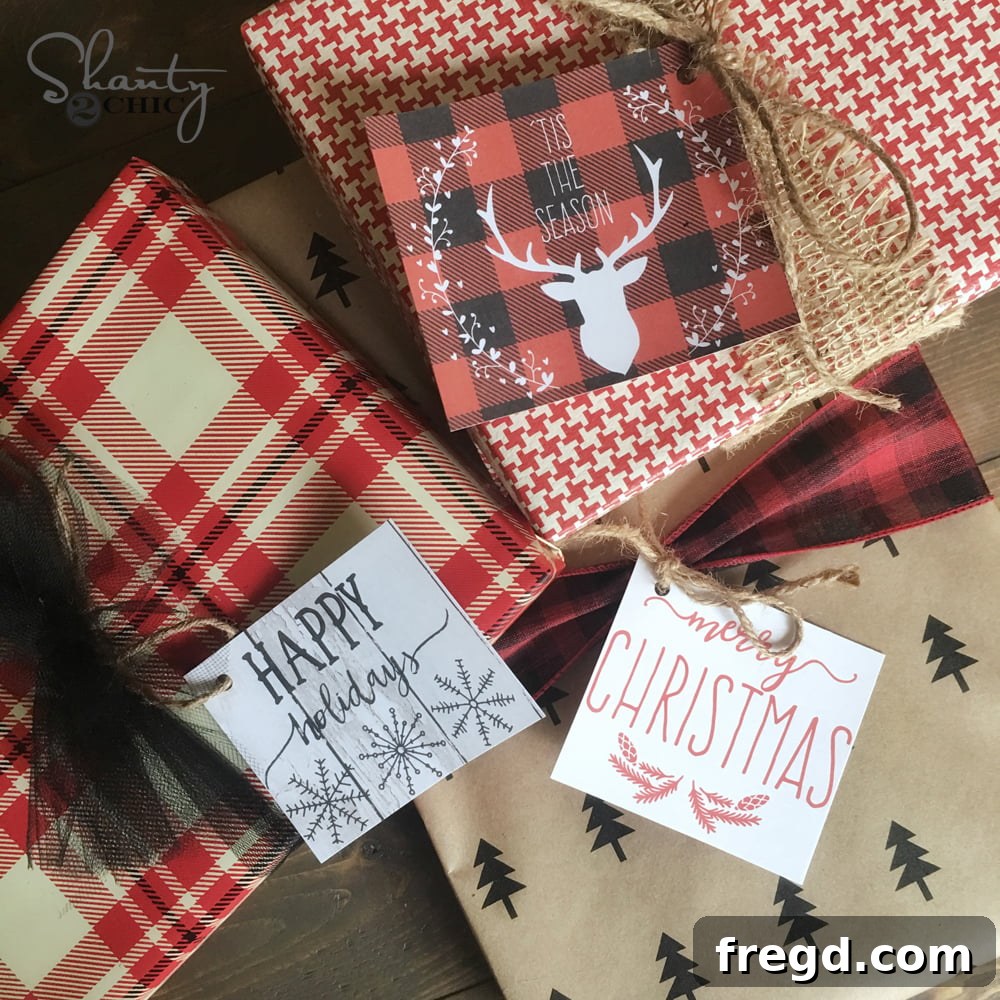
Free Printable Gift Tags
Don’t miss out on future projects, helpful tutorials, and daily dose of home decor inspiration! Make sure to follow us on our social media channels to stay updated with all our latest DIY creations, free plans, and design tips. Join our vibrant community of fellow crafters and home improvers!
Youtube