
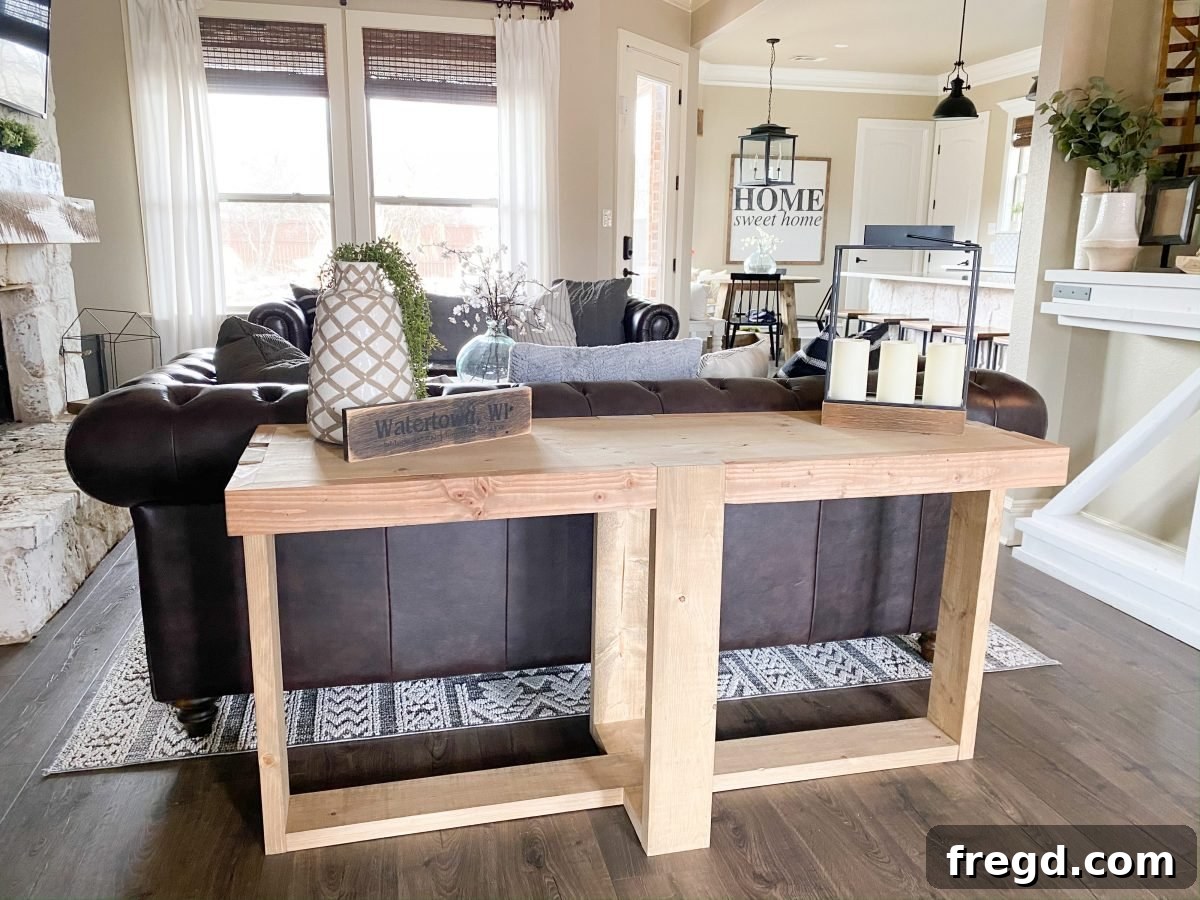
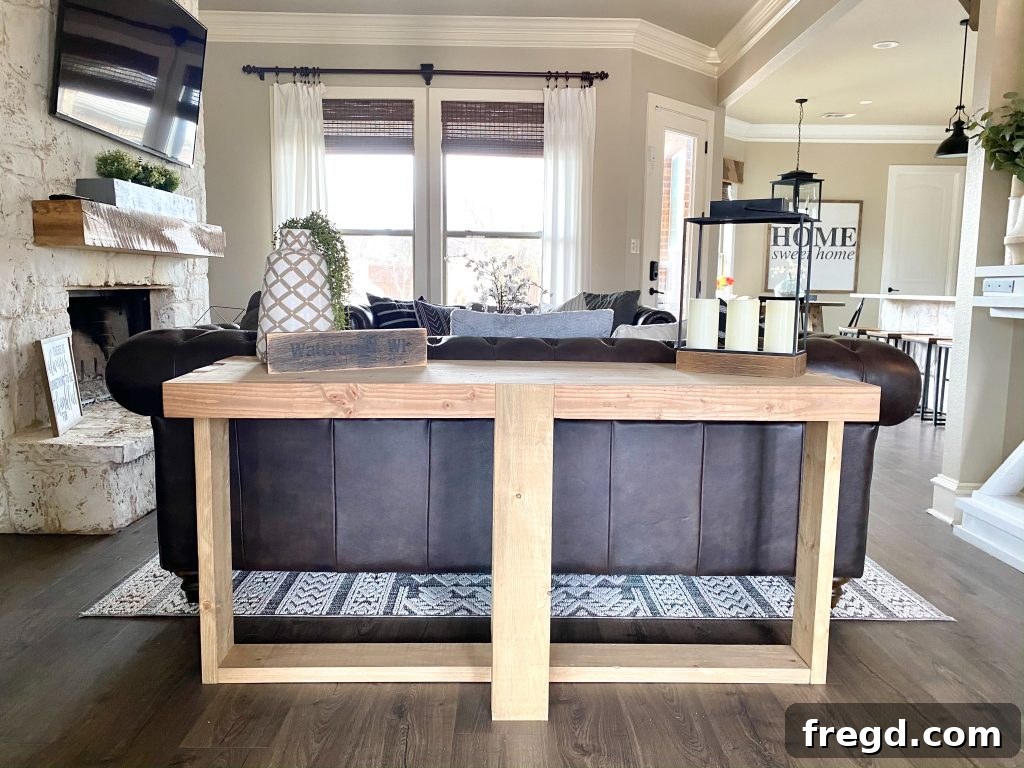
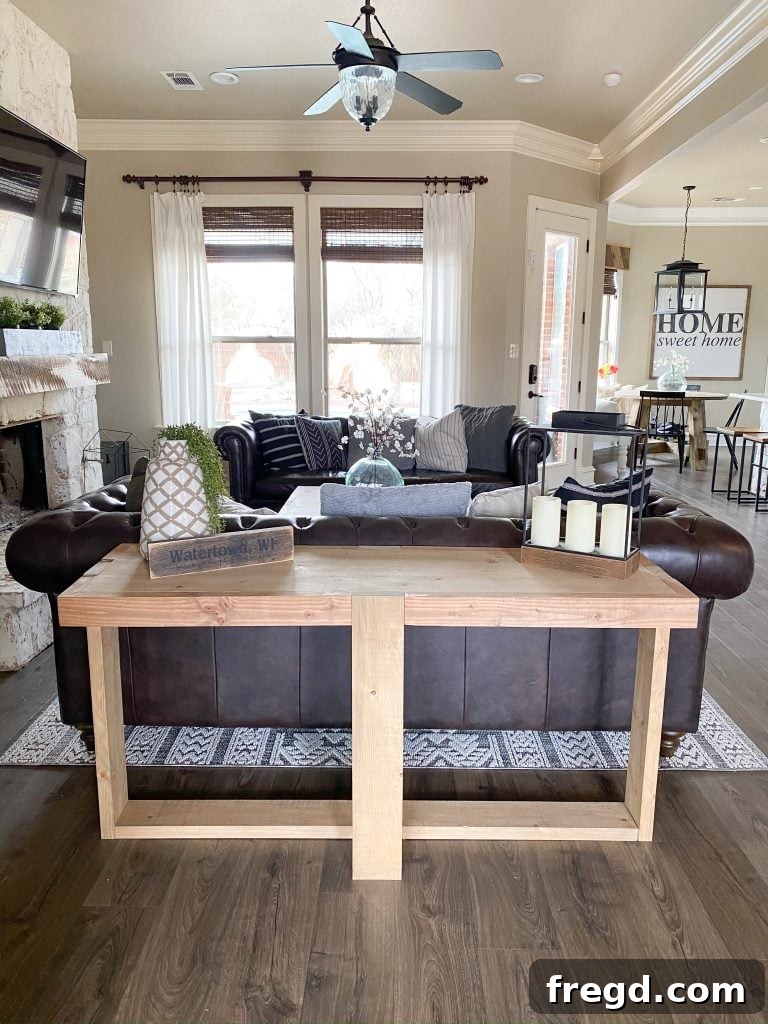
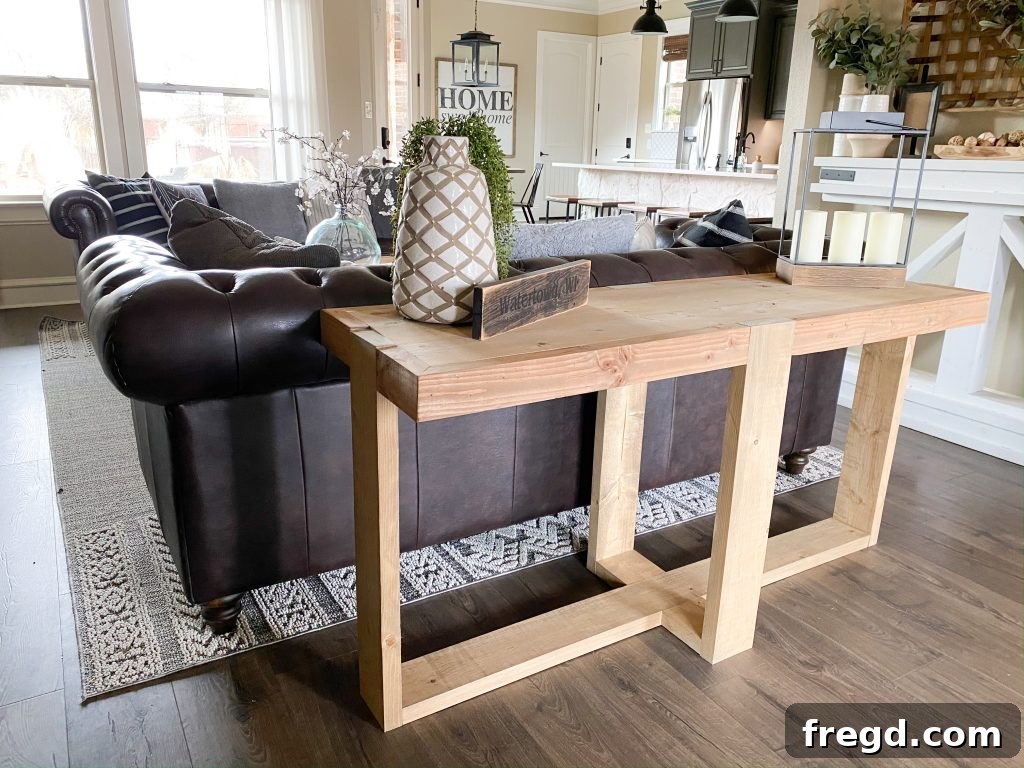
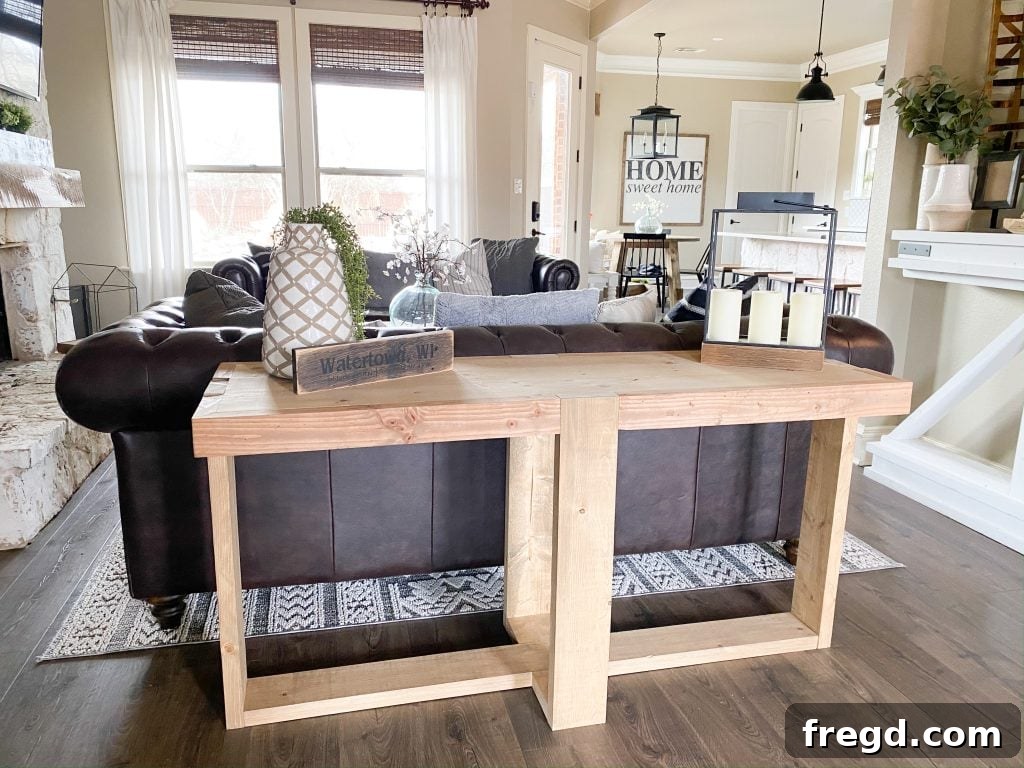
Are you ready to transform your living space with a beautiful, custom-built piece of furniture? Learn how to craft this stunning DIY Modern Farmhouse Console Table using surprisingly few materials – just 8 boards! With free, easy-to-follow plans by Shanty2Chic, this project is not only rewarding but also incredibly budget-friendly, costing under $70.
Inspired by the popular DIY Square Coffee Table design, this console table offers a cohesive and stylish addition to your home. It’s designed to be a straightforward build, making it perfect for both novice and experienced DIYers. We’ve included a comprehensive how-to video to guide you through every step, ensuring your success. Simply click the box below to watch the video tutorial!
For an even more detailed walkthrough and to ensure you have all the measurements and instructions at your fingertips, don’t forget to download the free printable plans. They are an invaluable resource for this project!
Click here to download the FREE printable plans!
Now, let’s gather our tools and materials and embark on this exciting building journey!
Table of Contents
Crafting Your Own Modern Farmhouse Console Table: An Introduction
The modern farmhouse aesthetic has captured the hearts of many homeowners, blending rustic charm with clean lines and contemporary comfort. A console table is a versatile piece of furniture that can instantly elevate an entryway, hallway, or living room, offering both functional surface space and a stylish focal point. But why buy when you can build it yourself?
This DIY Modern Farmhouse Console Table project is designed to be accessible for everyone, regardless of your woodworking experience. With a minimal investment of just 8 standard lumber boards and a few essential tools, you can create a high-quality, custom piece for under $70. This not only saves you money but also instills a profound sense of accomplishment. Imagine the compliments you’ll receive on a piece you crafted with your own hands!
Our inspiration for this console table comes from the beloved DIY Square Coffee Table, ensuring a consistent and harmonious look if you’re building a furniture set. We’ve meticulously broken down each step, providing clear instructions and helpful visuals to ensure a smooth building process. So, roll up your sleeves, embrace your inner craftsman, and get ready to create a beautiful and functional console table that perfectly complements your home décor.
Essential Supplies & Tools for Your Console Table Project
Before diving into the build, it’s crucial to gather all your necessary supplies and tools. Having everything organized and ready will streamline your process and prevent interruptions. This project utilizes common lumber and standard woodworking tools, making it an excellent entry point for new builders.
Required Supplies:
- 6 – 2x6x8 Framing Lumber: These boards will form the sturdy legs and the planked tabletop. When selecting lumber, look for straight pieces with minimal knots or warps. Pine or Douglas fir are common and affordable choices for this type of project, offering a beautiful grain for staining.
- 2 – 2x4x8 Framing Lumber: These boards will be used for the internal runners and supports of the table base. Again, aim for straight, defect-free pieces to ensure a stable structure.
- 2 1/2″ Pocket Hole Screws: Essential for creating strong, concealed joints. These screws are specifically designed for pocket hole joinery, pulling pieces tightly together for a durable bond. Ensure you use the correct length for your material thickness.
- 2″ Brad Nails: Perfect for attaching the trim pieces, offering a secure hold without large, visible nail heads. A brad nailer makes this task quick and easy.
- Wood Glue: A critical component for any strong wood joint. Applied alongside screws, wood glue creates a bond that is often stronger than the wood fibers themselves, ensuring the longevity and stability of your table.
- Sandpaper (various grits): You’ll need an assortment of sandpaper, typically starting with a coarser grit (like 80 or 100) for initial shaping and smoothing, then progressing to medium (120 or 150) and fine (180 or 220) grits for a silky-smooth finish.
- Wood Filler (optional): Useful for filling any small gaps, imperfections, or nail holes, creating a flawless surface before finishing.
- Stain and Protective Finish: As detailed later, we’ll use a custom stain mix. You’ll also need a clear protective topcoat like polyurethane or polycrylic to shield your table from daily wear and tear.
Recommended Tools:
- Miter Saw: This tool is indispensable for making precise crosscuts on your lumber, ensuring all your pieces are the correct length and perfectly square. Accuracy here is key to a professional-looking build.
- Drill: You’ll need a power drill for driving pocket hole screws and potentially pre-drilling holes. A cordless drill offers maximum mobility.
- Kreg Jig: The heart of this project’s joinery! A Kreg Jig allows you to drill angled “pocket holes” into wood, enabling incredibly strong and hidden screw joints. The Kreg K4 or K5 are excellent choices for home builders. For high-volume work, the Kreg Foreman offers speed and efficiency.
- Brad Nailer: While optional, a brad nailer (either pneumatic with an air compressor or an electric version) significantly speeds up attaching the trim and provides clean, almost invisible fasteners.
- Face Clamp (optional): A Kreg Face Clamp is incredibly useful for holding boards perfectly flush while securing them with pocket hole screws, ensuring seamless joints on your tabletop and trim.
- Table Saw (optional): While not strictly necessary for this build if your lumber dimensions are perfect, a table saw offers versatility for ripping boards to custom widths or making highly accurate cuts.
- Tape Measure & Pencil: Essential for accurate marking and measuring all your cuts.
- Safety Glasses & Hearing Protection: Always prioritize safety when working with power tools. Wear appropriate personal protective equipment.
Building the Sturdy Table Base
The base is the foundation of your console table, providing stability and support for the tabletop. A well-constructed base ensures your table will be robust and last for years. Take your time with these steps to ensure square and strong joints.
Step 1: Preparing Your Lumber and Drilling Pocket Holes
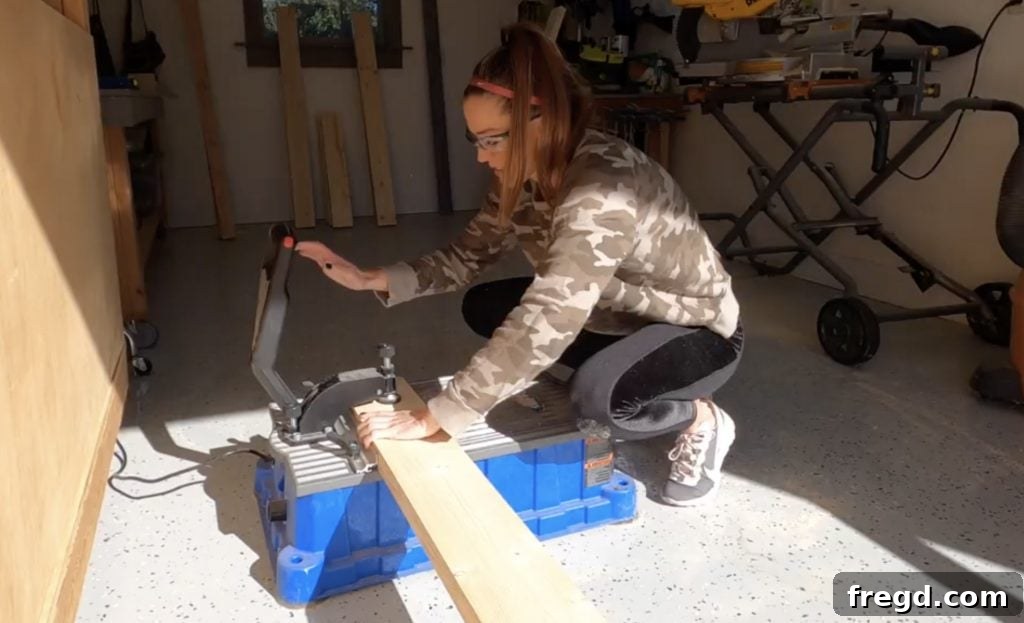
Begin by carefully cutting all your leg pieces and runners to the precise dimensions specified in the free plans. Use your miter saw for clean, accurate cuts. Remember the adage: “measure twice, cut once!”
Once your pieces are cut, it’s time to drill the pocket holes. For the long runners, you’ll need to drill 1 1/2″ pocket holes at both ends. Pocket hole joinery is a fantastic technique that creates incredibly strong joints while keeping the screws hidden from view, contributing to the clean aesthetic of your farmhouse table.
For this project, we primarily use the Kreg Jig. If you’re building furniture frequently or commercially, the Kreg Foreman is a powerhouse that makes drilling pocket holes incredibly fast and efficient. However, for most DIY enthusiasts building for their homes, our favorite Kreg Jig (like the Kreg K4 or K5) is more than sufficient. These models are less than half the price and perform the exact same job with precision. Kreg recently launched new and improved versions which are truly amazing! We shared more about them on our Instagram stories if you’d like to see them in action.
- You can find the new Kreg Jig (K4 or K5 models are highly recommended) here!
- For high-volume production, you can find the Kreg Foreman here!
After drilling, apply a generous bead of wood glue to the ends of the long runner where the legs will attach. Then, firmly attach a leg to each end of the long runner using 2 1/2″ pocket hole screws. Ensure the legs are flush with the edges of the runner and that the assembly is square. Clamps can be very helpful here to hold the pieces tightly while you drive the screws.
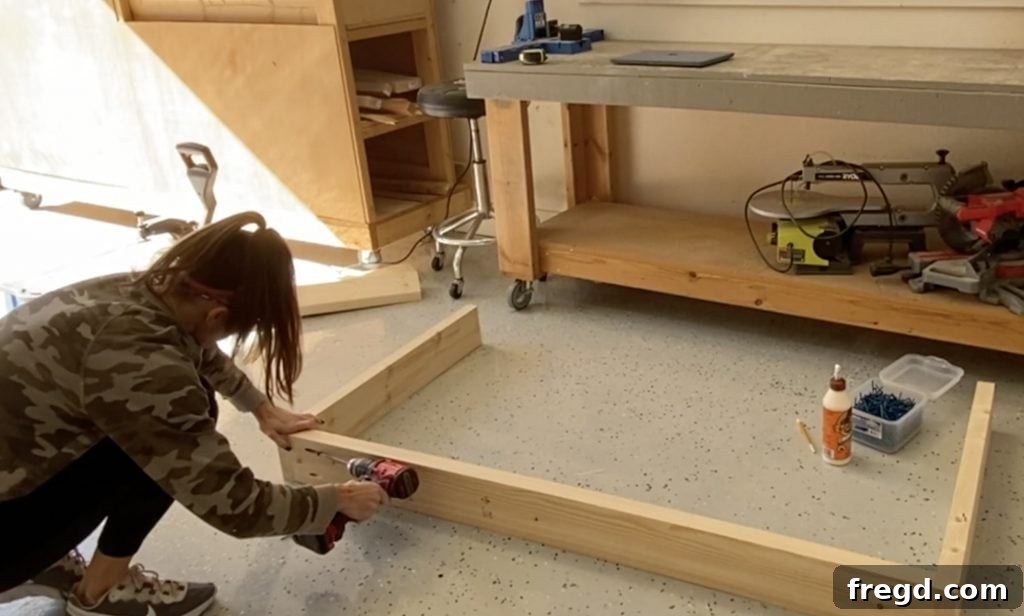
Allow the glue to set for a few minutes before moving the assembly too much, but don’t wait until it’s fully dry if you have more adjustments to make.
Step 2: Integrating Short Runners for Stability
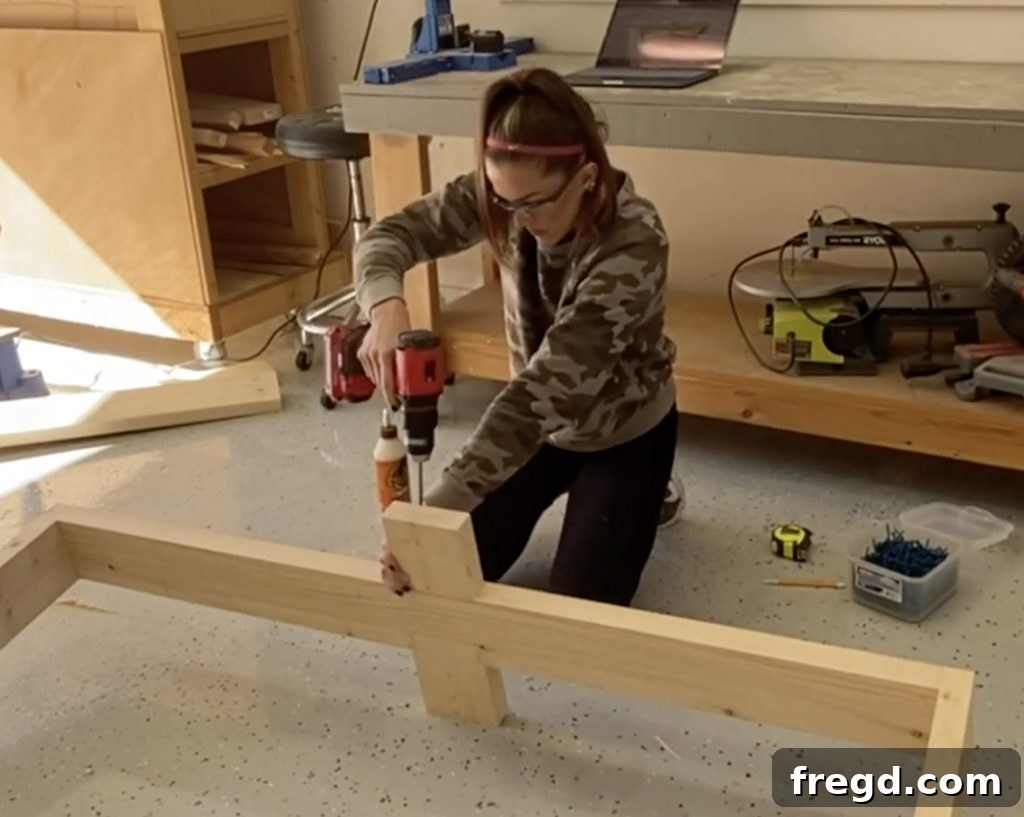
Next, prepare your short runners. Just like the long runner, drill 1 1/2″ pocket holes at both ends of each short runner. These pieces will add crucial support and rigidity to your table’s base.
Carefully center the short runners on the long runner, ensuring even spacing according to your plans. Apply wood glue to the mating surfaces and secure them in place with 2 1/2″ pocket hole screws. This step significantly enhances the structural integrity of your console table, preventing wobbling and ensuring it can support weight effectively. Double-check that all connections are tight and square before proceeding.
Step 3: Completing the Base Frame
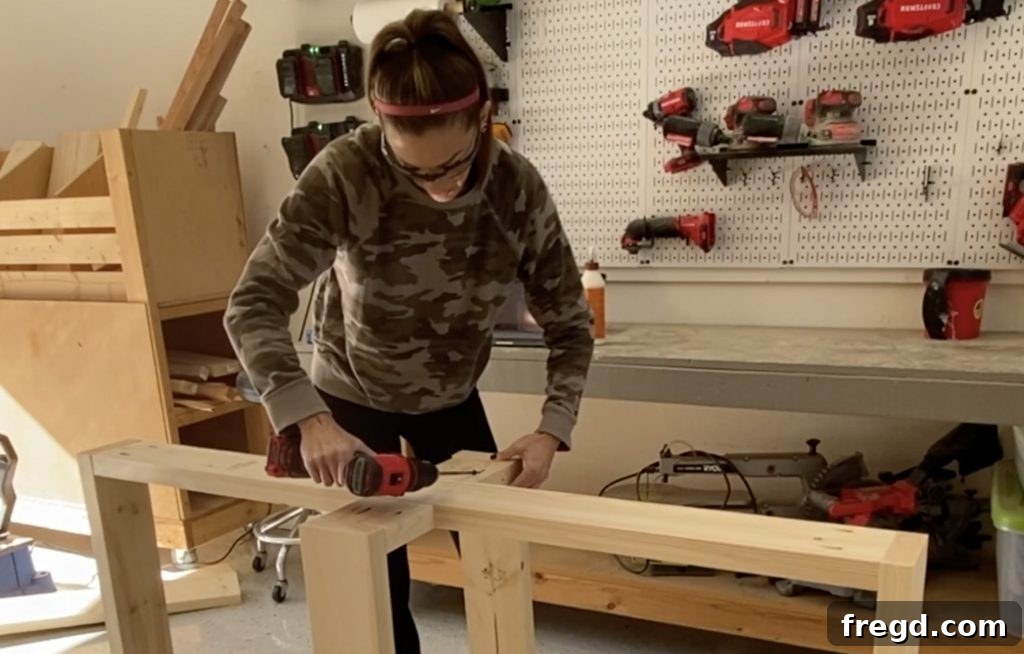
With the runners in place, it’s time to attach the remaining front and back legs to the short runners. Apply wood glue to the joining surfaces and use 2 1/2″ pocket hole screws to firmly secure each leg. At this point, you’ll start to see the complete form of your table base taking shape. It’s essential to ensure all legs are perfectly plumb and square to the ground, and that the entire base is free from any rack or twist. A flat surface and a reliable square tool will be your best friends here. Let the glue fully cure according to the manufacturer’s instructions for maximum strength.
Assembling the Rustic Table Top
The tabletop is the most visible and functional part of your console table. This section focuses on creating a beautiful, sturdy surface that will define the farmhouse character of your piece.
Step 1: Creating the Planked Surface
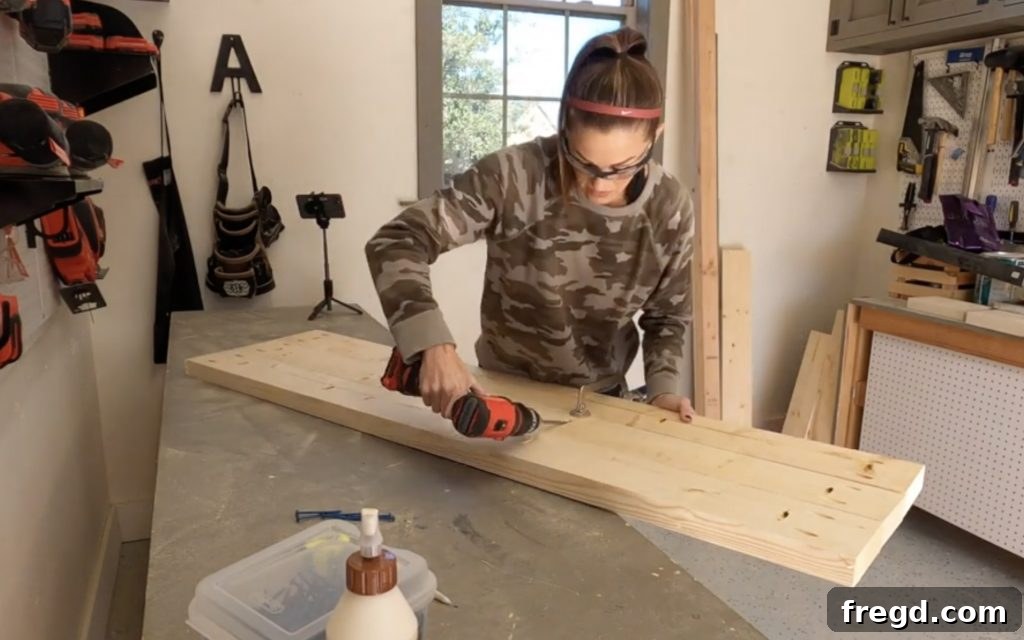
Now, cut the plank boards for your tabletop to the specified size from your 2×6 lumber. The beauty of a farmhouse table often lies in its planked top, which gives it character and a solid feel. Drill 1 1/2″ pocket holes along the edges of the planks, as indicated in your cut list. These pocket holes will allow you to join the individual planks together seamlessly, creating a solid, wide tabletop.
When joining the planks, apply a generous amount of wood glue along the edges of each board. Then, use 2 1/2″ pocket hole screws to pull them together. The key to a smooth, flat tabletop is to keep the boards perfectly flush during this process. This is where a Kreg Face Clamp becomes invaluable. It holds the board faces even, preventing any slight lips or misalignment that would require excessive sanding later.
- You can find the Kreg Face Clamp that I used to get the boards smooth here!
Once all planks are joined, inspect the top for any minor gaps or unevenness. Don’t worry if there are small imperfections; these can be addressed during the sanding and finishing stages. Allow the glue to dry completely for a strong, unified tabletop.
Step 2: Attaching the Top to the Base
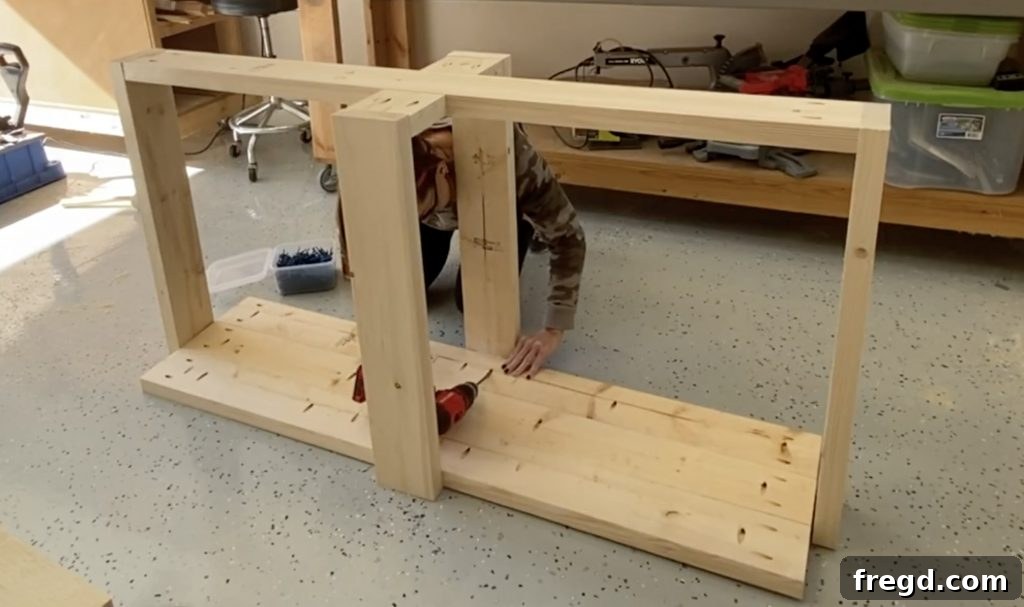
With the tabletop fully assembled and the glue dried, it’s time to marry the top with the base. Carefully center the assembled base on top of the planks. Ensure there is an even overhang on all sides, unless your design specifies otherwise. This step is crucial for the overall aesthetics and balance of your console table.
Once perfectly positioned, secure the legs to the underside of the planks using 2 1/2″ pocket hole screws and wood glue. You’ll want to drill these pocket holes from the inside of the top runners of the base upwards into the tabletop. This method keeps the fasteners hidden and provides an incredibly strong connection. Double-check that the table is stable and level once assembled.
Adding the Decorative Trim
The trim pieces are often overlooked but play a significant role in defining the modern farmhouse aesthetic. They provide a finished, custom look and can conceal any visible joints, giving your table a polished appearance.
Step 1: Installing Short Trim Pieces
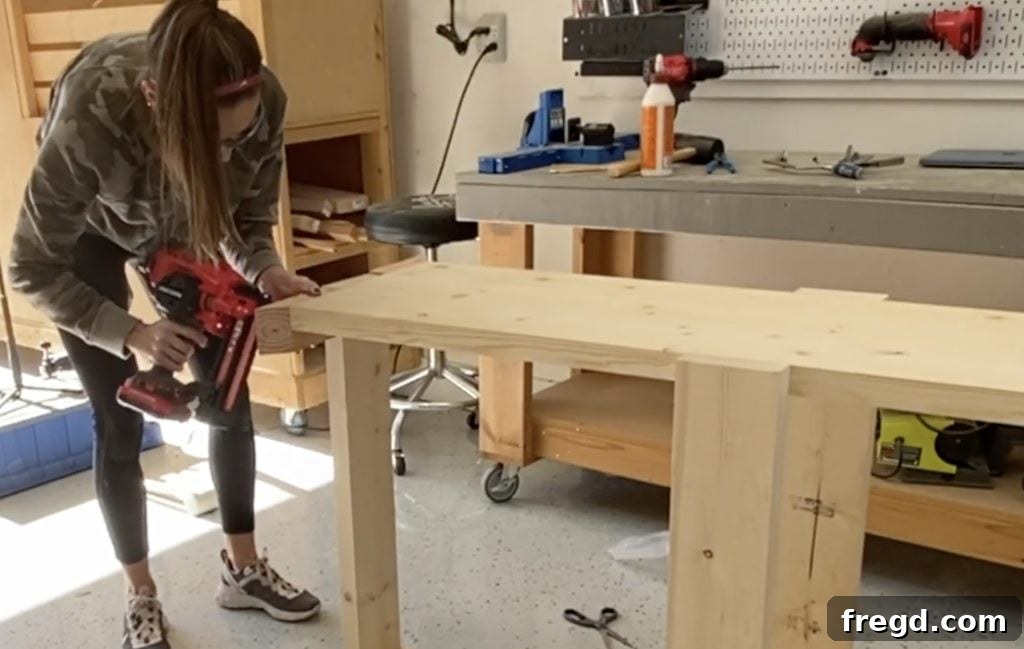
Now, flip your table right-side-up. Carefully measure and cut your short trim pieces to size, ensuring they fit snugly. For a professional finish, drill 1 1/2″ pocket holes on the square ends of each trim piece. These pocket holes will allow you to attach the trim securely without visible screw heads on the exterior.
Apply wood glue to the back of the trim pieces, where they will meet the tabletop and legs. Attach them using 2 1/2″ pocket hole screws. The critical detail here is to make sure the top of the trim pieces are perfectly flush with the top of the legs and the tabletop planks. This creates a continuous, clean surface that is characteristic of the modern farmhouse style. Use clamps to hold the trim in place while you fasten it, ensuring a tight bond.
Step 2: Attaching Long Trim Pieces and Finishing Corners
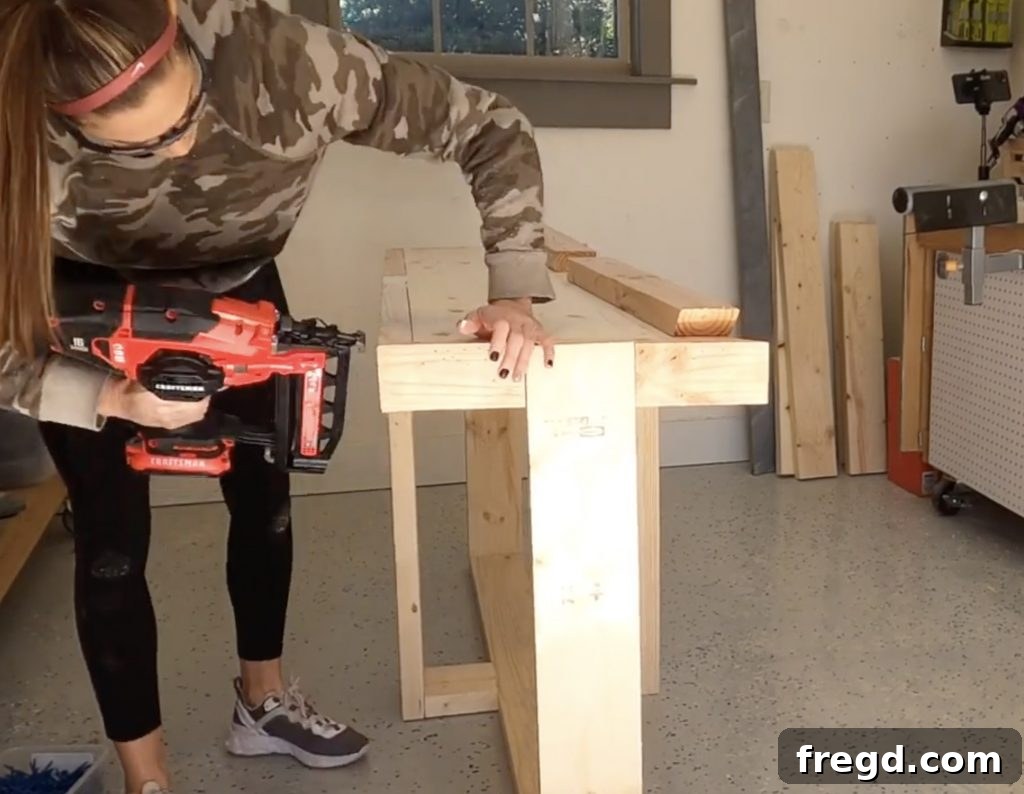
Proceed to measure and cut the long trim pieces to size. As with the short trim, drill 1 1/2″ pocket holes at the square ends of these longer pieces. Apply wood glue to the mating surfaces and attach them to the table top and legs with 2 1/2″ pocket hole screws. Make sure these pieces are also flush with the tabletop and legs, creating a continuous apron around the table.
To ensure strong, seamless corners where the long and short trim pieces meet, use 2″ brad nails to attach the corners together. The brad nailer will drive these small nails quickly and cleanly, leaving minimal holes that can be easily filled with wood filler before sanding. This final trim work completes the structural assembly of your console table, giving it a refined and integrated appearance.
Perfecting the Finish: Staining and Sealing Your Table
The finish is what truly brings your DIY Modern Farmhouse Console Table to life, enhancing its natural beauty and protecting it for years to come. This stage requires patience and attention to detail, but the results are well worth the effort.
Step 1: Sanding and Preparing for Stain
Before applying any stain, proper sanding is absolutely critical for a professional-looking finish. Start with a coarser grit sandpaper (e.g., 80 or 100 grit) to remove any pencil marks, glue squeeze-out, or minor imperfections. Work your way up through progressively finer grits (120, 150, 180, and finally 220 grit). Always sand in the direction of the wood grain.
The goal is to achieve a smooth, uniform surface that will absorb the stain evenly. After sanding with each grit, thoroughly wipe down the entire table with a tack cloth or a damp cloth to remove all sawdust. Any lingering dust can lead to an uneven or blotchy stain. For softwoods like pine, applying a pre-stain wood conditioner is highly recommended. This helps prevent blotchiness by evening out the wood’s porosity, ensuring a more consistent stain application.
Step 2: Applying Your Custom Stain
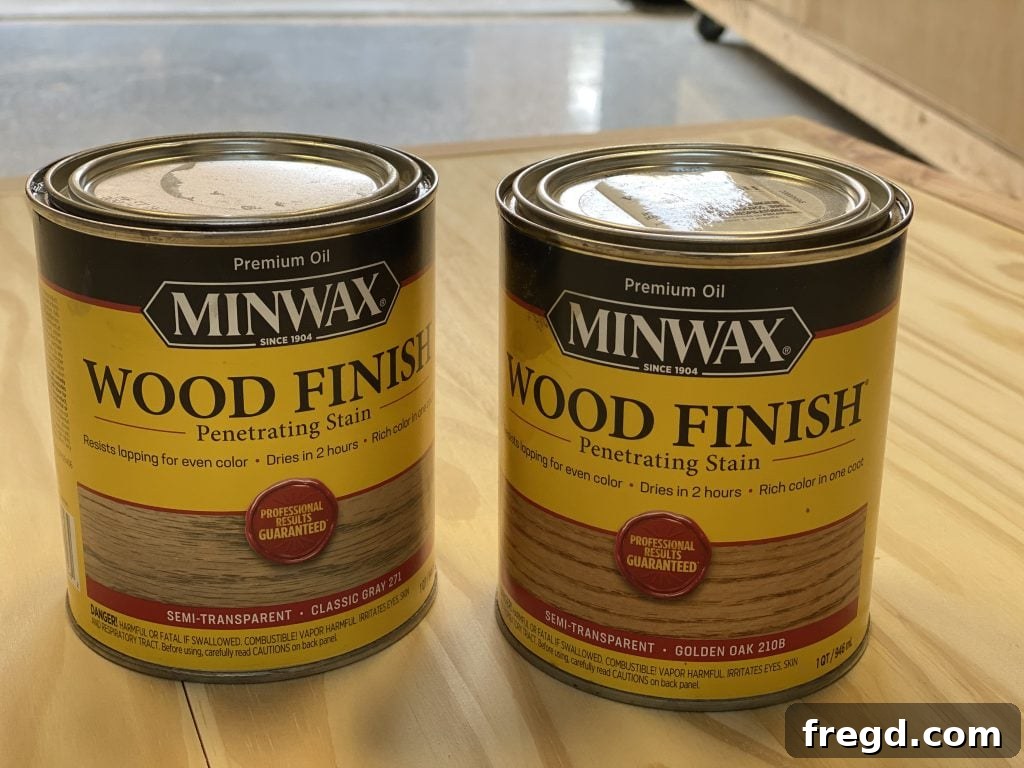
For a unique modern farmhouse aesthetic, we’ve found that a custom blend of stains works wonders. Our preferred mix is 2 parts Minwax Wood Finish in Golden Oak with 1 part Classic Gray. This combination creates a beautiful, muted tone that perfectly balances warmth and sophistication, characteristic of the farmhouse style.
Thoroughly mix your stain blend in a separate container. Apply the stain with a clean cloth or a foam brush, working in small sections and moving with the grain. Allow the stain to penetrate the wood for a few minutes (the longer it sits, the darker the color). Then, wipe off any excess with a clean, lint-free cloth. For a deeper color, you can apply a second coat after the first has dried completely. Always test your stain mixture on a scrap piece of the same wood to ensure you achieve your desired color before applying it to the entire table.
- You can find the Minwax Classic Gray stain here!
- You can find the Minwax Golden Oak stain here!
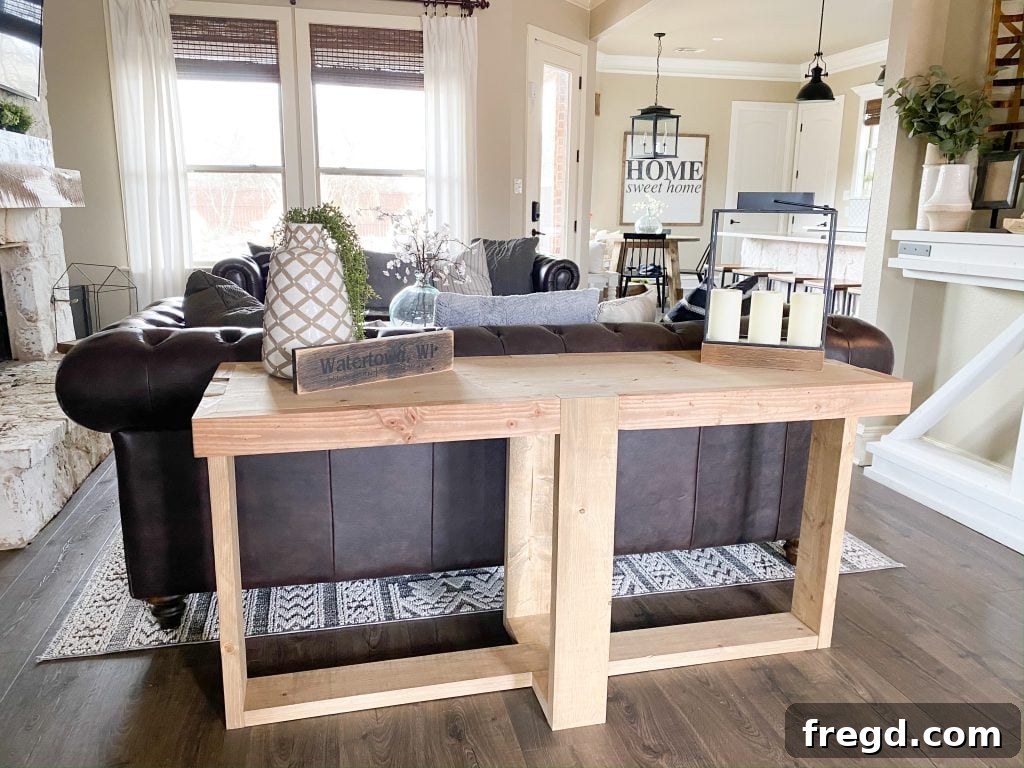
Once you’ve achieved your desired stain color, allow the table to dry completely. This can take anywhere from 24 to 48 hours, depending on humidity and ventilation. Ensure the area is well-ventilated to aid drying and reduce fumes.
Step 3: Sealing for Durability and Longevity
After the stain has thoroughly dried, it’s time to apply a protective topcoat. This clear finish will safeguard your beautiful work from spills, scratches, and everyday wear, ensuring your console table remains pristine for years. Options include polyurethane, polycrylic, or a durable wax finish.
Polyurethane is a popular choice for its durability. Apply it with a high-quality brush, foam applicator, or by wiping it on, following the product’s instructions. Apply thin, even coats, allowing each coat to dry completely before applying the next. For an extra smooth finish, lightly sand with 220 or 320 grit sandpaper between coats (after drying) and wipe away dust before applying the next layer. Two to three coats are usually sufficient for a console table, providing excellent protection.
Once the final coat has cured (which can take several days), your DIY Modern Farmhouse Console Table is complete! You now have a stunning, handcrafted piece of furniture that reflects your personal style and craftsmanship.
Frequently Asked Questions (FAQs)
Here are answers to some common questions about building this console table:
- Can a beginner really build this console table? Absolutely! This project is specifically designed with simplicity in mind. With detailed plans, a video tutorial, and pocket hole joinery (which is very forgiving), beginners can achieve professional-looking results. Patience and careful measuring are your best tools.
- What type of wood is best for this project? We recommend using common framing lumber like pine or Douglas fir. These woods are affordable, readily available, and take stain beautifully. Their natural imperfections can even add to the rustic charm of the farmhouse style.
- How can I customize my console table? The possibilities are endless! You can adjust the dimensions to fit your space, experiment with different stain colors or paint finishes, add decorative hardware, or even incorporate a lower shelf for additional storage.
- What if I don’t have a Kreg Jig? While a Kreg Jig is highly recommended for its ease and strong, concealed joints, you could technically use alternative joinery methods like traditional screws (pre-drilled and countersunk for wood plugs) or dowels. However, these methods are often more challenging for beginners and may not offer the same clean aesthetic or strength as pocket holes.
- How do I care for my finished wood furniture? To maintain your console table, simply wipe it down with a damp cloth as needed. Avoid harsh chemical cleaners, as they can damage the finish. If you used a durable topcoat like polyurethane, it will offer good protection against moisture and scratches.
Conclusion: Enjoy Your Handcrafted Farmhouse Console Table
Congratulations! You’ve successfully built your very own DIY Modern Farmhouse Console Table. This project is a testament to what you can achieve with a few boards, some basic tools, and a willingness to learn. Revel in the satisfaction of creating a functional and beautiful piece of furniture with your own hands.
This console table is more than just a surface; it’s a statement of personal style and a conversation starter. Place it in your entryway to welcome guests, behind a sofa in your living room, or as a decorative accent in a hallway. Its versatile design and sturdy construction ensure it will be a cherished part of your home for many years.
Don’t forget to share your amazing builds with us on social media! Use the hashtag #shanty2chic so we can see and share your creations with our community.
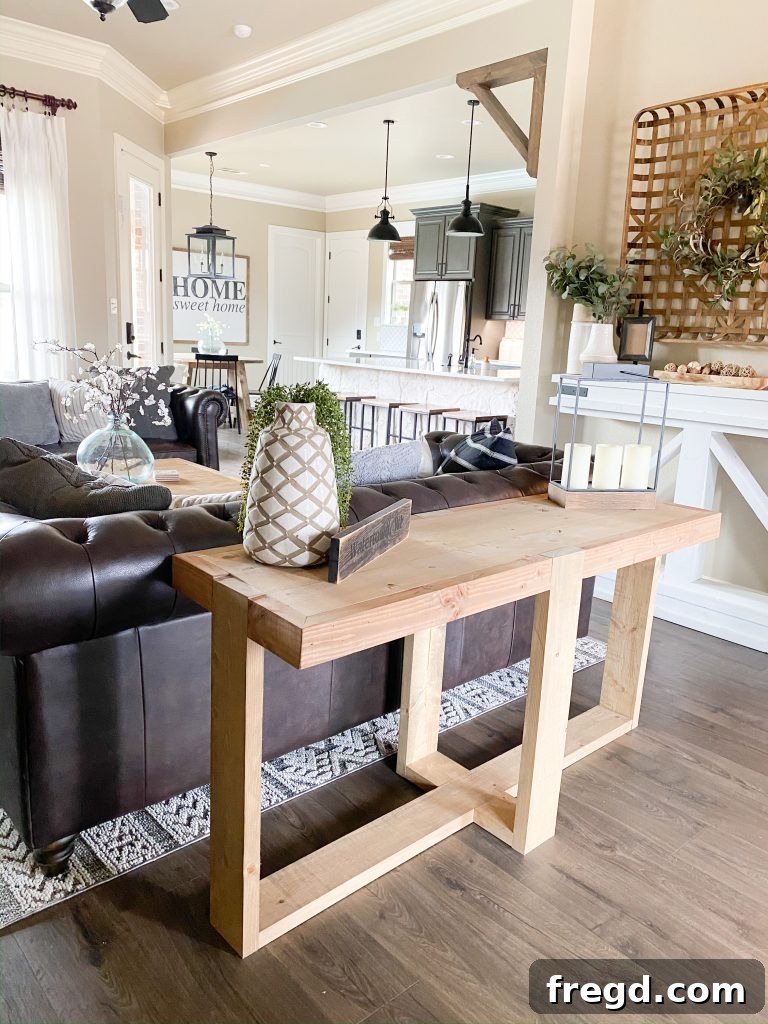
Happy Building!
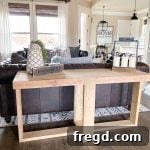
Modern Farmhouse Console Table
For a comprehensive guide including a detailed cut list, step-by-step instructions, and a full supply list, download the FREE printable plans here!
Tools
-
Miter Saw
-
Drill
-
Kreg Jig (K4/K5 or similar pocket-hole jig)
-
Brad Nailer
-
Table Saw (optional)
-
Wood Glue
-
Safety Glasses & Hearing Protection
Supply List
- 6 2x6x8 Framing Lumber
- 2 2x4x8 Framing Lumber
- 2 1/2″ Pocket Hole Screws
- 2″ Brad Nails
- Wood Glue
- Minwax Wood Finish (Golden Oak & Classic Gray)
- Sandpaper (various grits)
- Clear Protective Finish (e.g., Polyurethane)
Instructions Overview
-
For a detailed cut list and complete step-by-step assembly instructions with images, please refer to the main article sections above and download the free printable plans for comprehensive guidance.