
Transforming the Heart of Household Chores: Our DIY Laundry Room Makeover Begins!
I am about to show you the most loathed, neglected, and often hidden room in my house – a space that, for too long, was merely functional and utterly devoid of charm.
Yep, my laundry room. While “loathed” might be a strong word, it certainly felt like a perpetually “boring” space. And let’s be honest, laundry itself can be boring enough without its environment adding to the monotony! Especially during baseball season, which means an endless parade of muddy uniforms and sweaty gear, our small laundry nook felt more like a chore factory than a functional household area. As much as I adore my family and the joy of caring for them, it was time to inject some much-needed personality and efficiency into this forgotten corner of our home.
Maximizing Every Inch: The Genesis of Our Custom Washer and Dryer Pedestal
Like many homeowners, I’ve often yearned for one of those expansive mudroom/laundry room combinations you see in magazines – spaces that offer ample room for sorting, folding, and storing. Unfortunately, that wasn’t a feature we prioritized (or found!) during our house hunt, leaving us with a modest laundry room conveniently located off the garage. This compact space, however, sparked a determination within me: to make the absolute most of every square inch, transforming it into a highly functional and aesthetically pleasing area. This resolve led directly to the creation of our DIY Washer/Dryer Pedestal – a cornerstone of our laundry room transformation.
The idea behind a custom-built pedestal wasn’t just about elevating the appliances; it was about reclaiming wasted vertical space and integrating smart storage solutions tailored to our specific needs. Traditional store-bought pedestals often come with a hefty price tag and generic dimensions that might not perfectly suit every washer and dryer model or room layout. Building our own allowed for complete customization, significant cost savings, and the immense satisfaction that comes from a successful DIY project. If you’re eager to learn about the intricate details of the construction process, including material lists and step-by-step instructions, you can explore the full DIY Washer/Dryer Pedestal build HERE. It’s a project that truly empowers you to take control of your home’s functionality and style.
Selecting the Perfect Shade: A Gray Area That Works
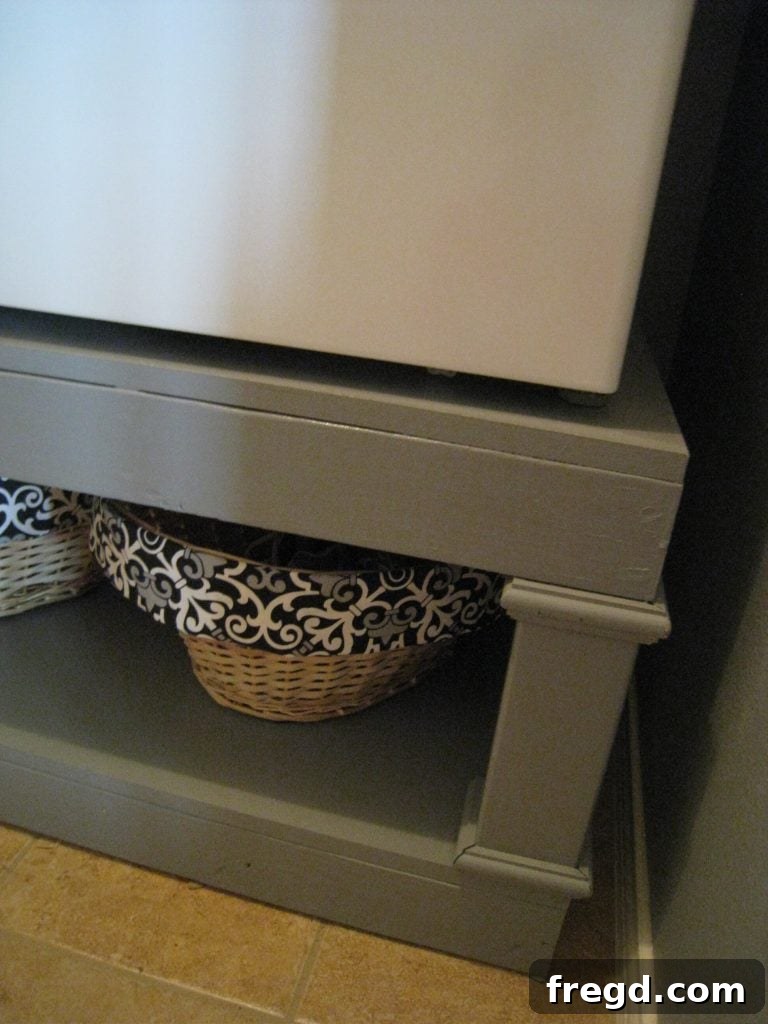
Once the sturdy frame of the pedestal was complete, the next exciting phase was choosing the perfect finish. For the paint, I gravitated towards Behr Gray Area in a high-gloss finish. My approach to color selection for this project was refreshingly simple; there was no complex scientific formula or endless deliberation over samples. I simply picked a gray that looked appealing, a shade that felt inherently clean, modern, and versatile. The beauty of a neutral gray is its ability to provide a calm and sophisticated backdrop, allowing other elements in the room to take center stage without overwhelming the small space.
Beyond its aesthetic appeal, the high-gloss finish was a deliberate choice for practical reasons. In a laundry room, durability and ease of cleaning are paramount. A high-gloss surface is notoriously resilient, resisting moisture, scuffs, and everyday wear and tear, making it incredibly easy to wipe down and maintain its fresh appearance. After applying two generous coats of Behr Gray Area, the pedestal received its final protective layer: a single coat of Minwax Polycrylic, also in a high-gloss sheen. This clear topcoat not only amplified the shine but also provided an extra shield against humidity and potential spills, ensuring that our DIY creation would stand the test of time and countless laundry cycles.
The Installation Saga: A Tale of Perseverance (and a Little Chaos)
Now, for the part of any DIY journey that often involves a fair share of grit, teamwork, and sometimes, unexpected hiccups: the installation. Ladies, if you’re planning to embark on a similar build for your laundry room, you might want to tell your husband to step out of the room for a moment while I share this anecdote! Getting this behemoth of a pedestal, along with the weighty washer and dryer, into our compact laundry room was, to put it mildly, an epic struggle. It was the biggest pain in the touche, demanding intricate maneuvering and a good dose of humor to avoid complete frustration. If you’re blessed with a large laundry room, you likely won’t encounter such theatrics, but for those of us navigating tight quarters, prepare for an Olympic-level logistical challenge.
I’ll spare you every excruciating detail, but picture Austin Powers famously attempting to turn his buggy around in a cramped warehouse – that pretty much sums up our experience! There were moments of genuine strain, frayed nerves, and a collective sigh of relief when the pedestal finally settled into place. The adventure, however, wasn’t over. The first time we reconnected the water lines and turned the water back on, a connection wasn’t quite secure, resulting in a dramatic spewing of water everywhere. Our strategically placed beach towels (visible in the corner of one of the pics, testament to our preparedness, or perhaps our expectation of trouble!) became immediate heroes. My incredibly patient husband, John, was a trooper, connecting the dryer hose for what felt like the fourth time, all while I, the ever-present chronicler, remained behind the lens. Despite the temporary chaos, these are the unforgettable, slightly painful, and ultimately humorous memories that enrich any DIY story.
Okay, you can tell the hubbies they’re safe to come back in now!
Before & After: Witnessing the Laundry Room Transformation
It’s always incredible to see the power of a good makeover. Remember the “before” state? The appliances squatting directly on the floor, the exposed utility hookups creating visual clutter, and an overall sense of blandness that made laundry feel even more like a chore. It was purely functional, without a shred of personality.
And now, for the exciting “after”! The transformation is truly striking. Our small laundry room, once a neglected corner, has been reborn as a bright, organized, and much more inviting space. The custom pedestal instantly became the focal point, providing a robust foundation for the appliances while dramatically upgrading the room’s aesthetic appeal and functionality.
Unlocking Storage Potential and Elevated Ergonomics
What truly elevates this DIY project beyond mere aesthetics are the practical benefits it delivers. The primary advantage I absolutely love is the incredible storage it offers on the bottom. The open cubbies beneath the elevated appliances are now home to a set of stylish yet incredibly affordable baskets (a tutorial for these will be shared very soon, so stay tuned!). These baskets are perfect for neatly stowing away detergents, fabric softeners, dryer sheets, and other laundry essentials, keeping them organized and out of sight, yet always within easy reach. This smart storage solution significantly reduces visual clutter and streamlines the entire laundry process.
Beyond dedicated storage, the pedestal serves several critical functions that dramatically improve the laundry experience. It raises the washer and dryer to a much more ergonomic height, which means no more excessive bending and stooping when loading or unloading laundry – a huge relief for the back! This thoughtful elevation also cleverly conceals all the unsightly hoses, cords, and hookups on the wall, instantly giving the room a cleaner, more finished, and visually appealing look. This simple yet effective transformation dramatically enhances both the functionality and the personality of our once-dull laundry room, making daily chores a little more enjoyable.
Unbeatable Value: DIY vs. Retail Pedestals
Beyond the enhanced aesthetics and functionality, one of the most compelling reasons to undertake a DIY project like this is the incredible cost savings. The total material cost for our custom-built washer and dryer pedestal, excluding the paint (which was a minor additional expense or items we already had on hand), came in at a remarkable $80! Let’s put that into perspective. If you were to purchase pedestals from a retail store, they typically cost around $200 for a single unit. Given that most laundry setups require two pedestals – one for the washer and one for the dryer – you’d be looking at a substantial investment of approximately $400 for off-the-shelf options. Our DIY approach not only allowed us to create a perfectly customized solution but also resulted in an impressive saving of around $320. This significant difference in price makes building your own pedestal an undeniably attractive and budget-friendly alternative for anyone looking to upgrade their laundry room without emptying their wallet.
Built to Last: A Testament to DIY Durability
When you invest your precious time and effort into constructing a piece of furniture for your home, you want assurance that it’s built to endure. Our DIY pedestal was designed with robustness in mind, and it has certainly proven its exceptional durability. I recently found myself needing to reach the higher sections of the room to perform some paint touch-ups on the walls and ceiling. Instead of wrestling with a precarious step stool, I confidently climbed directly onto the pedestal. It didn’t budge an inch! This impromptu stability test not only reaffirmed its solid construction and strength but also highlighted an unexpected bonus: its unwavering stability. Beyond supporting impromptu painting sessions or even offering a safe perch for a quick magazine read (yes, it’s that solid!), its tough build ensures that our expensive appliances are housed safely and securely for many years to come, offering peace of mind alongside its practical benefits.
The Journey Continues: Completing Our Dream Laundry Room
While the DIY washer and dryer pedestal has undeniably been a game-changer for our laundry room, this reveal is just one exciting milestone in our ongoing home improvement adventure. We are still meticulously adding the crucial finishing touches that will truly tie the entire space together and enhance its functionality even further. Anticipate future updates where I’ll be back to share the complete laundry room makeover, showcasing additional organizational solutions, thoughtful decorative elements, and perhaps even some clever lighting ideas that will maximize both comfort and style in this often-underappreciated area of the home. Stay tuned for more inspiration as we transform this once-neglected space into a truly delightful and hyper-efficient hub for all our household chores.
Thank you so much for stopping by and joining us on this exciting DIY journey! We sincerely hope our experience inspires you to look at those hidden, unloved spaces in your own home with fresh eyes and the confidence to transform them into areas you genuinely enjoy. Happy building!
~Ashley