
Transform Your Kitchen Island: A DIY Board and Batten Makeover Guide for a Stylish & Durable Upgrade
Embarking on a home improvement journey can be incredibly rewarding, especially when you infuse your living spaces with personalized touches. For the past two years, our mission has been to steadily introduce custom features into our home, enhancing both its aesthetic appeal and functionality. This week, an unexpected opportunity arose, leading us to tackle a significant project ahead of schedule: a complete refresh of our kitchen island. What began as a minor mishap quickly evolved into a fantastic opportunity to implement a design element we’d long admired – the classic board and batten style.
The Catalyst for Change: Why Our Kitchen Island Needed a Makeover
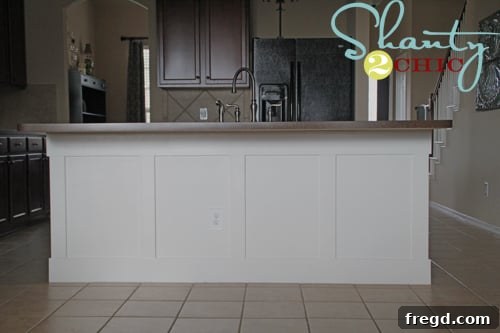
You might notice that rather prominent circular mark on the left side of the island in the ‘before’ photo. That little imperfection was the unexpected trigger for this entire project. In an effort to touch up some scuffs around the house using leftover paint from the builder, I inadvertently discovered a significant difference in color – the old paint had dried considerably darker than our walls. This misstep resulted in large, two-toned patches across almost every room in the house, a testament to the importance of always testing paint in an inconspicuous area first! To rectify the situation for the island, I had to cut a substantial section of the wall from the island itself, take it to Home Depot for a precise color match, and thankfully, the paint matching nightmare was finally over.
With the correctly painted patch seamlessly reinstalled, our focus shifted to the island’s overall condition. After two years of enduring daily life – countless meals, homework sessions, and impromptu art projects with the kids eating at the bar – the surface and base of our kitchen island had definitely seen better days. It’s amazing how much wear and tear a central hub like an island can accumulate. Honestly, I hadn’t fully grasped just how worn and “nasty” it had become until I began the demolition phase. The signs of constant use, from scuff marks and chipped paint to general grime, were undeniable, making a comprehensive revamp an absolute necessity rather than just a cosmetic upgrade.
Project Overview: Planning Your Board and Batten Kitchen Island Transformation
The board and batten style offers a timeless and elegant solution for adding architectural interest and visual texture to any space. It involves attaching thin strips of wood (battens) over seams or directly onto a flat panel (boards), creating a sophisticated, paneled look. For a kitchen island, this design not only elevates the aesthetic but also provides a durable, easy-to-clean surface, perfect for high-traffic areas prone to spills and scuffs from little feet. Our goal was to create a feature that was both beautiful and highly functional, capable of standing up to the demands of a busy family kitchen.
Before diving into the physical work, meticulous planning is paramount. This phase involves envisioning the final look, taking precise measurements, and sketching out your design. Consider the scale of your island and how the battens will be spaced to create a harmonious pattern. Will the battens run vertically, horizontally, or a combination? Think about the top and bottom trim pieces and how they will frame your design. Gathering inspiration from online sources, magazines, or even other homes can help solidify your vision and ensure the finished project seamlessly integrates with your home’s existing decor.
Step 1: Demolition – Preparing Your Island for Its Grand Transformation
The first crucial step in transforming our kitchen island was the careful removal of the existing, well-worn baseboard. This process, while seemingly minor, sets the stage for the entire project, ensuring a clean and even surface for the new board and batten installation. I began by using a simple utility knife, an inexpensive yet incredibly useful tool (available at Home Depot for around $2.00). The goal here was to cut a clean seam along the caulk line where the baseboard met the wall. This prevents damage to the drywall as you pry the old trim away and ensures a smoother removal process.
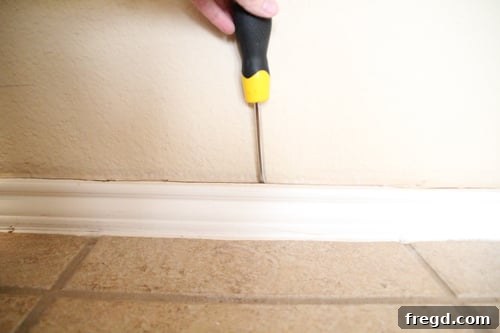
Once the caulk line was scored, the next phase involved carefully prying the baseboard away from the wall. For this, a flat-head screwdriver and a hammer proved invaluable. By gently hammering the flat-head screwdriver behind the baseboard, you can create leverage, slowly separating the trim from the wall. Work slowly and methodically along the length of the baseboard, repositioning your screwdriver every few inches to minimize damage to the wall surface. This cautious approach ensures that your demolition leaves a clean canvas, reducing the amount of repair work needed before the new installation begins. A smooth, prepared surface is key for a flawless final result.
Step 2: Strategic Layout – Designing Your Batten Pattern
With the demolition complete and the island surface prepped, it was time for the creative and analytical part of the project: designing the batten placement. This step is crucial for achieving a balanced and aesthetically pleasing board and batten look. I started by visually mapping out where each vertical batten would go, using a pencil to lightly mark the wall. Consider the dimensions of your island and the size of your chosen battens to ensure an even and symmetrical pattern. Often, placing battens at the corners and then evenly spacing the interior battens works best. Don’t be afraid to experiment with different layouts on paper or with temporary markings on the wall until you find a design that feels right and enhances the island’s proportions. This foresight prevents costly mistakes and ensures you’re happy with the final outcome.
Step 3: Material Selection – Choosing the Right Boards for Durability and Style
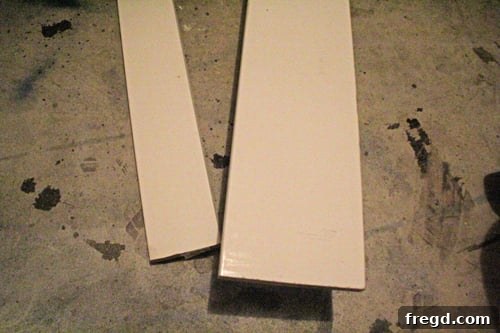
For the board and batten components, selecting the right materials is essential for both ease of installation and long-term durability. I opted for pre-primed MDF (Medium-Density Fiberboard) boards for several compelling reasons. MDF is renowned for being exceptionally straight and smooth, which translates into a professional, flawless finish. Its density also makes it incredibly easy to paint, absorbing primer and paint evenly for a sleek look. Furthermore, MDF is generally more cost-effective than solid wood, making it an excellent choice for budget-conscious DIYers without compromising on quality.
Specifically, I used 1×6 inch MDF boards for the top and bottom trim pieces, providing a substantial frame for the design. For the vertical battens, I chose 1×4 inch MDF boards. This combination creates a classic profile, offering sufficient visual weight while maintaining an elegant proportion. The pre-primed nature of these boards significantly reduces preparation time, allowing you to move directly to cutting and installation after a light sanding, if desired. While other materials like solid pine or even PVC trim can be used, MDF offers a fantastic balance of performance, aesthetics, and affordability for projects like this.
Step 4: Precision Cuts – Mastering Your Miter Saw (or Hand Saw)
Achieving crisp, seamless corners is a hallmark of professional-looking trim work, and this is where precise miter cuts come into play. For the corners of the top and bottom trim pieces, I utilized my compound miter saw. This powerful tool allows for accurate angled cuts, ensuring that two pieces of trim meet perfectly at a 45-degree angle to form a neat 90-degree corner. If you don’t own a compound miter saw, don’t despair! A miter box and a hand saw, readily available at any hardware store, can achieve the same results with a bit more manual effort and careful technique. The key is to measure twice and cut once, always double-checking your angles to avoid gaps. Take your time with these cuts, as the quality of your miters will significantly impact the overall finish of your board and batten design.
Step 5: Secure Installation – Attaching Your Board and Batten Elements
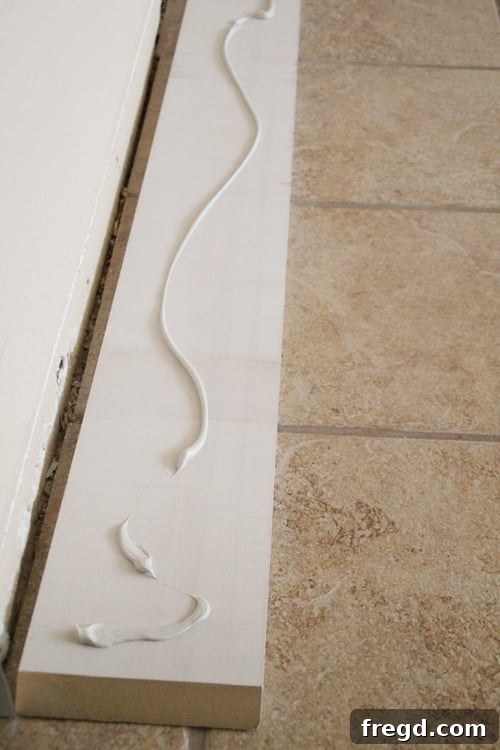
With all your trim pieces and battens cut to size, it’s time for installation. Securing these components firmly to the island is crucial for a durable and long-lasting finish. I began by applying a strong adhesive, specifically Liquid Nails, to the backside of each MDF piece. This provides an immediate and powerful bond between the wood and the wall surface, preventing any future movement or detachment. Apply a consistent bead of adhesive, ensuring coverage along the length of the board, but avoid excessive application that could squeeze out when pressed.
Immediately after applying the Liquid Nails, I used a nailer to further secure each piece to the wall. The nailer drives small finishing nails discreetly into the MDF and into the wall studs (where possible), offering mechanical reinforcement that holds the pieces in place while the adhesive cures. Space your nails evenly, typically every 12-16 inches, making sure they are flush with the surface to facilitate easy patching later. This two-pronged approach – using both adhesive and nails – creates an exceptionally strong bond, ensuring your board and batten will withstand daily wear and tear for years to come. For areas with electrical outlets, a router was used to meticulously cut out the necessary openings in the MDF, ensuring a perfect fit around the existing electrical infrastructure.
Step 6: Cutting and Fitting the Boards – The Kreg Jig Rip Cut Advantage
Now for the exciting part – filling in the spaces between the battens with the “boards” component of our board and batten design. For this, I used 1/4-inch plywood sheets. Opting for plywood and cutting it down to fit the specific dimensions between the battens was a strategic choice, primarily because it’s significantly more cost-effective and often easier to manage than purchasing pre-cut panels of the exact width needed. This approach allows for greater customization and minimizes material waste, contributing to the budget-friendly nature of this project.
To cut the plywood sheets down to their precise sizes, I utilized the new Kreg Jig Rip Cut, and I cannot express enough how much I love this tool! It was an absolute game-changer. This innovative tool, which was just hitting stores around April for an incredibly reasonable $34.99, proved indispensable. It allowed me to cut every plywood board exactly to size with unparalleled accuracy and ease. Its design features a guide at the end that keeps your saw moving in a perfectly straight line, coupled with an adjustable ruler that guarantees precise and repeatable cuts. Furthermore, its compact design means it takes up very little storage space, a huge bonus for any DIY enthusiast. The Kreg Jig Rip Cut transformed what could have been a tedious and potentially inaccurate task into a smooth, efficient, and precise process, making it a highly recommended addition to any serious DIYer’s toolkit.
Once all the plywood panels were perfectly cut, I attached them to the wall using the same reliable combination of Liquid Nails adhesive and my nailer. This ensured each board was firmly secured and flush with the battens, creating a unified and robust surface. This method minimizes gaps and provides a solid foundation for the final finishing steps. The careful installation of these boards is critical to achieving the smooth, seamless look that defines quality board and batten work, making the subsequent caulking and painting stages much simpler and more effective.
Step 7: The Finishing Touches – Caulking and Painting for a Flawless Result
With all the board and batten elements firmly in place, the final step is where the magic truly happens, transforming raw materials into a polished, professional-looking feature. This involves meticulous caulking and painting. Caulking is a non-negotiable step for any trim project; it fills any tiny gaps or seams between the MDF boards, the battens, and the wall, creating a smooth, monolithic surface that looks custom-built. Use a good quality paintable caulk and apply it carefully along all edges, smoothing it with a wet finger or a caulking tool for a flawless finish. This attention to detail dramatically elevates the perceived quality of your work.
Finally, it was time to paint! For this project, I chose a semi-gloss latex paint, specifically matched to our existing trim color at Home Depot. Semi-gloss paint is an excellent choice for kitchen islands and other high-traffic areas because it offers superior durability and, perhaps most importantly, is incredibly easy to clean. Spills, scuffs, and sticky fingerprints simply wipe away, making maintenance a breeze – a huge advantage in a busy household with children. The latex formula ensures easy application and quick drying times. With the final coat of paint, the transformation was complete, revealing a stunning, durable, and stylish kitchen island that looks far more expensive than its actual cost.
The Stunning Transformation: Unveiling Your New Kitchen Island
The entire process, from the initial demolition to the final coat of paint, proved to be surprisingly straightforward and incredibly rewarding. The most impressive aspect of this DIY kitchen island revamp is its incredible affordability. The total cost for all materials – the MDF boards, plywood, Liquid Nails, caulk, and paint – came out to just around $50. For such a minimal investment, the visual impact and functional improvements are truly phenomenal. It’s a testament to how impactful budget-friendly DIY projects can be when approached with careful planning and execution.
Beyond the cost savings, one of the biggest benefits, especially for a kitchen island that serves as the heart of family activity, is the enhanced durability and ease of cleaning. Thanks to the semi-gloss latex paint, spills and smudges no longer cause panic. A quick wipe-down is all it takes to keep the island looking pristine, a stark contrast to its previous worn state. This combination of affordability, durability, and stunning aesthetic appeal makes the board and batten kitchen island makeover an absolute winner in our home.
Beyond the Kitchen Island: More Builder-Grade Upgrades
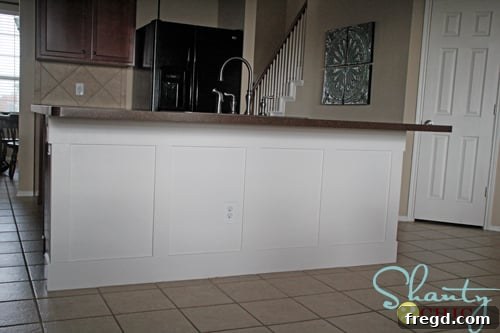
This project truly felt like getting a lot of “bang for my buck” – a significant upgrade for minimal expense and effort. The transformation has not only revitalized our kitchen but also reignited my passion for tackling more “builder-grade” areas in our home, turning them into customized, character-filled spaces. There’s immense satisfaction in taking something standard and making it uniquely yours.
If you’re inspired by this kitchen island makeover, I would absolutely love for you to share it with others by pinning it! Your shares help inspire more DIY enthusiasts to take on their own home improvement projects. Thank you so much for stopping by and following along on this journey. Happy building! ~Ashley