
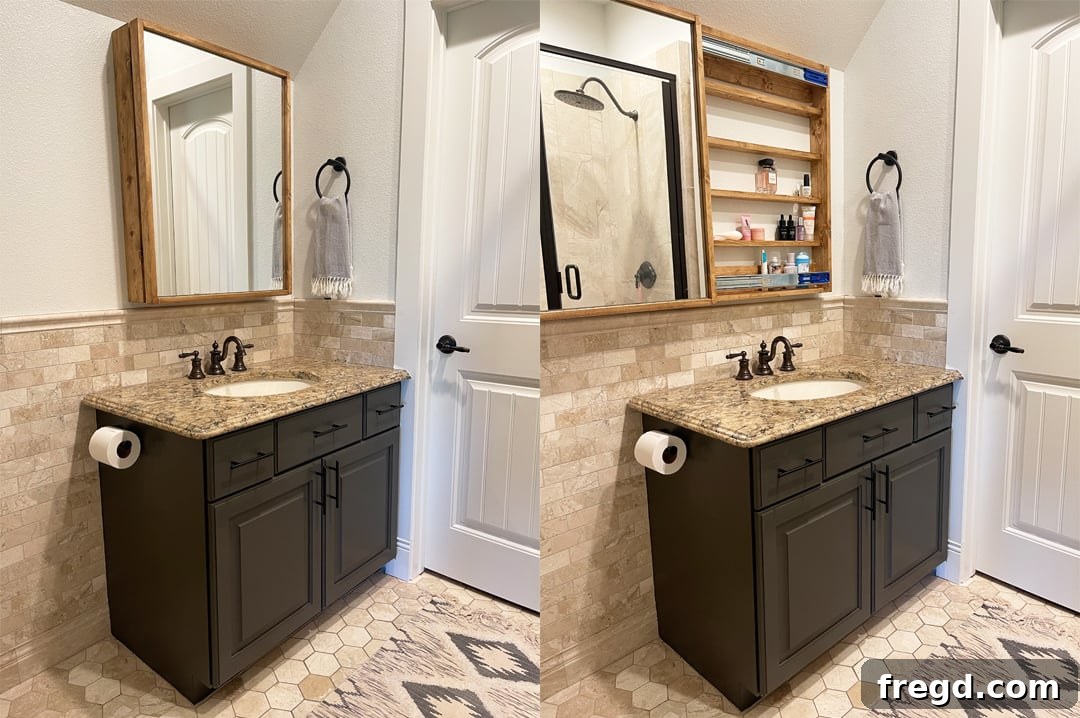
Discover how to build a stunning, functional DIY Medicine Cabinet with hidden mirror storage using just a few essential tools, five pine boards, and free, easy-to-follow plans from Shanty2Chic!
Are you tired of cluttered bathroom countertops and limited storage space? This project is the perfect solution. Imagine a beautifully framed mirror that elegantly conceals all your daily essentials – from beauty products and toiletries to medications – keeping your bathroom looking pristine and organized. This beginner-friendly DIY project offers an innovative way to maximize space, especially in smaller bathrooms, while adding a touch of custom craftsmanship to your home. Say goodbye to visible bottles and tubes, and hello to a sleek, streamlined bathroom aesthetic that truly reflects your style.
This comprehensive guide is designed to empower you, walking through every step of creating your very own DIY Bathroom Mirror with Hidden Storage. We’ve simplified the process to ensure even novice builders can achieve professional-looking results. By following our detailed instructions, complete with a free printable cut list and supply breakdown, you’ll gain practical experience with essential woodworking tools and techniques. Get ready to transform your bathroom with this smart, stylish, and incredibly satisfying storage solution!
Click here to jump straight to the free printable plans and detailed cut list!
Table of Contents
How to Build a DIY Medicine Cabinet with Hidden Mirror Storage
This project began with a universal challenge: a small bathroom perpetually struggling with insufficient storage. My daughter’s modest vanity cabinet, once adequate, rapidly became overwhelmed with an expanding collection of beauty products as she entered her middle school years. To combat this growing clutter and enhance functionality, I envisioned a sophisticated yet practical solution – a sleek, custom-built mirror that would ingeniously slide open to reveal generous hidden storage. This innovative design not only banishes countertop chaos but also integrates significant utility and a modern, elegant aesthetic into any bathroom setting. The result is a DIY Bathroom Mirror with Hidden Storage that perfectly conceals bottles, tubes, and other toiletries, transforming a previously chaotic space into an organized, serene sanctuary. This approach allows for maximum utilization of vertical space, a critical factor in compact bathrooms where every inch counts.
This detailed guide is meticulously crafted with aspiring DIYers and beginners in mind, making it an ideal project for anyone eager to explore the rewarding world of woodworking. We have diligently broken down each step into clear, concise, and manageable instructions, complemented by detailed explanations and visual aids to ensure clarity. Through this project, you’ll gain invaluable practical experience with fundamental tools such as a miter saw for precise cuts and a Kreg Jig for creating robust, concealed joints. These are transferable skills that will serve you well in future DIY endeavors. The profound sense of accomplishment derived from constructing a functional and aesthetically pleasing piece of furniture with your own hands is truly immeasurable. So, let’s gather our materials, prepare our workspace, and embark on this exciting journey to create a bathroom you’ll be proud to showcase!
Why Choose a Hidden Medicine Cabinet? The Benefits of Smart Bathroom Storage
Traditional medicine cabinets often fall short in terms of aesthetic integration or providing sufficient storage capacity for contemporary needs. Opting for a DIY hidden medicine cabinet, especially one seamlessly integrated with a mirror, presents a multitude of compelling advantages that go beyond mere functionality:
- Achieve Clutter-Free Countertops: Immediately eliminate the visual noise of visible bottles, tubes, and cosmetics, thereby fostering a clean, serene, and spa-like bathroom environment. This contributes significantly to a more relaxed start and end to your day.
- Maximize Vertical Space: This design strategically utilizes often-neglected vertical wall space, effectively expanding your storage footprint even in the most compact bathrooms without occupying valuable floor area. It’s a smart solution for optimizing small spaces.
- Unmatched Customization Potential: Unlike generic, off-the-shelf storage solutions, a DIY cabinet empowers you to tailor every aspect – from precise dimensions and adjustable shelf heights to bespoke finishes – perfectly aligning with your bathroom’s existing decor and your unique storage requirements.
- Elevated Aesthetic Appeal: A sleek, frameless, or custom-framed mirror serves as an elegant focal point, artfully concealing practical storage behind a sophisticated facade. This enhances the overall design language of your bathroom.
- Personalized Organization System: Design the internal shelves to perfectly accommodate specific items, whether you need ample height for tall perfume bottles, snug compartments for small nail polishes, or dedicated spots for everyday dental hygiene products.
- Accessible for Beginners: This particular hidden medicine cabinet design is intentionally straightforward, serving as an excellent introduction to fundamental woodworking skills that are both accessible to learn and immensely rewarding to master.
Ultimately, this project is far more than just constructing a cabinet; it’s about intelligently reclaiming your bathroom space, significantly enhancing its functionality, and boosting its beauty with a distinctly personal and custom touch. It’s an investment in a more organized, tranquil home environment.
Essential Tools for Your Project
Before you embark on the construction phase, it is paramount to gather all the necessary tools. Having everything readily available will guarantee a smooth, efficient, and enjoyable building process. Always prioritize safety by wearing appropriate personal protective equipment and ensuring you are thoroughly familiar with the correct and safe operation of each tool. For this project, you’ll require a balanced mix of power tools for precise cutting and drilling, along with essential hand tools for assembly and achieving that perfect finish.
- Miter Saw: This is an indispensable tool for making exceptionally precise crosscuts on your wooden boards. It ensures that all frame, shelf, and trim pieces are cut accurately to their specified dimensions, which is critical for a flush and professional assembly.
- Kreg Jig: An invaluable and revolutionary tool specifically designed for creating incredibly strong, concealed pocket-hole joints. These joints are the cornerstone of robust and aesthetically pleasing cabinet construction, simplifying what would otherwise be complex joinery.
- Drill (Cordless recommended): Essential for a multitude of tasks including drilling accurate pilot holes, driving pocket-hole screws, and securely attaching various hardware components. A cordless drill offers unparalleled flexibility, portability, and ease of movement around your entire workspace.
- Brad Nailer: An ideal tool for quickly and neatly attaching lighter components such as trim pieces and cleats where small, barely visible fasteners are preferred. It significantly speeds up the assembly process and minimizes the need for extensive clamping.
- Sander (Orbital Sander recommended): Absolutely critical for smoothing all wood surfaces, preparing them impeccably for the application of stain or paint, and ultimately ensuring a flawless, professional-grade finish. Begin with a coarser grit (e.g., 120-grit) and progressively advance to finer grits (e.g., 180-220 grit) for the best possible results.
- Stud Finder: An absolutely necessary tool for safely and securely mounting your finished medicine cabinet to the wall. It precisely locates the hidden structural studs behind the drywall, guaranteeing that your cabinet is anchored into solid wood for maximum stability.
- Table Saw (optional, but highly recommended for efficiency and precision): While not strictly mandatory if you opt to purchase pre-sized boards or have a lumber yard perform the cuts, a table saw provides the capability to precisely rip larger boards (e.g., 1x4s) into narrower strips (e.g., 1x3s or 1x2s) required for shelves and trim. This method is often more cost-effective and offers superior precision and flexibility. If you do not have access to a table saw, simply purchase 1x3s for shelves and 1x2s for front cleats and trim directly.
- Measuring Tape, Ruler, and Pencil: For making accurate measurements, precise markings, and transferring dimensions onto your wood. Precision here prevents costly errors.
- Safety Glasses and Hearing Protection: Always wear appropriate personal protective equipment. Safety glasses are crucial to protect your eyes from sawdust and debris, and hearing protection is essential when operating noisy power tools.
- Woodworking Clamps: Indispensable for holding pieces securely in place while wood glue dries or while screws and nails are being driven, ensuring tight and strong joints.
Detailed Supply List for Your DIY Medicine Cabinet
Here’s a comprehensive and meticulously detailed list of all the materials you’ll need to purchase for your exciting DIY project. We have thoughtfully included affiliate links to specific products for your convenience, making it easier to acquire exactly what you need. However, please feel free to source comparable quality items from your preferred local hardware store. It’s always a good practice to double-check quantities against your final cabinet dimensions, although these plans are intelligently designed around standard board sizes to minimize waste and complexity.
- 5 – 1x4x8 Pine or Common Boards: These versatile boards will serve as the foundational material for the primary structure of both your cabinet and the elegant mirror frame. As detailed in the planning section, these plans anticipate you may rip some of these boards down to narrower widths. Should you lack a table saw, an alternative is to acquire 1×3 and 1×2 boards separately for the shelves, front cleats, and trim, as specified below.
- 1 1/4″ Pocket Hole Screws: These specialized screws are specifically engineered for optimal performance with a Kreg Jig, facilitating the creation of extraordinarily strong, clean, and hidden joints that are critical for structural integrity.
- 1 1/4″ Brad Nails: Perfect for securely attaching lighter, non-load-bearing components such as trim and cleats. Brad nails leave a much smaller hole, making them less visible and easier to conceal during the finishing stages.
- 3″ Wood Screws: Absolutely essential for the critical task of securely mounting the entire finished cabinet to your wall studs. Their length ensures deep penetration and a reliable anchor.
- 2 – 24″ Drawer Slides: These high-quality, heavy-duty drawer slides are the mechanical heart of your hidden storage. They will enable your mirror frame to glide effortlessly and smoothly, revealing the concealed compartment. Ensure you select full-extension slides for maximum accessibility to your stored items.
- 1 – 24″x30″ Frameless Mirror: This is the aesthetic centerpiece of your hidden storage solution. Choosing a frameless design typically lends itself to a modern, minimalist, and sleek appearance, though you could adapt for other mirror styles if preferred.
- Construction Adhesive: A powerful, high-strength adhesive specifically formulated for securely attaching the mirror to its wooden frame. It is vital to select an adhesive that is compatible with both mirrors and wood to prevent damage to the mirror’s backing.
- Wood Glue: For robustly reinforcing all wood-to-wood joints, providing an indispensable layer of extra strength and unparalleled stability in conjunction with screws and nails.
- Wood Filler: Indispensable for meticulously concealing nail holes, minor imperfections, and the pocket holes themselves before the sanding and final finishing stages, ensuring a smooth, flawless surface.
- Wood Finish (Stain or Paint): Your choice to beautifully match or complement your existing bathroom decor. Consider a wood stain to highlight the natural grain, or choose paint for a vibrant pop of color or a seamless integration.
- Polyurethane (or other durable protective sealant): An absolutely vital step to provide robust protection for your finished cabinet against the harsh realities of moisture and humidity inherent in a bathroom environment. This sealant is crucial for ensuring the long-term durability and pristine appearance of your project.
Important Note on Lumber Sizing: I was able to efficiently construct this entire project using just five 1×4 boards. I leveraged my table saw to precisely rip the shelf boards down to 1×3 dimensions and the front cleats and mirror trim pieces to 1×2 dimensions. This technique is not only remarkably cost-effective but also ensures perfectly precise sizing for all components. However, if you do not have access to a table saw, you can readily adapt your material procurement by purchasing pre-cut 1×3 boards specifically for the shelves and 1×2 boards for the front cleats and mirror trim. While this alternative might marginally increase your material cost, it significantly enhances the project’s accessibility for those without specialized ripping equipment, ensuring anyone can build this stunning cabinet.
Cut List and Project Planning for Precision
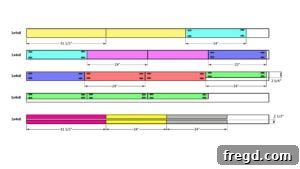
Before making a single cut, it is absolutely crucial to thoroughly review the detailed cut list provided in the free printable plans here. This comprehensive list precisely specifies the exact dimensions for every single piece of wood you will need for this project. Precision at this stage is non-negotiable; always adhere to the woodworking adage: “measure twice, cut once!” Take your time to ensure every measurement is accurate and every cut is perfectly square, as precise cuts are the fundamental bedrock upon which a professional-looking and properly functioning finished product rests. As you cut each piece, immediately label it clearly with a pencil (e.g., “cabinet side,” “shelf,” “mirror top”) to avoid any confusion during the assembly process. This meticulous planning and preparation phase is critically important for minimizing material waste, streamlining the assembly, and ensuring all components fit together flawlessly, guaranteeing a successful build from start to finish.
Step-by-Step: Building the DIY Medicine Cabinet Frame
The cabinet frame serves as the foundational core of your innovative hidden storage unit. Uncompromising precision in these initial construction steps is absolutely vital to ensure that the mirror slides smoothly, the entire unit is exceptionally sturdy, and the final product is aesthetically pleasing. For maximum durability and structural integrity, always incorporate high-quality wood glue in addition to using screws for every joint.
Step 1: Assemble the Main Cabinet Box
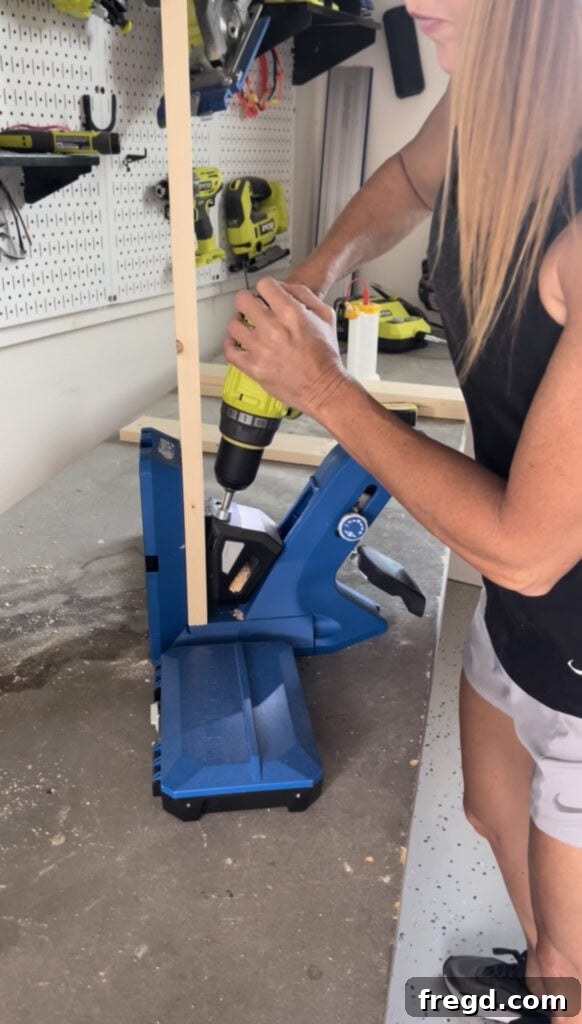
Begin by meticulously cutting your main cabinet frame boards to their exact specified dimensions as detailed in your cut list. Exercise extreme care to ensure that all cuts are perfectly square, which is fundamental for a flush assembly. Using your Kreg Jig, drill 3/4″ pocket holes into both ends of the top and bottom frame pieces. These strategically placed pocket holes are designed to facilitate the creation of exceptionally strong, concealed joints that are both durable and visually clean. Apply a generous, even amount of high-quality wood glue to the ends of the top and bottom pieces before securely attaching them to the side pieces using 1 1/4″ pocket hole screws. Crucially, clamp the pieces firmly and accurately while fastening to ensure a tight, perfectly flush connection. This meticulous process forms the basic rectangular box that is the structural heart of your cabinet.
- You can find our favorite Kreg Jig model here, renowned for efficient and reliable joinery.
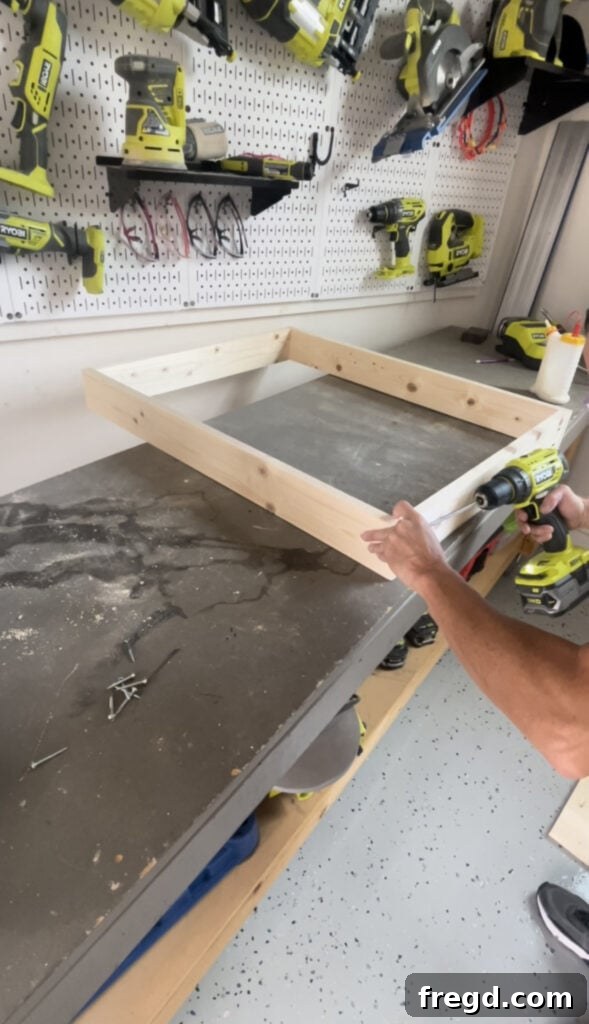
To confirm the frame is perfectly square, measure diagonally from opposing corners; both diagonal measurements should be identical. Make any necessary adjustments while the glue is still wet and pliable, before it fully sets, ensuring structural integrity.
Step 2: Install the Back Cleats for Wall Mounting
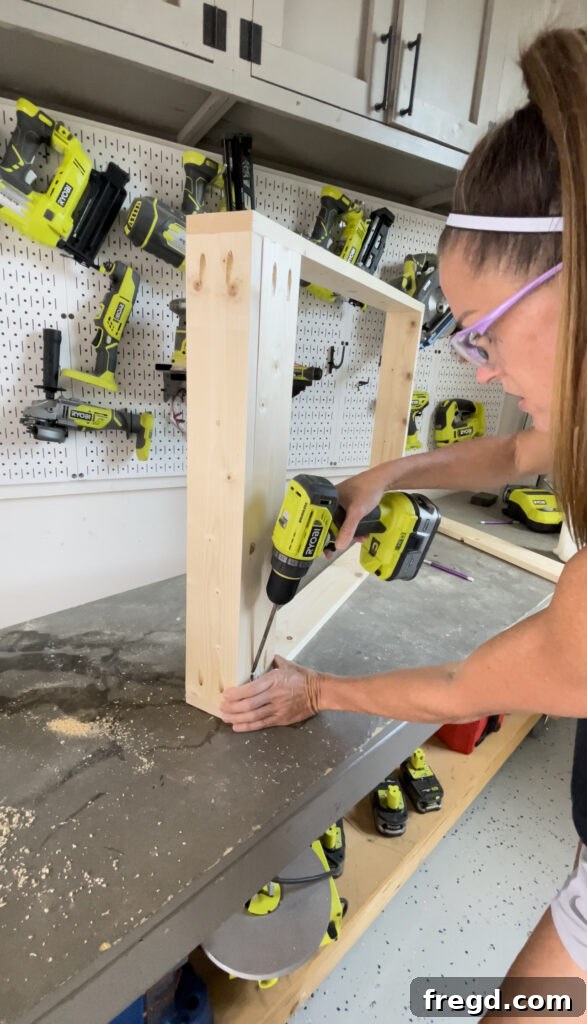
Next, cut the back cleats to their precise required size as per your cut list. These cleats are essential as they will serve as the primary attachment points for securely hanging your finished cabinet onto the wall. Drill 3/4″ pocket holes into both ends of each cleat. Apply a bead of wood glue along the edges where they will meet the frame, and then attach them to the inside back of the main cabinet frame using 1 1/4″ pocket hole screws. It is absolutely crucial that the pocket holes on these cleats face the back of the frame; this allows them to be completely flush with the frame’s rear edge, ensuring a clean appearance and providing a robust, flat mounting surface against the wall. These strategically placed cleats provide indispensable structural support and guarantee a safe and reliable method for permanent wall installation.
Step 3: Add the Interior Shelves
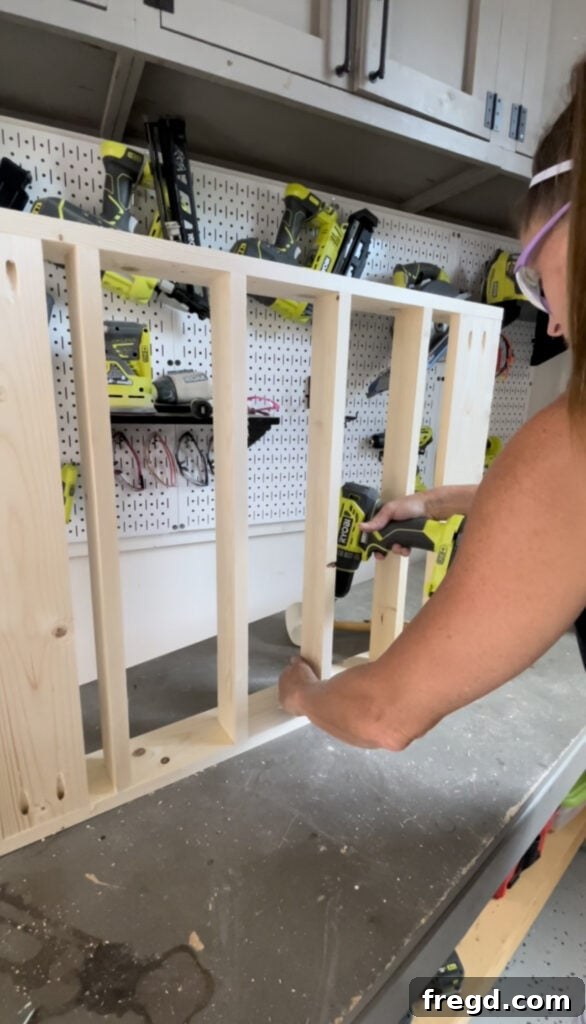
Now, prepare your shelf boards by cutting them to the correct dimensions (revisiting the note about ripping 1x4s to 1x3s if you possess a table saw for optimal sizing). Drill 3/4″ pocket holes into both ends of each shelf board. Apply wood glue to the ends and meticulously position them inside the cabinet frame. Attach them firmly with 1 1/4″ pocket hole screws, taking care to ensure that the back edge of each shelf board is perfectly flush with the back of the main cabinet frame. This precise alignment is paramount not only for a neat, finished appearance but also for the proper, unimpeded function of the hidden mirror mechanism later in the build. You have the flexibility to space the shelves according to your specific storage needs, or you can confidently follow the recommended spacing detailed in the provided plans for balanced organization.
Step 4: Attach the Front Cleats for Drawer Slides
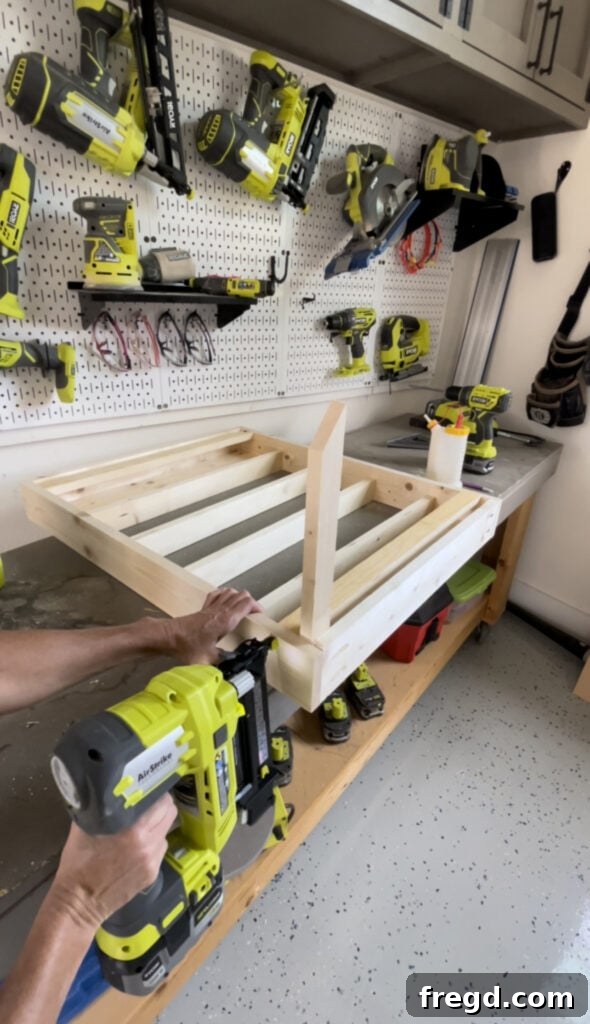
Cut the front cleats to their required size. These cleats are absolutely vital for the accurate mounting of the drawer slides that will eventually carry your mirror and enable its smooth, hidden operation. Apply wood glue along their contact edges and attach them to the inside front of the cabinet frame using 1 1/4″ brad nails. The key to this step is exceptionally precise placement: they should be attached exactly 3/4″ from both the top and bottom interior frame boards, and they must be perfectly flush with the very front edge of the cabinet frame. To guarantee impeccable spacing and alignment, I highly recommend using a scrap 1x board as a temporary spacer during attachment. This meticulous positioning is fundamental to ensuring that the drawer slides will function correctly and that the mirror will sit perfectly flush when fully closed, contributing to the seamless hidden effect.
Constructing the Elegant Mirror Frame
The mirror frame is not merely a decorative element; it is the robust structure that will securely house your frameless mirror and function as the sliding door for your ingenious hidden storage. This particular segment of the build demands meticulous attention to detail to ensure the mirror is impeccably secure within its frame and that the frame itself is both structurally sound and aesthetically captivating.
Step 1: Assemble the Mirror Frame Structure
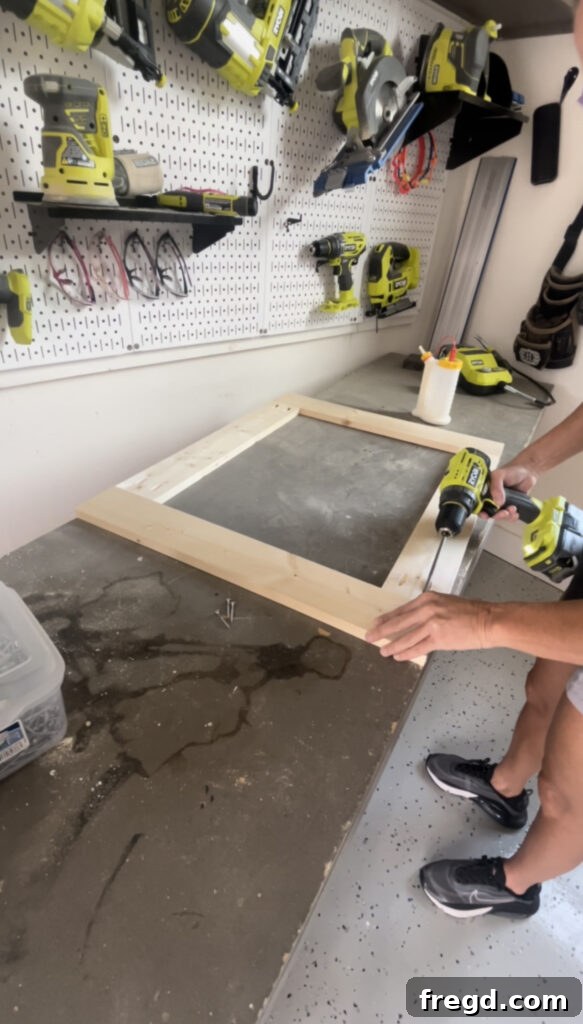
Carefully cut all the mirror frame pieces according to their precise dimensions as outlined in your comprehensive cut list. For creating exceptionally strong and elegantly invisible joints, meticulously drill 3/4″ pocket holes into the side boards of the mirror frame. Apply a consistent bead of wood glue to the ends of the top and bottom pieces before firmly joining them to the side pieces with 1 1/4″ pocket hole screws. It is absolutely essential to ensure that all corners are perfectly square and that the entire frame structure is rigid and free from any flex. This frame will later receive the frameless mirror, so a flat, even, and stable surface is paramount for proper and lasting adhesion. Allocate sufficient time during this step to meticulously create a robust, square, and aesthetically pleasing frame that will beautifully showcase your mirror.
Seamless Integration: Attaching the Drawer Slides
The drawer slides are the ingenious mechanism that truly enables the “hidden” aspect of your storage, allowing the mirror to glide effortlessly and quietly. Accurate installation of these components is of paramount importance for ensuring smooth, reliable operation and achieving a truly professional, integrated look.
Step 1: Attach Inner Drawer Slide Pieces to Mirror Frame
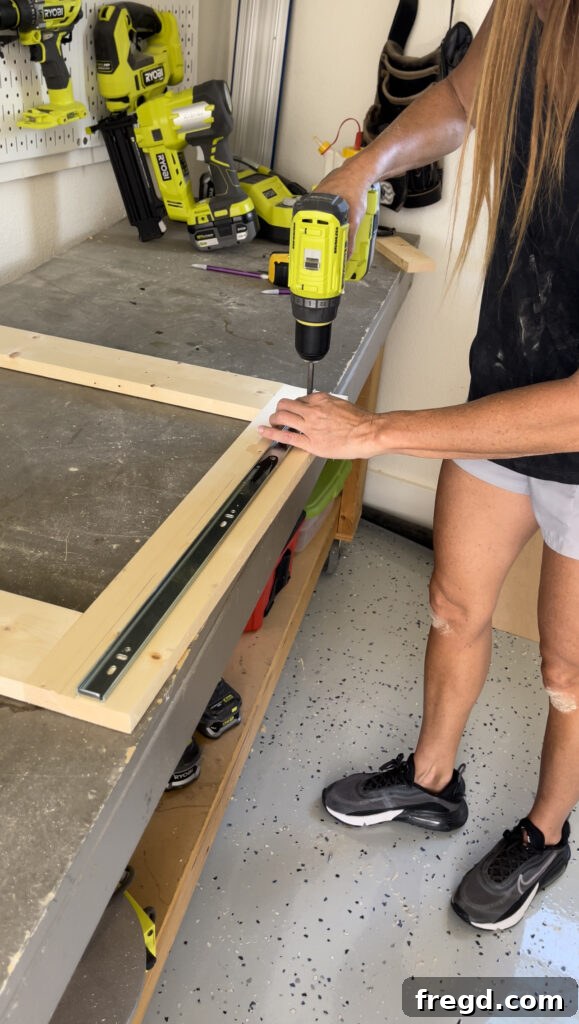
Begin by carefully flipping your newly assembled mirror frame over so that its back surface is facing upwards on your workbench. Now, meticulously separate the two distinct parts of your 24″ drawer slides. Take the narrower, inner pieces of the drawer slides and align them precisely. Attach them to the back of the mirror frame. The placement here is critically important: they must be aligned exactly where the front cleats of the cabinet shelf are positioned. To ensure an absolutely perfect, friction-free fit, it is highly recommended to perform a “dry-fit” – temporarily place the mirror frame with these slides onto the cabinet’s front cleats (which will have the other part of the drawer slides already attached) to confirm alignment before permanently fastening. Use the specific screws typically provided with your drawer slides for secure attachment, ensuring they are driven straight and tight.
Step 2: Attach Main Drawer Slide Pieces to Front Cleats
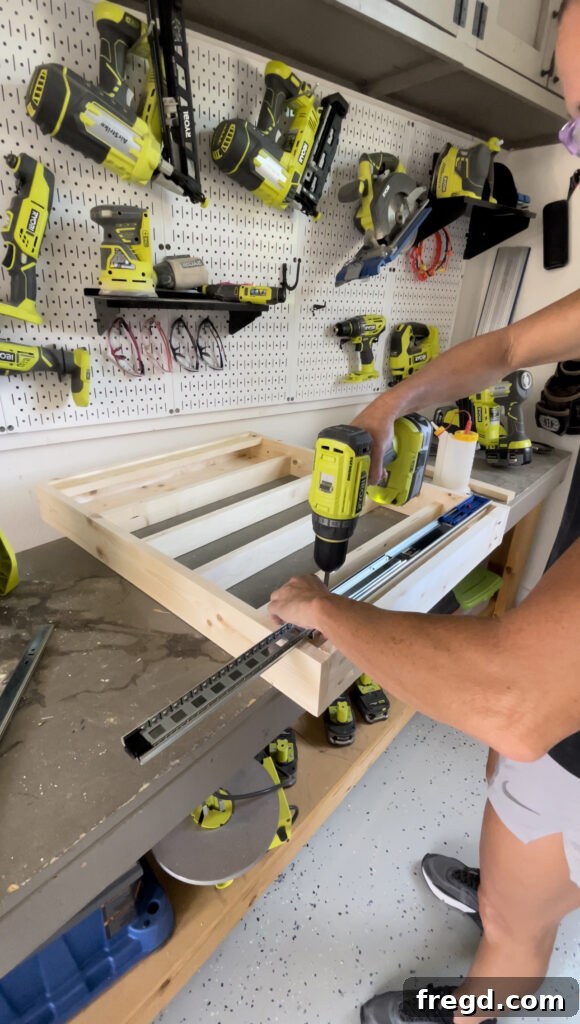
Now, retrieve the main, wider pieces of the drawer slides – these are the components that will remain stationary and fixed to the cabinet structure. Carefully center these pieces on top of the front cleats that you previously installed on the cabinet frame. Use the hardware (screws) provided with the drawer slides to securely fasten them. As in the previous step, a precise dry fit with the mirror frame’s slides is absolutely essential. This crucial step verifies that when the two corresponding parts of the drawer slides are brought together, they will form a perfectly aligned and fully operational sliding mechanism. Remember, even minor adjustments made here can dramatically impact how smoothly and silently your mirror operates, so take your time to achieve optimal alignment.
Step 3: Integrate the Mirror Frame with the Cabinet
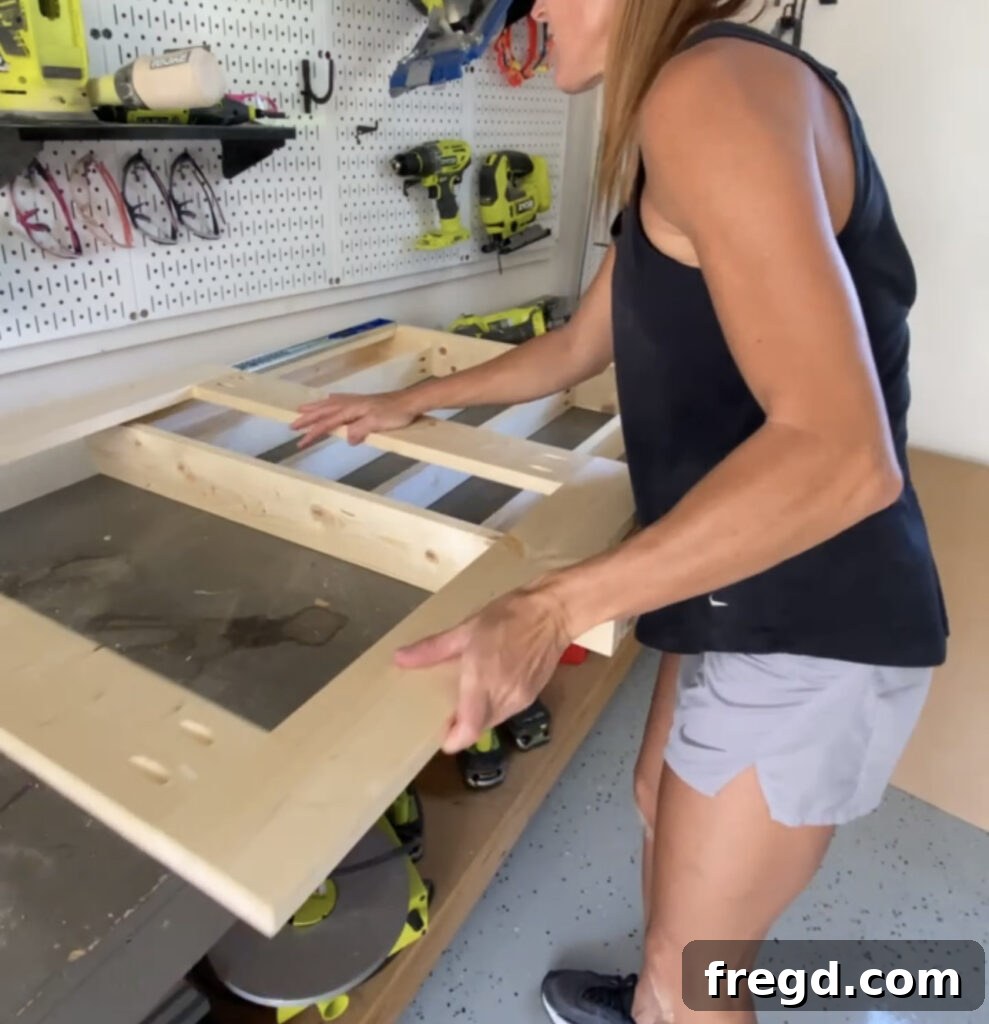
With both corresponding parts of the drawer slides now securely attached – one set to the mirror frame and the other to the cabinet frame – the exciting moment has arrived to bring them together. Carefully align the mirror frame (along with its attached drawer slide components) and gently slide it over the cabinet frame, ensuring the drawer slides engage smoothly. This is the precise moment when your innovative hidden storage mechanism comes to life! Once engaged, test the sliding action multiple times. Pull the mirror out and push it back in, checking for smooth movement, absence of catching, or any signs of resistance. If you detect any sticking or stiffness, gently examine the alignment and make any necessary minor adjustments to the slide placement before proceeding to the next steps. Patience here ensures flawless long-term operation.
Adding the Decorative Trim to the Mirror
The addition of the trim pieces is not merely for aesthetics; it provides a polished, elegant look to your mirror frame, creating a seamless visual appearance and, importantly, securely holding the frameless mirror firmly in place. This particular step offers a significant opportunity for aesthetic customization, allowing you to personalize the final look of your hidden cabinet.
Step 1: Attach Top and Bottom Mirror Trim Pieces
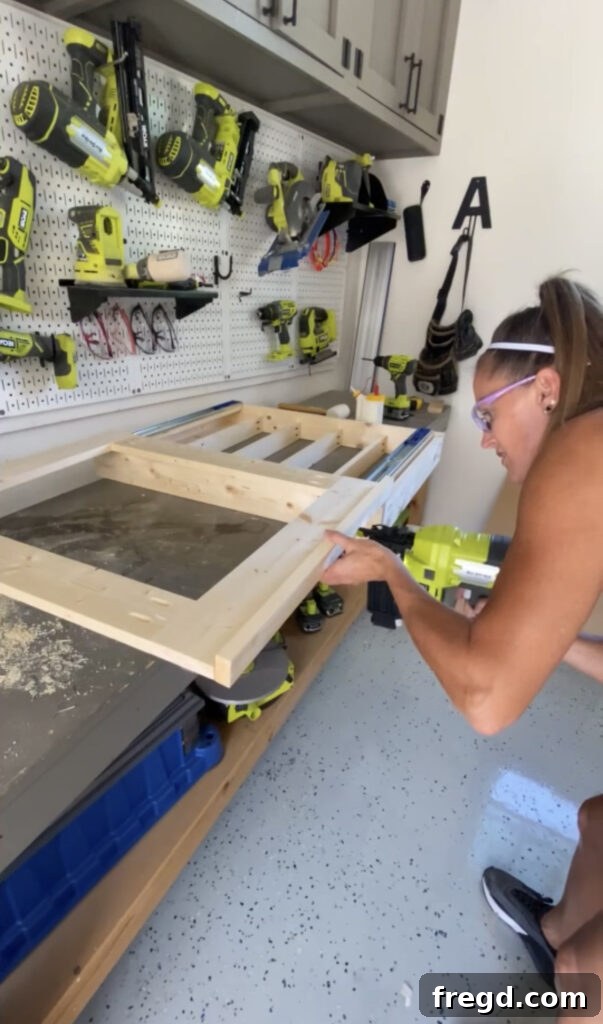
Meticulously measure and cut the top and bottom mirror trim pieces to their precise lengths (referring once more to your comprehensive cut list and making sure to rip 1x4s to 1x2s if you’re using a table saw, or utilizing pre-cut 1x2s). Apply a thin, consistent bead of wood glue along the specific edges of the mirror frame where these trim pieces will eventually sit. Firmly attach the trim pieces to the mirror frame using 1 1/4″ brad nails. It is absolutely crucial that the bottom edge of these trim pieces sits perfectly flush with the bottom edge of the mirror frame. This precise alignment creates a clean, uniform, and professional look, and more importantly, ensures that the mirror will sit correctly and securely within its enclosure. Utilize clamps or hold the pieces firmly in place until the glue begins to set and the brad nails are fully driven.
Step 2: Attach Side Mirror Trim Pieces
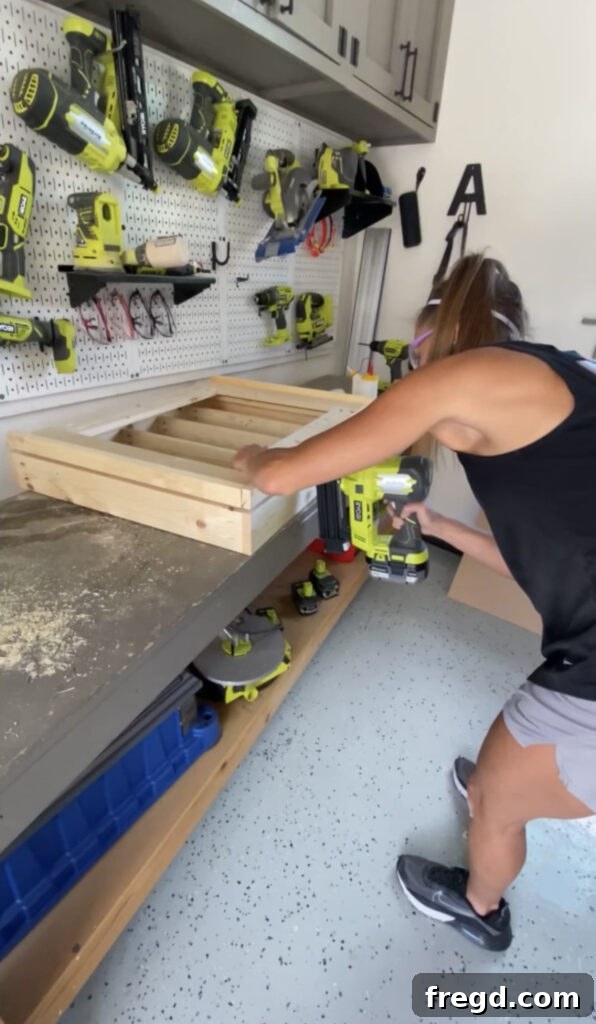
Follow the identical meticulous process for the side trim pieces. Begin by measuring them with utmost accuracy, then cut them to their precise required size. Apply a consistent, thin line of wood glue along the corresponding edges. Securely attach them to the mirror frame with 1 1/4″ brad nails. Ensure these side pieces also align perfectly with the vertical edges of the frame and butt snugly against the previously installed top and bottom trim pieces, creating seamless corners. Once all four trim pieces are firmly in place, you should have a completely enclosed and visually appealing mirror frame, now ready for the crucial stages of finishing and the final installation of your mirror.
The Finishing Touches: Sanding, Staining, and Sealing
The applied finish is what genuinely elevates your DIY medicine cabinet from a merely functional piece of furniture to a truly beautiful and integrated addition to your bathroom. This critical section covers the meticulous preparation of the wood, the careful application of your chosen finish, and the indispensable process of protecting it for long-term durability and beauty in a bathroom environment.
Step 1: Prepare the Surface with Wood Filler and Thorough Sanding
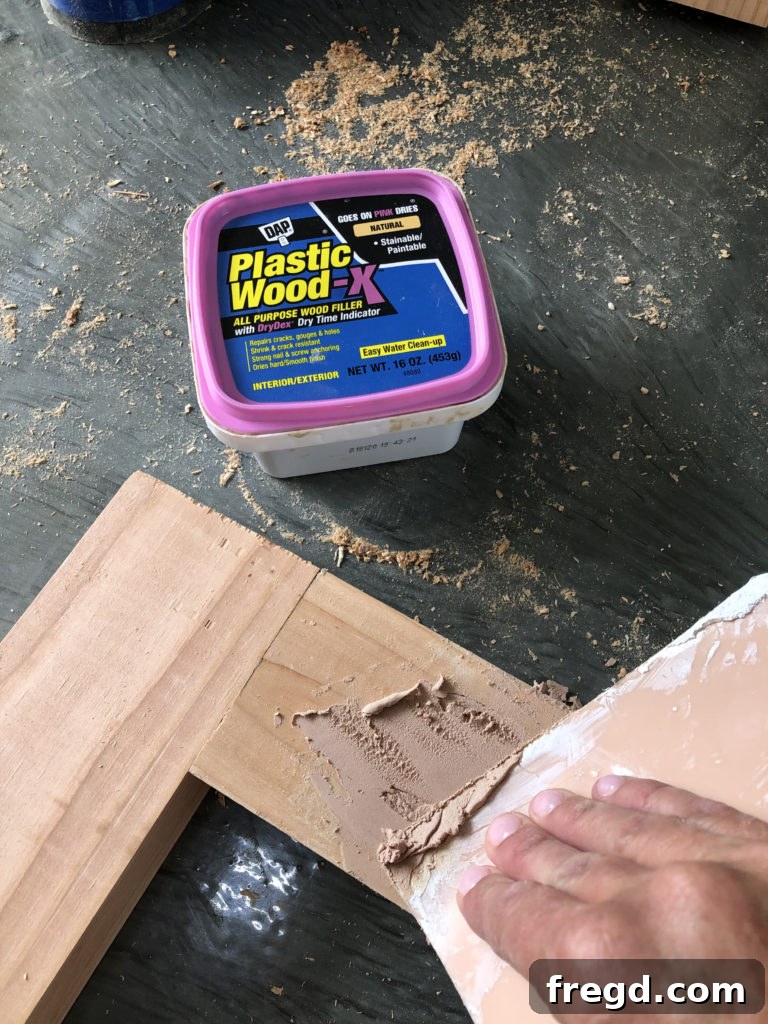
Before applying any type of finish, it is absolutely crucial to meticulously prepare all wood surfaces. Begin by carefully filling all exposed pocket holes, every single brad nail hole, and any other minor imperfections or gaps with a high-quality wood filler. Allow the filler to dry completely and thoroughly, strictly adhering to the product manufacturer’s instructions for drying times. Once the wood filler is fully cured, sand the entire cabinet extensively. Start this sanding process with a medium-grit sandpaper (e.g., 120-grit) to effectively smooth out any lingering rough spots and efficiently remove any excess wood filler. Subsequently, transition to a finer grit sandpaper (e.g., 180-220 grit) for achieving an exceptionally smooth and silky-soft finish. Always ensure you sand diligently with the grain of the wood to prevent unsightly scratches. After completing the sanding, thoroughly wipe down all surfaces with a tack cloth or a slightly damp (but not wet) cloth to meticulously remove any remaining sawdust or fine particles, which could otherwise compromise the quality and adherence of your chosen finish.
Step 2: Apply Your Chosen Wood Finish and Essential Protective Sealant
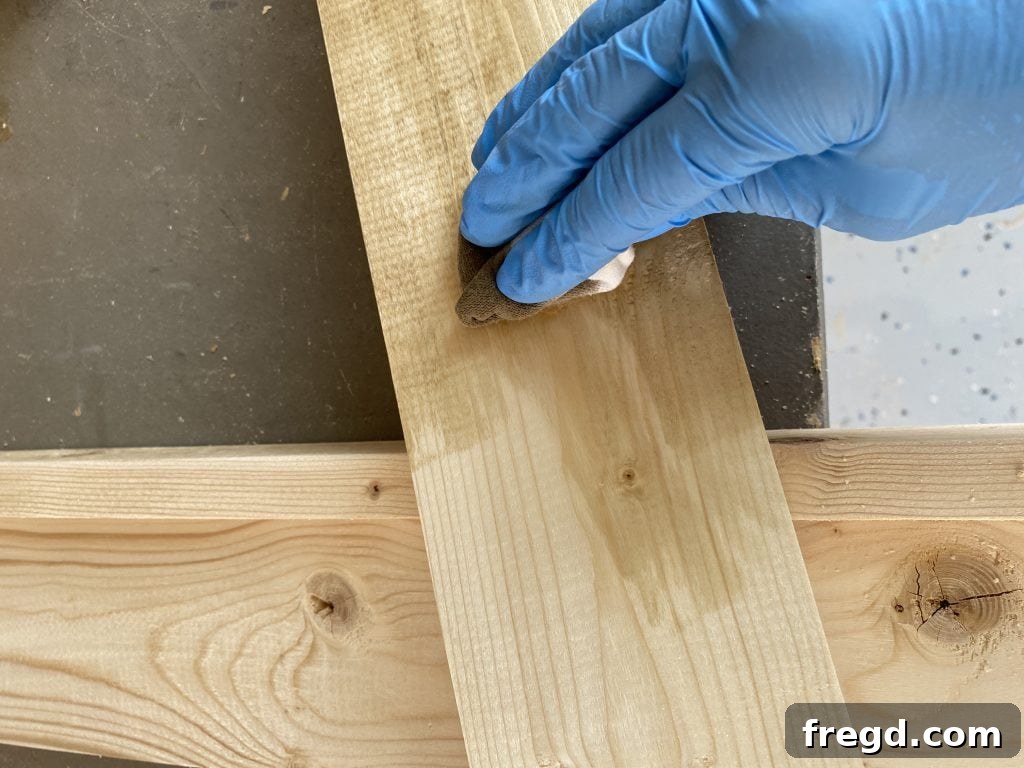
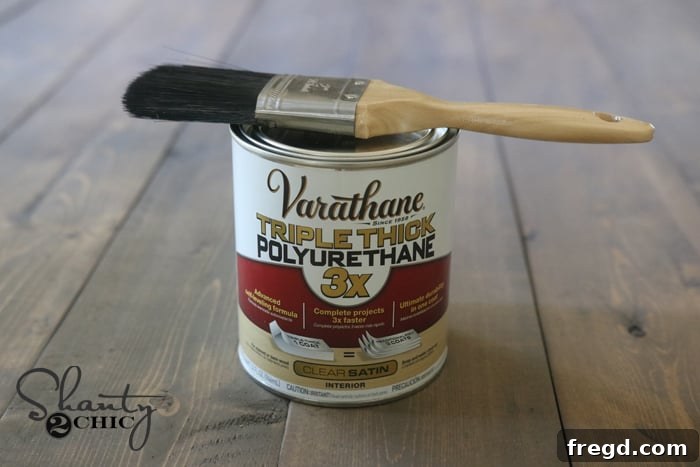
Now arrives the highly anticipated and creative part of the project! Apply one even coat of your chosen wood stain to the entire cabinet, always meticulously following the manufacturer’s specific instructions for application. Utilize a high-quality brush or a clean rag, applying the stain evenly and carefully wiping off any excess product for a beautifully consistent color. If your preference is painting, first apply a suitable wood primer, then follow with two thin, even coats of your chosen paint, allowing ample drying time between coats. Ensure the stain or paint dries completely. Drying times can fluctuate significantly based on the specific product, ambient temperature, and humidity levels, so patience is key. Once thoroughly dry, it is absolutely vital to add a protective finish, especially given the high-moisture bathroom environment. Apply a few thin, even coats of polyurethane or another appropriate protective sealant, sanding very lightly with an ultra-fine-grit sandpaper (e.g., 320-grit) between coats for achieving optimal smoothness and superior adhesion. This critical protective layer will effectively shield your cabinet from moisture, humidity, and the daily wear and tear, thereby ensuring its exceptional longevity and enduring beauty.
- Explore a diverse range of wood finishes and stains here to discover the perfect aesthetic for your project.
- Find high-quality polyurethane and other robust protective sealants here to guarantee exceptional durability.
Step 3: Securely Attach the Frameless Mirror
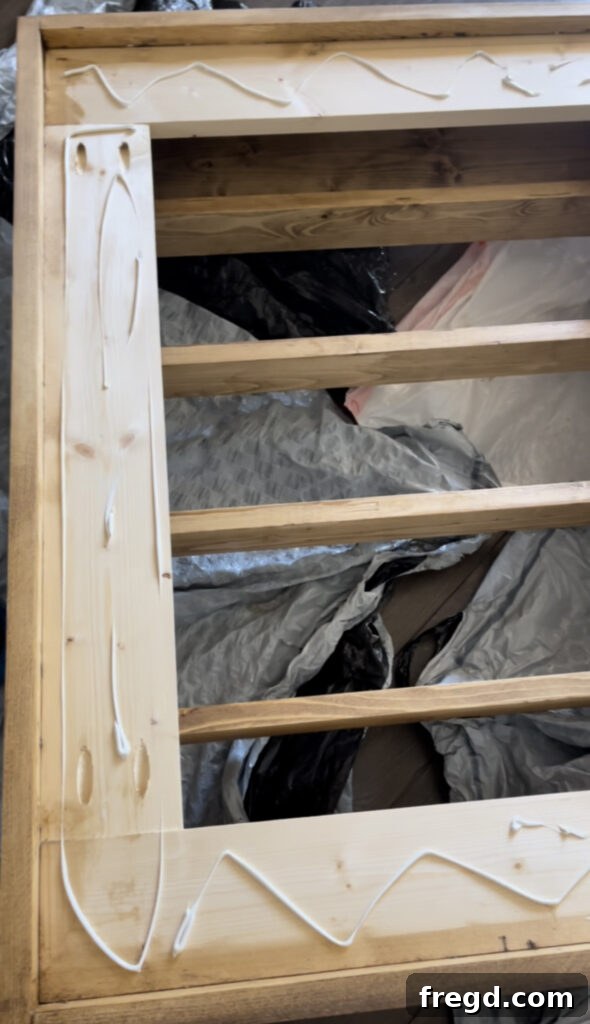
Once the cabinet’s finish is entirely dry and fully cured – meaning it has hardened and reached its maximum protective capabilities – it is time for the final, delicate step of attaching the mirror. Carefully lay the mirror frame face down on a clean, soft, and protected surface to prevent any scratching or damage. Apply a generous, yet even, amount of construction adhesive specifically formulated for mirrors (this is crucial to avoid any chemical reactions that could damage the mirror’s silver backing). Apply the adhesive to the inside perimeter and strategically in the center of the mirror frame. With utmost care, gently place your 24″x30″ frameless mirror onto the adhesive, ensuring it is perfectly centered and level within the frame. Apply gentle, even pressure across the entire surface of the mirror to ensure excellent adhesion. Allow the adhesive to dry completely, strictly adhering to the product’s specific directions, which can often require a full 24-48 hours. It is absolutely imperative that you do not move or attempt to hang the mirror until the adhesive has fully and completely cured to prevent detachment or shifting.
- Discover the highest-quality construction adhesives specifically designed for mirror projects here.
Securely Hanging Your DIY Medicine Cabinet
Properly and securely hanging your newly built medicine cabinet is an absolutely critical step for both safety and long-term stability. Given that this cabinet will be holding various items and features a sliding mirror mechanism, it is paramount that it is firmly anchored to the structural wall studs, not just drywall.
Step 1: Locate and Mark Wall Studs with Precision
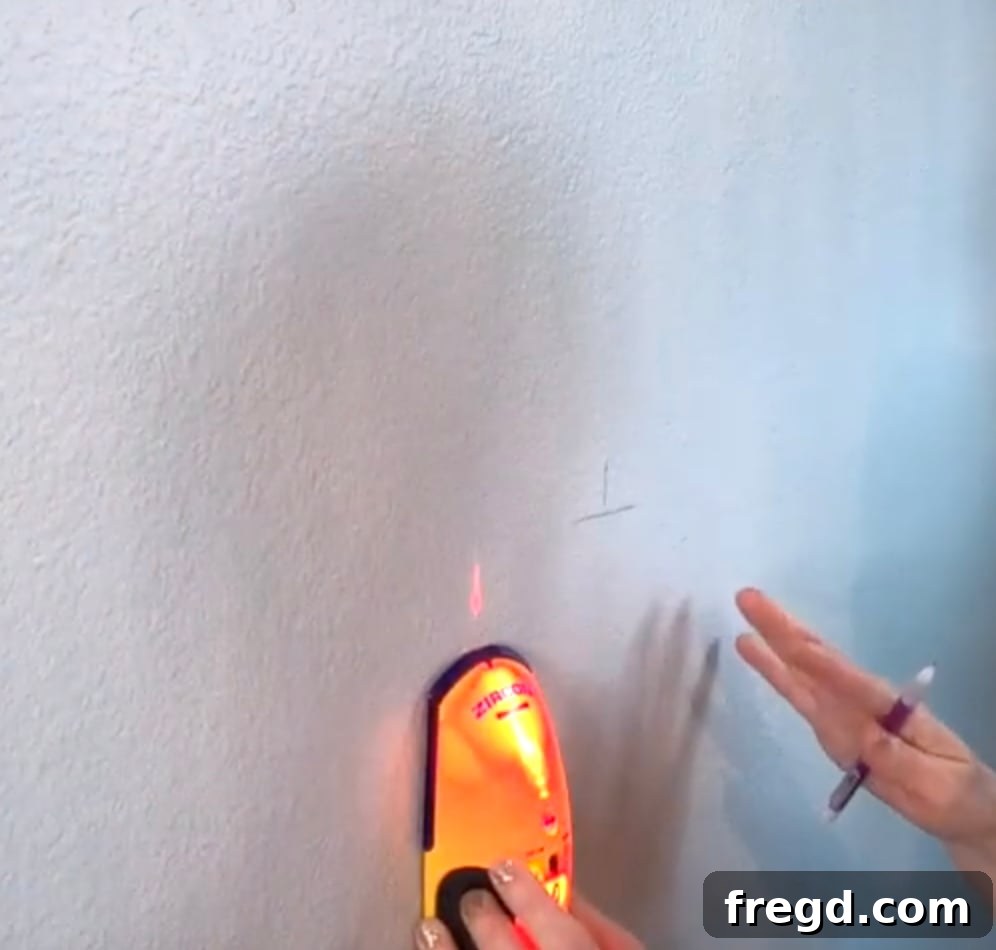
Before you even attempt to lift or position your cabinet, employ a reliable electronic stud finder to precisely locate the wooden studs hidden behind your drywall in the exact area where you intend to hang the cabinet. Once identified, clearly mark the center of each stud with a pencil. It is unequivocally crucial to anchor the cabinet into at least two (or more, if available and practical) wall studs for maximum stability, especially for a piece of furniture that will be regularly opened, closed, and hold considerable weight. Ensure that the stud markings align perfectly with the pre-drilled pocket holes in the back cleats of your medicine cabinet frame, guaranteeing direct and strong attachment points.
- A high-quality and accurate stud finder is indispensable for precise and safe installation.
Step 2: Mount the Cabinet to the Wall Studs
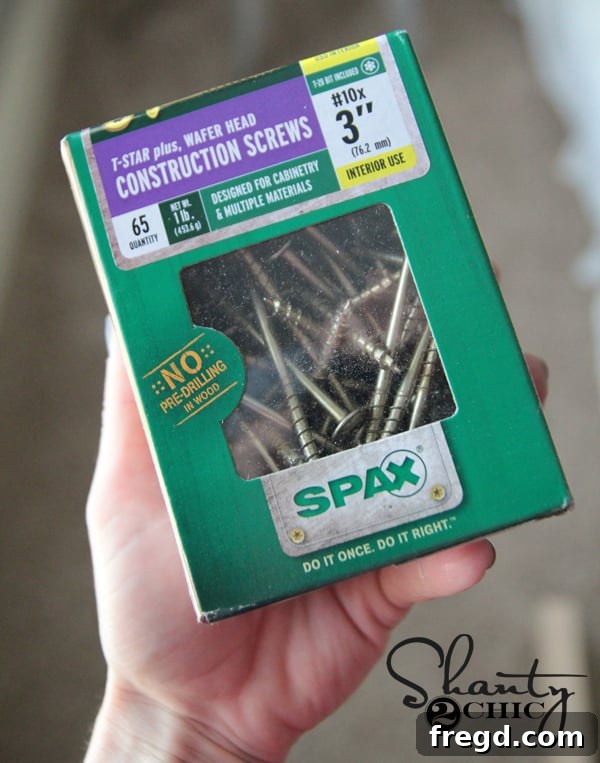
With extreme care, position your fully assembled medicine cabinet onto the wall, meticulously aligning its back cleats with your previously marked stud locations. Utilize a level to ensure the cabinet is perfectly straight and horizontally plumb. With the cabinet held firmly in place (it is highly recommended to enlist the help of a second person for this crucial step to maintain stability and safety), drive strong 3″ wood screws through the pre-drilled pocket holes in the back cleats and directly into the solid center of the wall studs. For a truly robust and unequivocally safe installation, I strongly recommend using at least two 3″ wood screws for each cleat, or more if the design allows. Once all screws are firmly tightened, give the cabinet a gentle but firm tug to conclusively confirm it is absolutely, securely attached and exhibits no discernible wobble or movement.
Congratulations! Your impressive DIY Medicine Cabinet with Hidden Storage is now fully installed, secure, and ready for immediate use. Take a well-deserved step back and proudly admire your remarkable handiwork – a truly custom-built, exceptionally functional, and aesthetically pleasing addition that will undoubtedly elevate your bathroom space!
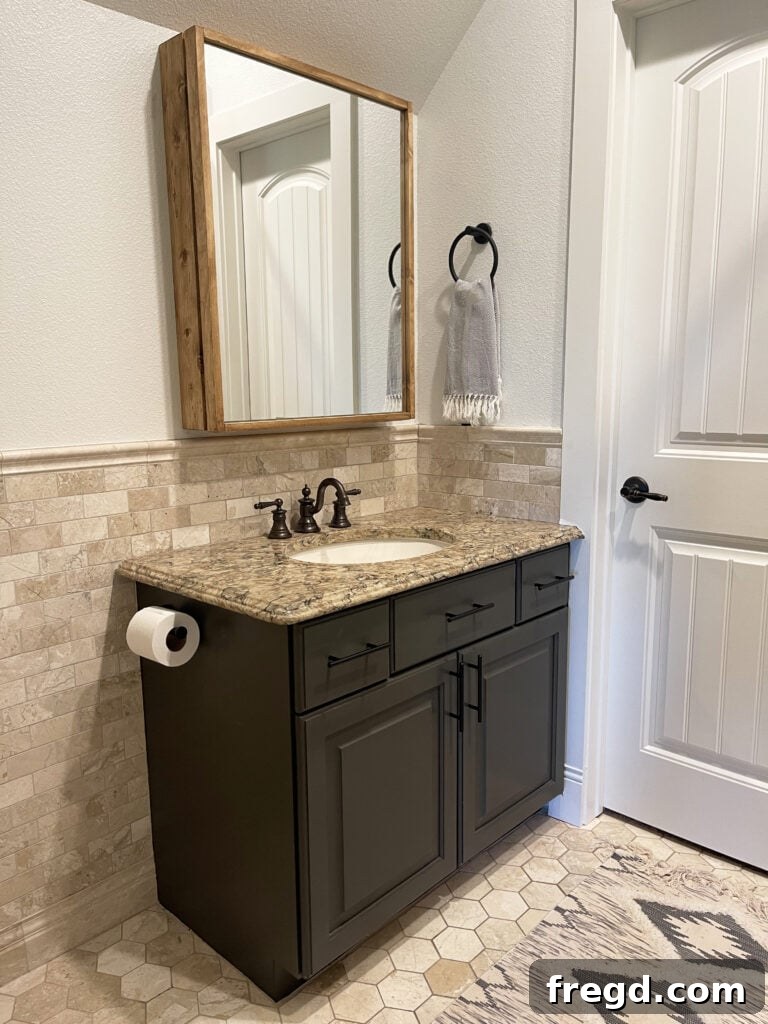
I am absolutely thrilled with how her DIY Wooden Medicine Cabinet ultimately turned out! It stands as a testament to the fact that practical home projects can indeed be both incredibly functional and exceptionally beautiful.
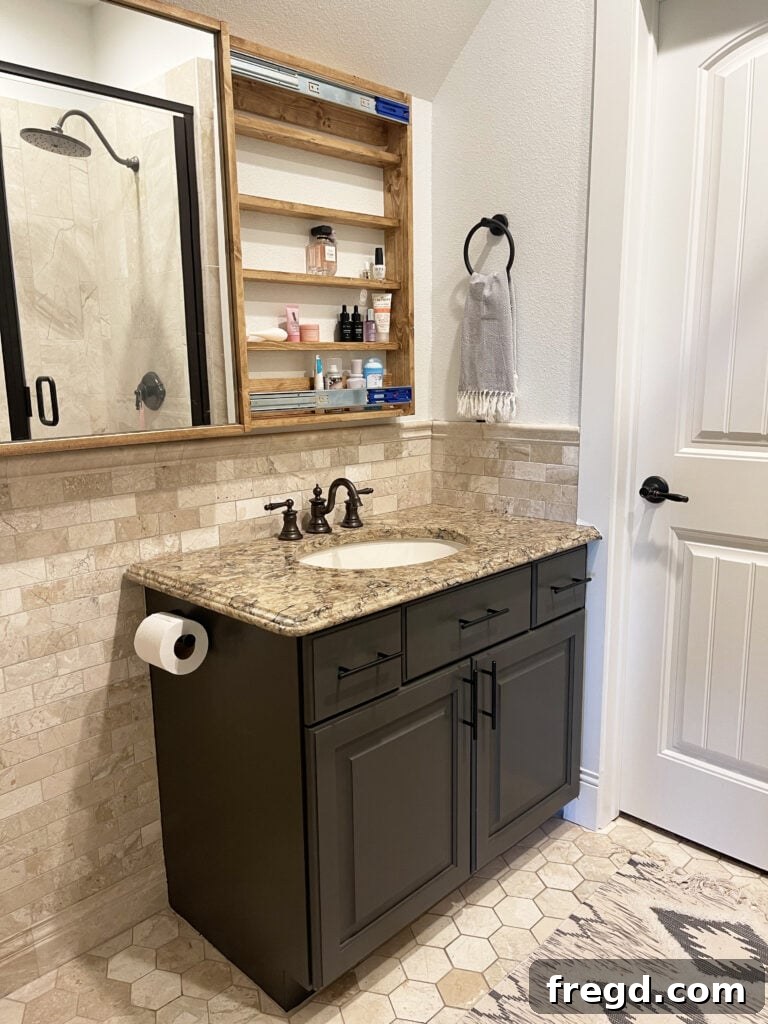
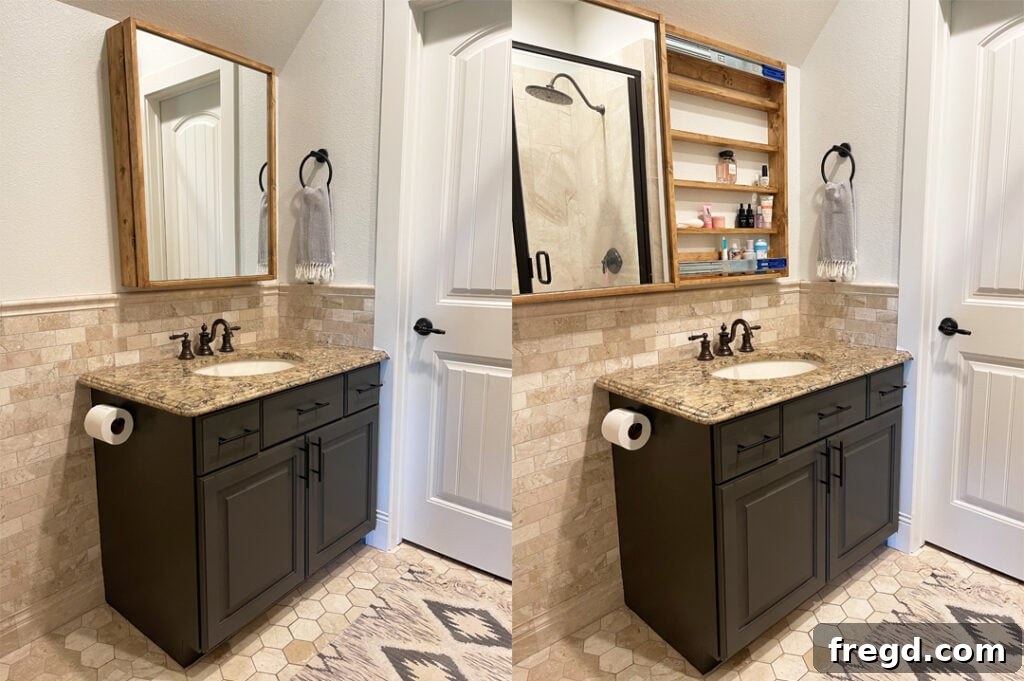
This cleverly designed hidden storage solution has unequivocally made her bathroom space significantly more functional and enjoyable. I particularly adore the ingenious hidden storage aspect; it’s not just a novelty, but a perfectly engineered feature designed to be the ideal depth for organizing a diverse array of items. From elegant perfume bottles and vibrant nail polishes to essential everyday beauty products and toothpaste, everything now has its designated, out-of-sight place. This seamless organization transforms a potentially chaotic area into a serene, organized, and beautifully streamlined environment, making daily routines a pleasure.
Customization Ideas & Expert Tips for Your Project
One of the most rewarding aspects of embarking on a DIY project is the incredible freedom and ability to customize it to perfectly suit your personal taste and specific needs. Your newly built hidden medicine cabinet offers a fantastic canvas for personalization. Here are a few inspiring ideas and expert tips to make your project truly unique and perfectly integrated into your home’s aesthetic:
- Color & Finish Exploration: Do not feel limited to traditional wood stains. Consider painting your cabinet a bold, contrasting color to make a statement, matching it precisely to your existing bathroom vanity for a cohesive look, or applying a distressed finish for a charming farmhouse or rustic appeal. High-gloss finishes can add a touch of modern luxury, while matte finishes offer a sophisticated subtlety.
- Internal Configuration Versatility: Think beyond fixed shelves. Incorporate adjustable shelves to easily accommodate items of varying heights, from tall hairsprays to small jars. You could also add small, removable dividers within the shelves to better organize tiny items like cotton swabs, nail files, or jewelry, preventing them from scattering.
- Hardware Selection: While the primary design emphasizes a sleek, frameless mirror, consider adding small, elegant decorative pulls to the bottom edge of the mirror. These not only enhance ease of sliding but also allow you to introduce a design element that complements your bathroom’s existing fixtures and hardware, tying the room together.
- Integrated Lighting Solutions: For enhanced functionality and ambiance, integrate subtle LED strip lighting along the inside perimeter of the cabinet. This provides excellent illumination for finding items. Alternatively, discreet backlighting around the mirror frame can create a soft, inviting glow.
- Mirror Style Alternatives: While a frameless mirror is suggested for its contemporary and clean aesthetic, you have options. Explore mirrors with a decorative beveled edge for a touch of classic elegance, or even a slightly tinted or antique-style mirror for a unique visual effect.
- Wood Species Exploration: Instead of common pine, consider building your cabinet from a different wood species such as robust oak, smooth maple, or even character-rich reclaimed wood. Each wood type offers a distinct grain pattern, color, and durability. Be mindful that denser woods might require specialized screws or adjusted drilling techniques.
Pro Tip for Bathroom Durability: For bathrooms that experience particularly high humidity levels, such as those with showers that are used frequently, I strongly recommend applying an extra coat (or even two) of high-quality polyurethane or a specialized marine-grade sealant to all exposed and internal surfaces of the cabinet. Pay particular attention to all edges of the wood, as these are often the most vulnerable points for moisture penetration. This additional protective measure will significantly enhance your cabinet’s resistance to moisture damage and ensure its beauty lasts for years to come.
DIY Medicine Cabinet: Project Summary and Free Plans
Project Rating: 5 out of 5 stars (Based on community feedback and ease of build)
DIY Medicine Cabinet with Hidden Storage Mirror
Learn how to build this stylish and exceptionally functional DIY Medicine Cabinet featuring a sliding mirror with concealed storage. This innovative project is perfect for efficiently organizing your bathroom essentials, significantly reducing clutter, and adding a touch of custom-built appeal to your home. It’s an accessible woodworking project that yields impressive results.
Ready to embark on your bathroom transformation? Click here for the full set of FREE printable plans! These detailed plans include a comprehensive shopping list, precise cut list, and step-by-step assembly instructions to guide you through every phase of the build.
Tools Required
- Miter Saw
- Kreg Jig
- Drill
- Brad Nailer
- Sander
- Stud Finder
- Table Saw (optional, for ripping boards)
- Measuring Tape & Pencil
- Safety Glasses & Hearing Protection
- Woodworking Clamps
Supply List
- 5 – 1x4x8 Pine or Common Boards (or equivalent 1x3s, 1x2s)
- 1 1/4″ Pocket Hole Screws
- 1 1/4″ Brad Nails
- 3″ Wood Screws
- 2 – 24″ Drawer Slides (full-extension recommended)
- 1 – 24″x30″ Frameless Mirror
- Construction Adhesive (mirror-safe)
- Wood Glue
- Wood Filler
- Wood Finish (Stain or Paint)
- Polyurethane (or other protective sealant)
- Tack Cloth
Quick Build Overview
- Preparation: Cut all wood pieces accurately according to the provided detailed plans and cut list.
- Cabinet Frame Assembly: Construct the main cabinet frame using strong pocket hole joinery and wood glue, ensuring all joints are square and secure.
- Internal Structure: Attach the back cleats (for wall mounting) and install all interior shelves within the cabinet frame, ensuring flush alignment at the back.
- Drawer Slide Foundation: Install the front cleats inside the cabinet frame; these are crucial for mounting the drawer slides that enable the mirror’s hidden function.
- Mirror Frame Construction: Build the separate mirror frame using pocket holes, creating a sturdy base for your mirror.
- Drawer Slide Integration: Attach the corresponding drawer slide components to both the cabinet’s front cleats and the back of the mirror frame. Execute a dry fit to ensure perfectly smooth operation.
- Final Cabinet Assembly: Carefully slide the mirror frame onto the cabinet frame, engaging the drawer slides, and test for seamless motion.
- Mirror Trim: Add decorative trim pieces to the mirror frame using brad nails and wood glue, completing the mirror’s aesthetic and securing its edges.
- Finishing Prep: Meticulously fill all exposed nail holes and imperfections with wood filler, then sand the entire cabinet thoroughly, progressively moving to finer grits.
- Finishing Application: Apply your desired wood finish (stain or paint) and follow with multiple coats of protective polyurethane, sanding lightly between coats for a durable, smooth surface.
- Mirror Attachment: Once the cabinet’s finish is completely dry and cured, securely attach the frameless mirror to its frame using a generous amount of mirror-safe construction adhesive. Allow for full curing time.
- Wall Installation: Accurately locate wall studs using a stud finder, then securely hang the completed medicine cabinet to the wall using robust 3″ wood screws driven through the back cleats into the studs.
Conclusion: Enjoy Your Organized Bathroom!
Bringing this DIY medicine cabinet with hidden storage to life is a project that delivers not only immense personal satisfaction but also tangible, practical benefits to your daily routine. You’ve accomplished something truly significant: you’ve not only constructed a beautiful and robust piece of furniture with your own hands, but you’ve also custom-tailored an intelligent solution to your specific bathroom storage needs. This effort effectively combats persistent clutter, enhances the overall aesthetic appeal of your space, and introduces a unique, handcrafted element to your home. The profound satisfaction of stepping into an organized, serene bathroom – knowing you personally built its key storage component – is a feeling truly unparalleled.
We enthusiastically encourage you to further personalize your cabinet. Experiment with your choice of finish, explore different internal organizers to perfectly categorize your items, or even select unique hardware that adds an extra touch of flair. This project serves as a fantastic foundational experience for developing and honing your woodworking skills, significantly boosting your confidence in tackling future home improvement endeavors. Don’t keep your amazing creations to yourself! We invite you to share photos of your finished DIY hidden medicine cabinets with our vibrant community on social media. Tag us using #shanty2chic so we can celebrate your success, admire your craftsmanship, and inspire countless other aspiring DIYers in the process!
- Complete your perfect bathroom transformation with this charming and cozy bath mat, conveniently available here!
Happy Building, and revel in the newfound tranquility and impeccable organization of your beautifully transformed bathroom!