Build Your Own Elegant Waterfall Writing Desk: Free Plans & Video Tutorial
Transform your space with a custom-built DIY Waterfall Writing Desk, a project that blends elegant design with practical functionality. This comprehensive guide provides everything you need to construct a stylish and robust desk, perfect for students, remote workers, or anyone seeking a beautiful addition to their home. With free detailed plans and an easy-to-follow YouTube video tutorial, even beginner woodworkers can achieve professional-looking results. What’s more, this project is incredibly budget-friendly, with lumber costs typically under $100, proving that high-end furniture doesn’t have to come with a hefty price tag.
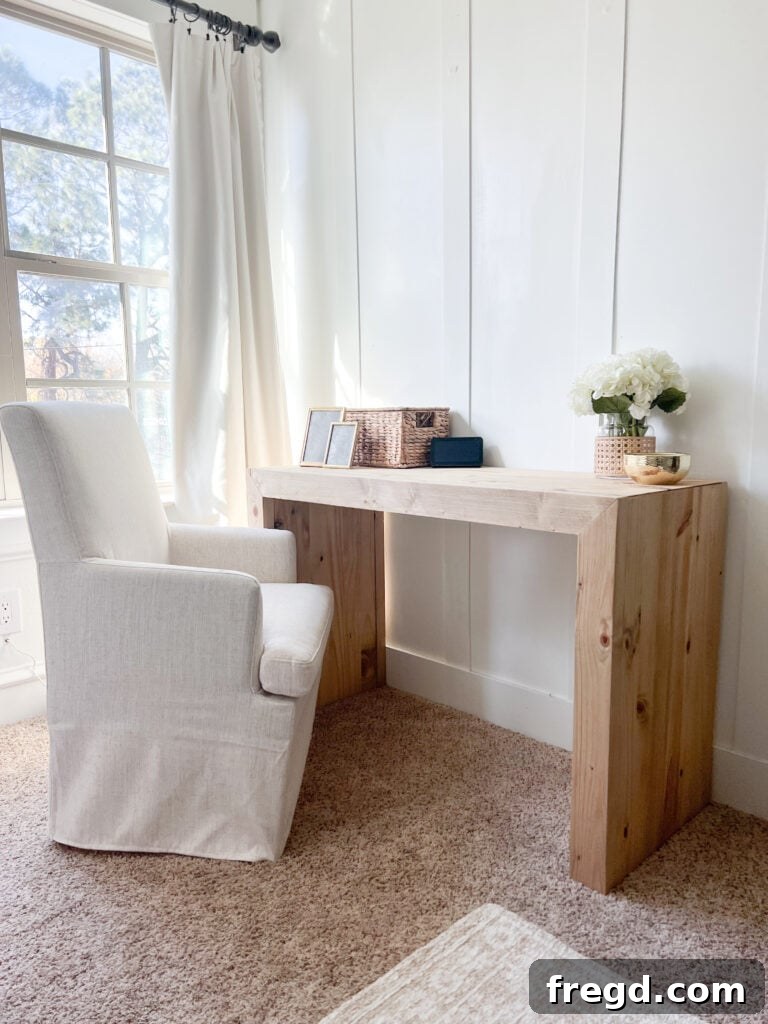
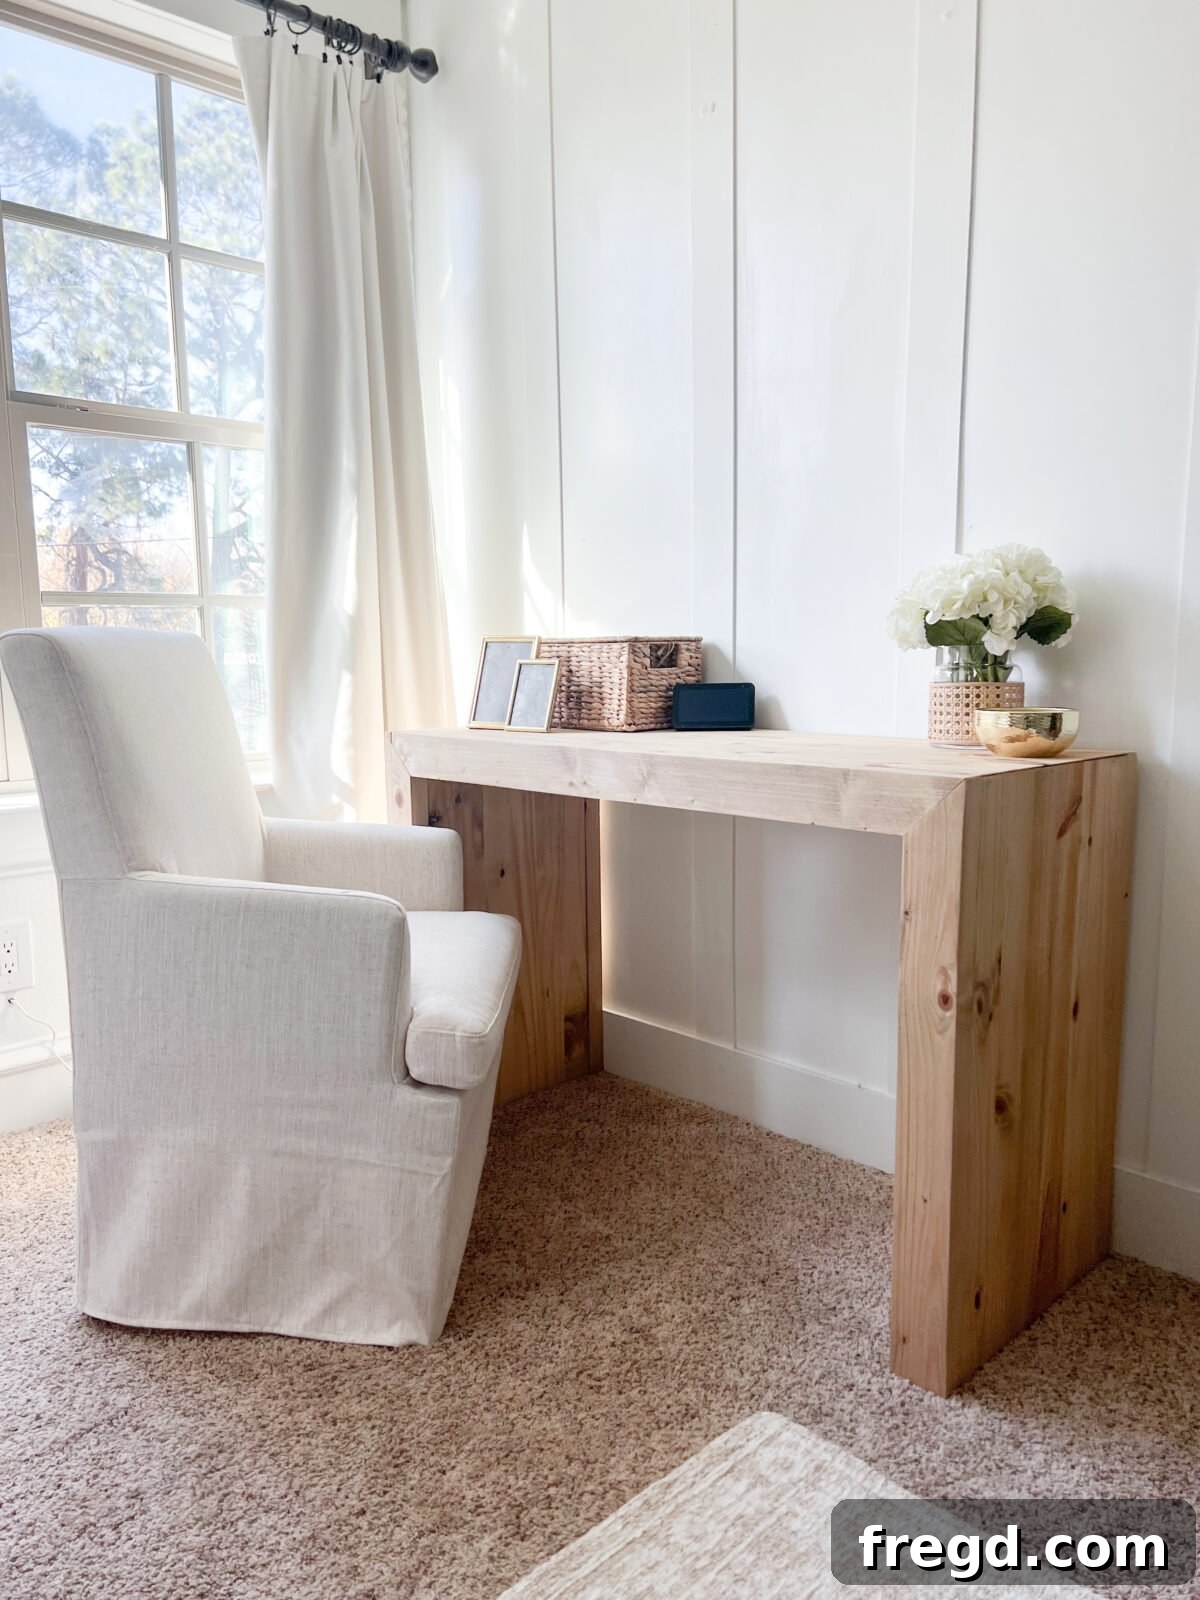
The inspiration for this desk came from a common need: a functional yet aesthetically pleasing workspace. My eldest daughter, currently navigating college life, needed a dedicated area for her laptop and studies. After discussing various design ideas, we collaborated to create this elegant “waterfall” design. The result exceeded expectations! Its compact footprint makes it an ideal writing desk for small rooms, apartments, or even a cozy corner. Beyond its primary function, its sleek profile allows it to double as a sophisticated console table in an entryway or a minimalist accent piece in any living space. We’ve ensured that you have all the resources at your fingertips, including free printable desk plans with precise dimensions, step-by-step instructions, and a detailed cut list, all available at the conclusion of this article.
DIY Waterfall Writing Desk: How-To Video Guide
To provide you with the clearest possible instructions, we’ve created a detailed video tutorial that walks you through every stage of building this elegant waterfall writing desk. Watching the process unfold visually can be incredibly helpful, especially for beginners. The video covers everything from preparing your lumber to the final assembly steps, demonstrating techniques and offering tips to ensure your project is a success. Follow along as we bring this budget-friendly desk to life!
Watch the full DIY Waterfall Desk video tutorial to see each step in action!
Jump to Full Recipe Card
Essential Tools for This Project
One of the fantastic aspects of this DIY waterfall desk project is that it requires a relatively small selection of common woodworking tools, making it an excellent choice for beginners looking to expand their skills. While some tools might seem advanced, each plays a crucial role in achieving strong, clean joints and a polished finish. Here’s a breakdown of the tools you’ll need:
- Drill: Essential for creating pilot holes and driving screws, especially when working with pocket holes. A cordless drill offers convenience and mobility.
- Kreg Jig: This is a cornerstone tool for this project, enabling you to create incredibly strong and hidden pocket-hole joints. We’ll delve deeper into its benefits below.
- Miter Saw: Perfect for making precise crosscuts and angle cuts, particularly the 45-degree angles needed for the desk’s frames and side panels.
- Table Saw: Used for ripping lumber lengthwise, transforming standard 2x4s into narrower, more refined pieces for the desk frames. A circular saw with a guide can be an alternative.
- Brad Nailer: Great for quickly and securely attaching the inside panels and support boards with minimal visible fasteners. It uses small brad nails that are easily hidden.
- Sander: Critical for achieving a smooth, professional finish. Both orbital sanders and detail sanders (like a corner cat) will be invaluable for preparing your wood for staining.
Familiarizing yourself with these tools before you begin will make the building process much smoother and more enjoyable. Safety should always be your top priority; remember to wear appropriate safety gear, including eye protection and hearing protection, when operating power tools.
Understanding and Using the Kreg Jig
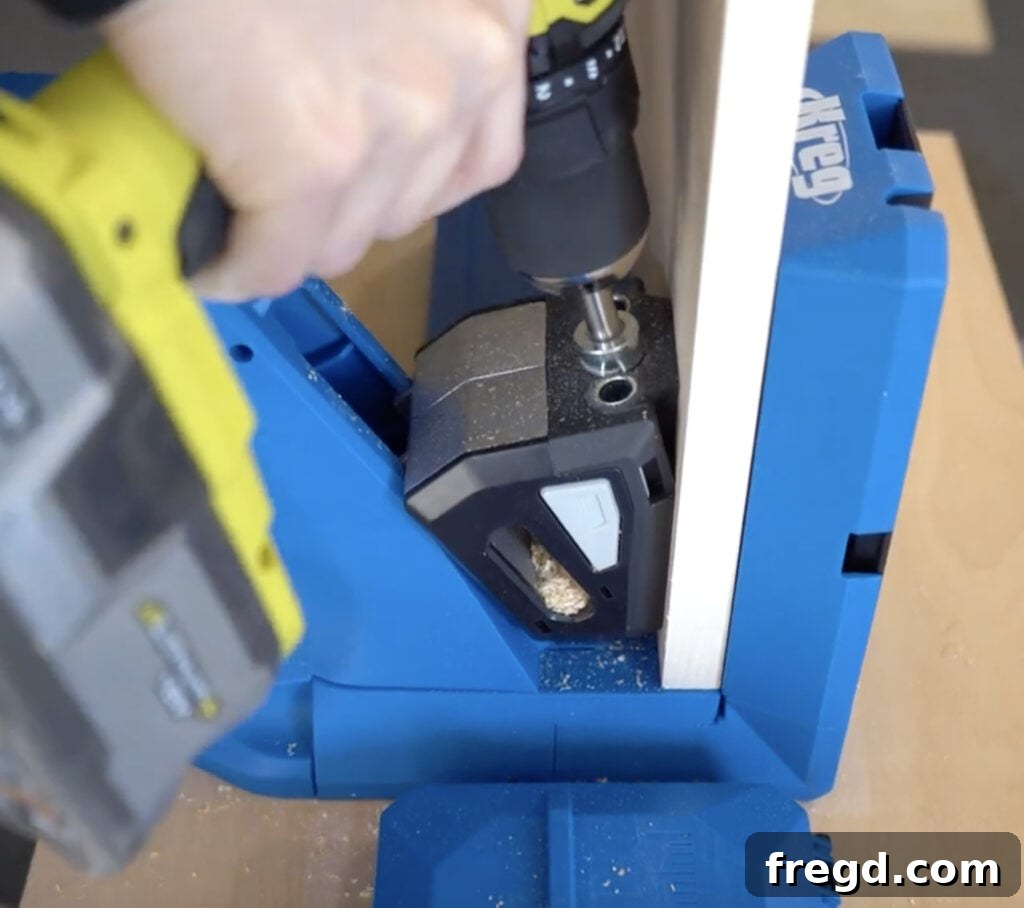
Among the tools listed, the Kreg Jig often sparks the most curiosity, and for good reason. It’s a true game-changer in DIY furniture building! A Kreg Jig is a specialized pocket hole jig designed to create strong, concealed joints. It works by drilling a stepped pilot hole at an angle into one piece of wood, allowing a self-tapping screw to connect it firmly to another piece. This method results in incredibly robust joints that are often stronger and cleaner than traditional countersunk screws, as the screw goes in at an angle, pulling the pieces tightly together.
When we first started building furniture, discovering the Kreg Jig revolutionized our projects. We were amazed at how user-friendly it was and the significant improvement it made to the structural integrity and aesthetic appeal of our creations. For this particular desk, I utilized the Kreg Jig 720 PRO model, which I absolutely adore. It’s a fantastic upgrade for anyone already familiar with pocket hole joinery, offering enhanced features and even faster setup. If you’re serious about DIY woodworking, investing in a Kreg Jig is highly recommended. You can find the Kreg Jig 720 PRO and explore its features further HERE on Amazon. For a visual guide, be sure to check out our video tutorial on how to effectively use the Kreg Jig 720 PRO HERE!
Selecting the Right Lumber for Your Waterfall Desk
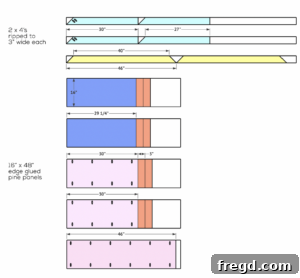
Choosing the correct lumber is crucial for both the aesthetics and durability of your DIY waterfall writing desk. For the desk’s internal frames, we opted for standard 2×4 framing lumber. However, to give the desk a more refined and polished appearance, we ripped these 2x4s down to a precise 3-inch width using a table saw. This process eliminates the rounded edges typically found on dimensional lumber, resulting in crisp, straight lines that elevate the overall design.
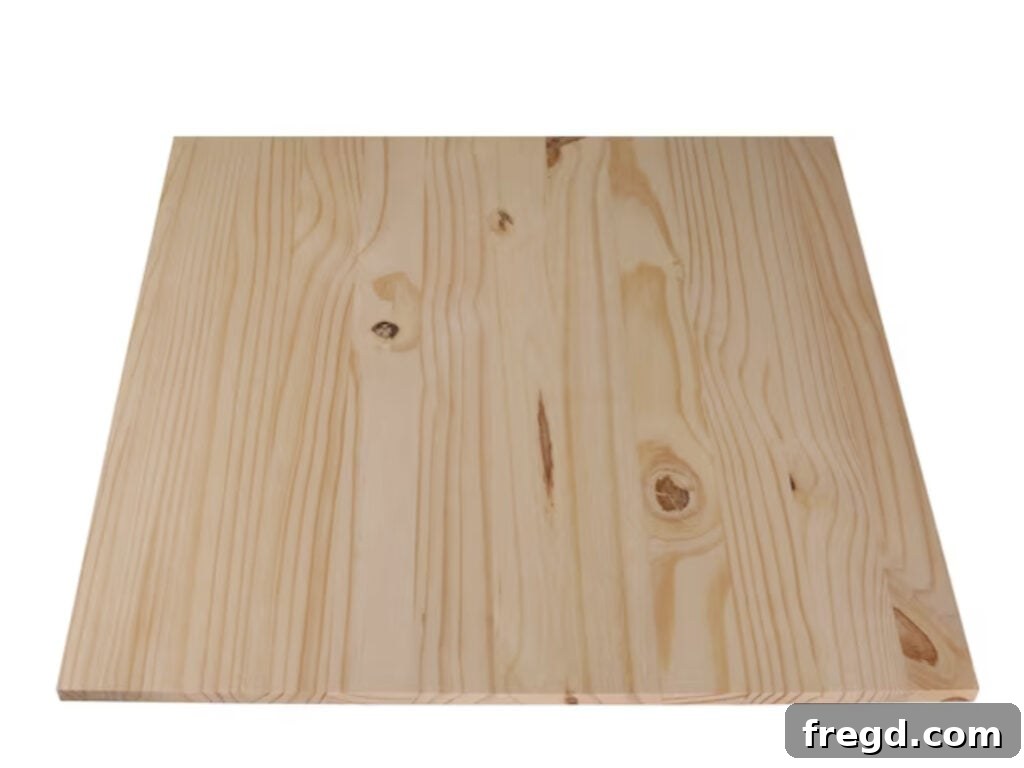
The main visible components of the desk—the top, sides, and internal waterfall panels—are constructed from laminated pine project panels. These panels are an excellent choice for DIY furniture projects because they offer a consistent, smooth surface that takes stain beautifully. You can generally find these pine boards in the lumber aisle of your local home improvement store, often wrapped in plastic and displayed alongside other tabletops or project boards. I personally source mine from Lowe’s, and you can view similar products HERE. They come in a variety of sizes, which is convenient for minimizing waste. For this design, I maintained the 16-inch width of the panels, but you have the flexibility to adjust this dimension with a table saw or circular saw to perfectly fit your specific space requirements. All crosscuts for these panels were accurately made using my miter saw.
Step 1: Preparing Your Wood and Building the Frames
The foundation of your DIY waterfall desk begins with precise wood preparation and the construction of the desk’s sturdy frames. As previously mentioned, the first critical step is to take your 2×4 boards and rip them down to a consistent 3-inch width using a table saw. This small but significant modification transforms the raw lumber, giving it a much more refined and professional appearance by removing the typical rounded edges. If you’re new to this technique, we have a helpful video demonstrating how to achieve straight edges from rounded lumber, which you can view HERE.
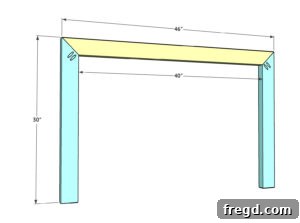
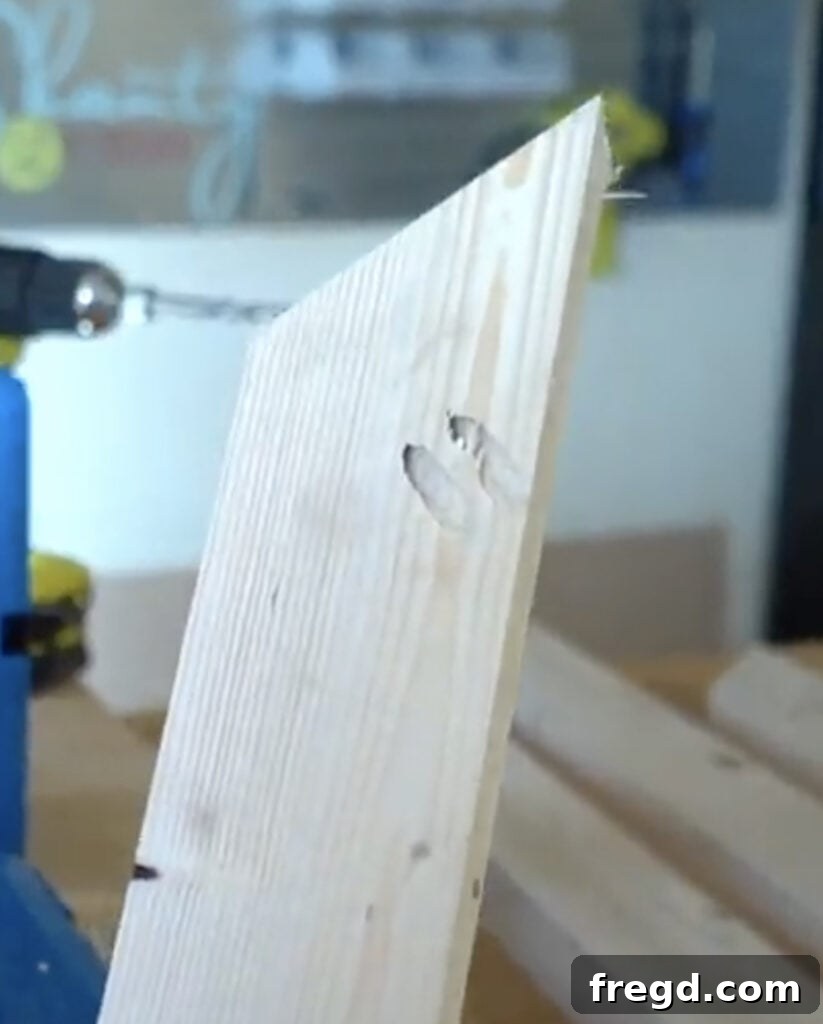
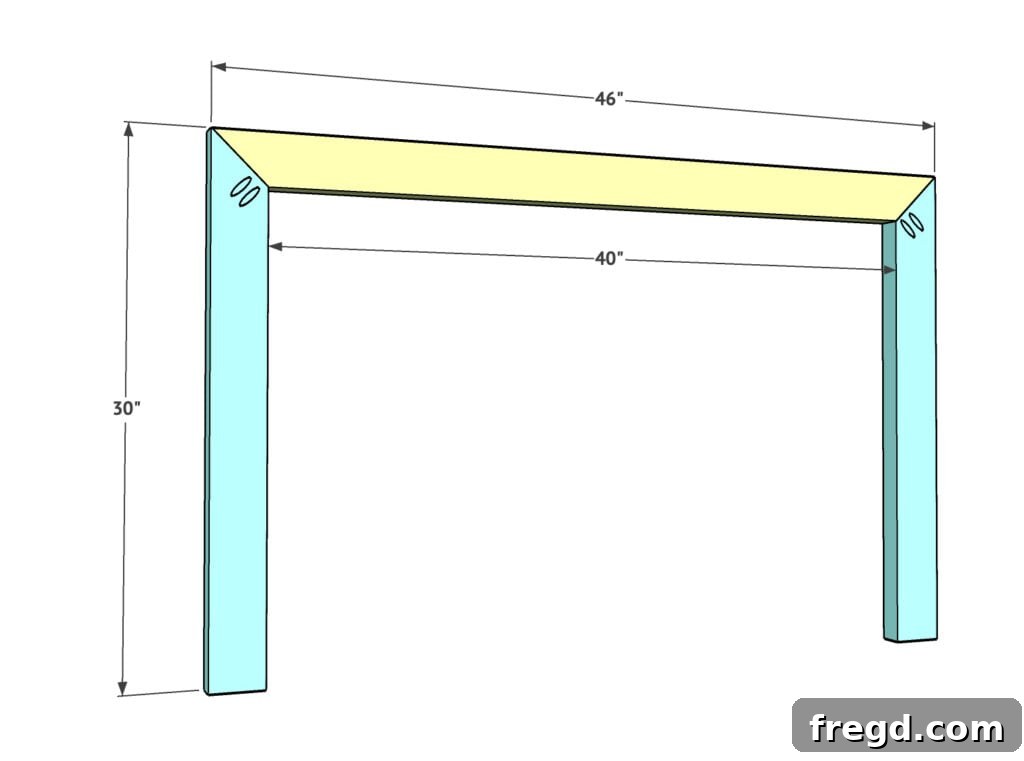
Once your 2x4s are ripped to 3 inches wide, it’s time to create the angled cuts that form the desk’s frames. Using your miter saw, carefully cut the boards at 45-degree angles to assemble two identical rectangular frames. These frames will define the overall structure of your desk. On each of the side boards for these frames, drill 1.5-inch pocket holes at the edges of the 45-degree angles. These pocket holes are essential for creating strong, hidden joints.
Finally, assemble the frames. Apply a generous bead of wood glue to the mating surfaces of the 45-degree cuts. Then, using 2.5-inch Kreg pocket hole screws, firmly attach the side boards to the top and bottom boards to form two complete, identical frames. During this assembly, Kreg Face Clamps are incredibly useful tools. They help to hold the pieces flush and tightly together while you drive the screws, ensuring a perfectly aligned and strong joint. You can find more information about Kreg Face Clamps and their benefits HERE!
Step 2: Attaching the Desk Top
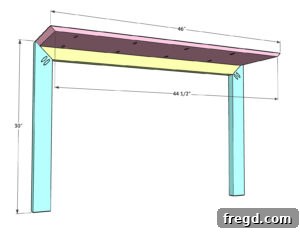
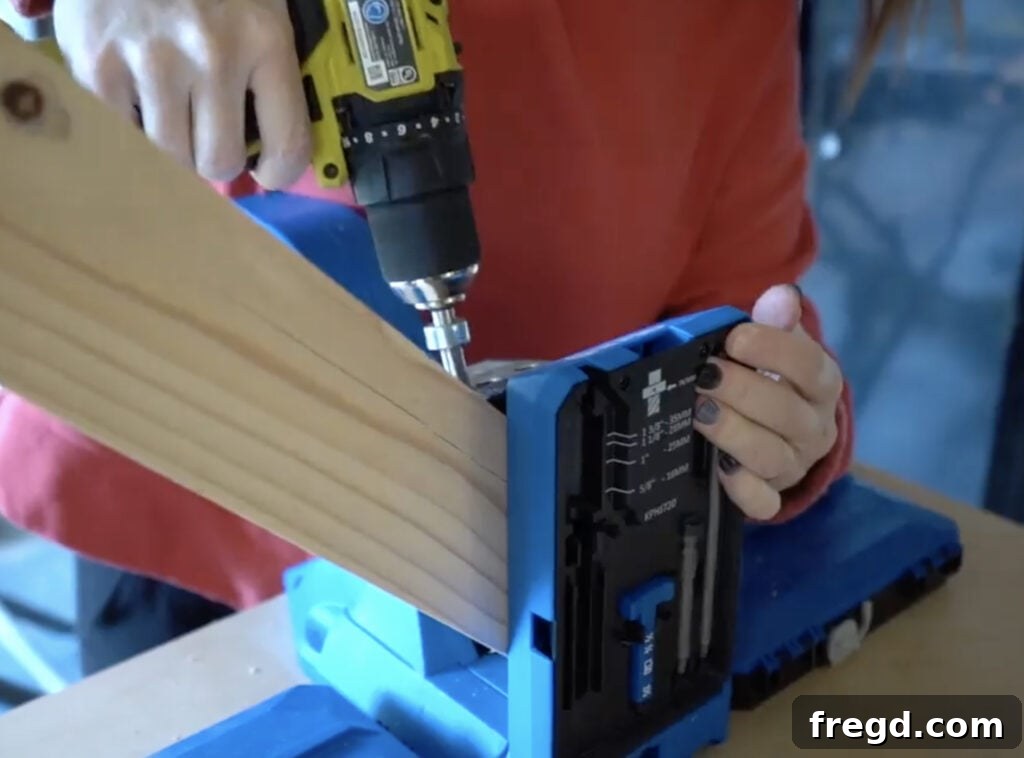
With your frames constructed, the next pivotal step in building your DIY waterfall writing desk is to secure the desktop. This step will begin to give your project its recognizable form and functionality. Take one of your laminated pine project panels, which will serve as the desk’s surface. Along both long sides of the underside of this desktop panel, you will need to drill 3/4-inch pocket holes. These holes should be spaced evenly to ensure maximum stability and a strong connection to the frame below.
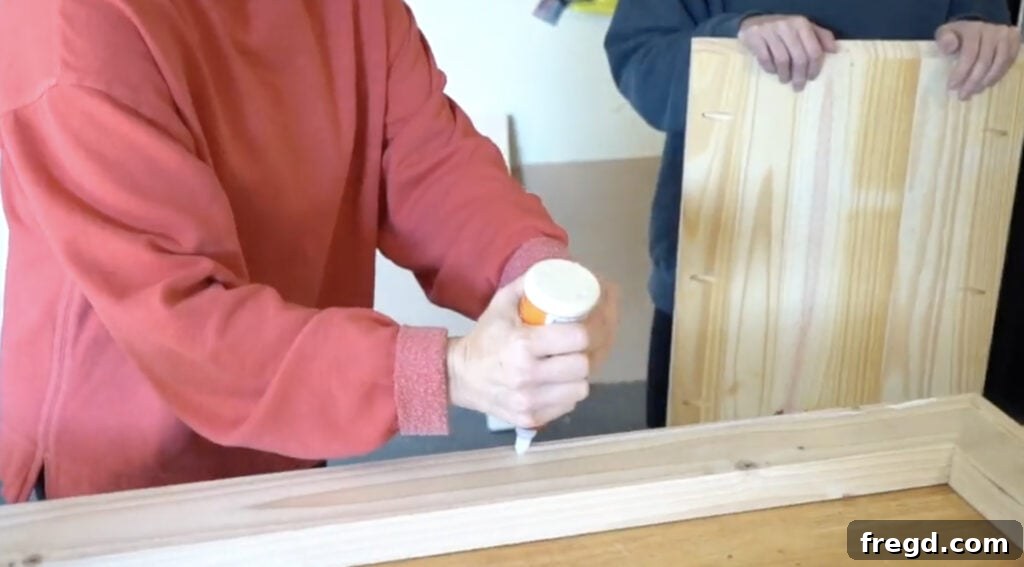
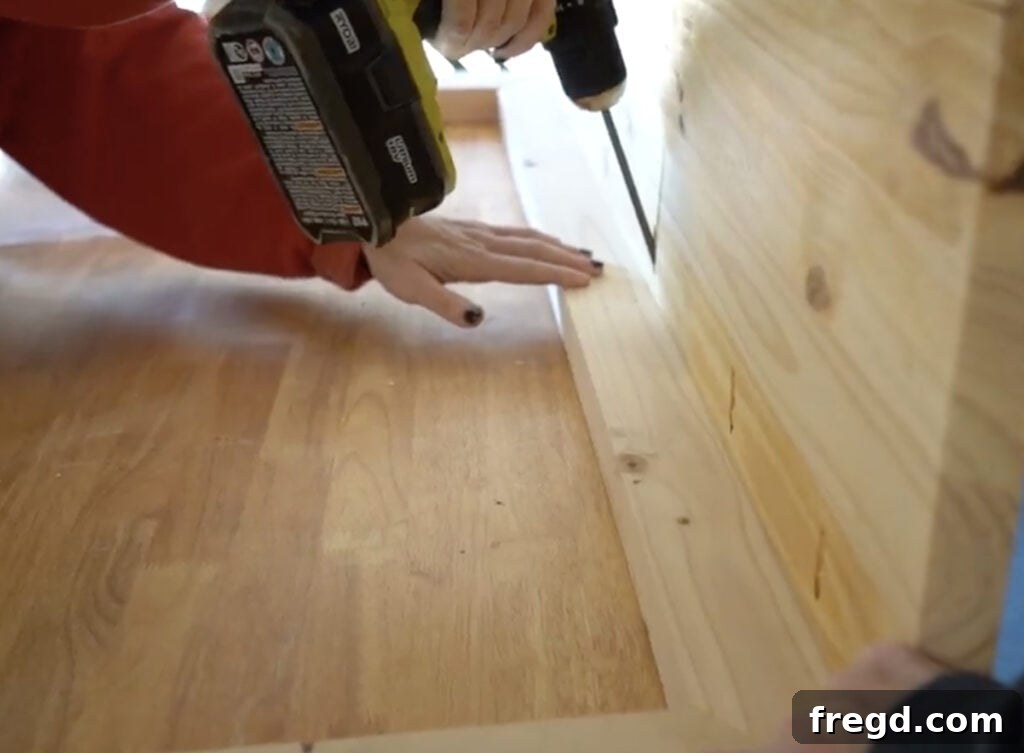
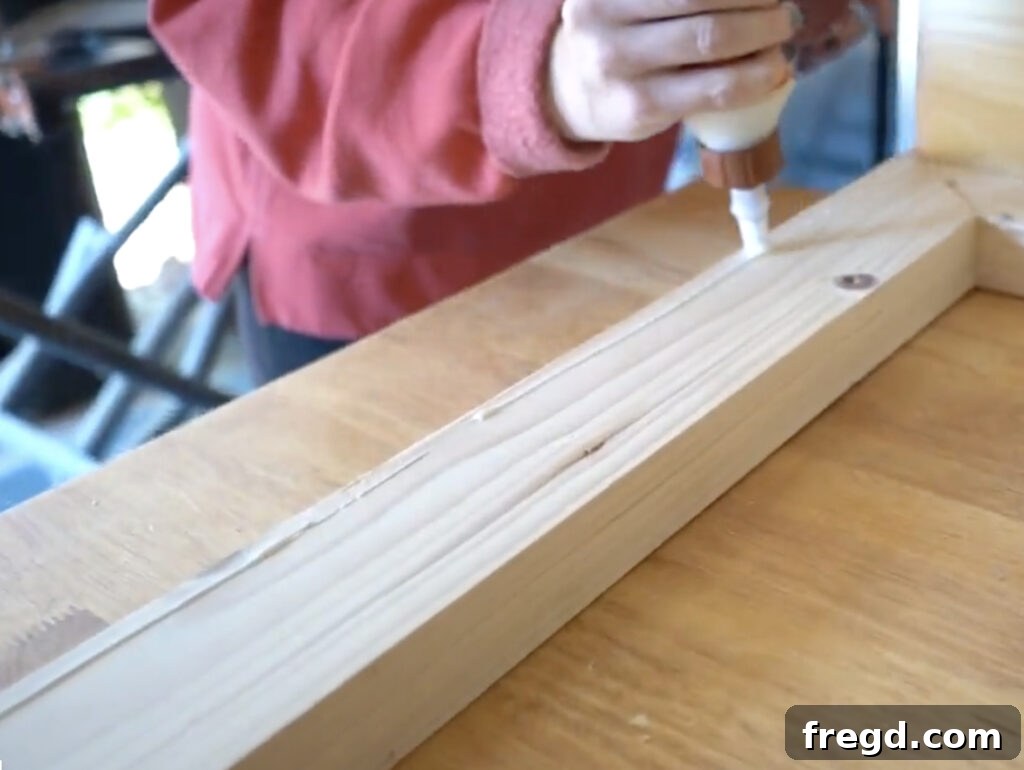
Once the pocket holes are prepared, apply a continuous line of high-quality wood glue along the top edge of one of the 3-inch wide frames you assembled in Step 1. Carefully align the desktop panel with this frame, ensuring that the top surface of the desk is perfectly flush with the top edge of the frame. This precise alignment is key to achieving a seamless, professional look. Using 1.25-inch pocket hole screws, secure the desktop to the frame through the pocket holes you just drilled. Drive the screws firmly but avoid overtightening, which can strip the wood. The combination of wood glue and pocket hole screws creates an incredibly strong and durable bond, ready for years of use.
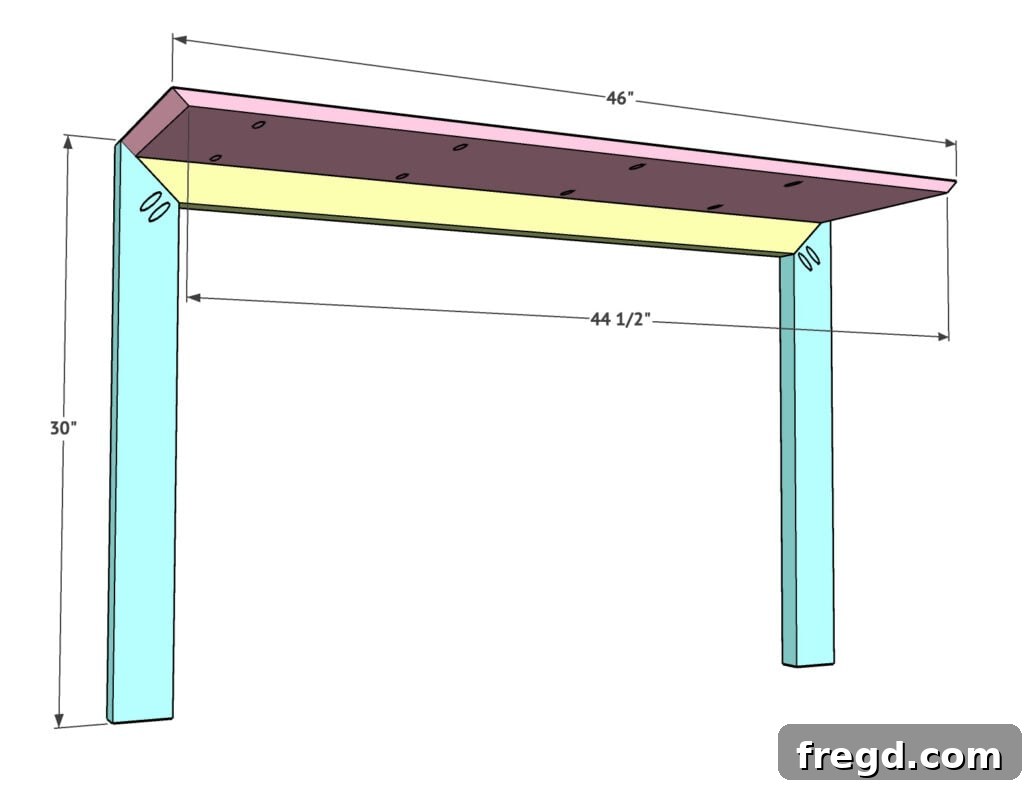
Step 3: Installing the Outer Side Panels
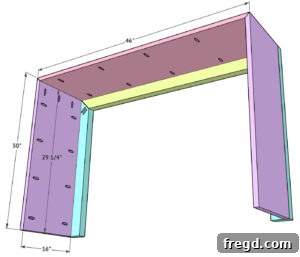
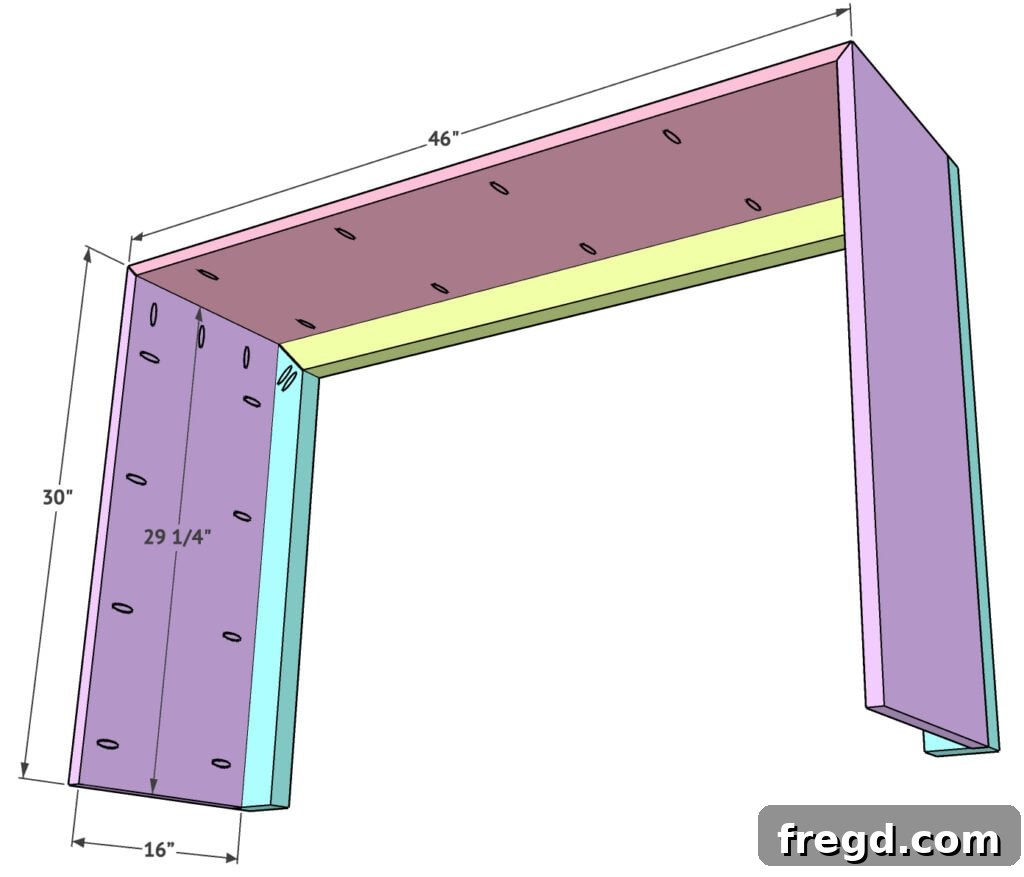
With the desk top securely attached to one frame, it’s time to introduce the outer side panels, which are crucial for both the structural integrity and the aesthetic “waterfall” effect of your desk. These panels will extend downwards from the desktop, forming the visible legs of the desk. Similar to the frame components, the top edges of these side panels are also cut at a precise 45-degree angle. This angle is essential for aligning seamlessly with the desk top and creating a continuous, flowing line.
Prepare these outer side panels by drilling 3/4-inch pocket holes along both long sides of their inner surfaces. These pocket holes will facilitate the strong, hidden attachment to the desk’s main frame. Once the holes are drilled, apply a continuous line of wood glue to the outer edge of the side frame pieces. Carefully position the outer side panel, ensuring that its outside surface is perfectly flush with the outside surface of the frame board. This alignment is critical for the clean lines of the waterfall design. Using 1.25-inch pocket hole screws, securely fasten the outer side panel to the frame. The combination of glue and screws will create a durable and almost invisible joint, contributing to the desk’s minimalist appeal. Repeat this process for the other outer side panel if applicable to your design, ensuring symmetry and stability.
Step 4: Adding Internal Support Boards
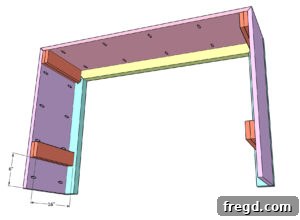
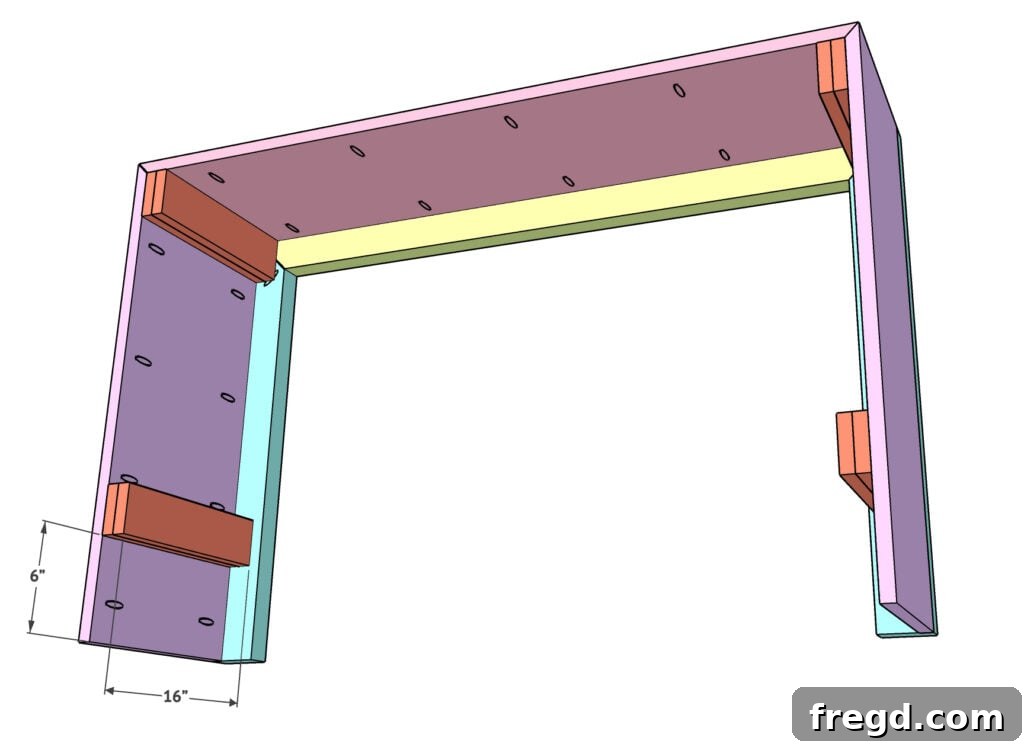
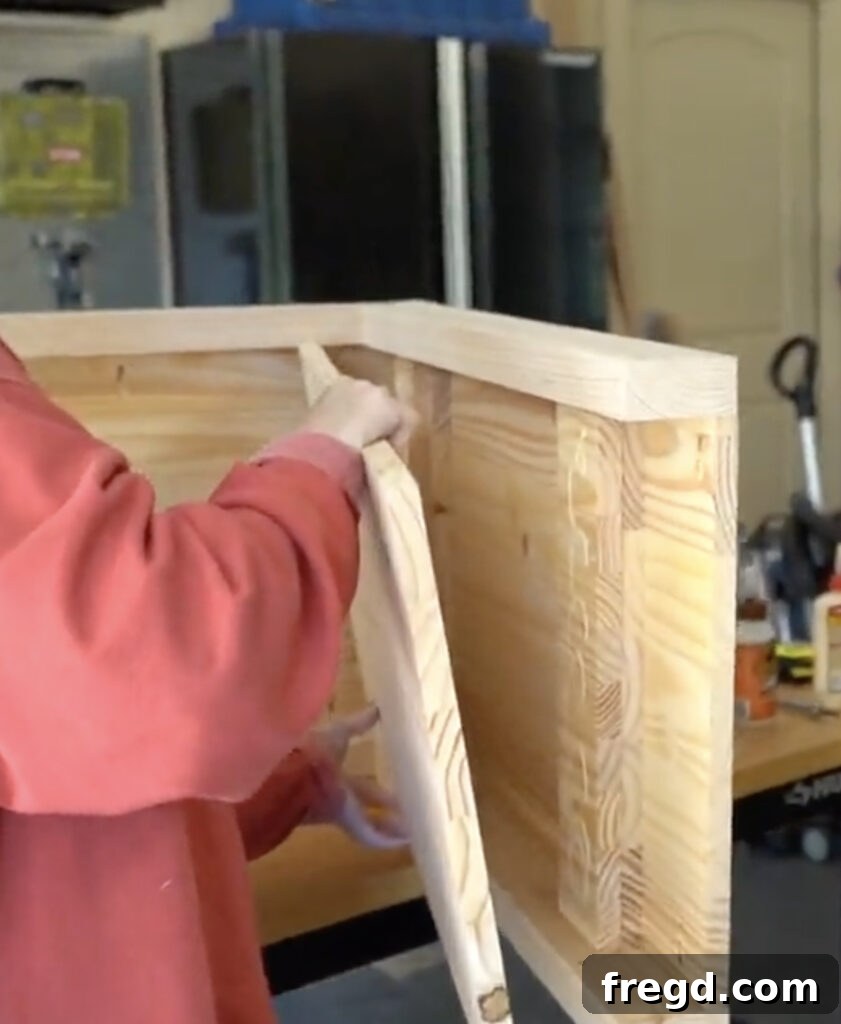
To further enhance the stability and structure of your DIY waterfall writing desk, and to provide solid anchoring points for the final waterfall panels, you will now add internal support boards to the insides of the desk’s side sections. These supports are ingeniously crafted from leftover scraps of your edge-glued pine panels, proving the efficiency of material usage in this project. You will need to cut four pieces, each approximately 3 inches wide. These pieces don’t need to be perfectly identical in length, as they will be installed in sets to create a double-layer support system.
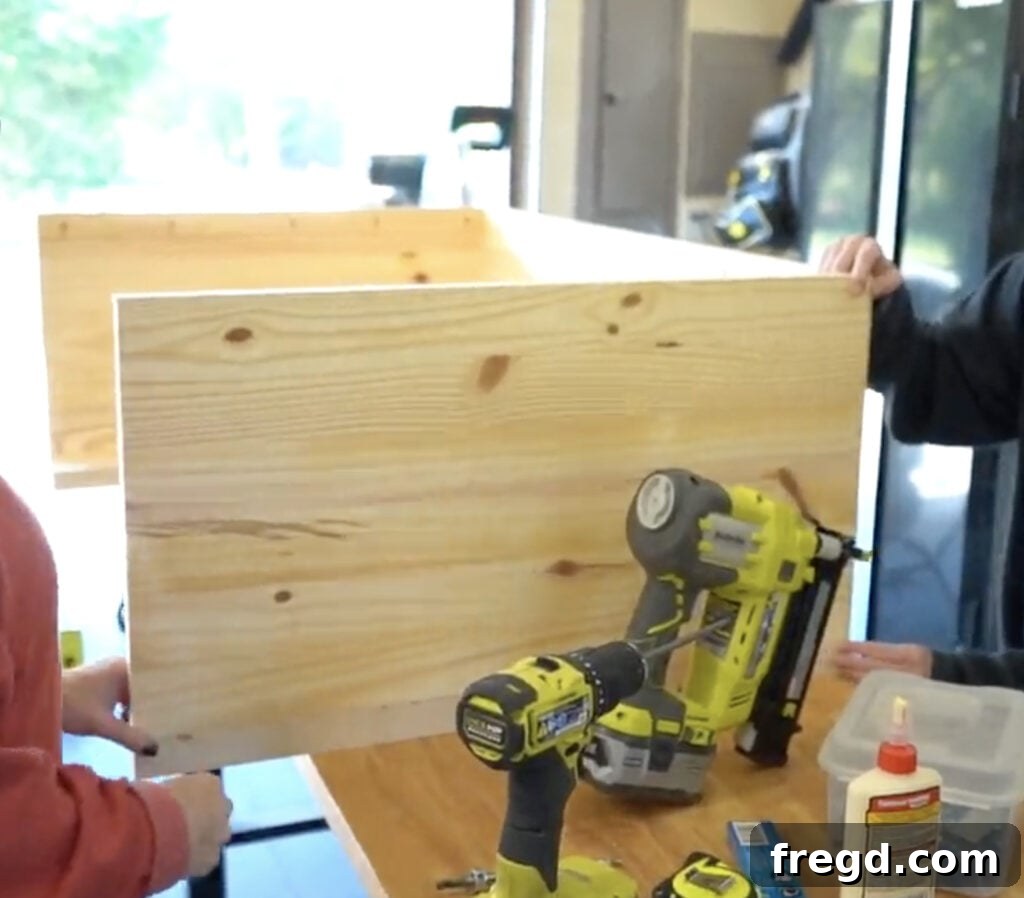
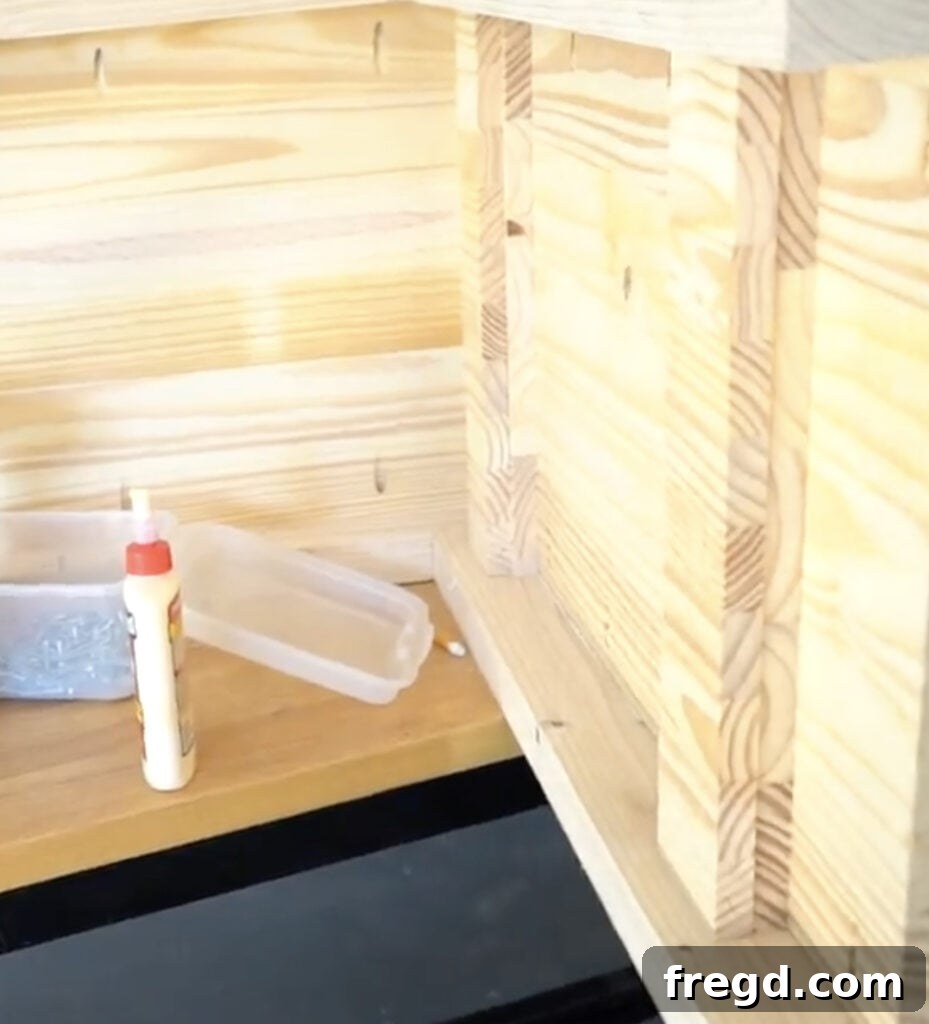
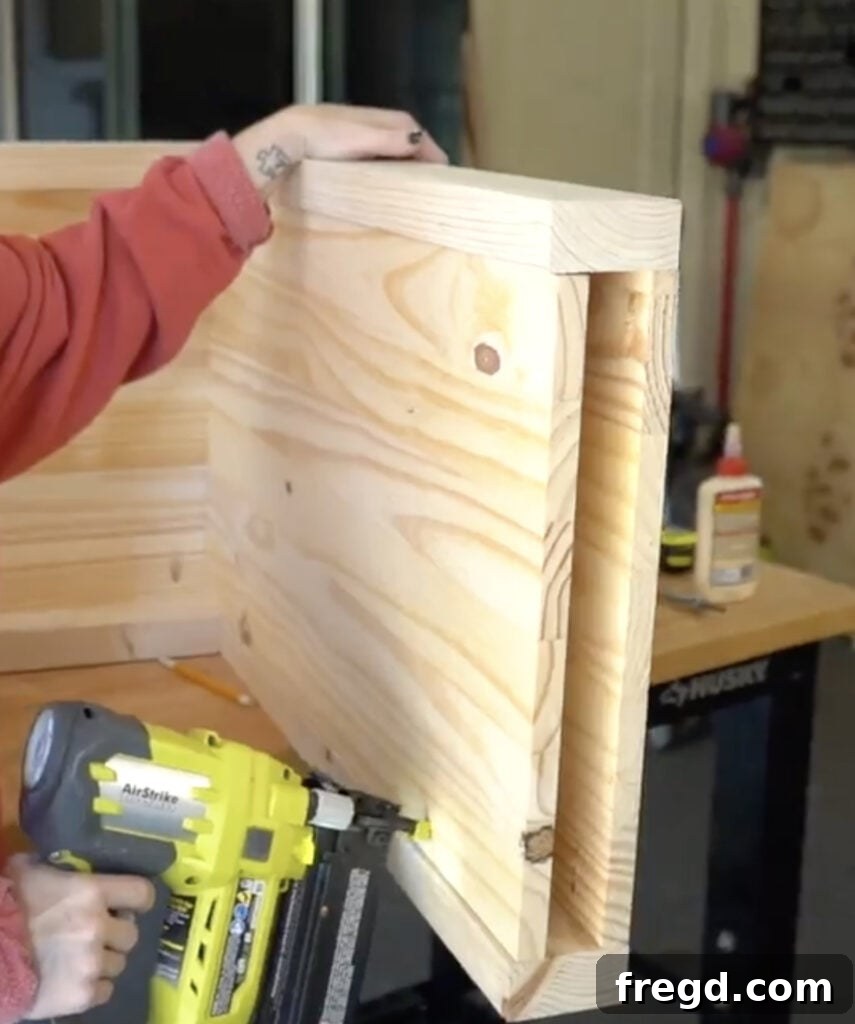
For each side of the desk, you will install two support boards. Line up the first support board at the very top of the desk’s interior side. Apply wood glue to its back surface and attach it firmly with 1.25-inch brad nails. The brad nailer makes this process quick and leaves minimal visible marks. Immediately below this, place the second support board, again applying wood glue and securing it with brad nails. This creates a robust double-thickness support. Repeat this process for the other side of the desk, using the remaining two support boards. Before moving to the next step, it’s a good practice to make a small, discreet pencil mark on the outside edge of the main desk panels. This mark will serve as a visual guide, indicating the exact location of these internal support boards when you attach the final decorative panels, ensuring your brad nails hit their target accurately.
Step 5: Connecting the Second Frame to the Desk Body
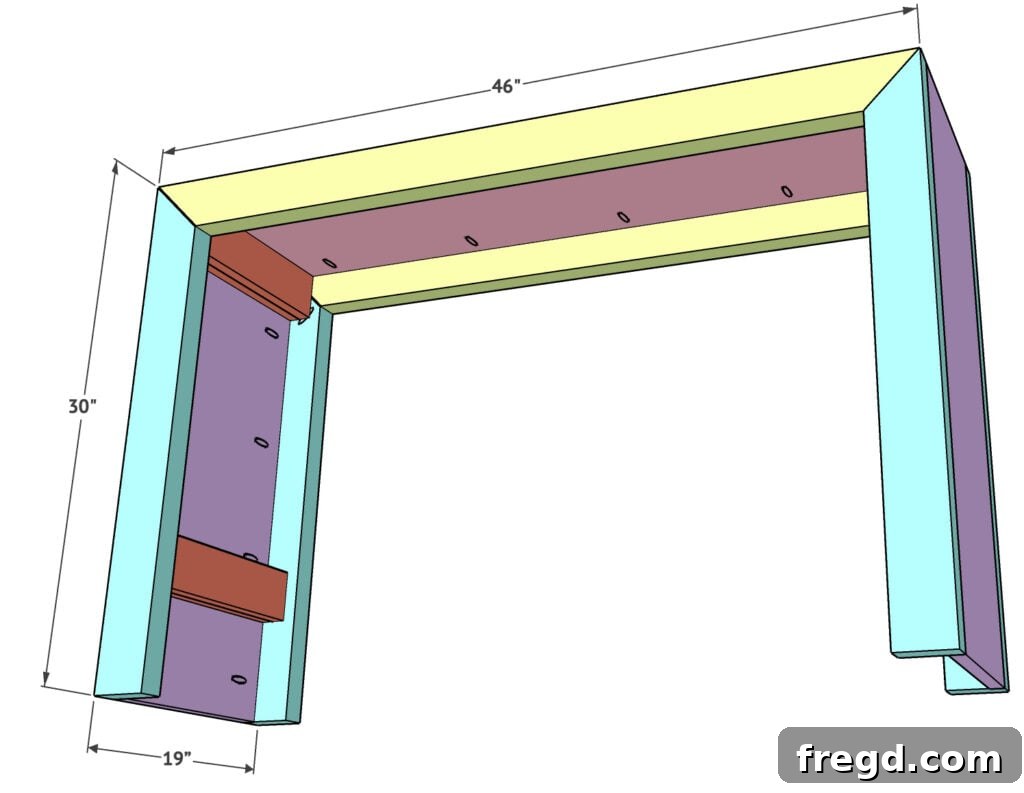
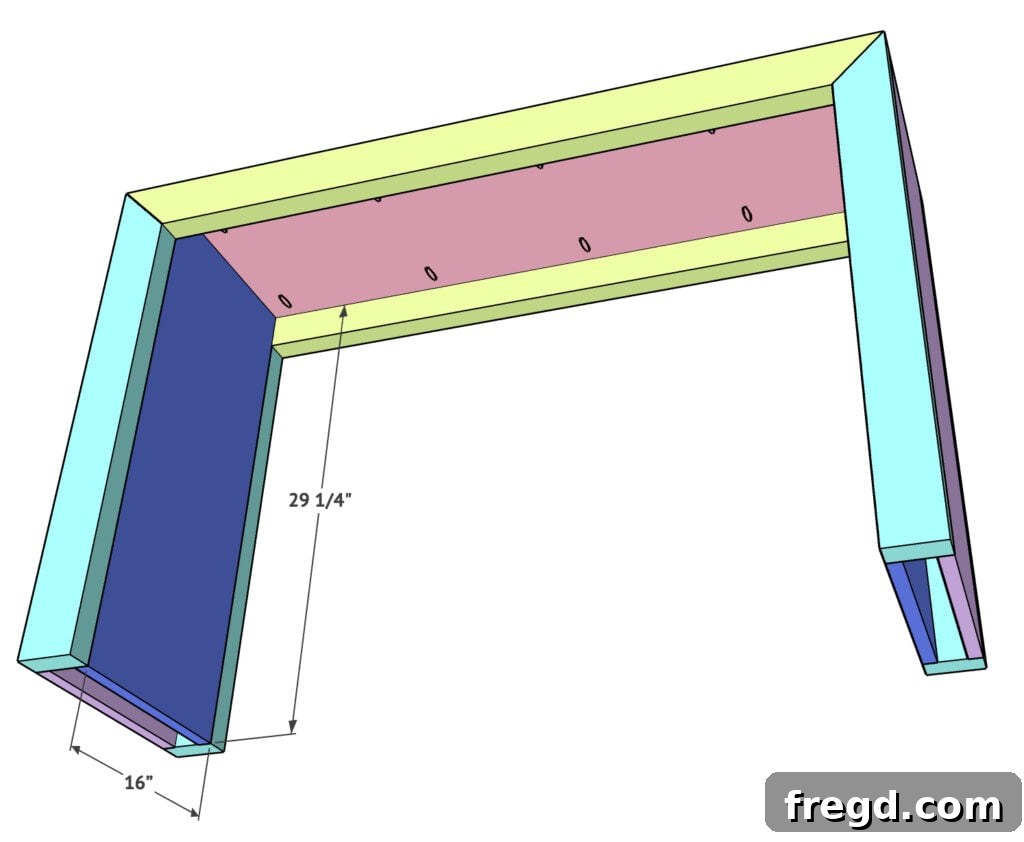
At this stage, your DIY waterfall writing desk is really taking shape. You have the desktop attached to one main frame and the outer side panels installed. Now, it’s time to integrate the second identical frame you constructed in Step 1. This second frame will serve as the back support and complete the overall structural integrity of your desk, creating a solid and stable unit.
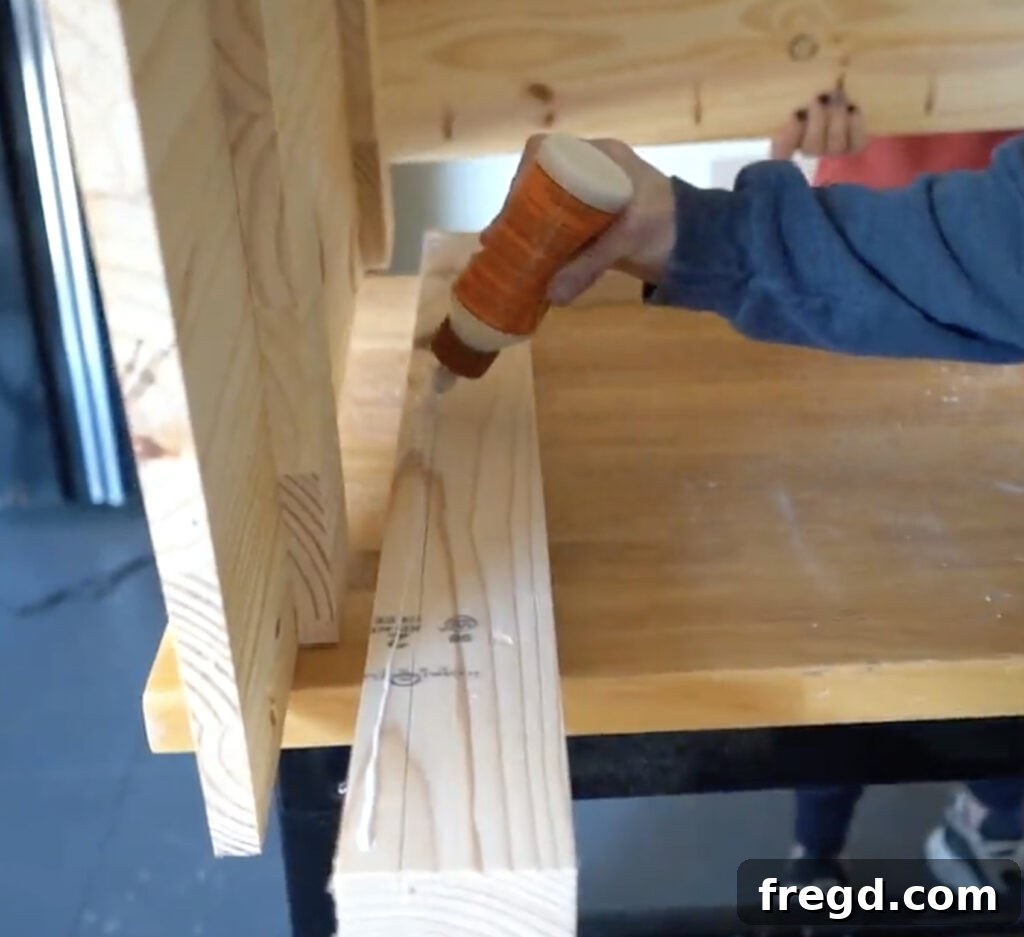
To attach the second frame, carefully apply a continuous line of wood glue around all of the flush outer edges on the back of the first desk body (the assembly of desktop, first frame, and outer side panels). This includes the edges of the desktop and the outer edges of the side panels where they will meet the second frame. Carefully position the second frame against these glued edges, ensuring that all outside edges of both the existing desk body and the new frame are perfectly flush. Achieving this flush alignment is crucial for the desk’s appearance and stability. Once aligned, use 1.25-inch Kreg pocket hole screws to firmly attach the second frame to the desk body. Drive the screws into the pocket holes you previously drilled on the second frame, pulling the entire structure tightly together. The combination of strong wood glue and pocket hole screws will create an incredibly robust connection, completing the core structure of your elegant waterfall desk.
Step 6: Completing the Waterfall Look with Inside Panels
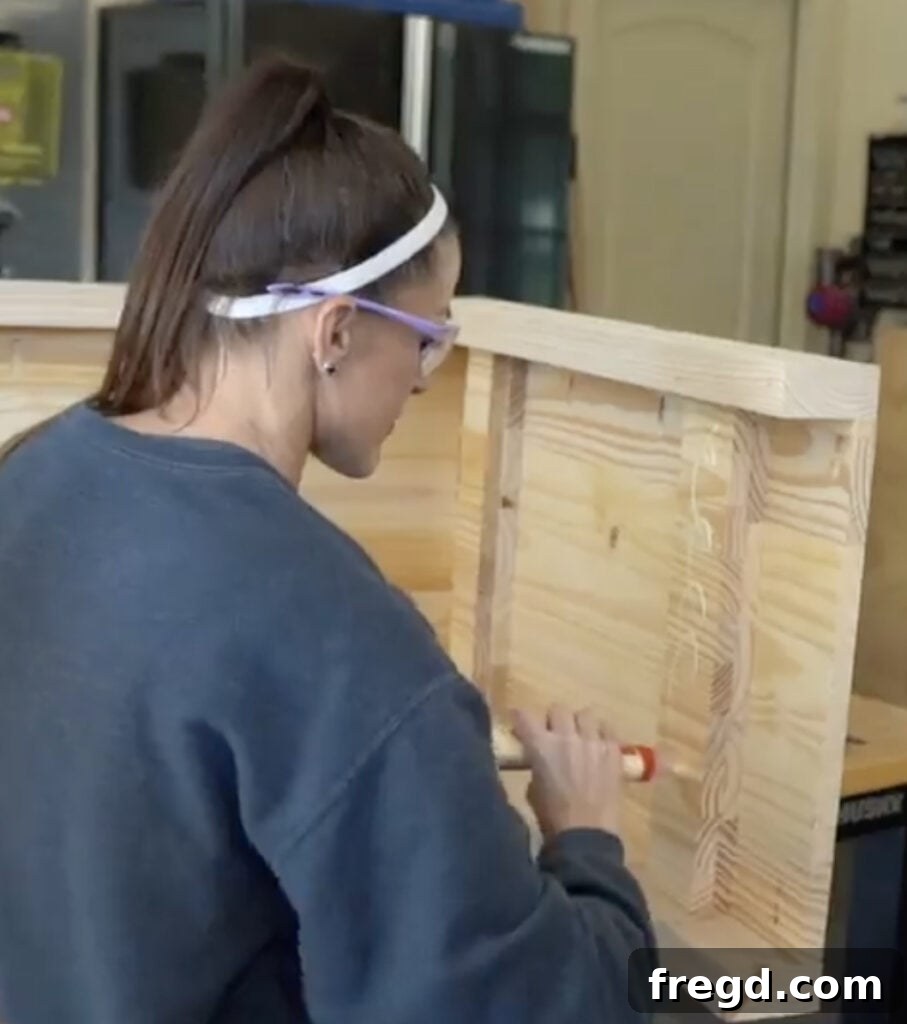
The final construction step is where the DIY waterfall writing desk truly earns its name and distinctive aesthetic. You will now attach the inside panels, which not only conceal all the visible pocket holes and internal support boards but also create the sleek, continuous “waterfall” effect down the sides of the desk. These panels are also crafted from your edge-glued pine panels, cut precisely to size to fit snugly within the frame.
To attach these crucial final pieces, apply a consistent line of wood glue to the tops of each internal support board that you installed in Step 4. These supports provide a solid surface for the inside panels to adhere to. Carefully position each inside panel, ensuring it sits flush and covers the internal structure perfectly. Using your brad nailer, secure the panels in place with 1.25-inch brad nails. Since you made those small pencil marks in Step 4, you’ll know exactly where to aim your nails to hit the support boards underneath, ensuring a strong attachment without visible fasteners. The combination of glue and brad nails will create a seamless, elegant finish, giving your desk that sought-after contemporary waterfall appearance. With these panels in place, the construction phase is complete, and your desk is ready for finishing touches.
Achieving the Perfect Finish: Staining Your Desk
Now that your DIY waterfall writing desk is fully assembled, it’s time for the exciting final step: staining and finishing! This is where you can truly customize the desk to match your personal style and interior decor. For this project, I opted to create a unique custom stain color by mixing three different Varathane stain shades. This is a wonderfully creative and simple way to achieve a truly bespoke look that stands out from off-the-shelf options. You can catch a quick video reel of how I mixed this particular color here!
To recreate this custom hue, start with an empty tub or container – inexpensive options are readily available at hardware stores, or you can repurpose one you have at home. The blend consisted of two parts Natural stain, one part Golden Oak, and a delicate splash of Weathered Gray. Simply combine these in your bucket and stir gently until fully integrated. This specific combination yielded the rich, nuanced finish I was envisioning, providing a warm yet modern aesthetic.
Before applying any stain, proper sanding is absolutely paramount for a beautiful, even finish. Begin by sanding all surfaces with a medium-grit sandpaper (around 120-150 grit) to smooth out any imperfections, glue residue, or mill marks. Follow this with a thorough sanding using fine-grit sandpaper (220 grit or higher) to achieve a silky-smooth surface. I find my Ryobi Corner Cat detail sander excellent for reaching tight spots, but a standard orbital sander will also work wonderfully for larger flat areas. Remember to wipe off all sanding dust with a tack cloth before staining.
Once your stain is applied and dry, a protective topcoat is essential for durability. This shields the wood from spills, scratches, and everyday wear and tear. My go-to polyurethane for this purpose is THIS ONE, known for its excellent protection and clear finish. Apply thin, even coats, following the manufacturer’s instructions for drying times and light sanding between coats for the best results. A well-finished desk not only looks fantastic but will also stand the test of time, serving as a functional and beautiful piece of furniture for years to come.

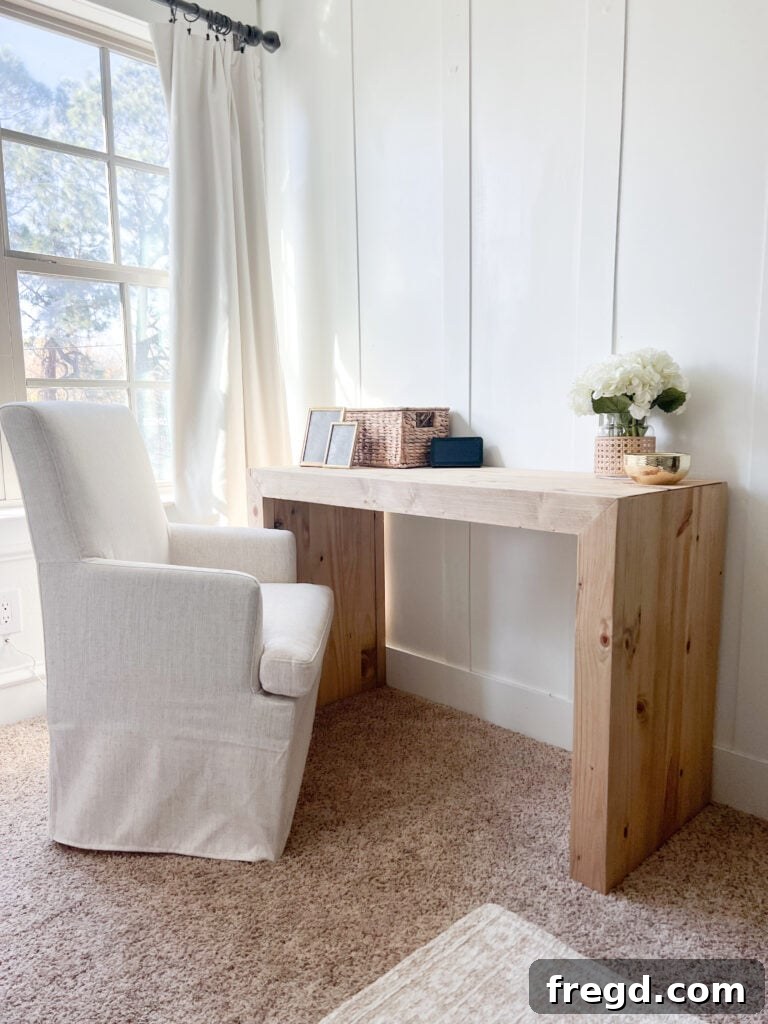
Explore More DIY Desk Designs
If you’ve enjoyed building this DIY Waterfall Writing Desk, or if you’re looking for different styles to fit other spaces in your home, we have a variety of other fantastic desk designs that cater to different needs and aesthetics. From space-saving solutions to more expansive workspaces, you’re sure to find your next woodworking project here. Check out some of our other popular desk designs:
- DIY Corner Desk: Maximize corner spaces with a custom-fit and functional workstation.
- DIY Modern Farmhouse Desk: A sturdy and stylish desk with a blend of rustic charm and contemporary lines.
- DIY Murphy Wall Desk: The ultimate space-saving solution, folding away when not in use.
Download Your Free Printable Plans
Ready to start building? We’ve made it incredibly easy for you to get started on your own DIY Waterfall Writing Desk project. You can download and print the complete, detailed plans with a comprehensive cut list and step-by-step instructions. These plans are designed to guide you through every phase of the build, ensuring accuracy and helping you achieve a high-quality finish. Click the link below to get your free printable plans today and bring your dream desk to life!
DIY Waterfall Writing Desk
Supply List
- 3 boards 2 x 4 x 8 ripped to 3″ wide each
- 5 panels 16″ x 48″ edge glued pine panels
- Wood Glue
- 2.5″ Kreg Pocket Hole Screws
- 1.25″ Kreg Pocket Hole Screws
- 1.25″ Brad Nails
- Wood Stain (e.g., Varathane Natural, Golden Oak, Weathered Gray)
- Polyurethane Protective Coat
- Sandpaper (medium and fine grit)
Instructions
-
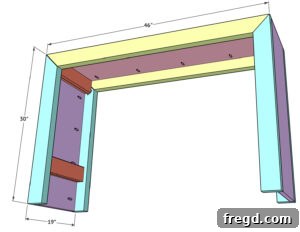
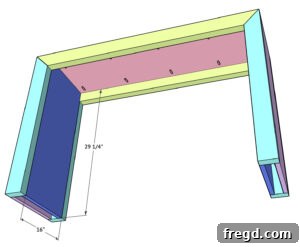
Refer to the Free Printable Plans for a detailed cut list and dimensions specific to your desired desk size. This will ensure all components are precisely cut.

-
Begin by ripping your 2×4 boards to 3 inches wide each using a table saw. Then, cut these boards at 45-degree angles to form two identical frames. Drill 1.5-inch pocket holes at the edges of the 45-degree angles on each side board. Attach the side boards to the top and bottom boards using wood glue and 2.5-inch pocket hole screws to create these two sturdy frames.
-
Next, add the desk top. Drill 3/4-inch pocket holes down both long sides of the bottom of the desktop panel. Apply a line of wood glue to the top edge of one assembled frame. Carefully align and attach the desktop flush with the top of this frame using 1.25-inch pocket hole screws.
-
Now, attach the outside side panels of the desk. The top of these panels should also be cut at 45-degree angles. Drill 3/4-inch pocket holes down both long sides on the inside surfaces of these boards. Apply wood glue to the edge of the side frame pieces. Attach the outside panels using 1.25-inch pocket hole screws, ensuring the outside of the desk side piece is flush with the outside of the frame board.
-
Next, add the support boards to the insides of the desk sides. Cut 4 pieces of scrap panel material, each around 3 inches wide. Line up the first support at the top of the desk’s interior side, attach with wood glue and 1.25-inch brad nails. Place a second support directly below it, also attaching with wood glue and brad nails. Repeat for the other side. Make a small mark on the outside edge of the panels to indicate the location of these supports.
-
Attach the second frame to the desk body you have built. Apply a line of wood glue around all flush outer edges on the back of the first desk body. Align and attach the second frame to these edges using 1.25-inch Kreg pocket hole screws, ensuring all outside edges are flush.
-
The final step is attaching the inside panels to create the waterfall look and hide all internal structure. These are edge-glued panels cut to size. Apply wood glue to the tops of each inside support board and attach the panels using 1.25-inch brad nails.