
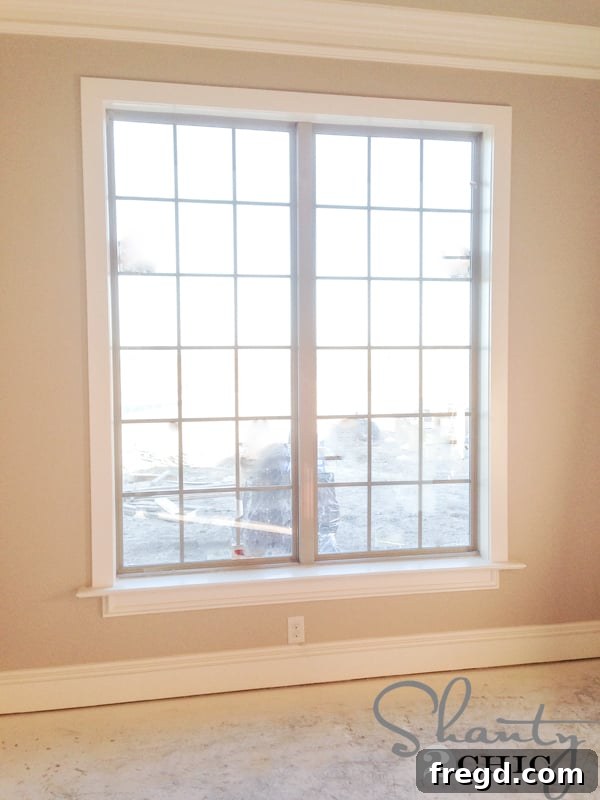
DIY Window Casing: Transform Your Plain Windows with This Easy & Inexpensive Faux Wood Trim Tutorial
Are you dreaming of elegant, wood-cased windows but deterred by the thought of complex carpentry or high costs? What if we told you that achieving that custom, built-in look for your windows is not only incredibly easy but also surprisingly affordable? This comprehensive guide will walk you through creating beautiful, faux wood window casings using simple materials like plywood and MDF. Prepare to elevate the aesthetic of your home, add significant architectural interest, and impress everyone with your DIY prowess – all without breaking the bank!
Many homeowners believe that adding sophisticated window trim is a job best left to professionals, involving intricate measurements and expensive lumber. However, this tutorial demolishes that myth, proving that anyone, even those new to DIY projects, can achieve stunning results. Imagine transforming your plain, unadorned windows into captivating focal points that enhance your home’s character and value. This project is not just about adding trim; it’s about adding charm, warmth, and a touch of custom craftsmanship to every room.
I genuinely believe in the power of this simple yet impactful project. Had I known how straightforward and budget-friendly it was to faux case my windows, I would have embraced this transformation in every window of my previous home. It’s an accessible project that delivers a high-end look, making it a perfect weekend endeavor for anyone wanting to “fancy-up” their existing windows without extensive time commitments or specialized skills.
The Magic Behind Inexpensive Window Upgrades: Plywood & MDF
The secret to this budget-friendly window casing lies in the choice of materials: a sheet of 1/2″ Purebond Plywood and 1×4 MDF boards. These materials are widely available, cost-effective, and surprisingly versatile. You might be wondering about the total cost; in my experience, I was able to case every window in my house with just a few sheets of plywood and MDF for under $300. This makes it an incredibly appealing option for homeowners looking to make a significant visual impact without a hefty investment.
Using plywood for the base structure provides stability and depth, creating the foundational framework for the casing. Purebond plywood is an excellent choice as it’s typically formaldehyde-free, offering a healthier indoor environment, and often has a smoother surface ideal for painting. MDF (Medium-Density Fiberboard) is then used for the visible trim pieces. MDF is favored for its perfectly smooth surface, consistent density, and excellent paint-holding capabilities, which are crucial for achieving that flawless, professional finish akin to solid wood trim.
This method brilliantly combines the structural integrity of plywood with the smooth, paint-ready surface of MDF, providing a robust, beautiful, and affordable solution for your window casing needs. It’s a testament to how smart material choices can lead to impressive DIY transformations.
Gather Your Tools and Materials
Before diving into the project, ensure you have all the necessary tools and materials. Proper preparation makes any DIY task smoother and more enjoyable. While some items might be specific power tools, there are often manual alternatives or rental options if you don’t own them.
Essential Materials:
- 1/2″ Purebond Plywood: One or more sheets, depending on the number of windows. Choose good quality plywood with minimal voids for the best results.
- 1×4 MDF Boards: For the visible trim pieces. MDF comes in various lengths; calculate your needs based on window dimensions.
- Wood Glue: High-quality PVA wood glue for strong, lasting bonds between wood and MDF.
- Nails: 2″ nails for securing the plywood base, and 1 1/4″ brad nails for attaching the MDF trim.
- Wood Filler: To conceal nail holes and minor imperfections before painting.
- Paint Primer: Essential for both plywood and MDF to ensure even paint absorption and a durable finish.
- Paint: Choose a durable interior paint in your desired finish (semi-gloss or satin often work well for trim).
- Caulk (Optional but Recommended): Acrylic latex caulk for sealing gaps between the new casing and the wall, providing a seamless look.
Recommended Tools:
- Tape Measure & Pencil: For accurate measurements and markings.
- Circular Saw or Table Saw: Crucial for ripping the plywood sheets into strips of the correct width. A table saw offers more precision.
- Miter Saw or Miter Box with Hand Saw: For precise, straight cuts on the MDF boards.
- Nail Gun (e.g., Rigid Nailer, Ryobi Airstrike Nailer): A pneumatic or battery-powered nailer significantly speeds up installation and provides a strong hold.
- Air Compressor: If using a pneumatic nail gun.
- Safety Glasses: Always wear eye protection when cutting or nailing.
- Sanding Block & Sandpaper: Various grits (80-120 for rough edges, 220 for final smoothing) for preparing surfaces.
- Level: To ensure your casing is perfectly straight and plumb.
- Putty Knife: For applying wood filler smoothly.
- Utility Knife: Handy for scoring drywall if minor adjustments are needed.
- Stud Finder: (Optional) For locating studs to nail into for extra security, especially for the plywood base.
Having these items ready will ensure a smooth workflow and a high-quality finish for your DIY window casing project. Take the time to gather everything before you begin cutting and installing.
Step 1: Building the Plywood Framework
The first critical step involves creating the foundational framework for your window casing using 1/2″ Purebond plywood. This step provides the depth and structure that will make your windows appear beautifully cased.
Preparation and Initial Measurements:
Begin by thoroughly cleaning the area around your windows. Remove any dust, debris, or existing caulk that might interfere with adhesion or accurate measurements. Now comes a crucial piece of advice: do not assume all your window openings are perfectly uniform. Measure each window individually, and for each window, measure each side of the opening. It’s common for older homes, or even new builds, to have slight variations, and accommodating these differences early on will prevent headaches later.
You’ll need to rip your 1/2″ Purebond plywood into strips. The width of these strips should match the depth of your window opening – specifically, the distance from your window frame to the edge of the drywall. This measurement ensures the plywood sits flush with your wall surface, creating a seamless transition. For example, if your window opening is 3.5 inches deep, your plywood strips will be 3.5 inches wide.
Cutting and Installing the Top Plywood Piece:
Start with the top of your window. Measure the exact length of the top of the window opening. Cut a piece of your pre-ripped 1/2″ Purebond plywood to this precise length. Before installation, inspect both edges of the cut plywood. If one side is noticeably smoother, orient that side to face forward (towards the room) for a better finish. If both edges are rough, a quick sanding with 80-120 grit sandpaper will smooth them out.
Using 2″ nails and your nail gun, secure this top plywood piece into place. Position it so that the front edge of the plywood is perfectly flush with the edge of the window opening. Aim for the middle of the board and place nails approximately every 10-12 inches along its length. Use a level to ensure it’s perfectly straight before permanently nailing it. This top piece serves as a crucial anchor for the rest of your casing.
Installing the Side Plywood Pieces:
Once the top piece is securely in place, measure the length of each side of the window opening, from the bottom of the installed top plywood piece down to the windowsill. Again, measure each side individually, as they may vary slightly. Cut your 1/2″ Purebond plywood strips to these precise lengths.
Carefully position each side piece, ensuring its front edge is flush with the window opening, just like the top piece. Use your nail gun (such as a Rigid nailer or similar) and 2″ nails to attach them. Apply about five nails along the length of each board, aiming for the center. Use a level to ensure these pieces are perfectly plumb (vertically straight) before nailing them firmly. A secure and level plywood framework is fundamental for a professional-looking finished product.
Step 2: Attaching the MDF Trim
With the plywood framework securely installed, it’s time to bring in the MDF boards to create the elegant, finished look of your window casing. MDF is ideal for this as it offers a perfectly smooth surface for painting and cuts cleanly for precise joints.
Measuring and Cutting MDF Side Pieces:
Begin by measuring each side of the window from the top of the plywood opening down to the window sill. Accuracy here is key for tight, professional-looking joints. Cut your 1×4 MDF boards to these precise lengths using a miter saw or miter box to ensure perfectly straight cuts.
Applying Wood Glue to the Plywood Edge:
This step is crucial for both strong adhesion and creating a specific aesthetic detail. Apply a thin, consistent line of wood glue along the outer edge of the 1/2″ plywood framework. As you do this, you’ll notice the distinct layers of the plywood on its edge. It’s important to only apply glue to the outer layers and leave the innermost layer exposed. This deliberate technique creates a subtle “reveal” – a slight, recessed edge of plywood that will be visible once the window is complete. This detail adds depth and a custom, craftsman-style look, differentiating your DIY casing from a simple flat trim.
Installing the MDF Side Pieces:
Carefully position your cut MDF side pieces onto the glued plywood edges. Ensure that the MDF is flush with the outer edge of the plywood, allowing that intended inner layer of plywood to remain exposed. This small exposed edge of plywood beneath the MDF board is what gives your casing a custom, layered appearance. Using your Ryobi Airstrike Nailer or similar brad nailer, secure the MDF side pieces with 1 1/4″ brad nails. Place nails every 10-12 inches, making sure the MDF is firmly attached and plumb. The combination of wood glue and brad nails provides a durable and long-lasting hold.
Installing the MDF Top Piece:
Now, measure for the top MDF piece. This measurement should span from the outside edge of one installed MDF side piece to the outside edge of the other. This ensures that your top piece will sit perfectly flush with both ends of the side pieces, creating clean, overlapping corner joints. Apply wood glue to the top edge of the plywood framework and the top edges of the installed MDF side pieces where the new top piece will rest.
Carefully place the cut MDF top piece into position, making sure it aligns perfectly with the outside edges of the side pieces. Use 1 1/4″ brad nails to secure it, just as you did with the side pieces. Ensure it is level and flush before completing the nailing. This forms a robust and aesthetically pleasing top casing that ties the entire structure together.
This image provides another clear view of that subtle, exposed edge of the plywood beneath the MDF, showcasing the thoughtful detail that elevates this faux wood casing to a high-quality finish.
Step 3: The Finishing Touches – Prep for Paint
With all the pieces cut, glued, and nailed into place, the structural work is complete. Now comes the stage where you transform your raw materials into polished, professional-looking window casings. This involves filling, sanding, and caulking to create a seamless surface ready for paint.
Filling Nail Holes and Imperfections:
Before you even think about painting, grab your wood filler. This step is crucial for achieving a smooth, flawless finish. Go over every single nail hole and any minor gaps or imperfections in the MDF or plywood. Apply a small amount of wood filler with a putty knife, pressing it firmly into the holes and smoothing it flush with the surface. Don’t worry about applying too much; you can always sand off the excess. Allow the wood filler to dry completely according to the manufacturer’s instructions. This usually takes a few hours.
Sanding for a Silky Smooth Surface:
Once the wood filler is dry, it’s time to sand. Start with a medium-grit sandpaper (around 120-150 grit) to smooth down any excess filler and to lightly scuff the entire surface of the MDF and plywood. This helps create a uniform surface and ensures better paint adhesion. Then, follow up with a finer grit sandpaper (220 grit) for a super silky smooth finish. Pay close attention to all edges and corners, ensuring they are smooth to the touch. Remove all sanding dust with a damp cloth or vacuum before moving on.
Caulking for a Seamless Look:
This is where the magic happens and your DIY project truly starts to look professional. Apply a thin bead of paintable acrylic latex caulk along all internal seams where the new casing meets the wall and where the different MDF pieces meet each other. Use a damp finger or a caulking tool to smooth the caulk into the gaps. This fills any tiny discrepancies, creating a clean, tight seal that gives the impression of custom-built trim. Caulking also helps prevent drafts and improves insulation around your windows.
Priming and Painting:
With the surface perfectly prepped, it’s time for primer. Apply one to two coats of high-quality paint primer to all surfaces of your new window casing. MDF, in particular, tends to “drink” paint, so priming is essential for an even, durable finish and to prevent the wood grain from showing through. Once the primer is dry, you can proceed with your chosen paint color. Apply two thin coats of paint, allowing ample drying time between each coat. Semi-gloss or satin finishes are often recommended for trim as they are more durable and easier to clean.
Easy enough! Now time for paint, and soon you’ll be enjoying your beautifully transformed windows.
Whoop! Look at that stunning transformation! The difference is truly remarkable, elevating the entire room’s aesthetic. You can clearly see how the simple addition of this faux wood casing instantly adds depth, character, and a touch of architectural elegance to an otherwise ordinary window.
More windows cased, showcasing the consistent, beautiful results you can achieve across your entire home. Each window now serves as a beautifully framed piece of art, perfectly complementing your interior design choices.
Conclusion: Embrace the Transformation!
This DIY window casing project is more than just adding trim; it’s about transforming the entire feel of your home. What initially might seem like a daunting task quickly reveals itself to be an accessible, rewarding, and incredibly cost-effective way to add significant value and visual appeal. By following these clear, step-by-step instructions, even beginner DIYers can achieve professional-looking results that will dramatically enhance their living spaces. The combination of affordable materials like plywood and MDF, coupled with careful execution, proves that high-end aesthetics don’t always require a high-end budget.
Take pride in knowing that you’ve personally crafted these beautiful architectural details. The simple act of casing your windows adds character, depth, and a sense of completeness to your rooms, making them feel more finished and inviting. This project is a fantastic demonstration of how minor renovations can have a major impact on your home’s overall look and feel. So, go ahead, give your windows the stylish upgrade they deserve!
If you’re curious about other elements of my home design, such as my paint color choices, you can find them HERE. For all my house build updates and more DIY inspiration, you can click HERE!
Thanks so much for stopping by and happy building!