
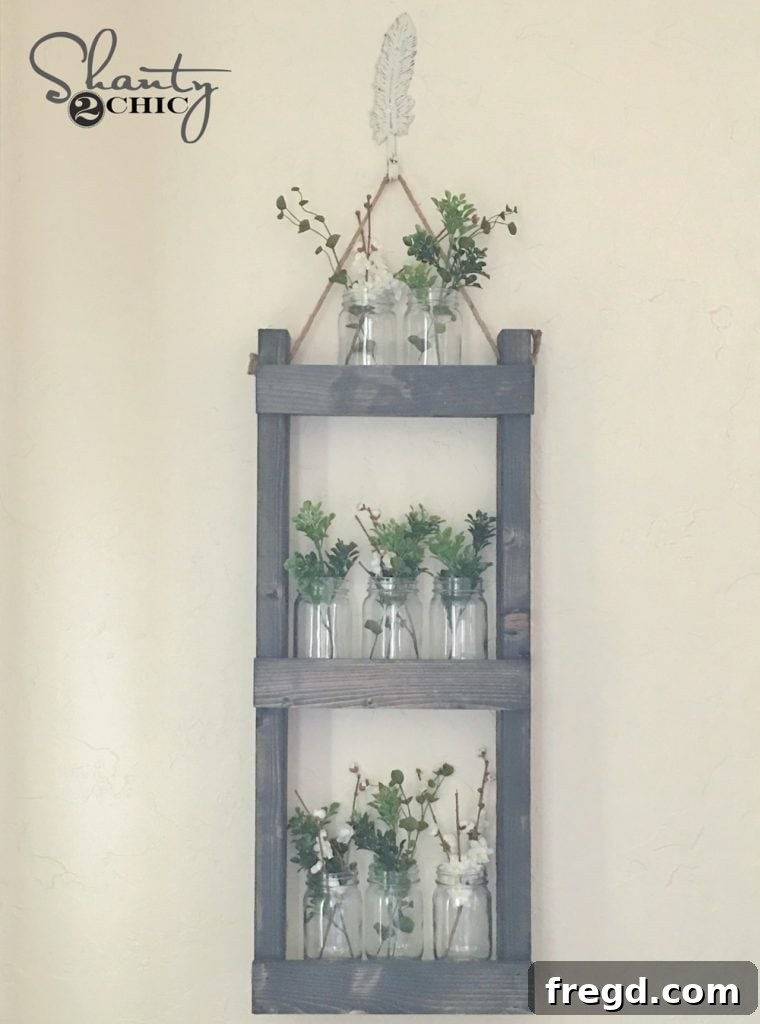
Craft Your Own Rustic Charm: The Ultimate DIY Mason Jar Caddy & Organizer
Hello DIY enthusiasts and home decor lovers! Are you looking for a charming, functional, and incredibly simple project to enhance your home organization or add a touch of rustic elegance? Look no further! We’ve combined our passion for classic mason jars, smart storage solutions, and natural wood to bring you this absolutely adorable and versatile DIY Mason Jar Caddy.
This project is perfect for anyone, from seasoned woodworkers to enthusiastic beginners, offering a rewarding experience with a beautiful end product. Before we dive into the detailed instructions, we highly recommend watching our step-by-step video. It provides a visual guide that complements the written plans perfectly, ensuring you can follow along with ease and confidence. Get ready to transform some simple wood pieces into a functional work of art!
Watch Our DIY Mason Jar Caddy Video Tutorial Here!
Isn’t that just a delightful way to add character and order to your space? The simplicity of the design belies its incredible functionality and aesthetic appeal. This project truly embodies the spirit of practical beauty, making it a fantastic addition to any home.
We promise you, this is an exceptionally straightforward build that yields professional-looking results. Whether you’re aiming to declutter your kitchen counters, organize your craft supplies, or create a unique centerpiece, this DIY Mason Jar Caddy is your answer. Its versatile design allows it to seamlessly blend into various decor styles, from farmhouse rustic to modern minimalist.
Unlock Your Creativity with Free, Detailed Plans!
To make this project as accessible as possible, we’re providing completely free, comprehensive plans. These detailed blueprints include all the measurements, a precise cut list, and a full supply list, guiding you through every step of the construction process. You don’t need to be an expert carpenter; just follow these plans, and you’ll be amazed at what you can create!
CLICK HERE to Download Your FREE DIY Mason Jar Caddy Plans!
Our plans outline the overall dimensions for the caddy shown, which is designed to hold several standard-sized mason jars. However, one of the fantastic benefits of DIY is the ability to customize! Feel free to adjust the length of the middle boards to make your caddy wider or narrower, accommodating more jars or different jar sizes. This flexibility ensures your finished caddy perfectly fits your specific needs and available space.
You’ll be delighted to see that the supply list and cut list for this project are remarkably short and simple. This means less time at the hardware store and more time enjoying the crafting process! We’ve streamlined everything to ensure a smooth and enjoyable build from start to finish. Our goal is to empower you to create something beautiful and functional without unnecessary complexity.
Materials and Tools You’ll Need
Before you begin, gather your materials and tools. While the list is short, having everything ready will make the process much smoother.
Wood Supply:
- Several pieces of common pine lumber (as specified in the plans, typically 2x4s and smaller boards). Pine is excellent for DIY projects due to its affordability and ease of working. Alternatively, you could use reclaimed wood for a more distressed, eco-friendly look.
Hardware & Adhesives:
- Wood glue (for strong, lasting joints)
- 2.5-inch pocket hole screws (specifically designed for Kreg Jig joints)
- Rope (for the handle, choose a thickness that fits your drilled holes and aesthetic preference – jute, sisal, or cotton rope work well)
Essential Tools:
- Drill/Driver (with appropriate drill bits for rope holes and driving screws)
- Miter Saw or Circular Saw (for precise cuts on your lumber)
- Kreg Jig (an invaluable tool for creating strong, concealed pocket hole joints)
- Wood clamps (to hold pieces securely during drilling and assembly)
- Measuring tape and pencil
- Safety glasses and hearing protection (always prioritize safety!)
- Optional: Nailer (for attaching the front jar retainers, though screws can also be used)
- Optional: Sandpaper (various grits from 80 to 220 for a smooth finish)
Step-by-Step Construction Guide for Your DIY Mason Jar Caddy
Let’s get started on building your very own beautiful and practical mason jar caddy. Remember to always double-check your measurements and follow safety guidelines when using power tools.
Step 1: Preparing Your Wood Pieces and Drilling Rope Holes
Begin by cutting all your lumber according to the precise measurements provided in our free plans. Accuracy here is key to ensuring a perfect fit for all components. Once your pieces are cut, take the time to sand them. Starting with a coarser grit (like 80 or 100) to smooth rough edges, then moving to a finer grit (like 180 or 220) will give you a wonderfully smooth surface, ready for staining or painting. This step also prevents splinters and allows for better absorption of your chosen finish.
Next, grab the two 2×4 pieces that will form the top side rails of your caddy. These are where your rope handle will be secured. Carefully measure and mark the locations for your rope holes on each piece, ensuring they are symmetrical and centered for a balanced handle. Use a drill bit that matches the diameter of your chosen rope. Securely clamp the wood to your workbench before drilling to prevent any movement and ensure clean, straight holes.
Step 2: Creating Strong Joints with Your Kreg Jig
Now it’s time to utilize the power of the Kreg Jig. This fantastic tool allows you to drill angled pocket holes, creating incredibly strong and discreet joints. Take your three smaller boards – these will form the bottom supports and middle divider of your caddy. Refer to your plans for the exact placement and number of pocket holes needed on each of these pieces. Set your Kreg Jig to the appropriate depth for your wood thickness and ensure your drill collar is correctly set. Drill the required pocket holes with care, ensuring they are clean and ready for assembly.
Step 3: Assembling the Main Structure of Your Caddy
With your pocket holes drilled, you can now begin to assemble the core structure of your DIY Mason Jar Caddy. Apply a small amount of wood glue to the ends of the three smaller boards where they will meet the two larger side rails. Wood glue significantly enhances the strength of your joints, making your caddy more durable. Position the smaller boards between the two larger ones according to your plans, ensuring everything is square and flush. Use wood clamps to hold the pieces firmly in place while you drive in the 2.5-inch pocket hole screws. Drive the screws through the pocket holes and into the larger boards. This creates a robust and stable frame for your organizer.
Step 4: Adding the Front Retainer Pieces (Jar Guards)
You’re almost there! The final structural step is to attach the small front pieces that act as retainers to keep your mason jars securely on the shelves. These pieces are crucial for preventing jars from sliding off, especially when the caddy is moved. Apply wood glue along the edges where these pieces will meet the main structure. Then, using either a nailer with small finishing nails or small wood screws, carefully attach these front pieces. Ensure they are flush and evenly spaced, taking into account the size of the mason jars you intend to use. This provides a neat finish and practical functionality.
And just like that, the main construction of your DIY Mason Jar Caddy is complete! Pat yourself on the back for a job well done. Now comes the exciting part: customizing the look!
Finishing Touches: Stain, Paint, and Personalization
With the caddy assembled, it’s time to add your personal touch. The finish you choose will dramatically impact the overall look and feel of your caddy, allowing it to perfectly complement your home decor. For our caddy, we opted for a really pretty grey stain by Varathane called Carbon Gray. This particular stain provides a sophisticated, modern rustic look that is incredibly popular and versatile.
When applying stain, always work in a well-ventilated area. Apply the stain evenly with a brush or rag, allowing it to penetrate the wood for a few minutes before wiping off any excess. For a deeper color, you can apply a second coat after the first has dried. If you prefer a painted finish, remember to apply a primer first, especially if you’re working with pine, to ensure even coverage and prevent bleed-through. After painting, consider a clear protective topcoat like polyurethane or wax to shield your caddy from moisture and wear, especially if it will be used in areas like the kitchen or bathroom.
Finally, thread your chosen rope through the pre-drilled holes in the top 2x4s. Secure the rope ends with sturdy knots, ensuring the handle is comfortable to hold and capable of carrying the weight of filled mason jars. You can tie decorative knots or simply secure them on the inside for a cleaner look. Alternatively, you could install a metal handle or a wooden dowel for a different style.
The Versatility of Your New Mason Jar Caddy
How wonderfully easy was that? And the best part is the incredible versatility of your newly crafted Mason Jar Caddy! This isn’t just a simple storage solution; it’s a dynamic decor piece that can be adapted to countless uses around your home. Here are just a few ideas to spark your imagination:
- Kitchen Organization: Store utensils, cutlery, spice jars, coffee pods, or even fresh herbs. It keeps everything tidy and within reach.
- Bathroom Elegance: Organize toothbrushes, cotton swabs, makeup brushes, lotions, and other toiletries.
- Craft Room Companion: Perfect for holding paintbrushes, pens, pencils, beads, buttons, or other small crafting essentials.
- Office Declutter: Keep pens, highlighters, paper clips, and sticky notes neatly contained on your desk.
- Garden Helper: Use it to store small hand tools, seed packets, or even display small potted succulents.
- Party & Event Decor: Fill jars with flowers for a rustic centerpiece, use them as candle holders, or for serving snacks.
- Thoughtful Gift: Fill it with homemade treats, craft supplies, or bath bombs for a truly personal and cherished present.
The possibilities are truly endless. This DIY Mason Jar Caddy not only helps you organize but also adds a significant touch of handmade charm and personality to any space it inhabits. It’s a testament to the fact that functional items can also be incredibly beautiful and contribute to the overall aesthetic of your home.
Embark on Your Next DIY Journey!
We hope this detailed guide inspires you to take on this rewarding DIY Mason Jar Caddy project. It’s a fantastic way to enhance your woodworking skills, add functional beauty to your home, and create something truly unique. Remember, the journey of creating is just as fulfilling as the finished product.
Don’t forget to download your free plans, watch the video, and gather your materials. You’ll be amazed at how quickly you can transform simple pieces of wood into a stylish and practical organizer. Once you’ve completed your caddy, we’d love to see how you’ve personalized it and put it to use in your home! Share your creations and inspire others to embark on their own DIY adventures.
Happy building, and happy organizing!