
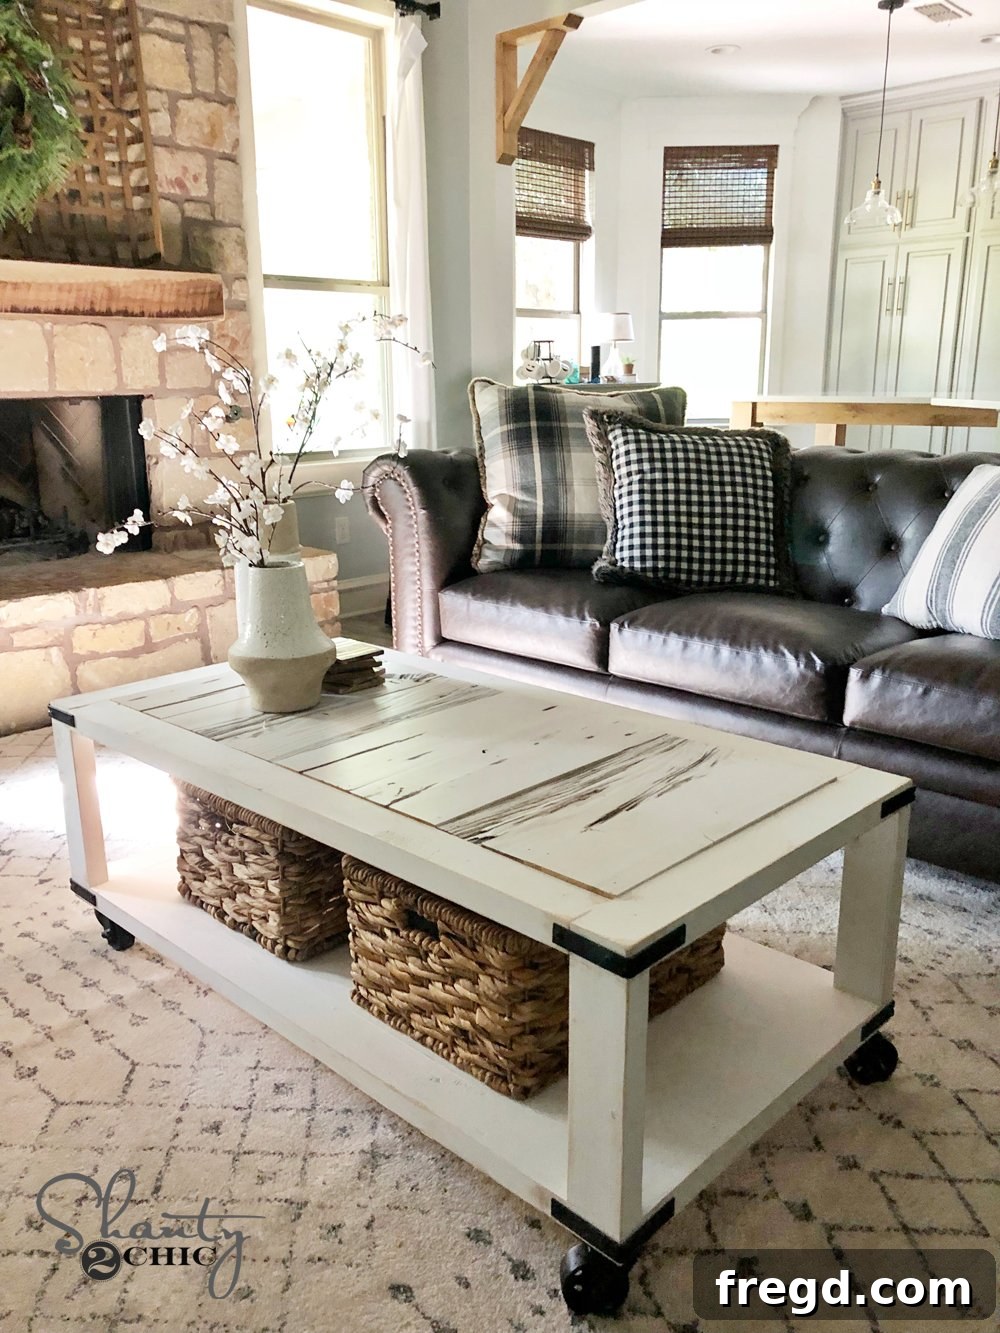
Welcome, DIY enthusiasts and home decor aficionados! Today, we’re thrilled to guide you through crafting a truly unique and charming addition to your living space: the farmhouse-style DIY Barn Wood Cart Coffee Table. This project combines rustic aesthetics with practical functionality, making it an ideal centerpiece for any modern farmhouse, industrial, or eclectic interior. Imagine gathering around a coffee table you’ve built with your own hands, showcasing the warm, authentic character of reclaimed barn wood. It’s not just furniture; it’s a statement piece, a conversation starter, and a testament to your craftsmanship, reflecting the timeless appeal of handcrafted decor.
Before we delve into the detailed steps, we highly recommend watching our comprehensive video tutorial. It provides visual insights that complement these written instructions perfectly, helping you envision each stage of the build and making the process even smoother.
Craft Your Own Farmhouse Barn Wood Cart Coffee Table
Embarking on a DIY furniture project like this is incredibly rewarding. Not only do you get a custom piece tailored to your taste and space, but you also gain invaluable woodworking experience and the satisfaction of creating something beautiful and functional. Our goal is to make this process as smooth and enjoyable as possible, even for those new to woodworking. To ensure you have all the necessary measurements and cut lists at your fingertips, be sure to download and print the FREE PLANS HERE. These plans are your essential companion throughout the build, guiding you with precision and clarity.
Why Choose a Barn Wood Cart Coffee Table for Your Home?
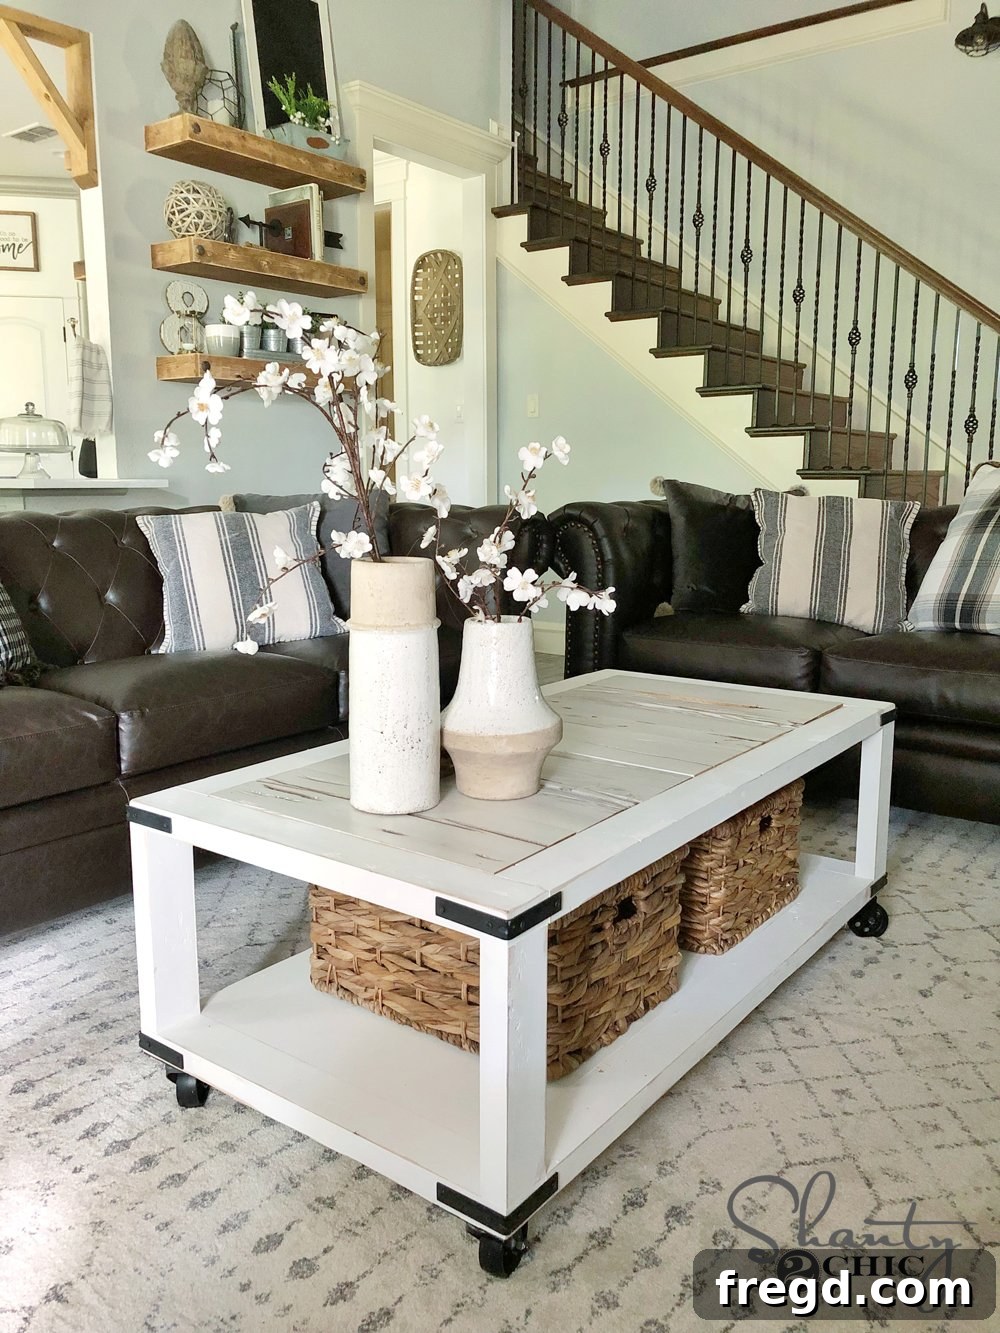
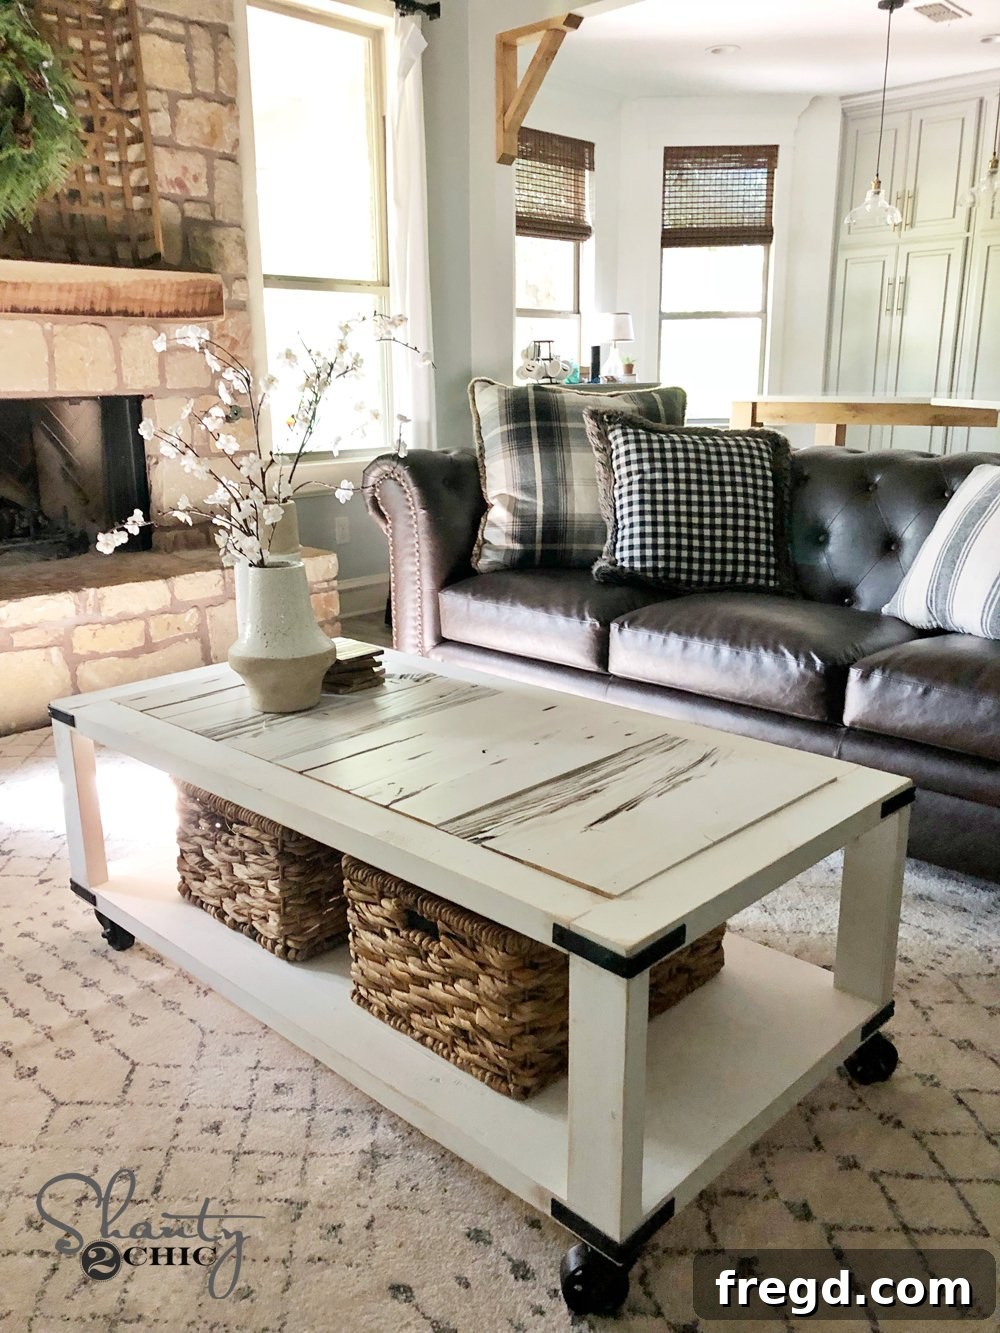
The allure of a barn wood coffee table lies in its authentic, weathered beauty and the story it tells. Reclaimed barn wood carries with it the marks of time and history, which adds an unparalleled depth and character that new wood simply can’t replicate. Each plank boasts unique imperfections, knots, and grain patterns that contribute to its distinctive charm, creating a focal point that feels both classic and contemporary. The “cart” design, featuring robust industrial casters and sturdy corner hardware, further enhances its unique appeal, blending rustic charm with practical mobility. This design allows you to easily move your coffee table for cleaning, rearranging furniture, or creating flexible living spaces for entertaining. Beyond its aesthetic appeal, this coffee table offers robust construction and ample surface area, making it both a beautiful and highly functional piece that will serve your household for years to come.
Essential Tools and Materials for Your DIY Coffee Table Project
Successful DIY projects begin with the right tools and quality materials. For this barn wood cart coffee table, you’ll need a combination of common woodworking tools and specific hardware that enhances both its structure and appearance. Remember, safety is paramount in any woodworking endeavor, so always wear appropriate safety gear, including eye protection, hearing protection, and dust masks, when operating power tools.
Key Materials for Your Rustic Coffee Table:
- Barn Wood Planks: These are the star of the show! We sourced our barn wood from Porter Barn Wood, an excellent supplier that offers convenient bundles specifically tailored for this project. This eliminates guesswork and ensures you have the exact amount needed. You have the flexibility to choose between pre-finished Snow White barn wood for an immediate elegant and distressed look, or unfinished barn wood if you prefer to apply your own custom stain, paint, or sealant to match your existing decor.
- Pre-finished Snow White barn wood bundle: Porter Barn Wood Shanty-2-Chic Barn Wood Cart Coffee Table Bundle
- Unfinished barn wood bundle: Porter Barn Wood Shanty-2-Chic Barn Wood Cart Coffee Table Bundle (No Finish)
- 2×4 Lumber: This forms the foundational structural framework for both the upper and lower shelves, as well as the robust legs.
- Plywood: Essential for the shelf bases, providing a stable, flat, and strong foundation for the barn wood planks.
- Wood Glue: A high-quality wood glue is crucial for creating strong, lasting, and durable joints between all wood components, enhancing the structural integrity of your table.
- Pocket Hole Screws: You’ll need various lengths (typically 1.25-inch and 2.5-inch) to securely fasten joints created with the pocket hole jig, ensuring concealed and robust connections.
- Brad Nails: Used for efficiently and discreetly attaching the barn wood planks to the plywood surfaces, providing a clean finish.
- White Paint: If you choose the pre-finished white barn wood for the top, a matching white paint will be needed for the table’s base framework to achieve a cohesive farmhouse aesthetic. The specific paint used is available here.
- Corner Hardware: These decorative and functional pieces add an authentic industrial touch, reinforce the corners, and enhance the cart-like appearance. Find the specific corner hardware used in this project.
- Metal Casters: The defining feature of a cart table, these provide mobility and contribute significantly to the industrial farmhouse look. Link to the metal casters.
- Optional: A stylish rug can beautifully complement your new coffee table and tie your living room decor together. Consider this inviting rug.
Recommended Tools for Effective Woodworking:
- Table Saw: Indispensable for precise, straight cuts and especially useful for ripping boards to custom widths, as we do for this project.
- Miter Saw or Circular Saw: Essential for accurately cross-cutting lumber to the specified lengths for the framework and legs.
- Pocket Hole Jig System (e.g., Kreg Jig): A must-have tool for creating strong, concealed, and professional-looking joints, which are central to this table’s construction.
- Drill/Driver: For pre-drilling pilot holes (to prevent wood splitting) and efficiently driving screws.
- Brad Nailer: For quickly and neatly attaching the barn wood planks with minimal visible fasteners.
- Tape Measure, Pencil, Speed Square: Fundamental for accurate marking, measuring, and ensuring square cuts and assemblies.
- Sander or Sanding Block: For smoothing rough edges and preparing surfaces for painting or staining, ensuring a professional finish.
- Wood Clamps: Crucial for holding pieces securely in place during gluing and screwing, ensuring tight and strong joints.
Step-by-Step Construction Guide for Your Farmhouse Coffee Table
1. Bottom Shelf Assembly: Building the Foundation
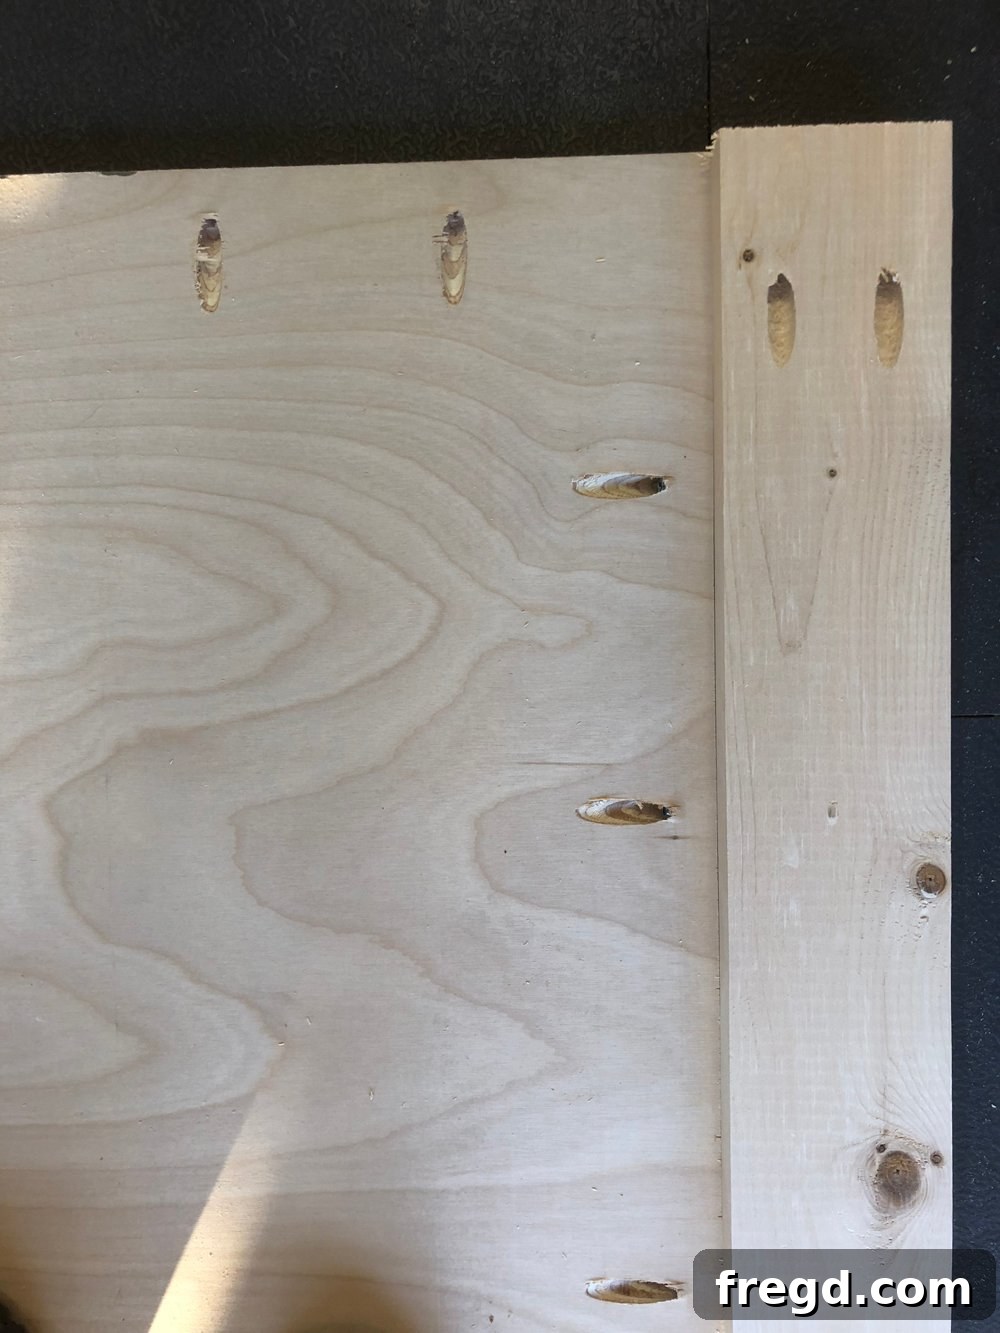
The construction of your coffee table begins with building the sturdy bottom shelf assembly. We utilized 2×4 boards for this section, and for a sleeker profile and to match our desired dimensions, we ripped these boards down to 3 inches wide using a table saw. While this step is optional, be aware that not ripping the boards will alter the overall dimensions of your final table, so adjust your measurements accordingly if you choose to keep the full 2×4 width. Precision is key here. Cut your plywood panel to the specified dimensions from the free plans. Next, create 3/4-inch pocket holes along all four sides of the plywood panel. These pocket holes will be crucial for securely attaching the plywood to the surrounding 2×4 framework. Additionally, add 1.5-inch pocket holes to the ends of each long 2×4 board. Apply a generous amount of wood glue to the edges of the plywood where the 2x4s will connect, then attach the long 2×4 sides to both sides of the plywood using 1.25-inch pocket hole screws. Ensure the plywood for the bottom shelf sits perfectly flush with the top surface of the 2×4 boards to create a seamless and strong foundation, which will contribute to the table’s overall stability.
2. Crafting the Table Top: The Showpiece Surface
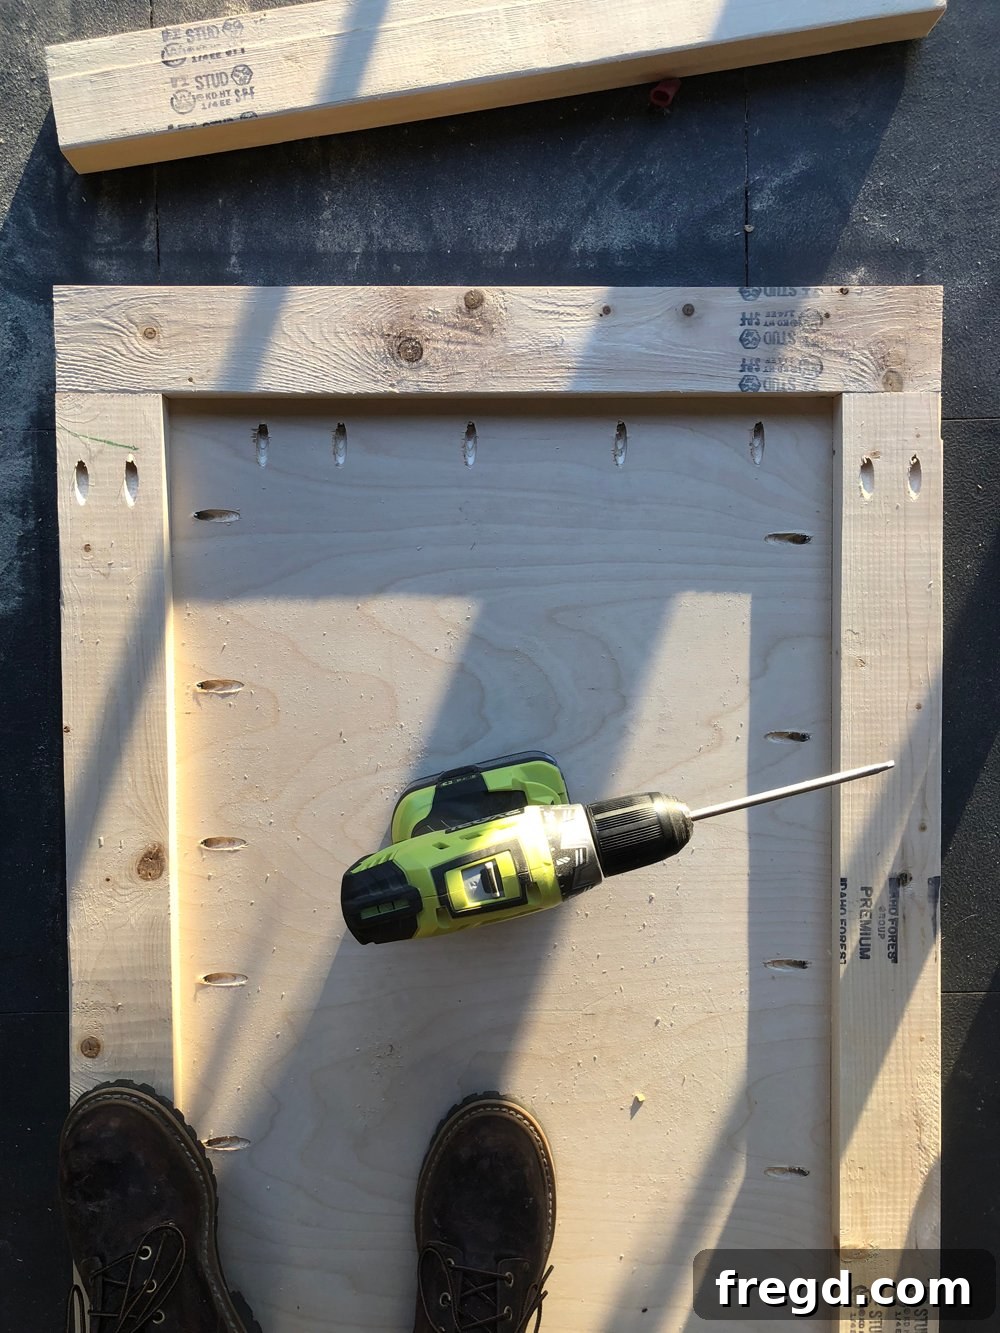
Next, we move to the top of the coffee table, which will be the primary surface and a major visual element. The assembly method for the table top is almost identical to the bottom shelf, with a crucial difference in the depth of the plywood, as detailed in the free plans. This slight modification ensures proper integration with your barn wood planks later. Begin by gathering a couple of scrap pieces of the barn wood planks you intend to use for the top. Lay these scraps flat on your workbench, then place the pre-cut plywood panel for the top directly on top of them, with the pocket holes facing upwards. This elevates the plywood slightly, making the attachment process easier and ensuring your screws don’t extend past the surface. Apply wood glue to the edges of the plywood where the 2×4 framework will connect, then securely attach the long 2×4 boards to the plywood using 1.25-inch pocket hole screws. Once the long sides are firmly in place, proceed to attach the shorter end 2×4 pieces. For these ends, you will use a combination of both 3/4-inch and 2.5-inch pocket hole screws to ensure maximum strength and stability, given the different joining points and the forces that the table top will endure. This meticulous approach ensures a durable, flat, and robust surface ready for your beautiful barn wood planks.
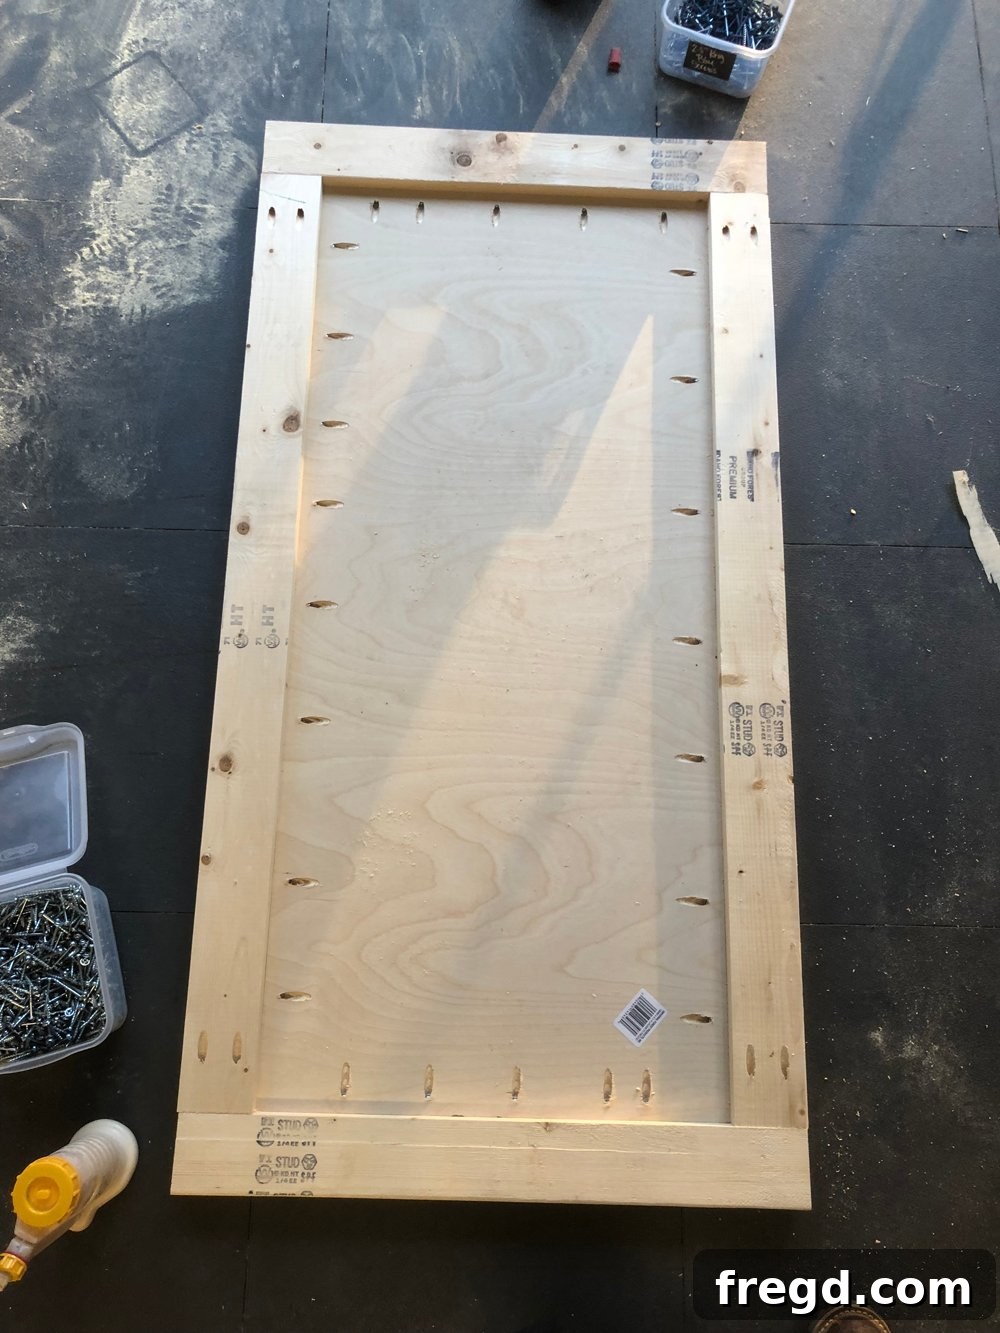
3. Assembling the Legs: Providing Essential Support and Height
Now it’s time to give your table its proper height and foundational structure by attaching the legs. Each leg is crafted from a 2×4 piece, cut precisely to 12 inches in length according to the plans. On one end of each leg piece, create 1.5-inch pocket holes. These strategically placed holes will allow for a strong, concealed, and aesthetically pleasing attachment to the underside of the table top. Apply a sufficient amount of wood glue to the end of each leg where it will meet the table top surface. Carefully position each leg at its designated corner, ensuring it sits perfectly flush with both the long and short sides of the table top assembly. This flush fit is crucial for stability and a clean finish. Secure the legs to the table top using 2.5-inch pocket hole screws, driving them firmly into place. This method provides robust support and maintains the clean lines and sturdy construction characteristic of quality farmhouse furniture.
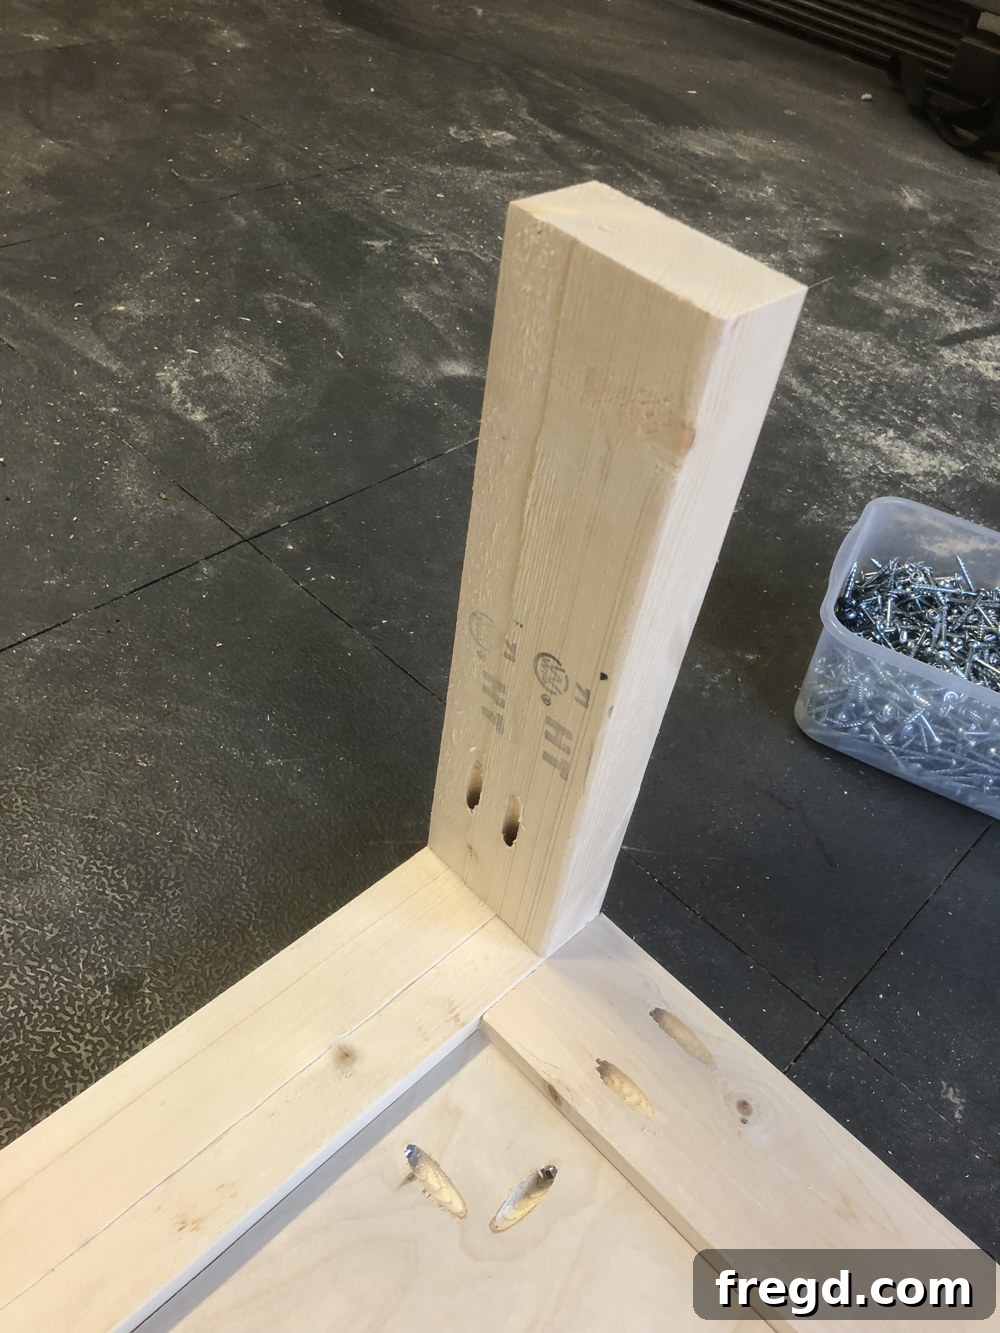
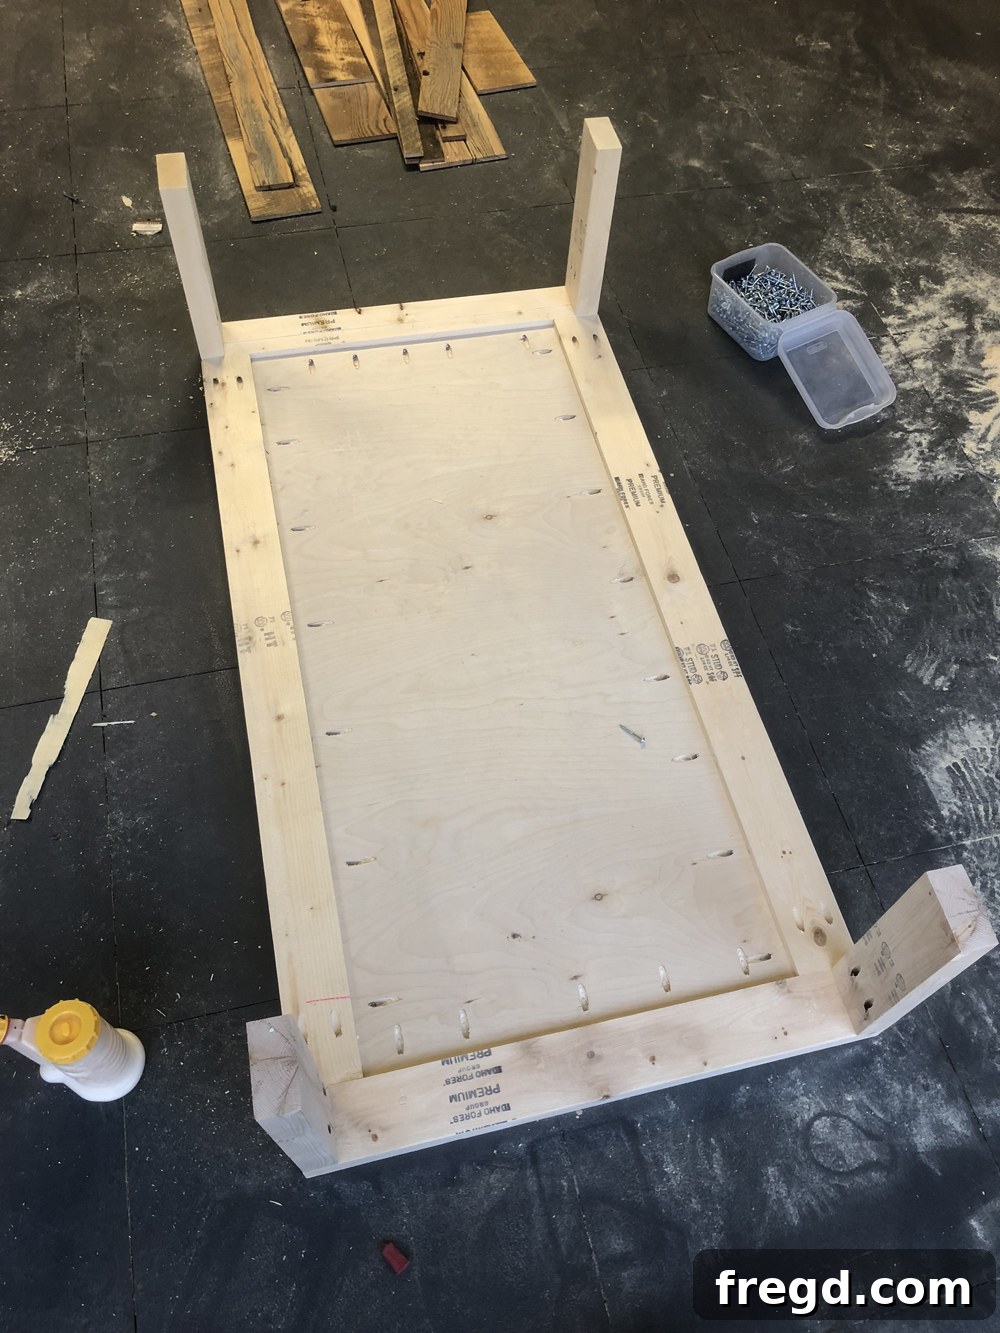
4. Attaching the Bottom Shelf: Completing the Main Framework
With the legs securely attached to the table top, the next crucial step is to integrate the bottom shelf, completing the main framework of your coffee table. For ease of assembly and to ensure accurate alignment, lay the entire table top assembly face down on your workbench or a stable flat surface, allowing the newly attached legs to point upwards. Apply wood glue generously to the bottom end of each leg piece. Then, carefully invert the pre-assembled bottom shelf (from Step 1) and place it onto the legs, aligning each leg precisely with its corresponding corner on the shelf. Double-check that all legs are perfectly flush with the edges of the bottom shelf framework. This alignment is vital for the table’s structural integrity and aesthetic appeal. Once alignment is confirmed, secure the legs to the bottom shelf using 2.5-inch wood screws or Spax screws, driving them through the base of the bottom shelf and firmly into each leg. This creates a strong, stable, and durable structure that will withstand daily use and provide excellent support for items placed on the lower shelf.
5. Laying the Barn Wood Planks & Finishing Touches: Bringing Your Table to Life
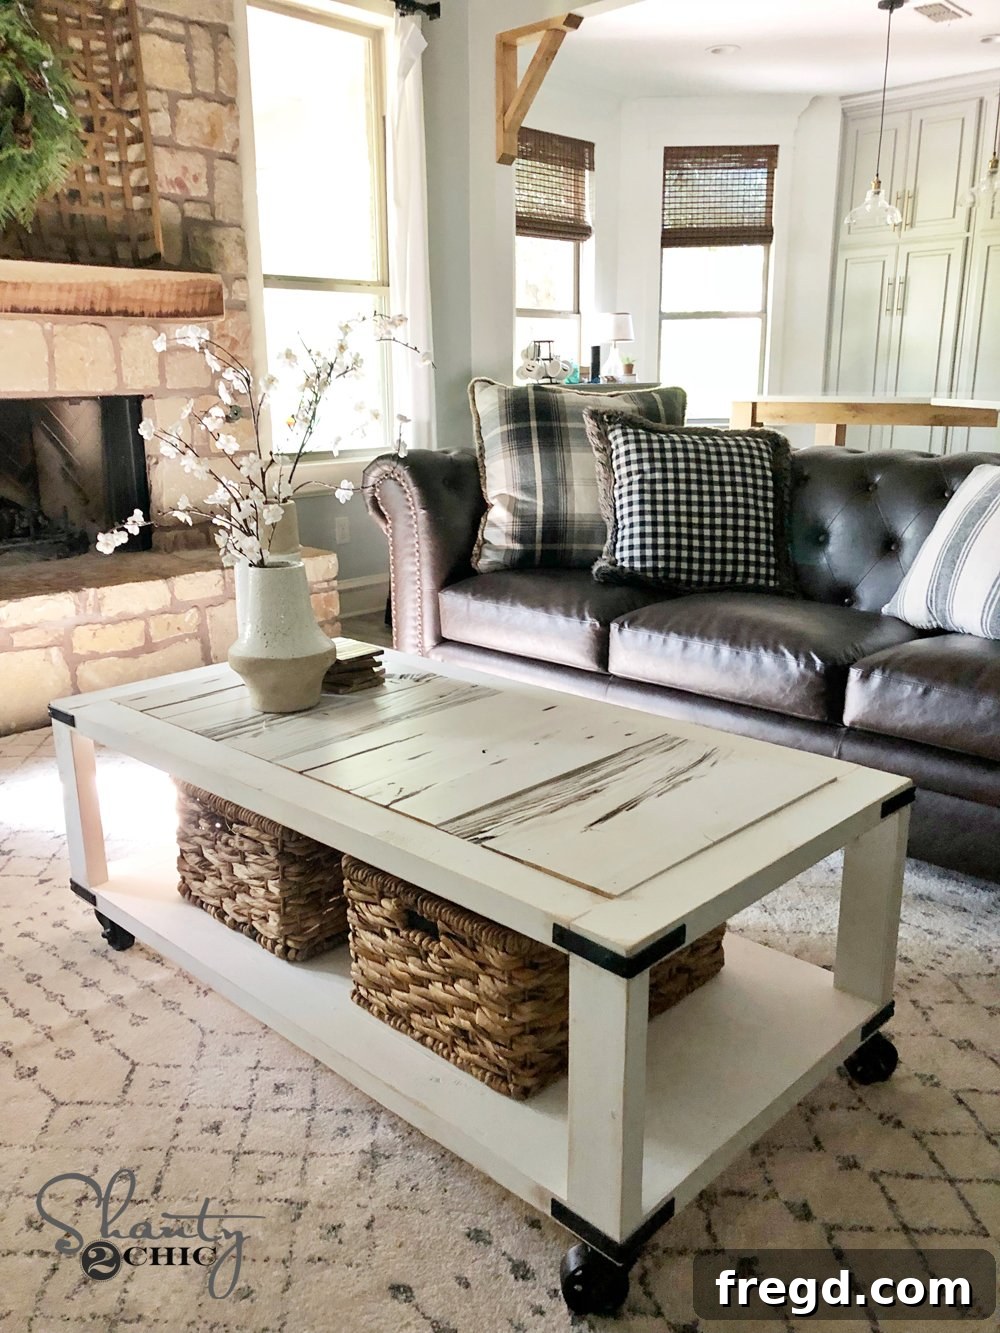
The moment has arrived to add the defining characteristic of your coffee table: the beautiful barn wood planks. Cut each plank to 20 inches in length, or as specified precisely in your free plans, ensuring a consistent and clean appearance across the table top. Before permanent attachment, if you are using unfinished barn wood, now is an excellent time to consider any pre-staining or painting you wish to do on the planks, or apply a protective sealant. If you’re using pre-finished white barn wood from Porter Barn Wood, as we did, it’s often best practice to paint the table base framework at this stage, prior to attaching the planks, to avoid overspray or uneven coverage on your finished barn wood. Once ready, apply wood glue to the top surface of your plywood base, then carefully lay each barn wood plank into place. Ensure they are snugly fitted and aligned to create a seamless surface. Secure each plank using a brad nailer. A vital tip for longevity and safety: always check that the length of your brad nails is not longer than the combined thickness of the planks and the underlying plywood to prevent them from protruding through the other side. Once all planks are in place, the core construction is complete! You can now proceed with any final sanding, painting, or staining of the base if not already done, and then attach the decorative corner hardware and the functional metal casters. These final elements not only enhance the table’s rustic aesthetic but also complete its cart functionality, making it truly versatile. Behold the striking character of these planks, ready to elevate your home decor:
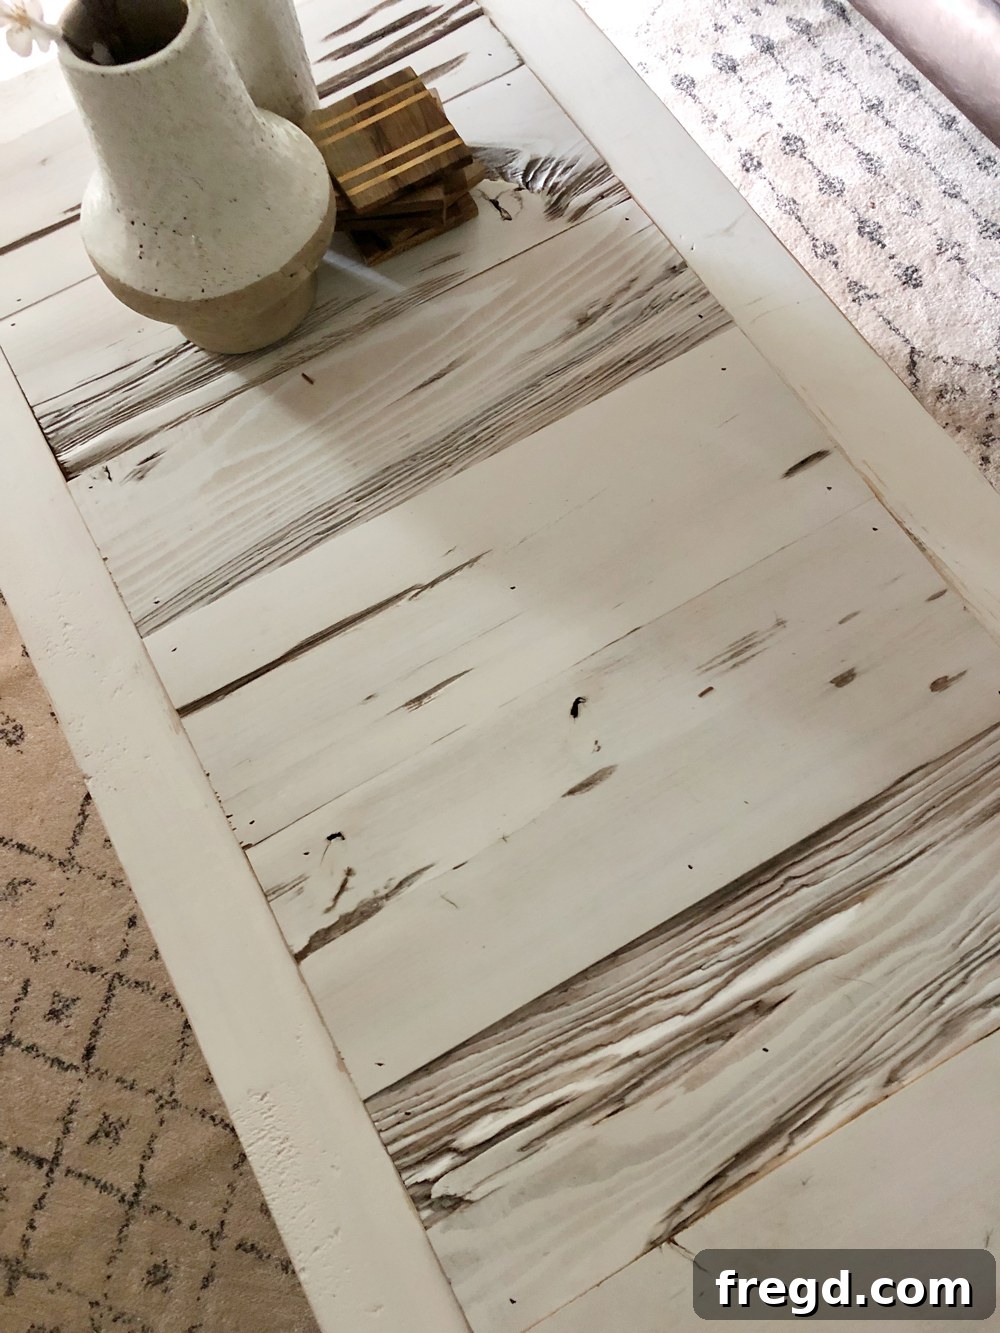
Customization and Styling Your Farmhouse Coffee Table
One of the greatest joys of DIY projects is the ability to customize and personalize your creation to perfectly reflect your taste and complement your existing home aesthetic. While our guide provides a fantastic blueprint for a stunning barn wood cart coffee table, feel free to make it uniquely yours. Consider experimenting with different stain colors for the barn wood – a rich, dark walnut can evoke a more traditional rustic look, while a light gray wash might suit a coastal farmhouse or Scandinavian-inspired vibe. If you opt to use new wood instead of reclaimed barn wood, you can achieve an aged appearance by experimenting with distressing techniques, such as sanding down edges, adding faux wormholes, or applying a reactive stain. Different types of casters or corner brackets can also dramatically change the table’s character, from heavy-duty industrial to more refined vintage or even modern styles.
Styling your new coffee table is another exciting step where your personality can shine. Adorn it with your favorite decorative accents: a stack of inspiring coffee table books, a charming potted plant, a rustic wooden tray holding remotes, or a collection of scented candles. Think about the textures and colors that will enhance the barn wood’s natural beauty. Remember, a coffee table isn’t just a surface; it’s an opportunity to express your personal style and create a warm, inviting focal point in your living room, making it truly a reflection of your home.
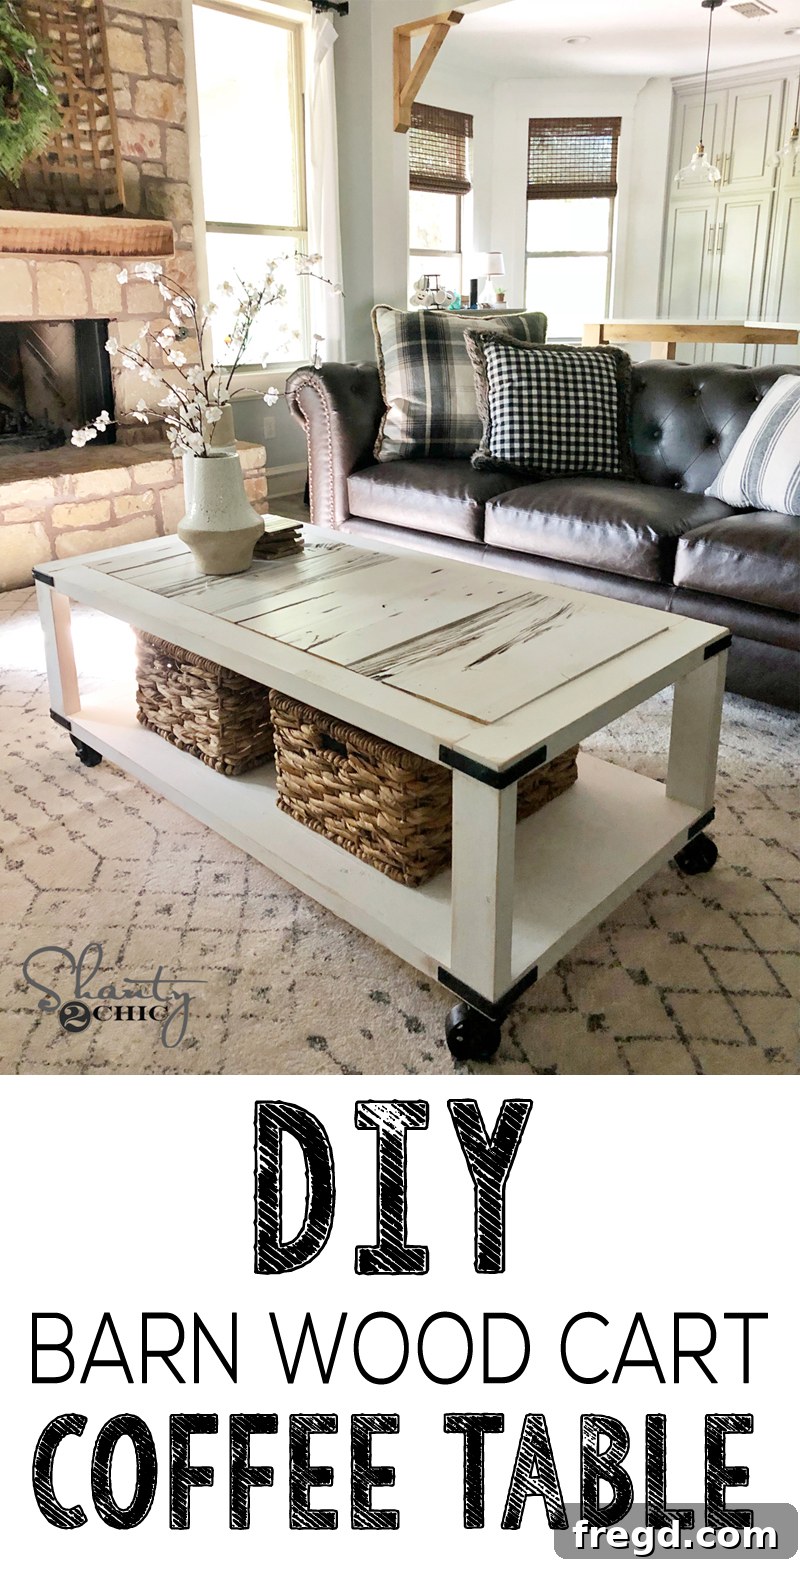
And here it is one more time, proudly finished and ready to grace your home, showcasing the perfect blend of craftsmanship and style!
Conclusion: Your Handcrafted Masterpiece Awaits!
Congratulations on embarking on and completing your very own DIY Barn Wood Cart Coffee Table! This project is more than just building a piece of furniture; it’s about adding a touch of personalized charm and robust functionality to your home. Each knot, grain, and weathered mark on the barn wood will tell its own unique story, making your coffee table truly one-of-a-kind and a cherished part of your living space. We hope this comprehensive guide, combined with our free plans and video tutorial, has empowered you with the confidence and skills to create a beautiful and enduring piece of furniture. The satisfaction of stepping back and admiring your handiwork, knowing you built it yourself, is unparalleled and a true reward for your efforts.
Don’t hesitate to share your finished projects with us and inspire fellow DIYers in our community. We love seeing how you’ve brought your own creative touch to this design. Happy building, and enjoy your stunning new farmhouse coffee table!