Craft Your Perfect Game Night: Build a Stylish DIY Portable Mahjong Table
For those who love the strategic fun of Mahjong, having a dedicated table elevates the entire experience. While pre-made tables are an option, building your own DIY Portable Mahjong Table means you get a custom piece that perfectly fits your style and space. This project isn’t just about functionality; it’s about creating a beautiful, sturdy, and easily storable piece of furniture that’s ready for any game night. Inspired by a recent dive into the Mahjong craze, we set out to design a table that combines practicality with our signature Shanty-2-Chic flair. The result is a foldable, compact, and absolutely charming table that makes racking and rolling a true delight.
Whether you’re battling for a clear hand in a cozy apartment, hosting friends, or simply need a versatile surface that can be tucked away when not in use, this DIY Mahjong table is an ideal solution. Its thoughtful design prioritizes ease of storage and robust construction, ensuring it stands up to countless intense Mahjong rounds. Best of all, it embodies the satisfaction of creating something beautiful and functional with your own hands. Get ready to transform your living space and your game nights with this essential woodworking project!
Want to see the entire build process in action? Watch our comprehensive how-to video HERE!
Let’s Get Started on Your Dream Mahjong Table!
🪚 Essential Supplies + Tools for Your Mahjong Table Project
Gathering all your materials and tools before you begin is key to a smooth and efficient build. For this DIY portable Mahjong table, we’ve selected components that ensure both durability and a beautiful finish, while keeping the construction process straightforward for DIYers of all skill levels. Here’s what you’ll need:
Lumber
- ¾″ Plywood (for tabletop): We recommend using a high-quality hardwood plywood for a smooth, stable playing surface. A 48″ x 48″ sheet is a great starting point, allowing ample room for Mahjong tiles and player convenience.
- 2×4 Boards Ripped to 2″ Wide (for trim): These will form the sturdy perimeter of your tabletop. Ripping them down from standard 2x4s gives you consistent, strong trim pieces that beautifully frame the playing surface. You can also source 2x2s or other trim stock, but the ripped 2x4s provide excellent rigidity.
- Scrap Plywood (for foot pads): Small pieces of ¾″ plywood are perfect for this. They don’t need to be aesthetically perfect, as they will be hidden, but they should be strong enough to anchor the folding leg hinges securely.
Hardware & Materials
- Folding Table Leg Hinges: The cornerstone of portability for this project! Look for heavy-duty hinges designed for folding tables, as they will ensure your table remains stable during play and folds neatly for storage. (You can find excellent options on Amazon, designed for robust use.)
- 4 Turned Wood Legs: While the hinges allow the table to fold, these legs provide the classic aesthetic. Choose a style that complements your home decor. (Find beautiful turned wood legs here on Amazon!)
- 1¼″ Kreg Screws (for foot pads and hinges): These specialized screws are ideal for pocket hole joinery and offer superior holding power in wood, perfect for securing critical components like the foot pads and hinges.
- 1½″ Pocket Hole Screws (for trim): Specifically designed for connecting pieces using pocket holes, these screws create strong, concealed joints for the tabletop trim.
- Wood Glue: A good quality wood glue is essential for reinforcing all your joints, ensuring long-lasting strength and durability.
- Beaded Wood Trim (optional but adorable!): This decorative trim adds a touch of elegance and detail to your table. It’s a simple addition that significantly enhances the “Shanty-2-Chic” aesthetic.
- Varathane Early American Stain: Our preferred choice for a warm, classic, and inviting finish. Feel free to choose a stain color that matches your personal preference or existing decor.
- Polycrylic or Top Coat of Choice: A clear protective topcoat is crucial for shielding your table from spills, scratches, and everyday wear and tear, ensuring it remains beautiful for years to come.
Tools
- Kreg Rebel Pocket-Hole Joiner (or any ¾″ pocket hole jig): This revolutionary tool makes creating strong, hidden joints incredibly easy. While the Rebel is our new favorite, any reliable ¾″ pocket hole jig will work.
- Kreg 20V Brushless Drill: A powerful and reliable drill is indispensable for driving screws and making the build process efficient. The brushless motor offers improved battery life and performance.
- Miter Saw (for 45° trim cuts): Essential for making precise angled cuts on your trim pieces, ensuring clean, tight corners for a professional finish.
- Nail Gun: For quickly and securely attaching the decorative beaded trim without leaving large holes. A brad nailer is perfect for this.
- Sander: An orbital sander or block sander is necessary for preparing your wood for finishing, ensuring a smooth surface for staining and topcoat application.
- Clamps: Various clamps (bar clamps, C-clamps) will be invaluable for holding pieces together while glue dries and screws are driven, especially when attaching the trim.
🪵 How to Build Your Stunning DIY Portable Mahjong Table: A Step-by-Step Guide
Now that you’ve gathered all your materials, let’s dive into the exciting process of bringing your portable Mahjong table to life. Each step is designed to be clear and manageable, ensuring a rewarding DIY experience.
Step 1: Prepare Your Tabletop with Precision Pocket Holes
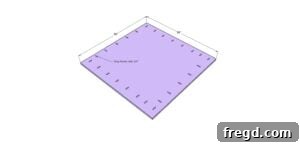
The foundation of your Mahjong table is the ¾″ plywood tabletop. Begin by accurately cutting your plywood to the desired dimensions (a common size is 36″x36″ or 40″x40″ for Mahjong, but adjust based on your needs). Once your tabletop is sized, it’s time to drill the pocket holes that will secure the trim. Using your Kreg Rebel Pocket-Hole Joiner, set the depth collar for ¾″ material. Drill pocket holes along the underside edges of the plywood where the trim will attach. We recommend spacing these holes every 6-8 inches for optimal strength. This technique creates incredibly strong, hidden joints, essential for a stable and beautiful table. The new battery-powered Kreg Rebel makes this step incredibly simple; its compact and portable design means you can bring the jig directly to your tabletop, eliminating the struggle of maneuvering large sheets through a stationary machine. This efficiency not only saves time but also ensures precise, consistent pocket holes every single time.
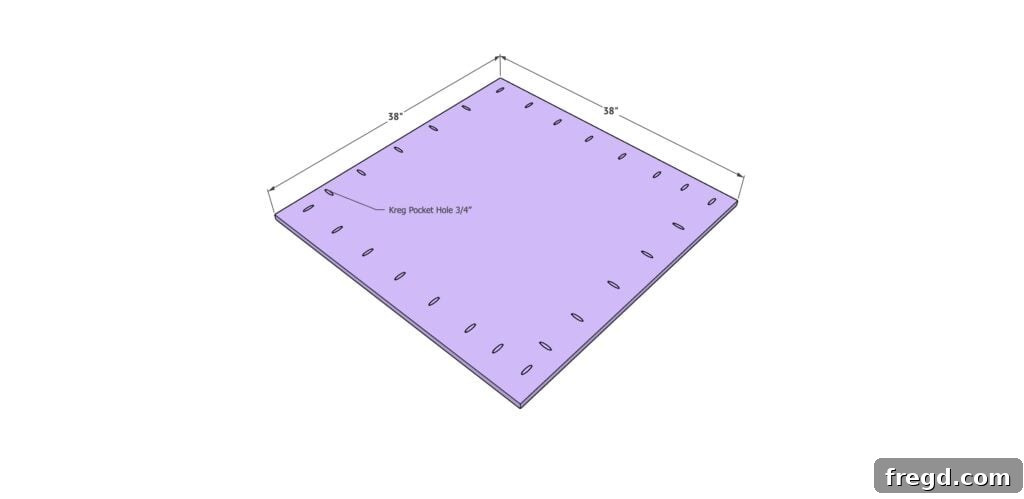
Our New Favorite Tool: The Kreg Rebel Pocket-Hole Joiner
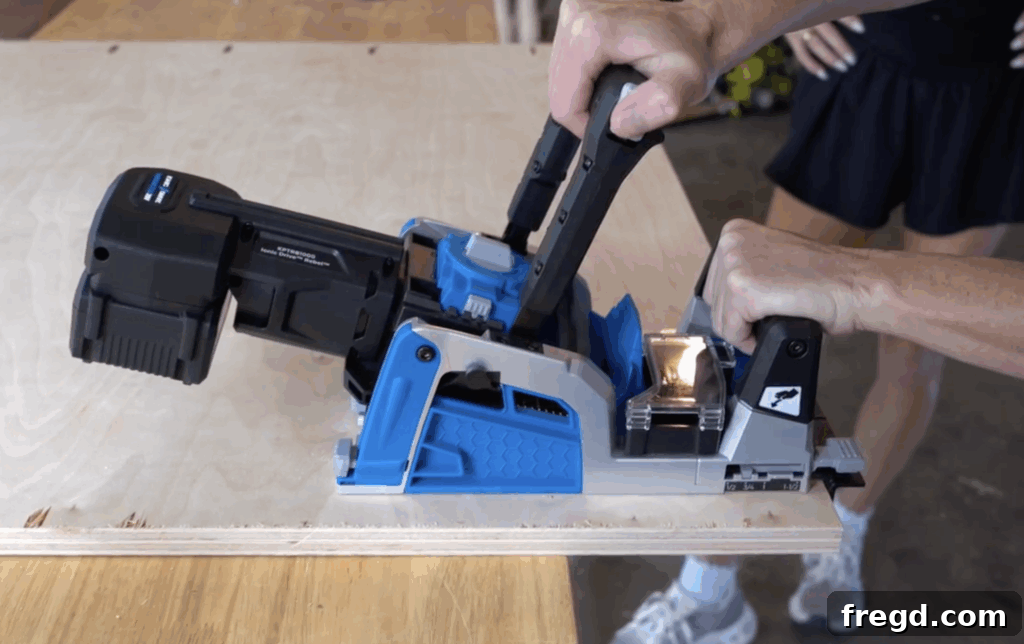
We’ve got a new woodworking obsession, and its name is the Kreg Rebel Pocket-Hole Joiner! As long-time enthusiasts of Kreg tools, we’ve used the robust Kreg Foreman for years. However, this compact powerhouse is truly a game-changer for many projects, especially those involving larger pieces like tabletops or furniture frames. Imagine the Foreman’s precision and power, but in a portable, battery-powered package that you can take anywhere in your shop, garage, or even on-site. The Rebel is designed to sit conveniently on your workbench, bringing the drilling action closer to your project. This means no more wrestling unwieldy boards or panels through a stationary jig; instead, you simply bring the Rebel to your material. Its quick and easy operation ensures perfect pocket holes with every press of the lever, making joinery faster and more efficient than ever before. We particularly appreciate that it maintains the familiar built-in material stops and intuitive depth settings we’ve come to rely on from Kreg, making setup a breeze. For this Mahjong table, we effortlessly set it to ¾″, drilled our holes, and were ready for the next step in no time. If you’re looking to elevate your DIY woodworking game, save space, or simply want a more flexible and powerful pocket hole solution, the Kreg Rebel is an investment that truly pays off. It’s compact, incredibly powerful, and unequivocally Shanty-approved! 💪
Step 2: Create and Secure the Tabletop Trim
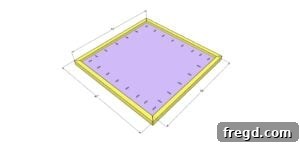
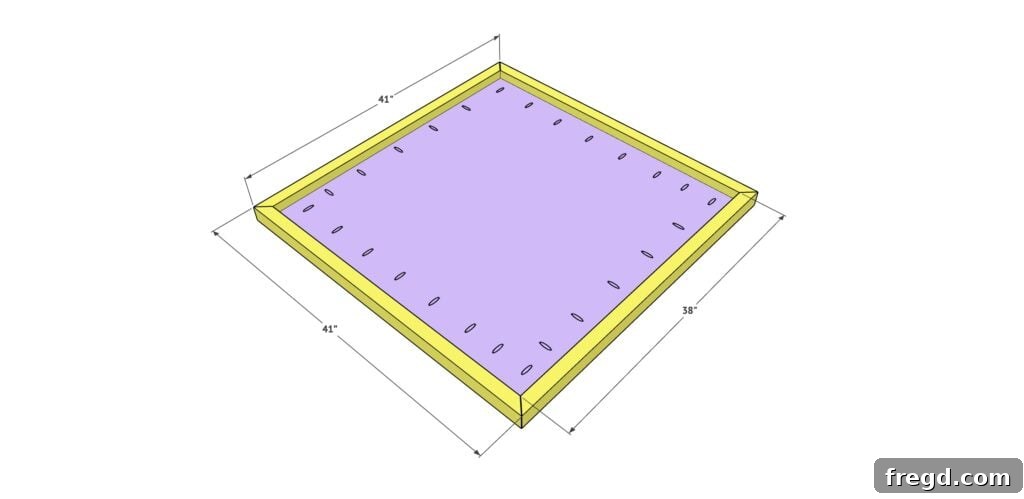
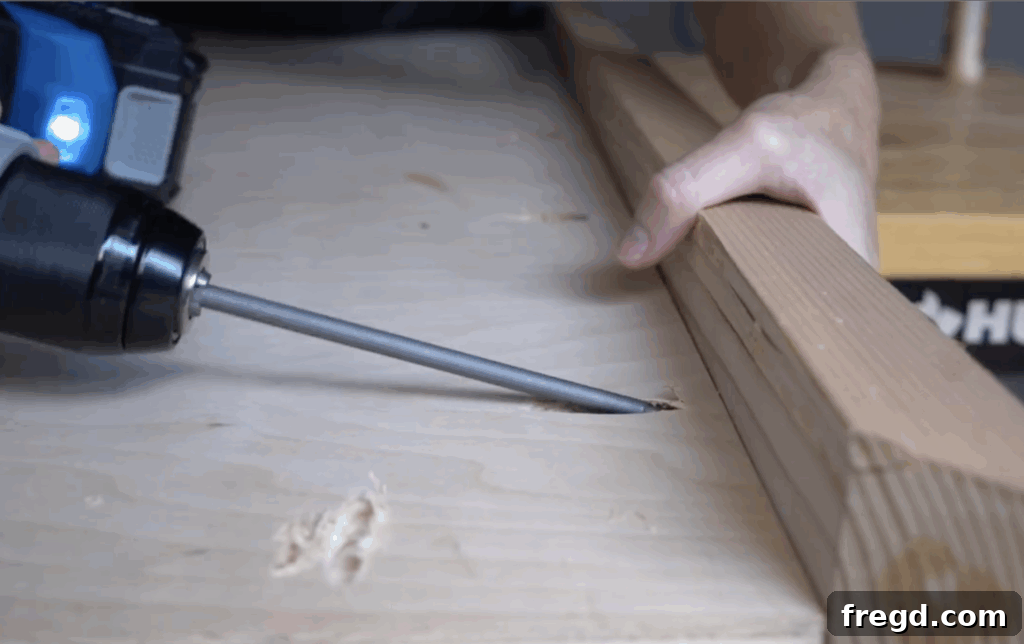
With your pocket holes drilled, it’s time to add the protective and decorative trim to your tabletop. Take your 2×4 boards and rip them down to 2″ wide. If you don’t have a table saw for ripping, you can often find pre-cut 2x2s or other suitable trim stock, though ripping from 2x4s offers better stability. Next, using your miter saw, carefully cut each end of your trim pieces at a 45° angle. This creates perfect mitered corners that will join seamlessly around your tabletop. Before attaching, apply a generous but even bead of wood glue along each edge of the plywood tabletop. Then, carefully align the trim pieces, ensuring your mitered corners fit snugly. Use 1½″ pocket hole screws to firmly attach the trim to the tabletop, driving them into the pocket holes you drilled in Step 1. To ensure the cleanest possible fit and prevent gaps, use clamps on each corner and along the lengths of the trim while the glue dries and you drive the screws. As a fun aside, for this particular project, we actually salvaged wood from an old kitchen table for the trim, embodying the “reduce, reuse, recycle” philosophy while adding a touch of sentimental value to the new build!
Step 3: Reinforce Leg Attachments with Foot Pads
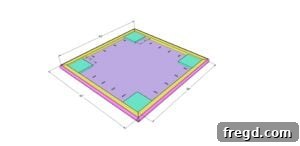
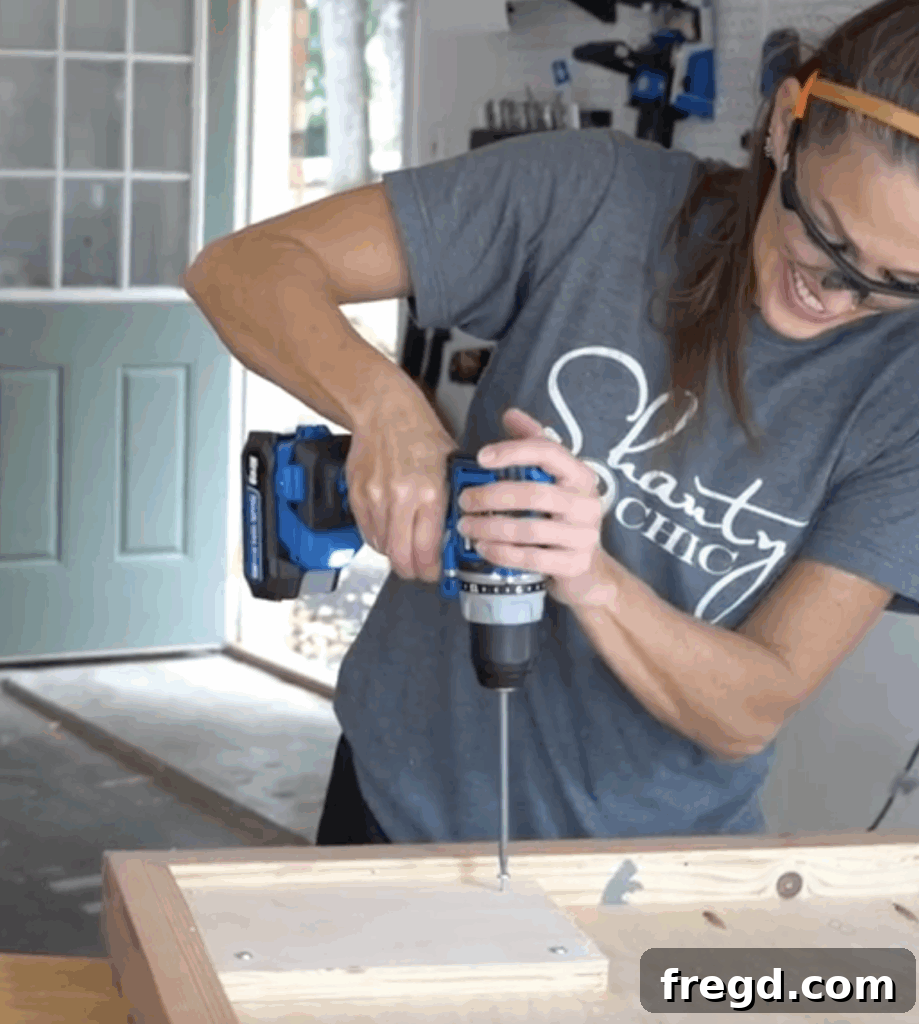
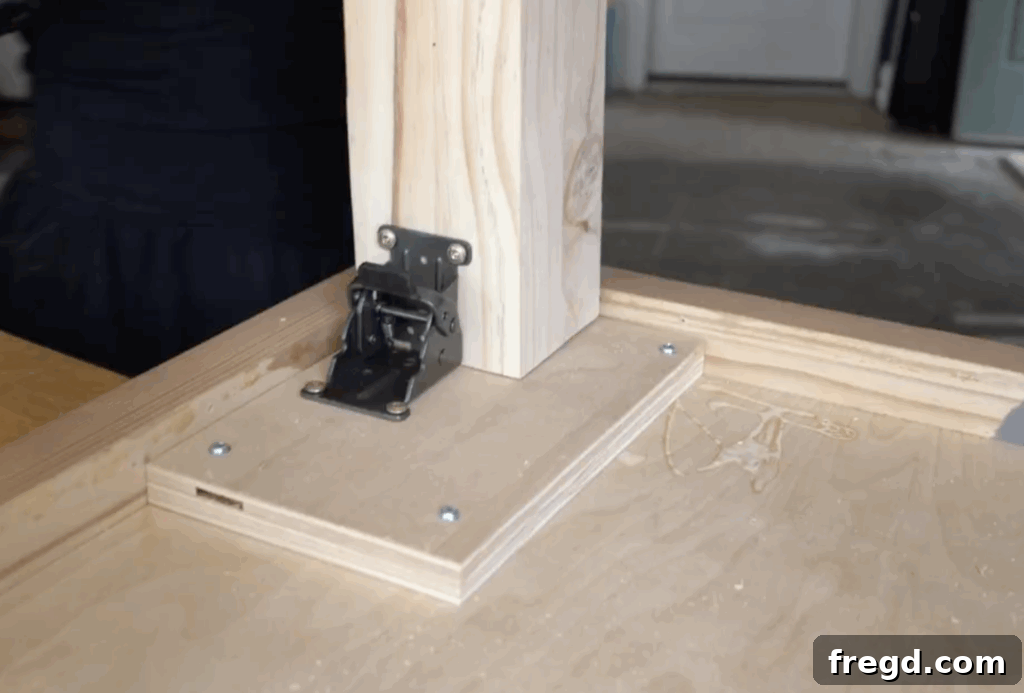
Before you attach the folding legs, it’s crucial to create a robust anchoring point. Cut four small square pieces from your scrap plywood; these will serve as foot pads. Apply wood glue to one side of each foot pad, then position them on the underside of each corner of your table, where the folding leg hinges will eventually attach. The foot pads provide a thicker, more stable surface for the hinge screws to bite into, significantly increasing the structural integrity of the legs. This extra reinforcement prevents wobbling and ensures your table remains rock-solid, even during the most animated Mahjong sessions. Secure each foot pad in place using 1¼″ Kreg screws, driving them through the foot pad and into the tabletop. Allow the glue to cure fully before proceeding.
Step 4: Install the Highly Functional Folding Legs
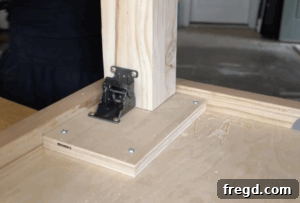
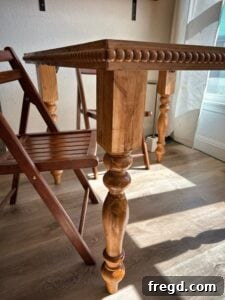
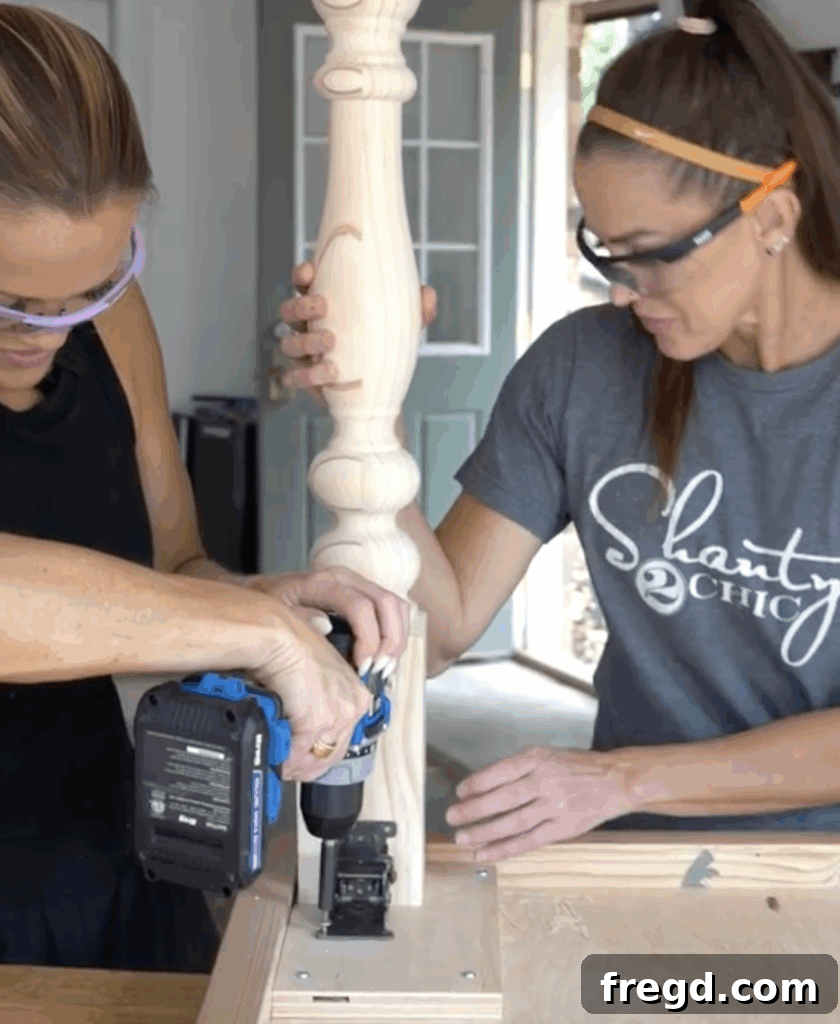
Now for the exciting part that makes this table truly portable: attaching the folding legs! We opted for heavy-duty folding hinges that are designed for longevity and ease of use, making your table incredibly simple to store and transport. (You can find the exact sturdy hinges we used HERE on Amazon!) Carefully position each hinge onto the foot pads you just installed. It’s critical to correctly orient each hinge so that the leg folds inwards, flat against the underside of the table, rather than outward. Test the folding mechanism before fully securing. Once properly aligned, attach the hinges and your chosen turned wood legs using 1¼″ screws. Double-check that all four legs fold flat and securely when retracted, and stand firmly when extended. A helpful tip: ensure the grain direction of your foot pads runs parallel to the direction the leg will fold. This simple detail provides a stronger anchor point for the hinge, further enhancing the stability of your portable table during intense gameplay.
Step 5: Embellish with Charming Decorative Trim
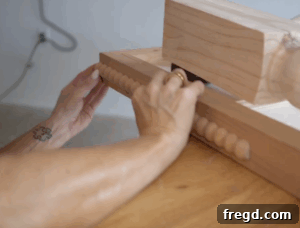
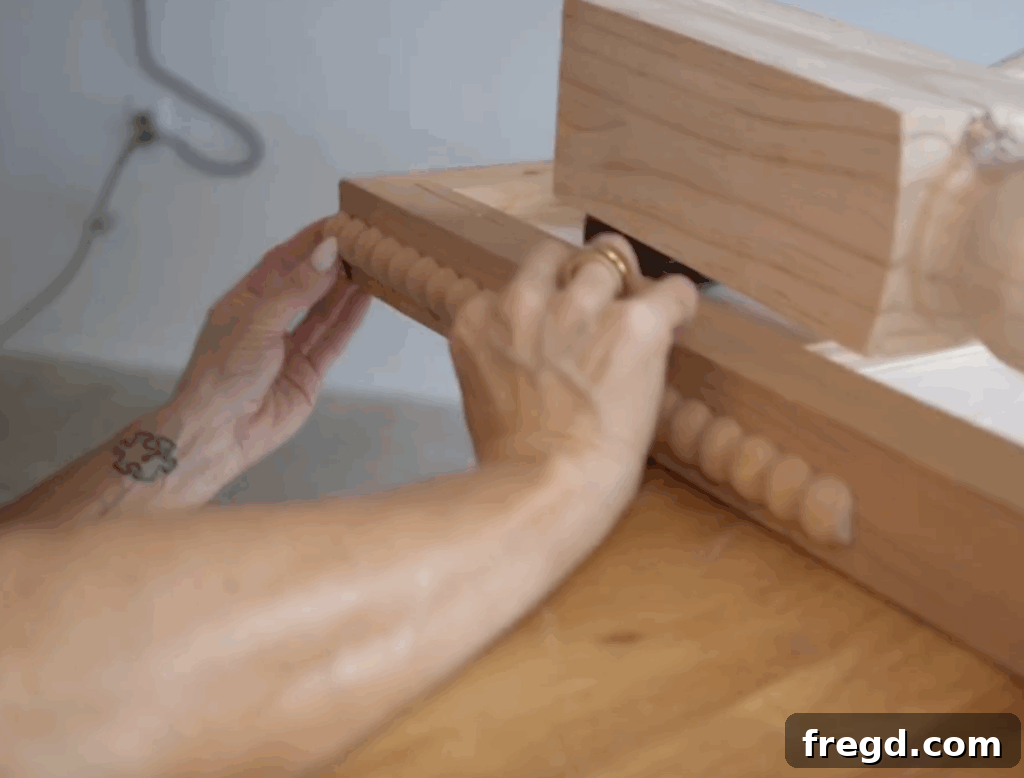
To infuse this Mahjong table with that unique Shanty-2-Chic charm and elevate it beyond a basic game surface, we added a beautiful beaded wood trim around the perimeter of the tabletop. This small, yet impactful, decorative detail makes a world of difference, transforming the table from functional to truly special. To attach, apply a thin bead of wood glue along the top edge of your existing trim. Carefully position the beaded trim, pressing it firmly into the glue. For added security and immediate hold while the glue dries, use a nail gun to fire a few small brad nails through the beaded trim and into the tabletop’s edge. Be mindful of nail length to avoid piercing through the playing surface. This step is entirely optional, but it offers a wonderful opportunity to personalize your table with an extra layer of craftsmanship and style, setting it apart from any store-bought alternative.
Step 6: Stain and Seal for a Lasting Beautiful Finish
With all the construction complete, it’s time to bring out the natural beauty of the wood and protect your hard work. Begin by thoroughly sanding the entire table, paying close attention to any rough spots, sharp edges, or glue squeeze-out. Start with a medium-grit sandpaper (e.g., 120-grit) to smooth out imperfections, then move to a finer grit (e.g., 180 or 220-grit) for a silky-smooth finish. Once sanded, wipe away all dust with a tack cloth or a slightly damp rag, ensuring the surface is perfectly clean and ready for staining. For that warm, classic tone we adore, we finished our table with Varathane Early American stain. Apply the stain evenly following the wood grain, allowing it to penetrate for the recommended time before wiping off any excess. For best results, you might apply a second coat after the first has dried, depending on your desired depth of color. After the stain has fully dried, apply a clear protective topcoat, such as Polycrylic. This step is crucial for sealing the wood and protecting it from moisture, spills, and daily wear and tear. Apply multiple thin coats, sanding lightly with very fine grit sandpaper (e.g., 320-grit) between coats for a supremely smooth, durable finish. Allow the topcoat to cure fully according to the manufacturer’s instructions before putting your beautiful new Mahjong table to use.
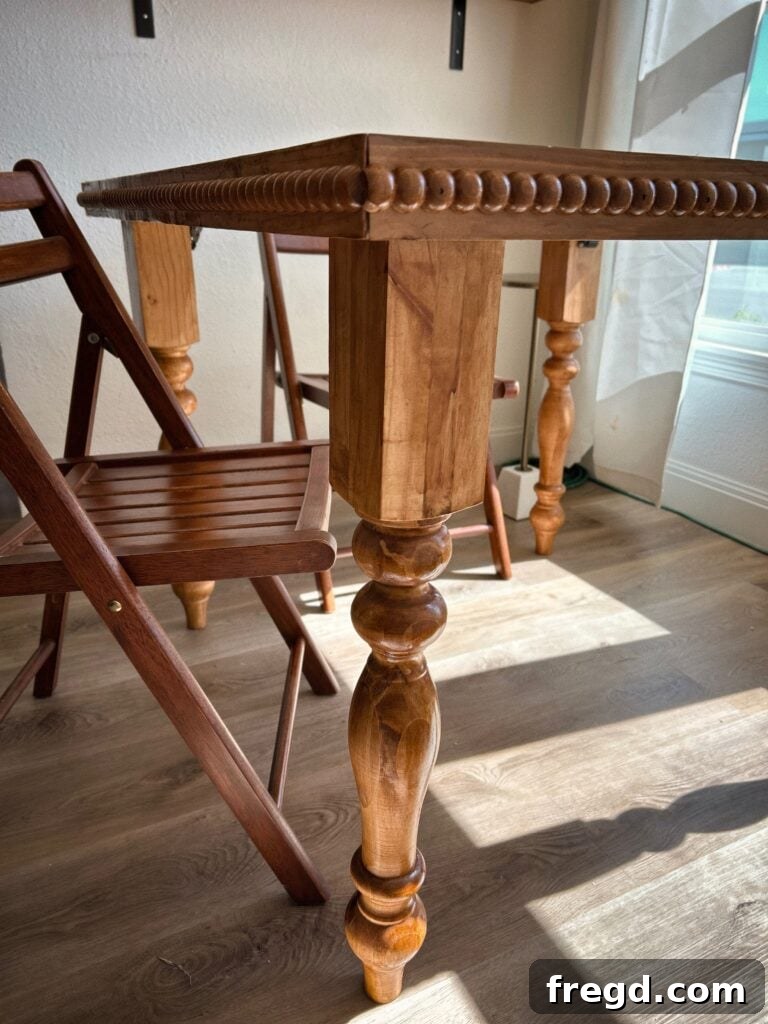
🀄 Game Night Ready: Enjoy Your Custom Mahjong Table!
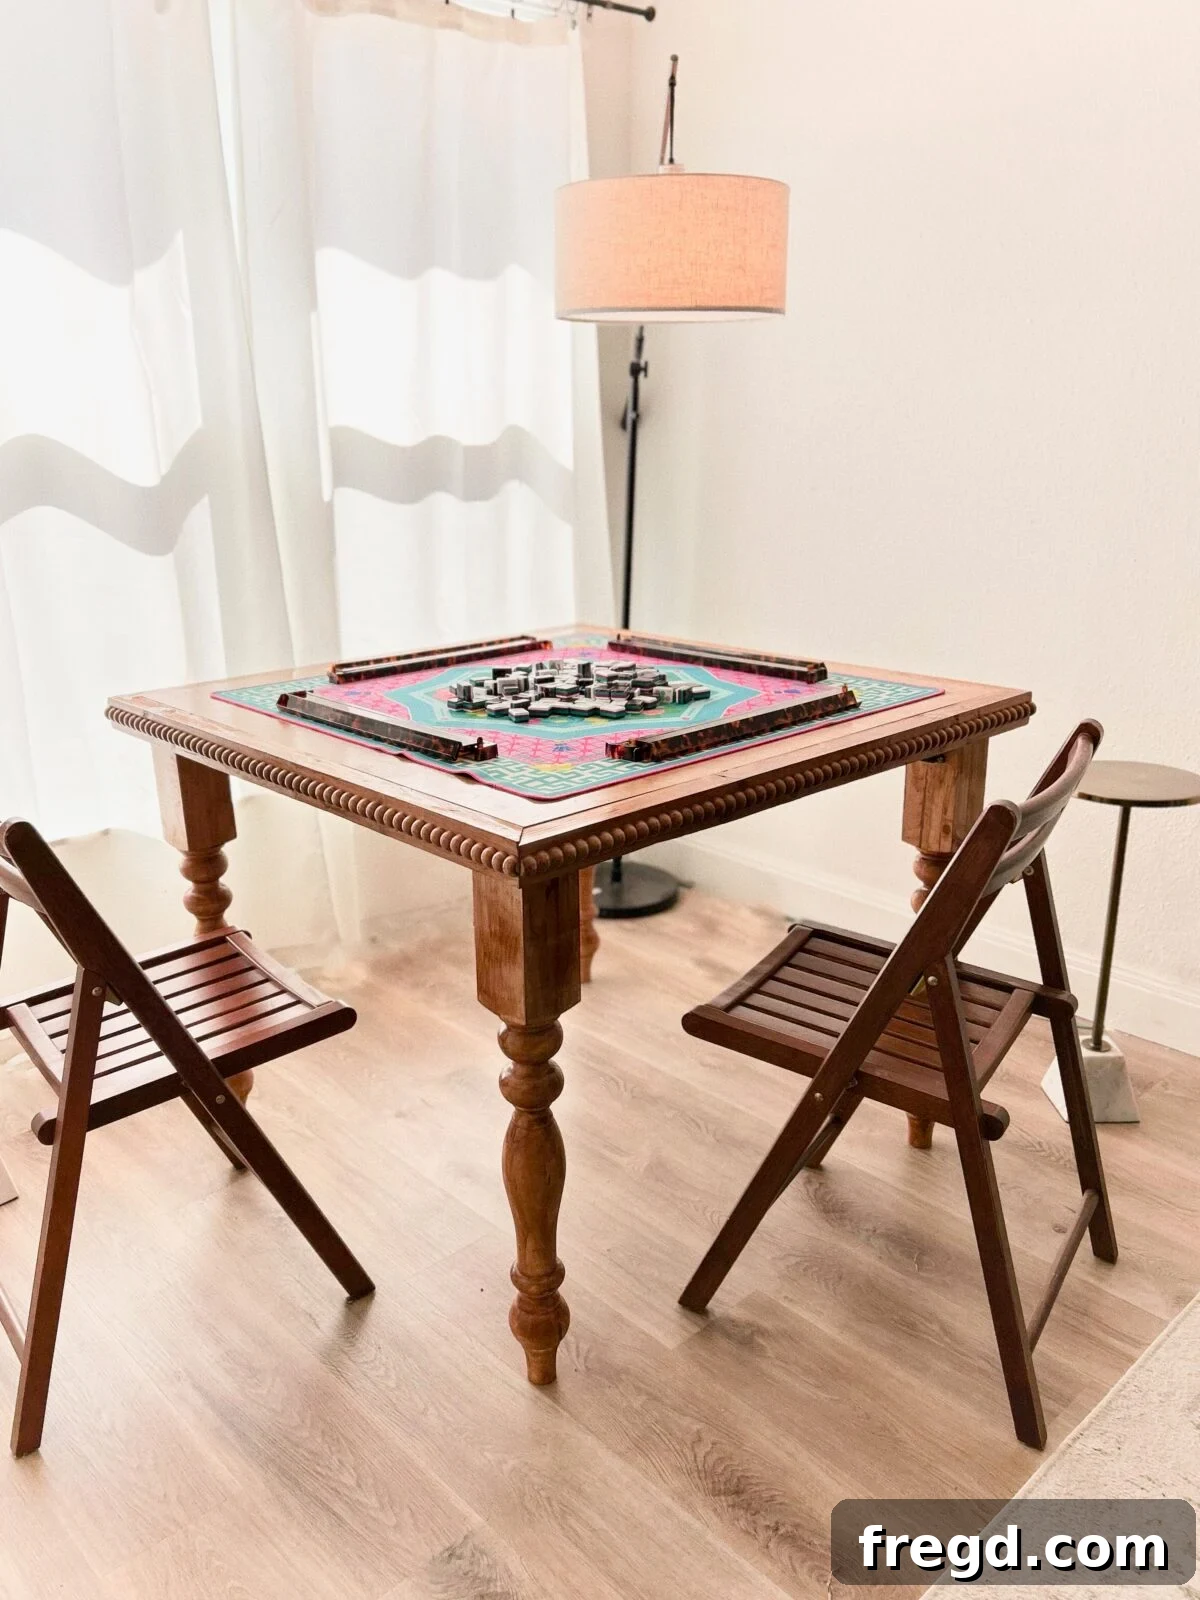
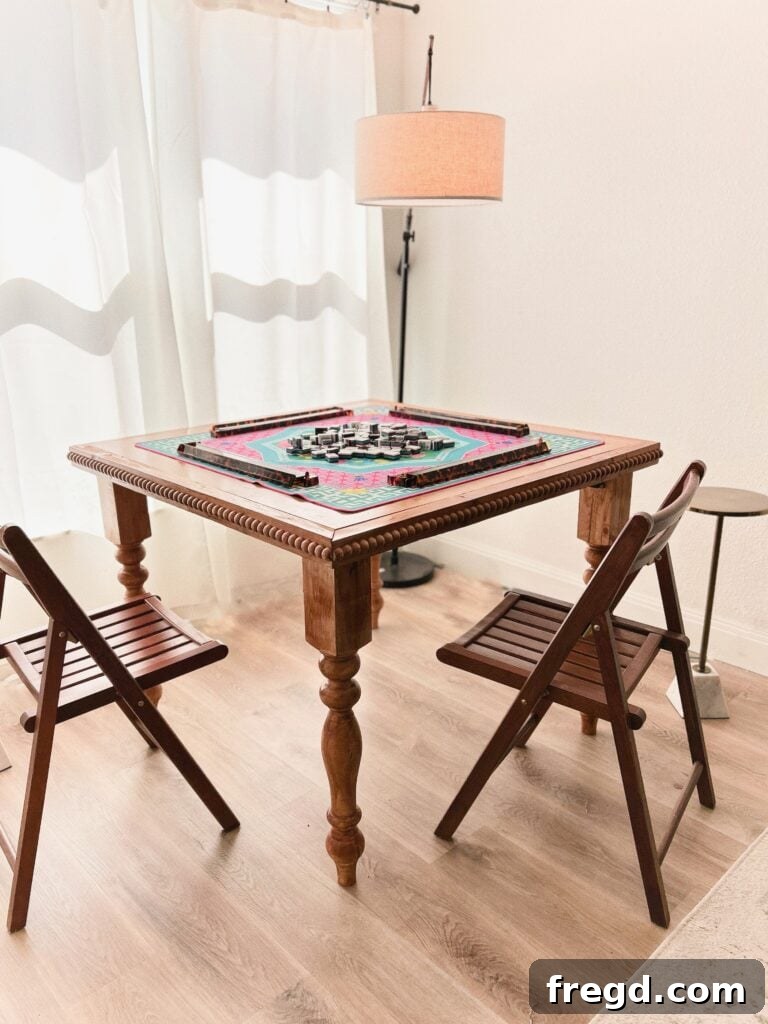
The satisfaction of completing a DIY project, especially one as beautiful and functional as this portable Mahjong table, is truly unmatched. We absolutely love how this table turned out! The brilliant design featuring folding legs makes it incredibly easy to store in a closet or under a bed when not in use, making it perfect for smaller living spaces or anyone who appreciates versatility. The rich, warm tone of the Varathane Early American stain gives it a timeless and inviting look, ensuring it will complement any decor style. And that delicate beaded trim? It’s the perfect finishing touch, tying all the elements together and adding that signature Shanty-2-Chic elegance that makes it a true conversation piece. This table isn’t just for Mahjong; it’s the ideal surface for any board game night, card games with friends, or even as an extra serving table during gatherings. Its sturdy construction means it can handle all the excitement and camaraderie of game night, standing firm through every tile shuffle and strategic move.
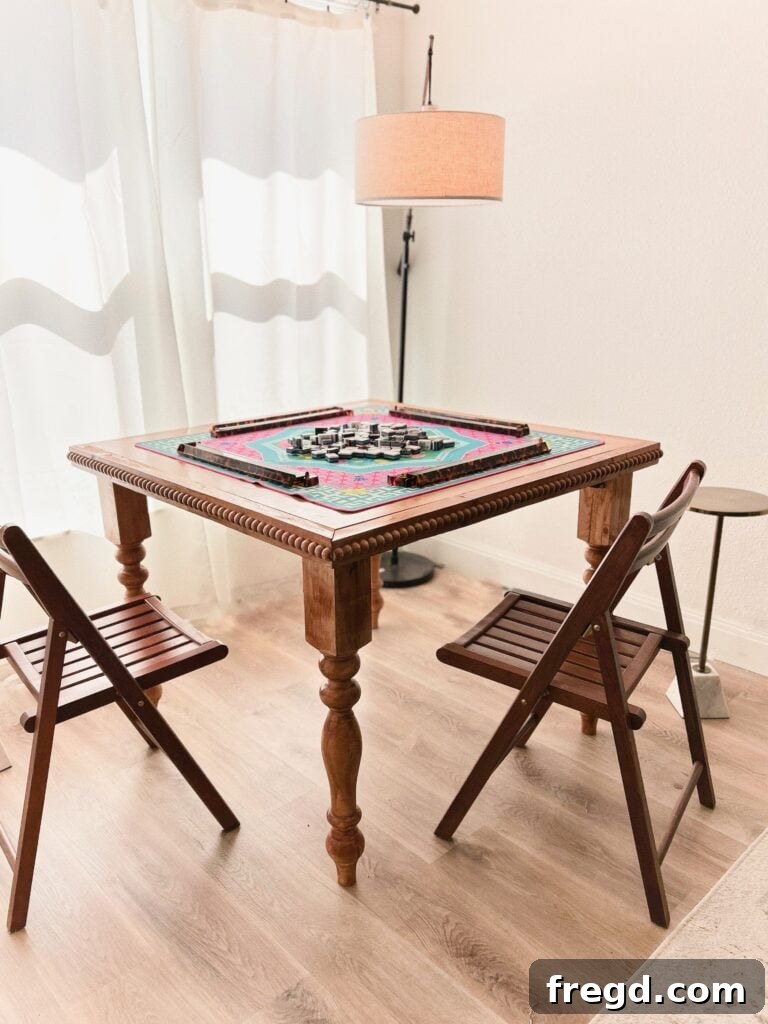
Absolutely no cracks in this table, y’all – only solid craftsmanship and endless fun! 😉
Don’t miss out on our next exciting build! Make sure to subscribe to our YouTube channel for more DIY tutorials, tips, and inspiration. If you embark on building your own Mahjong table, please share your creations with us! Tag us on social media—we absolutely adore seeing your unique Shanty-style projects and how you adapt them to your own homes. Happy building, and happy gaming!
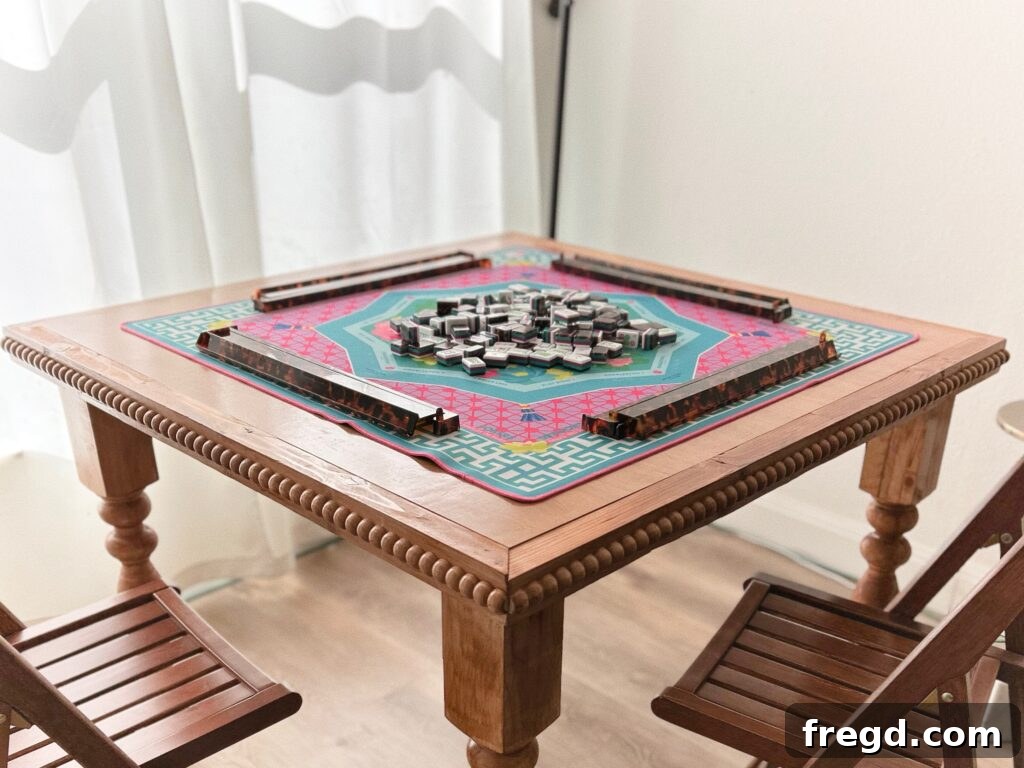
🔗 Want the Printable Plans?
To make your build even easier, we’ve prepared detailed, step-by-step printable plans. Download the comprehensive PDF plan, complete with precise measurements, cutting lists, and clear diagrams, to guide you through every stage of this project. Get your free plans here!
DIY Portable Mahjong Table Project Overview
Build Your Own Folding Mahjong Table
Tools You’ll Need
- Kreg Rebel Pocket-Hole Joiner (or equivalent ¾″ pocket hole jig)
- Kreg 20V Brushless Drill
- Miter Saw
- Nail Gun (Brad Nailer)
- Sander (Orbital or Block)
- Clamps (Bar clamps, C-clamps)
Complete Supply List
- ¾″ Plywood (approx. 48″ x 48″, cut to your desired tabletop size)
- 2×4 Boards (ripped to 2″ wide for trim, ends mitered at 45°)
- Beaded Wood Trim (approx. 170″ total length, optional)
- Heavy-Duty Folding Leg Hinges
- Scrap Plywood (for foot pads)
- 1¼″ Kreg Screws
- 1½″ Pocket Hole Screws
- Wood Glue
- Brad Nails
- Varathane Early American Stain
- Clear Topcoat or Polycrylic
Step-by-Step Instructions
-
Cut your ¾″ plywood tabletop to size. Use the Kreg Rebel Pocket-Hole Joiner to drill ¾″ pocket holes along all four underside edges where the trim will be attached, ensuring proper spacing for stability.

-
Rip your 2×4 boards to 2″ wide, then precisely miter each end at 45° to form the trim pieces. Apply wood glue to the plywood edges and securely attach the trim using 1½″ pocket hole screws, clamping corners tightly for a clean fit.
-
Before attaching the legs, glue and screw small plywood foot pads to the underside of each corner using 1¼″ Kreg screws. These pads provide crucial reinforcement for the folding hinge screws, enhancing the table’s overall stability.
-
Install the folding leg hinges and turned wood legs to the foot pads with 1¼″ screws. Ensure each leg is oriented correctly to fold inwards and lies completely flat when retracted, and stands firmly when extended.
-
For an extra touch of charm, attach the decorative beaded wood trim around the tabletop edges. Use a thin bead of wood glue and secure with brad nails for a refined finish.
-
Finally, sand the entire table smooth, remove all dust, and apply Varathane Early American stain for a rich, classic tone. Seal with several coats of a clear topcoat (like Polycrylic) and allow it to fully cure before enjoying your new Mahjong table.