
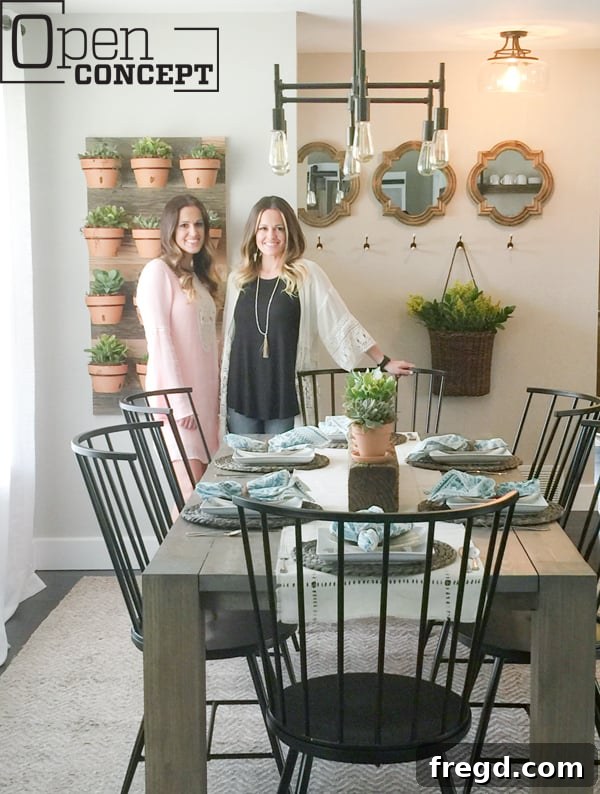
Building Your Dream: The DIY Modern Farmhouse Table from HGTV’s Open Concept
What an incredible journey it has been! We are absolutely thrilled by the overwhelming response to our recent episodes of Open Concept on HGTV. It was an honor to share our passion for DIY and home transformation with all of you. Among the many exciting projects unveiled, one design truly captured hearts and ignited a flurry of requests: our stunning DIY Modern Farmhouse Table, proudly featured in the Berry House.
This isn’t just any table; it’s a testament to timeless design and the joy of creating something beautiful with your own hands. We first gave a sneak peek into its construction during a live Facebook build, and ever since, our inboxes have been overflowing with requests for the detailed plans. We heard you loud and clear! The wait is officially over. For those who missed the live build, you can still catch a glimpse of the action and inspiration right here on our Facebook page.
Crafting a Modern Farmhouse Table is more than just a woodworking project; it’s about bringing warmth, character, and a touch of rustic elegance into your home. This table design perfectly blends classic farmhouse aesthetics with clean, contemporary lines, making it a versatile centerpiece for any dining space. Whether your home leans traditional, industrial, or truly modern, this table will effortlessly elevate your decor, providing a stylish and functional hub for family gatherings, entertaining guests, or simply enjoying everyday meals.
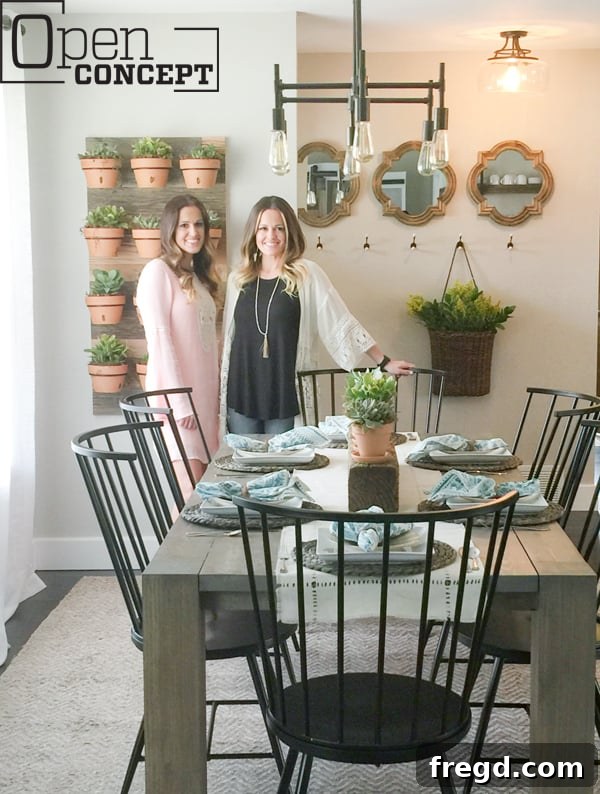
We absolutely adore this table, and it has quickly become a standout favorite among all the pieces we’ve created. Its sturdy construction, elegant lines, and the inherent charm of handmade furniture make it truly special. Now, let’s dive into the exciting part: the build process!
Your DIY Journey Begins: Crafting the Modern Farmhouse Table
One of the best aspects of this project is its accessibility. This DIY Modern Farmhouse Table is surprisingly easy to build, featuring minimal steps and straightforward techniques. If you’re new to woodworking or looking for a satisfying project to boost your confidence, this is an excellent choice. Don’t be intimidated; we’ll guide you through each stage with clarity and simplicity.
Essential Tools for Your Farmhouse Table Project
Before you begin, gather these fundamental tools. Having them ready will ensure a smooth and efficient build:
- Table Saw: Crucial for ripping boards to precise widths and creating those clean, sharp edges that define the modern farmhouse look.
- Miter Saw: Perfect for making accurate crosscuts and angle cuts, ensuring all your pieces fit together seamlessly.
- Drill: An indispensable tool for pre-drilling holes and driving screws, essential for strong and secure joinery.
- Kreg Jig: Your secret weapon for creating strong, concealed pocket hole joints, making the assembly process much simpler and leaving a professional finish.
- Sander: Essential for smoothing out rough edges and preparing your wood for staining and finishing, ensuring a luxurious feel.
With these tools at your disposal, you’re well-equipped to embark on this rewarding project.
Get the Free Plans: Your Blueprint for Success
To make your building process as straightforward as possible, we’re providing detailed, step-by-step plans absolutely free. These plans include precise measurements and diagrams to guide you through every cut and assembly stage.
Simply click the image above or use this direct link HERE to print your free plans and get started!
Gathering Your Materials: The Foundation of Your Table
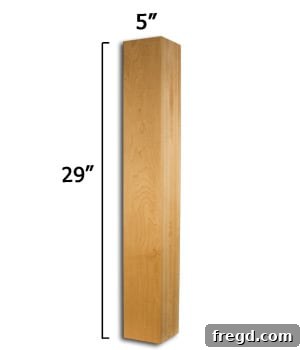
While the plans will specify exact lumber requirements, let’s highlight a key component: the table legs. For our Berry House table, we opted for these beautiful furniture legs from Osborne, specifically using knotty pine for its character and warmth. You can find the exact ones we used here. However, if you’re keen on saving money and have access to the necessary tools, you can easily piece together scrap 2×4 boards to form sturdy 5″x5″ legs, providing a truly custom and budget-friendly alternative.
Step-by-Step Construction Guide
1. Preparing Your Wood: Precision and Smoothness
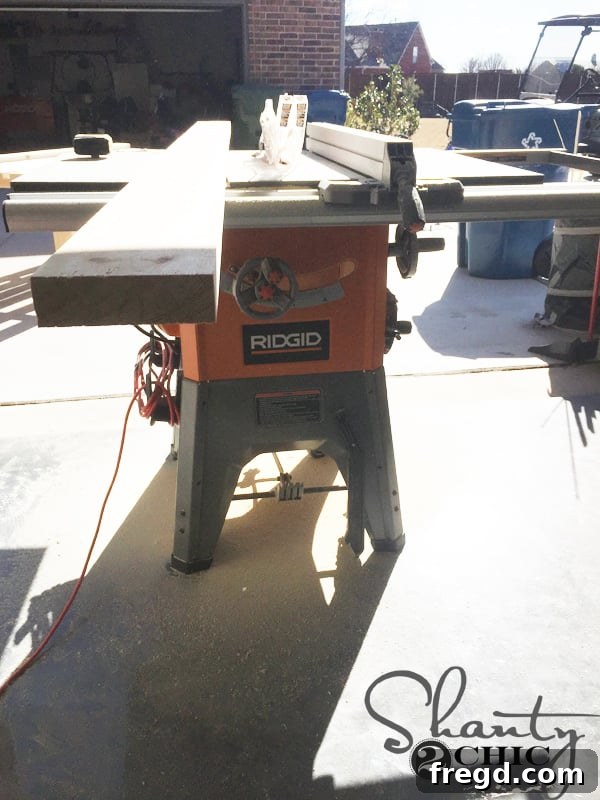
The first critical step in achieving that signature modern farmhouse look is to prepare your lumber. Using a table saw, carefully rip the rounded edges off every board you’ll use for the tabletop, apron, and supports. This might seem like a small detail, but it’s essential for several reasons:
- Precise Tabletop Width: For the tabletop planks, ripping the edges ensures they measure exactly 5 inches wide, perfectly matching the width of the table legs. This creates a cohesive and intentional design.
- Seamless Surface: By removing the rounded edges, you’ll achieve a perfectly smooth and flat tabletop. This eliminates the small gaps between boards that often become “crumb catchers” – a practical benefit for cleaning and aesthetics.
- High-End Finish: Applying this technique to the 2×3 apron pieces and supports instantly elevates the table’s appearance. The crisp, clean lines contribute significantly to the modern aesthetic, giving your DIY project a professionally crafted, high-end look.
2. Building the Apron: The Core Structure
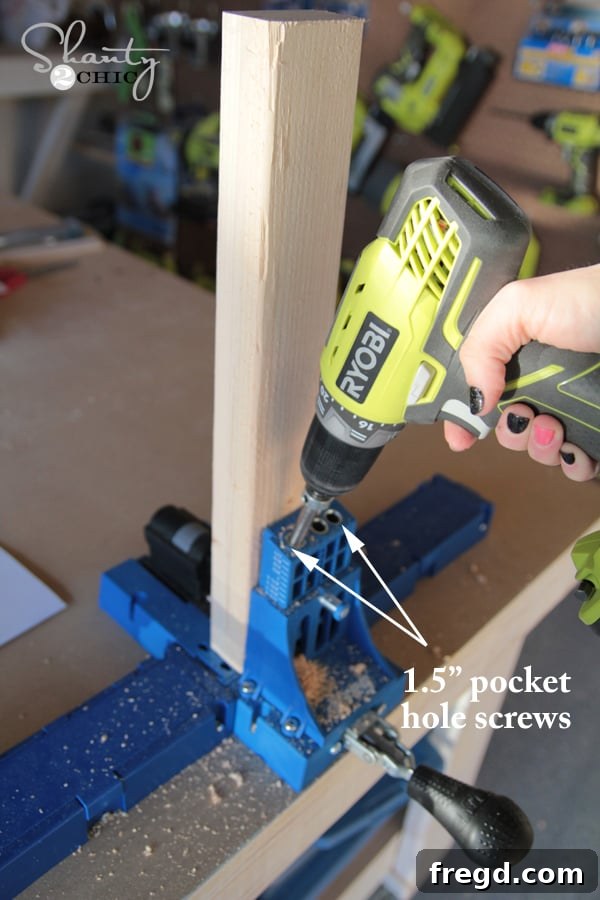
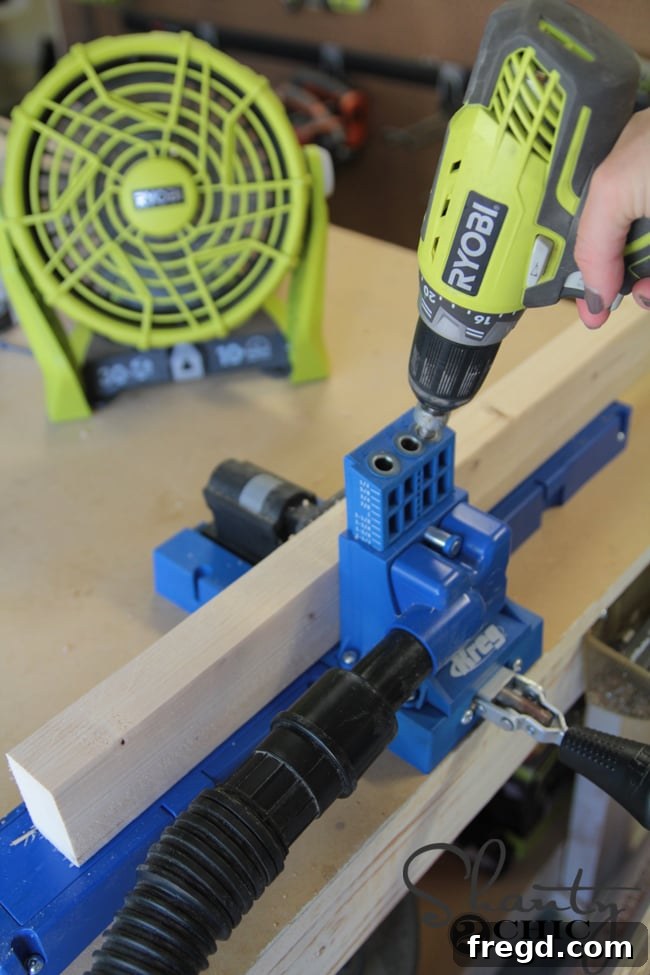
Begin by cutting all your apron pieces according to the dimensions in your plans. Once cut, it’s time to utilize your Kreg Jig. Drill two 1 1/2-inch pocket holes into each end of these apron pieces. Pocket holes are fantastic for strong, concealed joints. If you’re new to using a Kreg Jig, don’t worry! We have a helpful tutorial video, “How to Use a Kreg Jig,” available HERE. You can also find the Kreg Jig K5, a highly recommended model for its versatility and ease of use, on Amazon HERE.
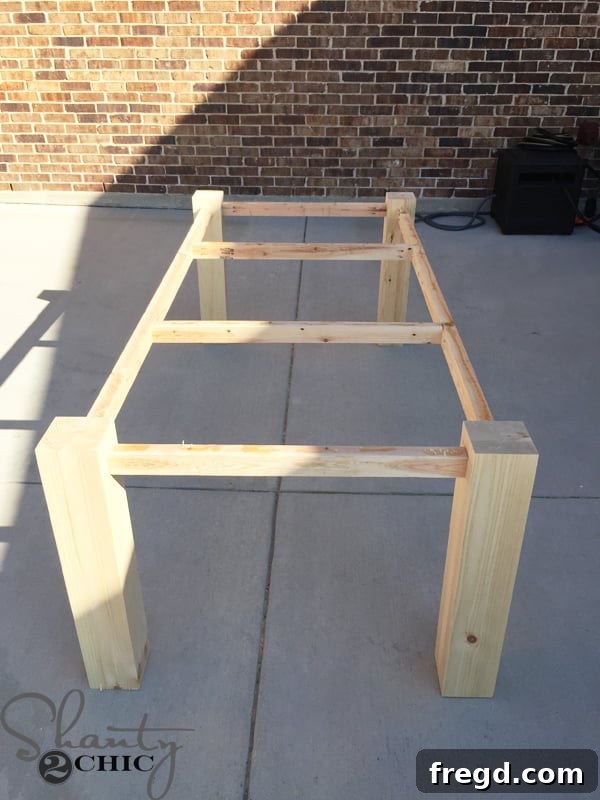
Next, attach the apron pieces to the table legs. Position each apron piece 1 1/2 inches down from the very top of the table leg. This strategic placement ensures there’s enough room for the tabletop planks to sit flush later and allows the beautifully crafted tops of your legs to remain visible, adding to the table’s aesthetic appeal. Ensure that each apron piece is perfectly centered on the leg for a balanced and sturdy frame.
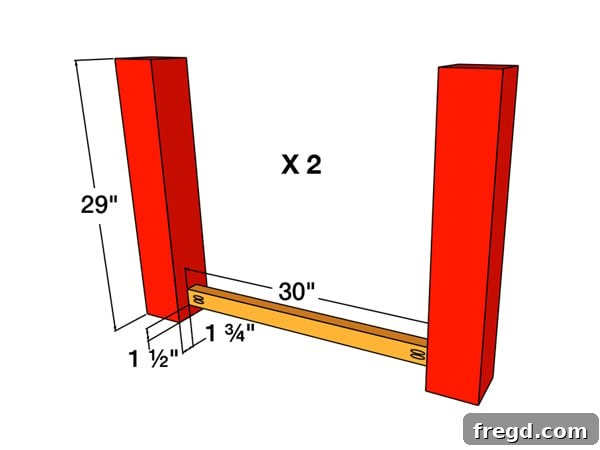
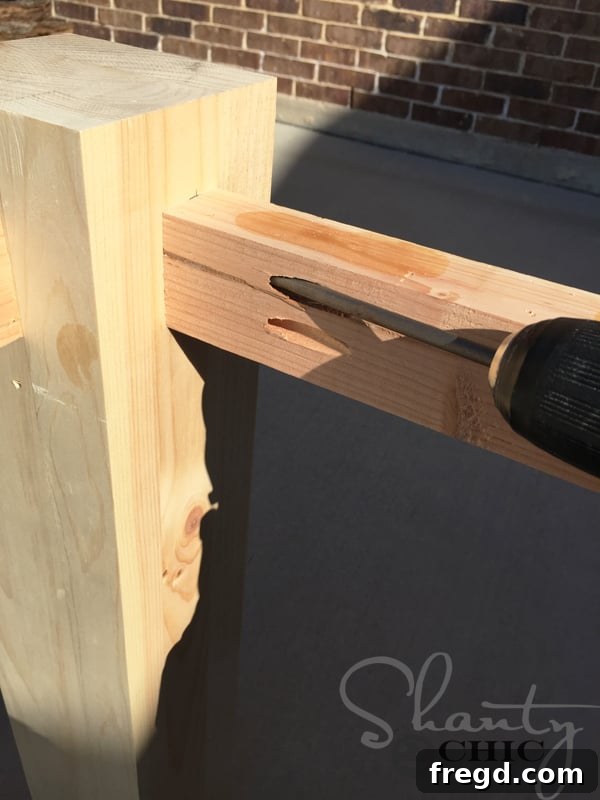
At this point, your table frame should begin to take shape, resembling the image below:
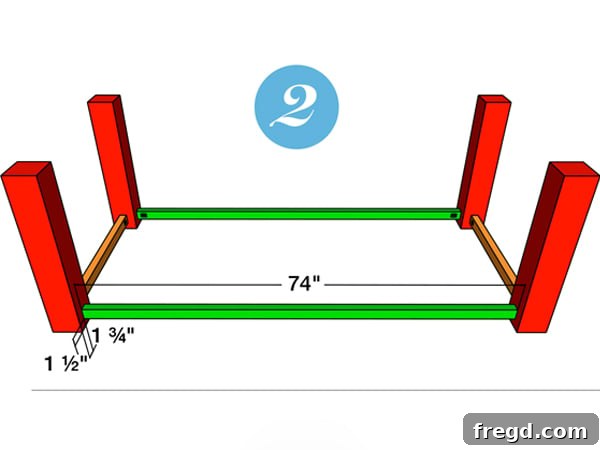
3. Adding Cross Supports: Enhancing Stability and Top Attachment
Now, cut the cross supports to the specified lengths. These pieces are vital for providing additional stability to the table and serving as attachment points for the tabletop planks. For each cross support, drill six 1 1/2-inch pocket holes along its length. These holes should be strategically placed to align with the center of your tabletop planks. Mark 4 1/4 inches from one end for the first pocket hole, then continue marking every 5 inches thereafter. Don’t worry about seeing these holes on the top of the board; they will be hidden once the tabletop is attached. Additionally, drill two 1 1/2-inch pocket holes on each end of the supports for attaching them to the apron.
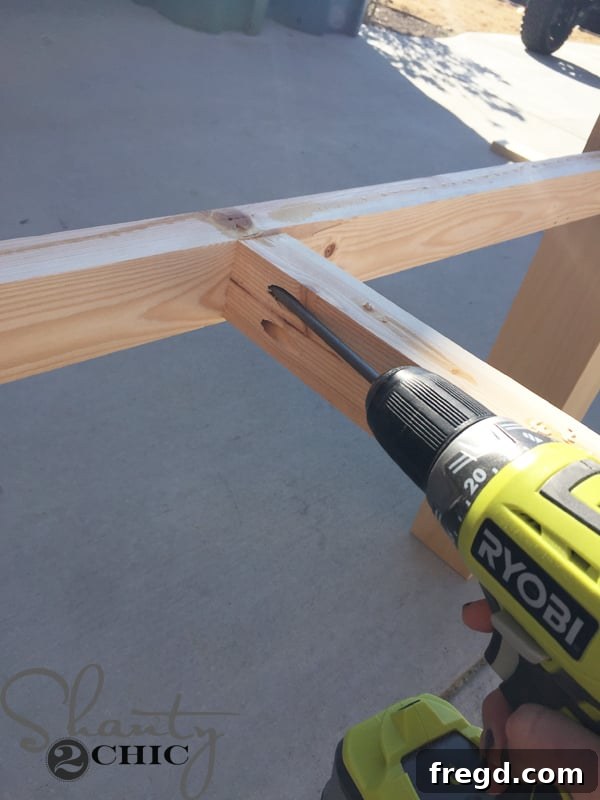
Attach these supports to the outside apron pieces using a combination of wood glue for extra strength and 2 1/2-inch pocket screws. While precise measurement is always good, you can generally eyeball the even placement of these supports across the width of your table. Continue adding them until all five supports are securely attached.
4. Crafting the Tabletop: The Surface of Your Creation
Now for the most visible part: the tabletop! Start by cutting your two outside planks. On each end of these boards, drill two 1 1/2-inch pocket holes. It’s crucial that these pocket holes are positioned close to the edges of the board. This is because the apron structure will rest neatly between them, ensuring a clean fit and strong connection.
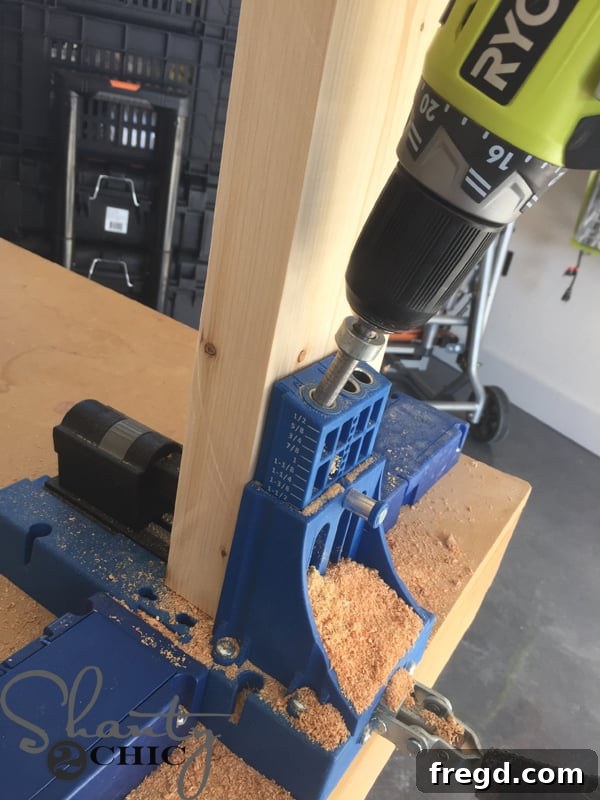
Attach the outside planks to the frame using 2 1/2-inch pocket screws. Ensure that the outer edges of these planks are perfectly flush with the outer edges of the table legs. This alignment is key to achieving the clean, squared-off look characteristic of modern farmhouse design.
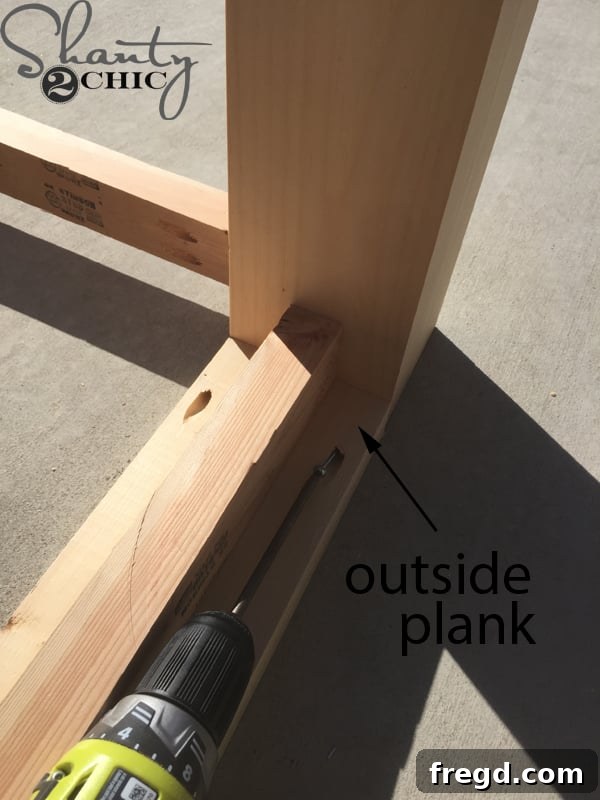
Your table should now have the initial tabletop planks securely in place, looking something like this:
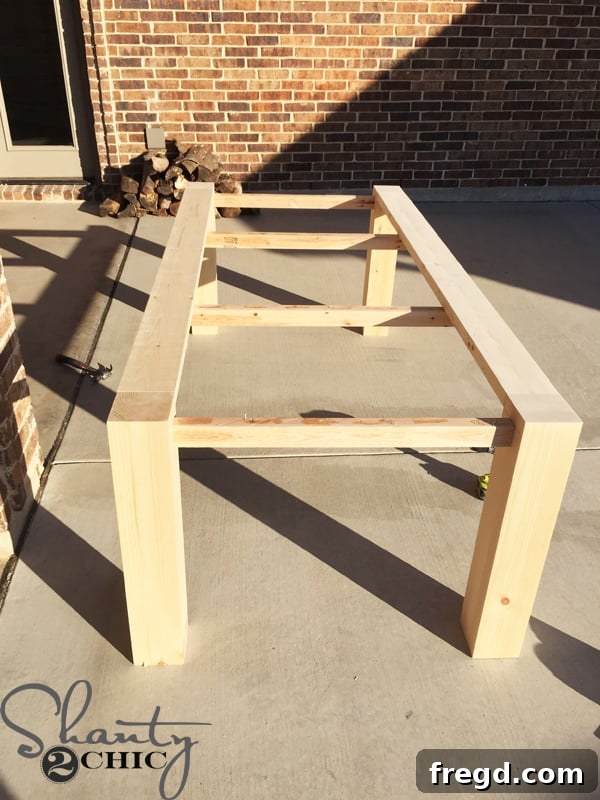
Finally, add the remaining interior tabletop planks. Secure them with 2 1/2-inch pocket screws and, for maximum durability and strength, generous amounts of wood glue between each plank and to the cross supports below. Clamp the planks together while the glue dries to ensure a tight, seamless bond across the entire tabletop surface.
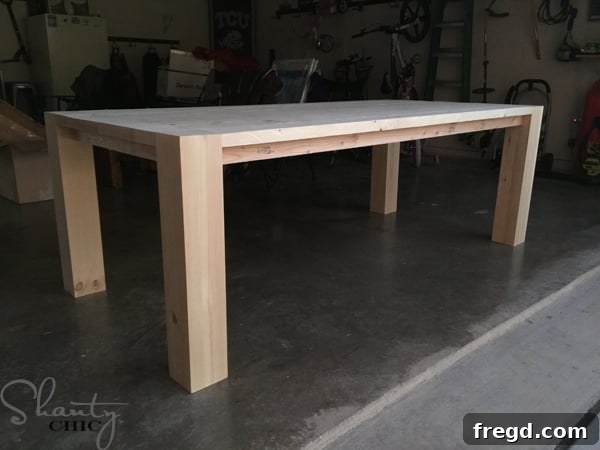
The Finishing Touch: Staining and Sealing
With the construction complete, it’s time to bring out the natural beauty of the wood and protect your hard work. This is where your table truly comes to life!
Achieving the Perfect Modern Farmhouse Stain
For our table, we achieved a unique and beautiful finish by mixing Varathane Ash and Varathane Weathered Gray Stain in a 50:50 ratio. This blend creates a sophisticated, subtle gray-brown tone that perfectly complements the modern farmhouse aesthetic. To apply the stain, simply wipe it onto the clean, sanded wood surface with a clean cloth, allowing it to penetrate for about 5 minutes. Then, with a separate clean cloth, wipe off any excess stain. This method ensures an even application and prevents pooling, resulting in a beautiful, consistent finish.
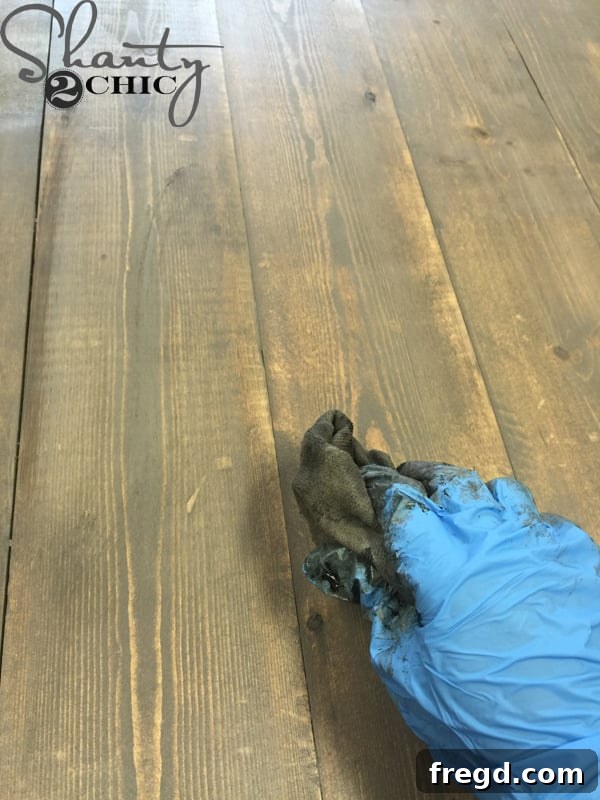
Once stained, your table will boast a rich, inviting hue, ready for the crucial step of protection.
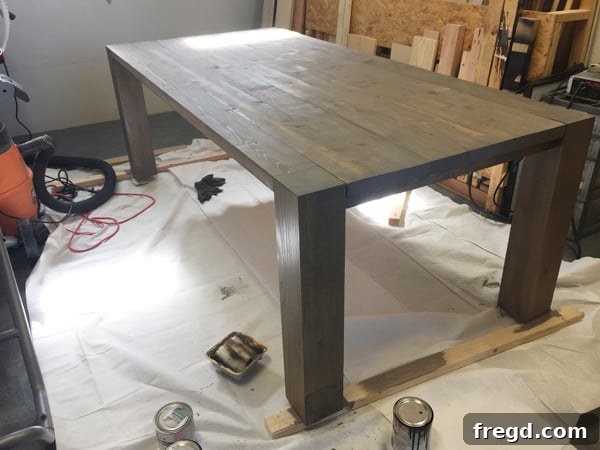
The table is now beautifully stained and ready for its protective finish!
Protecting Your Investment: Polyurethane Application
To safeguard your gorgeous new table from spills, scratches, and daily wear and tear, a durable topcoat is essential. We applied one coat of Varathane Triple Thick Polyurethane in a satin finish. This product is fantastic because it offers the protection of three coats in one, saving you time and effort while providing a robust, long-lasting barrier. Use a good quality paint brush to apply the polyurethane evenly, following the wood grain. Allow it to dry completely according to the manufacturer’s instructions. This final step will seal the stain and leave your table with a smooth, resilient surface that will stand the test of time.

And just like that, your magnificent DIY Modern Farmhouse Table is complete!
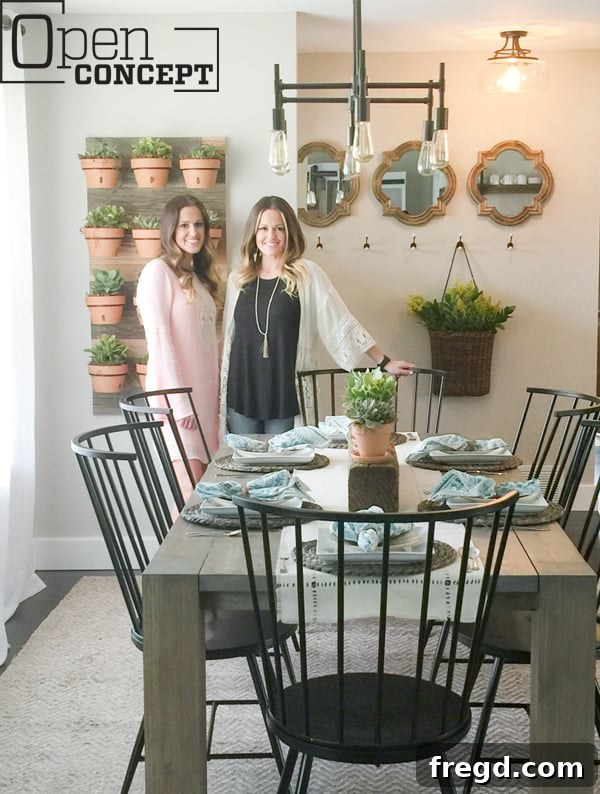
Styling Your New Modern Farmhouse Dining Space
Now that your stunning table is built and finished, it’s time to complete the look of your dining area. A key element of modern farmhouse design is mixing textures, materials, and styles to create an inviting and curated space. Here are some of the exact pieces we used to style the Berry House, offering a perfect blend of comfort and chic:
- Dining Chairs: The right chairs can dramatically impact your dining room’s ambiance. We sourced our stylish and comfortable Dining Chairs from Wayfair, available HERE. Their design perfectly complements the table’s aesthetic without overpowering it.
- Chandelier: A statement chandelier can define the entire room. Our elegant Chandelier from West Elm, found HERE, adds a touch of sophistication and warmth to the dining space.
- Wall Decor: Mirrors are fantastic for reflecting light and making a room feel larger. The beautiful mirrors on the wall can be discovered HERE, adding depth and visual interest.
- Textural Accents: To bring in natural elements and texture, we included a Hanging Basket on the Wall from World Market, which you can find HERE.
- Table Linens: Elevate your table setting with quality linens. Our Napkins from Anthropologie, available HERE, add a pop of subtle color and texture. Complement them with charming Napkin Rings from World Market, found HERE.
- Dinnerware: Simple, classic dinnerware allows your food and table decor to shine. We chose elegant White Dinner Plates from Target HERE, and coordinating Round Salad Plates from Target HERE.
- Table Runner: A table runner ties everything together. Our stylish Table Runner from World Market, available HERE, adds a finishing touch.
- Woven Chargers: Layering chargers under your plates adds another layer of texture and elegance. We found beautiful Woven Chargers from Hobby Lobby.
Thank You & Keep Building!
Thank you once again for tuning into Open Concept on HGTV and for joining us on this exciting DIY journey. Your enthusiasm and support inspire us to keep creating and sharing. If you missed any of our episodes, stay tuned to our social media channels; we’ll keep you posted as soon as we learn when they will re-air!
We hope this detailed guide empowers you to build your very own Modern Farmhouse Table. The satisfaction of crafting a piece of furniture that is both beautiful and functional, tailored to your home, is truly unparalleled.
Happy building!
Ashley and Whitney
Did you know we offer an extensive collection of over 25 free DIY dining table plans? Whether you’re looking for a different style, size, or challenge, be sure to explore our full range of designs to find the perfect project that fits your unique taste and skill level. Your next woodworking adventure awaits!