
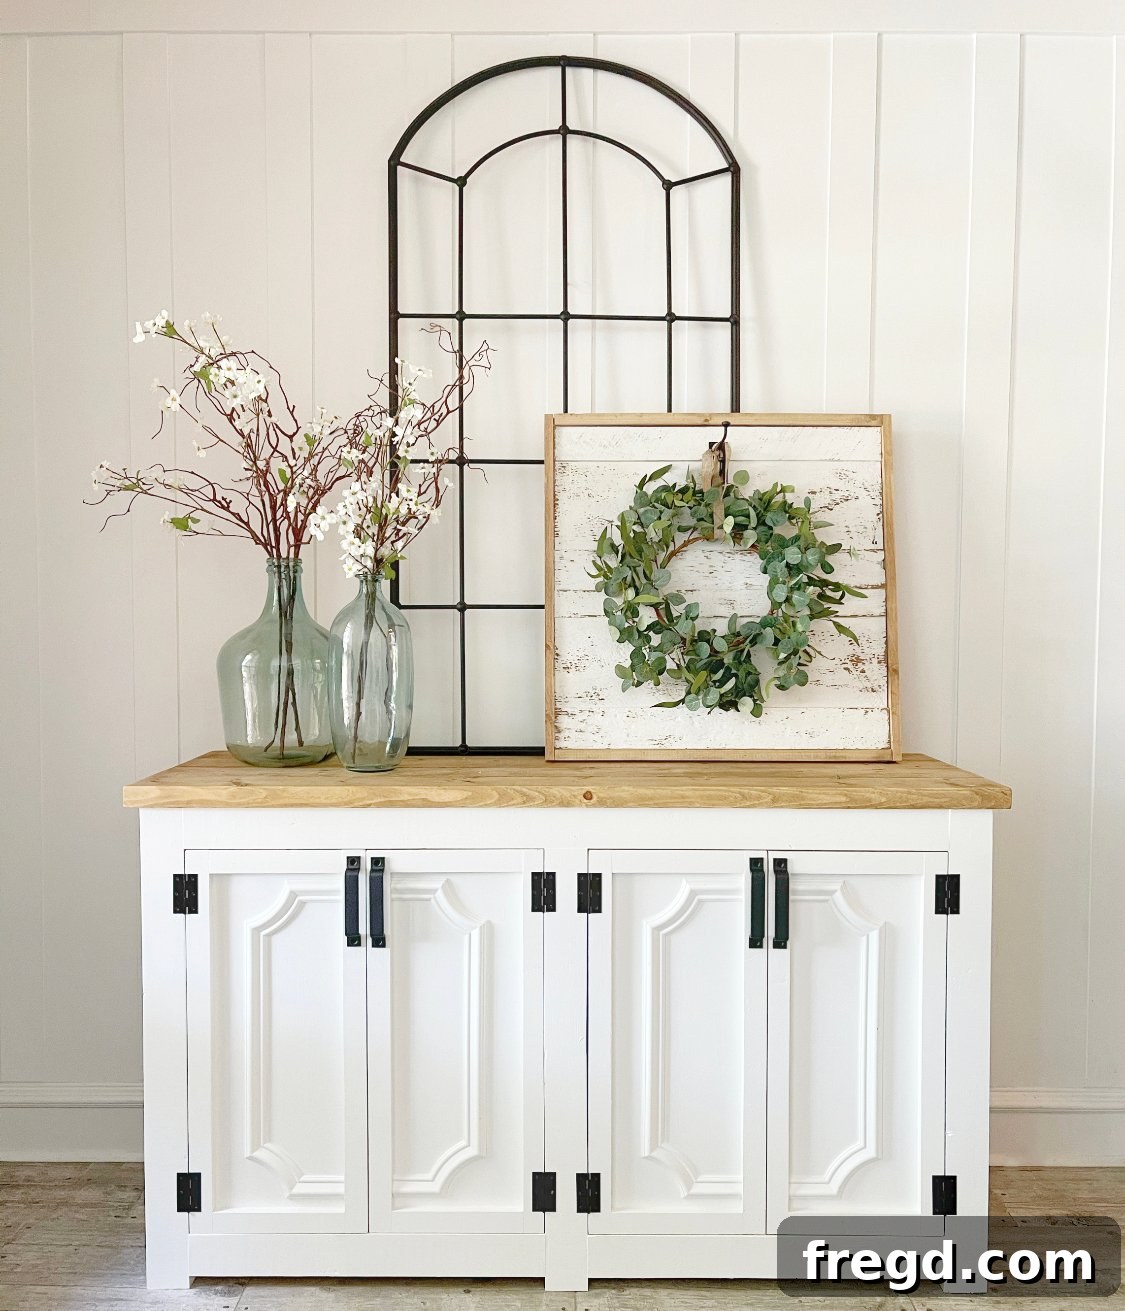
Welcome, fellow DIY enthusiasts! If you’re anything like me, you’re constantly seeking innovative ways to enhance storage and organization around your home. My entryway, while charming, desperately needed a piece that could offer both style and substantial storage. That’s when inspiration struck: I discovered some beautiful wainscoting panels, and immediately envisioned them transforming into the most exquisite cabinet doors. This vision became the blueprint for the elegant storage cabinet you see today.
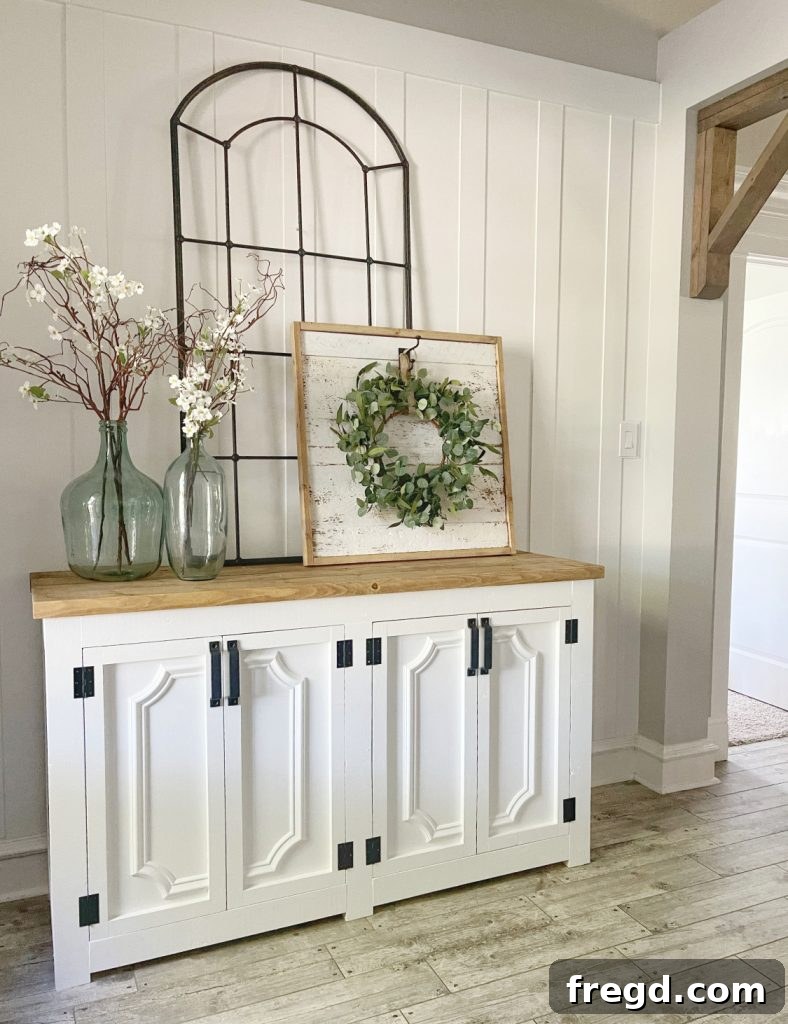
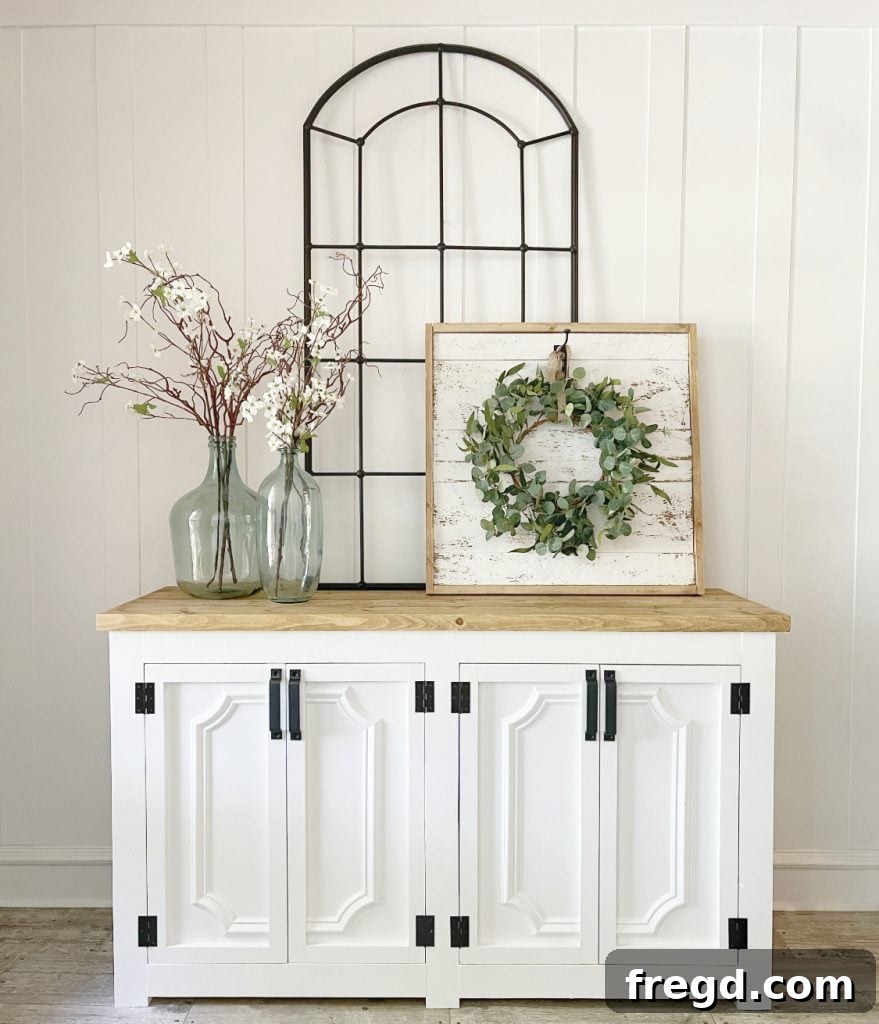
The transformation is truly remarkable, isn’t it? I couldn’t be more thrilled with how this project turned out. Before we dive into the detailed building process, be sure to watch our comprehensive how-to video here for a visual guide. You can also download and print the free plans at the bottom of this post, ensuring you have all the measurements and diagrams you need for a successful build.
Building Your Dream Entryway Storage Cabinet: A Step-by-Step Guide
This DIY modern farmhouse storage cabinet is designed not only to boost your home’s functionality but also to add a touch of timeless elegance. The wainscoting doors are a particular highlight, providing a custom, high-end look without the custom price tag. This project is perfect for intermediate DIYers looking to expand their woodworking skills and create a truly unique piece for their home.
Phase 1: Constructing the Face Frames
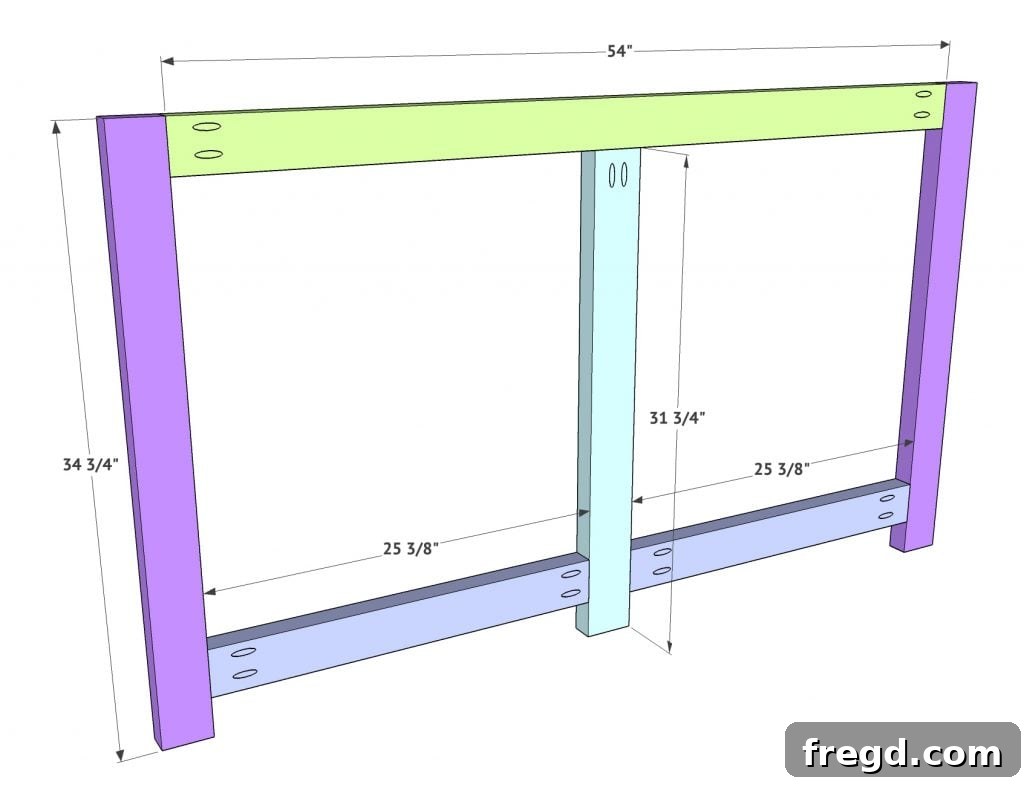
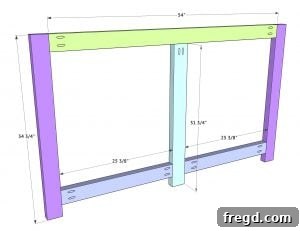
The foundation of any sturdy cabinet lies in its face frames. For this project, you’ll begin by building two identical face frames. I utilized 2×4 boards, meticulously ripped down to a consistent 3-inch width, creating a more refined profile than standard lumber. To join these pieces, incorporate 1.5-inch pocket holes at the designated points, as detailed in the plans. Secure them firmly with wood glue and 2.5-inch pocket hole screws. An important detail for the bottom horizontal boards is to ensure they align precisely 2.5 inches from the base of the leg pieces, establishing the cabinet’s initial elevation and overall structure.
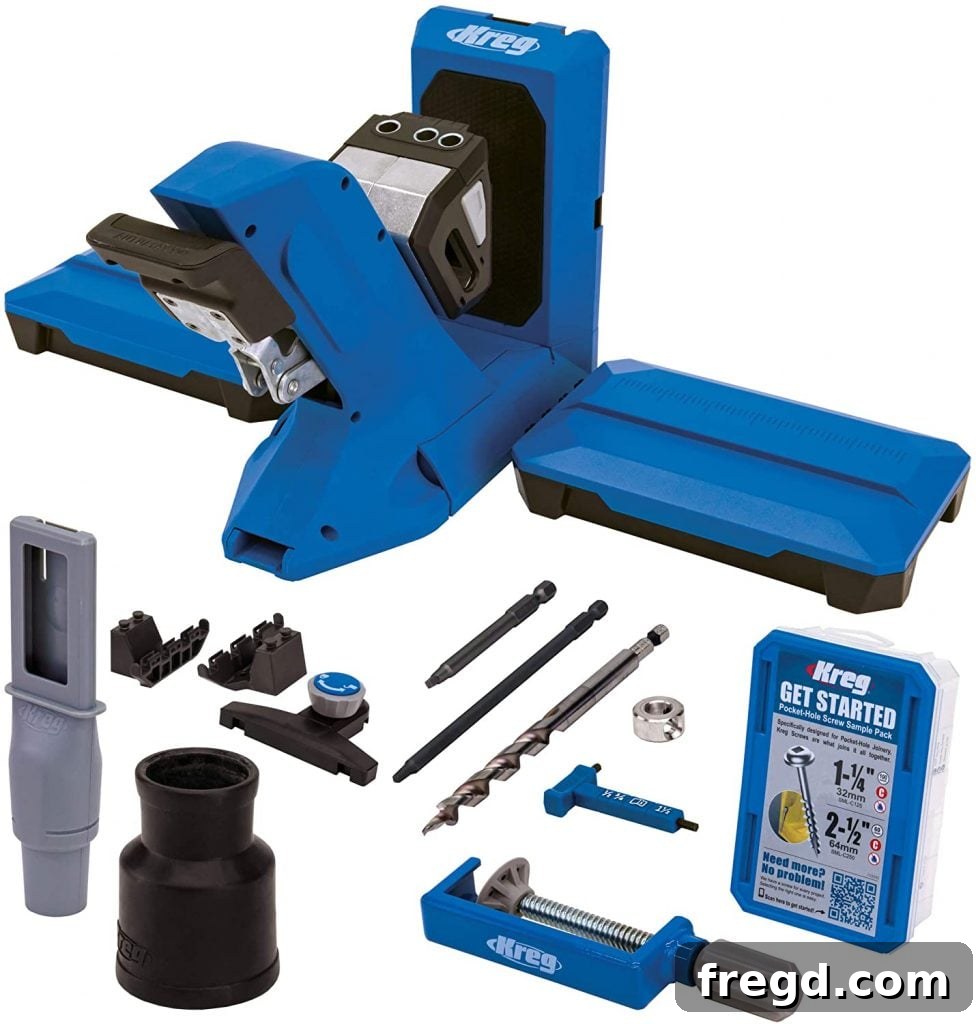
For this crucial step, I relied on my Kreg Jig 720 PRO, a tool I wholeheartedly recommend. Its precision and ease of use significantly streamline the process of creating strong, invisible joints. If you’re considering an upgrade or investing in your first pocket hole jig, this model offers outstanding performance and durability, making it a valuable addition to any workshop.
Phase 2: Crafting the Cabinet Sides
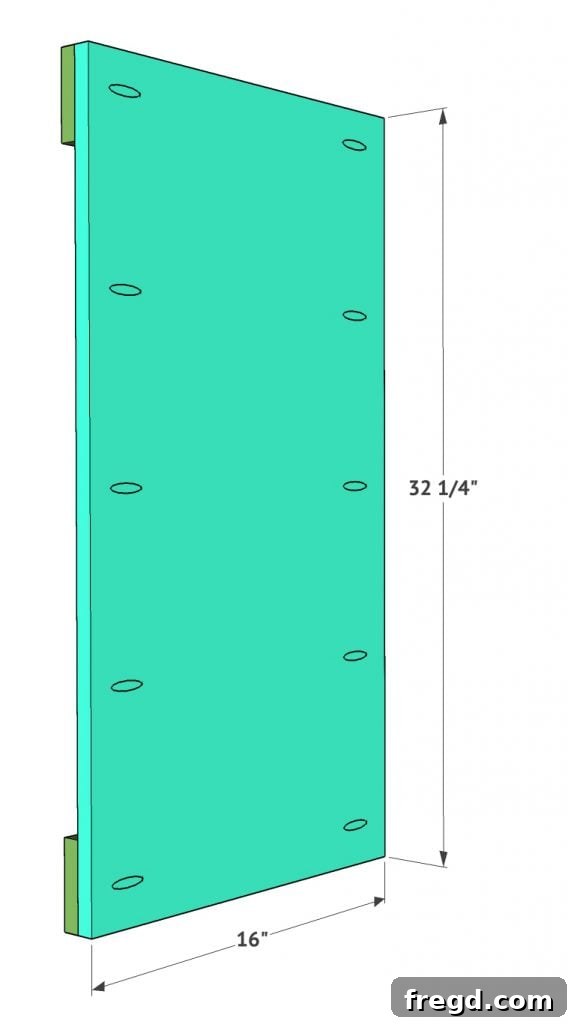
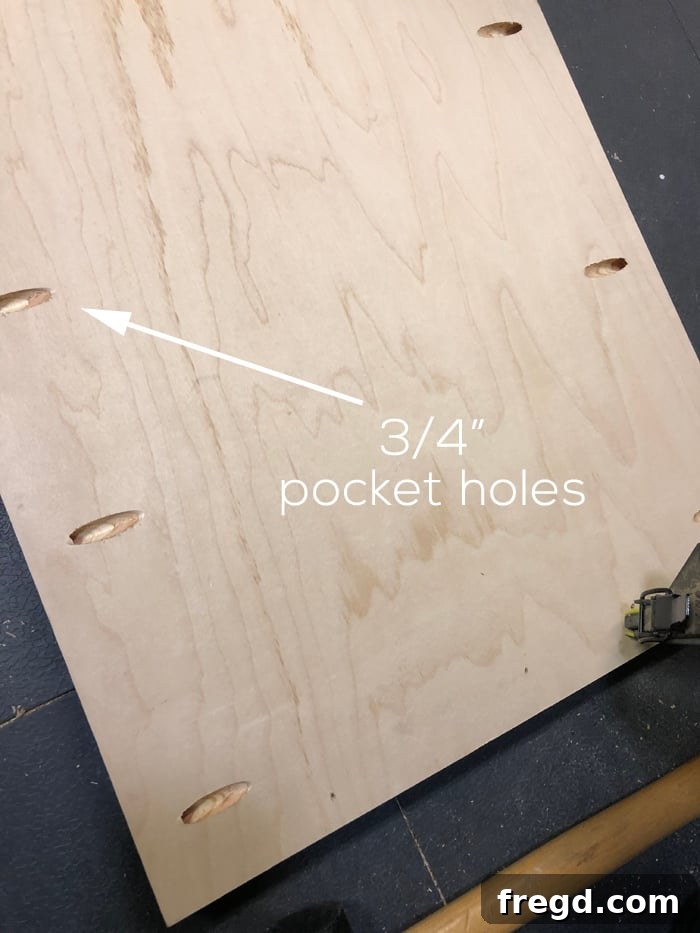
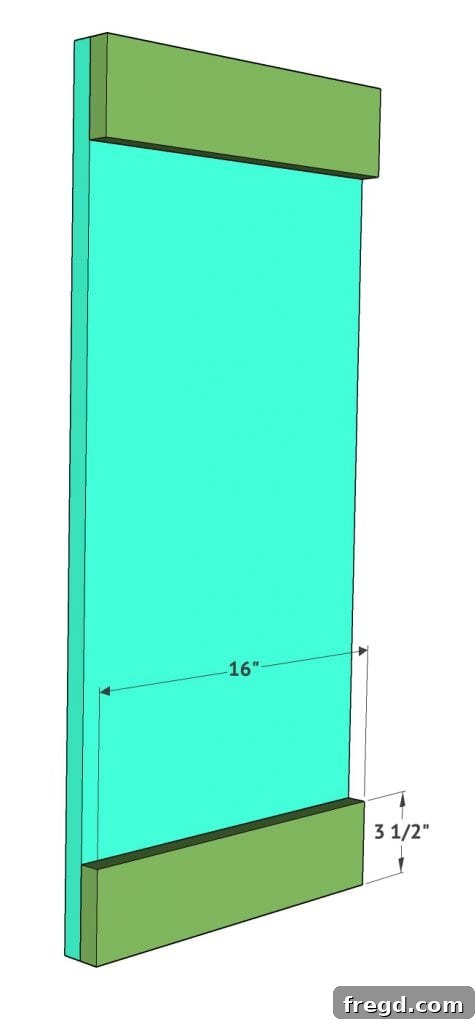
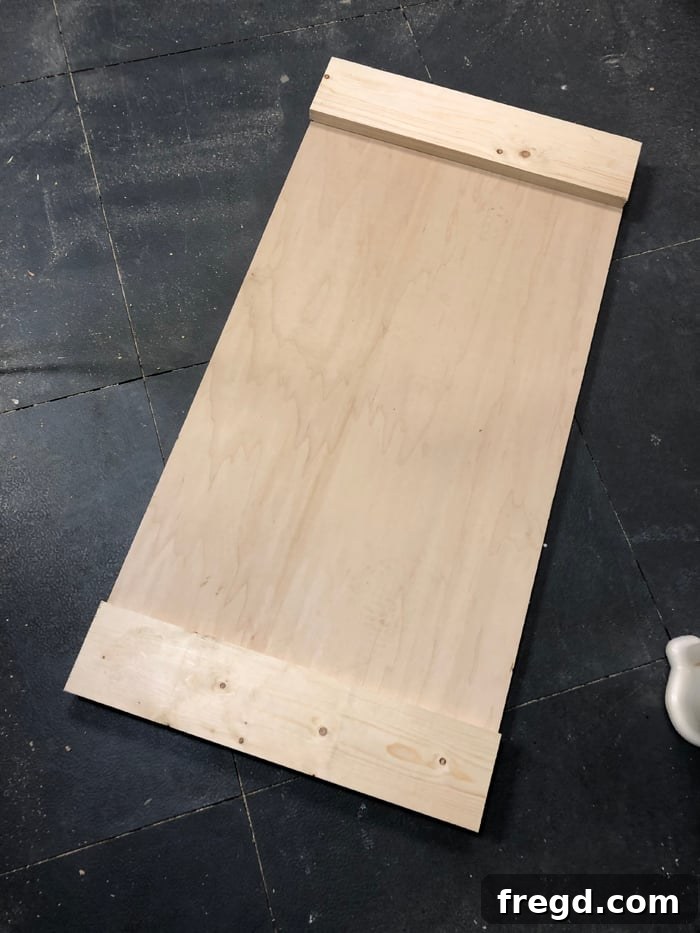
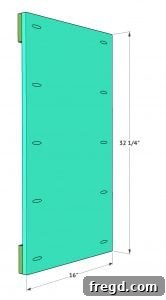
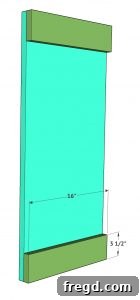
Next, focus on building the cabinet’s side panels. Each side is expertly constructed from 3/4-inch hardwood plywood, renowned for its stability and resistance to warping, combined with 1×4 boards that will form the decorative trim. Begin by adding 3/4-inch pocket holes along each long side on the back of the plywood panel. This hidden joinery ensures a clean, professional finish. Subsequently, attach the 1×4 trim pieces to the front of the panel using a combination of strong wood glue and 1.25-inch brad nails. The brad nails will hold the trim securely in place while the glue cures, creating a seamless bond. You will need to build two identical side panels for your cabinet.
Throughout this stage, I found my Greenworks drill to be an indispensable tool. Its compact size makes it comfortable to handle for extended periods, yet it delivers surprising power, making quick work of driving screws and preparing pilot holes. A reliable drill like this is essential for any DIY project, offering both efficiency and precision.
Phase 3: Assembling the Cabinet Body
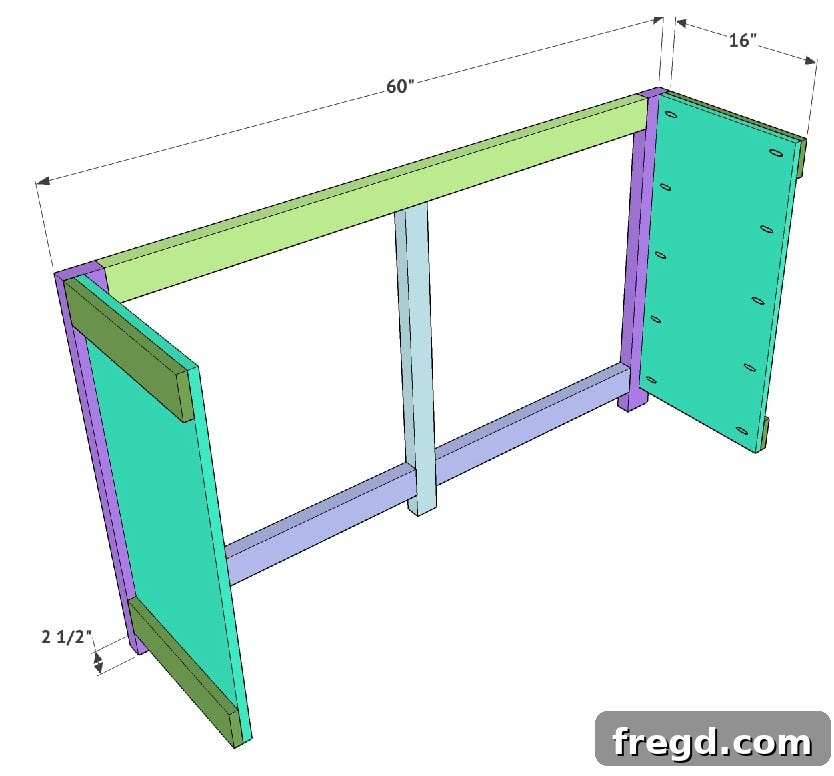
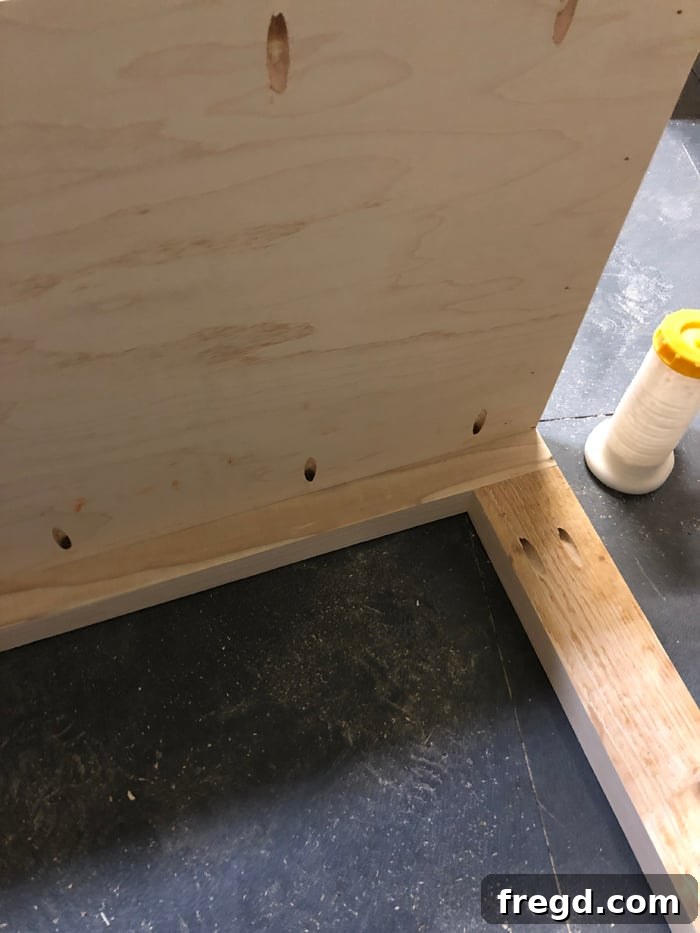
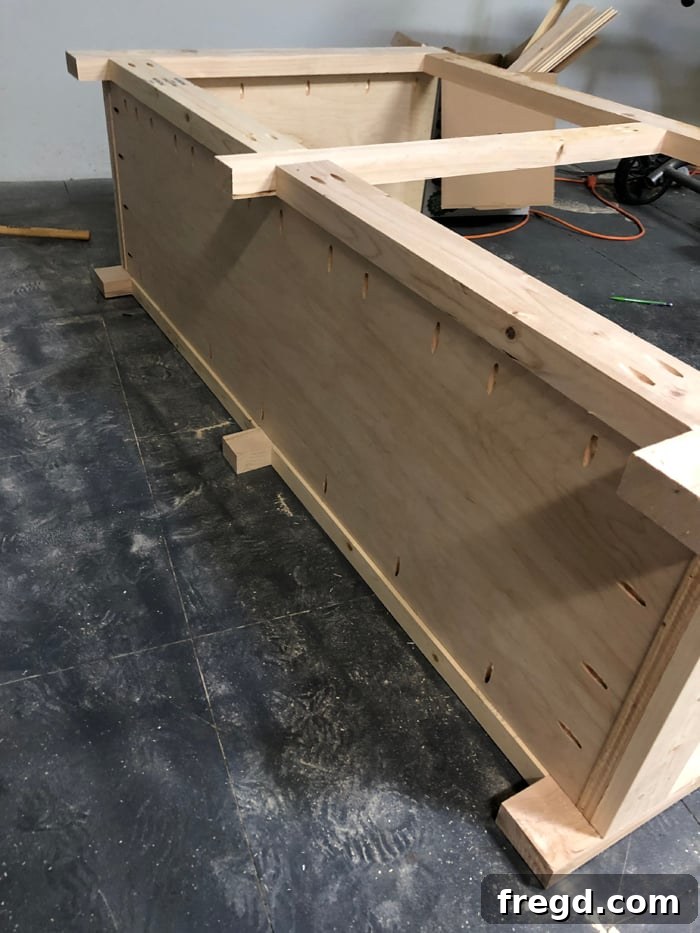
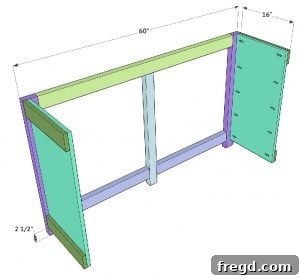
With your face frames and side panels prepared, it’s time to bring the main structure of the cabinet together. Carefully attach the two side frames to the back face frame using wood glue and 1.5-inch Kreg pocket hole screws. Precision is key here: ensure that the top edges of the side frames are perfectly flush with the top of the back face frame. This alignment will naturally create a 2.5-inch space below the bottom of the side frames, an intentional design element. Furthermore, verify that the outer edges of the side panel trim boards are flush with the outside edge of the face frame, creating a clean and cohesive exterior.
Phase 4: Installing the Cabinet Base
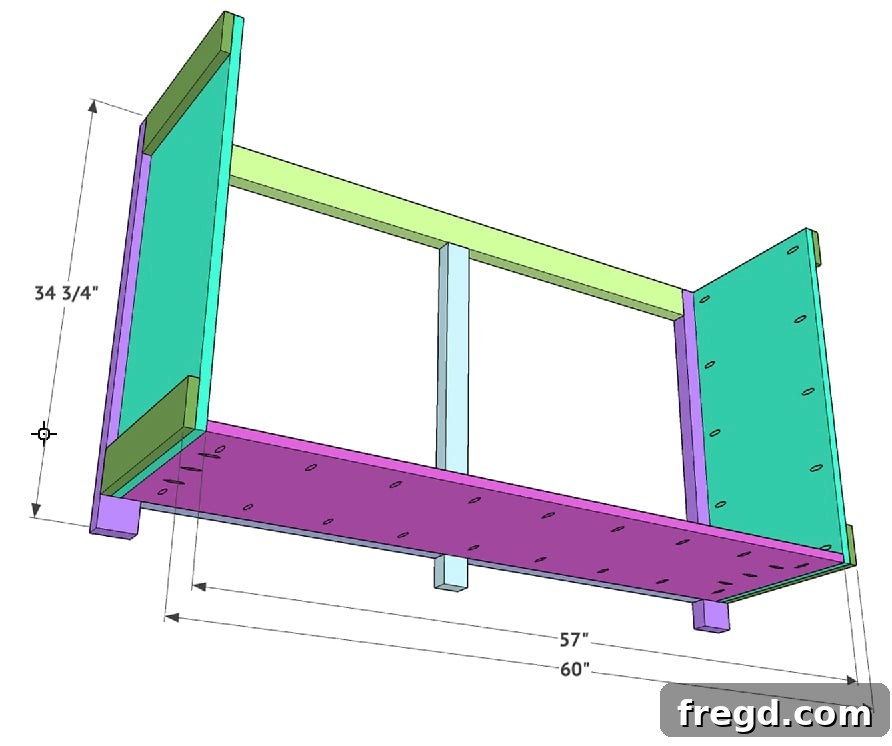
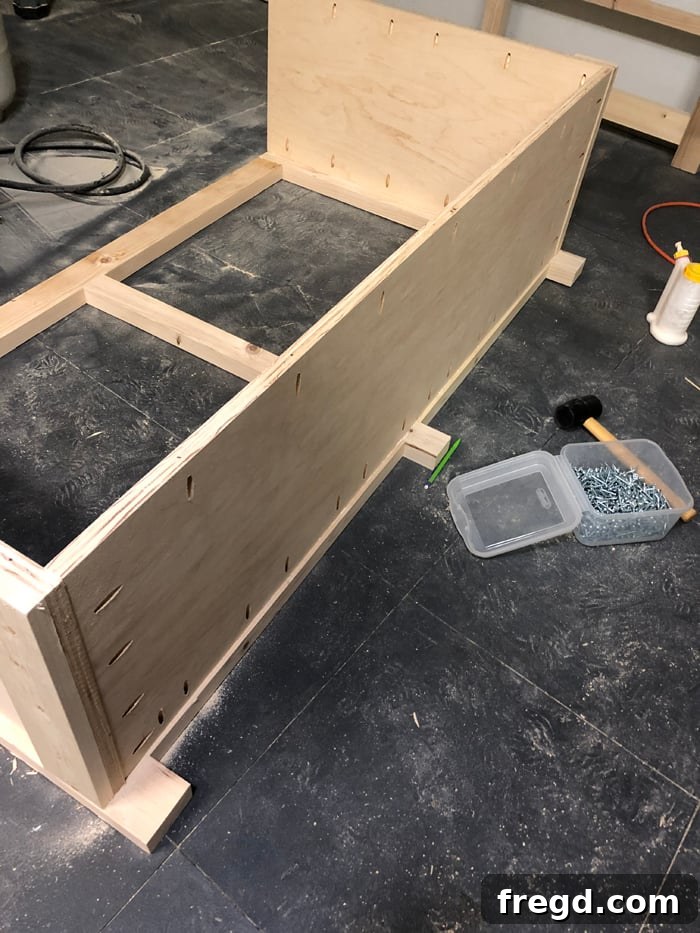
The base of this cabinet, like the side panels, is constructed from durable 3/4-inch hardwood plywood. Prepare this piece by adding 3/4-inch pocket holes along all four sides using your Kreg Jig. These pocket holes will facilitate strong, hidden connections. Then, apply wood glue generously to the mating surfaces and securely attach the base to both the back face frame and the side frames using 1.5-inch pocket hole screws. This step creates the robust platform upon which the entire cabinet rests, ensuring stability and longevity.
Phase 5: Adding the Middle Divider
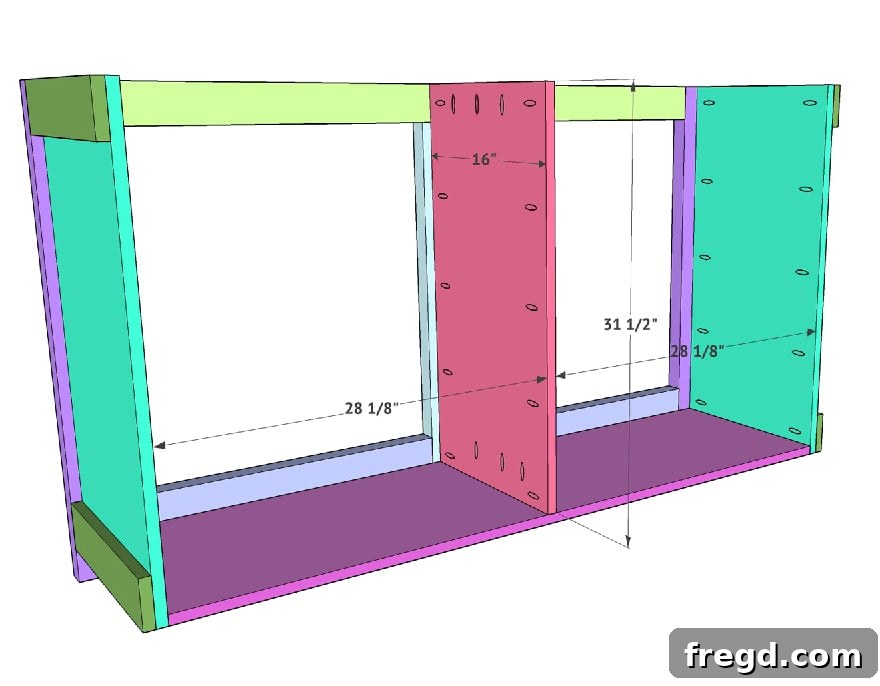
A central divider significantly enhances the cabinet’s structural integrity and provides practical separation for organizing contents. This divider is also made from 3/4-inch hardwood plywood, cut slightly shorter than the side frames to allow for proper door clearance and a flush top. Add pocket holes down both long sides and along the bottom edge of one side of this board. Attach it meticulously to the cabinet’s base using wood glue and 1.25-inch pocket hole screws for the bottom connection, and 1.5-inch pocket hole screws for the longer sides where it meets the middle leg of the face frame. Remember, wood glue is crucial for maximizing joint strength.
Phase 6: Attaching the Front Face Frame
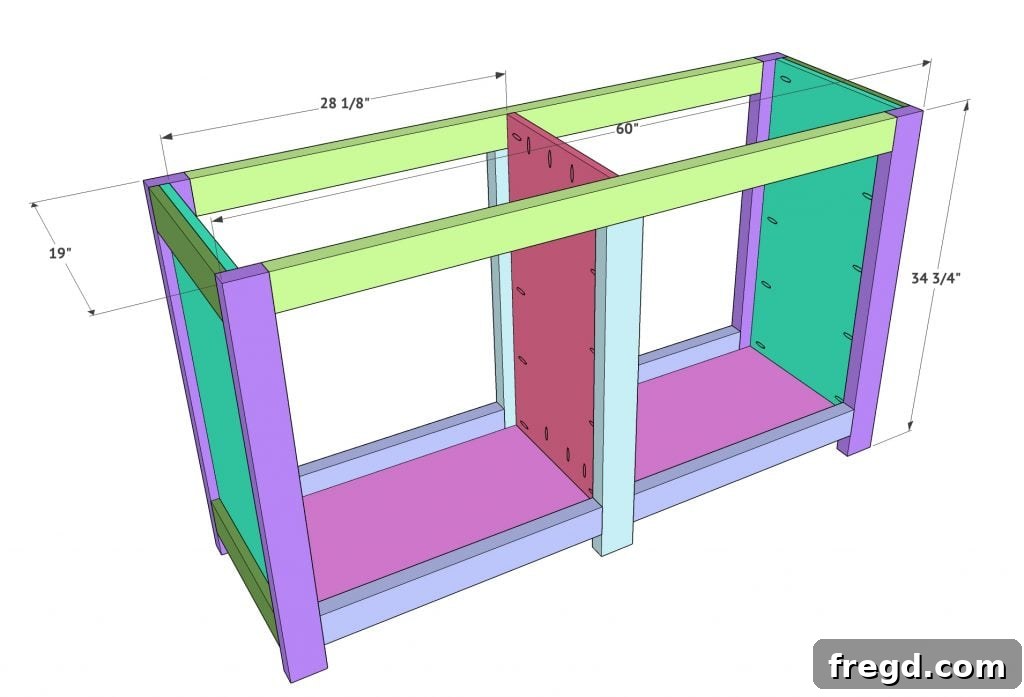
Now, it’s time to complete the main structural box by attaching the front face frame. This piece not only adds rigidity but also defines the front aesthetic of your cabinet. Apply wood glue to all mating surfaces, and then secure the front face frame by driving 1.5-inch Kreg pocket hole screws through the side frames and the center divider, directly into the face frame. Similar to the back face frame installation, ensure that the outsides and top of the front face frame are perfectly flush with the outside edges of the cabinet’s side panels. This precise alignment guarantees a professional and seamless appearance.
Phase 7: Building the Elegant Wainscoting Doors
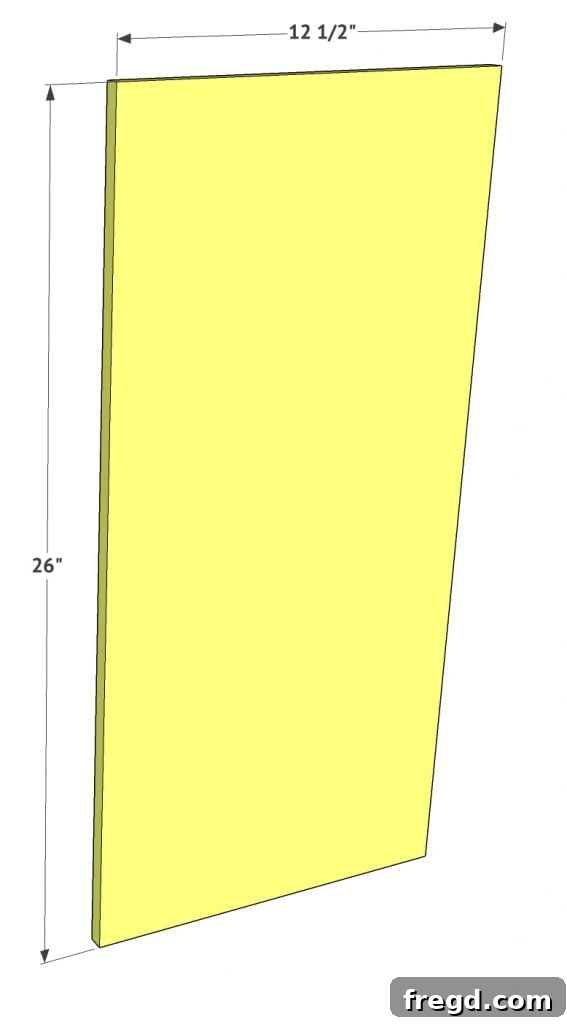
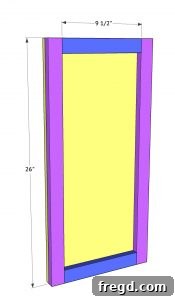
At this juncture, I prefer to pause the main cabinet assembly and focus on constructing the doors. This allows for precise fitting and ensures any minor adjustments can be made before the top and back are permanently attached. These beautiful doors are crafted from 1/2-inch hardwood plywood. Begin by carefully cutting each plywood panel to its exact size. A critical detail for proper function and aesthetics is to leave an approximate 1/8-inch gap around all sides of each door. It’s always best to measure and cut each panel precisely based on your cabinet’s actual openings, as slight variations can occur during the main assembly, ensuring a perfect fit even if the openings are not perfectly square.
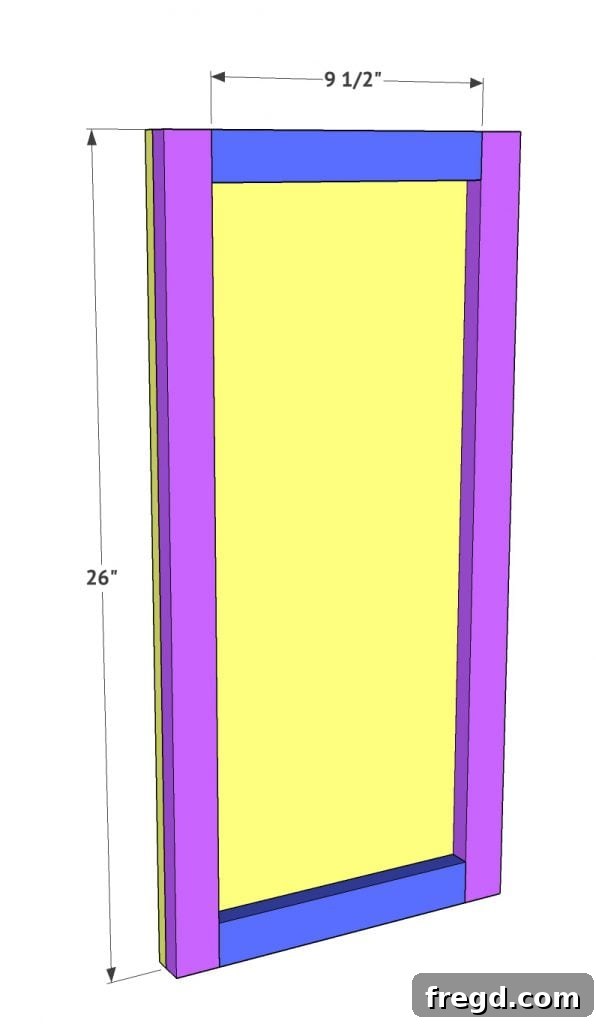
Next, you will attach the distinctive wainscoting door trim. This trim, which gives the doors their ‘fancy’ character, is typically made from slender decorative molding, often found in 1×4 dimensions or similar profiles suitable for wainscoting. Start by measuring and cutting your longer vertical trim pieces first, ensuring they span the full height of the plywood panel. Then, measure and cut the shorter horizontal pieces to fit precisely between the vertical trims. Attach all trim pieces securely to the plywood panel using both wood glue for lasting adhesion and 1-inch brad nails to hold them in place while the glue sets. This combination creates a strong, clean, and elegant door panel.
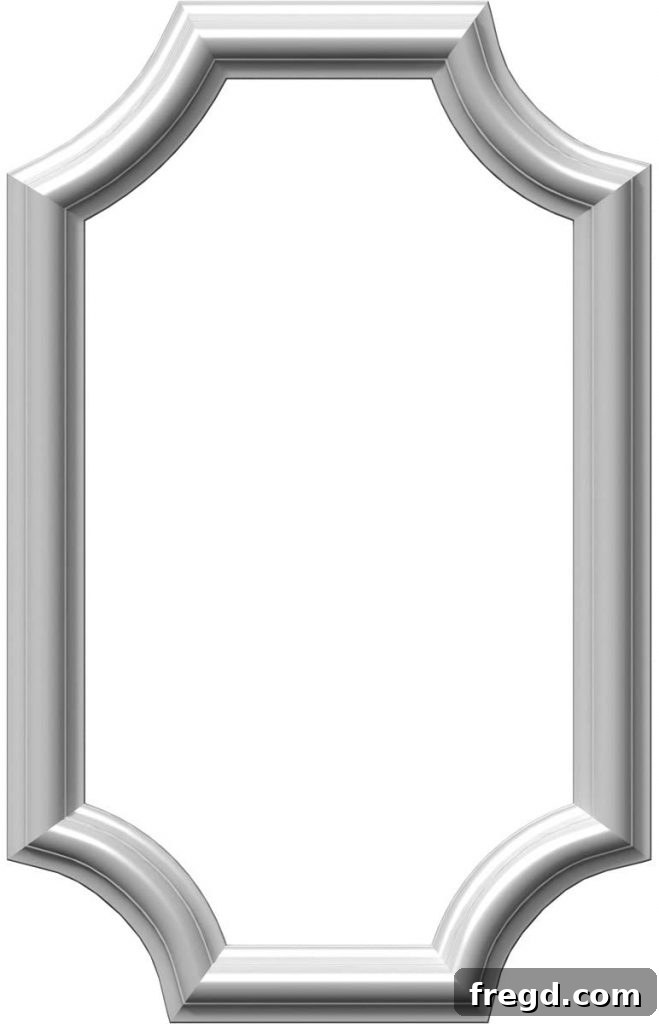
While I sourced my specific door trim from a local hardware store, I understand that exact links can be elusive. However, I found a very similar and high-quality alternative here on Amazon. I’ve personally used this brand for other trim projects and can attest to its excellent quality and consistent finish, making it a reliable choice for achieving that perfect wainscoting look.
Phase 8: Constructing the Cabinet Top
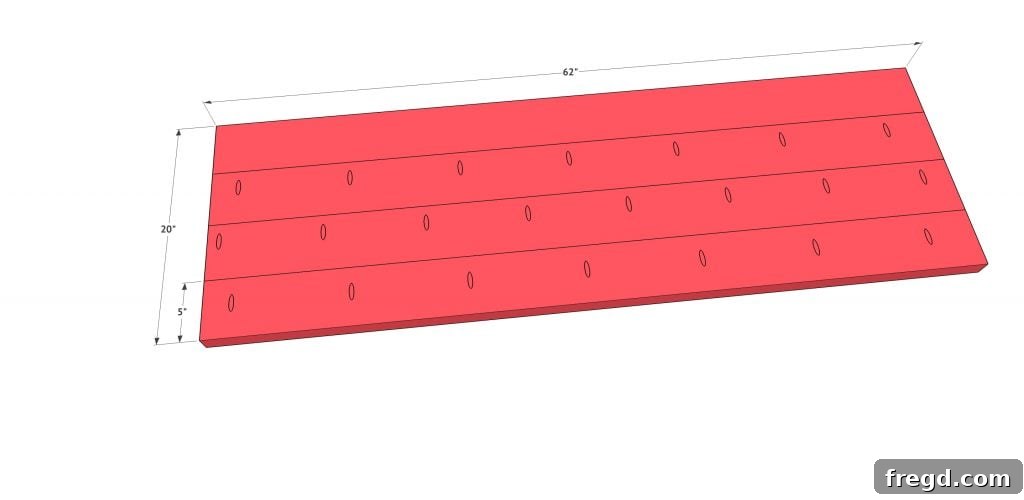
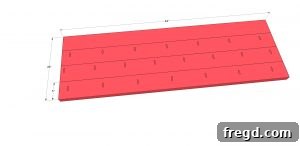
The top of the cabinet adds both functionality and a significant aesthetic element. For this project, the top is built from 2×6 boards, which I carefully ripped down to a uniform 5-inch width each. This modification provides a more substantial and customized look than off-the-shelf lumber. On one side of three of these boards, add 1.5-inch pocket holes. Align these boards flush with each other, ensuring a perfectly flat surface, and then securely attach them using 2.5-inch pocket hole screws. This technique creates a wide, robust, and visually appealing tabletop, ready for installation.
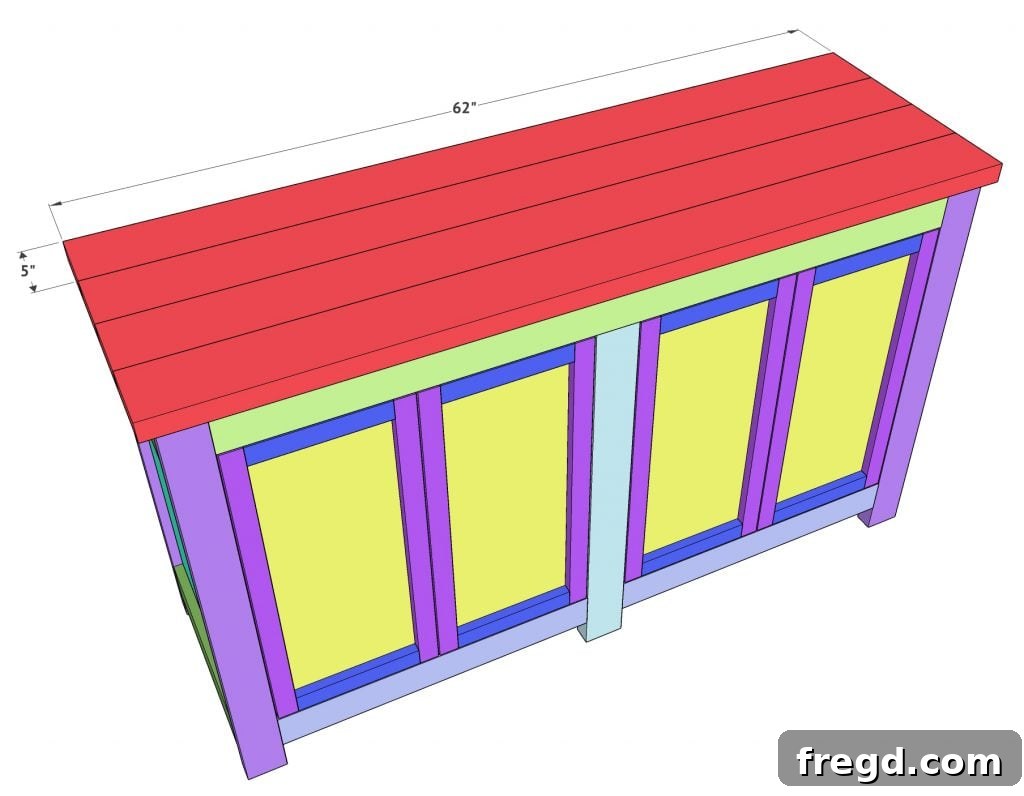
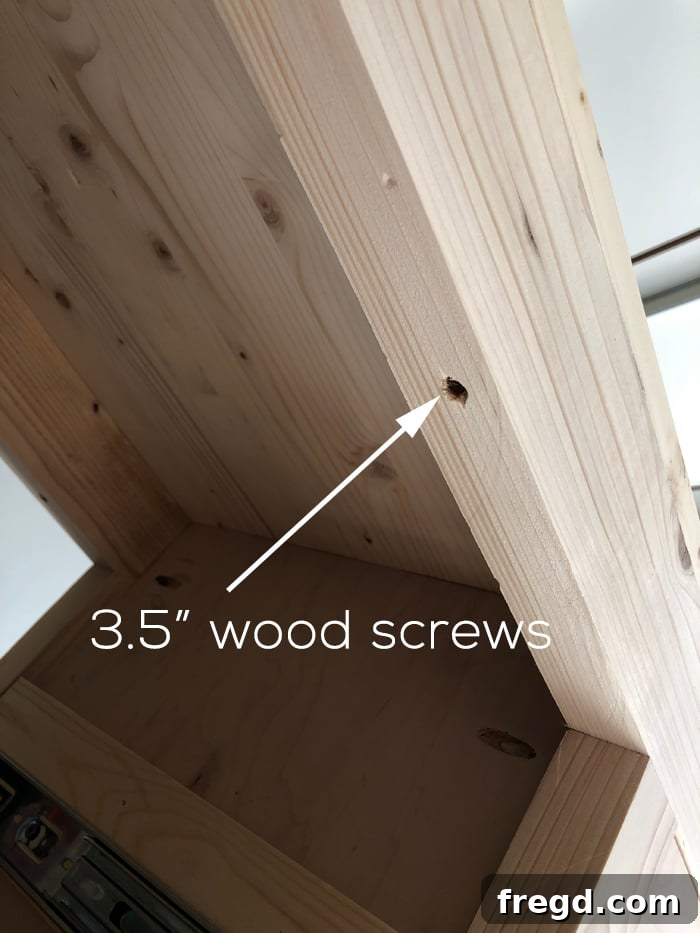
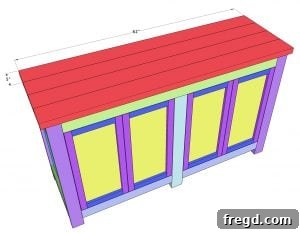
Once assembled, attach the cabinet top to the main cabinet body. For this, drive 3.5-inch wood screws or Spax screws directly through the face frame and into the underside of the cabinet top. This method ensures a very strong and secure connection, preventing any movement or sagging of the top over time. Take care to countersink your screws for a flush finish if you plan to fill and paint over them, or strategically place them in inconspicuous areas.
Phase 9: Installing the Back Panel
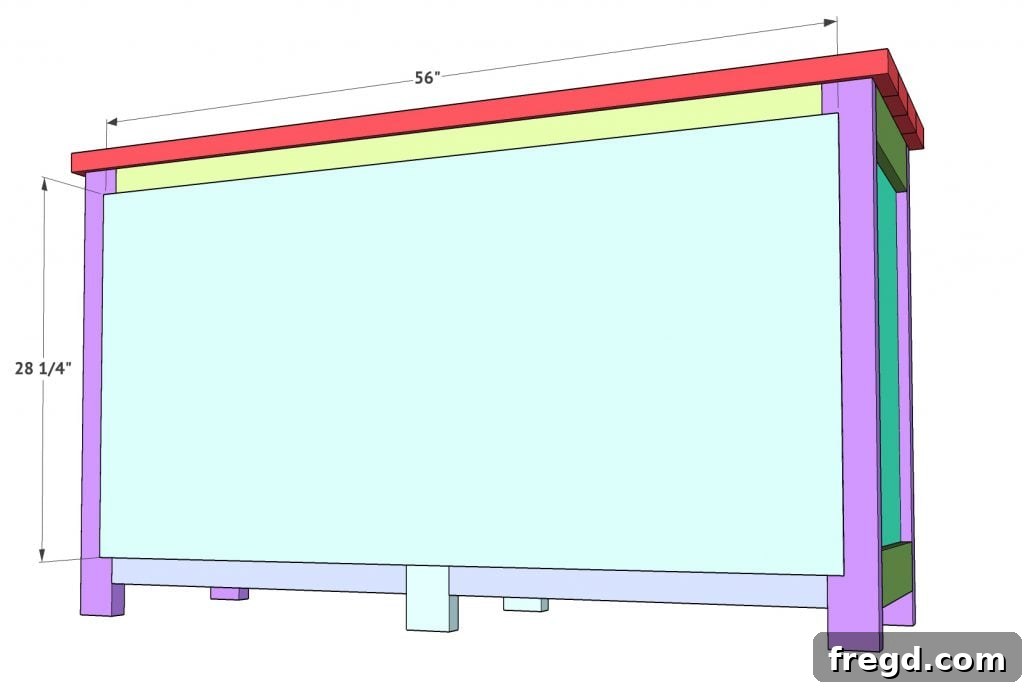
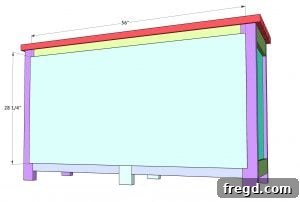
The final structural step is to add the back panel of your cabinet. This is typically made from 1/4-inch hardwood plywood, cut precisely to size to fit the entire back opening. Attach it securely to the back of the cabinet frame using wood glue and 1-inch staples or nails. The back panel not only encloses the cabinet, preventing items from falling out the back, but also significantly enhances the overall rigidity and squareness of the entire piece, making it more robust and stable.
Finishing Touches: Paint, Stain, and Hardware
With the construction complete, it’s time for the exciting part: bringing your cabinet to life with finishes! I chose a classic and versatile combination for this modern farmhouse piece. The doors and cabinet base were painted with Sherwin-Williams Pure White in a satin finish. This crisp white provides a fresh, clean look that brightens any space and highlights the wainscoting detail. For the top, I opted for Varathane stain in Golden Oak. The warm, rich tones of the Golden Oak create a beautiful contrast with the white, adding depth and a touch of rustic charm that perfectly complements the farmhouse aesthetic.
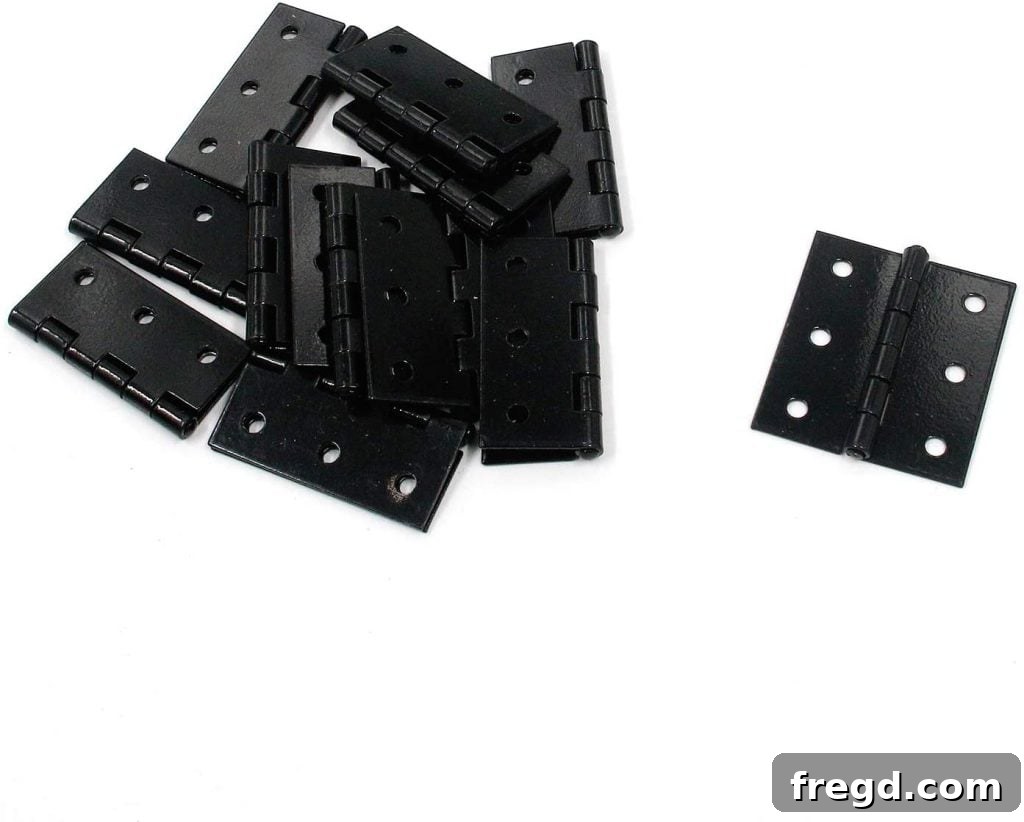
Hardware selection is crucial for both function and style. For the hinges, I discovered these fantastic options on Amazon, which offered an exceptional balance of quality and affordability. You can find them here. Their smooth operation and durable construction are exactly what you need for cabinet doors that will be opened and closed frequently.
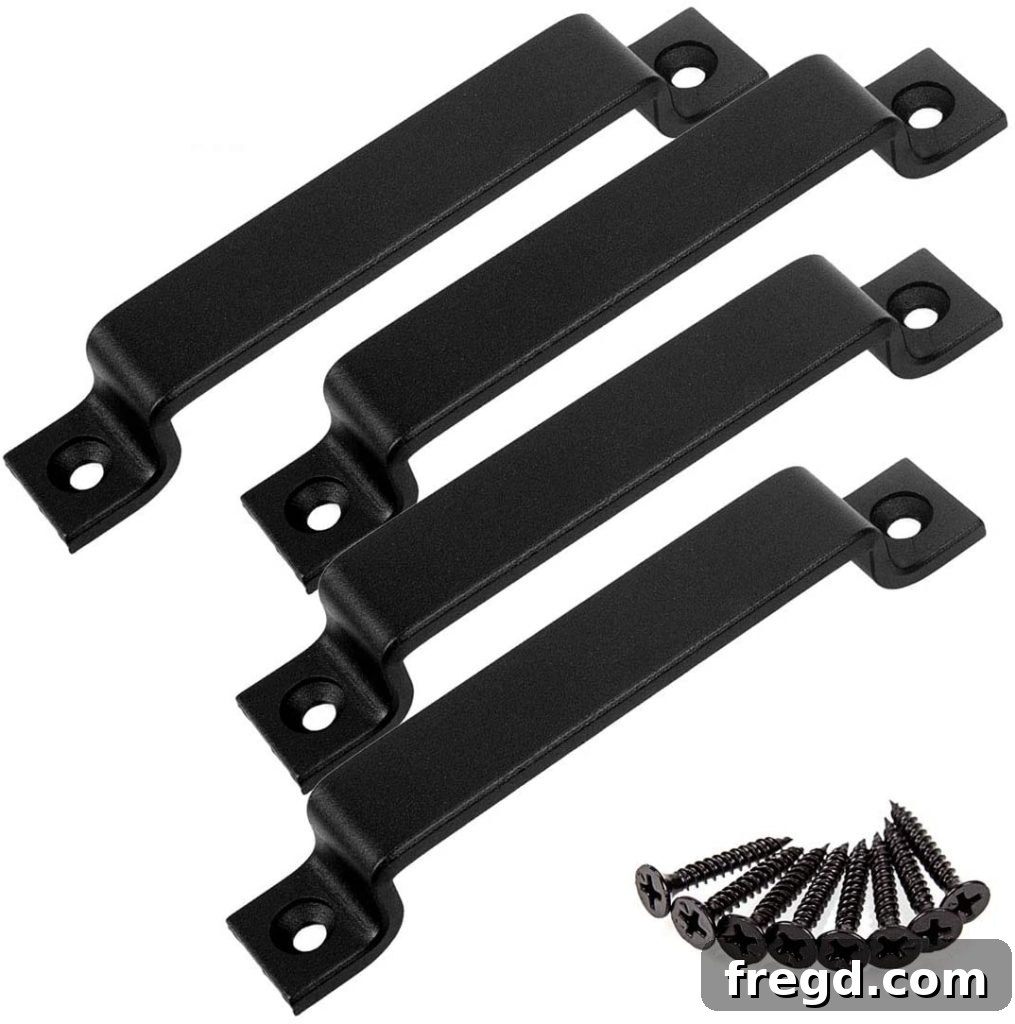
The door pulls are another element that significantly contributes to the overall aesthetic. I’ve used these specific pulls on several different builds because of their timeless design, robust feel, and incredible value. They are also available on Amazon here and ship incredibly fast, making them a convenient choice for your project. Their classic look perfectly ties into the modern farmhouse style, providing both beauty and functionality.
Decorating Your New Cabinet
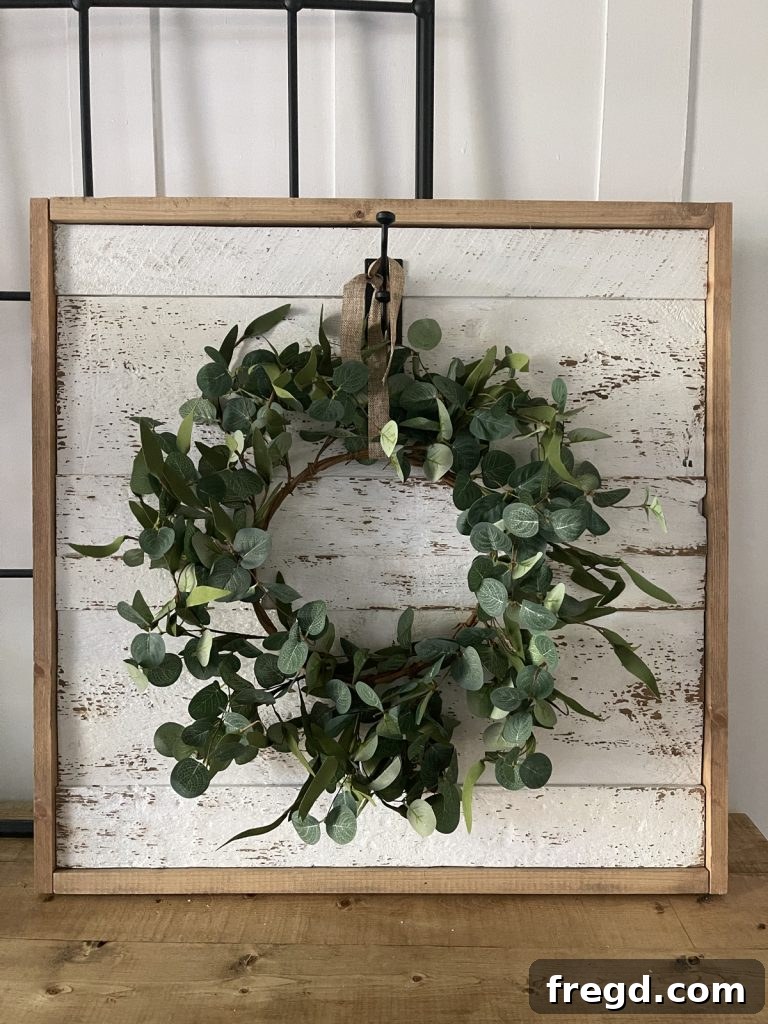
Once your cabinet is built, finished, and adorned with its hardware, it’s time to style it! A well-chosen decorative piece can truly elevate the look. For this entryway cabinet, I found a lovely wreath on Amazon here. While it was almost perfect, the berries were a bit too yellow for my desired aesthetic. A quick snip with a pair of scissors easily remedied this, allowing the wreath to blend seamlessly with the decor. Thoughtful styling not only personalizes your space but also showcases your new DIY masterpiece.
DIY Modern Farmhouse Fancy Door Cabinet
CLICK HEREto print the FREE plans!
Instructions
-
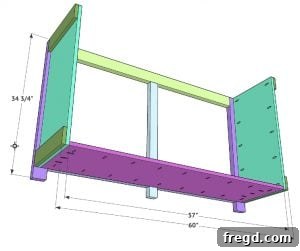
The first step is to build your 2 face frames. These are made from 2×4 boards that I ripped to 3” wide each. Add 1.5” pocket holes where they are shown here and attach in place using wood glue and 2.5” pocket hole screws. The bottom horizontal boards will line up 2.5” from the base of the leg pieces.

-
Now you will build the sides of the cabinet. These are constructed with 3/4” hardwood plywood and 1×4 boards. Add 3/4” pocket holes down each long side on the back side of the panel.
-
Then, attach the 1×4 trim to the front of the panel using wood glue and 1.25” brad nails. You will build two of these that will be identical.
-
Now attach the two side frames to the back face frame using wood glue and 1.5” Kreg pocket hole screws. You want the top of the side frames to be flush with the top of the back face frame which will leave a 2.5” space below the bottom of the side frames. You also want the outside of the trim boards to be flush with the outside edge of the face frame.
-
The base of this cabinet is also 3/4” hardwood plywood. Add 3/4” pocket holes with the Kreg Jig along all 4 sides of this piece. Then, attach it to the back face frame and side frames using wood glue and 1.5” pocket hole screws.
-
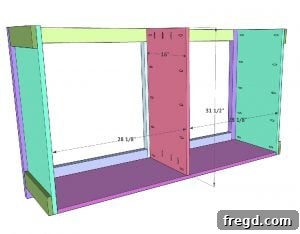
Attach the middle divider next. This is also 3/4” hardwood plywood cut slightly shorter than the side frames. Add pocket holes down both long sides and the bottom of one side of this board. Attach it to the base of the dresser and the middle leg of the face frame using wood glue and 1.25” pocket hole screws for the bottom and 1.5” pocket hole screws for the longer sides. Don’t forget to use wood glue too!
-
Attach the front face frame next! Use wood glue and 1.5” Kreg pocket hole screws to go through the side frames and center divider and into the face frame. Just like the back face frame, you want the outsides and top flush with the outside edges of the face frame.
-
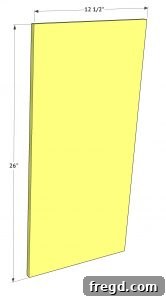
At this point, I like to stop and build the doors before adding my top and back. These doors are constructed from 1/2” hardwood plywood. Cut each panel to size. I like to leave 1/8” gap all around each door. It’s best to measure and cut this part exact in case one of your doors is uneven.
-
Attach the door trim next! This is 1×4 boards cut to size. Measure and cut your longer vertical pieces first, and then measure and cut the shorter horizontal pieces. Attach the trim pieces using wood glue and 1” brad nails.
-
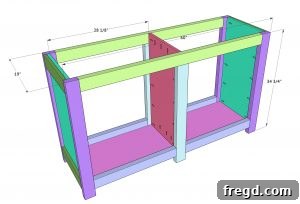
Build the top of the cabinet next. These are 2×6 boards that I ripped down to 5” wide each. Add 1.5” pocket holes down one side of 3 of the boards. Then, line them up flush and attach them using 2.5” pocket hole screws.
-
Attach the top to the cabinet with 3.5” wood or Spax screws through the face frame and into the top.
-
Final step is adding your back! This is just 1/4” hardwood plywood cut to size. Attach it to the back of the dresser using wood glue and 1” staples or nails.
This project is a testament to what you can achieve with a little creativity, the right tools, and detailed instructions. Enjoy building your very own custom modern farmhouse storage cabinet and transform your home’s entryway into a beautifully organized space!