Unlock the secrets to crafting beautiful, functional barn doors for your home with this comprehensive DIY guide. Whether you’re refreshing an old console, adding a touch of rustic charm to a pantry, or seeking a space-saving solution for a doorway, these easy-to-build barn doors are designed for success. Follow along with detailed instructions, a clear supply list, and expert tips to transform your living space. Say goodbye to heavy, clunky doors and embrace the lightweight, stylish appeal of your new custom creations!
Easy DIY Barn Doors: A Comprehensive Guide to Building Your Own
There’s something uniquely inviting about barn doors. Their blend of rustic charm and modern functionality makes them a popular choice for homeowners looking to add character and practical elegance to their interiors. For many, the idea of a DIY project can seem daunting, but with the right guidance, building your own barn doors is not only achievable but incredibly rewarding. This guide is crafted to walk you through every step of creating your very own easy DIY barn doors, making the process smooth, enjoyable, and successful.
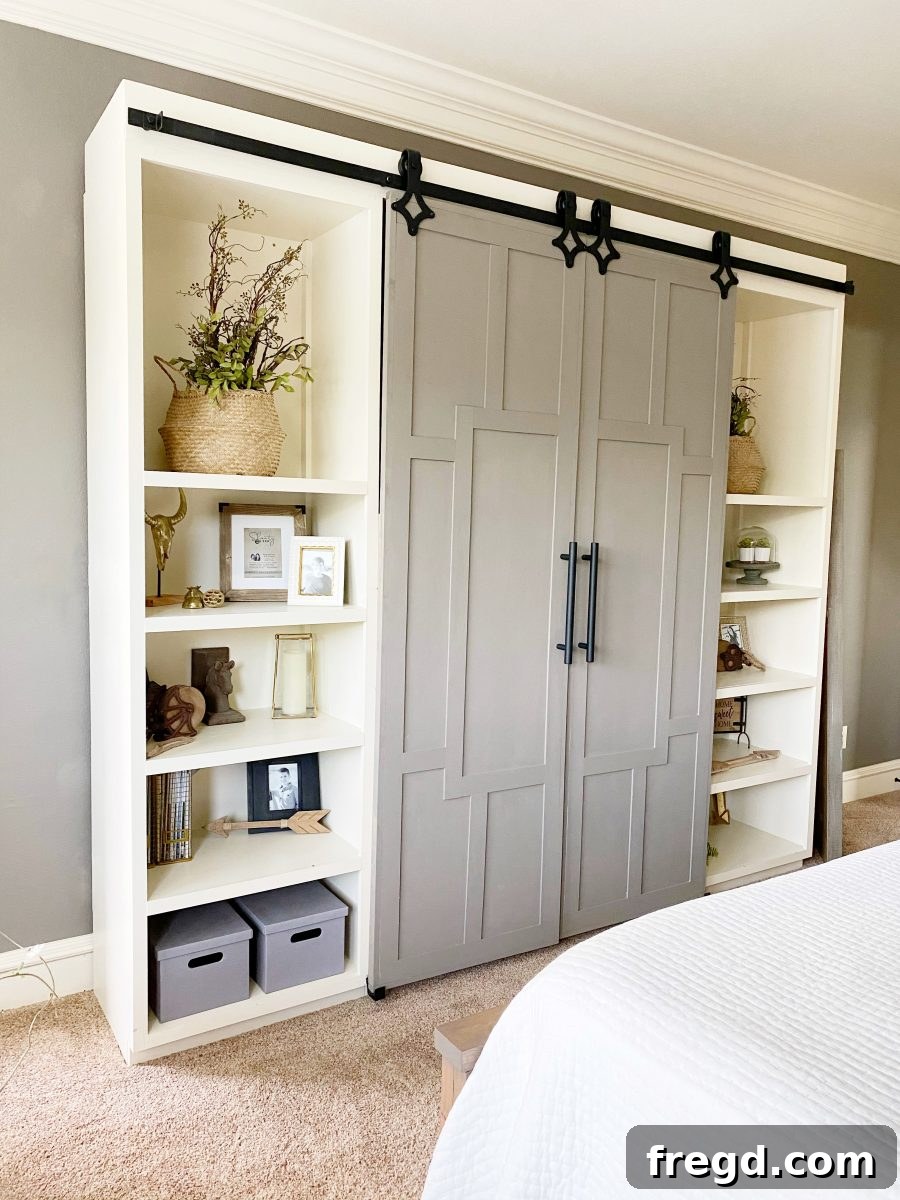
My own journey into building these lightweight barn doors began with a desire for a refresh. The original barn doors on my custom-designed media console had served me well for years, but their weight eventually took its toll on the hardware. It was the perfect excuse to create a lighter, more modern set that would glide effortlessly and instantly update the look of my living room. The result? A stunning transformation that I absolutely adore, and now I’m sharing all the how-to details, including a video tutorial and free printable plans, so you can achieve the same fantastic results!
Watch the full how-to video above for a visual guide to building your easy DIY barn doors.
Click here to jump to the free printable plans!
Planning Your Barn Door Project: Dimensions, Style, and Safety
Before diving into the build, careful planning is essential for a successful outcome. The beauty of DIY barn doors lies in their customizability, allowing them to perfectly fit any space, from media consoles to bedroom entrances or pantry openings. The first crucial step is accurate measurement. Determine the exact dimensions of the opening your barn doors will cover, then decide how much overlap you desire on each side for aesthetic appeal and privacy. Typically, barn doors are designed to be slightly wider and taller than the opening they cover.
Consider the style you want to achieve. Traditional barn doors often feature Z-braces or K-braces, but modern designs, like the lightweight ones presented here, focus on clean lines and geometric patterns created with trim. This specific design offers a sophisticated touch that can blend seamlessly with various interior styles, from farmhouse chic to contemporary minimalism. The choice of wood also plays a role in the final look and feel, and opting for lighter materials like poplar craft boards helps significantly reduce the overall weight, making for easier installation and smoother operation.
Finally, always prioritize safety. Working with power tools requires attention and proper safety gear. Ensure your workspace is clean and well-lit, and always wear safety glasses, hearing protection, and appropriate clothing. Familiarize yourself with each tool before you begin cutting and assembling.
Tools and Equipment You’ll Need
This project is designed to be accessible, requiring only a few essential tools that many DIY enthusiasts already own. For those just starting their tool collection, these are excellent investments that will serve you well in many future projects.
- Miter Saw: Indispensable for making precise crosscuts and angle cuts, ensuring your frame and trim pieces fit together perfectly.
- Table Saw (optional): While not strictly necessary, a table saw can be incredibly helpful for ripping larger sheets of plywood or wider boards down to size, offering more versatility.
- Kreg Jig: A pocket hole jig is a game-changer for creating strong, concealed joints, making your frame assembly robust and clean.
- Drill: Essential for drilling pilot holes and driving screws, especially when working with pocket hole joinery.
- Brad Nailer: Perfect for attaching trim pieces with small, less visible nails, providing a strong hold with minimal surface damage.
- Pin Nailer (optional): For even smaller, virtually invisible fasteners on delicate trim work, a pin nailer offers an extra level of refinement.
- Stapler (optional): A staple gun can be used for attaching the plywood backing quickly and securely, offering an alternative to brad nails.
- Sander: Crucial for achieving a smooth, professional finish, preparing the wood for paint or stain. Hand sanding blocks or an orbital sander are both suitable.
Essential Supplies for Your Barn Doors
Choosing the right materials is key to the longevity and aesthetic appeal of your barn doors. This list provides the exact quantities and types of wood used for this lightweight design, ensuring a durable yet easy-to-manage door.
- 4 – 1x4x8 boards: These will form the core frame of your barn doors. Opt for common whitewood or pine for an affordable yet sturdy base.
- 3 – 1x2x8 boards: Used for the decorative trim and outer framing, adding dimension and detail.
- 9 – 1/4″x3x48″ craft boards: These thinner boards are perfect for the front decorative elements, contributing to the lightweight design. Poplar or similar softwoods are ideal.
- 1 – 1/4″x48″x96″ hardwood plywood: This forms the main panel of the door, providing a stable and smooth surface for the trim.
- 1 1/4″ brad nails: For securing various components, especially the outer trim.
- 1/2″ pin nails: Ideal for attaching the decorative front trim discreetly.
- 5/8″ staples: To efficiently attach the plywood backing to the frame.
- 1 1/4″ pocket hole screws: For robust frame assembly using your Kreg Jig.
- Wood glue: An essential for strengthening all joints and ensuring long-lasting stability.
- Barn door hardware: Includes the track, rollers, and floor guides. Choose a style that complements your home decor.
Detailed Construction Steps
Cut List Preparation
Precision in cutting is paramount for a professional-looking barn door. Before making any cuts, it’s highly recommended to consult and print the free plans provided by Shanty2Chic. These plans will give you exact measurements for all components, minimizing waste and ensuring a perfect fit.
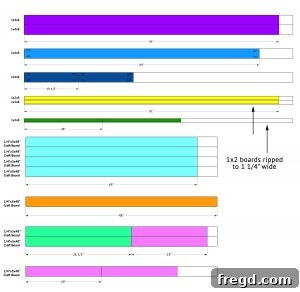
The first cut list focuses on the primary frame boards, usually 1x4s and 1x2s, which form the structural backbone of your door.
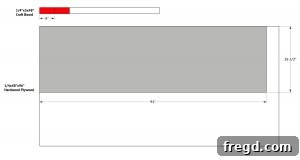
The second cut list provides measurements for the decorative craft boards that will create the unique pattern on the front of your barn door. Always measure twice and cut once!
Step 1: Building the Robust Frame
The foundation of your barn door is its frame. A sturdy frame ensures the door maintains its shape and stability over time. Using pocket hole joinery with a Kreg Jig will create strong, hidden connections for a clean finish.
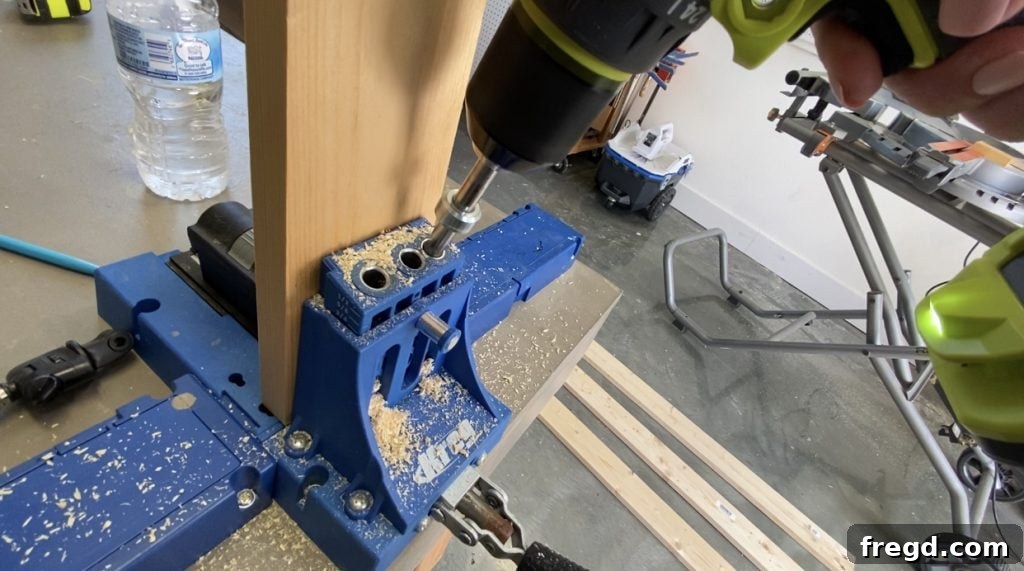
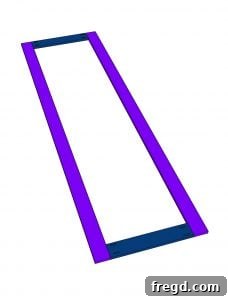
Begin by cutting your 1×4 boards to size according to your project plans. These will be your main frame components. Using your Kreg Jig, drill 3/4″ pocket holes into both ends of the short frame boards. Ensure your drill bit is set to the correct depth for 3/4″ material thickness.
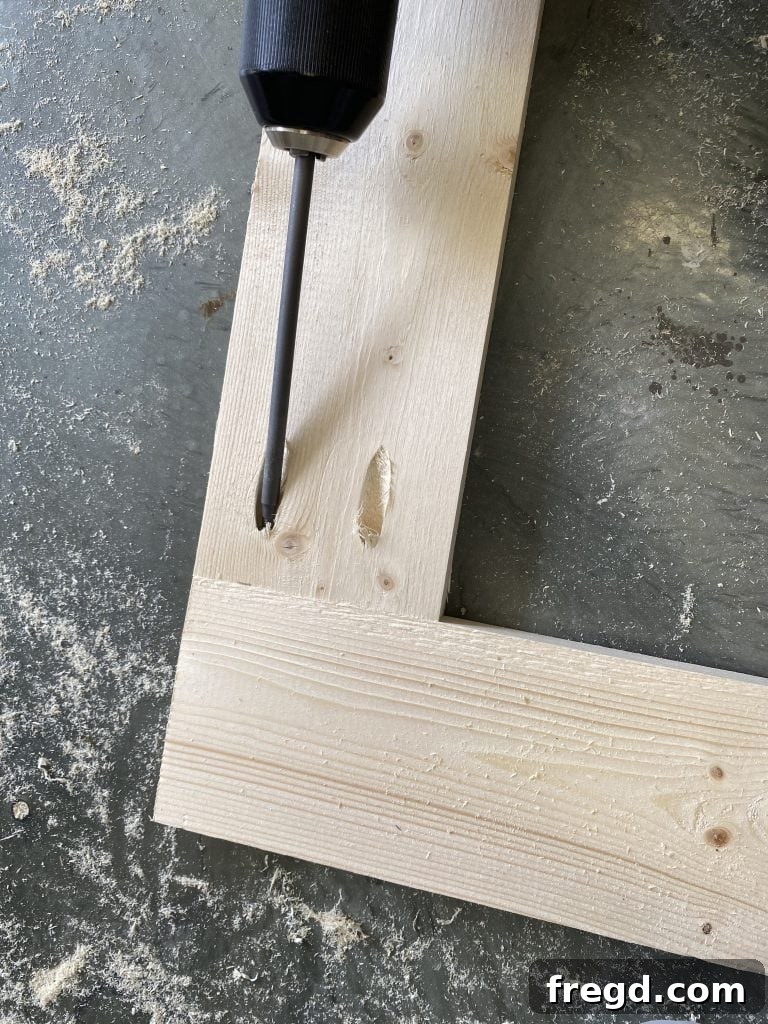
Apply a generous amount of wood glue to the ends of the short frame boards before aligning them with the long frame boards. Secure them firmly with 1 1/4″ pocket hole screws. This combination of glue and screws creates an incredibly durable joint.
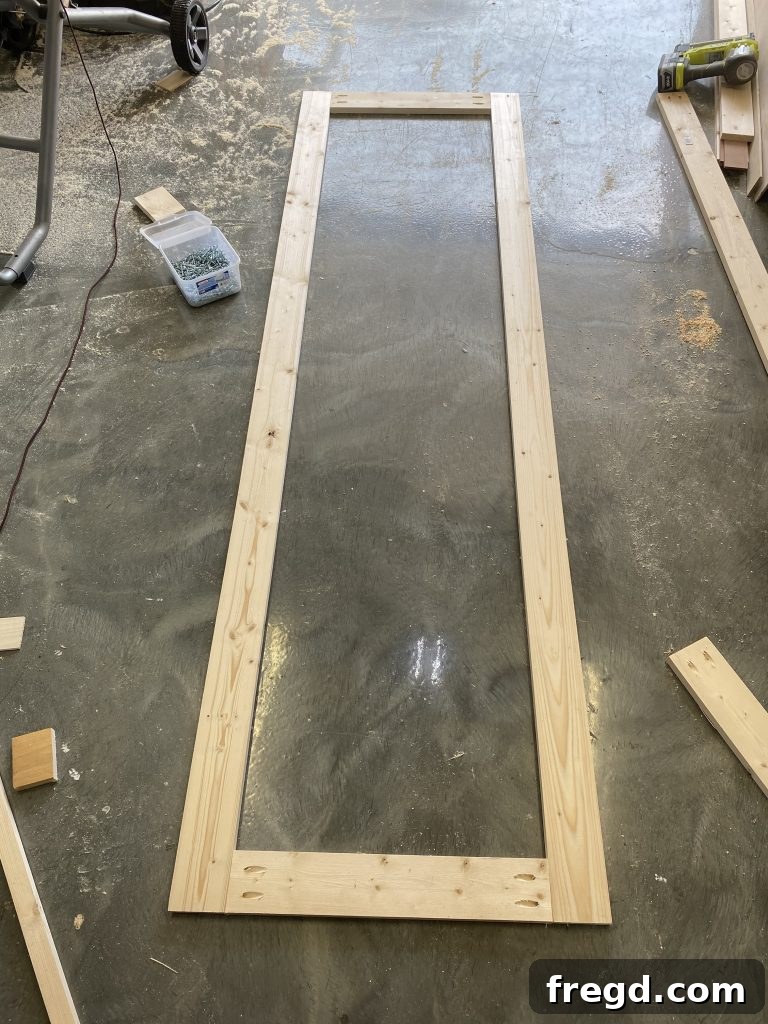
Once assembled, your outer frame should form a perfectly square or rectangular shape, depending on your door’s dimensions. Double-check its squareness with a measuring tape or carpenter’s square to prevent future warping.
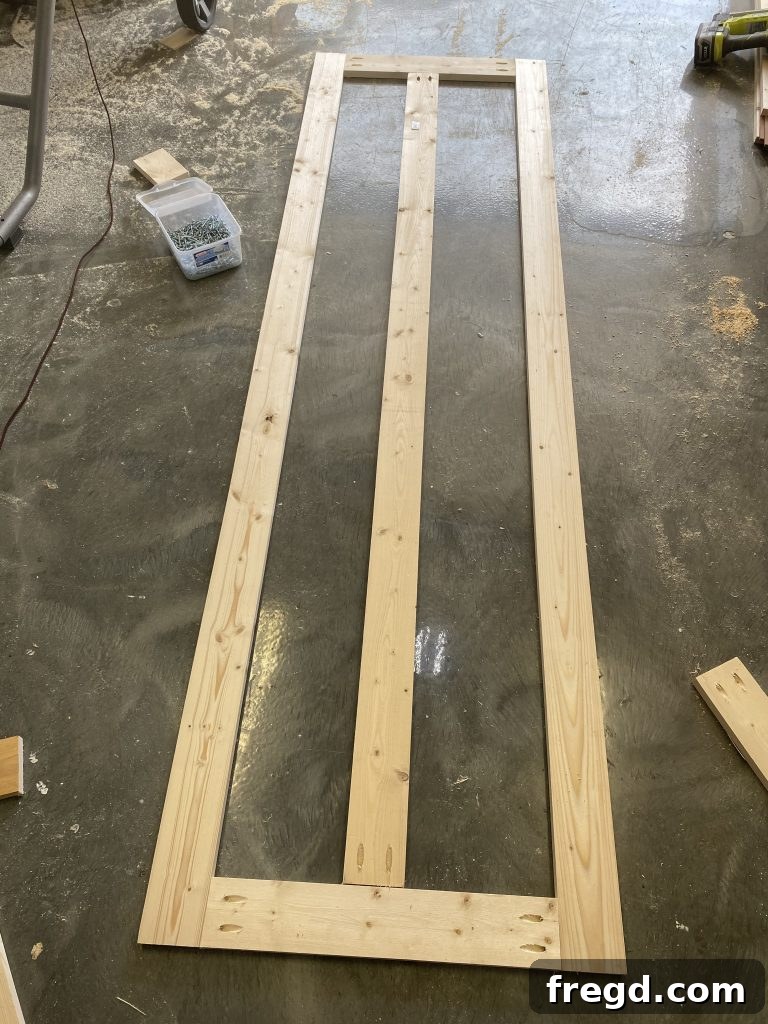
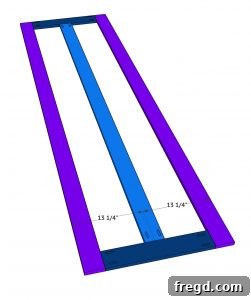
Next, cut the middle frame board to the appropriate size. Drill 3/4″ pocket holes at both ends of this board as well. Position it precisely in the center of your short frame boards. Attach it using 1 1/4″ pocket hole screws and wood glue, creating a strong central support for your door. This middle board is crucial for preventing the door from bowing and provides additional stability.
Step 2: Adding the Plywood Backing
The plywood backing provides a solid, flat surface for attaching the decorative trim and contributes significantly to the door’s structural integrity and lightweight nature.
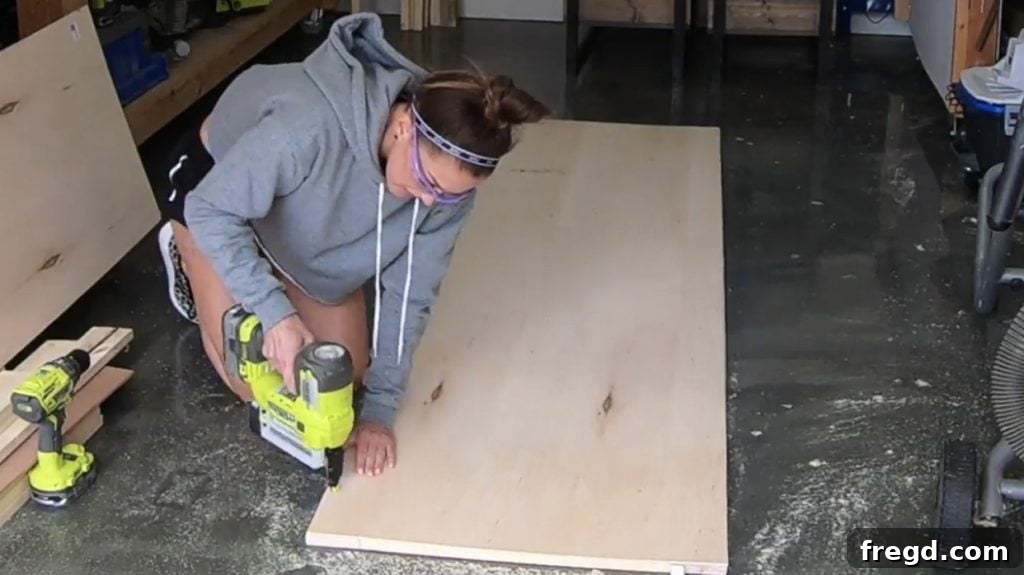
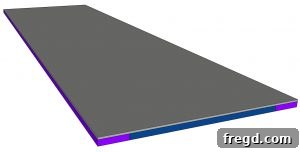
Carefully cut your 1/4″ hardwood plywood to exactly match the outer dimensions of your assembled frame. Flip the frame over so the side without the decorative trim is facing up. Apply a thin, even layer of wood glue over the entire frame surface that will contact the plywood. Place the plywood on top, aligning it perfectly with the edges of the frame. Secure the plywood to the frame using 5/8″ staples, spaced every 4-6 inches along all frame boards, including the middle support. This ensures a strong, uniform bond across the entire surface.
Step 3: Crafting the Decorative Trim
This is where the unique character and visual appeal of your barn doors truly come to life. The decorative trim creates the signature pattern that will define your door’s style.
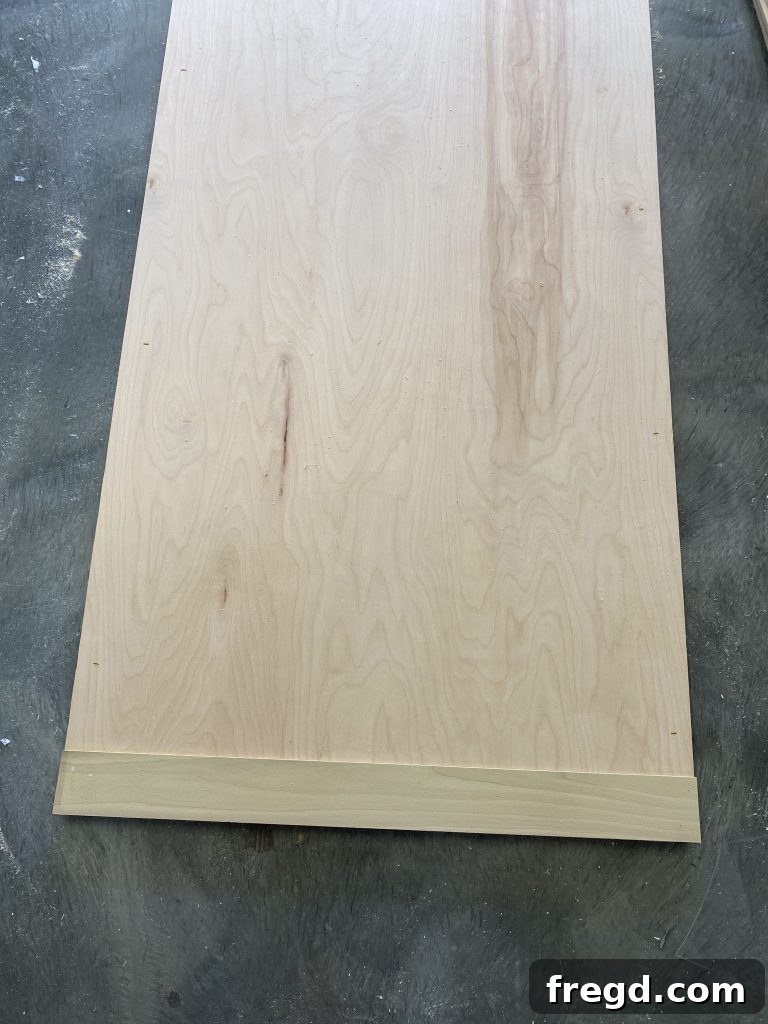
Cut your 1×2 boards (front outside trim) to size. These pieces will frame the entire front face of your barn door. Apply wood glue to the back of each trim piece and carefully align them with the outer edges of the plywood panel. Secure them in place using 1/2″ pin nails. The small size of pin nails makes them nearly invisible, preserving the clean look.
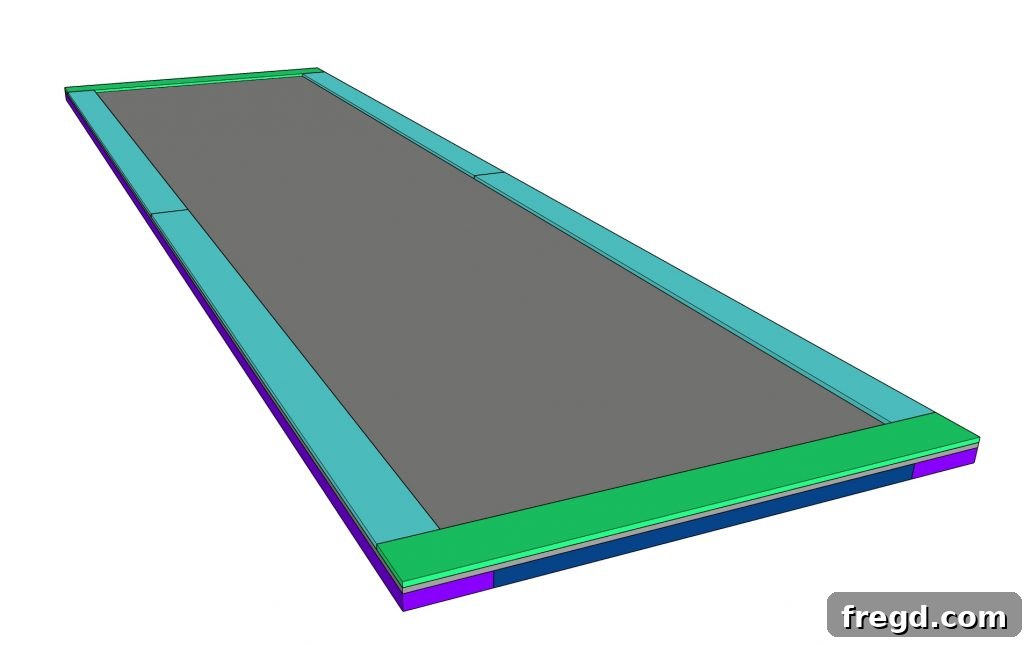
With the outer trim in place, you now have a defined border for your decorative pattern.
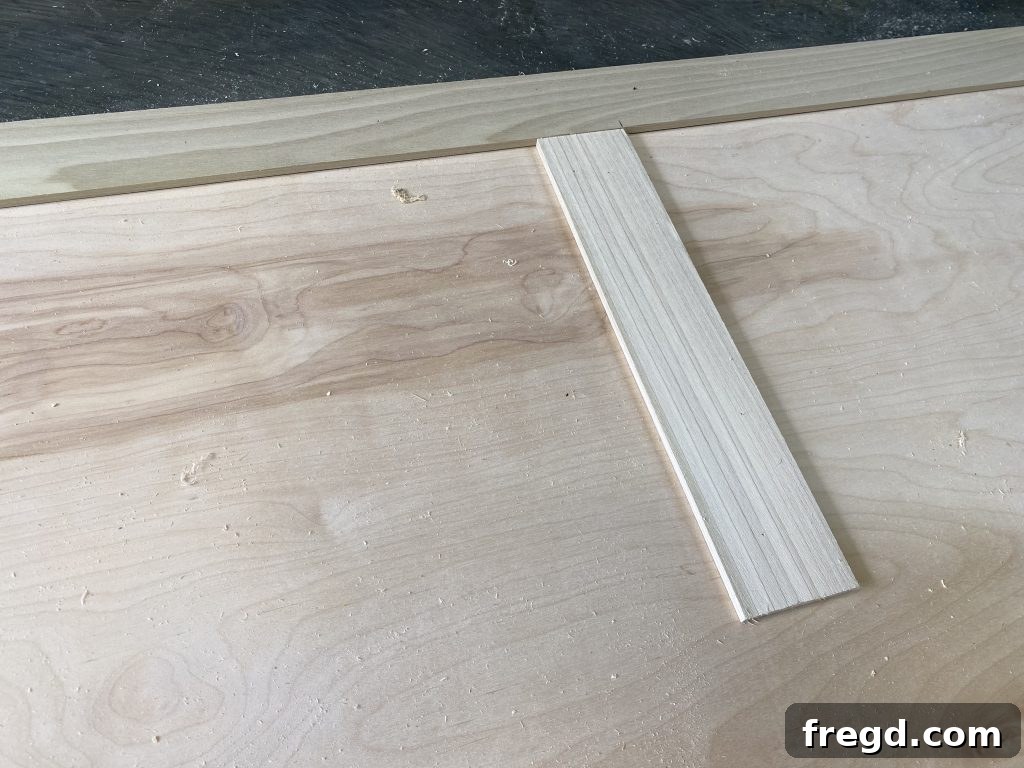
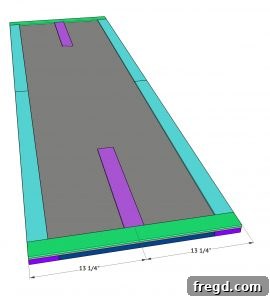
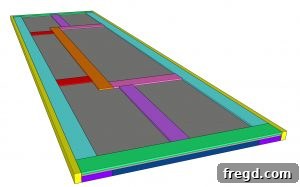
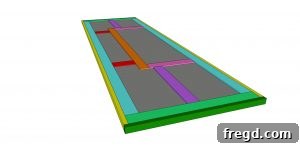
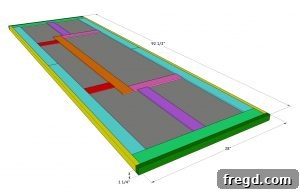
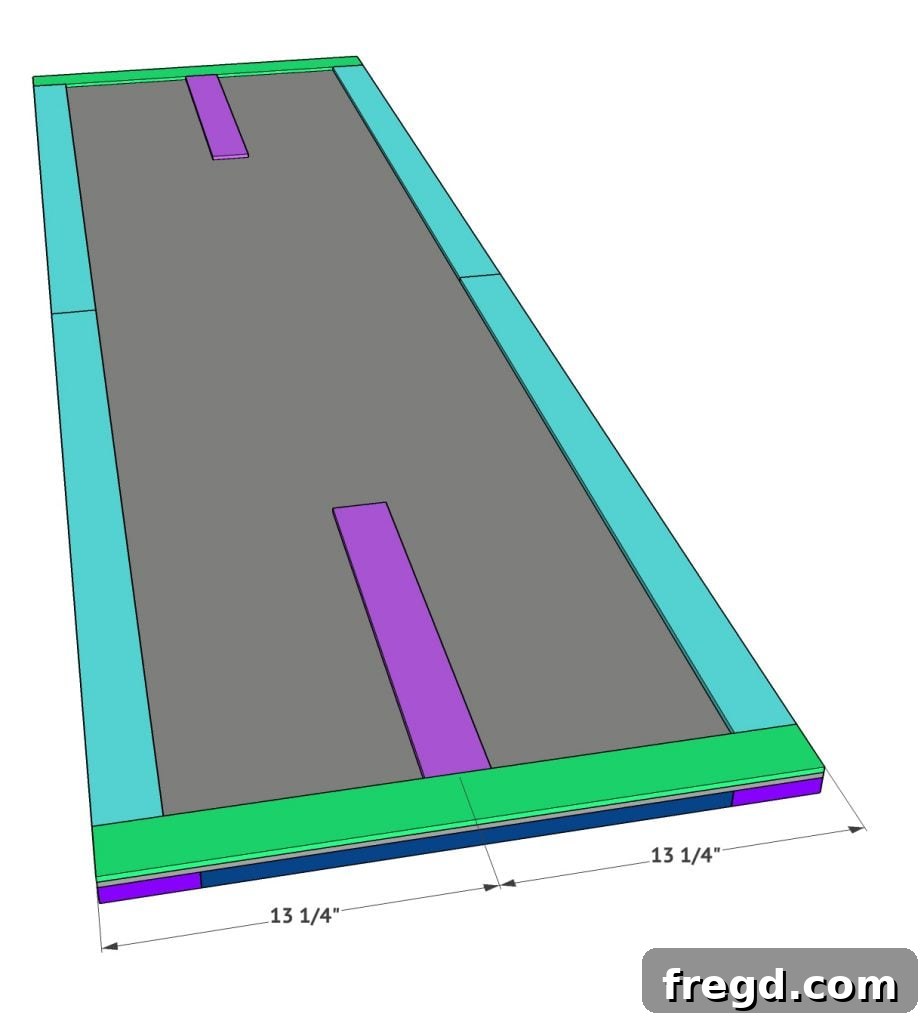
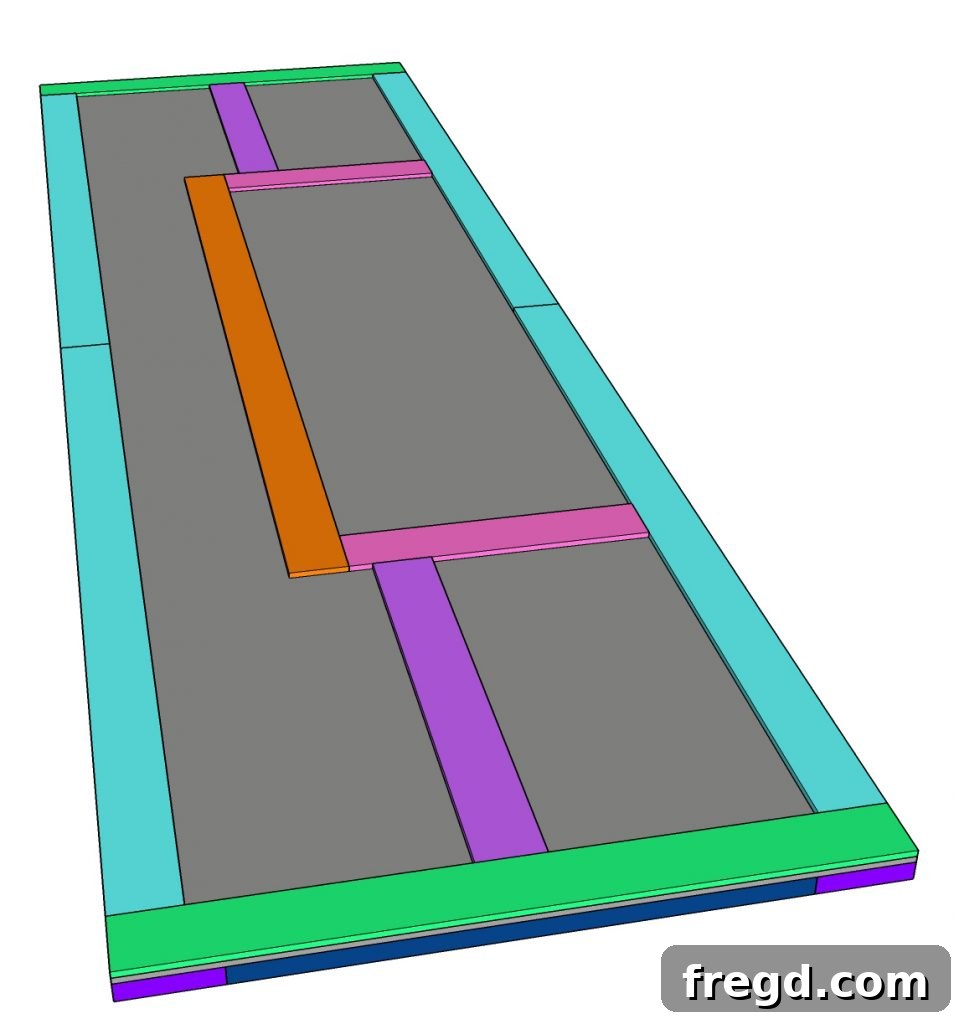
Next, cut the top and bottom middle pieces of trim (craft boards, referring to the purple pieces in the detailed plans). Center these pieces on the door, ensuring even spacing from the outer trim. Attach them with 1/2″ pin nails and wood glue.
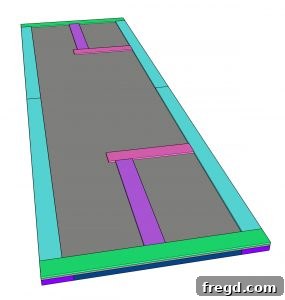
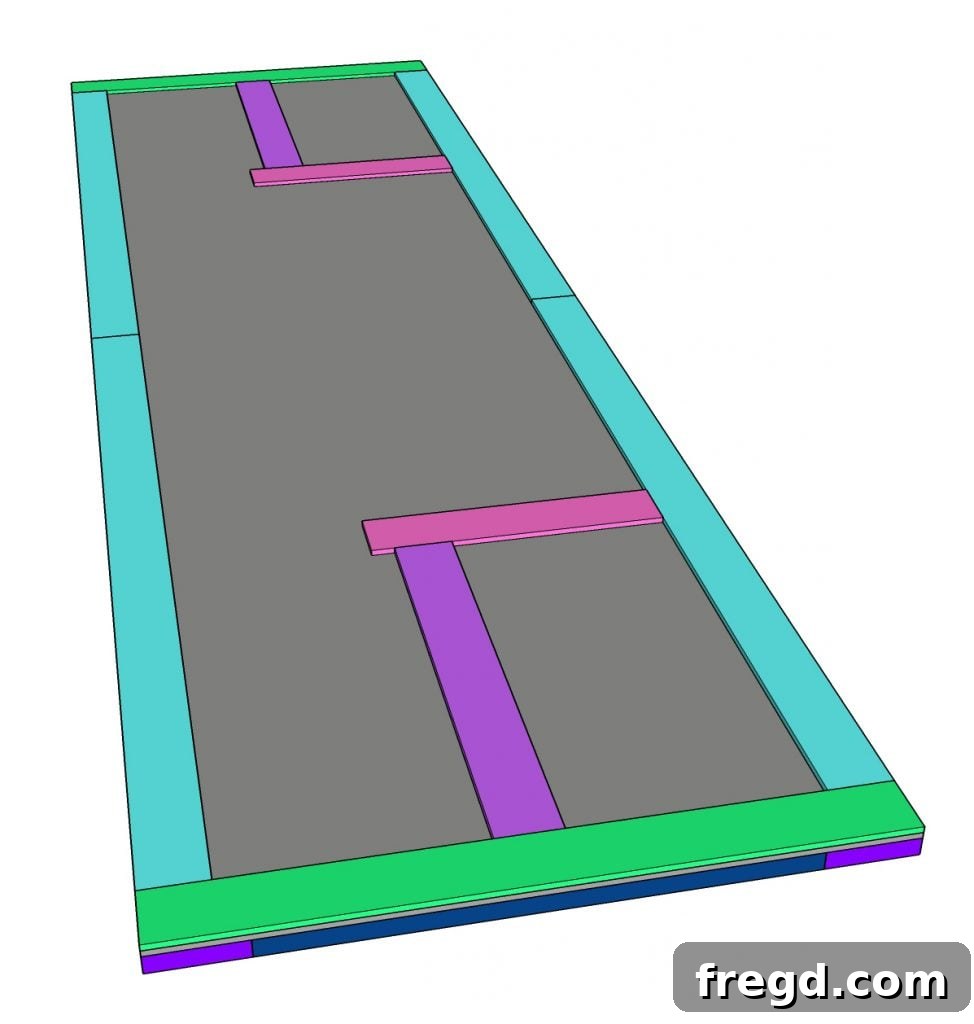
Continue by cutting the short horizontal trim pieces (pink in the plans) to size. These pieces will connect the outer frame trim to your central vertical trim. Attach them at the top of the vertical pieces with 1/2″ pin nails and wood glue, creating a distinct panel effect.
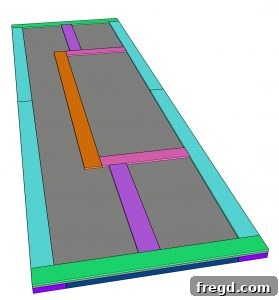
Cut the long vertical trim piece (orange in the plans) to size. This piece will span the height of your central design. Attach it precisely at the ends of the horizontal pieces, again using 1/2″ pin nails and wood glue, ensuring all edges meet cleanly.
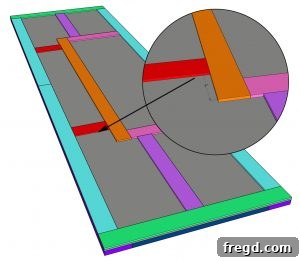
Now, cut the remaining short horizontal trim pieces (red in the plans) to size. These will create the smaller decorative boxes within your design. Attach them exactly 4″ from the ends of the long vertical piece, maintaining symmetry. Secure them with 1/2″ pin nails and wood glue.
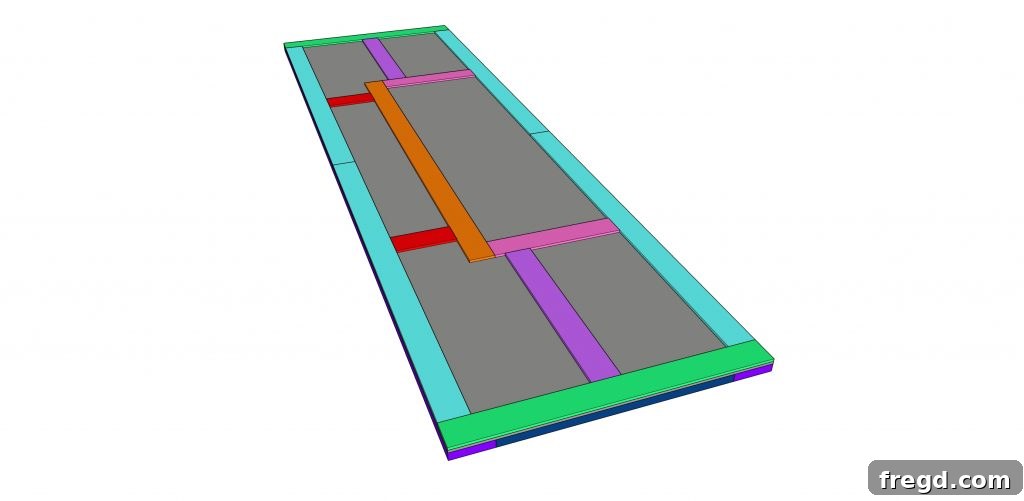
Congratulations! All of your decorative trim pieces are now attached, creating a beautiful and intricate pattern on the front of your barn door. Take a step back and admire your handiwork before moving to the final structural additions.
Step 4: Attaching the Outside Frame Trim
The final layer of trim provides a finished edge to your barn door, covering any exposed plywood edges and adding a professional, built-in look.
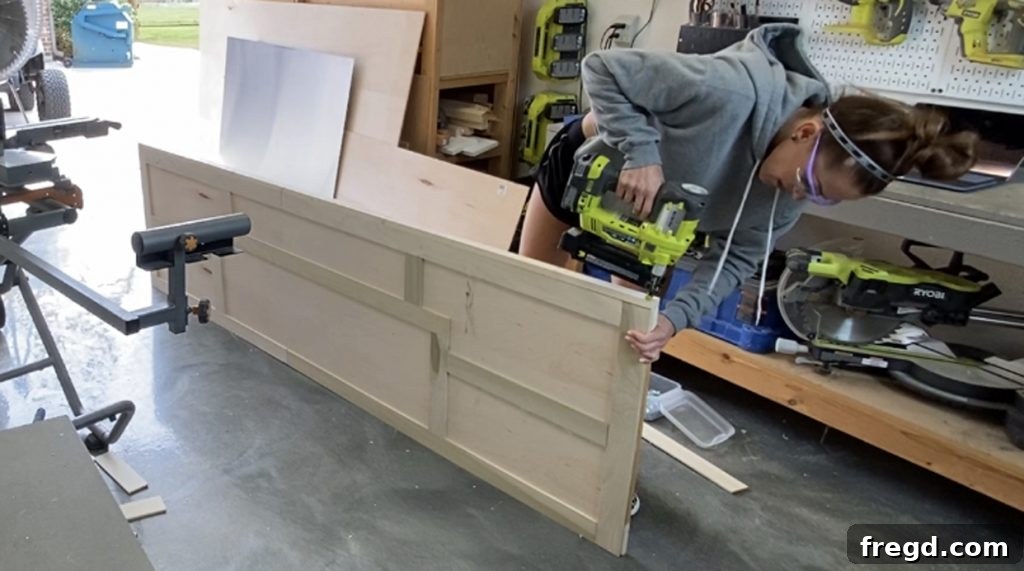
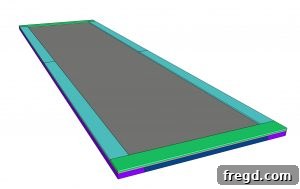
Cut the side trim pieces (from your 1×2 boards) to size, matching the full height of your barn door. Apply wood glue along the side edges of the door. Carefully align the trim pieces so their front surface is perfectly flush with the front of the decorative trim you just attached. This creates a seamless, layered effect. Secure these side trim pieces with 1 1/4″ brad nails, spacing them evenly for a strong hold.
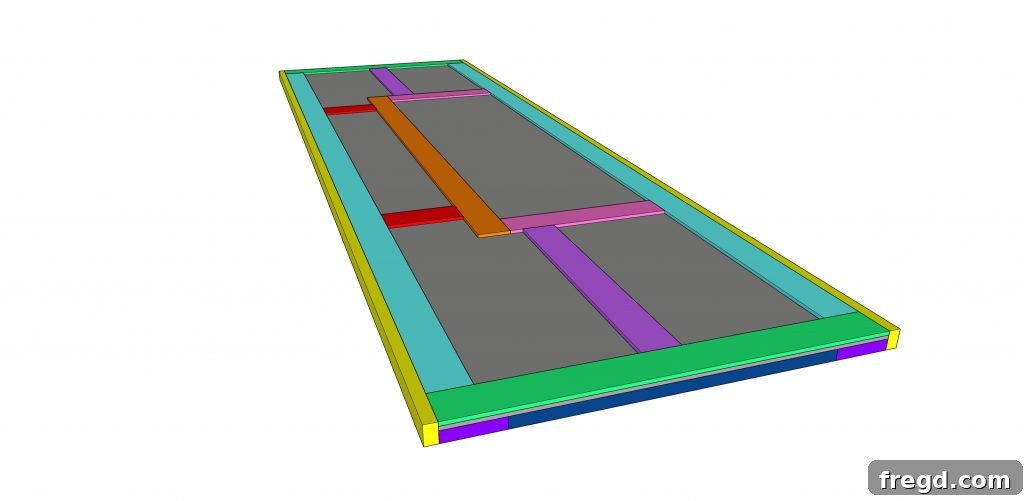
Ensure the side trim pieces are straight and flush along their entire length. Any gaps or misalignments will be noticeable in the final finish.
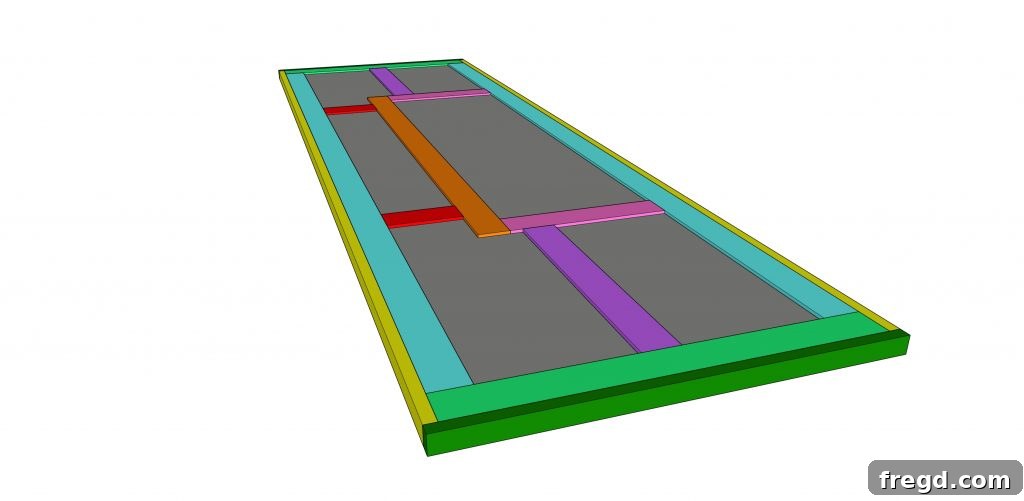
Finally, cut the top and bottom trim pieces to size, ensuring they fit snugly between the newly installed side trim pieces. Apply wood glue to the ends of the door and attach these trim boards using 1 1/4″ brad nails. The top and bottom trim boards should also be perfectly flush with the side trim boards, completing the clean, framed look of your barn door. With this step, the construction of your barn door is complete!
Step 5: The Perfect Finish: Sanding and Painting
A professional finish can elevate your DIY barn doors from homemade to custom-made. This stage requires patience and attention to detail, but the results are well worth the effort.
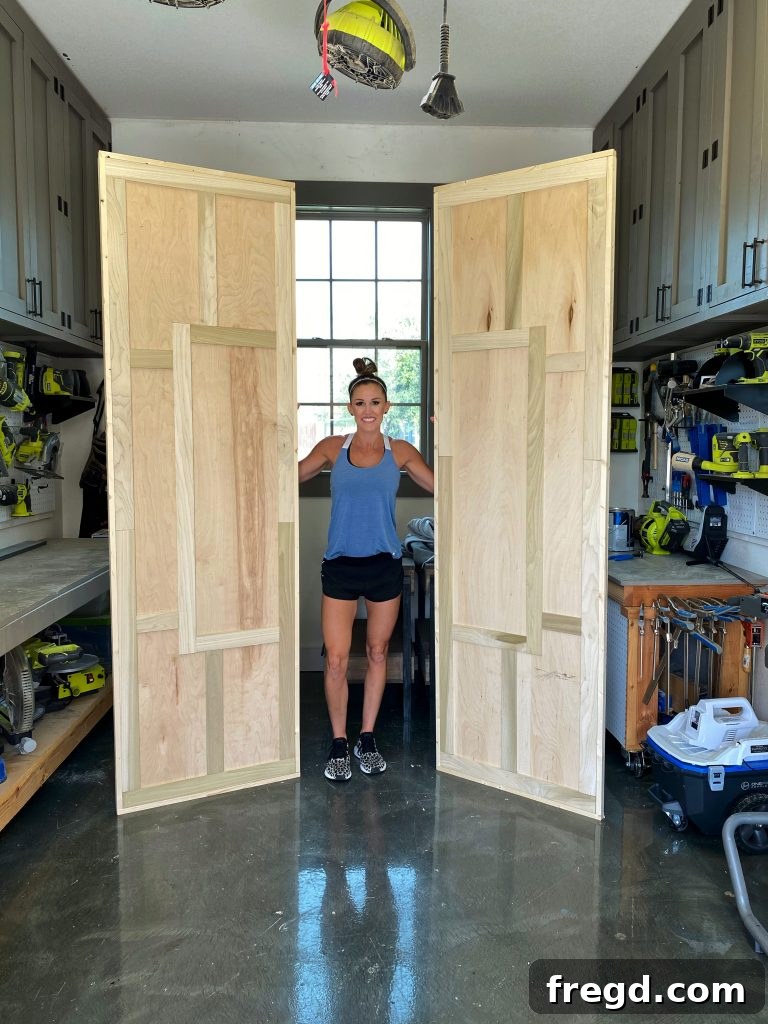
If you’re building a pair of doors, repeat all the construction steps for the second door. Once both doors are fully assembled, it’s time for prep work. Begin by filling all visible nail and staple holes, as well as any small gaps or seams where trim boards meet, with a good quality wood filler. Apply the filler liberally, allowing it to dry completely according to the manufacturer’s instructions.
Once dry, it’s time to sand. Start with a medium-grit sandpaper (around 120-150 grit) to smooth out the filler and initial imperfections. Then, progress to a finer grit (220 grit) for a silky-smooth surface. Sand with the grain of the wood, applying even pressure. A well-sanded surface is crucial for a flawless paint or stain application. After sanding, wipe down the entire door with a tack cloth or a damp cloth to remove all dust, ensuring a clean surface for painting.
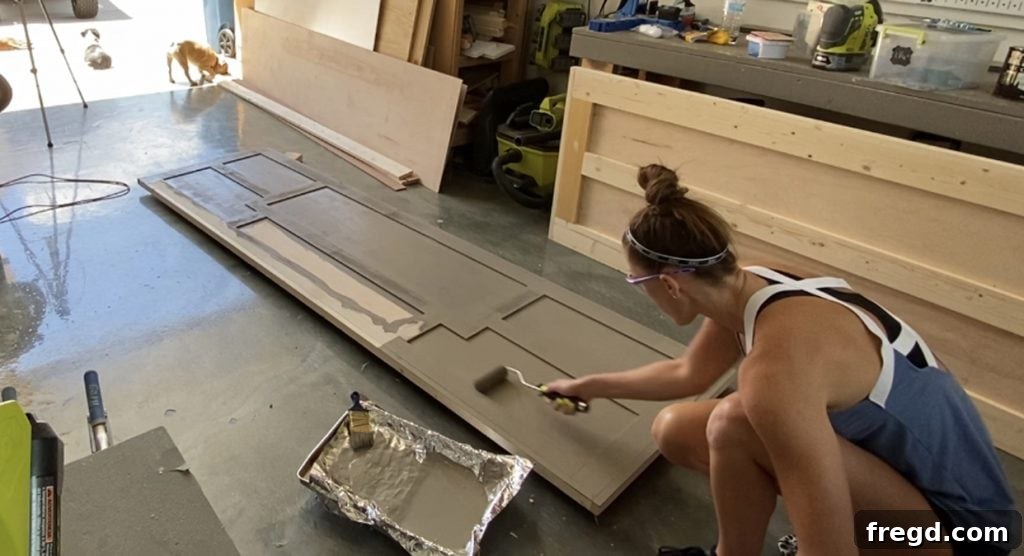
Now for the fun part: painting! For this project, a sophisticated gray paint was chosen: Seine by Valspar. Apply at least two coats of your chosen paint, allowing ample drying time between each coat. For best results, use a high-quality primer first, especially if you’re painting over raw wood or changing colors significantly. Primer helps with adhesion and provides a more uniform final color. Use a good brush for edges and corners and a roller for flat surfaces to achieve a smooth, even finish with minimal brush marks.
Step 6: Hanging Your New Barn Doors
The final step is to install your beautiful new barn doors, bringing your project to completion and transforming your space.
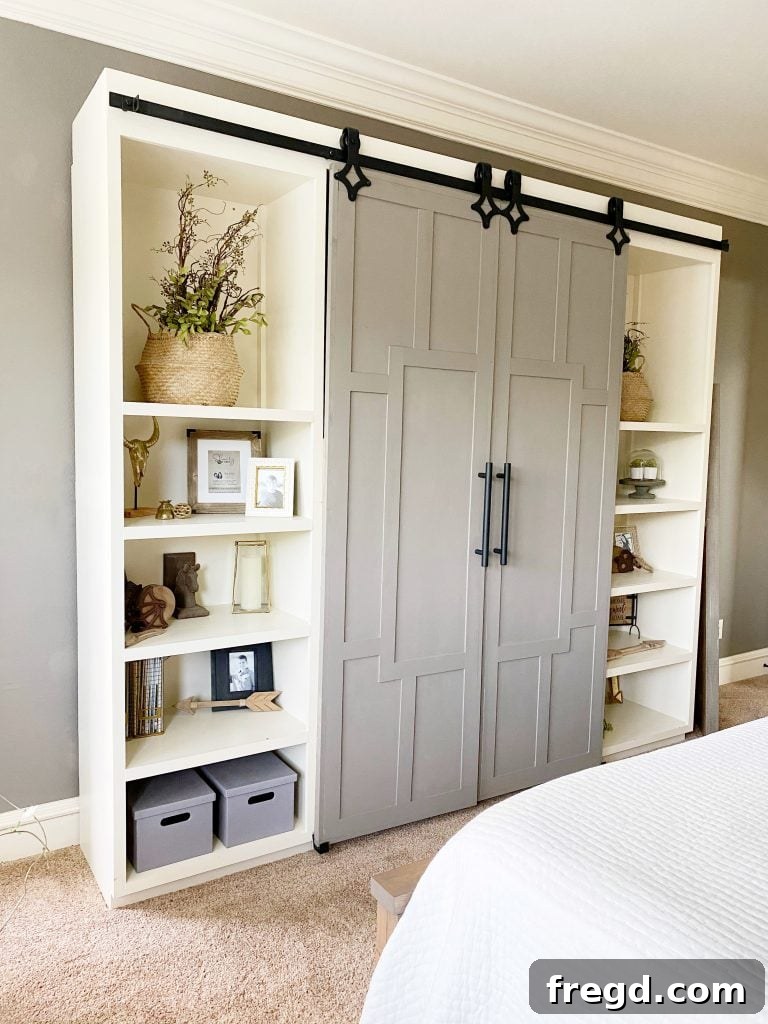
While the original barn door track, floor guides, and handles were retained for this particular media console, the old, worn-out wheels were replaced with new, smooth-gliding ones. You can find the wheels purchased for this project here. If you are installing new hardware, follow the manufacturer’s instructions carefully. Ensure the track is securely mounted to wall studs or a header board for maximum stability. Proper installation of the track and rollers is critical for the smooth and safe operation of your barn doors.
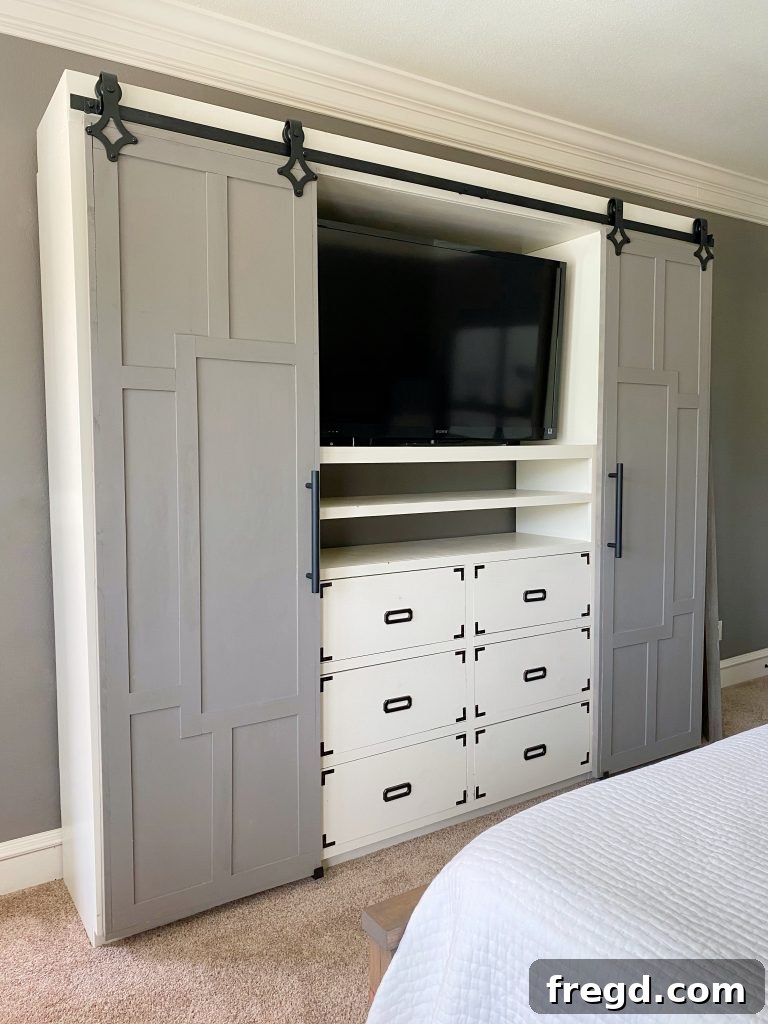
Once hung, stand back and admire your handiwork! The updated lightweight doors instantly transformed the media console, adding a modern touch and a beautiful contrast with the gray paint. The improved functionality of the new wheels ensures a seamless glide every time. If you’re building a media console from scratch, you can find the full set of plans for the entire media console here.
Customization Ideas for Your Barn Doors
The beauty of DIY is the freedom to customize! Here are a few ideas to make your barn doors uniquely yours:
- Color & Finish: Experiment with bold colors, subtle pastels, or rich wood stains. You could even try a distressed or whitewashed look for a more rustic aesthetic.
- Hardware: Beyond the functional track and rollers, choose decorative pulls and handles that match your home’s style – from sleek modern to ornate vintage.
- Trim Patterns: This guide features a specific geometric pattern, but you can create endless designs! Try a classic Z-brace, a K-brace, vertical planks, or even horizontal shiplap.
- Material Choice: For a different look, consider using reclaimed wood for the trim, or even metal accents, keeping in mind the weight implications for your hardware.
- Functionality: Add mirrors to one side for a dressing area or a chalk/whiteboard for a functional message center, especially useful for pantry or office doors.
Conclusion: Enjoy Your DIY Masterpiece
Building your own easy DIY barn doors is a project that delivers immense satisfaction and tangible results. You’ve not only saved money but also created a custom piece that perfectly suits your home and reflects your personal style. These doors offer a fantastic way to update any room, adding a blend of rustic charm and contemporary elegance.
We encourage you to embark on this rewarding journey and experience the pride of building something beautiful with your own hands. Don’t forget to share your amazing creations with us on social media using #shanty2chic so we can celebrate your DIY success together!
Easy DIY Barn Doors
Learn how to build these Easy DIY Barn Doors with free plans and a how-to video by Shanty2Chic! Download the full set of Free Printable Plans HERE!
Tools
- Miter Saw
- Table Saw (optional)
- Drill
- Kreg Jig
- Pin Nailer (optional)
- Stapler (optional)
- Brad Nailer
- Sander
Supply List
- 4 – 1x4x8 Whitewood or Common Boards
- 3 – 1x2x8 Whitewood or Common Boards
- 9 – 1/4″x3x48″ Craft Boards (poplar or similar)
- 1 – 1/4×48″x96″ Hardwood Plywood
Instructions
Cut List
-
Cut List 1

-
Cut List 2
-
Cut the back frame boards to size and drill 3/4″ pocket holes at both ends of the short frame boards. Attach the long frame boards to the short frame boards with 1 1/4″ pocket hole screws and wood glue.
-
Cut the middle frame board to size. Drill 3/4” pocket holes at both ends and attach it to the center of the short frame boards with 1 1/4” pocket hole screws and wood glue.
-
Cut the plywood to size, flip the frame over and attach the plywood to the frame with 5/8″ staples and wood glue.
-
Cut the front outside trim pieces to size and attach them to the front of the plywood with 3/4″ pin nails and wood glue.
-
Cut the purple trim pieces to size and attach them to the center of the plywood with 1/2″ pin nails and wood glue.
-
Cut the pink trim pieces to size and attach them to the ends of the purple pieces with 1/2″ pin nails and wood glue.
-
Cut the orange trim to size. Attach it to the ends of the pink trim pieces with 1/2″ pin nails and wood glue.
-
Cut the red trim pieces to size and attach them 4″ from the ends of the orange trim piece. Attach them with 1/2″ pin nails and wood glue.
-
Cut the side trim pieces to size. Attach them to the sides of the barn door with 1 1/4″ brad nails and wood glue. The front of the trim pieces should be flush with the front of the barn door trim.
-
Cut the top and bottom trim pieces to size and attach them to the ends of the barn door with 1 1/4″ brad nails and wood glue. The end trim boards should be flush with the side trim boards.
-
Now it’s time to fill all of the nail and staple holes with wood filler. I also added wood filler to the cracks where the trim boards were touching. Sand it down and give it a finish!
Make sure to share your builds with us on social media and use #shanty2chic so we can share them too!