Crafting Joy: Your Guide to an $8 DIY Grateful Wood Sign – Day 5 of Our 12 Days of Christmas Series!
Welcome to Day 5 of our festive 12 Days of Christmas series, where we’re unwrapping incredible DIY projects and inspiring gift ideas to brighten your holiday season and beyond! Today, we’re diving into a project that combines affordability, personalization, and rustic charm to create a truly special piece for your home or as a heartfelt present.

Unveiling Today’s Budget-Friendly Handmade Gift: The Personalized Wood Sign
I’m thrilled to share a fantastic, budget-friendly gift idea that’s perfect for anyone on your list. While I crafted my sign with my sweet baby sister in mind (and I think she’s going to adore it!), this project is incredibly versatile. It can be personalized for anyone – from beloved family members to cherished friends and even appreciative teachers. Get ready to discover how you can create your very own stunning DIY Wood Sign for less than $8!
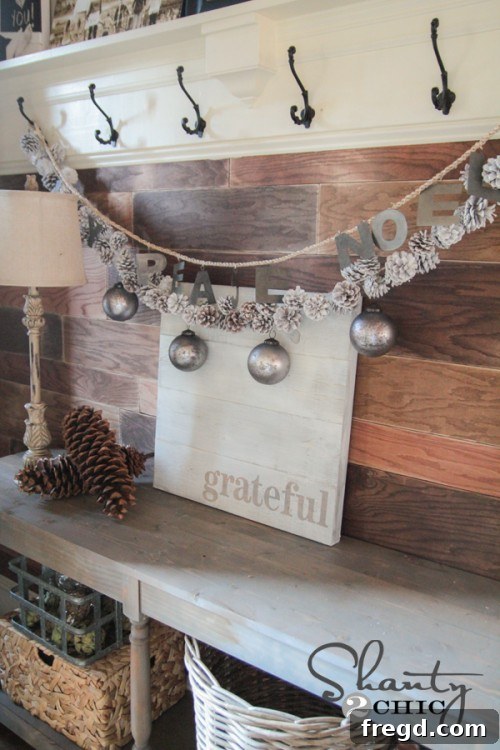
Why a “Grateful” Sign? Embracing a Mindset of Appreciation
For my sign, I deliberately chose the word “Grateful.” It’s more than just a word; it’s a powerful reminder I strive to embed in my own mind and in the hearts of my children throughout the year. In a world that often emphasizes what we lack, a simple visual cue to practice gratitude can truly transform our daily outlook. This sign serves as a beautiful, constant prompt to appreciate the blessings around us, making it not just a piece of decor, but a meaningful statement that fosters positivity in any space. It’s a message that resonates deeply, making it a perfect gift for cultivating a thankful atmosphere.
Your Easy & Affordable Woodworking Project Awaits!
You absolutely don’t need to be a seasoned carpenter or have a workshop full of expensive tools to tackle this project. It’s incredibly straightforward, making it ideal for beginners eager to dip their toes into woodworking. Thanks to its clever and simple design, it’s also wonderfully inexpensive. Using just two standard pine boards, you’ll craft a personalized masterpiece that looks far more complex and costly than it truly is. This project is a testament to how beautiful and impactful handmade items can be, even on a tight budget.
Essential Supplies for Your DIY Wood Sign: Get Ready to Craft!
Gathering your materials is the very first step to success. Having everything laid out and ready will make the building process smooth and enjoyable. Here’s a detailed list of what you’ll need for this impactful yet simple project:
- 1 – 1x6x8 pine board: This sturdy piece of wood will form the main face of your sign, providing ample space for your chosen word or design. Pine is an excellent choice for beginners due to its affordability and ease of cutting and sanding.
- 1 – 1x4x8 pine board: This board will be used to create the attractive, framed border around your sign. You have some flexibility here; you can also opt for a 1×3 or even a 1×2 board for the frame if you prefer a slightly thinner or more delicate border, customizing the final aesthetic.
- Gorilla Wood Glue: Or any other high-quality, strong wood adhesive. Wood glue is crucial for creating robust, lasting bonds between your boards before nailing, ensuring your sign holds together for years to come.
- 1.25” brad nails or finish nails: These small nails are perfect for securely attaching the frame pieces without splitting the wood. Brad nails are particularly easy to work with and leave minimal holes to fill.
- Wood stain of your choice: This allows you to customize the base color of your sign. I’ll be using Varathane Weathered Gray, which offers a beautiful, rustic, and slightly muted tone, but feel free to choose a color that perfectly matches your home decor or the recipient’s style.
- Stencil letters: I found a fantastic, reusable set at Michael’s that offered great variety and value. Look for stencils with a font you love and enough letters to spell your desired word or phrase.
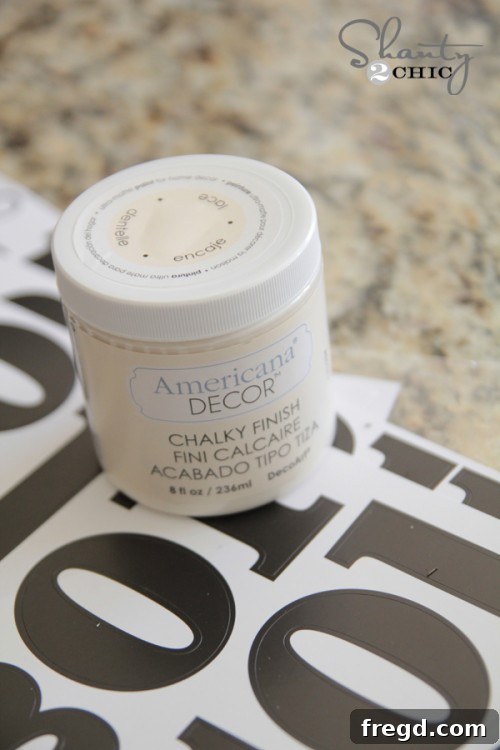
- Craft paint: Such as Americana Decor Chalky Finish paint (my preference for its thin coverage and matte look) or any standard acrylic craft paint. This will be used to paint over your stencils, creating crisp letters.
- 120-grit sandpaper: Essential for smoothing any rough edges after cutting and, crucially, for the final distressing step to achieve that charming vintage look.
- Optional: Brad nailer: Highly recommended for ease, speed, and precision. A cordless brad nailer like the Ryobi AirStrike simplifies the assembly process significantly.
- Optional: Orbital sander or corner cat sander: While sandpaper by hand works, a power sander can make quick work of smoothing and distressing, especially for larger projects.
- Safety glasses and gloves: Always, always protect yourself when working with tools, cutting wood, or handling stains and paints. Safety first!
Making the Cuts: Preparing Your Wood with Precision
Accuracy in your cuts is absolutely key to achieving a professional-looking sign. Remember the age-old carpenter’s adage: “Measure twice, cut once!” Taking your time here will save you headaches later. Here are the precise dimensions you’ll need for each piece:
- From your 1x6x8 board: Cut 4 pieces, each 22” long. These four planks will come together to form the expansive, central face of your sign, where your chosen word will be proudly displayed.
- From your 1x4x8 board:
- Cut 2 pieces, each 22” long. These two pieces will serve as the side frame components, running parallel to the long edges of your main sign body.
- Cut 2 pieces, each 15” long. These shorter pieces will form the top and bottom frame components, neatly enclosing the sign’s face.
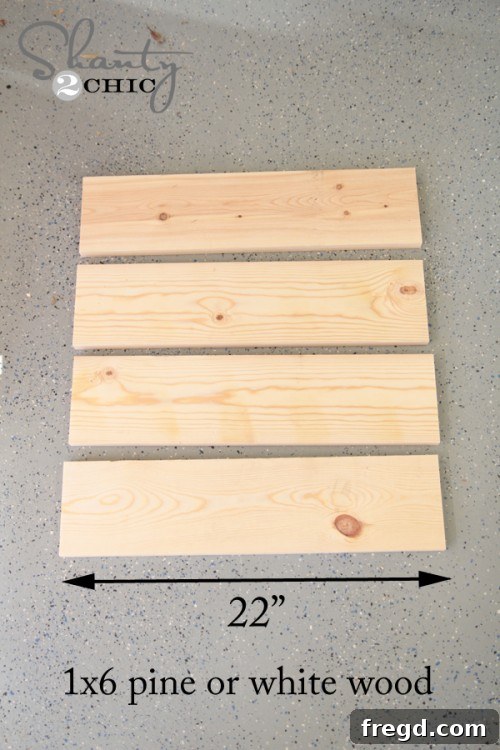
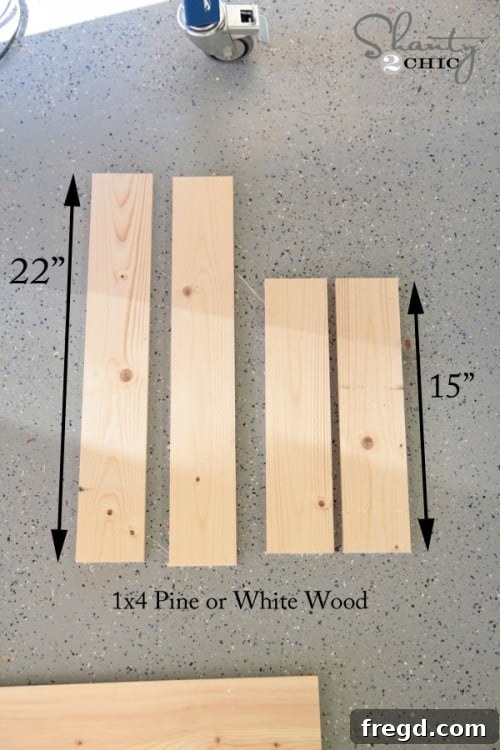
Once all your cuts are precisely made, take a moment to lightly sand any rough edges or splinters on your freshly cut wood using your 120-grit sandpaper. This small but important step will ensure a smoother finish for staining and painting, and also allows for better adhesion when gluing, creating a more refined final product.
Step-by-Step Assembly: Building the Foundation of Your Wood Sign
Step 1: Gluing the Main Sign Panels for a Seamless Surface
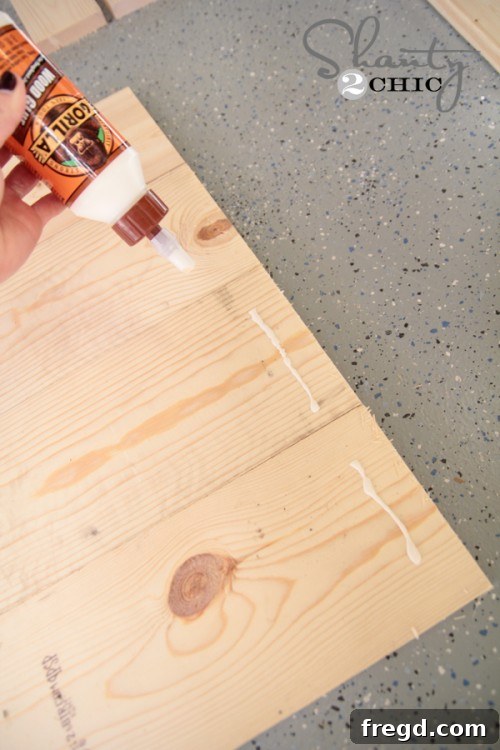
Begin by laying all four of your 22” 1×6 boards side by side on a flat, protected surface, such as a workbench covered with newspaper or a drop cloth. Take extra care to ensure they are aligned perfectly, creating a smooth and even surface. Apply a generous, continuous bead of Gorilla Wood Glue along the entire length of one side of each board that will connect to its neighbor. You want enough glue to create a strong, lasting bond across the entire joint, but try to avoid excessive squeeze-out. Firmly press the boards together, ensuring the edges are flush. For optimal results and to prevent warping, use wood clamps to hold the boards tightly together while the glue cures. Follow the manufacturer’s recommendations for drying time – usually 20-30 minutes for initial set, but allow 24 hours for a full, robust cure before proceeding. *Pro Tip: Immediately wipe away any excess glue that squeezes out with a damp cloth. Dried wood glue can create a barrier that prevents stain from absorbing evenly, resulting in patchy color.*
Step 2: Attaching the Side Frame Pieces with Precision
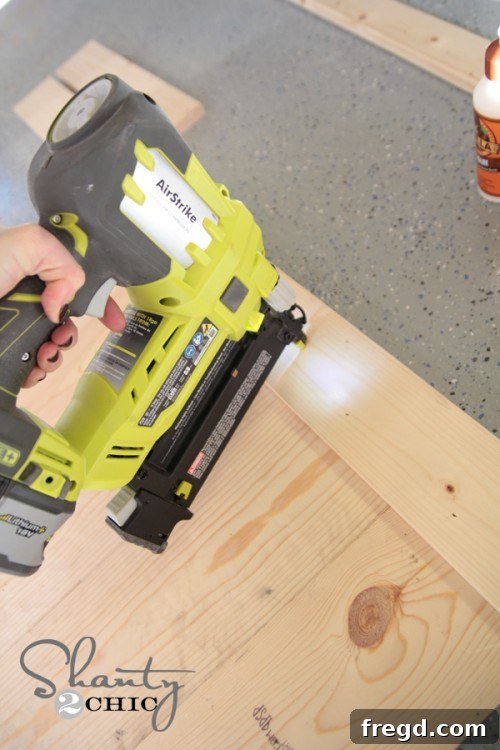
Once your main sign body is securely glued and sufficiently dried, it’s time to add the elegant frame. Take one of your 22” 1×4 pieces and align it perfectly along one of the longer edges of your assembled sign. Apply a thin, even line of wood glue to the back of the 1×4 where it will meet the main sign’s surface. Then, using your 1.25” brad or finish nails, secure this frame piece to the main boards. Space your nails evenly, approximately 6-8 inches apart, ensuring each nail penetrates through the frame piece and securely into the main sign body. Repeat this precise process for the opposite long edge of the sign, making sure both side pieces are firmly attached and flush.
For this crucial step, I highly recommend using a brad nailer, specifically the Ryobi AirStrike Brad Nailer. This cordless tool is an absolute game-changer for DIY projects! It’s incredibly simple to operate, eliminates the need for a bulky air compressor and hoses, and allows you to quickly and securely fasten pieces together with minimal effort. It’s truly one of my favorite tools in my workshop because of its sheer versatility, ease of use, and the professional finish it helps achieve. If you’re serious about DIY woodworking, investing in a tool like this will open up a world of project possibilities and make your crafting much more efficient and enjoyable. Always remember to wear safety glasses when operating power tools.
Once both 22” side frame pieces are robustly attached, your sign will begin to take on its framed appearance, looking something like this, a testament to your growing woodworking skills:
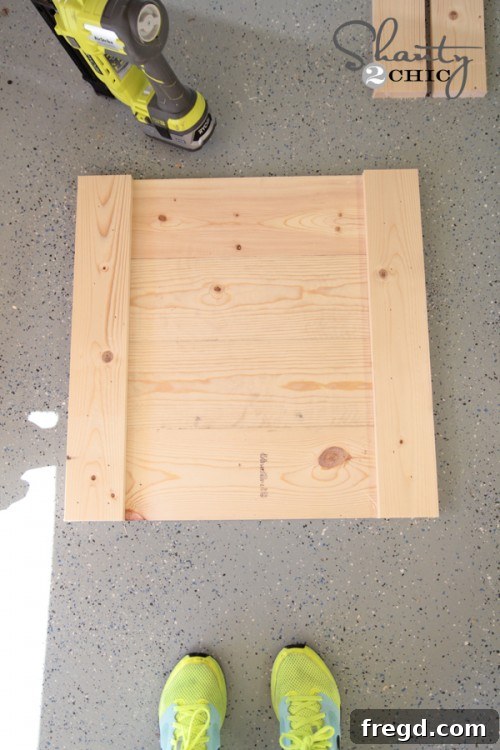
Step 3: Completing the Frame with Top and Bottom Pieces
Now, it’s time to complete the rustic yet refined frame that truly defines the sign’s aesthetic. Apply a neat, continuous line of wood glue to the exposed ends of your main sign body, where the remaining 15” frame pieces will attach. Carefully position one of the 15” 1×4 pieces along the top edge of your sign, ensuring it is perfectly flush with the side frame pieces you just installed. This attention to detail will ensure crisp corners and a professional look. Secure it firmly with 1.25” brad nails, just as you did with the side pieces, maintaining even spacing. Repeat this exact process for the bottom edge of the sign, creating a sturdy, box-like frame that elegantly encloses your sign’s face. Allow adequate time for the glue to set, providing additional strength to your nailed joints.
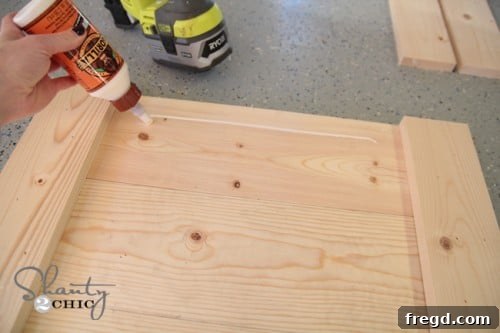
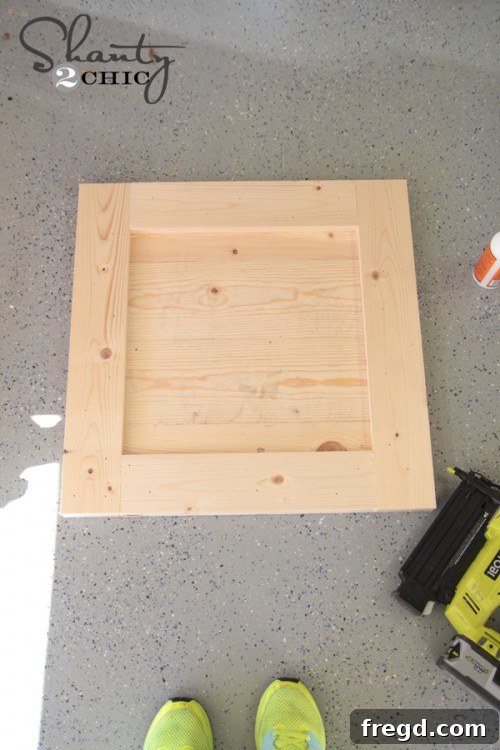
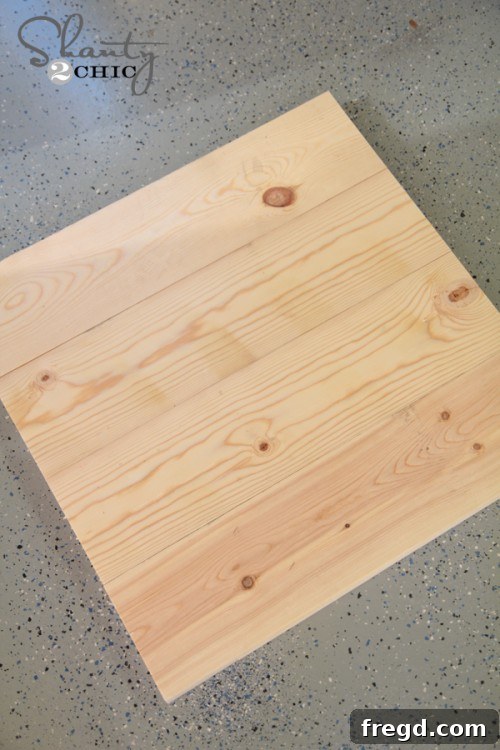
Once all four frame pieces are attached, give your newly assembled piece a confident flip! Just like that, you have a sturdy, beautifully framed wooden sign blank, ready for its artistic transformation. Take a moment to admire the solid construction – you’ve built the perfect canvas for your personalized message!
Adding Character: Staining and Lettering Your Sign to Perfection
Step 4: Staining for a Weathered Charm and Rustic Appeal
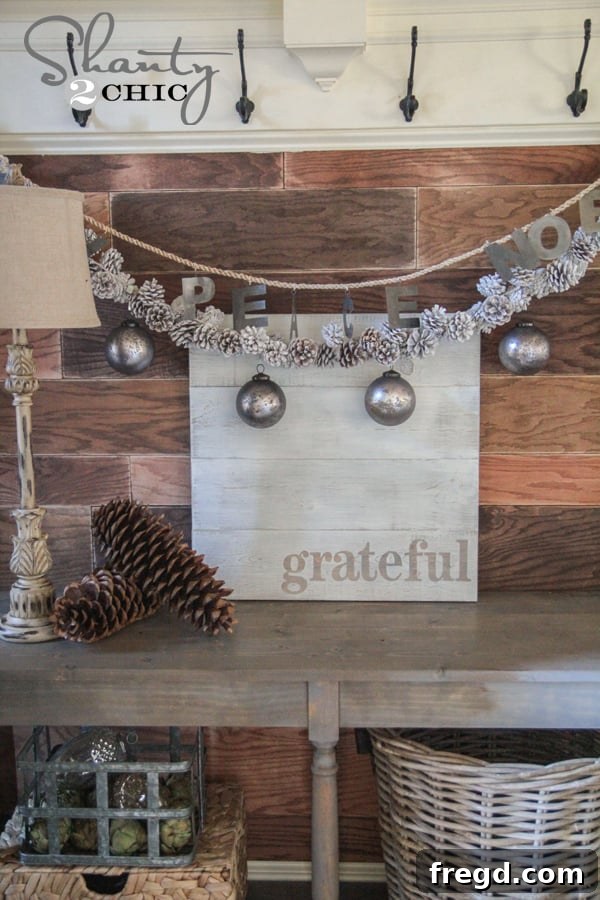
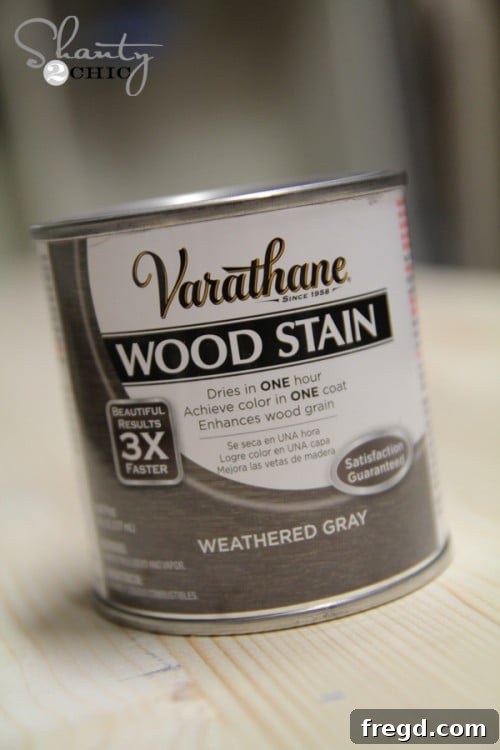
Now for one of the most exciting parts – adding color and character to your raw wood! My choice for this project was Varathane Weathered Gray wood stain. I absolutely adore how this particular color imparts a beautiful, soft, and slightly rustic feel to the wood. It beautifully enhances the natural grain and texture without overpowering it, creating a truly authentic weathered look. To apply, simply use a brush or a clean cloth, working the stain evenly along the direction of the wood grain. Allow the stain to penetrate the wood for a few minutes (check your specific product’s instructions), then carefully wipe off any excess with a clean, lint-free rag. This step is crucial for achieving an even finish and preventing a sticky residue. Always make sure to work in a well-ventilated area and wear protective gloves to keep your hands clean. Let the stain dry completely, which typically takes several hours, or even overnight, depending on the humidity and the product specifications. Patience here will pay off with a gorgeous, lasting finish.
Step 5: Applying Your Chosen Word with Precision Stencils
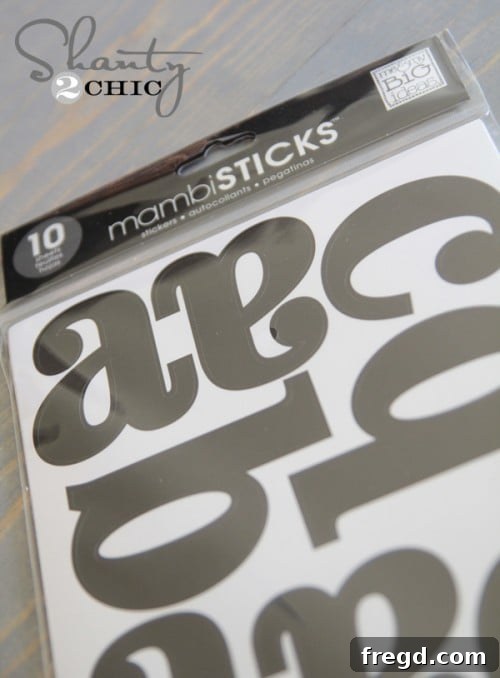
Once your stain is thoroughly dry and cured, it’s time to add your chosen word. This is where your sign truly becomes personalized! I discovered these fantastic reusable stencil letters at Michael’s – a true crafter’s gem. Not only did I get the entire set for an incredible deal (especially by using a 40% off coupon!), but I genuinely love the elegant font, the thoughtful inclusion of multiple copies of most letters, and the genius design that allows you to easily reposition and reuse them for countless future projects. Carefully peel the letters you need for your chosen word (“Grateful” in my case) and meticulously place them onto your stained sign. Take your time to ensure they are perfectly aligned, evenly spaced, and level. Once you’re happy with the placement, press down firmly on each letter, especially around the edges, to create a strong seal and prevent paint from seeping underneath, which is key for crisp lines.
Step 6: Painting Over the Stencils for Clear Lettering
With your letters firmly in place and your design finalized, it’s time to apply paint! I used Americana Decor Chalky Finish paint for this step, also sourced from Michael’s. I have a particular preference for this type of paint because it provides beautiful, thin coverage that creates a subtle, almost vintage-distressed look, rather than a thick, opaque layer that might look too stark. Of course, you could certainly use any standard acrylic craft paint you have on hand, but I find the Chalky Finish gives a unique, soft touch. Apply a thin, even coat of paint over the entire sign, making sure to cover all the stencil letters. The trick here is not to overload your brush, as too much paint can cause it to bleed under the edges of your stencils. A gentle dabbing motion with a foam brush or even a stencil brush often works best for achieving clean, sharp lines. Allow this coat to dry completely. The good news is that chalky finish paints typically dry quite fast, which is a fantastic bonus for eager crafters!
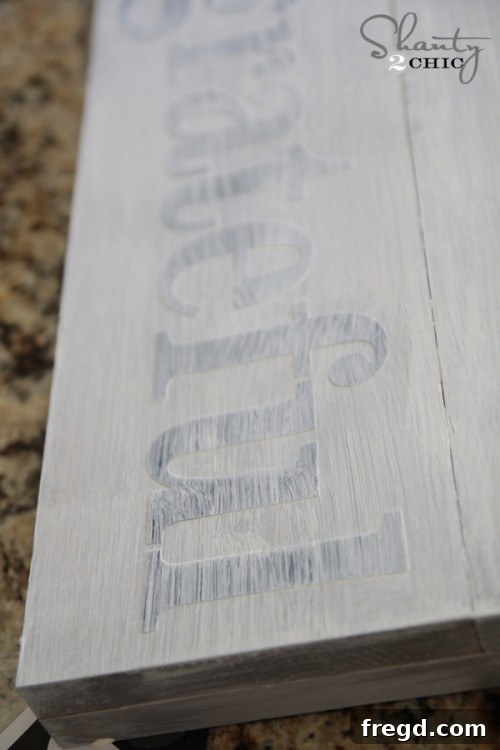
Step 7: Revealing Your Word – The Satisfying Moment of Peeling Stencils
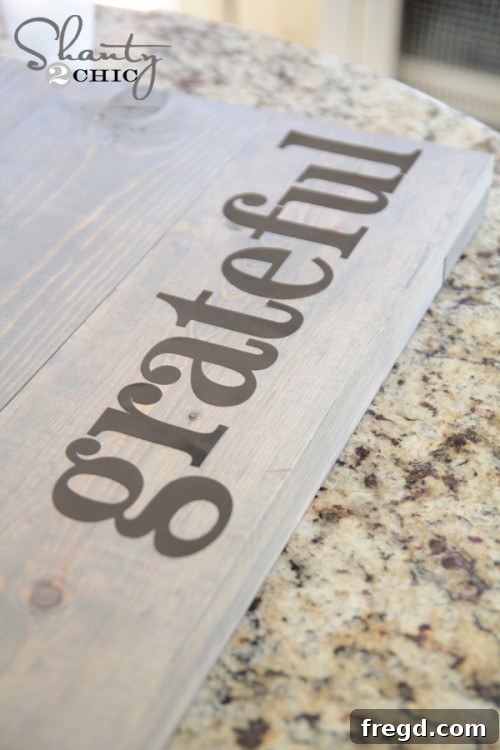
Once the paint is completely dry to the touch (and this is absolutely crucial to avoid any smudging or pulling up of paint), carefully begin to peel off your stencil letters. Take your time with this step, gently lifting each letter from the sign to reveal your beautifully crisp word underneath. The contrast between the weathered gray stain and the light, chalky paint creates a stunning, eye-catching effect, making your chosen word truly pop. It’s an incredibly satisfying moment to see the design come to life in this simple yet impactful way, a testament to your careful craftsmanship. The clean lines and thoughtful application will make all the difference in the final appearance of your personalized sign.
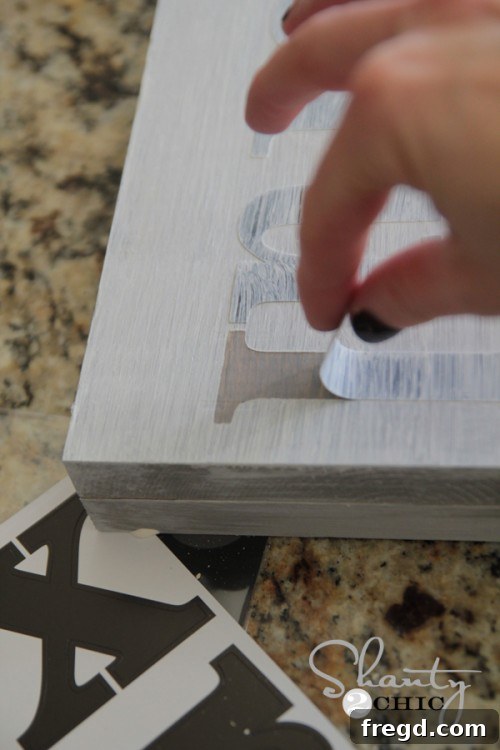
Step 8: Distressing for a Charming Vintage Appeal
My final touch for this sign was a bit of distressing, designed to give it that coveted vintage, well-loved, and slightly aged look. Using 120-grit sandpaper, I gently sanded the entire sign, focusing on the edges, corners, and anywhere natural wear would occur. For this particular part, my Ryobi Corner Cat sander was invaluable. Its compact design allowed me to easily reach into the corners and along the edges, achieving a consistent distressed effect. The goal here isn’t to remove all the paint, but rather to subtly expose some of the stained wood underneath and soften the painted edges of your letters. This technique instantly adds incredible character, depth, and an antique charm that I absolutely adore, making the sign feel like a cherished heirloom. If you don’t have a power sander, don’t worry! A simple sanding block or even just a piece of sandpaper held by hand works perfectly well; it just requires a little more elbow grease and attention to detail. Experiment with how much you sand until you achieve your desired level of rustic elegance.
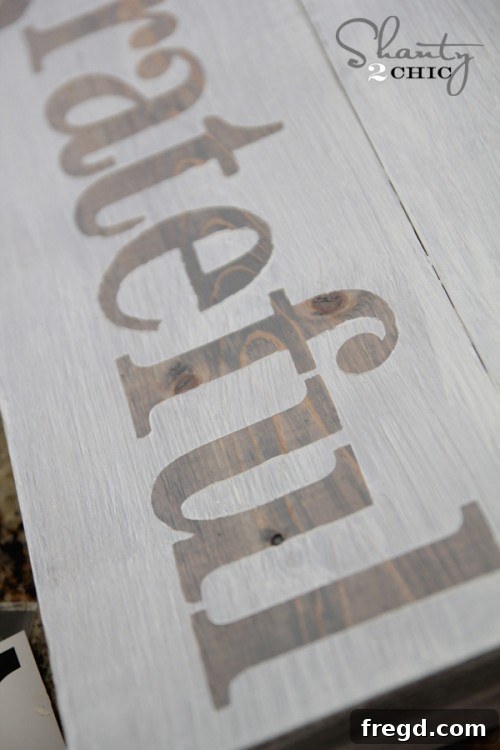
Your Masterpiece Complete: Displaying and Customizing Your Sign
Styling Your Handmade Creation: Bringing Charm to Any Space
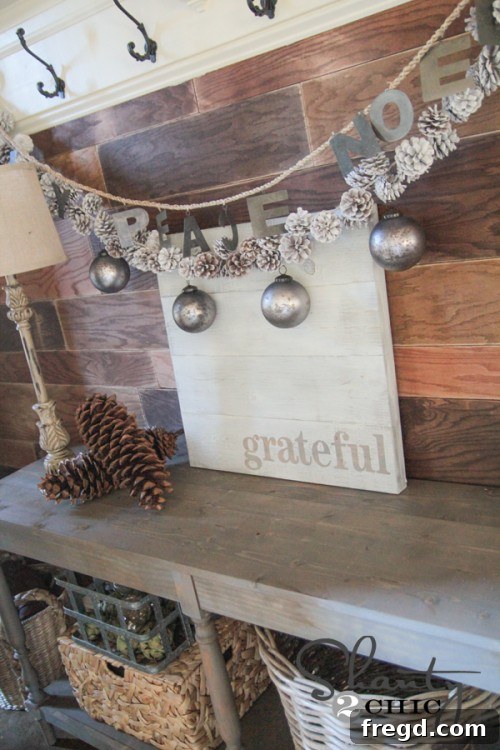
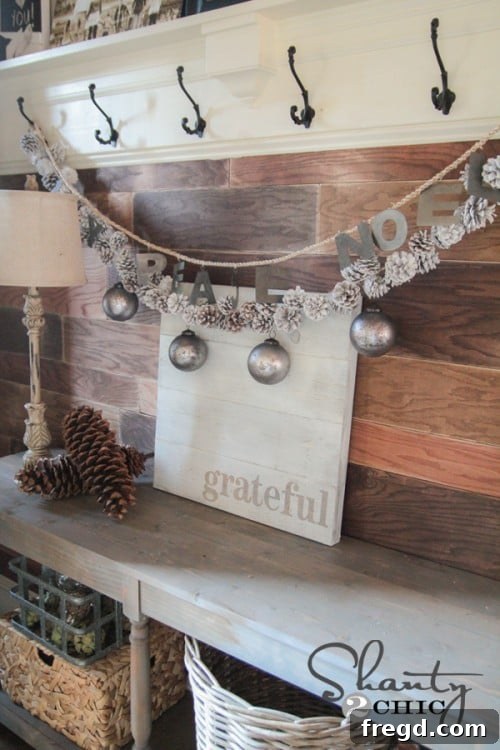
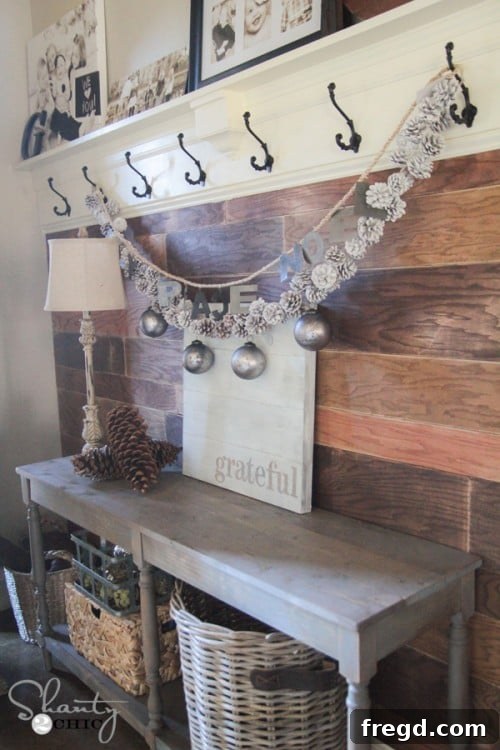
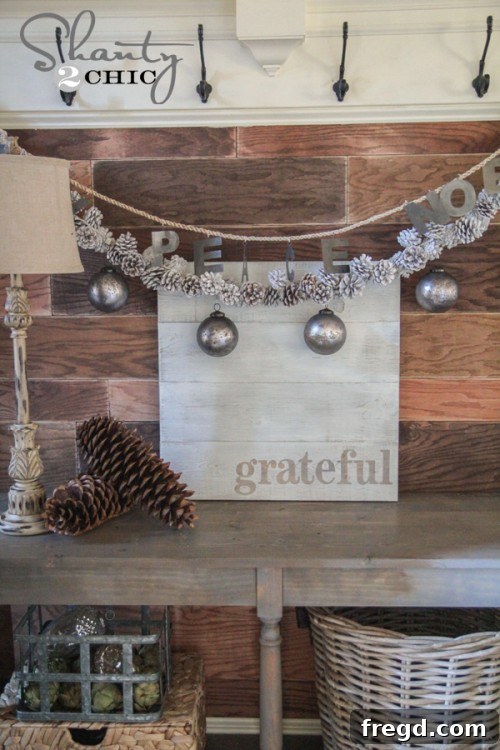
And there you have it! Your very own handcrafted wood sign is complete, a true testament to your creativity and effort. I proudly displayed mine on my entryway table, where its powerful message of gratitude instantly greets everyone who walks through the door, setting a positive tone for the entire home. Imagine this beautiful piece adding a personal touch and warm ambiance to your living room, bedroom, kitchen, home office, or even a nursery. Its neutral tones, rustic charm, and meaningful message allow it to blend seamlessly with a wide variety of decor styles, from modern farmhouse and industrial chic to bohemian and traditional. Consider propping it on a mantel, hanging it on a gallery wall, or leaning it against a shelf for a relaxed, inviting look. The styling possibilities are as endless as your imagination!
Endless Customization: Make It Truly Yours!
What do you think of this versatile project? The absolute best part is its incredible adaptability and potential for personalization! While “Grateful” holds a very special place in my heart, you can truly customize this sign with any word, phrase, meaningful quote, or even a simple design that resonates deeply with you or your intended gift recipient. Consider words like “Welcome,” “Family,” “Gather,” “Love,” “Blessed,” “Dream,” “Create,” or even a specific family name or an established date to mark a special occasion. This makes it an unparalleled gift for friends, family members, dedicated teachers, thoughtful neighbors, or anyone deserving of a unique, heartfelt, and handmade gesture. The possibilities for customization are truly limitless, allowing you to create a one-of-a-kind piece every single time that reflects individual personality and sentiment.
The Unbeatable Value: Craft a High-Quality Gift for Under $8!
And the absolute best part, the real cherry on top? The wood for this entire project costs an astonishing under $8! Bam! That’s right, for such a minimal investment, you can create a high-quality, personalized piece of home decor or a deeply heartfelt gift that looks far more expensive and professionally made than it truly is. This project perfectly embodies the spirit of DIY – creating something beautiful, meaningful, and incredibly impactful without breaking the bank. It’s proof that thoughtful gestures and stunning decor don’t have to come with a hefty price tag. I sincerely hope you love crafting this sign as much as I did, and that it brings joy to your home or to a loved one!
Join the Celebration: Discover More Day 5 Projects from Our Friends!
Do you have questions about any step of the process? Don’t hesitate to ask in the comments below – I’m always happy to provide further tips and guidance! Also, be sure to extend your holiday inspiration and entrepreneurial spirit by checking out the incredible Day 5 projects from my talented friends and fellow DIY enthusiasts in our “12 Days of Christmas” series. Each one offers unique ideas, creative tutorials, and fresh perspectives that are sure to spark your imagination and provide even more wonderful ways to decorate or gift this season. Just click on the buttons below to explore their wonderful creations and continue your journey of handmade discovery!