
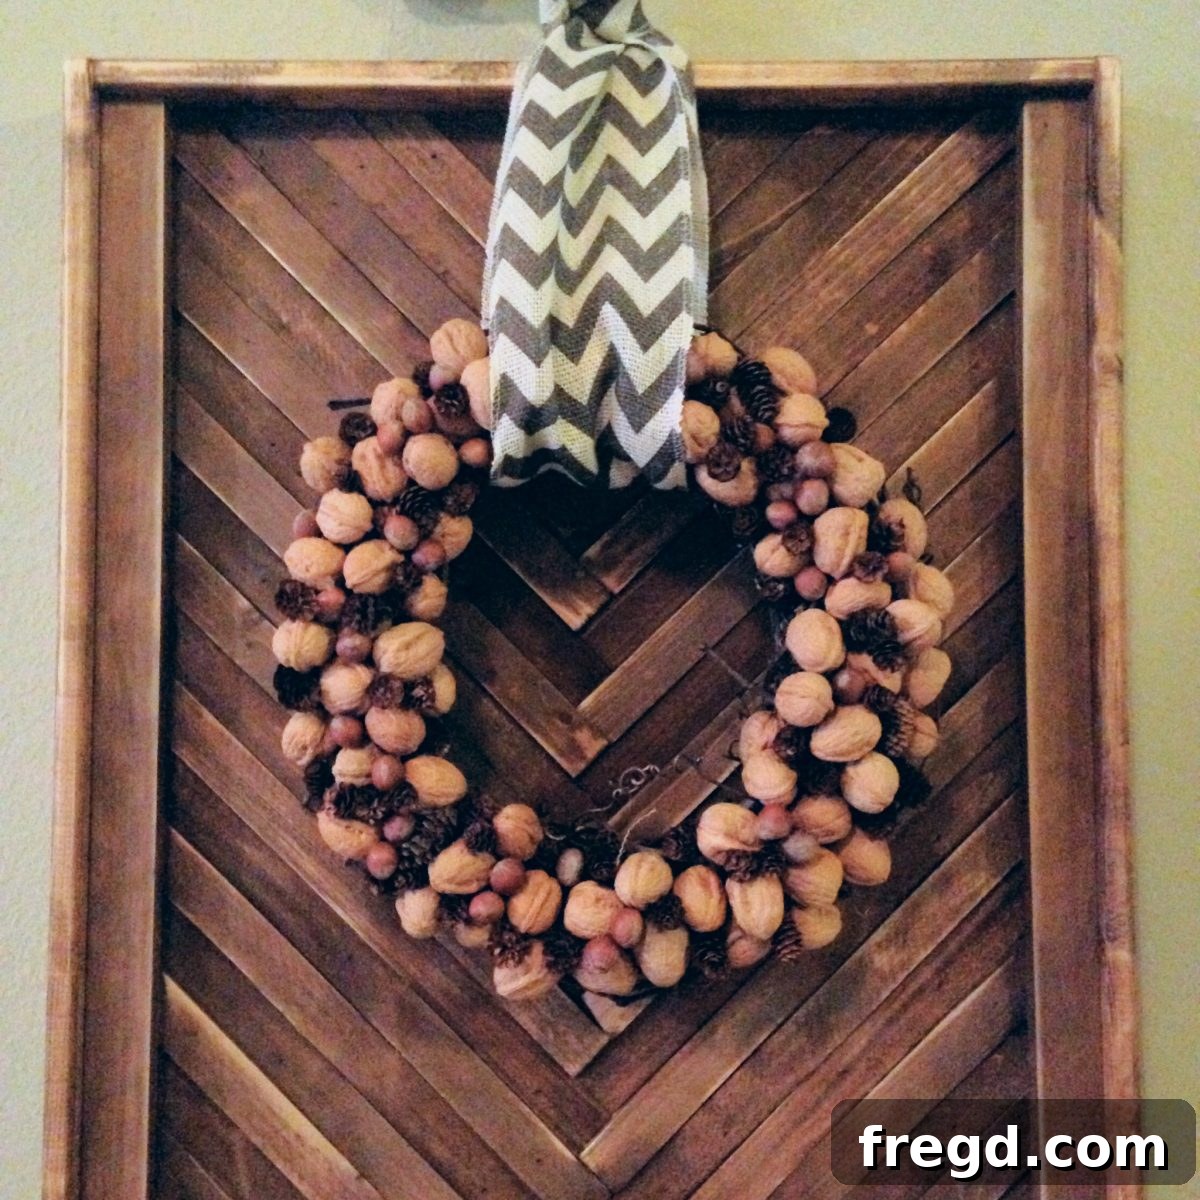
Crafting a Stunning DIY Nut & Pinecone Wreath: A Natural Home Decor Masterpiece
Hey fellow crafters and home decor enthusiasts!
We’re thrilled to share another exciting DIY project that brings the beauty of nature right to your doorstep. If you recall, we recently embarked on a fantastic collaboration with Gorilla Glue, showcasing our custom wreath hangers, which you can revisit here. Those hangers demanded equally charming adornments, and what better way to celebrate rustic elegance than with a magnificent nut and pinecone wreath? This timeless piece promises to infuse warmth and organic charm into any space, making it perfect for the fall and winter seasons, or simply as a year-round ode to natural beauty. Get ready to dive into a creative journey with us as we craft this beautiful wreath, step-by-step.
Embarking on Your Wreath Project: Gathering Essential Materials
Every successful DIY project begins with carefully selected materials. For this stunning nut and pinecone wreath, I focused on affordability and natural appeal. Here’s what you’ll need to get started:
- Grapevine Wreath Base: I picked up a lovely, inexpensive grapevine wreath from Hobby Lobby. These versatile bases are widely available at most craft stores, floral shops, and even online retailers. They are an excellent choice because their natural texture and color complement the nuts and pinecones beautifully, and any exposed areas blend seamlessly with the overall design, saving you time and materials compared to a solid foam base. Consider the size that best fits your desired display area – a 12-inch, 18-inch, or even larger wreath can make a grand statement.
- Assorted Nuts in Shells: For a rich textural variety, I used a bag of hazelnuts and a generous 4-pound bag of walnuts, both purchased affordably at my local grocery store. The beauty of using nuts in their shells is their inherent rustic charm and varied shapes. Don’t limit yourself to just these; pecans, almonds, acorns, and even small chestnuts can add wonderful diversity to your wreath. If you have access to a garden or woods, foraging for acorns or other local nuts can be a delightful and cost-effective way to gather unique materials. Just ensure they are clean and free of insects before use.
- Small Pinecones: To add another layer of natural texture and visual interest, I found a bag of tiny pinecones in the Christmas craft section at Hobby Lobby. These small accents are perfect for filling smaller gaps and adding intricate details. You can also gather pinecones from outdoors, but make sure to clean them thoroughly and consider baking them on a low heat (around 200°F/90°C for 30 minutes) to eliminate any potential pests or moisture.
- Hot Glue Gun and Glue Sticks: My trusty hot glue gun was the indispensable tool for this project. It provides a quick, strong bond for natural materials. Make sure you have plenty of glue sticks on hand, as you’ll be doing a lot of gluing! For extra durability, especially if your wreath will be exposed to varying temperatures or conditions, you might consider using a stronger adhesive like Gorilla Glue for the initial placement of larger nuts, then filling in with hot glue. However, for most indoor applications, hot glue is perfectly adequate.
With these simple yet effective materials, you’re well on your way to creating a captivating piece of decor.
The Heart of the Project: Crafting Your Natural Wreath, Step-by-Step
Now that you have all your materials ready, let’s bring this beautiful vision to life! The process is surprisingly straightforward, focusing on layering and texture to achieve a full, organic look.
Step 1: Laying the Foundation with Walnuts
I began by randomly gluing the walnuts around the grapevine wreath. This first layer is crucial as it establishes the main texture and volume of your wreath. There’s no need for a strict pattern; the natural asymmetry is part of its charm. Simply apply a generous dab of hot glue to the back of each walnut and firmly press it onto the grapevine base. Hold for a few seconds to ensure a strong bond.
One of the reasons I opted for a grapevine wreath over a styrofoam one was not just the cost savings, but also the aesthetic. The exposed sections of the natural grapevine add to the rustic appeal, meaning you don’t have to cover every single inch. This approach not only conserves your nuts and pinecones but also creates a more authentic, less “manufactured” look. Distribute the walnuts evenly, covering the top and outer edges of the wreath, leaving some space for the smaller fillers later.
Step 2: Filling the Gaps with Hazelnuts and Pinecones
Once the majority of your wreath is covered with walnuts, it’s time for the delightful task of filling in the empty spaces. This is where the hazelnuts and tiny pinecones come into play. Look for any visible gaps between the larger walnuts and carefully glue in the smaller items. This creates a denser, more cohesive look and adds a wonderful variation in texture and scale.
Don’t be afraid to tuck some pinecones underneath the walnuts or along the inner and outer edges of the wreath. This layering technique adds depth and makes the wreath appear much fuller. Step back occasionally to assess your progress and ensure an even distribution of textures. You’ll notice how the grapevine base beautifully peeks through in places, enhancing the organic feel.
Here’s a look from the side, demonstrating how the different elements create a rich, dimensional profile:
Elevate Your Creation: Tips for Wreath Perfection & Customization
Once your wreath is fully adorned with nuts and pinecones, you might think the journey is complete – but a few extra steps and creative touches can truly make it shine and extend its life.
Enhancing Durability and Longevity
- Sealant Spray: To protect your natural elements from dust, moisture, and potential pests, consider applying a clear matte or satin sealant spray. This will also help secure any loose particles and give the wreath a subtle finished look without adding an artificial sheen. Ensure you do this in a well-ventilated area.
- Secure Hanger: Before displaying, ensure your wreath has a sturdy hanger. You can simply loop a piece of twine, ribbon, or floral wire through the grapevine base at the top. For heavier wreaths, reinforce the hanging point with extra glue or wire.
Creative Customization Ideas
While the natural look is incredibly appealing, you can easily customize your nut and pinecone wreath to match various seasons or decor styles:
- Ribbons and Bows: Add a festive touch with a beautifully tied bow made from burlap, plaid, velvet, or satin ribbon. Choose colors that complement your home decor or the current season – deep reds and greens for Christmas, oranges and browns for fall, or a simple cream for a year-round elegant look.
- Faux Berries or Greenery: Tuck in small clusters of faux red berries, sprigs of artificial evergreen, or dried eucalyptus leaves for bursts of color and added texture.
- Cinnamon Sticks and Star Anise: For a sensory delight, glue a few cinnamon sticks or star anise strategically among the nuts. These will release a subtle, inviting fragrance.
- Twinkle Lights: For a magical evening glow, weave a string of battery-operated LED fairy lights through the wreath. This is especially charming during the holiday season.
- Metallic Accents: Lightly mist a few nuts or pinecones with gold, silver, or copper spray paint for a sophisticated metallic shimmer. This can add a touch of glamour without overpowering the natural aesthetic.
- Monogram or Initial: Attach a small wooden or metal monogram letter in the center or slightly off-center for a personalized touch.
The Joy of DIY: Why Crafting Your Own Wreath is So Rewarding
Beyond the simple satisfaction of creating something beautiful with your own hands, embarking on a DIY project like this nut and pinecone wreath offers a multitude of benefits:
- Personal Expression: A handmade wreath is a true reflection of your personal style and creativity. Unlike mass-produced decorations, yours will be unique, telling a story and showcasing your artistic flair.
- Cost-Effectiveness: While purchasing a high-quality, pre-made natural wreath can be quite expensive, crafting one yourself with readily available and often inexpensive materials like those used here can save you a significant amount.
- Mindfulness and Stress Relief: The act of crafting can be incredibly therapeutic. Focusing on the tactile process of gluing and arranging can be a wonderful way to unwind, de-stress, and practice mindfulness.
- A Sense of Accomplishment: There’s immense pride in displaying a piece of decor that you’ve crafted from scratch. It’s a conversation starter and a constant reminder of your creative capabilities.
- Connecting with Nature: Working with natural elements like nuts and pinecones brings a piece of the outdoors inside, fostering a connection with nature and enhancing the tranquility of your living space.
The Grand Finale: Displaying Your Handmade Masterpiece
My final and favorite step was to proudly hang this beautiful creation and capture its charm through a series of photographs! The satisfaction of seeing your vision come to life is truly unparalleled. This unique wreath isn’t just a decoration; it’s a testament to the beauty of natural materials and the joy of hands-on crafting.
What do you think of this rustic, elegant design? Have I gone nuts with my love for natural decor? I certainly hope you love it as much as I do! It’s a perfect project to add a touch of warmth and organic beauty to your home, whether for the holiday season or throughout the year.
I encourage you to try making your own! Share your creations with us – we’d love to see how you interpret this design and what unique touches you add. Happy crafting!