
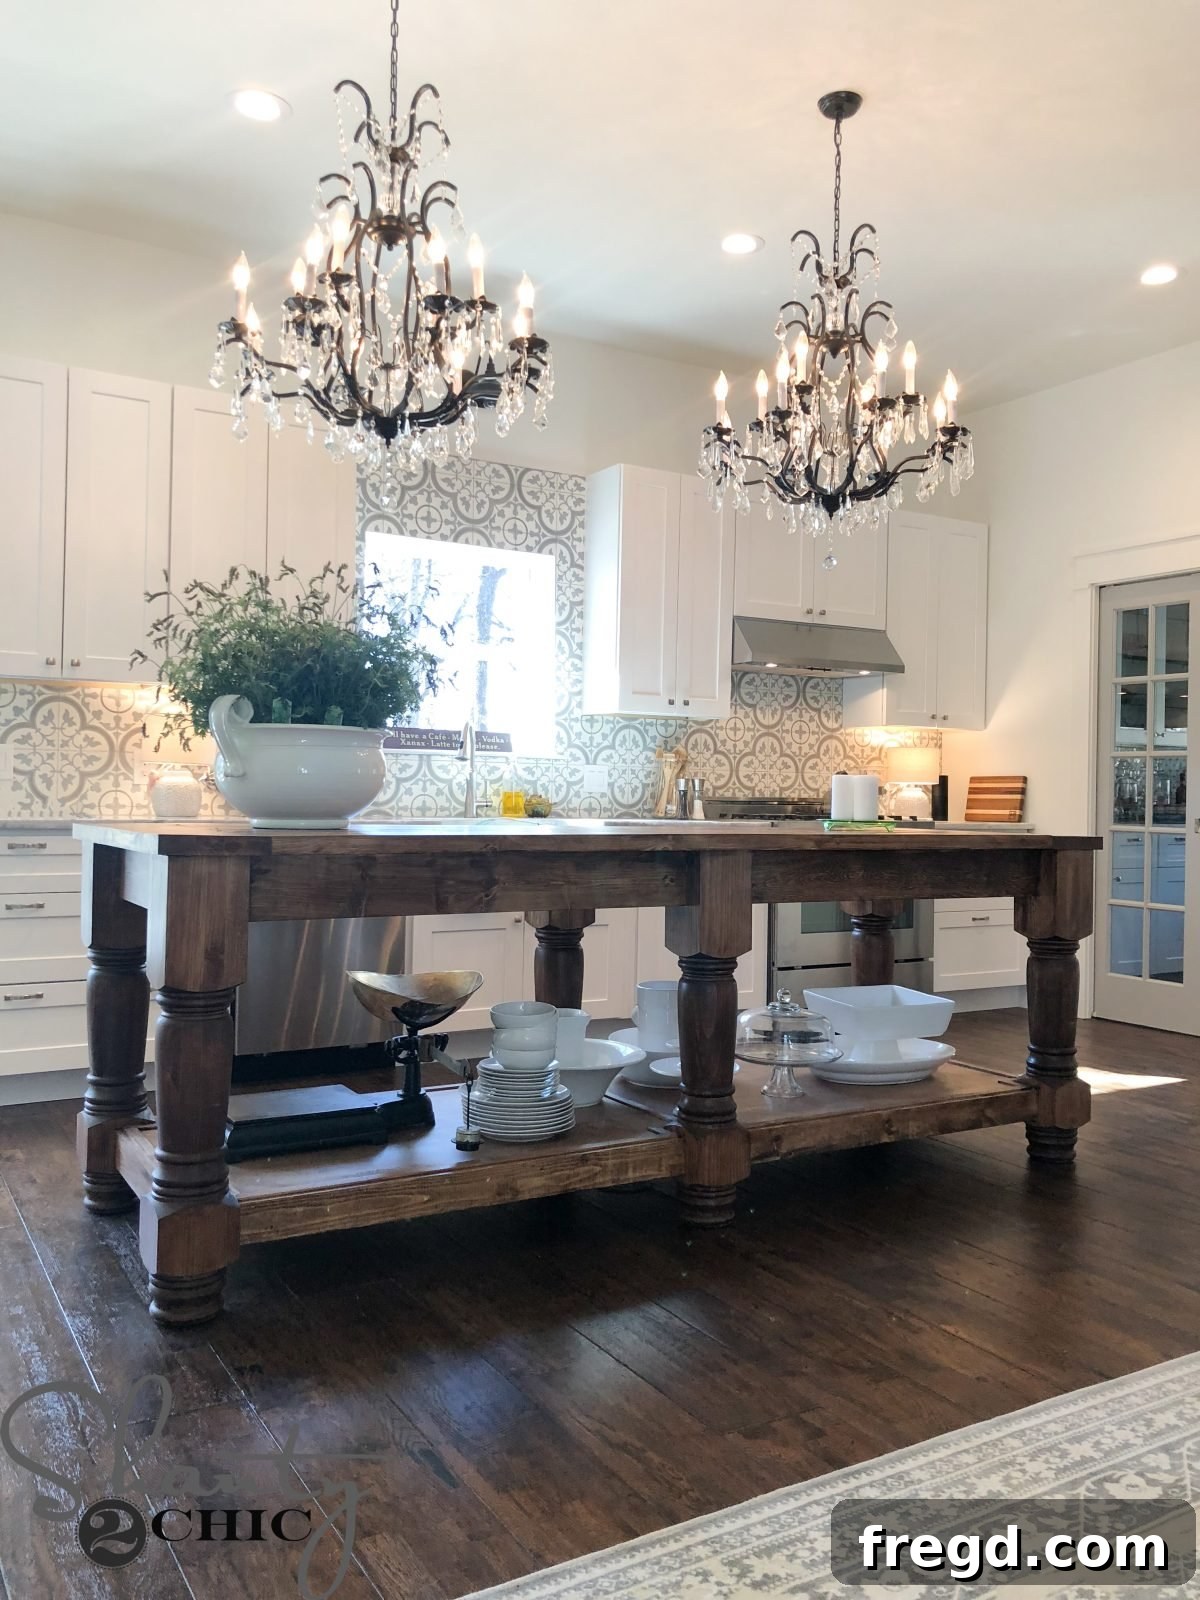
Welcome to our latest and arguably most ambitious woodworking project: a colossal DIY Kitchen Island that has truly redefined the heart of a recently renovated home. This isn’t just another build; it’s a testament to custom craftsmanship, transforming an ordinary kitchen into an extraordinary culinary and social hub. We’re thrilled to share the detailed journey of designing and constructing this magnificent piece, a build that became one of the largest and most rewarding projects we’ve undertaken.
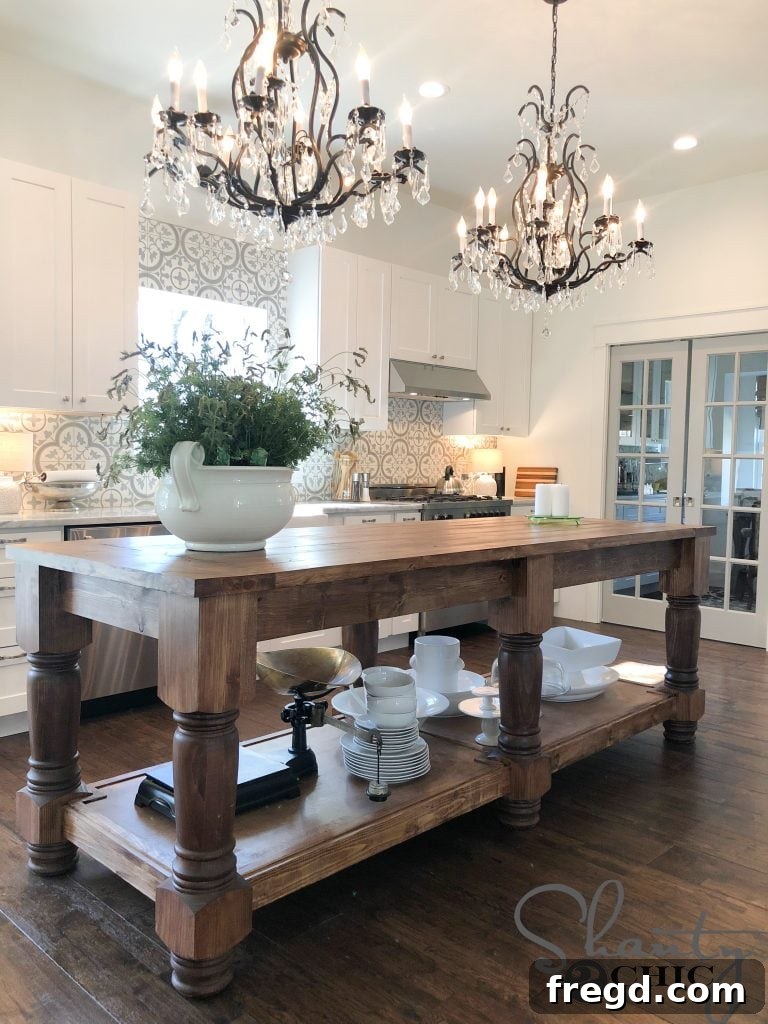
The homeowners embarked on a remarkable renovation journey, breathing new life into a charming 1970s ranch-style house. Their vision was clear: to create an expansive, open-concept kitchen that begged for a substantial centerpiece. That’s where we stepped in, tasked with designing and building a giant custom island that would perfectly fill their transformed space. The result is a stunning 8.5-foot island, not just a workspace but a statement piece that anchors the entire room.
For those who love to see the action unfold, we’ve documented every step of this incredible build. You can watch the full how-to process and gain valuable insights into each stage of construction by clicking the play button below.
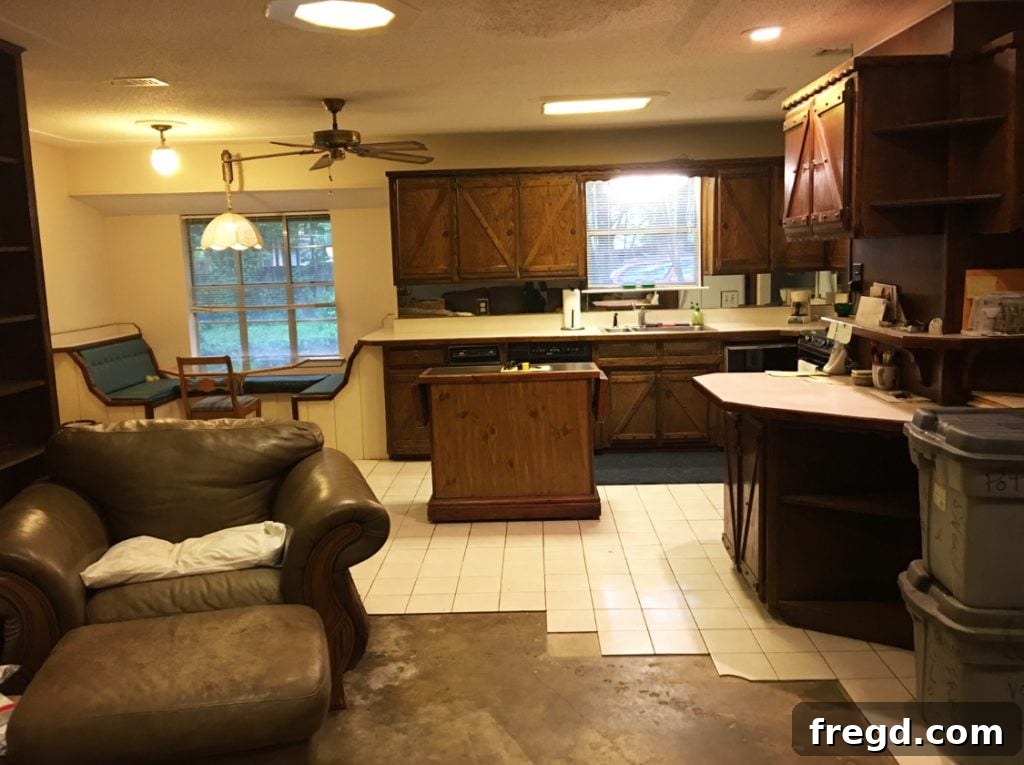
The journey began with a typical 1970s ranch, charming in its own right, but ready for a modern update that opened up its living spaces. The renovation transformed it into a sprawling, open-concept home, creating a blank canvas perfectly suited for our signature custom furniture pieces. The request for a generously sized kitchen island was our first exciting challenge, a project that would truly define the new kitchen’s aesthetic and functionality.
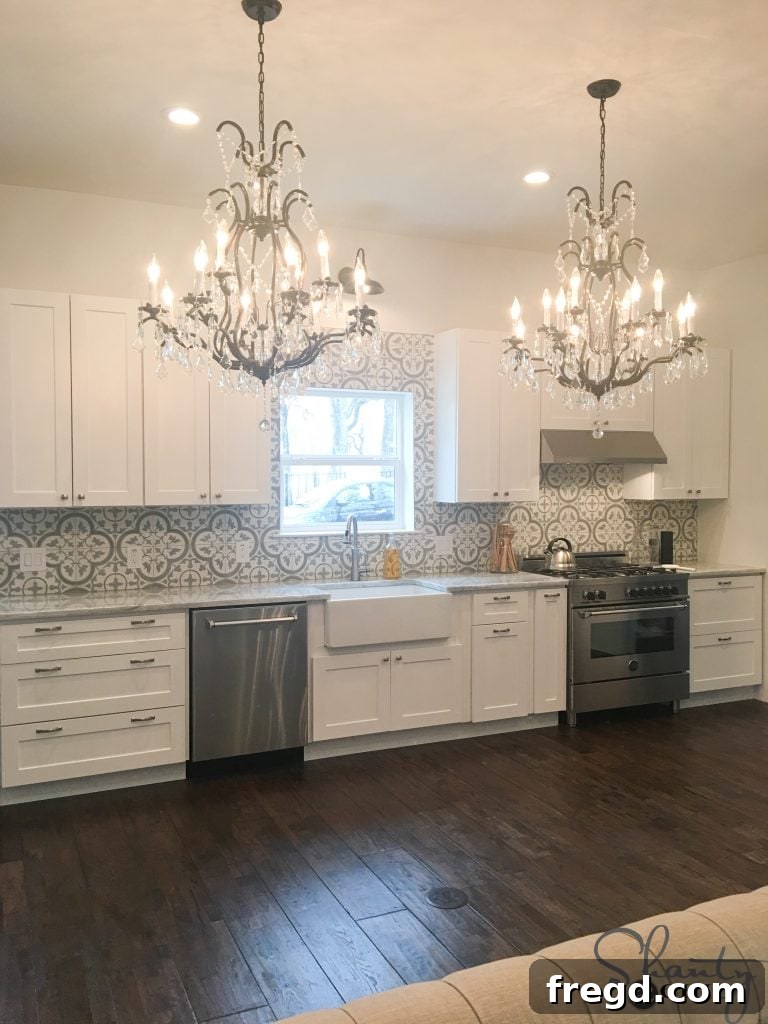
Crafting Your Dream DIY Kitchen Island
Our commitment extends beyond just building; we believe in empowering you to create beautiful, functional pieces for your own home. That’s why, with every custom project we undertake, we meticulously document the process and share comprehensive, free plans and detailed how-to videos. This farmhouse-style kitchen island, designed to be an impressive 8.5 feet long, is no exception. It offers ample counter space, storage, and seating, making it the ultimate gathering point for family and friends.
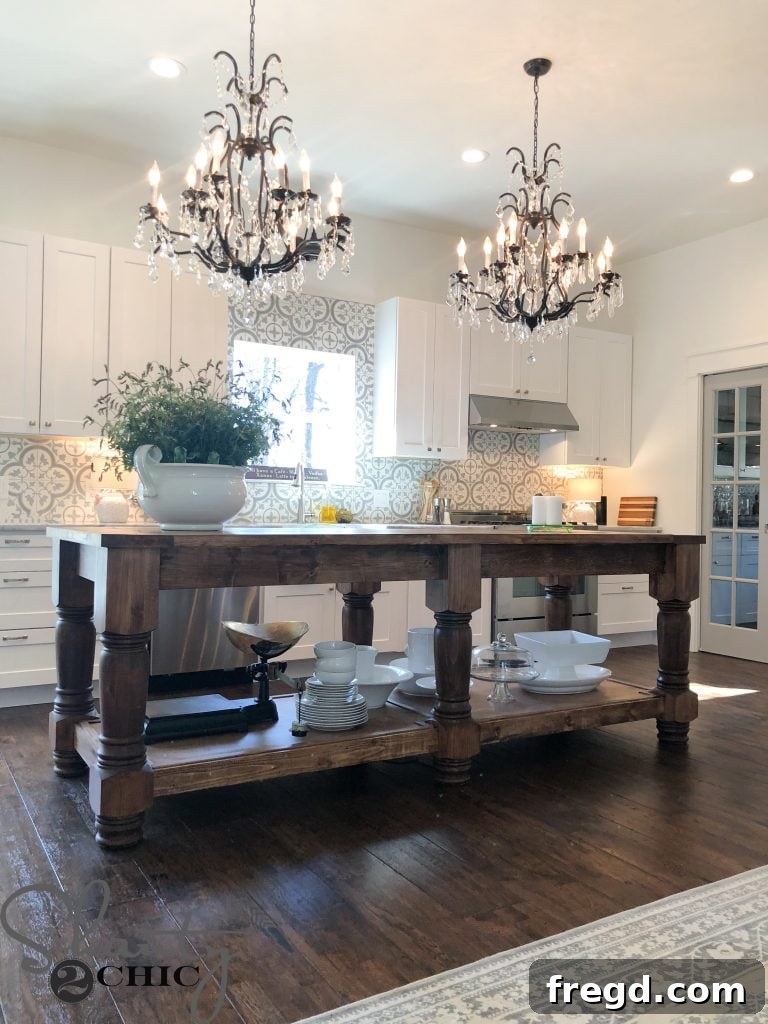
The Foundation: Massive Turned Legs
The undisputed highlight and the true showstopper of this magnificent island are its massive 6-inch turned legs. These substantial legs provide an incredible sense of scale, stability, and classic farmhouse charm. Their robust presence immediately draws the eye, establishing the island as a focal point in the kitchen. Sourcing the right legs was crucial to achieving this bold aesthetic.
We sourced these exceptional turned legs from Osborne Wood Company, opting for their beautiful knotty pine version. It’s important to note that these high-quality legs represent a significant portion of the overall material cost for the island. However, at approximately $1,000 for a giant custom piece of this caliber, the total investment remains incredibly cost-effective, especially when compared to custom-built or pre-fabricated islands of similar size and quality. For those looking to build on a tighter budget, there are excellent alternatives: consider using thinner turned legs, or simplify the design by building an island with only four legs, which can considerably reduce material expenses without sacrificing too much of the custom appeal.
Your Comprehensive DIY Kitchen Island Plans
Ready to build your own dream kitchen island? We’ve made it easier than ever with our comprehensive, FREE printable plans available HERE. These detailed plans will guide you through every cut, every drill, and every assembly step. Make sure to download them before you begin, and follow along with our step-by-step instructions below and in the accompanying video.
1. Precision Cutting for a Perfect Build
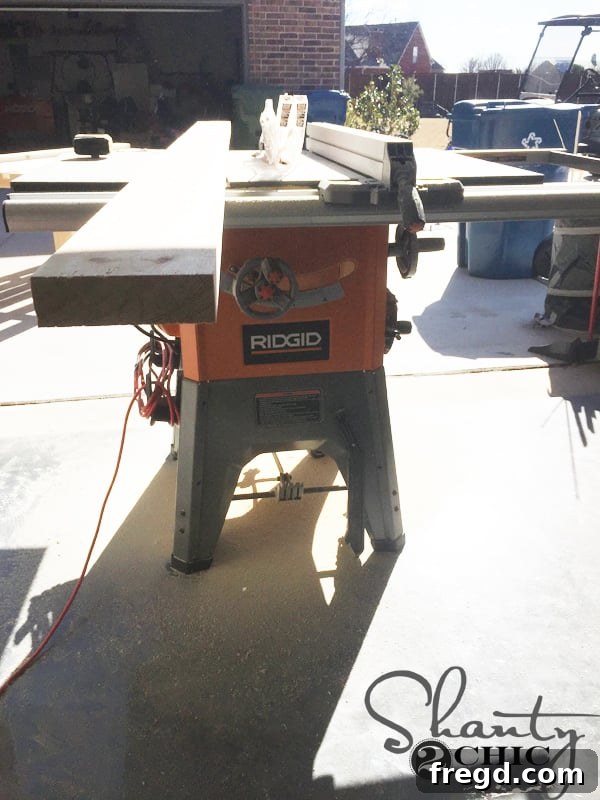
Accuracy in your cuts is paramount for a professional-looking finish. We began by preparing our lumber, using a table saw to rip the rounded edges off of the planks. This crucial step ensures that all boards have perfectly straight edges, allowing for tight, seamless joints when assembled. This technique is especially important for creating a smooth, gap-free tabletop. You can delve deeper into this specific process and learn how we achieve perfectly straight edges in our dedicated how-to video HERE. Always refer to the printable plans for the exact width and length specifications for each board you’ll be ripping.
2. Mastering Pocket Hole Joinery
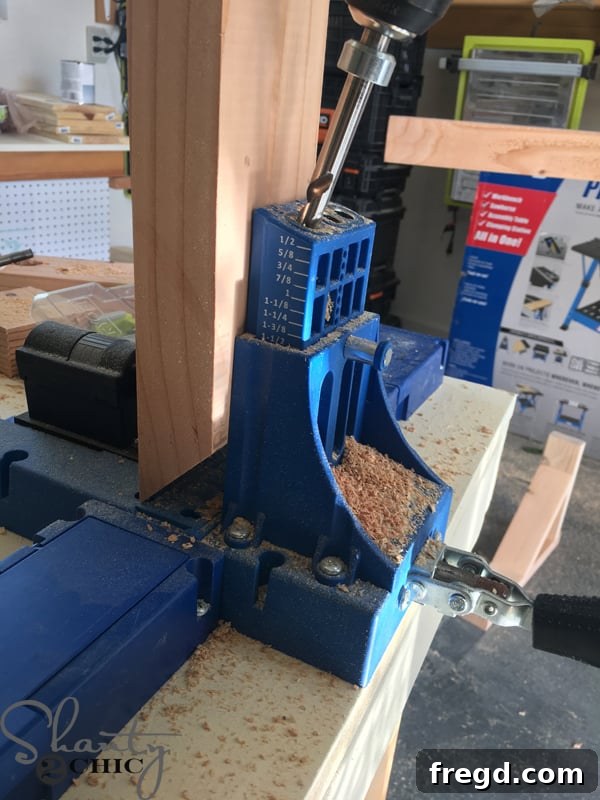
Pocket hole joinery is a fantastic technique for creating strong, concealed joints, perfect for furniture building. After ensuring all our boards were cut to the correct dimensions, we moved on to drilling pocket holes. For the tabletop planks, we drilled 1 1/2-inch pocket holes on both ends of every board. Additionally, six of these boards received pocket holes along one side to facilitate internal connections. Our go-to tool for this precision work is the Kreg Jig. You can find our favorite Kreg Jig model HERE. If you’re new to this method, be sure to watch our How to Use a Kreg Jig video HERE for a comprehensive tutorial.
3. Assembling the Robust Table Top
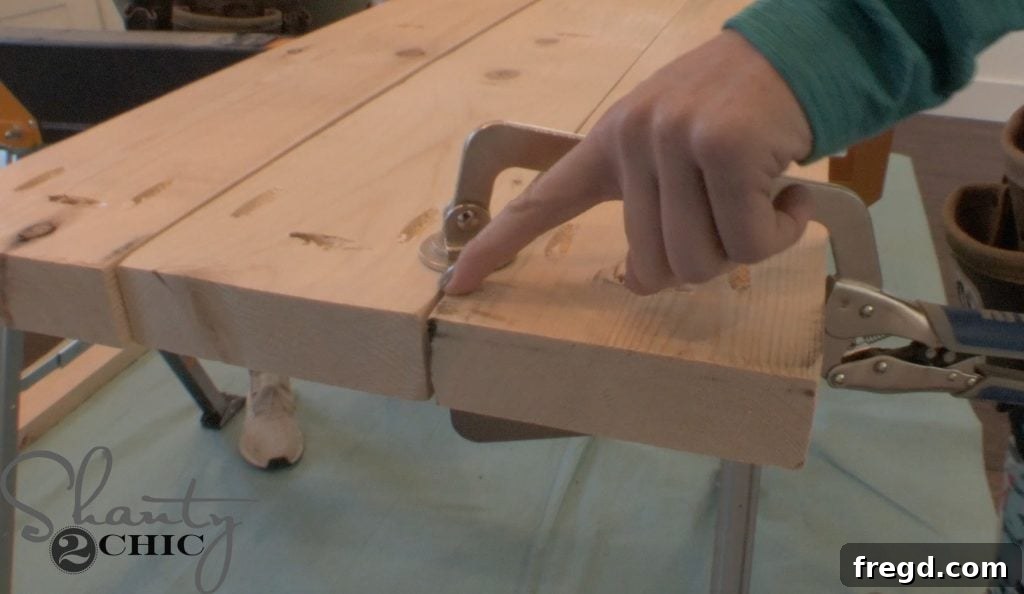
With all the pocket holes drilled, it was time to assemble the impressive tabletop. We carefully aligned the planks, applying wood glue to each joint before securing them together. For this step, a Kreg Face Clamp is invaluable, holding the boards flush while you drive in the screws, preventing any shifting. We used 2 1/2-inch pocket hole screws to create a strong, stable, and incredibly durable surface. The Kreg Face Clamp, a tool we highly recommend for this type of assembly, can be found HERE. For comfortable and efficient working, we recommend setting up on sturdy Sawhorses, available HERE.
4. Attaching the Decorative Bread Boards
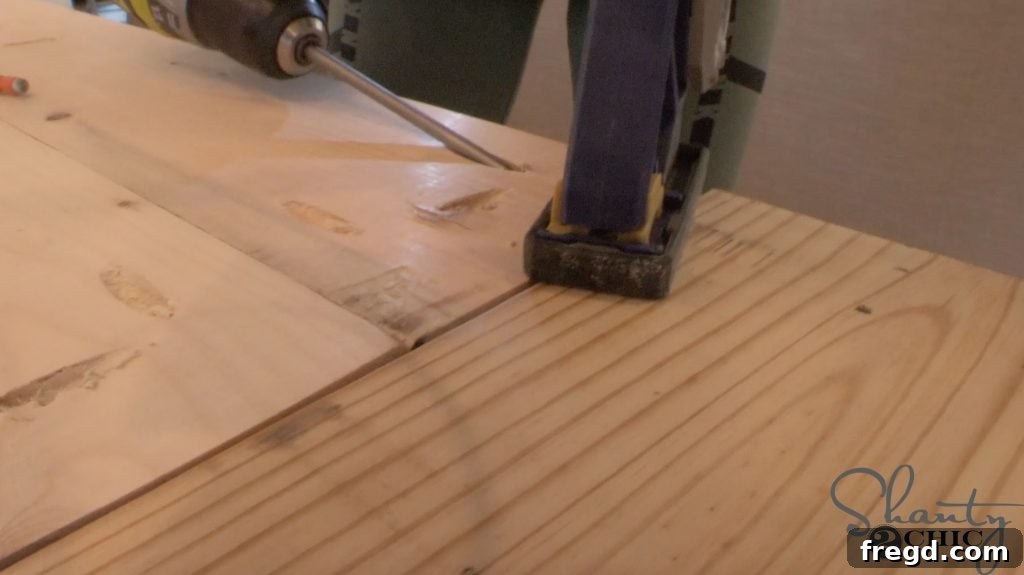
Once the main tabletop planks were securely joined, we moved on to adding the breadboards. These end pieces not only add a touch of traditional craftsmanship but also help to prevent warping of the main tabletop over time. We precisely measured and cut the breadboards to fit the width of our assembled tabletop. With careful alignment, these were then attached to the ends of the planks using 2 1/2-inch pocket hole screws. This method creates a strong mechanical connection while keeping the fasteners hidden for a clean aesthetic.
5. Constructing the Lower Apron Pieces
The apron pieces form the structural frame of the island, connecting the legs and providing support for the shelving. We started with the bottom front and back apron pieces. These were cut to the specified size, and 1 1/2-inch pocket holes were drilled on both ends of each piece. Careful measurements ensured these pieces were perfectly centered on the bottom block of the turned legs. Using a combination of wood glue for a strong bond and 2 1/2-inch pocket hole screws, we securely attached these essential components, forming the base of the island’s frame.
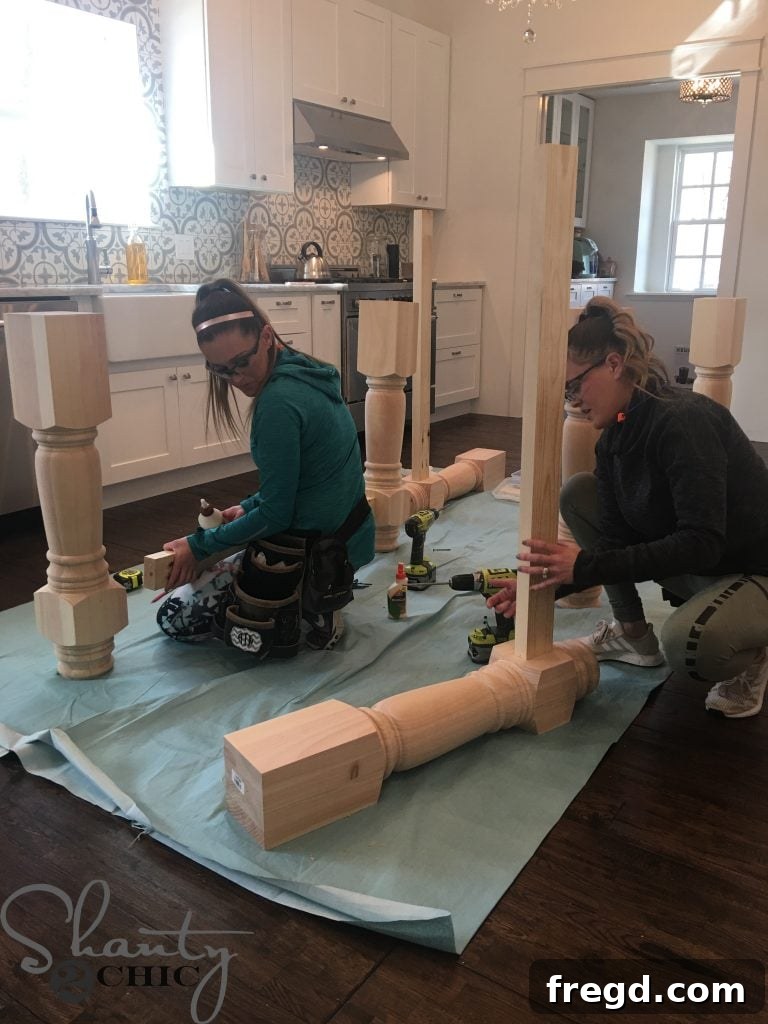
Next, we prepared the bottom side apron pieces. These were also cut to size, and 1 1/2-inch pocket holes were drilled into their ends. These pieces connect the leg base assemblies on either side of the island. We centered them on the bottom blocks of the end legs, then attached them with a generous application of wood glue and 2 1/2-inch pocket hole screws. This created two robust side assemblies, which would then be connected to form the complete base.
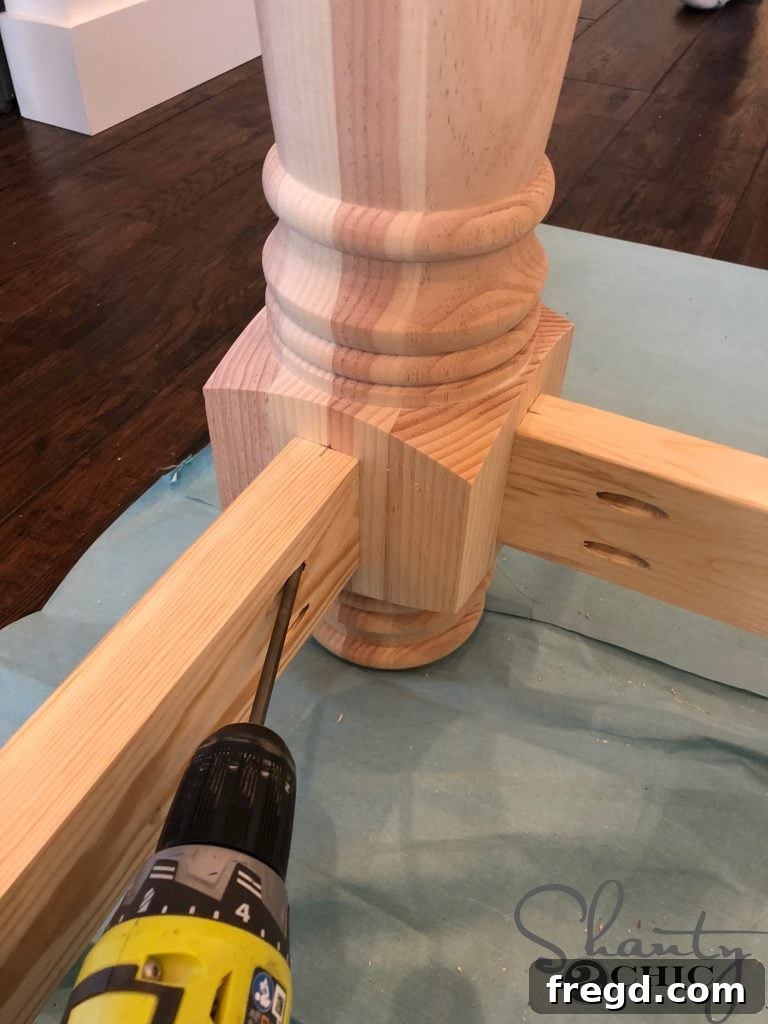
6. Installing the Bottom Support Pieces
With the apron pieces in place, it was time to add the bottom support pieces, which will ultimately hold the bottom shelf. These pieces were cut to size, and 1 1/2-inch pocket holes were drilled on both ends of each. We carefully spaced these supports evenly along the length of the side aprons, ensuring uniform distribution for maximum support. They were then attached to the side aprons using 2 1/2-inch pocket hole screws and wood glue, positioned 1/2 inch from the top edge of the apron pieces. This slight recess allows the shelf to sit flush.
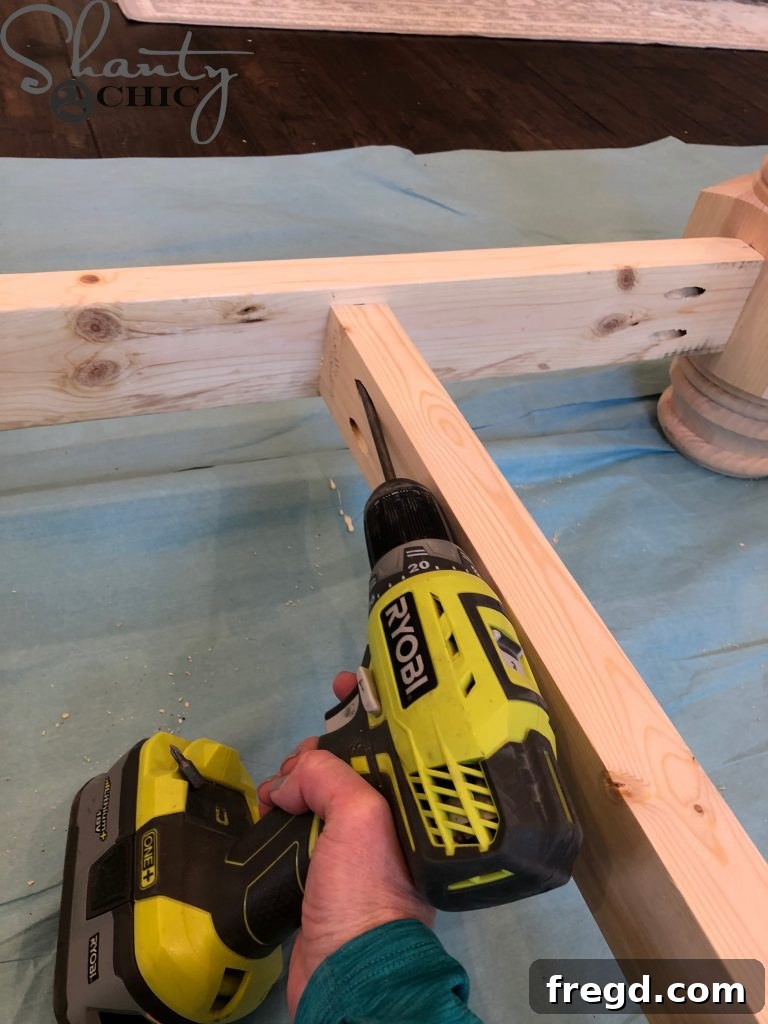
To further reinforce the center of the island and provide complete support for the shelf, we cut a bottom, center support piece to size. Just like the others, 1 1/2-inch pocket holes were drilled at each end. This piece was carefully centered on the bottom blocks of the middle legs and attached with 2 1/2-inch pocket hole screws and wood glue. Crucially, ensure this center support is perfectly level with all the other support pieces to prevent any rocking or unevenness in the finished shelf.
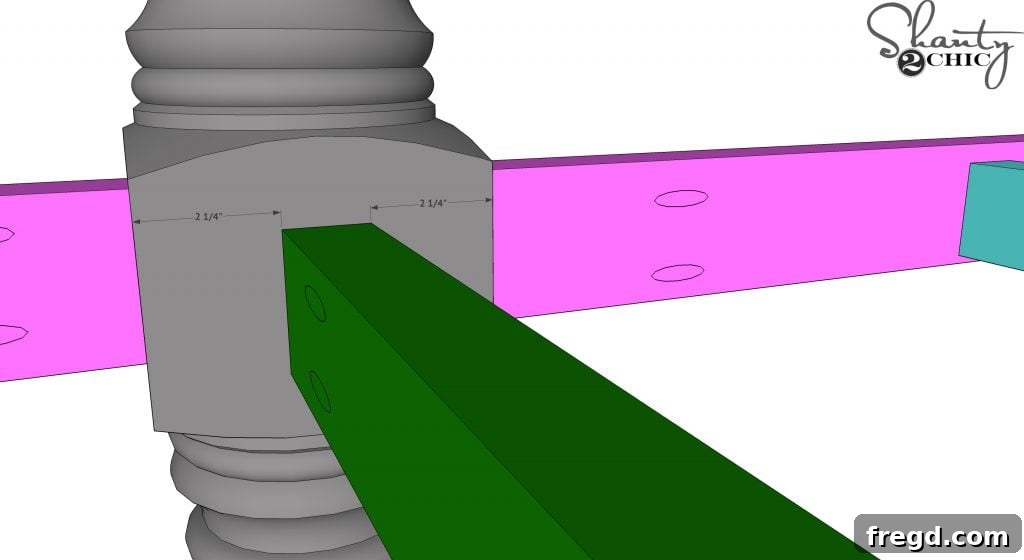
7. Crafting and Installing the Bottom Shelf
Once all the bottom supports were firmly in place, it was time to install the bottom shelf. We opted for hardwood plywood for its durability and smooth finish. The shelf pieces were cut precisely to size, carefully notched to fit around the legs. These panels were then attached to the supports and apron pieces using 1 1/4-inch brad nails and wood glue. The combination of nails and glue creates a very strong and stable shelf, perfect for storing kitchen essentials or displaying decorative items.
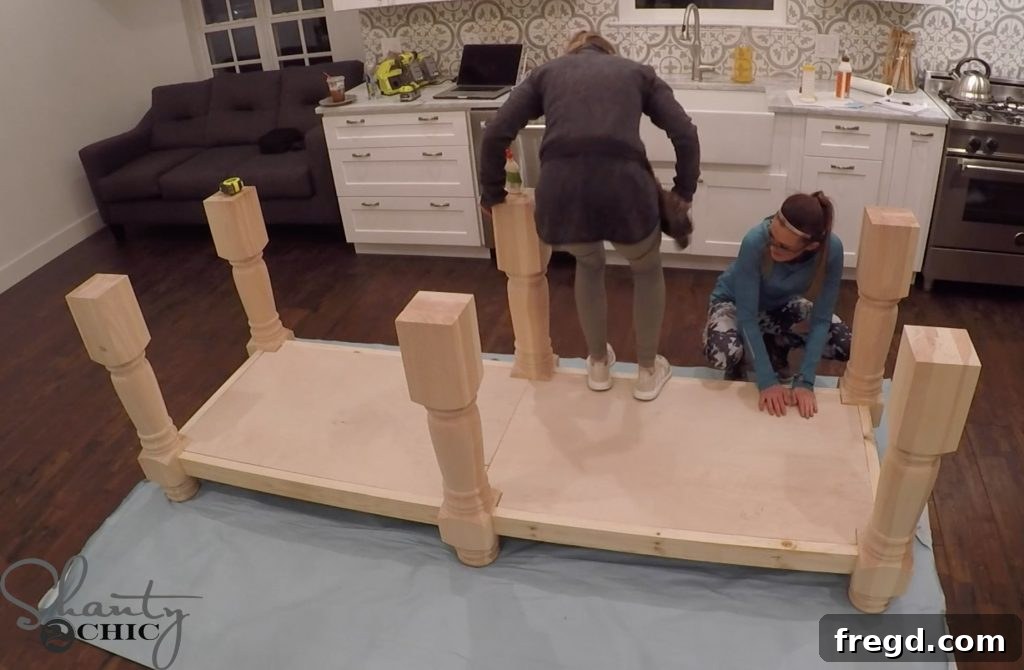
For a flawless finish, especially if there are any small gaps around the leg notches, you have a couple of options. You can use wood filler to seamlessly fill these spaces, sanding smooth for an invisible repair. Alternatively, for a decorative touch that also conceals imperfections, you can use 1 1/4-inch lattice trim. Simply measure and cut the trim as you go, carefully centering it over the seams or gaps. Attach the lattice with 5/8-inch pin nails and wood glue for a clean, professional look that adds another layer of detail to your island.
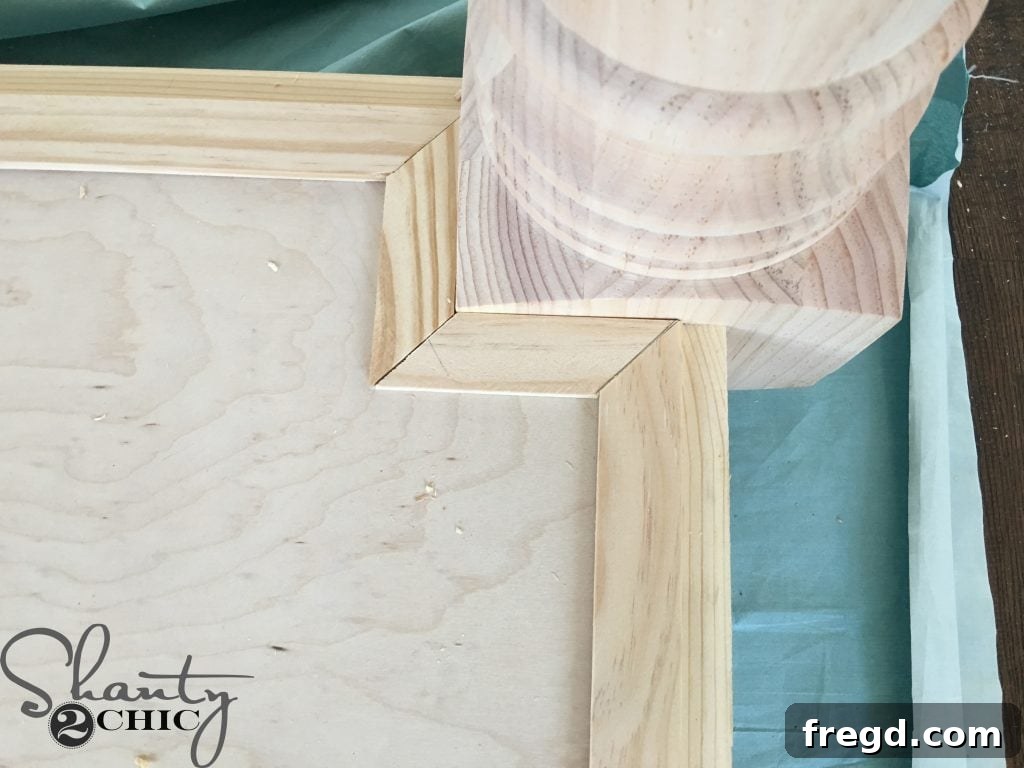
8. Adding the Top Apron Pieces
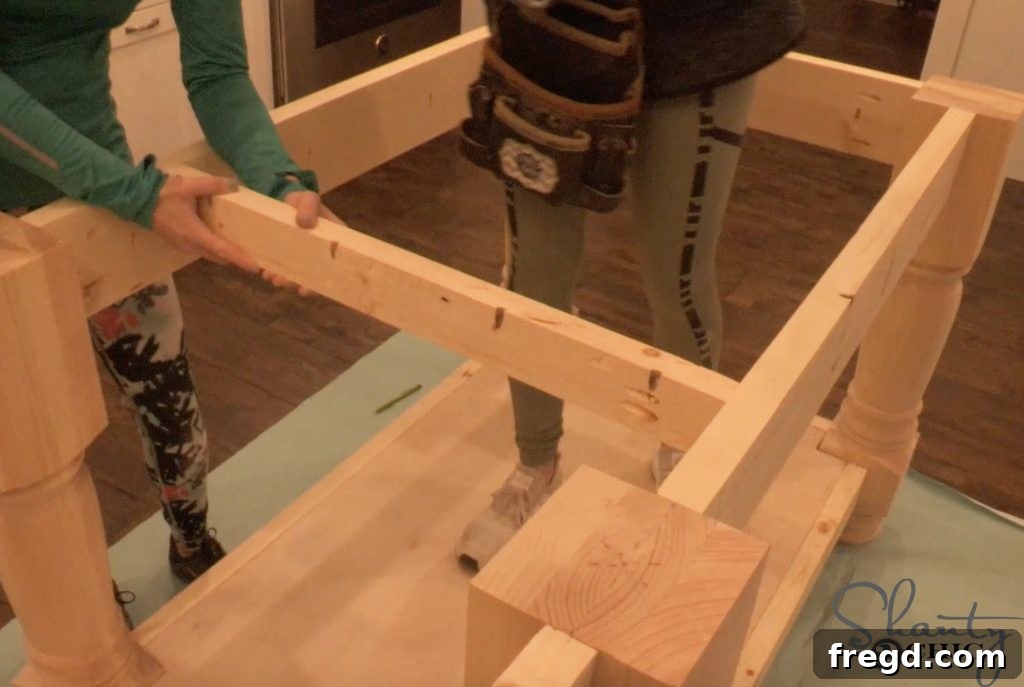
With the lower structure complete, the next critical step was to add the top apron pieces. These pieces run along the top of the island, connecting the legs and providing the final support for the tabletop. We started by cutting the front and back apron pieces to size. As before, 1 1/2-inch pocket holes were drilled on both ends of each piece. These were then carefully centered on the top block of the turned legs and securely attached with 2 1/2-inch pocket hole screws and wood glue. It’s vital to ensure that the top edges of these aprons are perfectly flush with the very top of the legs, creating a level surface for the countertop.
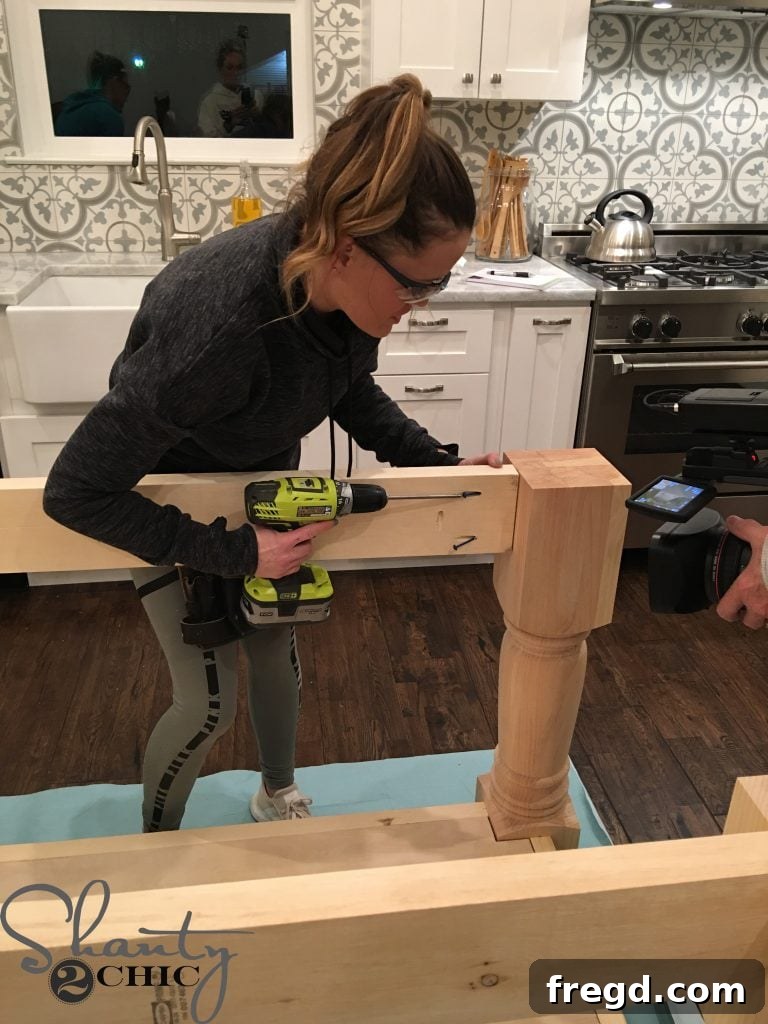
Following the same method, we then cut the top, side apron pieces to their exact dimensions and drilled 1 1/2-inch pocket holes on both ends. These pieces connect the leg assemblies on the sides, mirroring the bottom apron installation. Center them precisely on the top blocks of the legs, ensuring they align perfectly with the front and back apron pieces. This meticulous alignment is key to achieving a square and stable frame for the island’s upper section.
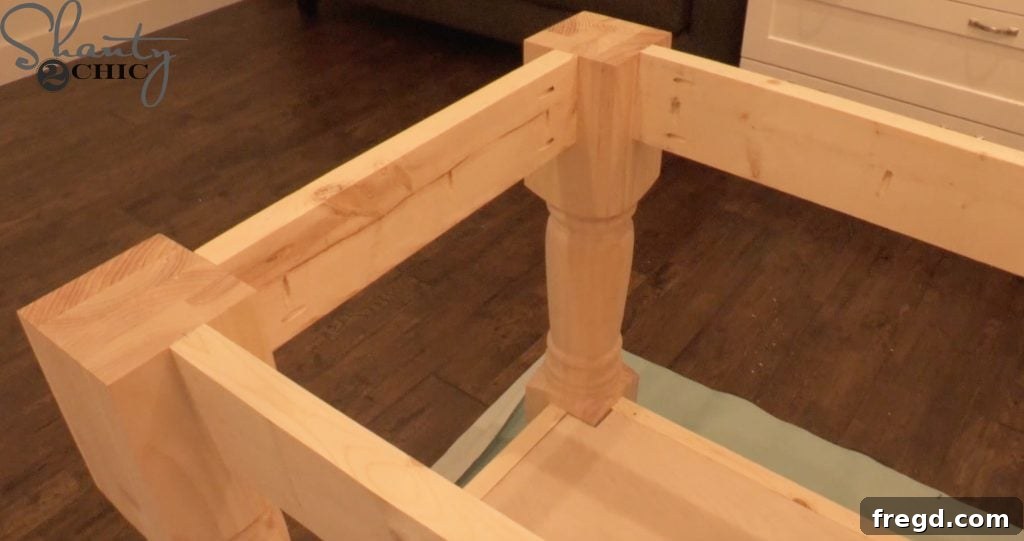
9. Securing the Top Support Pieces
The top support pieces are vital for providing comprehensive, even support across the entire underside of the tabletop, preventing any sagging or instability. We cut these pieces to size, drilling 1 1/2-inch pocket holes at both ends and along one edge of each piece. These supports were then carefully spaced out evenly across the length of the island, connecting the top front and back aprons. We attached them using 2 1/2-inch pocket hole screws and wood glue. Crucially, the top surface of these supports must be perfectly flush with the top of the aprons, creating a continuous, level plane for the tabletop to rest upon. This ensures a seamless and incredibly strong connection.
10. Attaching the Planked Table Top
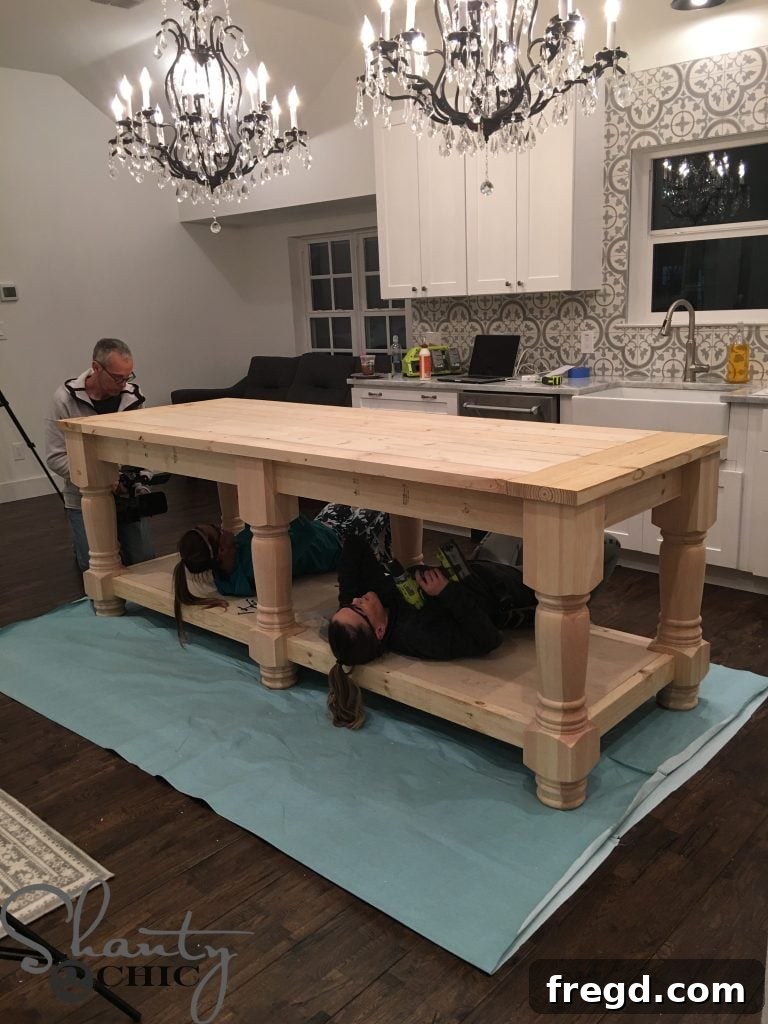
The moment of truth arrives as we integrate the beautiful planked tabletop with the island base. Carefully lift and center the assembled tabletop over the completed island frame. Precision here is important to ensure an even overhang on all sides. We then securely attached the top to the base using 2 1/2-inch pocket hole screws, driving them upwards from the supports and aprons into the underside of the planked top. This method ensures all fasteners are hidden, maintaining the clean lines of the design. A critical detail for aesthetic balance is ensuring the top overhangs each leg by a consistent 3/4 inch, giving it a substantial and elegant appearance.
11. The Grand Finish: Stain and Polyurethane
With the construction complete, the final, and often most satisfying, step is to apply the finish. This is where the wood truly comes to life, protected and enhanced. We chose a beautiful stain to highlight the natural grain of the knotty pine, applying one even coat. Our preferred stain is available HERE. After the stain dried completely, we applied two coats of a durable polyurethane finish. This clear coat not only offers robust protection against daily wear, spills, and moisture but also adds a beautiful sheen that truly elevates the island’s appearance. We highly recommend THIS POLYURETHANE for its exceptional performance. Always follow manufacturer instructions for application and drying times to achieve the best results.
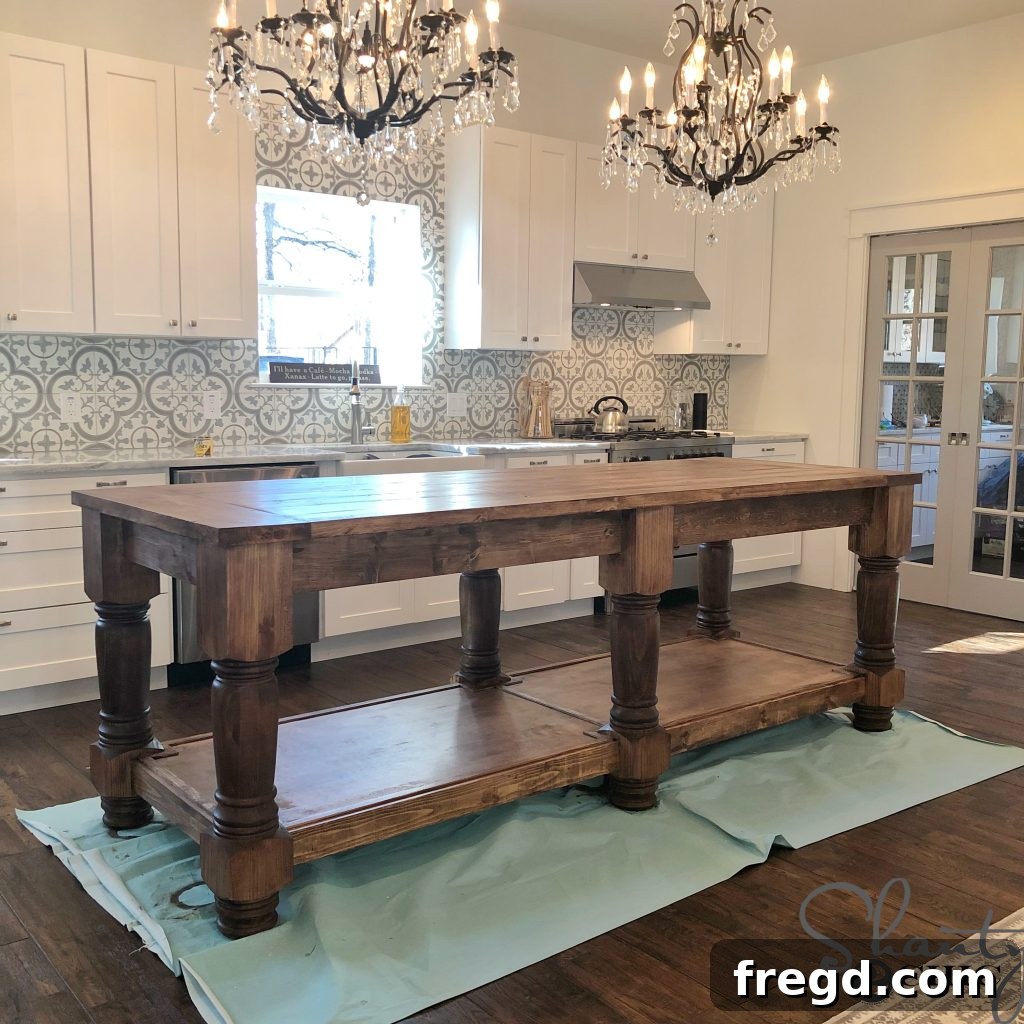
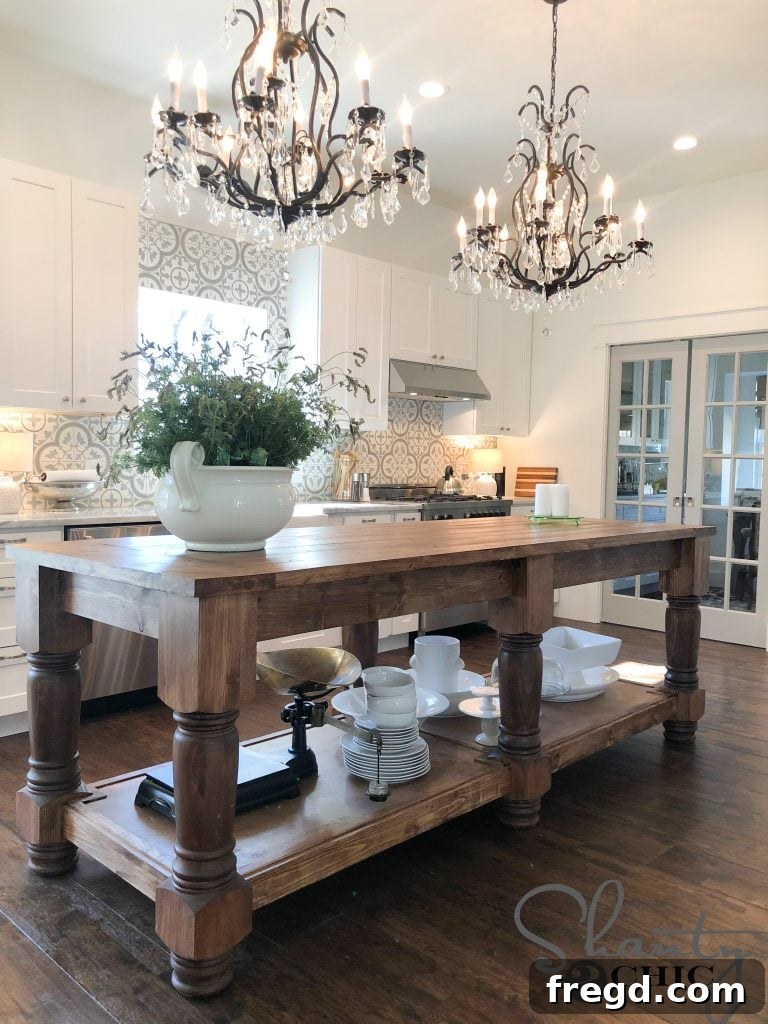
The transformation is truly remarkable, isn’t it? This giant DIY kitchen island now stands as the vibrant heart of the home, offering unparalleled functionality and a stunning visual anchor. It’s a testament to what thoughtful design and dedicated DIY effort can achieve.
We are incredibly excited about the other custom pieces we are building for this newly renovated home and can’t wait to share them with you. To ensure you don’t miss any of our upcoming projects, free plans, or how-to videos, make sure to subscribe to our YouTube channel HERE!
Shop the Look: Resources and Materials for Your Kitchen Oasis
We believe in sharing all our secrets! Here’s a curated list of many of the items and resources that brought this stunning kitchen to life, allowing you to recreate a similar aesthetic in your own space:
- Chic Chandeliers: The elegant lighting fixtures that perfectly complement the island can be found HERE.
- Classic Farmhouse Sink: Achieve that timeless kitchen appeal with the beautiful farmhouse sink, available HERE.
- Stylish Leggings: For those who appreciate comfort and style while working on DIY projects, similar leggings can be found HERE and HERE.
- Wood Stain: The exact stain used to bring out the rich tones of the island’s wood is detailed HERE.
- Durable Polyurethane: Protect your custom island with the high-quality polyurethane finish we used, available HERE.
- Elegant Counter Top: The luxurious counter top featured in this kitchen is Crystal Fantasy Granite, adding a touch of sophistication.
- Stunning Backsplash Tile: The unique and captivating backsplash tile can be sourced from The Tile Shop.
- Classic White Dishes: Elevate your kitchenware with timeless white dishes, similar to those found at AtHome.
- Durable Flooring: The beautiful and hard-wearing flooring that grounds the space is from Floor and Decor.
- Wall Paint: The crisp and inviting wall color is Pure White by Sherwin Williams, offering a perfect backdrop.
- Island Legs: Don’t forget the star of the show! The magnificent turned island legs can be found HERE.
Thank you so much for joining us on this incredible building adventure. We hope this detailed guide inspires you to tackle your own custom kitchen island project and create something truly special for your home.
Happy Building!