Are you ready to infuse your home with a blend of rustic charm and industrial chic? Look no further than these stunning DIY Industrial Floating Shelves, crafted with sturdy pipes and beautiful wood. This project isn’t just about adding storage; it’s about making a significant style statement that can dramatically transform any space, especially a kitchen. With our detailed free plans and an exclusive how-to video tutorial, even novice DIY enthusiasts can confidently tackle this rewarding build. We recently brought this vision to life during a “shanty house crash project” for our sister in the Houston area, where we spent two action-packed days turning a new house into a warm, inviting home. Among the various projects we completed, these DIY pipe shelves for her kitchen quickly became a standout, proving just how easy and impactful a well-executed DIY project can be. They are not only functional but also add significant character and open up the space, making it feel larger and more inviting. If you’re looking for an affordable yet high-impact home improvement, these industrial-style floating shelves are your perfect next project. Dive into the tutorial below and discover how simple it is to achieve this custom look for your own home!
Watch our comprehensive video tutorial to see every step in action. Simply click play to begin!
Full video tutorial for building DIY Floating Pipe Shelves.
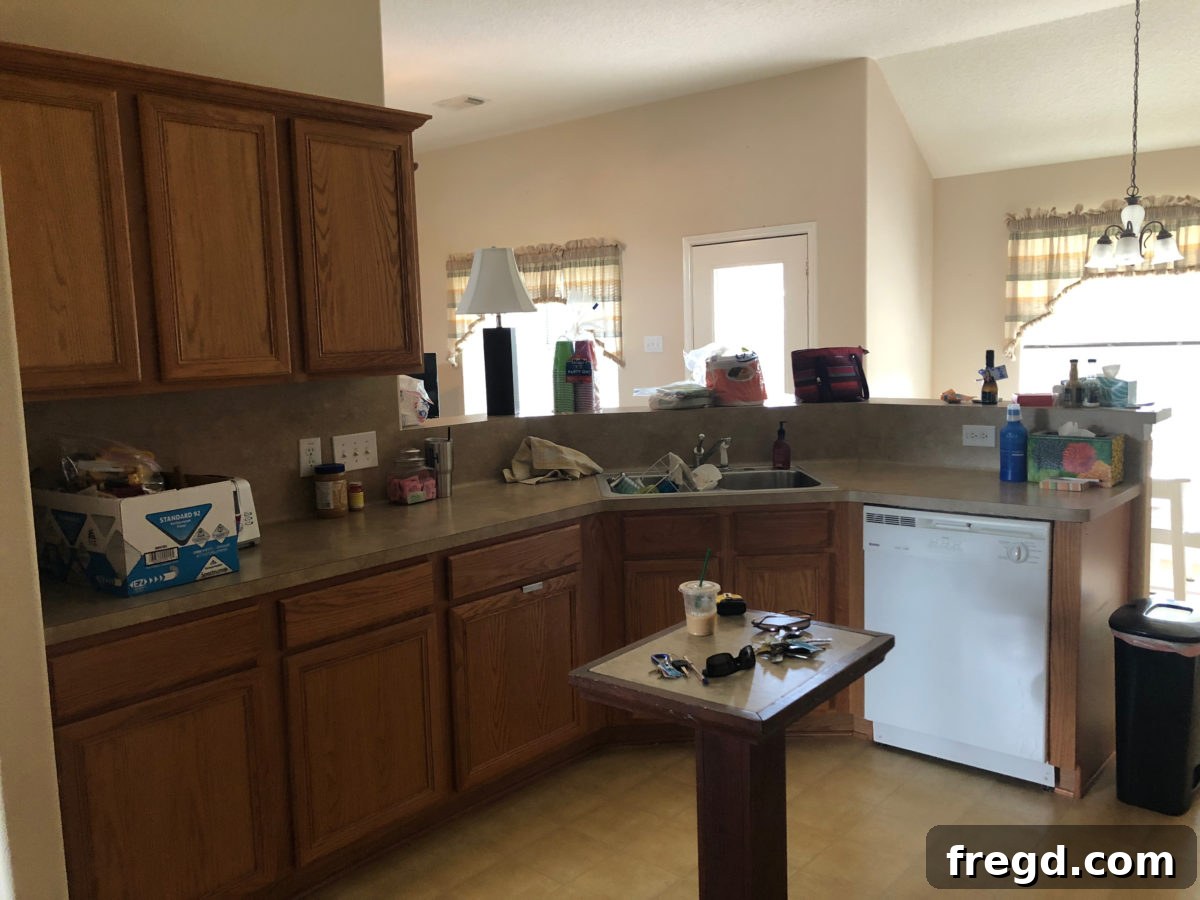
Let’s take a moment to appreciate the “before” – this is how this side of the kitchen looked, awaiting its exciting makeover. The potential for elegant, functional storage was just waiting to be unleashed!
CLICK HERE TO JUMP TO THE FREE PRINTABLE PLANS AND FULL SUPPLY LIST
Planning Your Perfect Industrial Pipe Shelves
Before you even pick up a saw, thoughtful planning is key to a successful DIY project. These industrial floating shelves are highly customizable, allowing you to tailor them to your specific space and aesthetic preferences. Consider the dimensions of your wall, the amount of storage you need, and the overall look you’re aiming for. The beauty of pipe shelving lies in its versatility, fitting seamlessly into various decor styles from rustic farmhouse to modern industrial. Our free plans provide a fantastic starting point, offering precise measurements and a clear guide to help you visualize the finished product.
Essential Tools and Materials for Your Floating Shelves
Gathering all your tools and materials before you begin will streamline the building process and make for a much smoother experience. For this project, you’ll need standard woodworking tools and a few specific items to achieve the signature industrial look. We’ll be working with pine or whitewood for the internal frame, hardwood plywood for the shelf surfaces, and beautiful barnwood for the trim, adding that desirable rustic touch. Don’t forget the star of the show – the metal pipe shelf brackets that give these shelves their unique “floating” appearance and robust support.
Step-by-Step Construction: Building Your Industrial Floating Shelves
Step 1: Assembling the Shelf Frame – The Core Structure
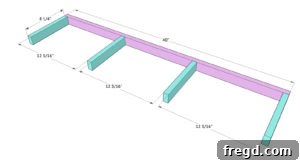
The foundation of your floating shelves begins with a sturdy internal frame. We use 1×2 lumber for this, which provides excellent support without adding unnecessary bulk. Start by cutting your 1x2s according to the dimensions in our free plans. Precision here is crucial for a perfectly square and strong shelf. Once your pieces are cut, take one of the longer boards and attach the four smaller, perpendicular pieces to it. Use a combination of high-quality wood glue for a strong bond and 1.25-inch brad nails for immediate hold and reinforcement. Ensure the end pieces are perfectly flush with the ends of the longer board, and then evenly space the two inner support pieces. This meticulous alignment will ensure your shelf sits flat and securely.
For attaching the boards, we highly recommend the Ryobi 18G nailer. This tool is an absolute game-changer for DIY projects, making the nailing process incredibly fast, accurate, and effortless. It’s a favorite in our workshop and almost indispensable for builds like these, offering superior control and efficiency compared to traditional hammering.
Step 2: Completing the Rectangular Frame
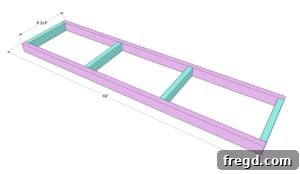
With one side of your frame partially assembled, it’s time to complete the rectangular structure. Take your second long 1×2 board and attach it to the opposite ends of the four shorter boards you just installed. Again, apply a generous amount of wood glue before securing with 1.25-inch brad nails. Drive the nails through the long board and into each shorter support piece. At this stage, you should have a perfectly formed, open rectangular frame. This internal skeleton provides the essential structure that will support the entire shelf and its contents, ensuring longevity and stability.
Step 3: Adding the Top and Bottom Plywood Pieces
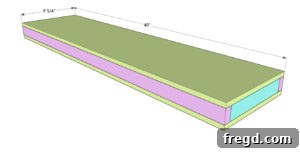
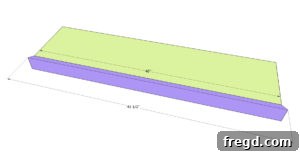
With your frame constructed, it’s time to add the top and bottom surfaces of your shelves. For this, we use 1/2-inch hardwood plywood, which offers a smooth, durable surface. We carefully ripped each piece down to 9.75 inches wide (you can often have your local hardware store do this for you if you don’t have a table saw). After cutting these plywood pieces to the correct length as specified in the plans, attach them to the top and bottom of your shelf frame. Once again, employ wood glue for a strong, permanent bond and secure them with 1.25-inch brad nails, driving them through the plywood and into the underlying frame. This step encapsulates the internal structure, creating a hollow, yet incredibly strong, box that gives the illusion of a solid piece of wood when finished.
Step 4: Adding the Rustic Charm with Front Trim
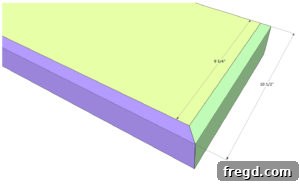
Now for the detail that truly elevates these from simple boxes to elegant floating shelves: the trim. We opted for barnwood, ripped down to 2.5 inches wide, for its authentic rustic texture and character. You can find the barnwood we used HERE, or alternatively, a standard 1×3 board can be used directly without needing to be ripped. Begin by cutting the front trim piece to size. For a professional, seamless look, we cut each end at a 45-degree angle. The short point of each angle should be perfectly flush with the length of the shelf you’ve constructed. Attach this trim piece using wood glue and 1.25-inch brad nails, driving them through the trim and into the underlying shelf frame. This creates a beautiful, finished edge that hides the plywood and adds depth.
Step 5: Finishing the Trim on the Sides
With the front trim piece securely in place, turn your attention to the side pieces. Cut each side trim board to length. The front end of these boards will also be cut at a 45-degree angle to meet the front trim seamlessly, creating a perfect mitered corner. The back end, however, will be cut straight and should be flush with the back of the shelf. This allows the shelf to sit snugly against the wall once installed. Attach these side boards using wood glue and 1.25-inch brad nails, just as you did with the front piece. Take your time to ensure all corners meet perfectly, as this attention to detail makes all the difference in the final appearance of your floating shelves.
Step 6: Finishing and Installing Your Pipe Shelves
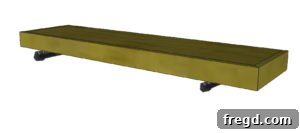
Congratulations, your shelves are now fully constructed! Before hanging your industrial pipe brackets, it’s time for the crucial finishing touches. Stain or paint your shelves to match your desired aesthetic and allow them to dry completely. For a protective finish, consider adding a clear coat to guard against moisture and wear, especially in a kitchen environment. The next exciting step is attaching the pipe brackets to your wall. This process is surprisingly simple, but watching our video tutorial will provide clear visual guidance. We made this step even easier by using our incredible Ryobi Brushless Driver – a tool that offers superior power and precision for effortless installation. Click HERE for the link to this fantastic driver!
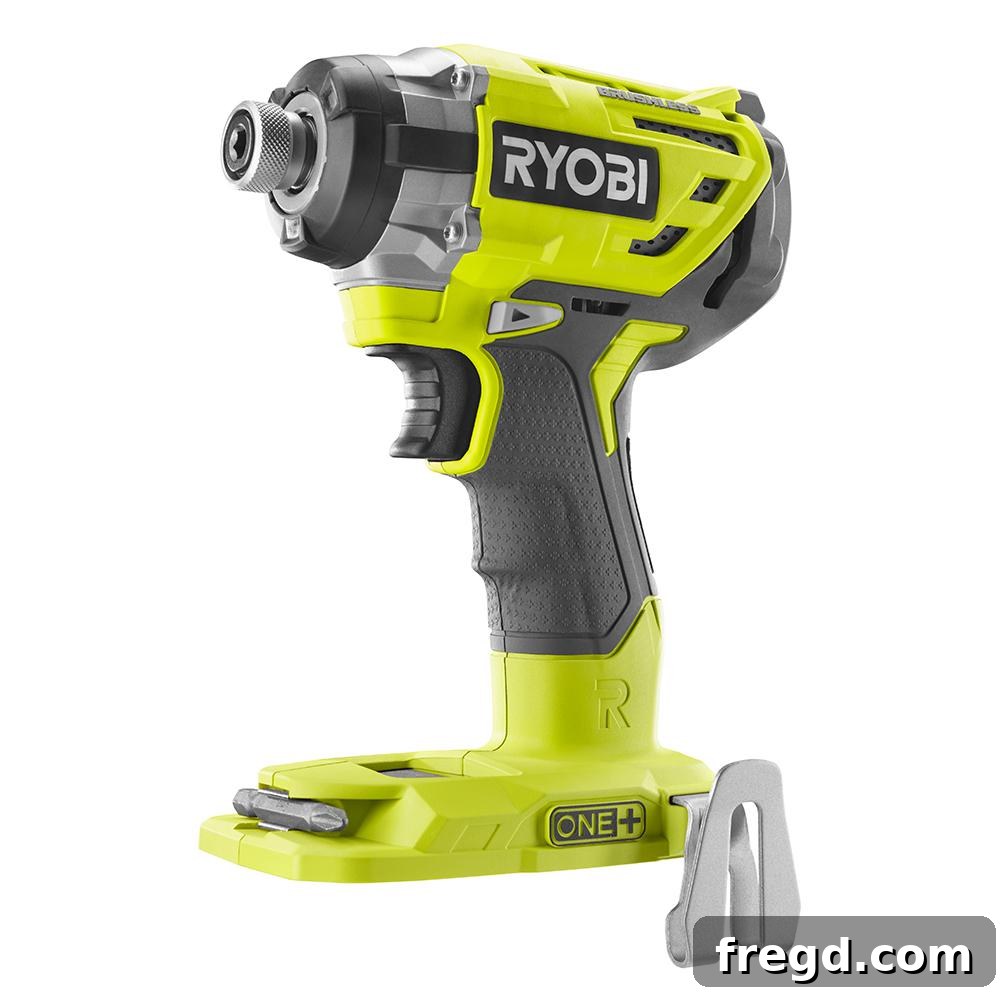
You can find the exact pipes we used for these shelves HERE! These specific pipes are designed for shelving and come with all necessary hardware for a secure installation.
Once all of the pipe flanges and extensions are firmly attached to the wall, carefully set your beautifully finished shelves on top of the pipe structure. The final step is to lock them into place using the small brackets or clips that typically come with the pipe shelf kits. These ensure the shelves don’t slide and remain perfectly secure. This simple installation method not only makes the shelves easy to mount but also allows for effortless removal if you ever decide to redecorate or move.
The Finished Look: Industrial Floating Pipe Shelves
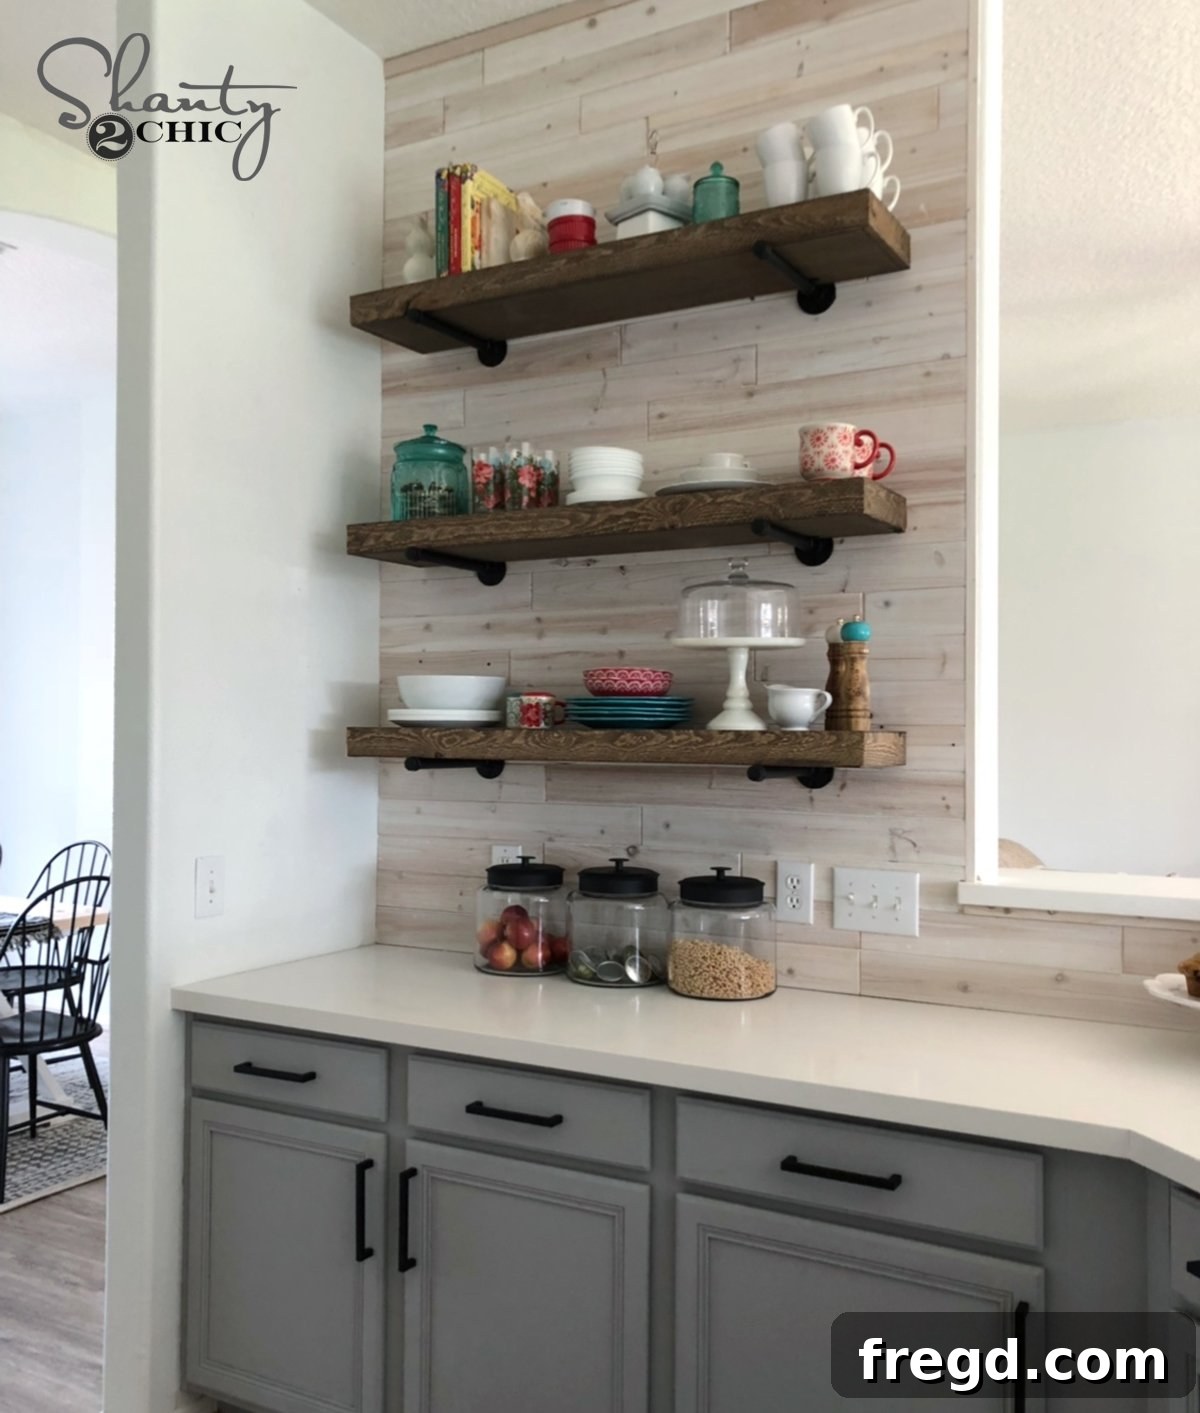
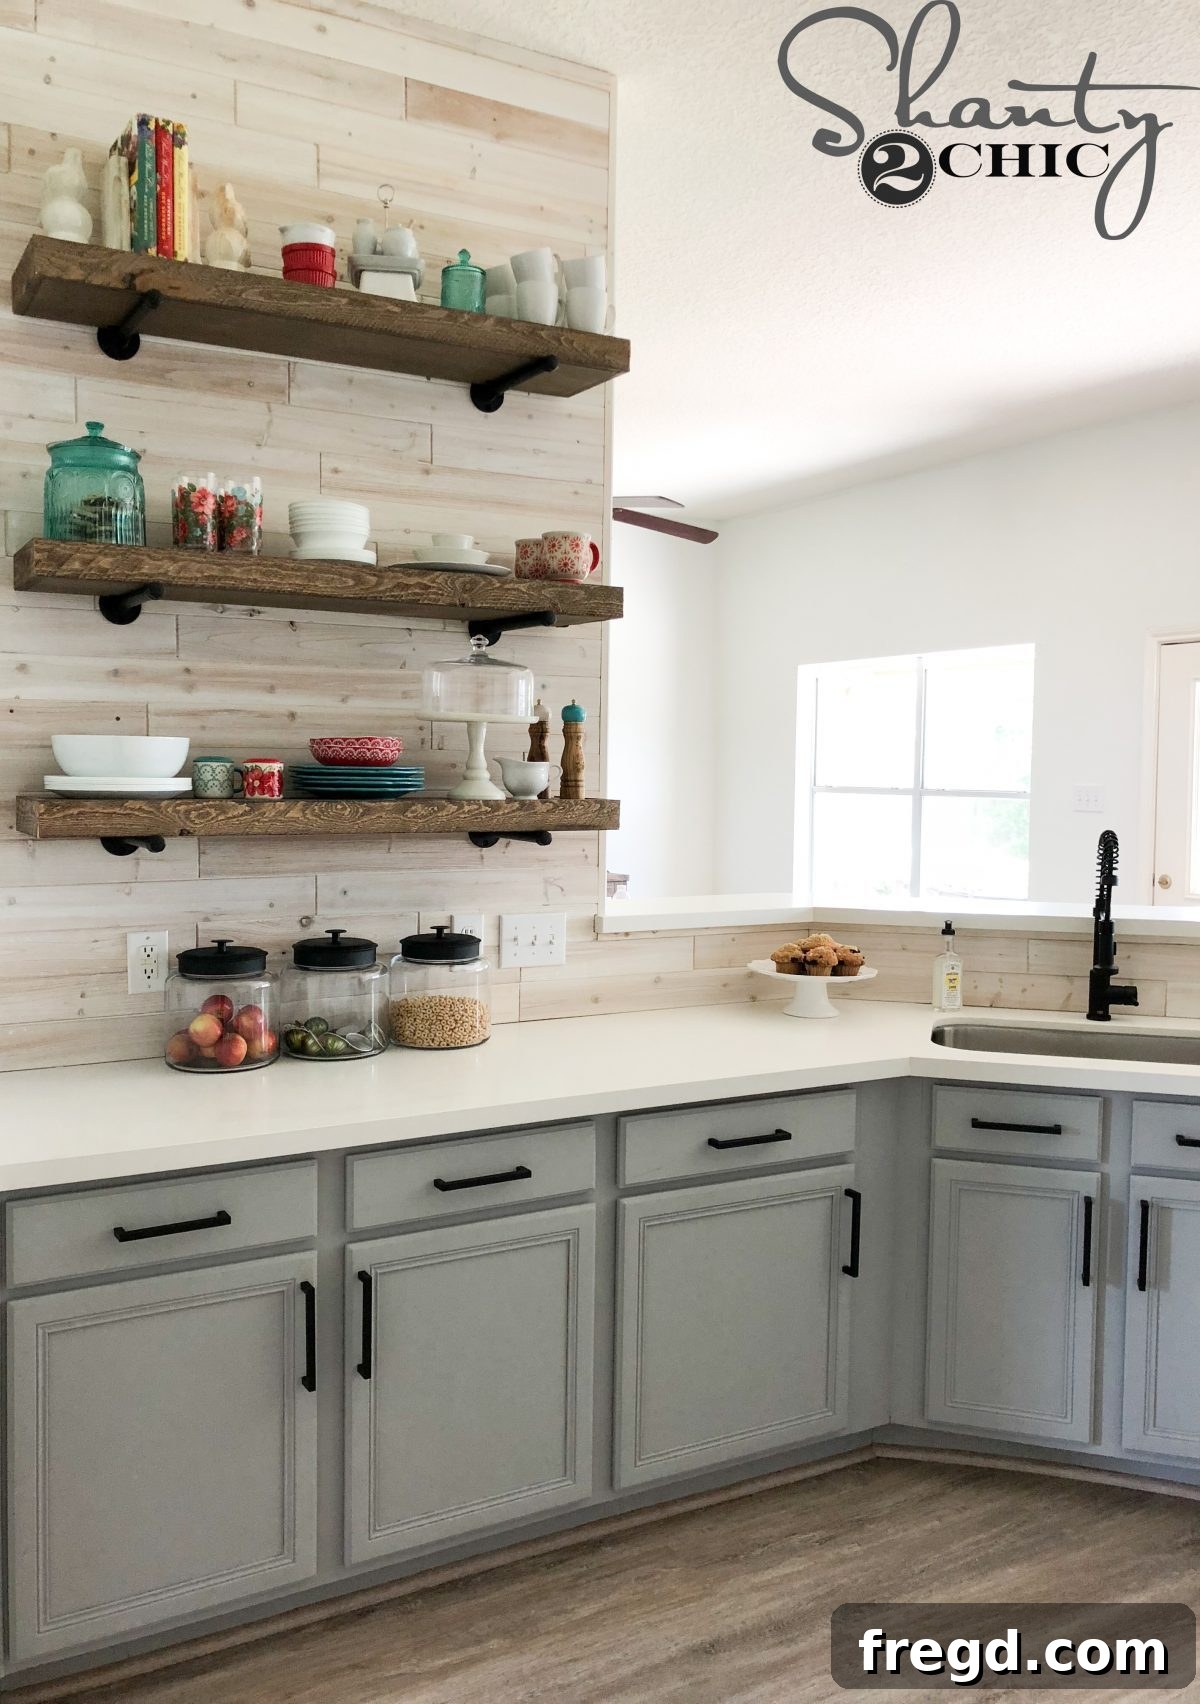
And there you have it – the stunning transformation of a plain wall into a functional and stylish display area! These industrial floating pipe shelves are now perfectly set in place, ready to hold everything from decorative accents to everyday kitchen essentials. The blend of warm wood and cool metal creates a captivating contrast, making them a focal point in the room. We couldn’t be happier with how they turned out, bringing that perfect touch of farmhouse industrial charm to our sister’s kitchen.
The satisfaction of seeing a DIY project come to life is truly unparalleled. These shelves not only provide much-needed storage but also elevate the entire aesthetic of the kitchen, demonstrating how a simple project can make a huge difference. We were absolutely thrilled with the results, and so was our sister!
To ensure a cohesive look throughout the kitchen, we carefully selected a stain that perfectly complemented the barnwood trim used on the shelves. We achieved this rich, warm tone using THIS STAIN. The right stain or paint can truly enhance the natural beauty of the wood and tie your entire design together.
We absolutely love seeing your creativity come to life! If you build your own version of these amazing floating shelves, please be sure to share them on social media and use the hashtag #shanty2chic. This allows us to see your incredible work and share it with our growing community of DIY enthusiasts. Now, let’s take one last look at just how dramatically these shelves transformed the space. Remember the “before,” a blank canvas full of untapped potential?
And now, behold the “after”! A stunning display of functional beauty and thoughtful design, all achieved through a rewarding DIY project. The open shelving instantly brightens the space and offers endless possibilities for styling and organization.
Beyond the shelves themselves, the right decor can truly bring a space to life. Here are links to all the charming items we used to style and decorate this kitchen, adding those perfect finishing touches that make it feel warm and welcoming:
- Blue Plate
- Red Bowl
- Shakers
- Mugs
- Glasses
- Cake Stand
- Cookie Jar
- Small Shakers
- Montana Jars
DIY Floating Shelves with Industrial Pipes
Unlock the potential of your home decor with these stylish and functional DIY Floating Shelves, featuring a modern industrial pipe design. Shanty2Chic provides you with comprehensive free plans and an easy-to-follow how-to video tutorial, making this project accessible for all skill levels. These shelves are not only an excellent way to add storage but also to introduce a unique design element that complements various interior styles, from rustic farmhouse to contemporary industrial.
Make sure to click the link below to download and print the full set of detailed plans!
Download Free DIY Floating Pipe Shelves Plans (PDF)
Supply List for DIY Floating Pipe Shelves
To successfully complete your industrial floating shelves, you’ll need the following materials. We’ve carefully selected these to ensure durability, stability, and aesthetic appeal. Having all your supplies ready before you start will make the building process much more efficient.
- 2 – 1x2x8 Pine or Whitewood boards (for the internal frame)
- 1 – 1/2″x24″x48″ Hardwood Plywood sheet (for the top and bottom surfaces)
- 1 – 2.5″ Barnwood trim (or a 1×3 board for an alternative look)
- 2 – Metal Pipe Shelf Brackets (per shelf, choose your desired style and length)
- Wood Glue (strong adhesive for joints)
- 1 1/4″ Brad Nails (for securing components, ideally with a brad nailer)
Detailed Instructions for Building Your Floating Pipe Shelves
Follow these step-by-step instructions carefully to construct your beautiful and sturdy industrial floating shelves. Each step includes tips to ensure a high-quality finish and a satisfying building experience.
-
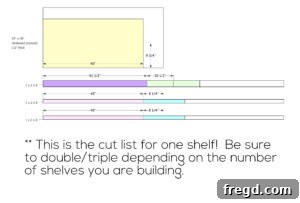
Cut List and Preparation: Begin by carefully cutting all your wood pieces according to the provided plans. Accuracy in this initial step will significantly impact the final fit and finish of your shelves. Lay out all your cut pieces to ensure you have everything ready for assembly.

-
Assemble the First Side of the Frame: Take one of your longer 1×2 boards. Attach the four smaller 1×2 pieces to it using wood glue and 1 1/4″ brad nails. Position the two end boards flush with the ends of the long board, and then evenly space the two remaining shorter boards in between. Ensure the nails go through the long board and into the end grain of the short boards for a strong joint.
-
Complete the Rectangular Frame: Now, take the other long 1×2 board. Attach it to the opposite ends of the four shorter boards you just installed. Again, use wood glue and 1 1/4″ brad nails, driving them through the long board and into each shorter board. At this point, you should have a complete rectangular frame, which forms the inner structure of your floating shelf.
-
Attach Top and Bottom Plywood: It’s time to add the 1/2″ hardwood plywood pieces to the top and bottom of your shelf frame. These pieces should be ripped down to 9 3/4″ wide (or have your hardware store do this for you). After cutting them to the correct length, apply wood glue to the frame edges and attach the plywood using 1 1/4″ brad nails. Drive the nails through the plywood and into the frame, creating a sturdy box structure.
-
Install Front Trim: Now, add the decorative trim. If using barnwood, ensure it’s ripped to 2 1/2″ wide. Alternatively, a 1×3 board works perfectly. Cut the first, front trim piece to size, cutting each end at a 45° angle for a mitered joint. The short point of each angle should be flush with the overall length of your shelf. Attach this trim using wood glue and 1 1/4″ brad nails, through the trim and into the shelf frame.
-
Attach Side Trim Pieces: Next, cut and attach the side trim pieces. The front end of these boards will also have a 45° angle cut to meet the front trim perfectly. The back end should be cut straight and flush with the back of the shelf. Secure these side pieces with wood glue and 1 1/4″ brad nails, ensuring all joints are tight and clean.
-
Finishing and Installation: Your shelves are now fully assembled! Before hanging, stain or paint them to your desired finish and allow ample drying time. For detailed instructions on how we attach the industrial pipe brackets to the wall, be sure to watch our video tutorial – it’s incredibly straightforward! Once installed, stand back and admire your handiwork. Don’t forget to share your finished floating shelves on social media with #shanty2chic so we can celebrate your success!