
DIY Garage & Workshop Cabinets: Free Plans for Ultimate Storage Solutions
Welcome back, fellow DIY enthusiasts! As promised, I’m thrilled to share the comprehensive, step-by-step free plans for building your very own custom DIY cabinets. This project is a game-changer for anyone looking to bring order and efficiency to their garage, workshop, or any space craving superior storage. If you’re ready to say goodbye to clutter and hello to a beautifully organized workspace, you’ve come to the right place!
For those who missed the grand tour of my revamped shop and want to see these incredible cabinets in action, you can catch all the inspiration and design ideas right here on YouTube.
Why Custom DIY Cabinets? The Transformation of My Workshop
Four years ago, when we built our home, the decision to choose this particular floor plan was heavily influenced by one key feature: an additional single-car garage. This extra space was earmarked from day one to become my dedicated garage workshop. In the initial rush of moving in and setting up, I opted for quick, open shelving to get my tools and materials off the floor. It served its purpose temporarily, but as any active woodworker knows, open shelving in a shop environment presents a significant challenge: sawdust.
Layers upon layers of fine sawdust began to accumulate on everything. Tools, materials, finished projects – nothing was safe from the pervasive dust, and it was becoming incredibly frustrating. Not only did it create a constant cleaning chore, but it also made finding things difficult and gave the entire space a perpetually messy feel. I finally reached my breaking point and decided it was time for a permanent, custom solution that would truly meet the needs of an active workshop: enclosed cabinets.
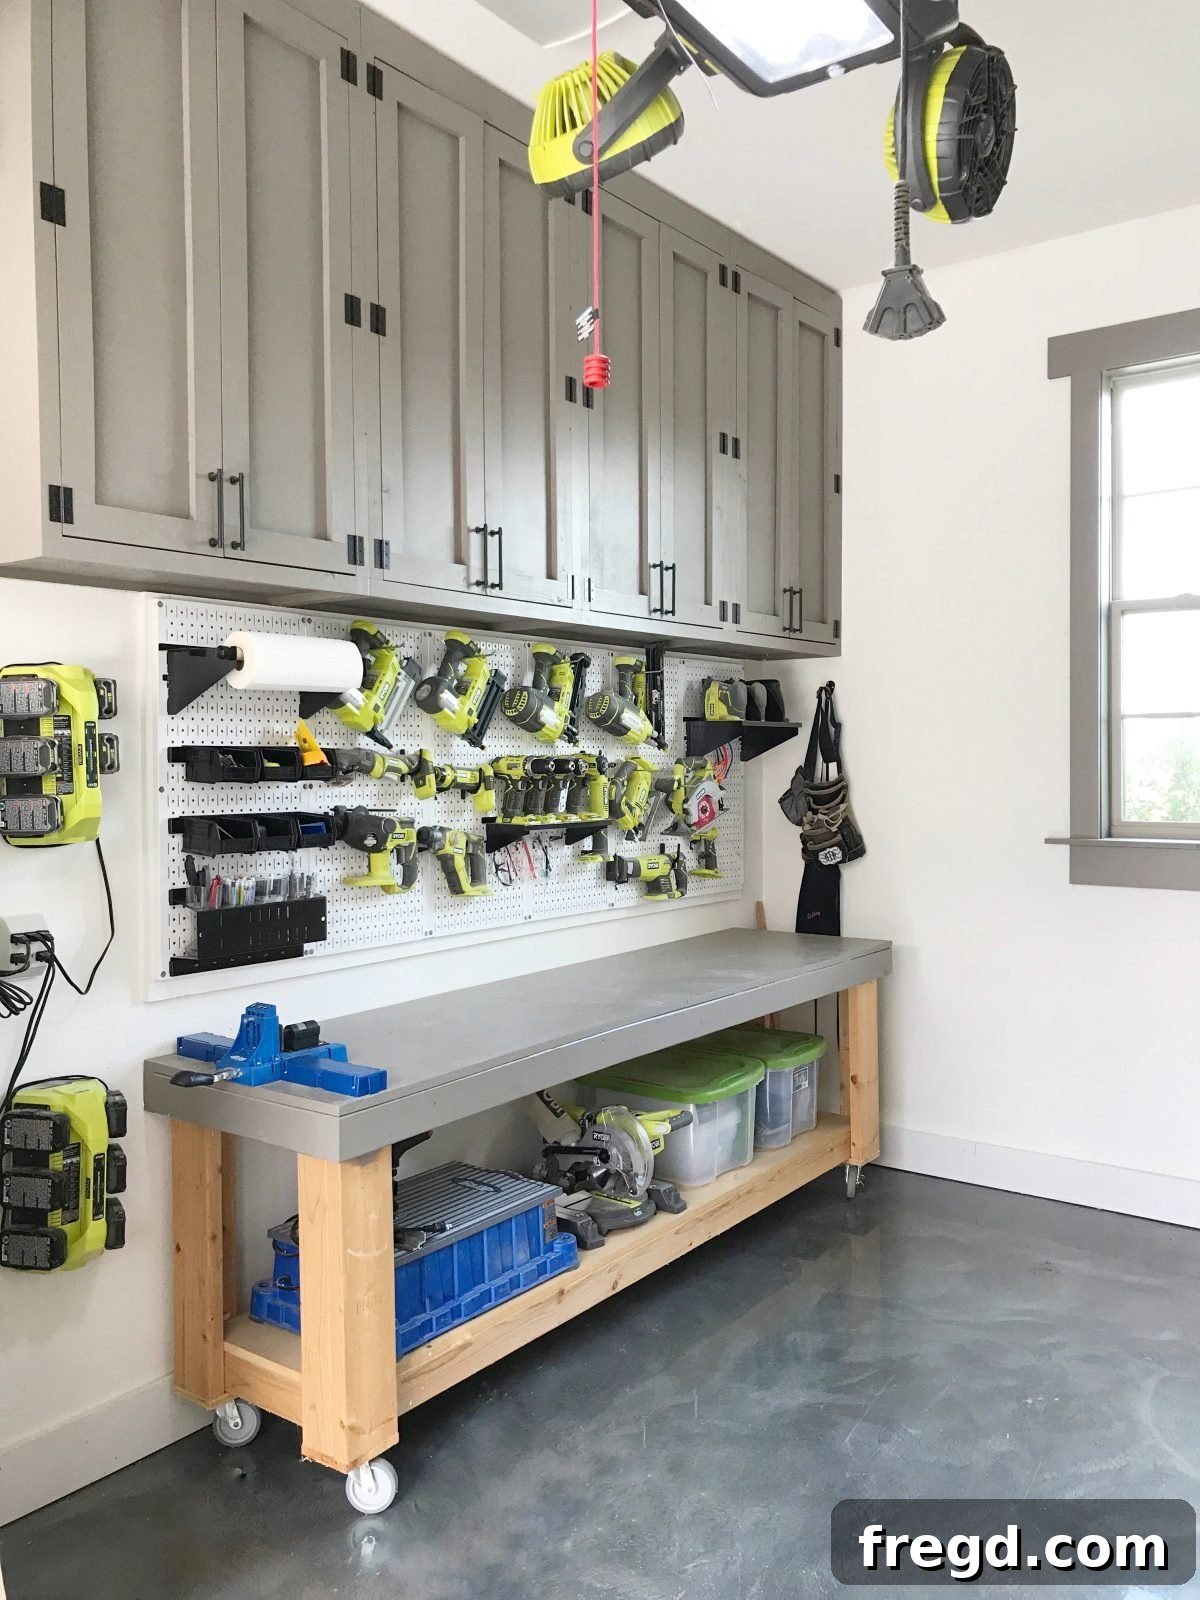
My goal was to maximize vertical storage without sacrificing valuable floor space or workbench accessibility. I designed these upper cabinets to extend ceiling-high (my ceilings are a generous 9 feet), making them a substantial 50 inches tall. This thoughtful dimension left ample space below for a full-sized pegboard and a robust workbench, creating a highly functional and organized work zone. While the cabinets are indeed high, a simple step ladder provides easy access, and truthfully, I don’t need to get into them constantly. The result? I am absolutely obsessed with my new cabinets! They have transformed my workshop into a clean, efficient, and inspiring creative hub, protecting my tools and materials from dust and making every project more enjoyable.
Unlock Your Workshop’s Potential: Free DIY Cabinet Plans
Ready to build your own dream storage system? We’ve made it incredibly easy. You can download the free, printable plans for building a single cabinet box right HERE. These detailed plans will guide you through all the necessary measurements, cuts, and material requirements, ensuring a successful build. Follow along with the step-by-step process below for an even clearer, visual understanding of each stage.
Step 1: Preparing Your Plywood – Accurate Cuts for a Solid Foundation
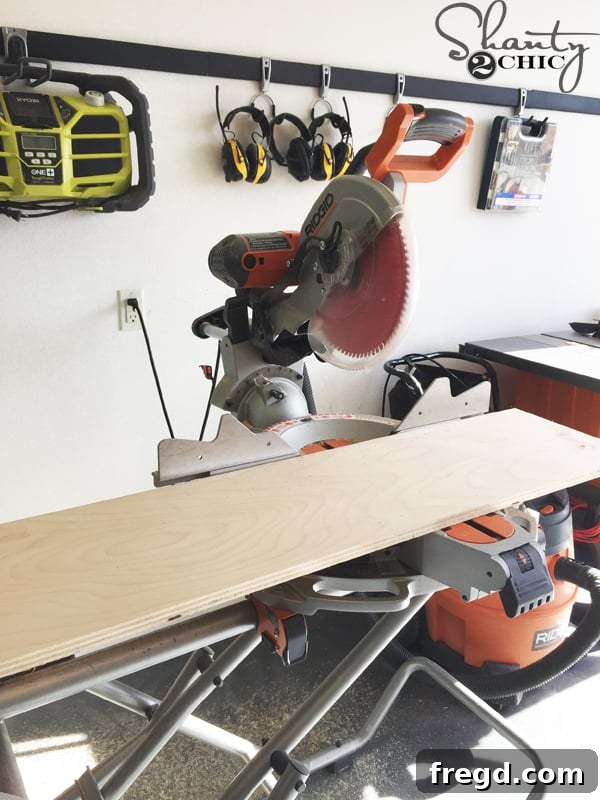
The journey to beautiful, functional cabinets begins with precise material preparation. For this project, high-quality birch plywood is an excellent choice due to its strength, stability, and smooth finish, which takes paint exceptionally well. You’ll need to accurately rip your plywood into the correct widths for the cabinet sides, top, and bottom panels as specified in your plans.
If you have access to a table saw, this is the ideal tool for achieving perfectly straight and accurate long rips. A table saw provides unmatched precision and efficiency for these crucial cuts. However, don’t let the lack of a table saw deter you! Many hardware stores offer a cutting service where they can rip full sheets of plywood to your specified dimensions. This is a fantastic and cost-effective option for those without a large workshop or specialized tools. Once the plywood is ripped to width, you can then make all the necessary cross-cuts (shorter cuts) at home using either a miter saw for quick, precise square cuts or a circular saw with a straight-edge guide for larger pieces. Accuracy here is key for a square cabinet box.
Step 2: Drilling Shelf Pin Holes – Customization at Your Fingertips
After you’ve cut the top, bottom, and side panels for your cabinet box, the next crucial step is to create the shelf pin holes. These holes are essential for adjustable shelving, allowing you to customize your storage layout to fit items of various heights. This feature is incredibly useful, providing unparalleled flexibility as your storage needs evolve over time.
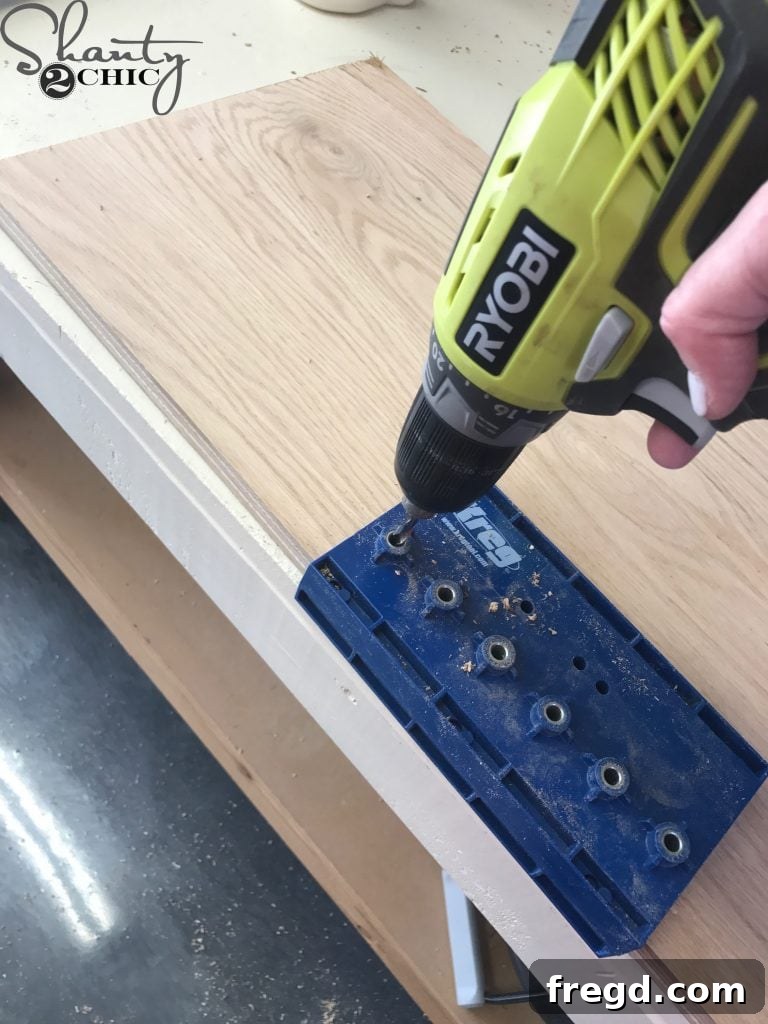
I highly recommend using a Kreg Shelf Pin Jig, available on Amazon, for this task. It’s an exceptionally user-friendly tool that ensures perfectly spaced, consistently aligned holes every time. Simply refer to your downloaded plans for the precise placement of the first set of holes. The jig features a guide on one end; just align it with the edge of your panel, clamp it securely to prevent movement, and drill through the pre-drilled holes in the jig. This method guarantees accurate and repeatable results.
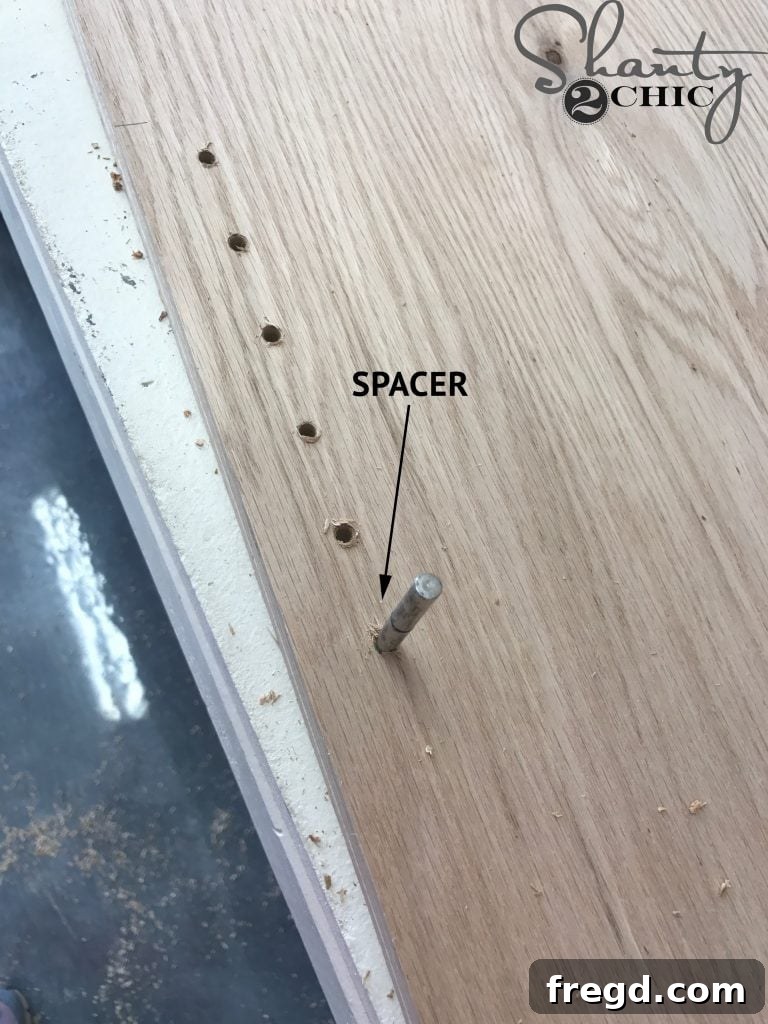
Once the initial set of holes is drilled (typically six holes at a time), you’ll utilize the clever spacer provided with the jig. Insert the spacer into the bottom-most hole of the newly drilled set. This allows you to slide the Kreg Shelf Pin Jig precisely into position for the next series of holes, maintaining consistent spacing throughout the entire cabinet side. Continue this process, moving the jig down and drilling, until you have the desired number of shelf pin holes along the entire height of the cabinet side. This systematic approach ensures maximum adjustability for your shelves.
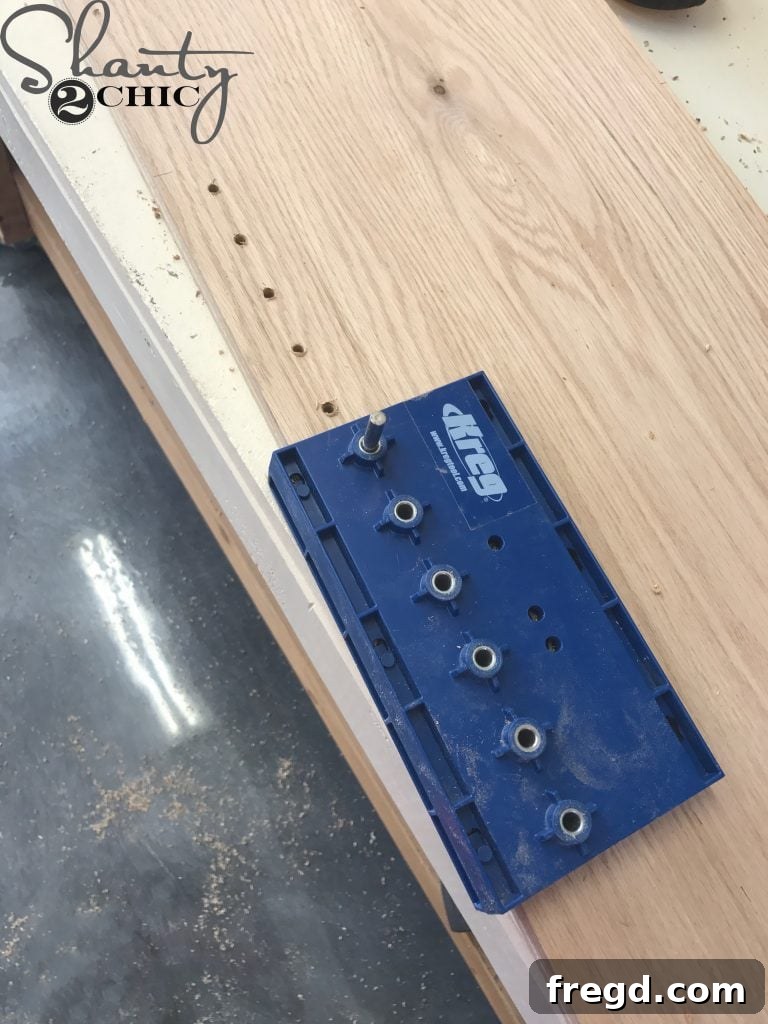
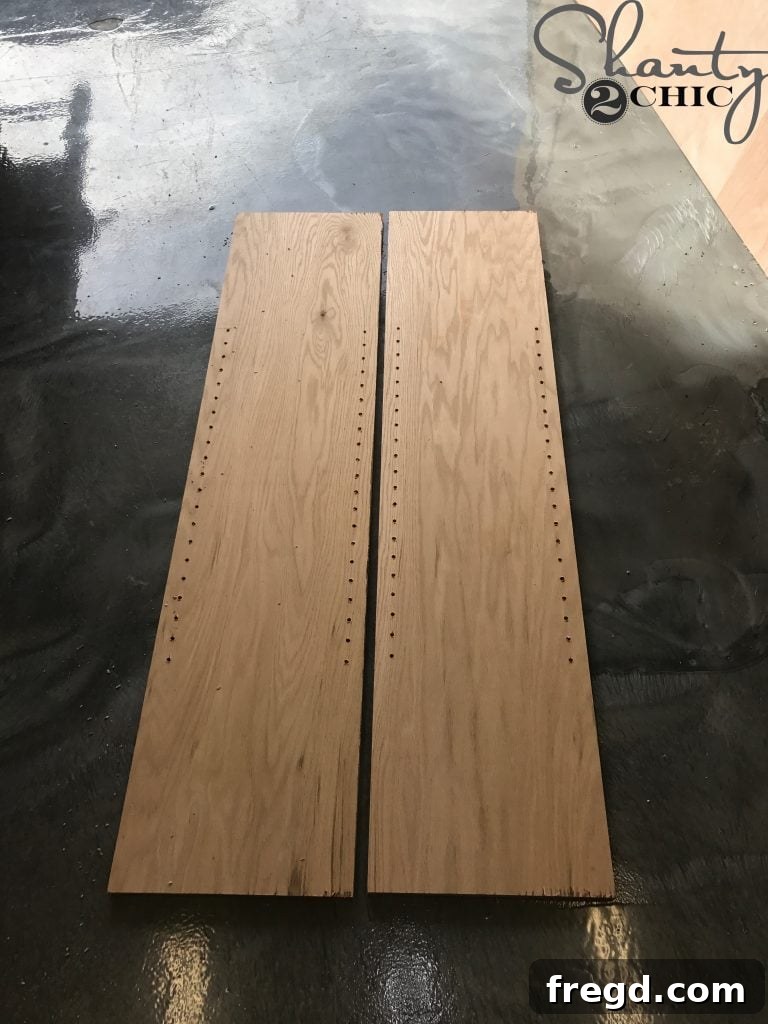
It’s important to drill these shelf pin holes on both interior sides of each cabinet side panel. This symmetry is crucial for creating stable and level shelves within your finished cabinet, allowing you to easily reposition them later.
Step 3: Creating Pocket Holes – Strong and Hidden Joinery
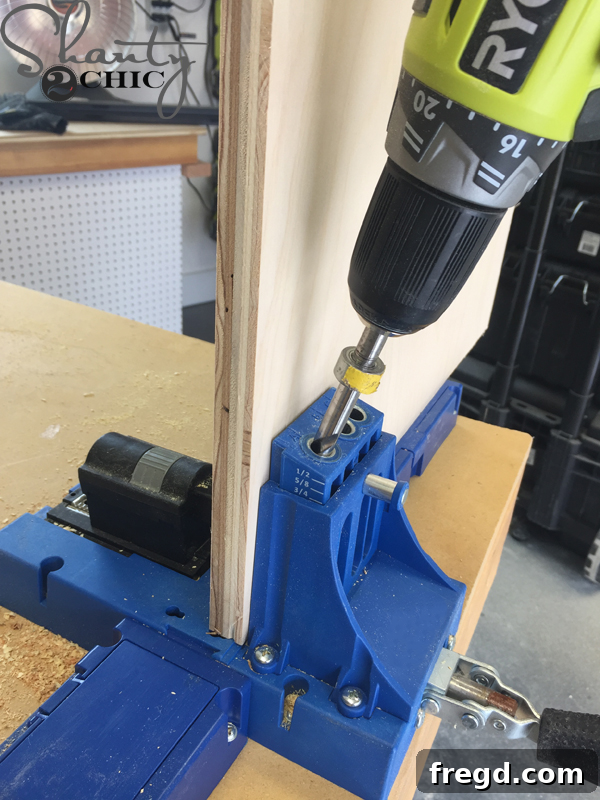
Pocket hole joinery is an incredibly effective and popular method for cabinet construction, offering strong, concealed joints that are perfect for DIY projects. For this step, you’ll need a Kreg Pocket Hole Jig. I drilled 3/4-inch pocket holes into both ends of the top and bottom cabinet box pieces. These strategically placed holes will later accept screws to securely fasten the top and bottom panels to the cabinet sides, creating a robust and clean joint.
If you’re in the market for a reliable pocket hole jig, our favorite model of the Kreg Jig can be found on Amazon. This versatile tool simplifies the process of creating strong, tight-fitting joints that are hidden from view, making your cabinet assembly both sturdy and aesthetically pleasing. Proper setup and clamping of the jig are essential for consistent hole placement and depth.
Step 4: Assembling the Cabinet Box – Building the Core Structure
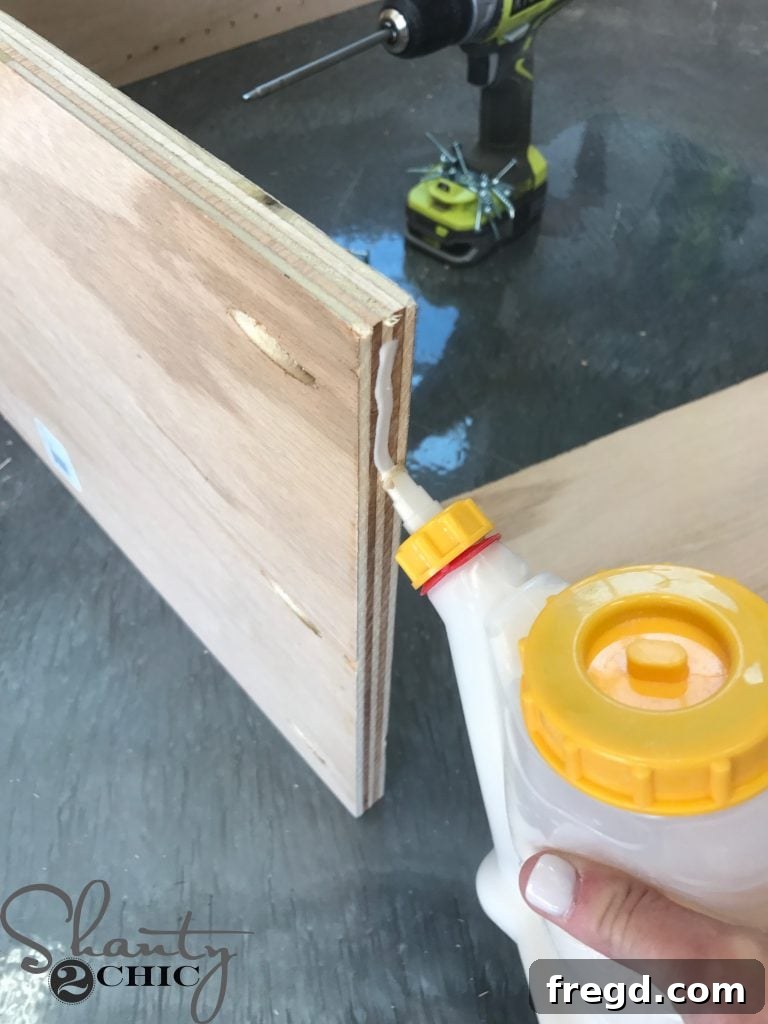
With all your cuts made and holes drilled, it’s time to bring your cabinet box to life! This assembly phase requires careful alignment and secure fastening to ensure a square and sturdy cabinet that will last for years. Begin by applying a continuous, thin line of high-quality wood glue along the ends of the top and bottom cabinet pieces. Wood glue provides incredible strength, creating a joint that is often stronger than the wood itself, and it helps to prevent future squeaks or wobbles. For easy, mess-free application, we highly recommend this favorite glue bottle dispenser, also available on Amazon.
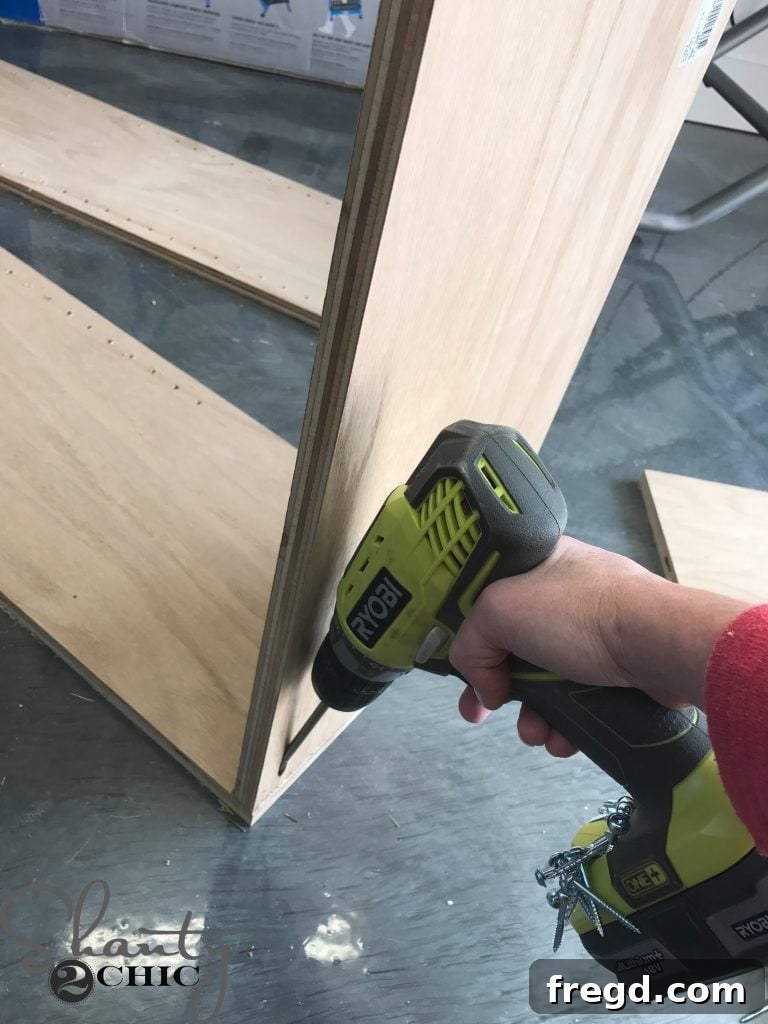
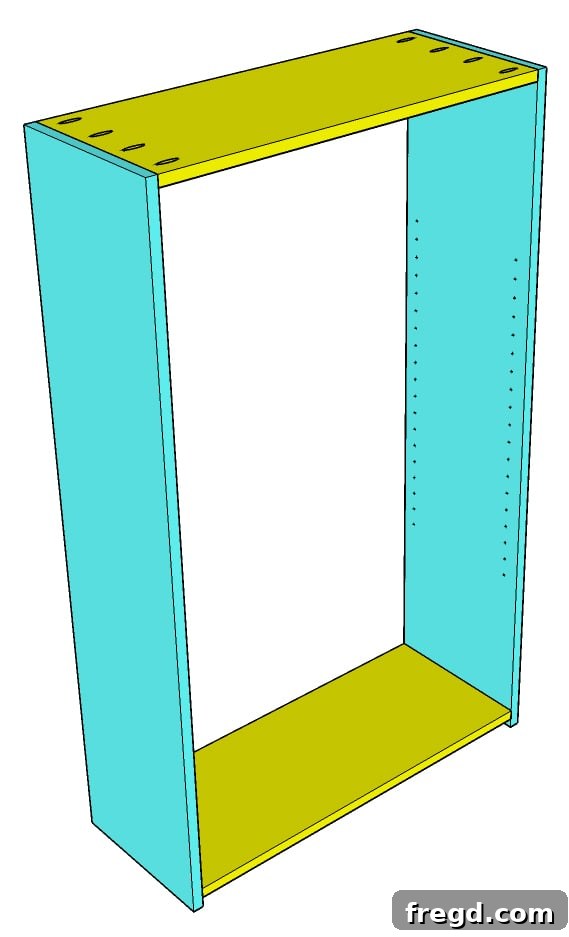
Next, carefully align the top and bottom pieces with the cabinet sides. Use clamps to hold the pieces tightly together while you drive 1 1/4-inch pocket hole screws into the pre-drilled pocket holes. Remember, the pocket holes on the top piece should face upwards (these will be hidden by the cabinet top once installed), and those on the bottom piece should face downwards (hidden by the cabinet bottom). Ensure the top piece is flush with the very top of the cabinet sides. The bottom piece should be attached 3/4 inch up from the very bottom edge of the cabinet sides. These precise placements are crucial for the overall structural integrity and aesthetic of your cabinet, so always refer to your detailed plans for exact measurements and guidance. Confirm squareness with a tape measure by measuring diagonally across corners; if the measurements are equal, your box is square.
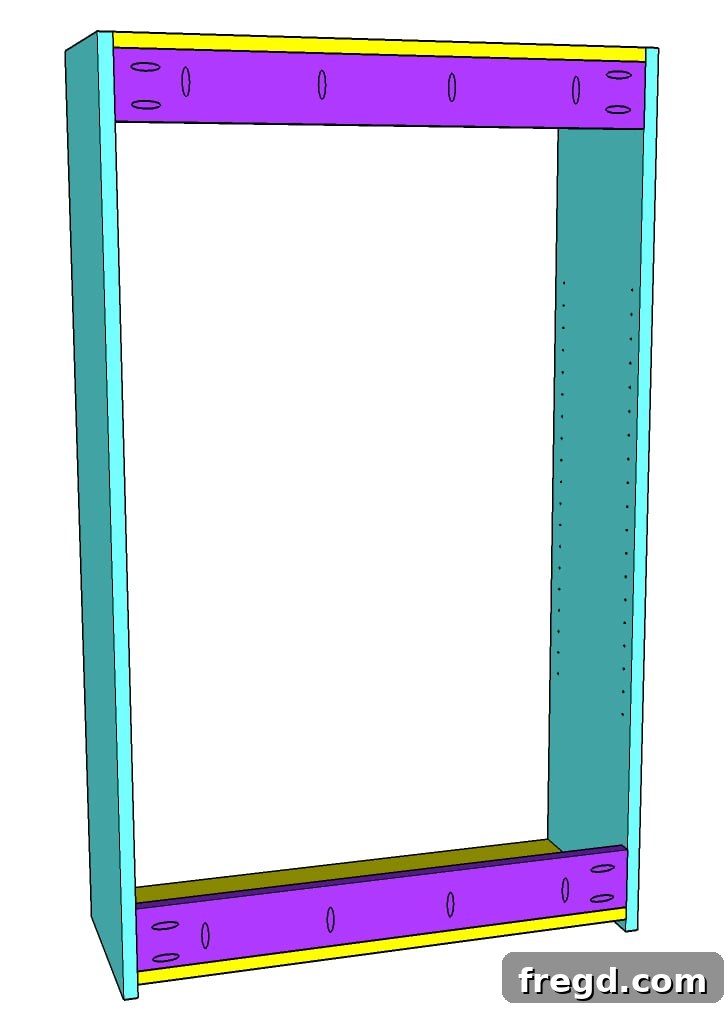
To further reinforce the cabinet and provide a secure mounting point for installation, you’ll add back brace pieces. Measure and cut these braces to size according to your plans, then drill 3/4-inch pocket holes into each end and along one side of each piece. Attach them to the top, bottom, and sides of the cabinet box, ensuring they are perfectly flush with the very back edge of the cabinet. These braces will play a critical role in stabilizing the cabinet and providing solid points to secure it to your wall studs during installation.
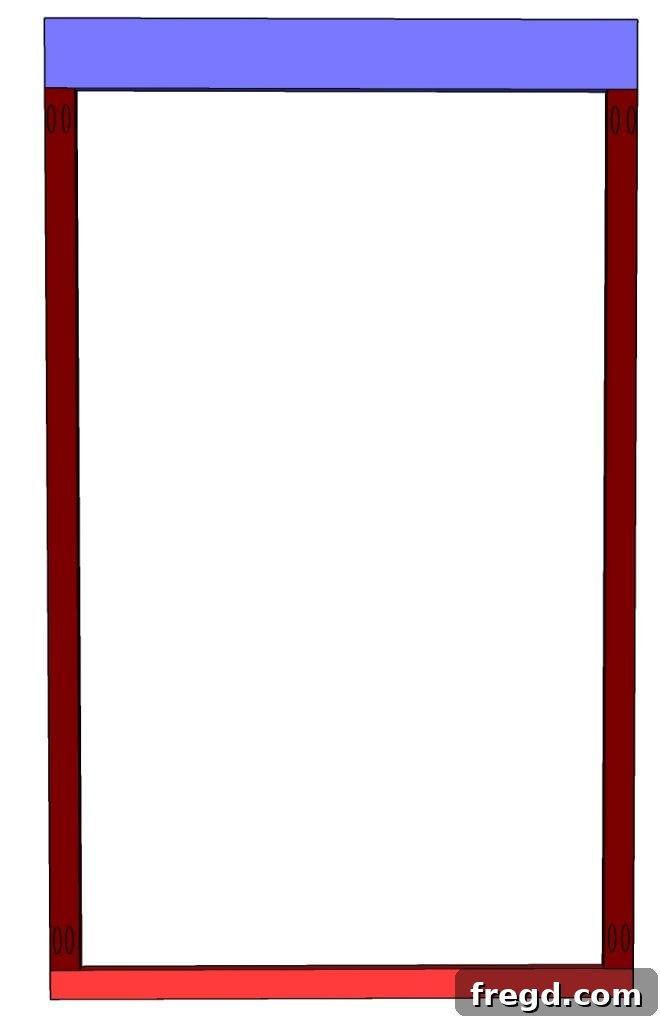
Step 5: Crafting and Attaching the Face Frame – The Professional Touch
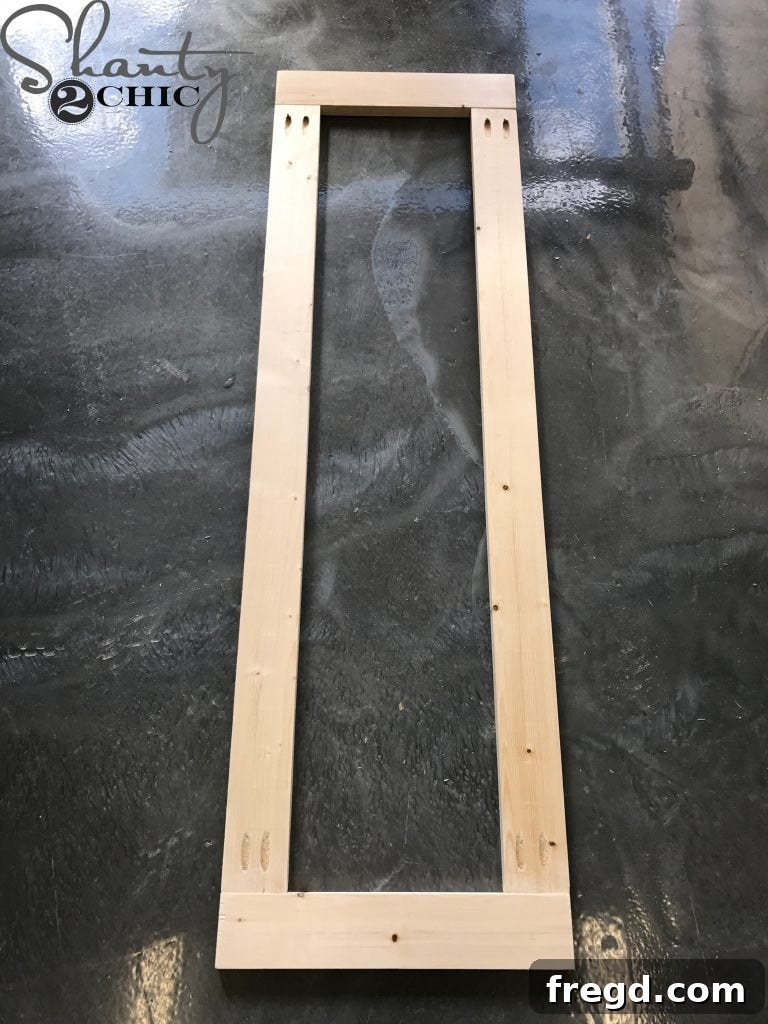
A face frame gives your DIY cabinets a professional, finished look while also adding significant rigidity to the front of the cabinet box. Measure and cut your face frame pieces (stiles and rails) precisely to size according to your plans. Drill 3/4-inch pocket holes into each end of the vertical (stile) pieces, then apply wood glue to the joints and attach them to the horizontal (rail) pieces using 1 1/4-inch pocket hole screws. Ensure all joints are tight and square as you assemble the rectangular face frame. Precision in this step is vital for the overall appearance of your cabinets.
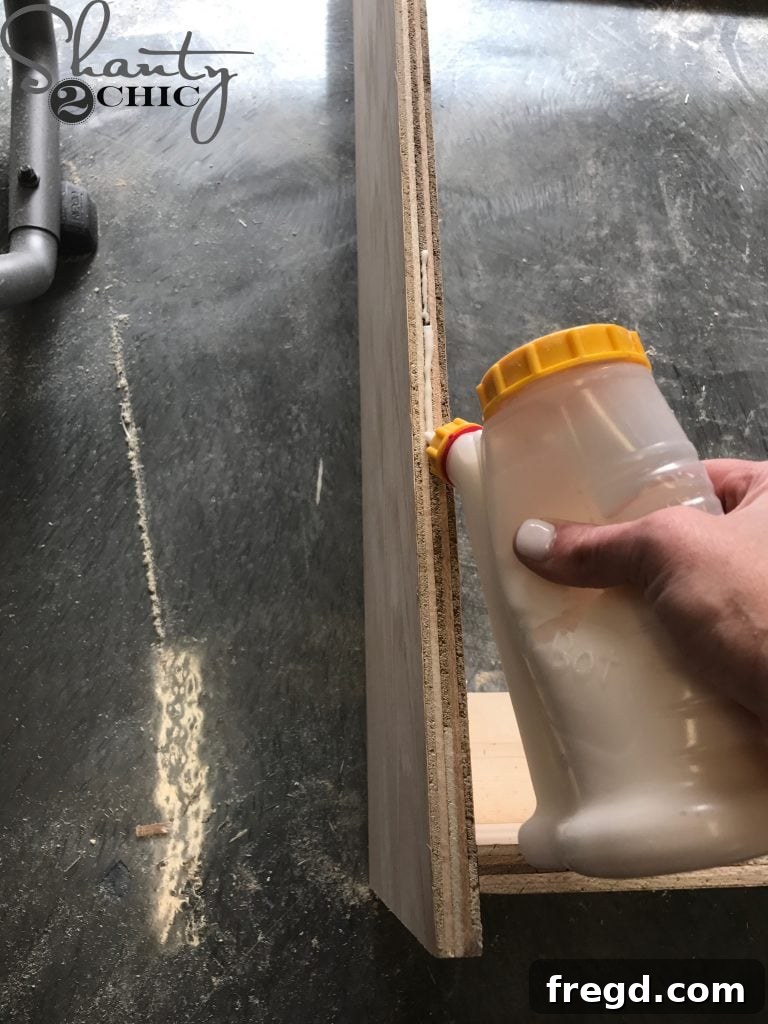
Once the face frame is assembled, it’s time to attach it to the cabinet box. Apply a thin, even line of wood glue to the entire front edges of the cabinet box. This glue will create a strong, permanent bond between the face frame and the box, preventing gaps and ensuring long-term durability and a seamless appearance.
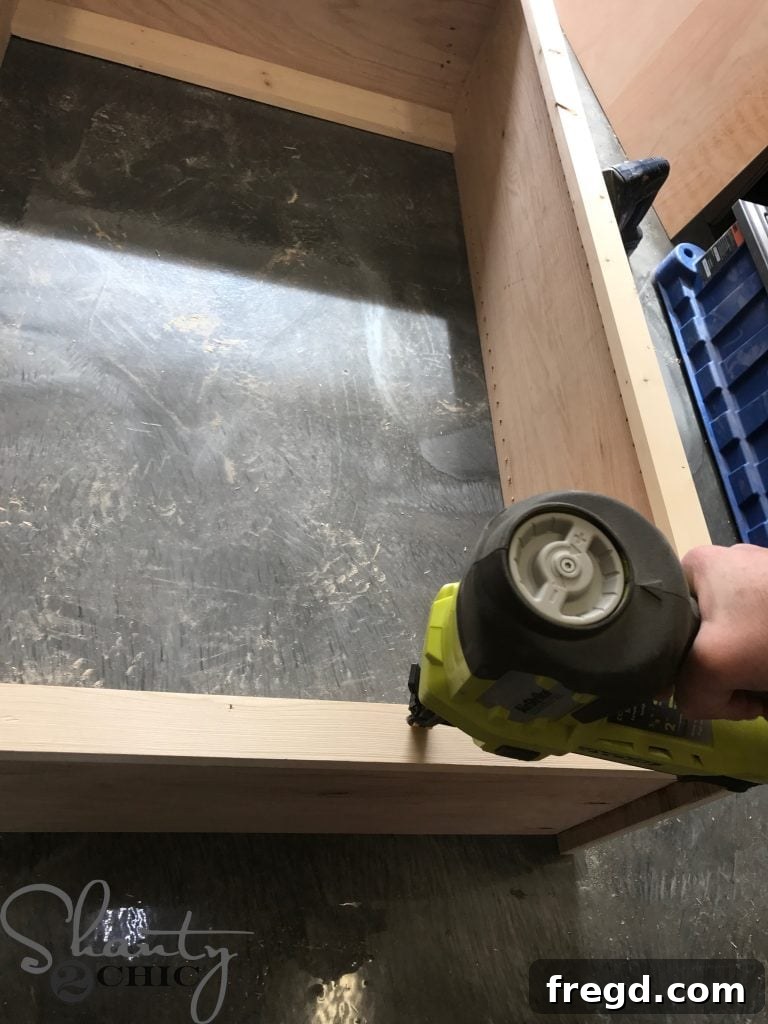
Carefully position the assembled face frame onto the glued front edges of the cabinet box. Use clamps to hold it in place while you secure it with a nail gun, such as my reliable Ryobi Airstrike 18-gauge brad nailer, driving 1 1/4-inch brad nails. The sides and top of the face frame should be perfectly flush with the corresponding sides and top of the cabinet box. The bottom of the face frame should align flush with the top of the cabinet’s bottom shelf piece. Take your time during this step to ensure precise alignment for a truly professional finish. Brad nails provide immediate holding power while the wood glue cures, resulting in an incredibly strong connection.
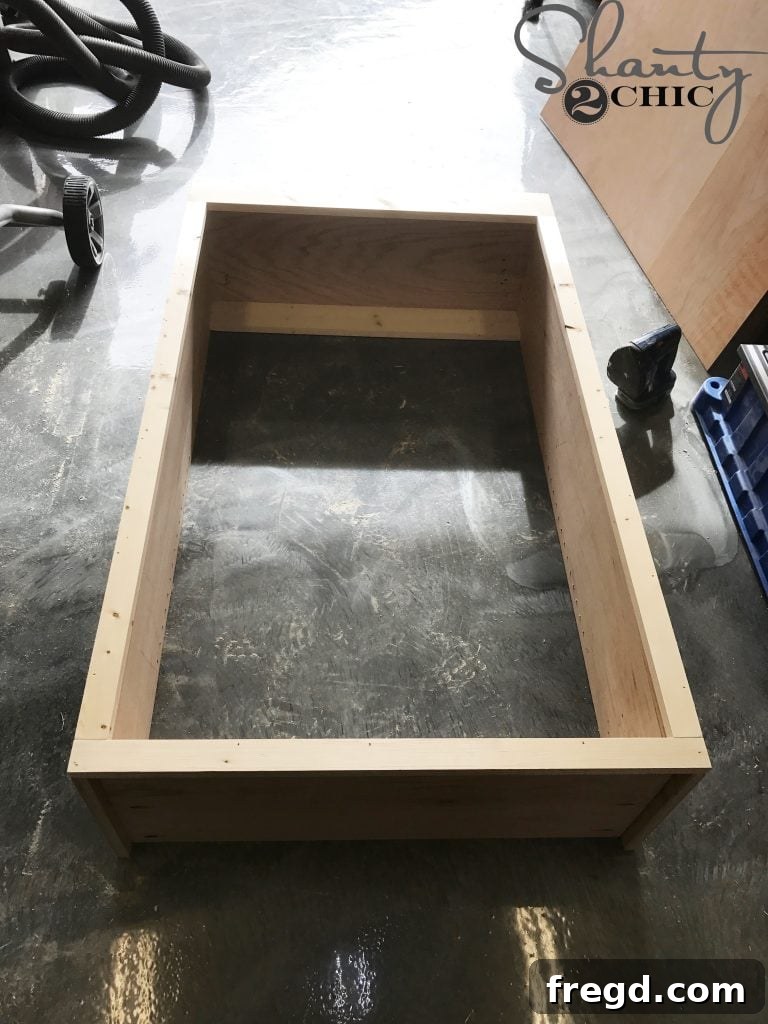
Here’s a look at the cabinet box with the face frame expertly attached, showcasing a clean, ready-for-finishing aesthetic that elevates the entire project.
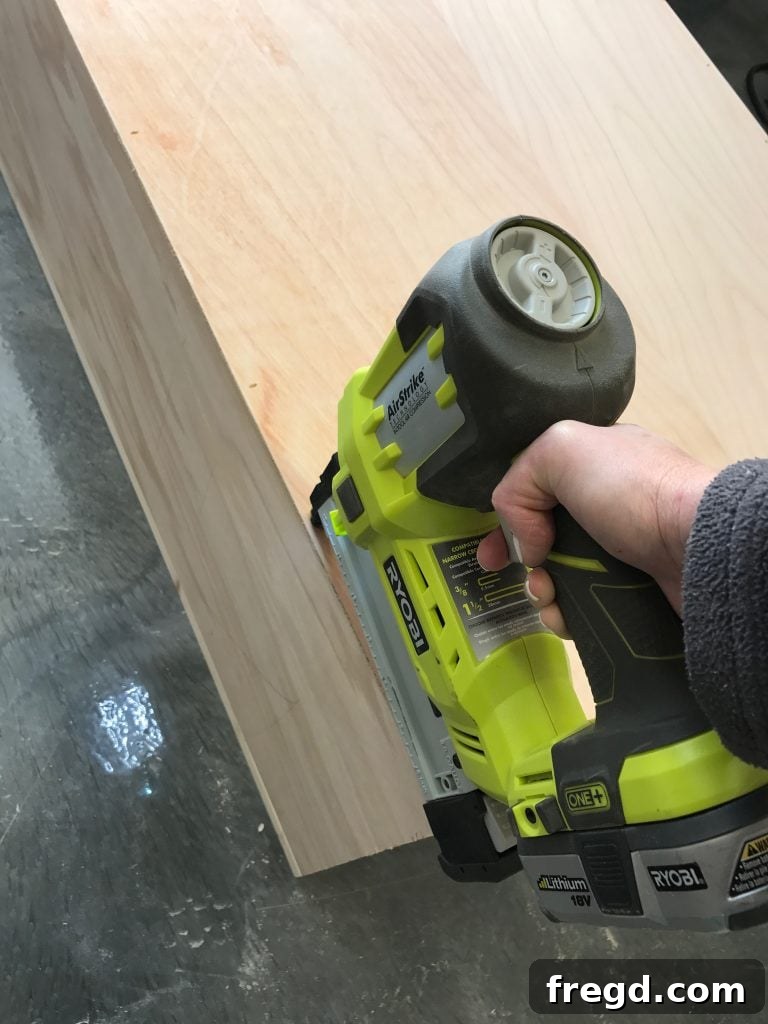
Step 6: Installing the Cabinet Back – Adding Stability and Enclosure
The cabinet back serves several important functions: it adds significant rigidity to the entire box, helps keep dust out, and provides a clean, finished interior. Flip the assembled cabinet over so its face frame rests flat on your workbench (always protect the face frame with a blanket or scrap wood to prevent damage). Cut a piece of 1/4-inch hardwood plywood to perfectly fit the back opening of your cabinet, ensuring it’s square and flush with the edges.
Apply a continuous bead of wood glue around the entire perimeter of the back opening where the plywood will sit. Then, carefully place the 1/4-inch plywood back onto the glued edges. Secure it firmly with 3/4-inch staples using a stapler like my Ryobi Airstrike Stapler. Alternatively, you can use a brad nailer with 3/4-inch brad nails, spacing them approximately every 4-6 inches. The combination of glue and fasteners will create a very strong and durable cabinet back, ensuring everything inside stays clean and secure, while also preventing the cabinet from racking.
Step 7: Building the Custom Cabinet Doors – The Finishing Element
With the cabinet box complete, it’s time to construct the doors that will truly define the look and functionality of your storage solution. For this project, we’re building simple yet elegant shaker-style doors, renowned for their timeless appeal. Set your cabinet box aside for a moment and focus on the door assembly.
Measure and cut your cabinet door trim pieces (stiles and rails) to the exact sizes specified in your plans. Drill 3/4-inch pocket holes into the ends of both vertical trim pieces (stiles). Apply wood glue to the joints and attach the stiles to the top and bottom horizontal pieces (rails) using 1 1/4-inch pocket hole screws. Ensure these frames are perfectly square and flush. Repeat this process carefully for each door you are building, aiming for consistency in size and squareness.
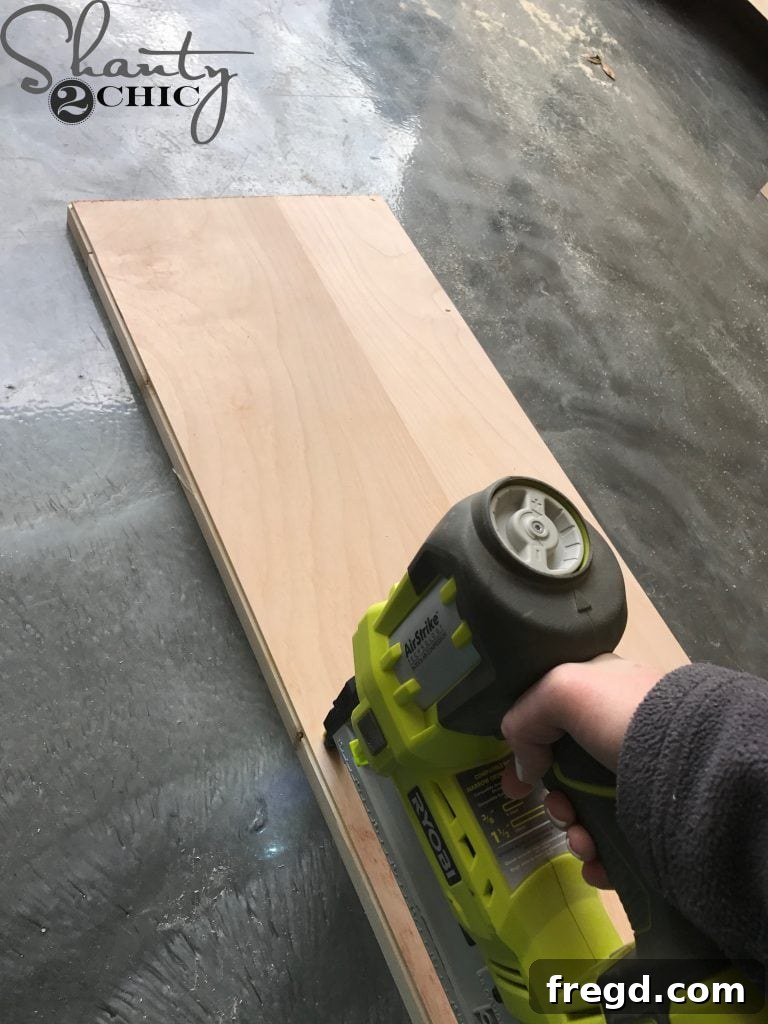
Next, cut a piece of 1/4-inch hardwood plywood to fit precisely within the recess of each assembled door frame. Apply wood glue to the inner edges of the door frame where the plywood will sit, then carefully place the plywood panel. Secure it to the back of the door frame using 3/4-inch staples (with a tool like the Ryobi Airstrike Stapler) or a brad nailer. This creates a robust and attractive door panel that will hold up to daily use. Complete this step for both cabinet doors, ensuring a tight fit and secure attachment.
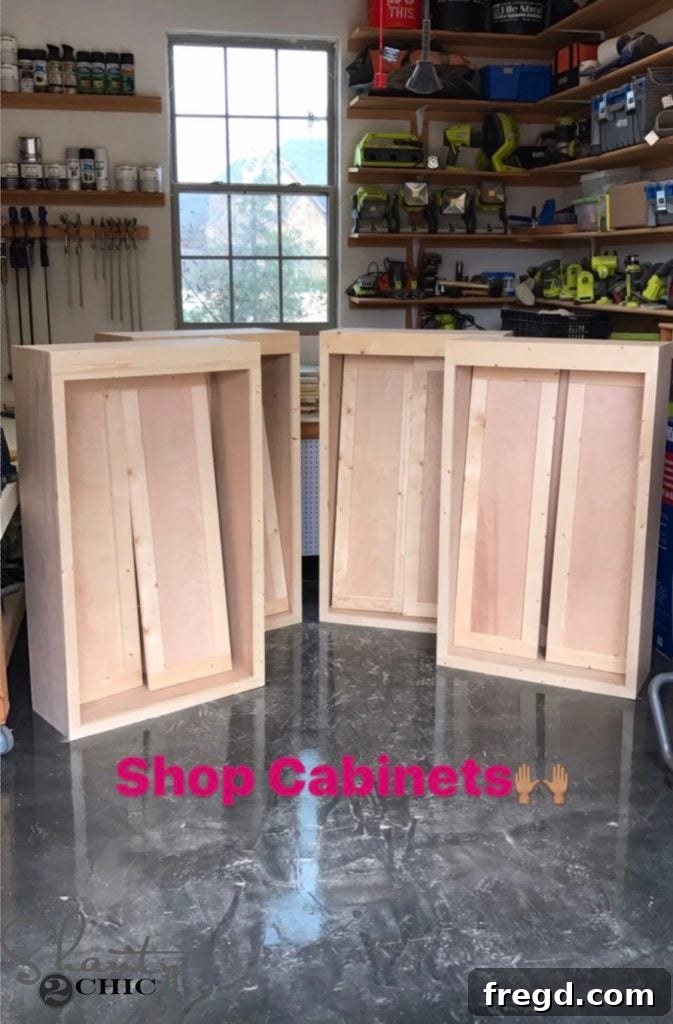
Once your doors are fully assembled, this is an excellent time to test fit them to your cabinet box with hinges. This ensures they operate smoothly, close properly, and fit correctly within the face frame before moving on to finishing. After confirming a good fit, remove the hinges before proceeding with painting and the final installation of the cabinets. Painting the doors separately ensures a smoother, more professional finish without the hinges getting in the way, and allows for thorough coverage.
Step 8: Garage Cabinet Installation – Securely Mounting Your Storage
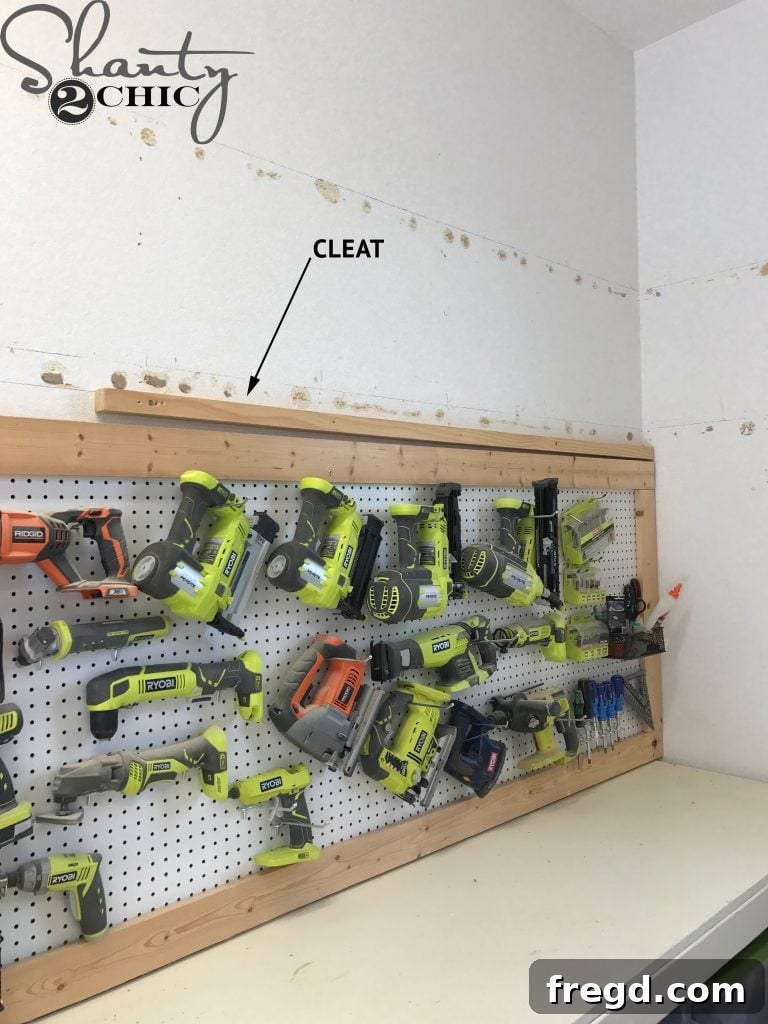
Installing upper cabinets securely is paramount, especially in a busy workshop environment where they will hold potentially heavy items. The key to a safe and level installation, even when working alone, is to use a ledger board or cleat. I utilized an 8-foot 2×2 scrap piece of wood as a temporary cleat. This simple but effective trick provides a stable shelf for the cabinets to rest on while you secure them, ensuring they remain perfectly level across their entire run.
Before attaching the cleat, use a reliable stud finder to accurately locate and mark the wall studs where your cabinets will be installed. Mark the center of each stud clearly. Use a long level to ensure your cleat is perfectly horizontal, then attach it to the wall studs with robust 3-inch wood screws. Drive at least two screws into each stud the cleat crosses. This cleat will bear the initial weight of the cabinets, allowing you to work hands-free.
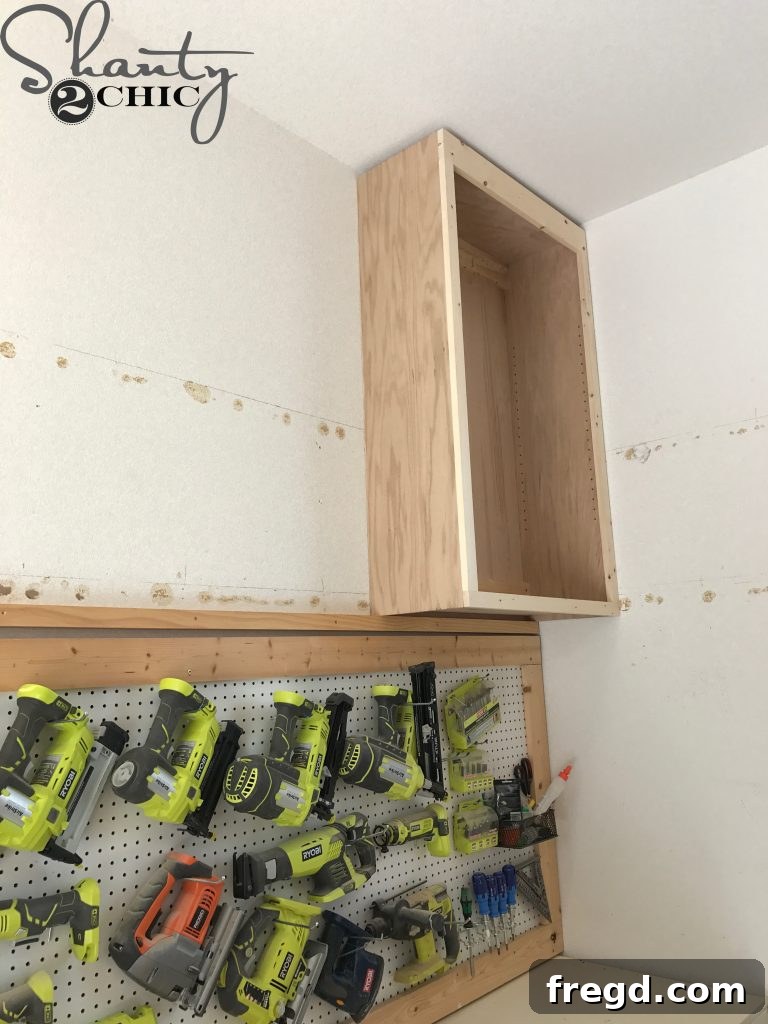
With the cleat securely in place, carefully lift each cabinet box and rest it on top of the cleat. Once the cabinet is supported and level, you can then drive 3-inch wood screws from the back braces of the cabinet directly into the marked wall studs. Use at least two screws per stud into the cabinet’s back braces, ensuring a strong, secure connection that will safely hold your cabinet’s contents for years to come. Pre-drilling pilot holes into the cabinet back and studs can help prevent splitting.
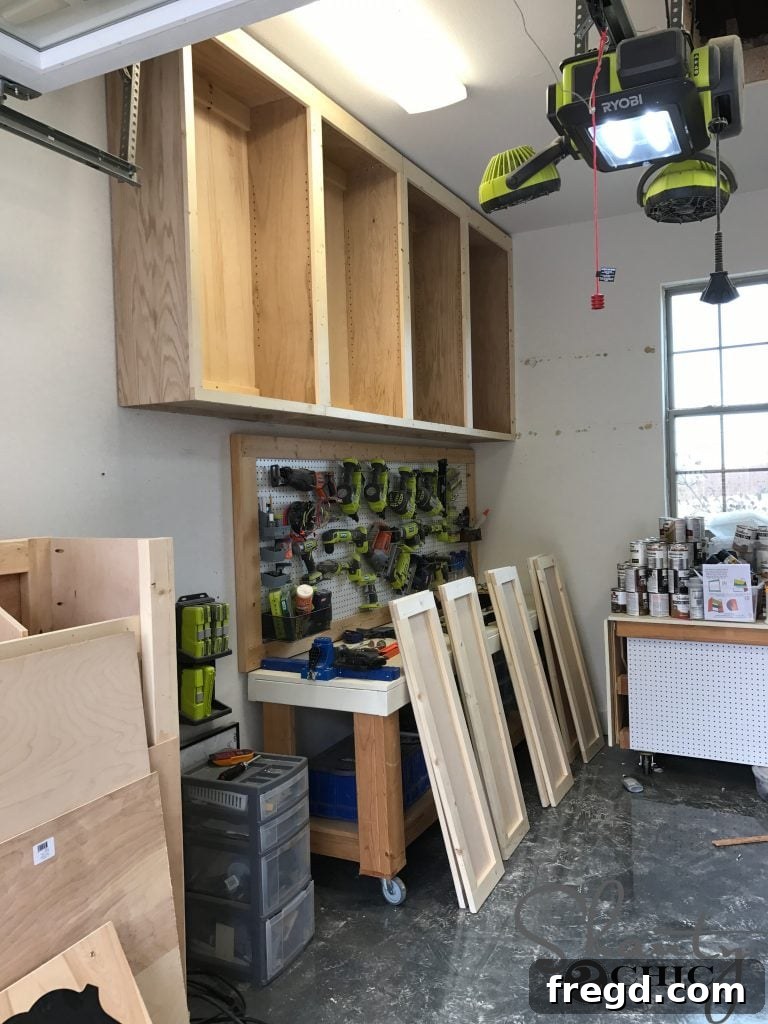
Repeat this process for every cabinet box you are installing. If your run of cabinets extends beyond 8 feet, you will likely need to install additional cleats to provide continuous support and ensure uniform levelness across the entire bank of cabinets. Always double-check your measurements and levels as you go, making minor adjustments if necessary to achieve a perfectly aligned bank of cabinets.
Step 9: Painting Your Custom Cabinets – The Perfect Finish
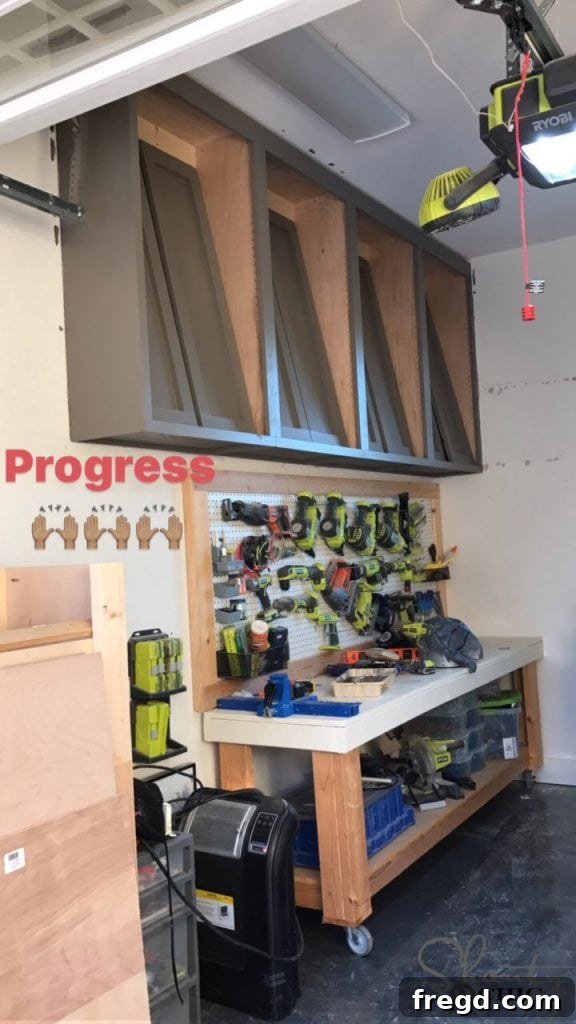
Once all your cabinets are securely hung and aligned, it’s time for the exciting transformation that paint provides! A quality paint job not only protects your cabinets from the elements and wear and tear but also significantly enhances their aesthetic appeal, making your workshop a more inviting place. I chose to paint my cabinets with two coats of Sherwin Williams’ “Urbane Bronze.” This sophisticated, deep gray-brown color adds a touch of modern elegance and depth to the workshop, creating a more refined and inspiring environment compared to raw wood or plain white.
For best results, ensure your cabinets are thoroughly cleaned and free of any dust, debris, or grease. Apply a good quality primer, especially if you’re using plywood, to ensure even paint absorption, excellent adhesion, and to prevent any wood tannins from bleeding through. Follow with two thin, even coats of your chosen paint, allowing adequate drying time between coats as recommended by the manufacturer. Sand lightly with fine-grit sandpaper (e.g., 220-grit) between coats for an ultra-smooth, professional-looking finish. This attention to detail will result in cabinets that not only function wonderfully but also look professionally made and stand up to the rigors of a busy workshop.
Step 10: Final Touches & Organization – Hardware, Shelves & More
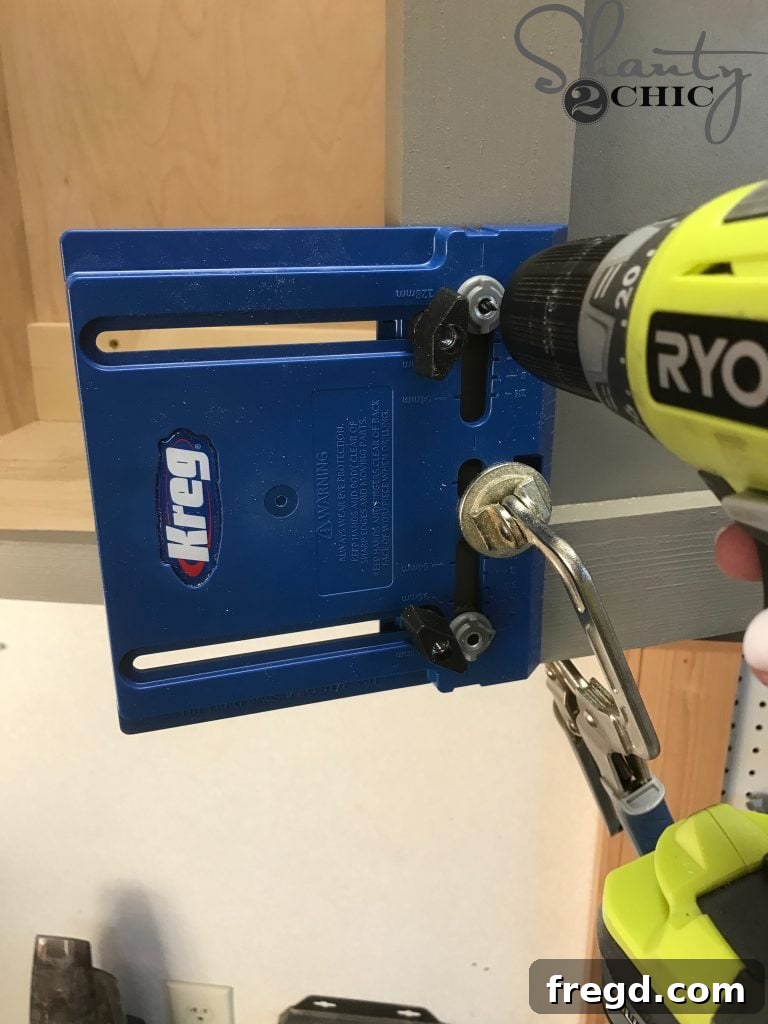
With the paint dry and fully cured, it’s time to add the finishing hardware that makes your cabinets fully functional and beautiful. Reattach the doors using your chosen hinges, ensuring they open and close smoothly. For a truly professional and perfectly aligned hardware installation, especially for pulls and knobs, I highly recommend using the Kreg Cabinet Hardware Jig, available on Amazon. This ingenious tool takes the guesswork out of positioning pulls and knobs, ensuring consistent placement across all your doors and drawers. You’ll also find a Kreg Jig Face Clamp incredibly useful for holding pieces securely in place while you drill hardware holes.
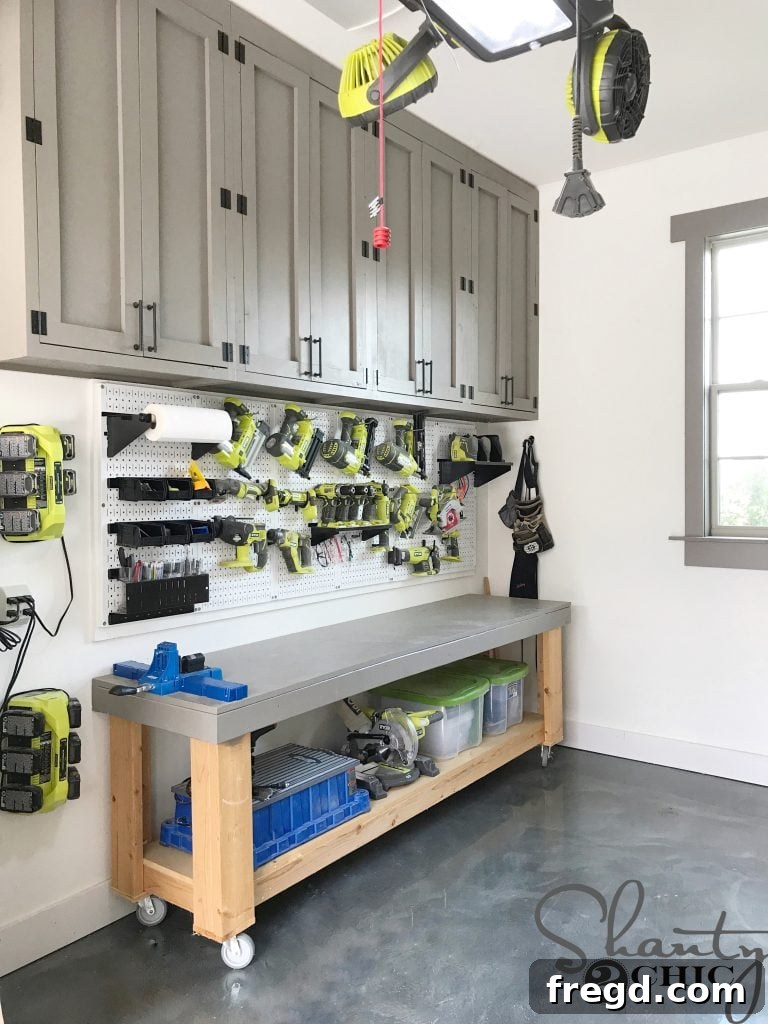
Finally, cut your adjustable shelves to size, making sure they fit snugly within the cabinet box without binding. Simply slide them into place using the shelf pins you installed earlier. And just like that, your magnificent DIY cabinets are complete and ready for organization!
The transformation doesn’t stop there. To complement my new dust-free storage, I also gave my workbench top a fresh coat of paint and installed a brand-new Wall Control Pegboard. This pegboard system is absolutely fantastic for organizing frequently used tools, keeping them within easy reach and off the workbench surface. The combination of enclosed cabinets, an optimized workbench, and an efficient pegboard has truly made my workshop a joy to work in. These DIY cabinets are a game-changer for maintaining a tidy, efficient, and inspiring creative space, allowing you to focus more on your projects and less on the mess!
Essential Workshop Tools & Accessories
Beyond the cabinets themselves, a well-equipped workshop is key to tackling any DIY project with confidence and efficiency. Here are some of the fantastic items that help keep my shop running smoothly and efficiently, and contribute to the overall organization:
- Cabinet Pulls: Elevate the look of your custom cabinets with stylish and functional pulls. Find a wide selection HERE.
- Cabinet Hinges: Durable and smooth-operating hinges are crucial for the longevity and functionality of your cabinet doors. Get yours HERE.
- Cabinet Door Clasps: Ensure your cabinet doors stay securely closed with reliable clasps. Shop for them HERE.
- Full Shop Tour: Dive deeper into my workshop setup and organization strategies, and gather more ideas for your space in this comprehensive tour.
- Lumber Storage Cart Plans: Efficiently store your lumber and sheet goods to keep your shop tidy and accessible. While my plans are coming soon, you can check out Whitney’s fantastic DIY lumber storage cart plans HERE.
- Narrow Workbench Plans: Maximize your workspace with a clever, compact workbench design that fits smaller areas. Find the free plans HERE.
- Wall Control Pegboards: The ultimate solution for keeping frequently used tools organized and easily accessible on your wall. Purchase them HERE.
- Pegboard Hooks and Accessories: Customize your pegboard system to fit every tool and item perfectly. Explore options HERE.
- Garage Door Opener: For added convenience and modern access to your workshop. Learn more about the one I use HERE.
A Note on Floor Coating: Unfortunately, I cannot recommend the floor coating product I initially used, as it has begun chipping quite horribly. I am actively researching and planning a new solution for my workshop floors and will be sure to provide an update on my findings and new choice very soon! Stay tuned for a future post on my floor revitalizing journey.
Thinking about setting up your own workshop or upgrading your tools to tackle ambitious projects like these cabinets? Don’t forget to visit our “Tools” page for expert suggestions on essential tools to kickstart your woodworking journey and make your projects easier and more enjoyable!
Conclusion: Build Your Dream Workshop Today!
Creating these DIY garage storage cabinets has been one of the most impactful projects for my workshop. The difference between struggling with dusty, disorganized open shelving and enjoying the clean, efficient, and aesthetically pleasing storage offered by these custom cabinets is truly night and day. Not only do they protect my valuable tools and materials from pervasive sawdust, but they also contribute to a much more inspiring and productive environment, fostering creativity and making every task a pleasure.
We hope these free plans and detailed step-by-step instructions empower you to tackle this rewarding project yourself. Imagine the satisfaction of building functional, beautiful storage tailored exactly to your needs, transforming a chaotic space into a highly organized and efficient workshop. A well-organized workshop makes every project more enjoyable, safer, and more efficient. So, gather your tools, download the plans, and start building your dream garage storage system today! Happy building, and enjoy the incredible benefits of a truly custom and clean workspace!