
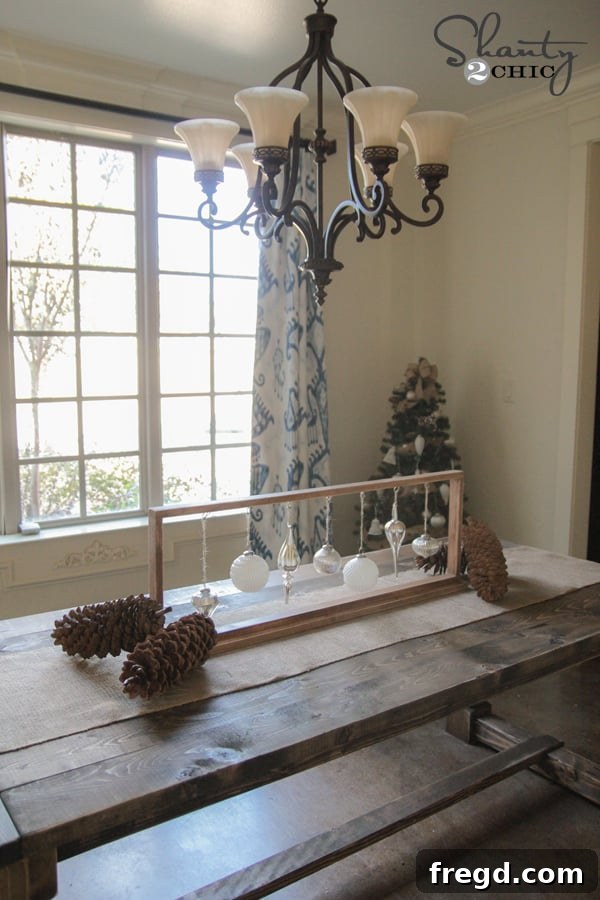
Craft Your Own Festive Charm: An Easy DIY Christmas Centerpiece Tutorial
Welcome back to our much-anticipated 12 Days of Christmas Series! We’re thrilled to present Day 2, and trust us, this project is a true holiday gem. If you’re anything like us, you’re constantly seeking fresh and delightful ways to elevate your festive home decor, especially when it comes to the dining table. Look no further! Today, we’re unveiling a stunning DIY Christmas Centerpiece that promises to add a rustic yet elegant touch to your holiday celebrations.
There’s something uniquely satisfying about creating your own holiday decorations. A handmade Christmas centerpiece not only reflects your personal style but also infuses your home with an unparalleled warmth and charm that store-bought items simply can’t replicate. This particular project is a testament to that philosophy – it’s incredibly simple to construct, remarkably inexpensive, and yields a high-end, custom look that will impress all your holiday guests. Imagine the conversations sparked around your dining table, all thanks to your creative handiwork!
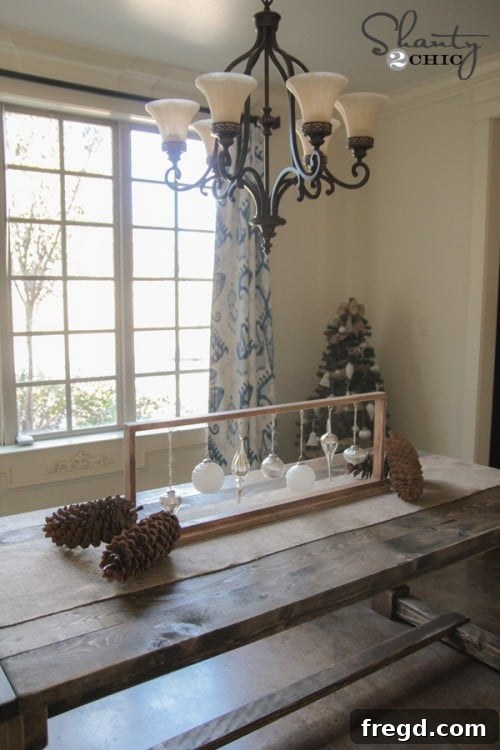
The beauty of this design lies in its versatility. While it makes a spectacular focal point for your Christmas dining table, its adaptable nature means it can adorn virtually any surface in your home. I’ve personally tested it on my entryway table, and the result was equally captivating, creating an inviting welcome for anyone stepping through the door. It could also grace a mantelpiece, a coffee table, or even a console table, bringing festive cheer wherever it resides. This project is not just a seasonal decoration; it’s an investment in timeless, handcrafted elegance that you can cherish year after year.
Essential Supplies for Your Handmade Christmas Centerpiece
Gathering your materials is the first exciting step in any DIY adventure. For this rustic Christmas centerpiece, you’ll find that the supply list is surprisingly short and budget-friendly, consisting primarily of common lumber and a few hardware pieces. We’ve opted for standard pine boards, which are readily available at any home improvement store and offer a beautiful grain for staining. Let’s get started with what you’ll need:
Supply List:
- 1 – 1x4x4 (One piece of 1-inch by 4-inch lumber, 4 feet long)
- 1 – 1x2x10 (One piece of 1-inch by 2-inch lumber, 10 feet long)
- 7 cup hooks (Choose a finish that matches your desired aesthetic, such as silver, brass, or black)
- Wood glue (A strong, fast-drying wood glue is recommended for durable joints)
- 1.25” finish or brad nails (These smaller nails provide a clean finish and strong hold when combined with glue)
Precise Cuts for a Perfect Fit
Accuracy in your cuts is paramount for a professional-looking finish. Even if you’re new to woodworking, these cuts are straightforward and can be easily achieved with a miter saw or even a hand saw with a miter box. Always measure twice and cut once to ensure your pieces fit together seamlessly. These dimensions will create a centerpiece approximately 41 inches long, perfectly sized for most dining tables.
Cuts You’ll Need:
- 1 – 1×4 at 41” (This will form the sturdy base of your centerpiece)
- 2 – 1×2 at 40” (These will be the longer sides of your upper frame)
- 2 – 1×2 at 12” (These will be the shorter end pieces of your upper frame)
Step-by-Step Assembly: Building Your Christmas Masterpiece
Step 1: Constructing the First Section of the Frame
With your wood pieces cut to perfection, it’s time to begin assembly. Take one of your 12-inch 1×2 pieces and one of your 40-inch 1×2 pieces. Apply a generous, but not excessive, bead of wood glue along the edge of the 12-inch piece where it will meet the end of the 40-inch piece. Align these two pieces at a 90-degree angle, forming an ‘L’ shape. Secure them firmly using your 1.25-inch finish or brad nails. The combination of glue and nails creates a remarkably strong joint, essential for the durability of your centerpiece.
Recommended Tool: The Ryobi AirStrike Brad Nailer
For efficient and flawless assembly, a brad nailer is an absolute game-changer. I personally used my Ryobi AirStrike brad nailer for this entire project, and I can’t recommend it enough. This cordless tool offers incredible precision, power, and portability, making quick work of joining wood pieces without the need for an air compressor. If you’re serious about DIY projects or simply want to make your crafting life easier, adding a brad nailer to your tool collection (or your Christmas wish list!) is a decision you won’t regret. It truly saves a tremendous amount of time and effort, leaving you with smooth, clean joints every time. Trust me, your future DIY self will thank you.
Step 2: Completing the Rectangular Frame
Repeat the process from Step 1, attaching the other 12-inch 1×2 piece to the remaining 40-inch 1×2 piece in the same manner. You will now have two L-shaped sections. These will form the top rectangular frame of your centerpiece, which will later hold the decorative hooks. Ensure your joints are flush and secure before moving on.
Step 3: Attaching the Base
Now, take your single 41-inch 1×4 piece – this will serve as the sturdy base of your centerpiece. Run a continuous line of strong wood glue down the exact center of this 1×4 piece. This central placement is crucial for stability and visual balance. Next, carefully align one of your previously assembled rectangular frame sections on top of this glue line, ensuring it is perfectly centered both lengthwise and widthwise on the 1×4 base. Once aligned, secure it firmly using your brad nailer or finish nails. Drive nails through the bottom of the 1×4 into the 1×2 frame for maximum stability.
At this stage, your project should begin to resemble the basic structure of the centerpiece, with one long side of the frame attached to the central base. Take a moment to admire your progress and ensure all joints are tight and secure.
Step 4: Installing the Decorative Cup Hooks
Before we fully enclose the frame, it’s significantly easier to attach the cup hooks. These hooks will hold your beautiful ornaments or other festive embellishments. I found elegant silver cup hooks at Target, but you can choose any color or style that complements your desired aesthetic. Mark out even spacing for your seven cup hooks along the inner side of the long 1×2 piece you just attached. For optimal placement and to prevent wood splitting, it’s crucial to pre-drill pilot holes using a small drill bit. This creates a guide for the hook and ensures it screws in smoothly and securely.
Pro Tip: The Ryobi Eye Hook Driver
While you can certainly screw in the cup hooks by hand, allowing for a good arm workout, there’s a fantastic little tool that will save you a tremendous amount of time and effort: the Ryobi Eye Hook Driver bit. This ingenious attachment for your drill makes installing eye hooks (and cup hooks!) incredibly fast and simple. You just insert the hook into the bit, and your drill does all the twisting. I absolutely adore this tool; it’s perfect for projects like this, and at around $5 from Home Depot, it’s an indispensable addition to any DIYer’s toolkit. It’s a small investment that delivers huge returns in convenience!
Step 5: Completing the Frame
Once all seven cup hooks are securely installed into the first long 1×2 piece, you’re ready to complete the rectangular frame. Take the remaining 40-inch 1×2 piece (with its attached 12-inch end piece) and apply wood glue to the connecting edges. Carefully position this second L-shaped section to meet the other side of your 12-inch end pieces, creating a full rectangle on top of your 1×4 base. Ensure all corners are square and the pieces are flush. Use your brad nailer or finishing nails to secure the joints, completing the upper frame structure.
Finishing Touches: Personalizing Your Centerpiece
Congratulations, the basic construction of your DIY Christmas centerpiece is complete! Now comes the fun part – personalizing it to match your home’s aesthetic. The beauty of this project is its adaptability; you can finish it in countless ways. For my centerpiece, I chose to apply Varathane wood stain in “Early American.” This classic shade provides a rich, warm tone that beautifully enhances the wood grain, offering a rustic, farmhouse-inspired appeal. After the stain had thoroughly dried, I lightly distressed the edges with a sander. This technique adds character and a charming, aged look, making the piece feel like a treasured heirloom.
Decorating for the Holidays and Beyond
The final step is to adorn your new centerpiece! I opted for a simple yet elegant approach, using natural twine to hang a variety of festive ornaments from the newly installed cup hooks. You can get creative here: mix traditional glass balls with rustic pinecones, add glittering snowflakes, or even personalize it with family photos in miniature frames. Consider weaving in some fresh pine boughs, eucalyptus, or berry sprigs for a natural touch. Small LED fairy lights can add a magical glow, and slender candles placed strategically on the base will create a warm, inviting ambiance. This centerpiece isn’t just for Christmas; by simply changing out the ornaments, you can adapt it for other holidays or even use it year-round as a stylish display for small potted plants or decorative items.
We hope you enjoyed this DIY journey and are inspired to create your own unique Christmas centerpiece. This project is a fantastic way to add a personal, heartfelt touch to your holiday decorations, bringing joy and a sense of accomplishment. Thank you so much for joining us today!
Don’t forget to explore the amazing Day 2 projects from our talented friends in the “12 Days of Christmas Series”! Simply click on their project buttons below to discover more festive inspiration. Each day, one of our hosts will be offering an exciting giveaway, so be sure to check them all out for a chance to win something special this holiday season!
~Whitney