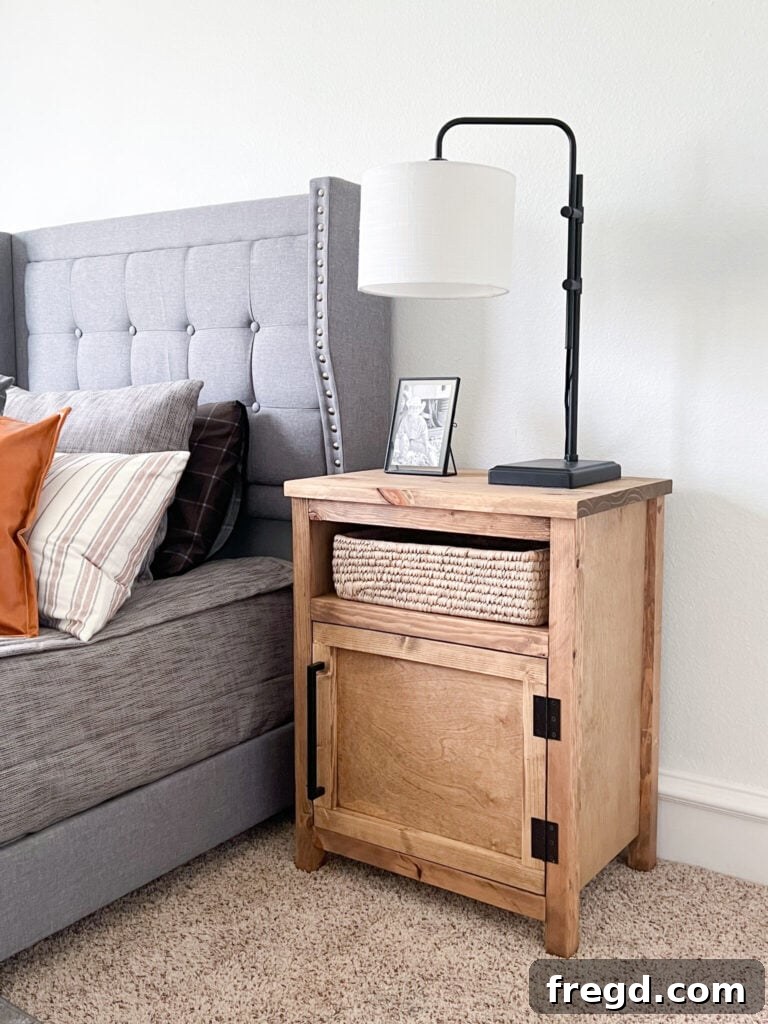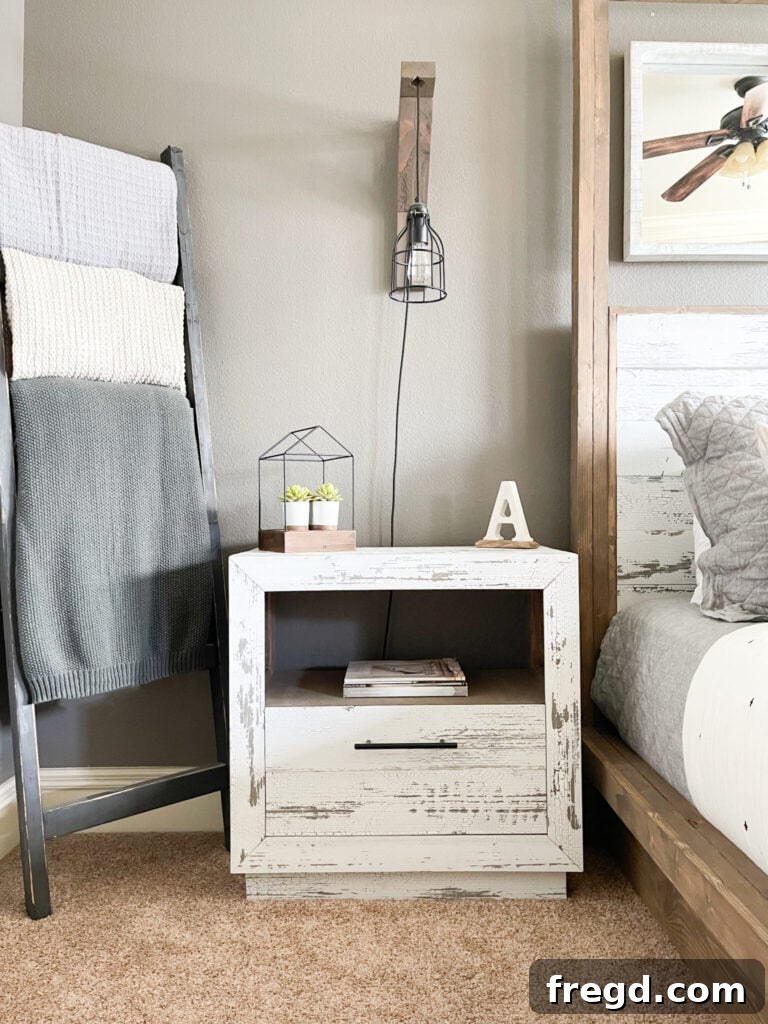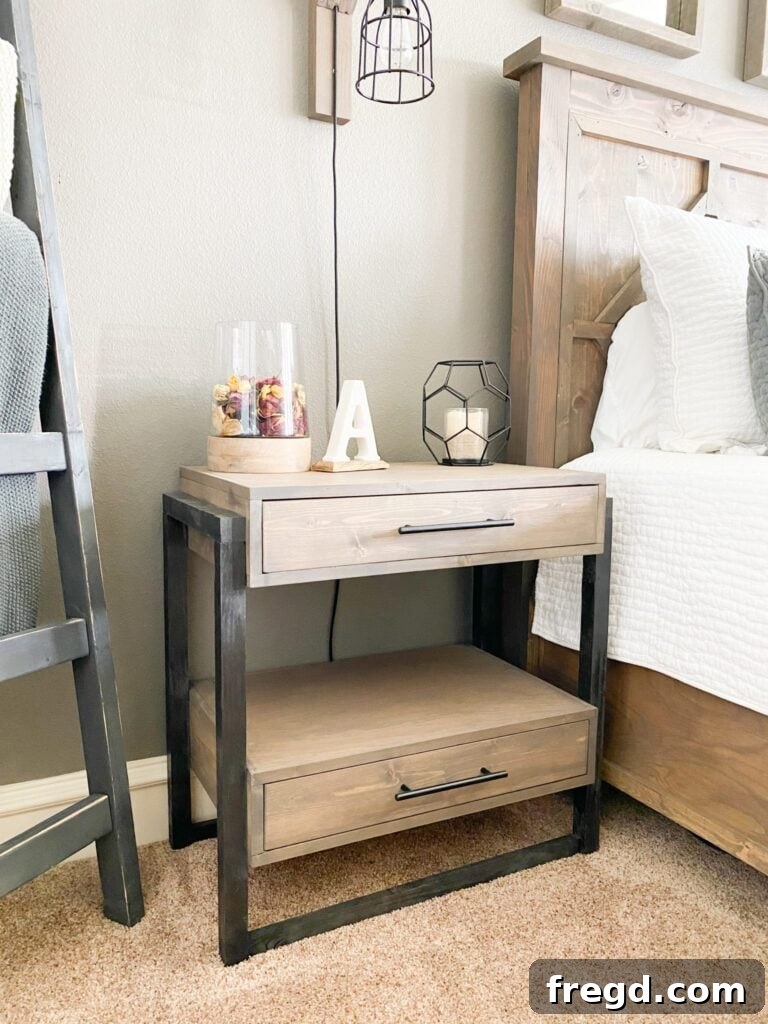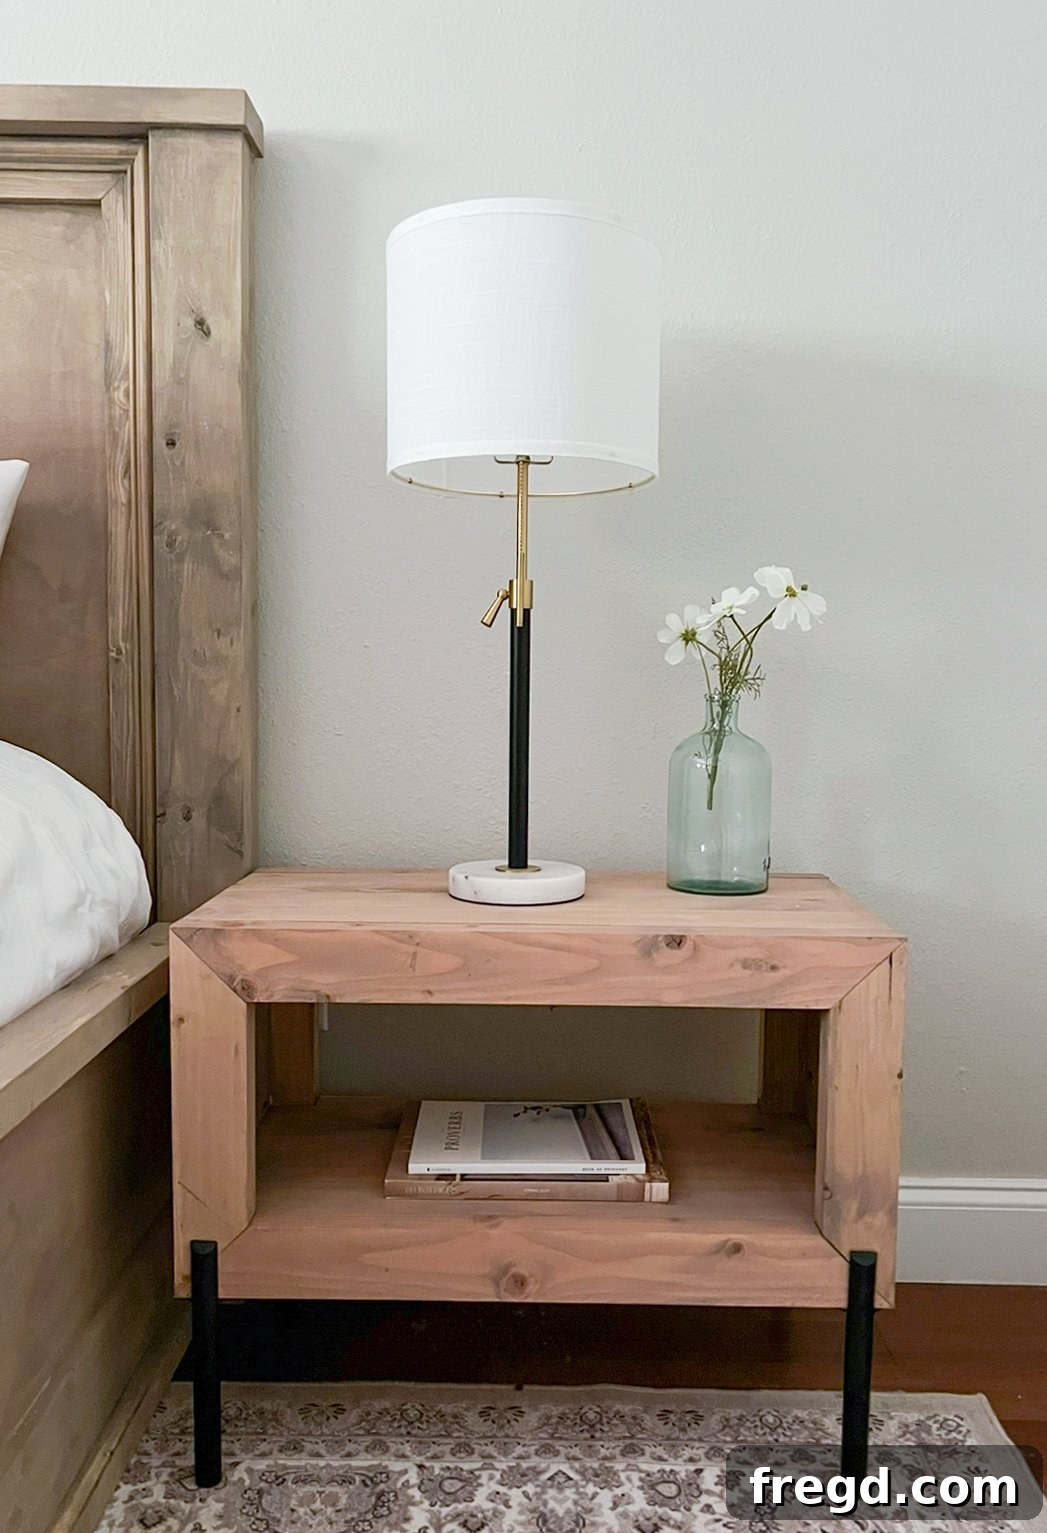
Unlock your inner craftsman and elevate your bedroom decor with this easy-to-follow guide to building a stunning DIY Rustic Modern Nightstand. This comprehensive tutorial will walk you through every step, from selecting your lumber to applying the perfect custom stain, ensuring you create a beautiful and functional bedside table that perfectly complements any bedroom style. Not only will you gain a unique piece of furniture, but you’ll also enjoy the satisfaction of a successful woodworking project.
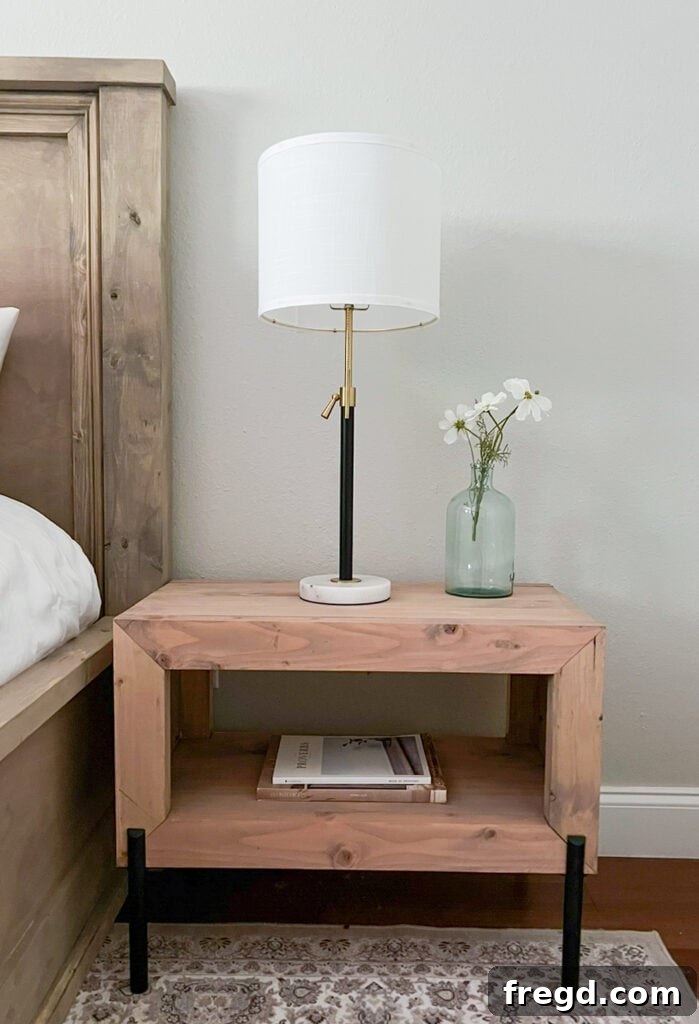
The rustic modern aesthetic blends the warmth and character of natural materials with clean lines and contemporary design. This nightstand embodies that balance perfectly, offering a versatile piece that can double as a chic side table or an accent piece in your living room. We are incredibly proud of how this project turned out, and we’re excited for you to experience the same joy in creating your own. Be sure to download and print the FREE detailed plans available at the bottom of this post to get started!
DIY Video Tutorial
Why Build Your Own Nightstand?
Embarking on a DIY nightstand project offers a multitude of benefits beyond just saving money. When you build your own furniture, you have complete control over the design, dimensions, and finish, allowing you to create a piece that perfectly matches your personal style and space requirements. It’s an incredibly rewarding experience to see raw materials transform into a functional and beautiful object by your own hands. Plus, handmade furniture often carries a unique charm and story that mass-produced items simply cannot replicate. This rustic modern nightstand, for example, combines sturdy construction with a sleek aesthetic that will enhance any bedroom.
Understanding Rustic Modern Design
The “rustic modern” style is all about creating a warm, inviting, and sophisticated atmosphere by marrying natural textures with contemporary elements. For this nightstand, the rustic touch comes from the natural wood grains and the substantial feel of the lumber, even after being refined. The modern aspect is evident in its clean lines, minimalist form, and the deliberate absence of excessive ornamentation. This fusion allows the nightstand to fit seamlessly into diverse interior designs, from a cozy cabin feel to an urban loft. It’s about achieving a balanced aesthetic that feels both timeless and current.
Essential Tools and Materials
Before diving into the build, gathering your tools and materials is crucial. For this project, a few key pieces of equipment will make your woodworking journey smooth and efficient. Beyond your trusted Kreg Jig (which we’ll discuss in detail), you’ll need:
- Miter Saw: Essential for making precise crosscuts, especially those 45-degree angles on your frames.
- Table Saw: Invaluable for ripping boards to custom widths, giving your project a professional, polished edge.
- Drill/Driver: For pre-drilling and driving pocket hole screws.
- Orbital Sander or Corner Cat Sander: To achieve a perfectly smooth finish ready for staining.
- Tape Measure & Pencil: For accurate measurements and markings.
- Wood Glue: For extra strong and durable joints.
- Clamps: To hold pieces securely in place while glue dries or screws are driven.
- Safety Gear: Always wear safety glasses and hearing protection when operating power tools.
Having these items ready will ensure a safe and successful build.
Lumber for the Nightstand
The foundation of this sturdy and stylish nightstand lies in the careful selection of lumber. For the primary framework, we opted for durable 2×4 framing lumber. To achieve the sleek, modern aesthetic we were aiming for, these 2x4s were expertly ripped down to a precise 2.5 inches wide each. This process removes the rounded edges typically found on standard framing lumber, giving the piece a much more refined and custom-built appearance.
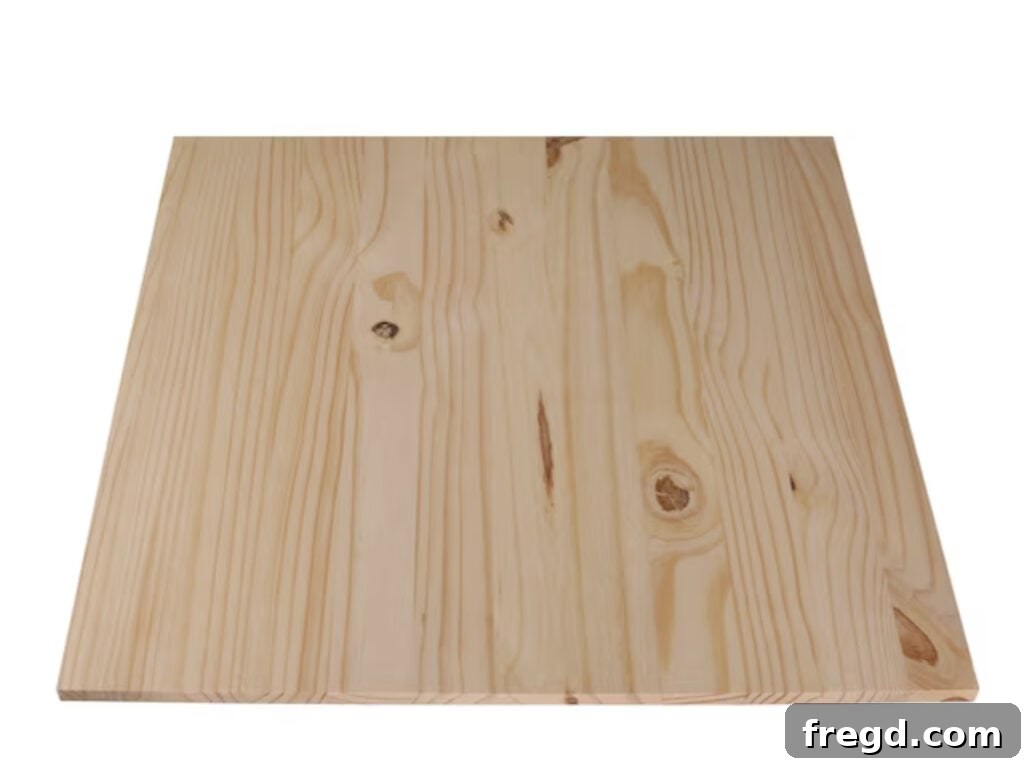
For the top, sides, and base panels of the nightstand, we chose laminated pine project panels. These panels are a fantastic choice for DIY furniture projects due to their consistent quality, smooth surface, and excellent staining properties. You can typically find these pine boards conveniently located in the same aisle as dimensional lumber at your local hardware store, often wrapped in plastic. We frequently source ours from Lowe’s, where they are readily available. These pine boards come in a variety of sizes, which is a great advantage as it helps minimize material waste. For this specific project, we purchased 16-inch x 48-inch panels. We then ripped these down to a width of 14 inches and cut the remaining sections to their required lengths, maximizing efficiency and ensuring a perfect fit for all components.
The Kreg Jig: Your Secret Weapon for Strong Joints
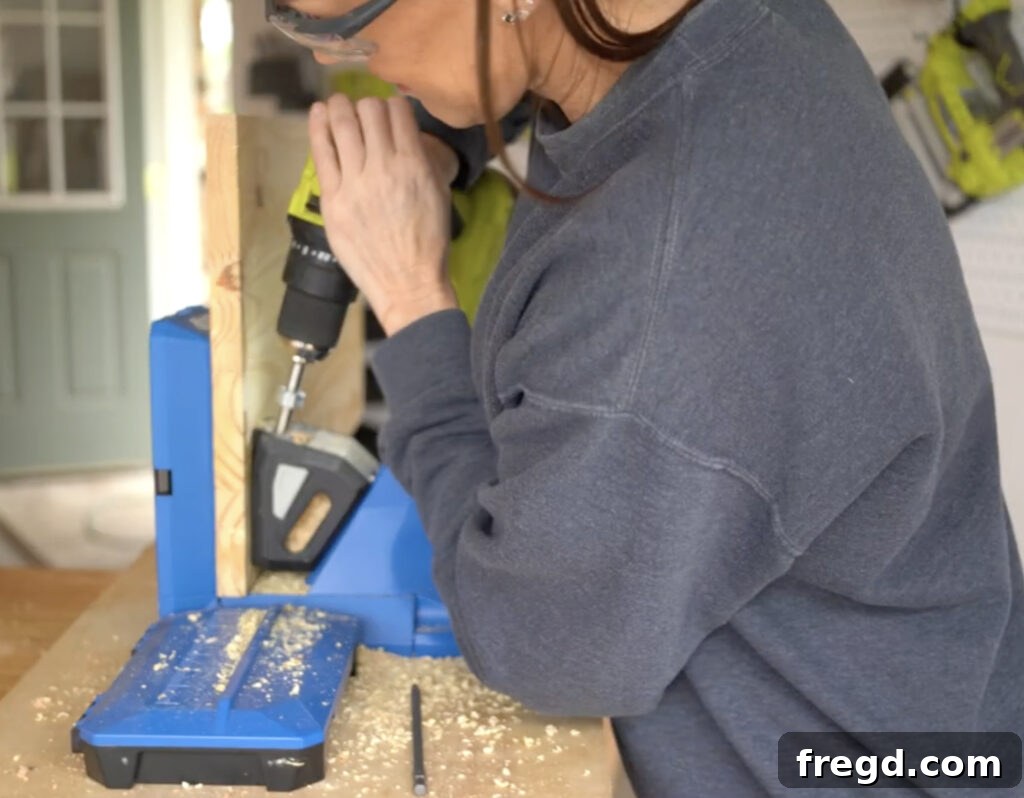
One of the most frequent questions we encounter from fellow DIY enthusiasts is, “What exactly is a Kreg Jig, and how does it revolutionize woodworking?” A Kreg Jig is an indispensable pocket hole jig designed to create incredibly strong and precise pocket holes in wood. These specialized holes allow you to join two boards together with robust joints that are both faster to create and significantly stronger and cleaner than traditional countersunk wood screws. Discovering the Kreg Jig was an absolute game-changer for our furniture building endeavors, transforming how we approached joinery and elevating the quality of our finished pieces.
We were immediately impressed by the user-friendly nature of the Kreg Jig and the exceptional strength it imparted to our builds. It simplifies complex joinery, making it accessible even for beginners, while still delivering professional-grade results. For constructing this DIY Rustic Modern Nightstand, we relied on our Kreg Jig 720 PRO, and we can confidently say it’s a tool we absolutely adore! For those who already own a different Kreg Jig model, the 720 PRO is definitely worth considering for its significant upgrades and enhanced features. You can explore the Kreg 720 Pro on Amazon to learn more. Additionally, we’ve created a dedicated How to Use a Kreg Jig video that provides a detailed walkthrough on maximizing its potential for your projects!
Introducing the Kreg Jig 720PRO Model
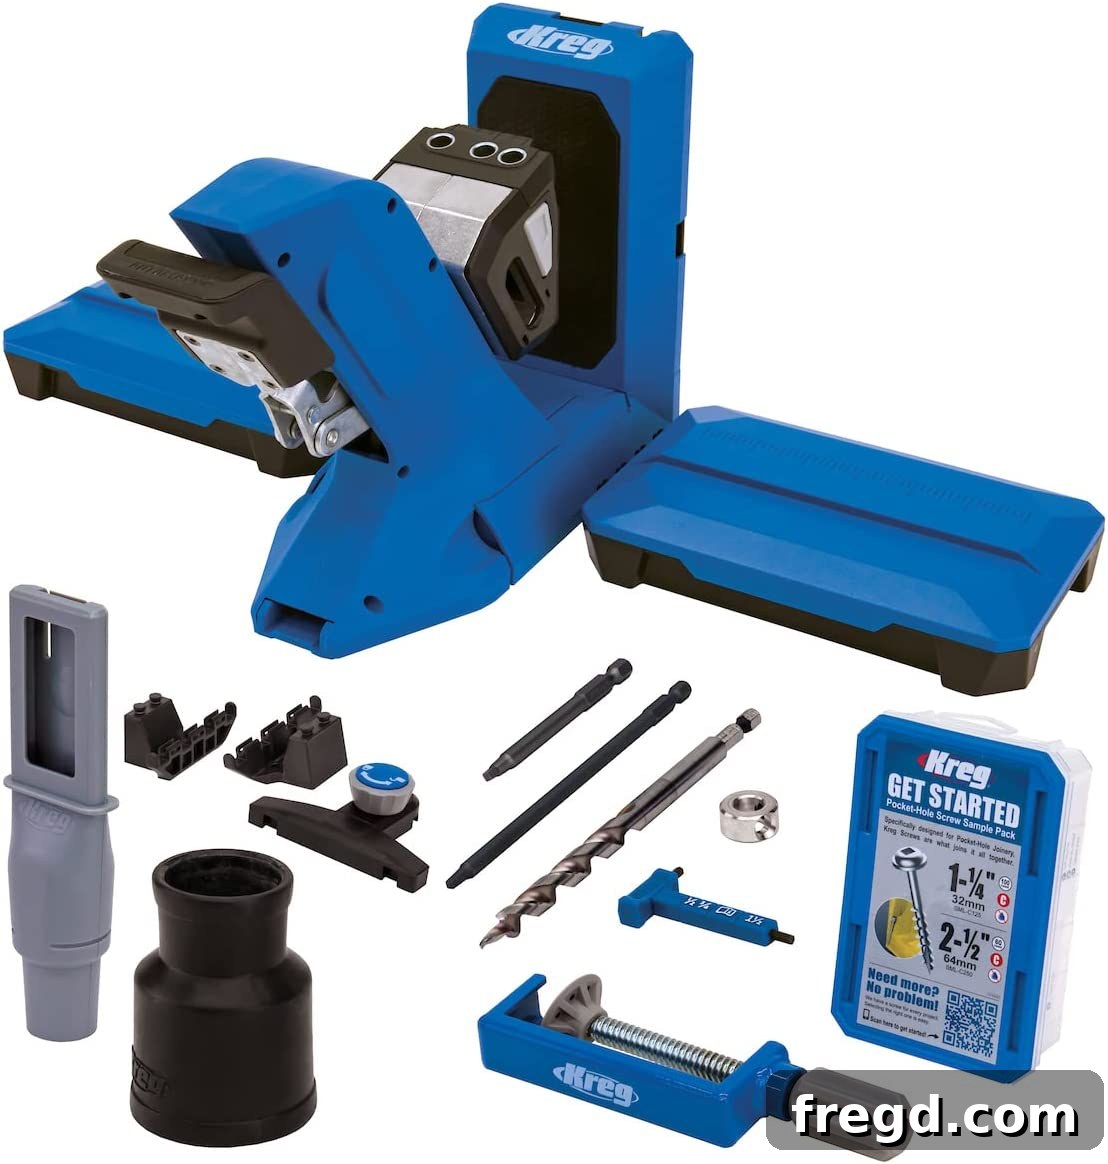
The Kreg Jig 720Pro undeniably stands out as our absolute favorite pocket hole jig. Its innovative Automaxx dual Clamp feature self-adjusts to accommodate various material thicknesses, making the furniture building process incredibly fast and remarkably efficient. This means less time fussing with settings and more time building! The 720Pro also boasts practical built-in material support wings on its docking station, perfect for stabilizing larger panels like plywood. Thoughtful storage features keep your accessories organized, and it includes a robust clamp to securely hold the jig in place on your workbench, ensuring stability during use.
Additional accessories further enhance its versatility and user experience, including a dust port with a vacuum adaptor to keep your workspace clean, a starter pack of 160 Kreg pocket hole screws to get you going, and even a downloadable plan to inspire your next project. Despite its advanced features, the 720Pro is designed to fold up compactly, making it an ideal tool for small workshops where space is at a premium. Its robust construction and intuitive design truly make it a standout choice for anyone serious about woodworking.
What’s Included with the 720PRO?
When you invest in the Kreg Jig 720PRO, you’re not just getting a jig; you’re getting a complete system designed for efficiency and precision:
- Easy-Set Drill Bit
- 3″ #2 Driver Bit
- 6″ #2 Driver Bit
- Easy-Set Drill Bit Collar
- Material Thickness Gauge
- Dust Collection Vacuum Adapter
- Kreg Docking Station with Material Support Wings
- Kreg Pocket-Hole Jig Clamp
- 1 Downloadable Plan (to get you started!)
- 160 Kreg Pocket-Hole Screws
To see the 720 PRO in action and get a better understanding of its incredible features, be sure to check out our dedicated video:
Preparing Your Lumber: Ripping the Boards
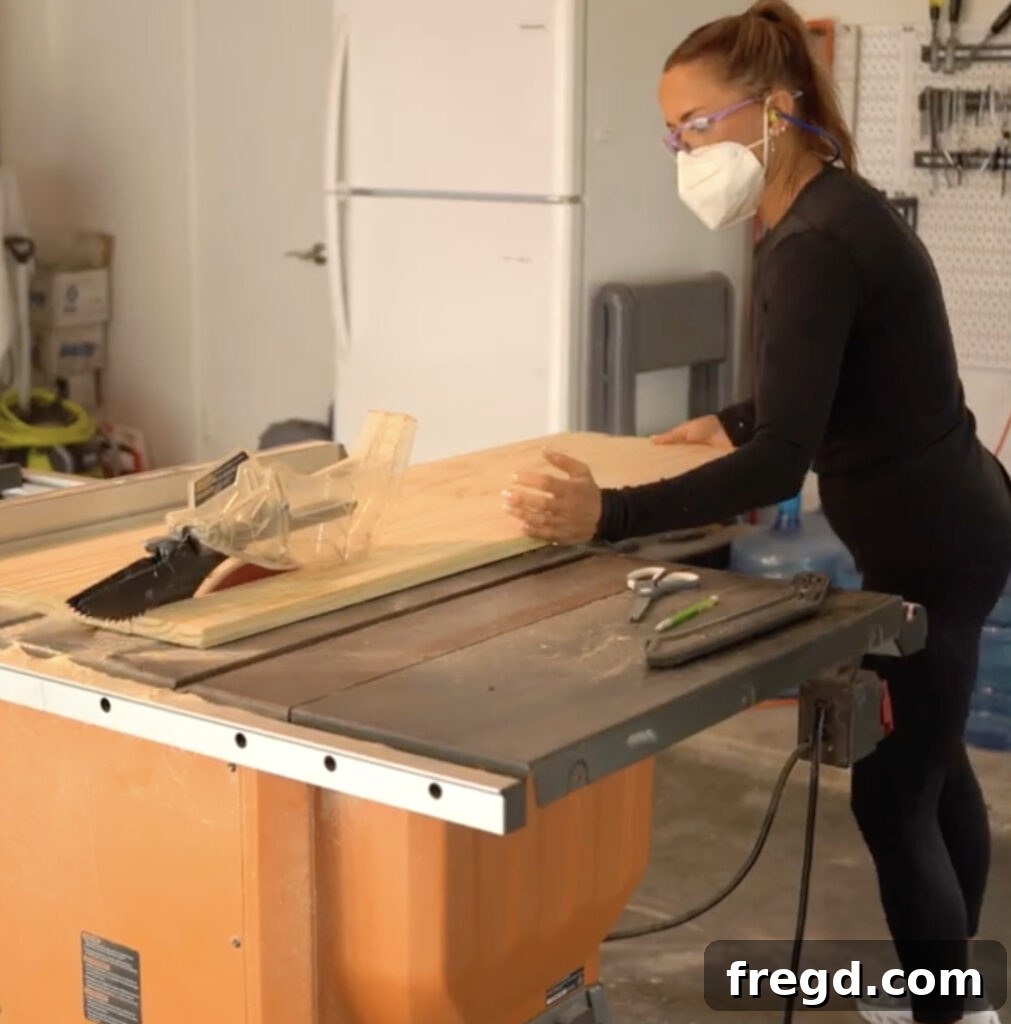
A crucial step in achieving the refined “rustic modern” aesthetic for this nightstand involves carefully preparing your 2×4 boards. Before you even think about drilling pocket holes, we highly recommend ripping your 2×4 boards down to a consistent width, ideally 3 inches wide each for this project. This process, performed with a table saw, removes the factory-rounded edges of standard framing lumber, resulting in perfectly straight, crisp edges. This seemingly small detail makes a monumental difference in the final appearance, giving your furniture a much more expensive and custom-built feel, rather than looking like it was constructed from raw construction-grade wood.
Our preferred workflow is to make all crosscuts first using our miter saw, creating smaller, more manageable pieces. Then, we take these smaller pieces to the table saw to rip them to their final widths. This method provides greater control and safety, especially when dealing with longer boards that can be cumbersome on a table saw. Ripping the boards ensures that when multiple pieces are stacked or joined, they create a seamless, solid, and monolithic look, as if carved from a single piece of timber. This technique is particularly impactful on a piece like this nightstand, where the clean lines are central to its modern appeal. If you’re new to ripping boards or need a refresher, watch our How to Rip Boards video for a detailed demonstration!
Step-by-Step Nightstand Construction
Now that your materials are prepped and your tools are ready, let’s dive into the exciting part: building your rustic modern nightstand. Follow these detailed steps carefully for the best results.
Step 1: Building the Frames
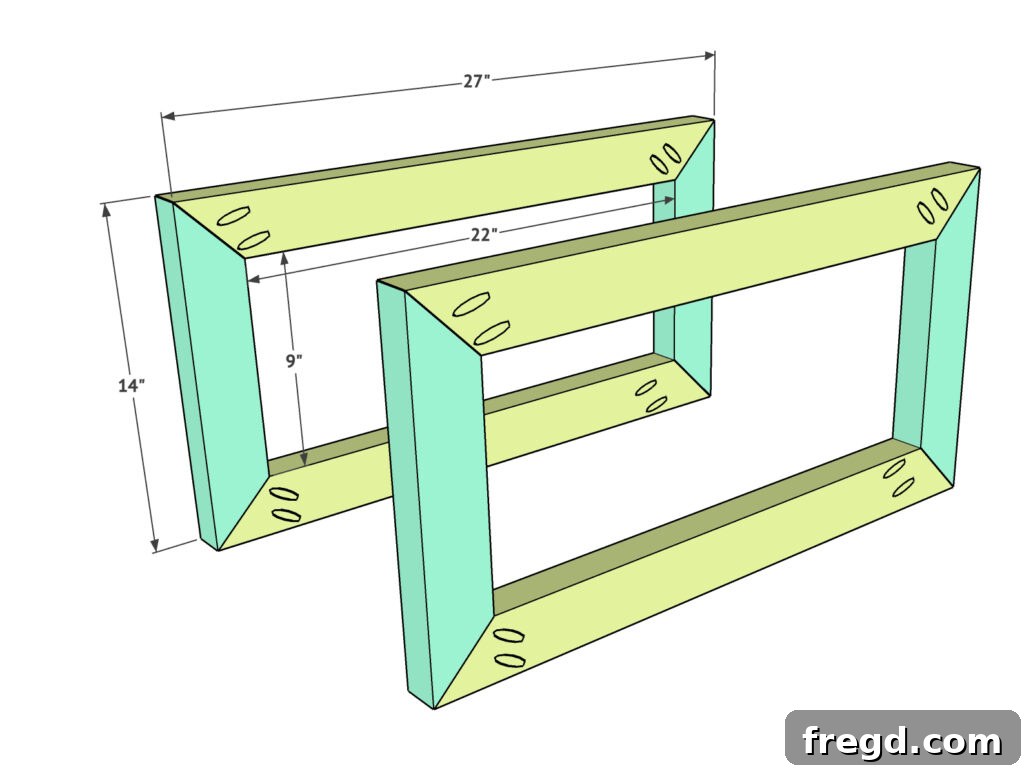
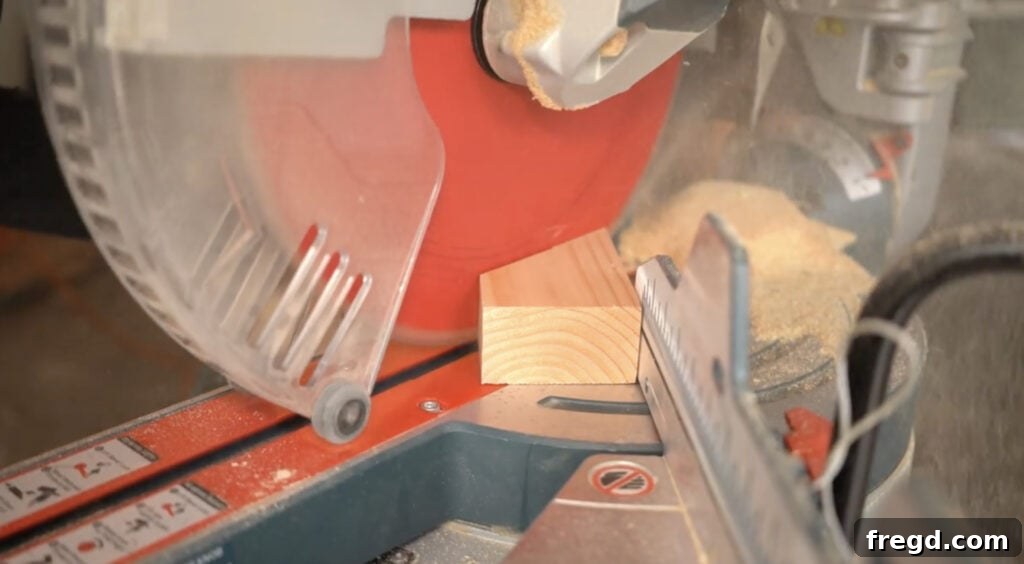
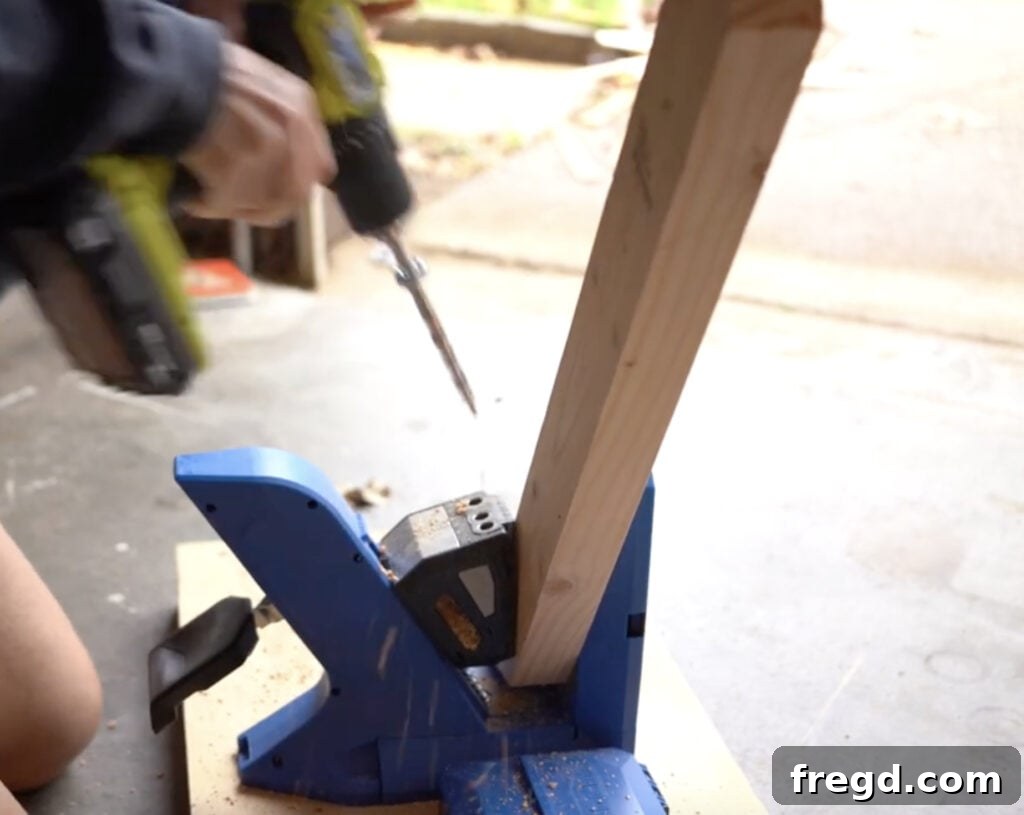
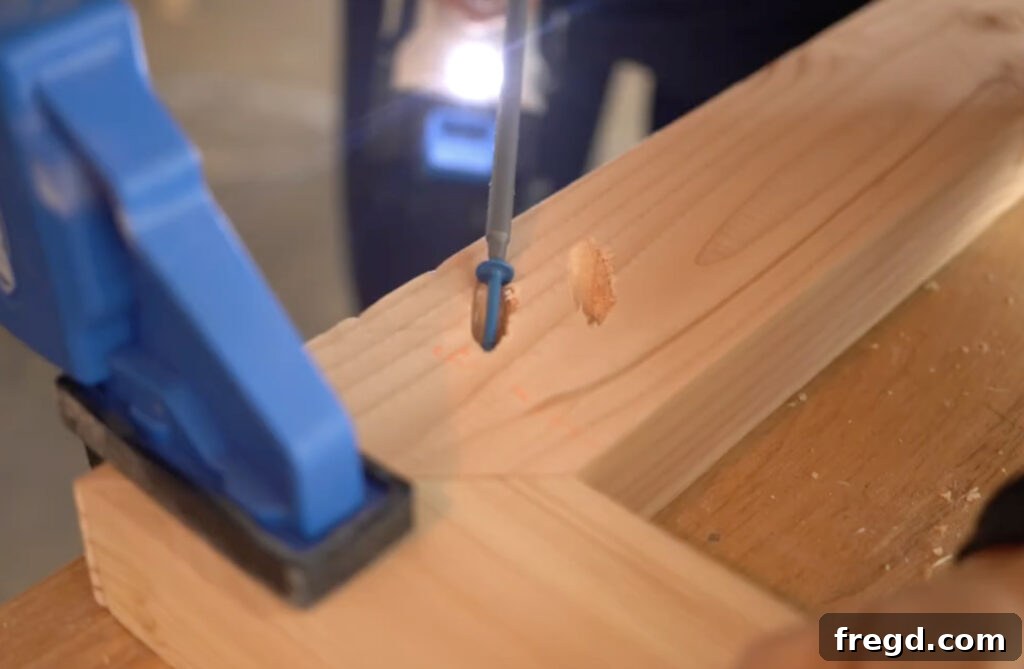
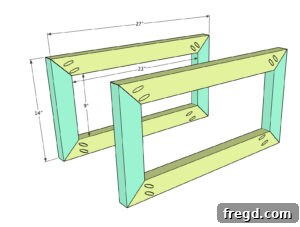
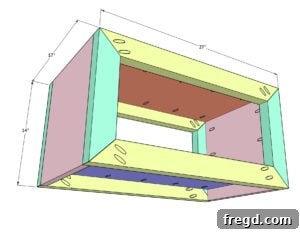
Your nightstand’s core structure begins with creating two identical rectangular frames. These frames are meticulously crafted from the 2×4 boards you previously ripped to 2.5 inches wide on your table saw. Precision is key here: each end of every frame piece will need to be cut at a 45-degree angle. Once your cuts are made, grab your Kreg Jig and add 1.5-inch pocket holes to the ends of the shorter frame pieces. Crucially, these pocket holes should also be drilled at a 45-degree angle, mirroring the mitered cuts, to ensure a strong and seamless joint. To assemble your frames, apply a generous amount of wood glue to all mating surfaces, align your pieces carefully, and secure them with 2.5-inch pocket hole screws. Construct both the front and back frames, ensuring they are perfectly identical.
Step 2: Attaching the Tabletop
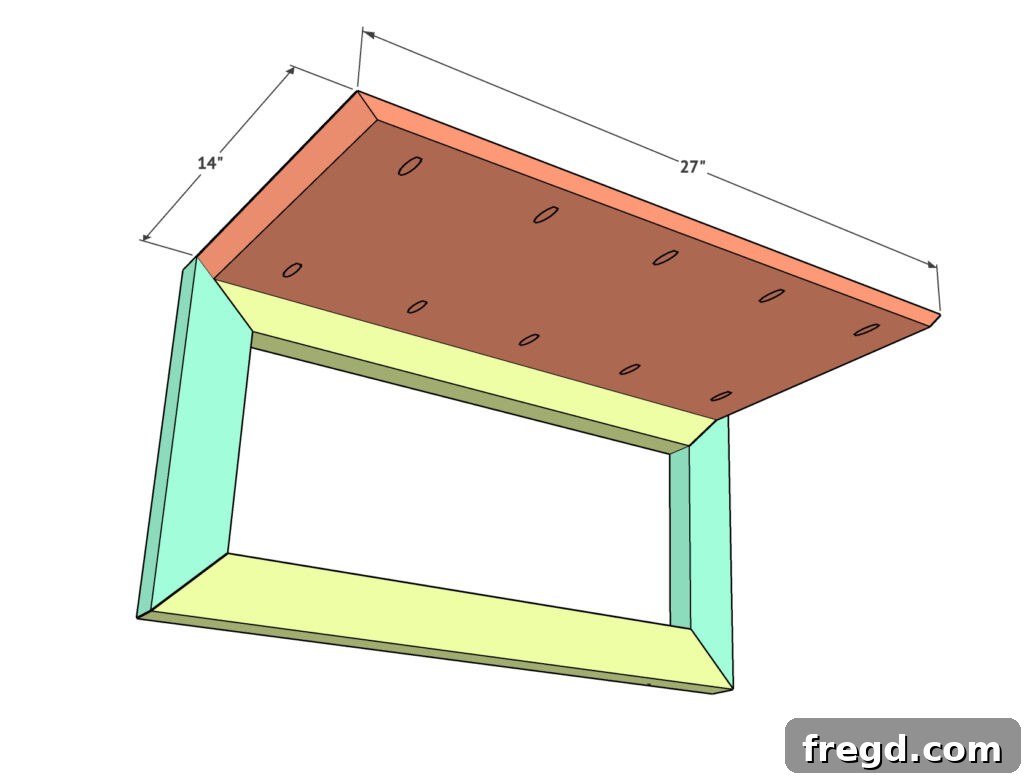
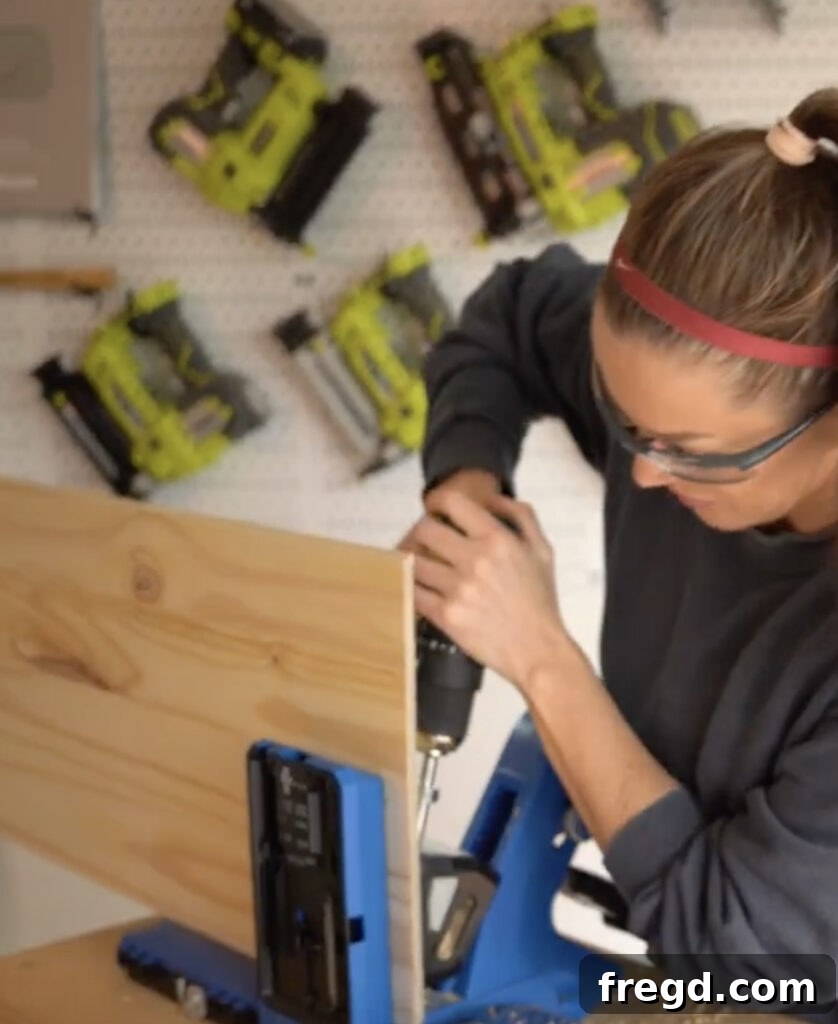
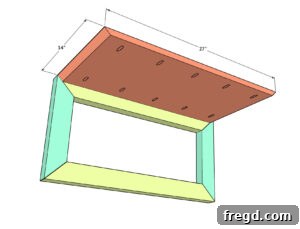
With your frames ready, the next step is to attach the tabletop to one of your newly constructed front frames. Begin by adding 3/4-inch pocket holes along both long edges of the tabletop board. It’s important to ensure these holes are evenly spaced for maximum strength and stability. Next, apply wood glue to the top edge of the front frame where the tabletop will rest. Carefully position the tabletop so that its top surface aligns perfectly flush with the top edge of the frame piece. The tabletop itself should have its ends cut at a 45-degree angle, designed to perfectly meet the mitered edges of the frame for a clean, cohesive look. Secure the tabletop to the frame using 1.25-inch pocket hole screws, driving them through the pocket holes and into the frame. This ensures a strong, hidden connection.
Step 3: Adding the Side Panels
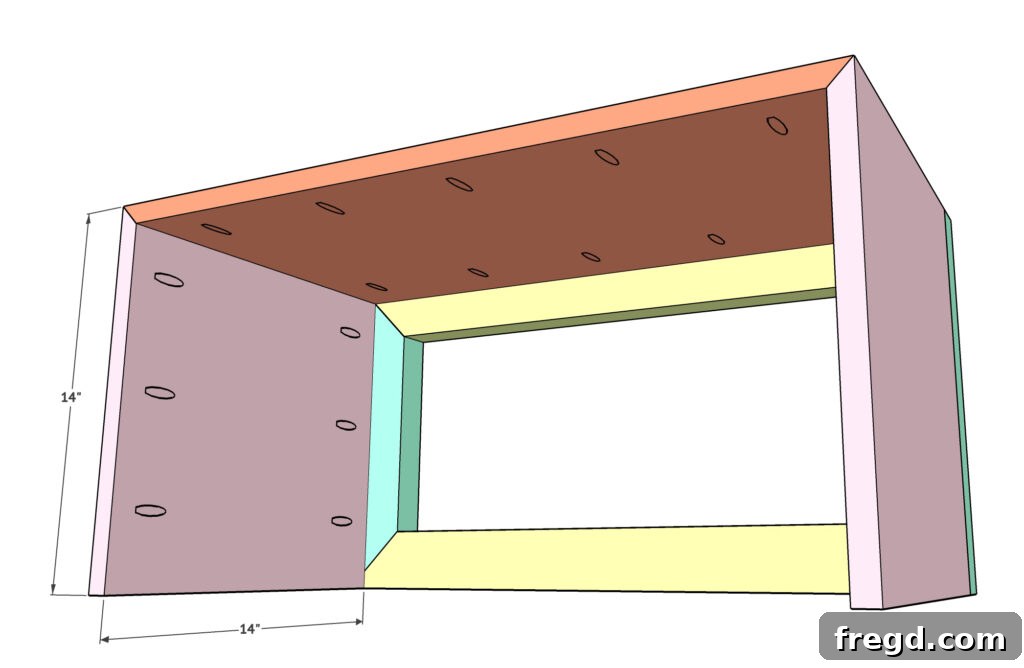
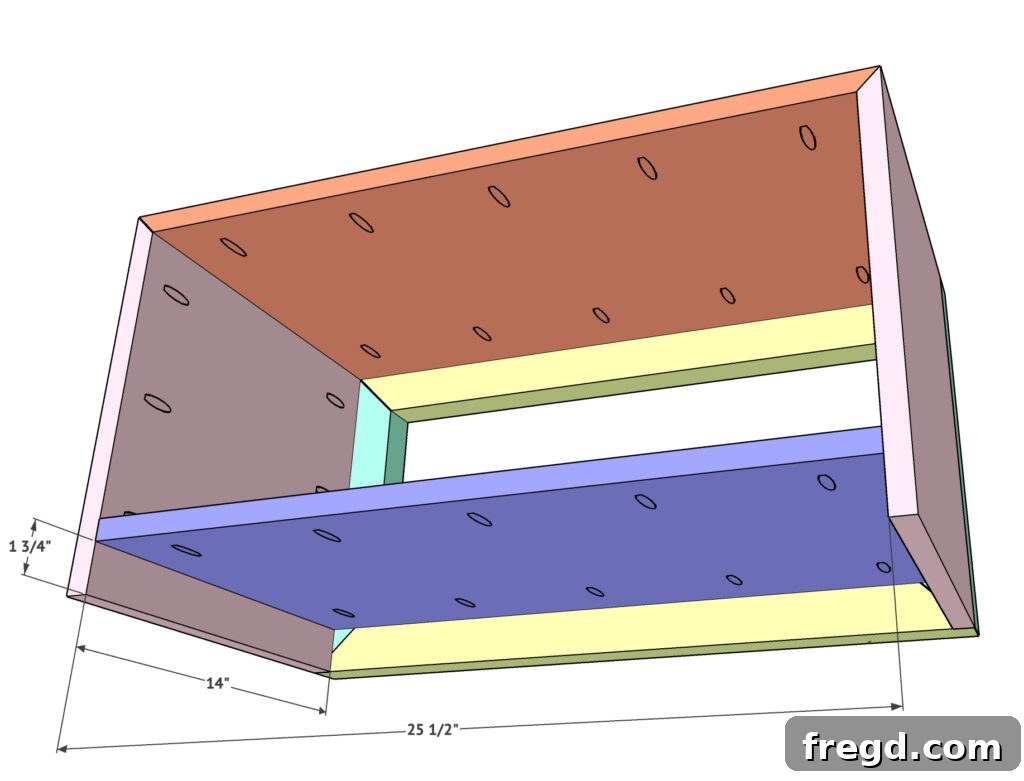
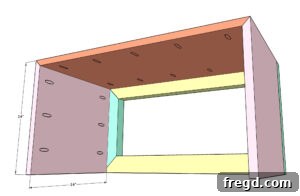
The next critical step involves attaching the side panels of your nightstand, which are also crafted from the laminated pine boards. Pay close attention to the cuts for these pieces: the bottom edge of each side panel will be a straight cut, designed to sit flat, while the top edge will feature a 45-degree angle, allowing it to seamlessly meet the mitered tabletop. Once your cuts are perfect, drill 3/4-inch pocket holes into the top of each board, positioned just below the angled cut, and also along both long sides. These pocket holes will be crucial for a strong, hidden attachment.
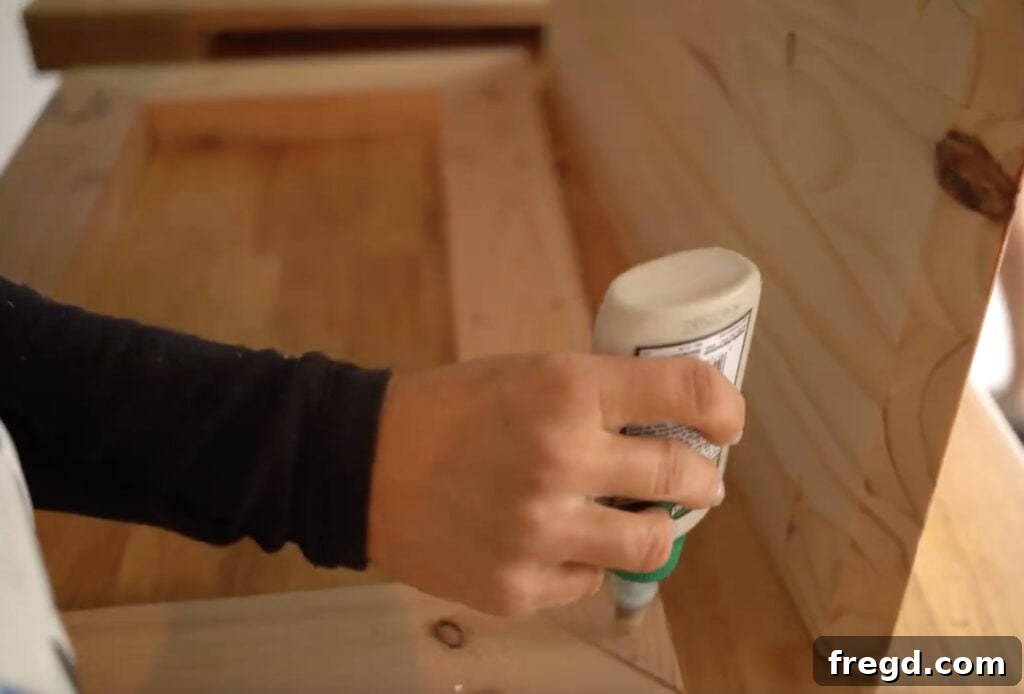
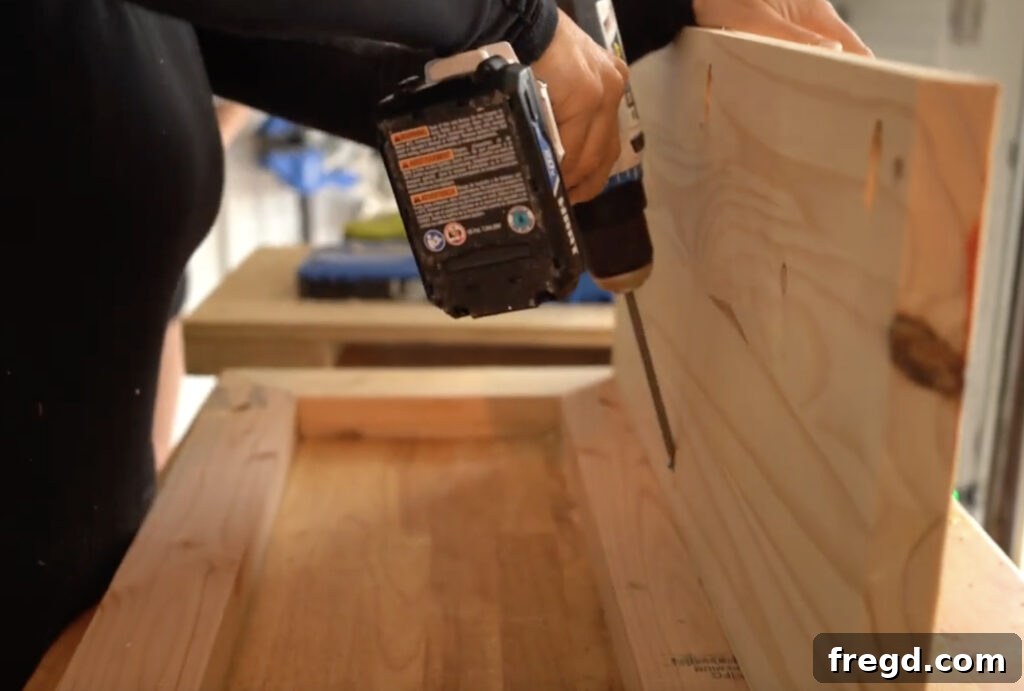
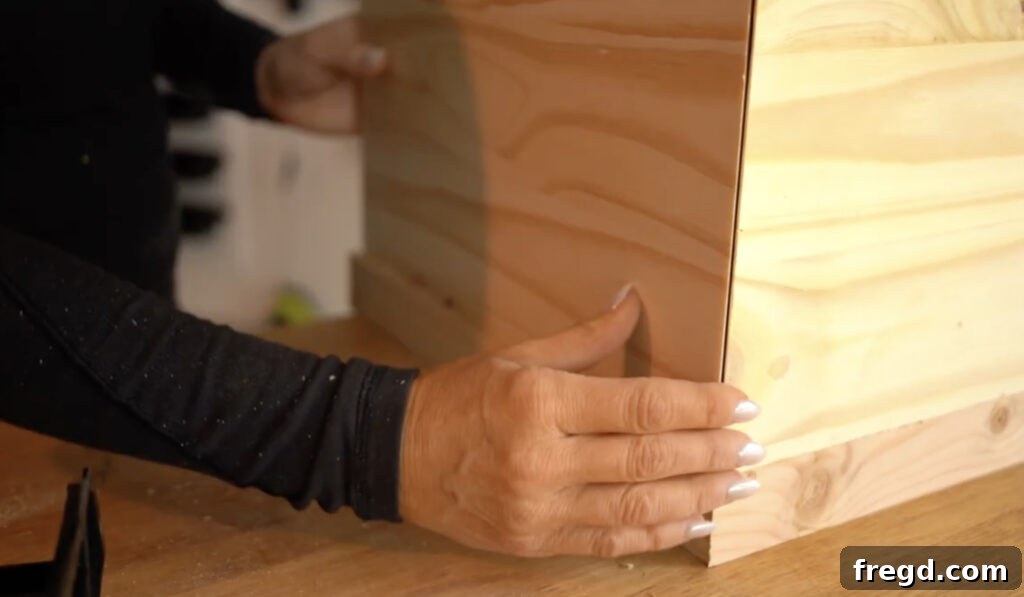
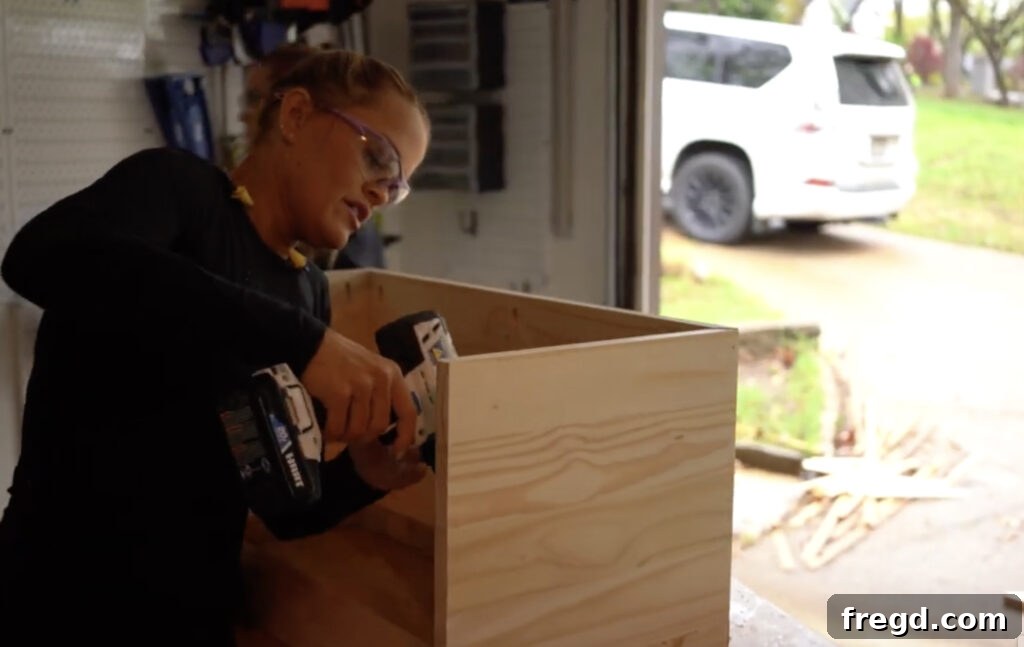
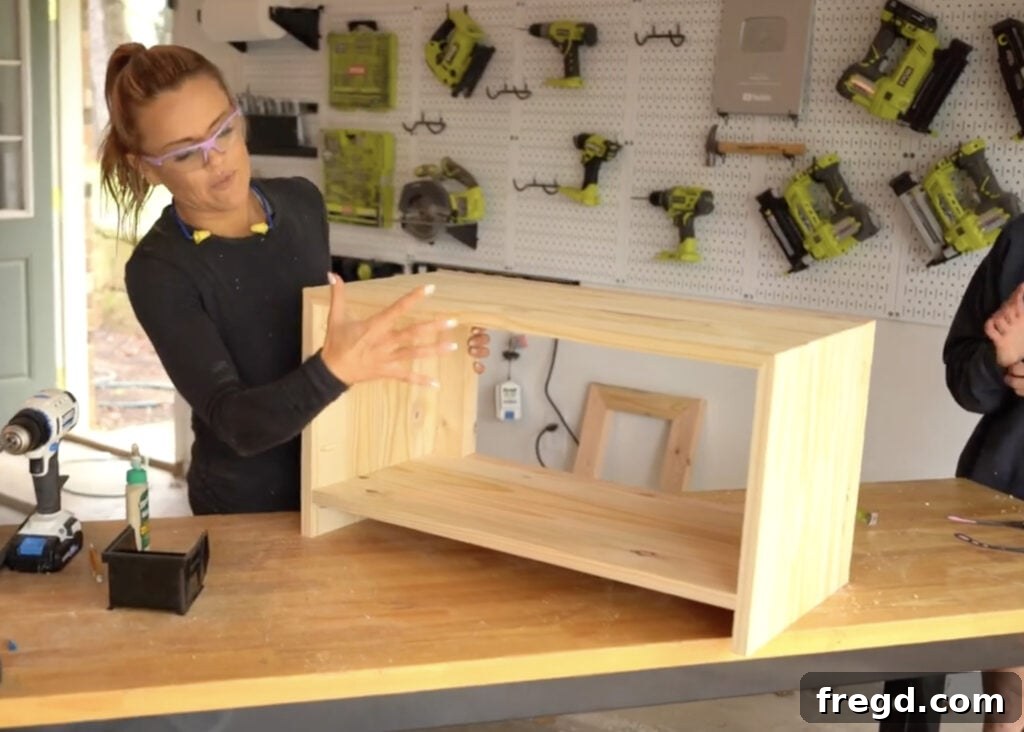
To attach, apply wood glue to the mating edges of the side panel and the existing frame structure. Carefully position each side panel so it sits flush with the outside edge of the front frame. Drive 1 1/4-inch pocket hole screws through the pocket holes in the side panels and into the frame pieces, ensuring a tight and secure bond. Repeat this precise process for the side panel on the opposite side, making sure both are perfectly aligned and flush. This step truly brings the nightstand’s form to life.
Step 4: Securing the Bottom Shelf
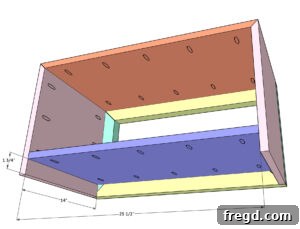
Now, let’s integrate the crucial bottom shelf, which greatly enhances the nightstand’s functionality and storage capacity. This shelf board is also constructed from one of your prepared laminated pine project panels. To prepare it for attachment, drill 3/4-inch pocket holes along both the short and long ends of this board. These strategically placed holes will allow for a strong, concealed connection. Apply wood glue to the top edge of the bottom frame piece where the shelf will sit. Carefully position the bottom shelf board so that its top surface aligns perfectly flush with the top edge of the bottom frame piece. Once aligned, secure the board firmly to the frame using 1.25-inch pocket hole screws. This creates a robust and seamless base for your nightstand, ready to hold baskets, books, or decorative items.
Step 5: Completing the Structure with the Second Face Frame
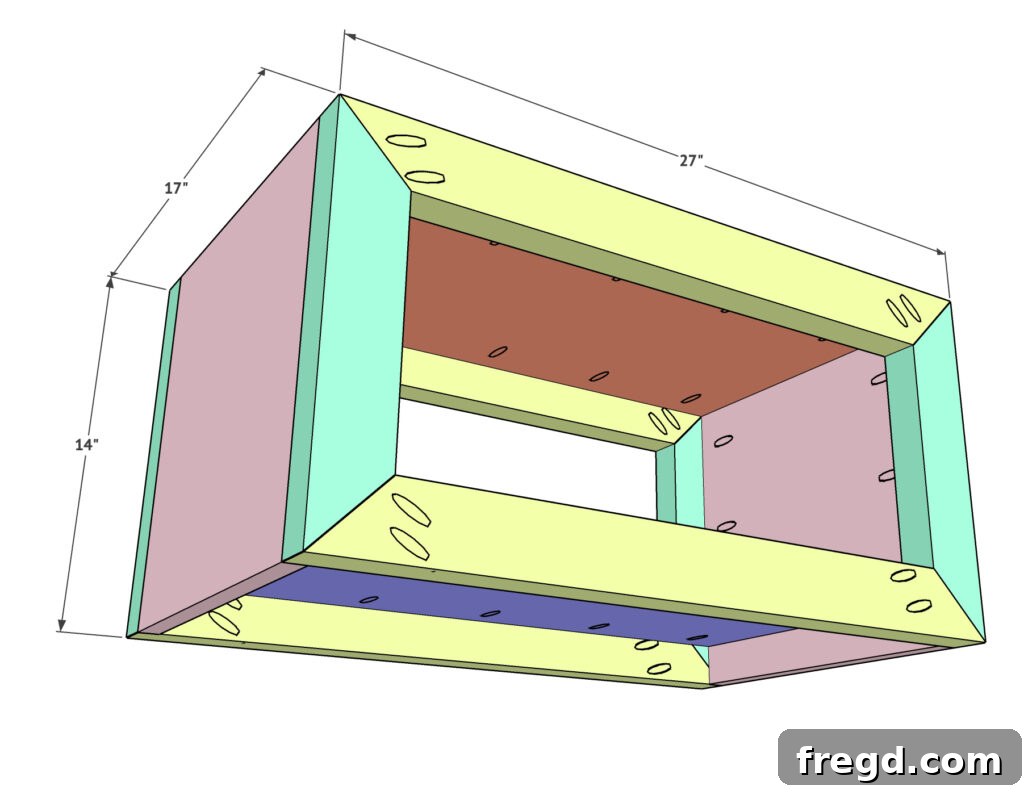
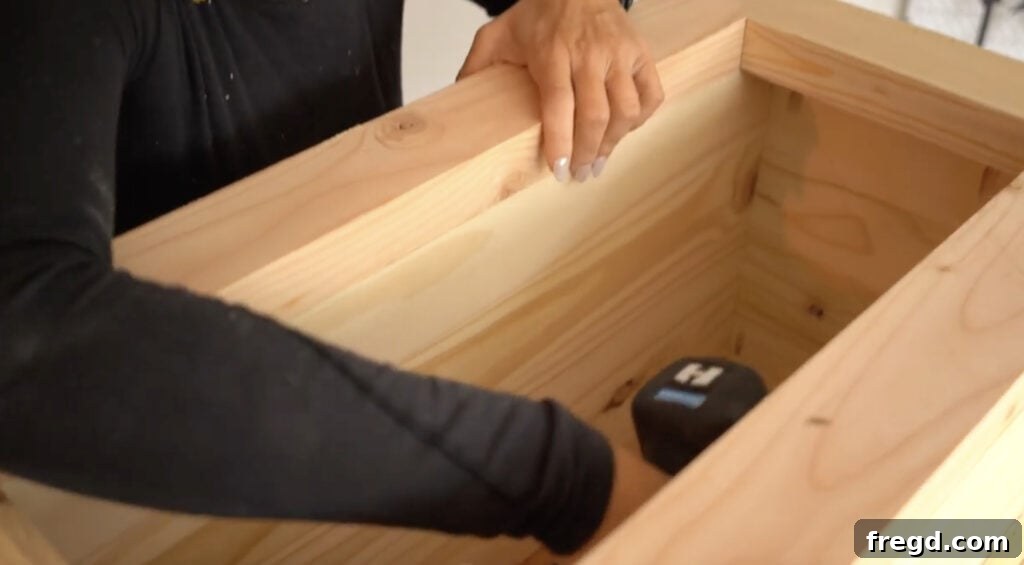
The final structural step is to attach the second face frame to the back of the table. This is where your careful frame construction from Step 1 comes into full play. When positioning this second frame, ensure that the pocket holes you drilled are facing towards the back of the table. This ingenious placement keeps the pocket holes hidden from view on the finished piece, contributing to that professional, clean aesthetic. You will attach this back face frame in the exact same manner you attached the front: drive pocket hole screws through the pocket holes on all of the project panels (top, sides, and bottom shelf) and into the front of this back face frame. Remember to use wood glue on all mating surfaces in conjunction with your pocket hole screws for an exceptionally strong and durable bond. This completes the robust box structure of your nightstand, making it incredibly stable and ready for its finishing touches.
Adding the Perfect Hardware
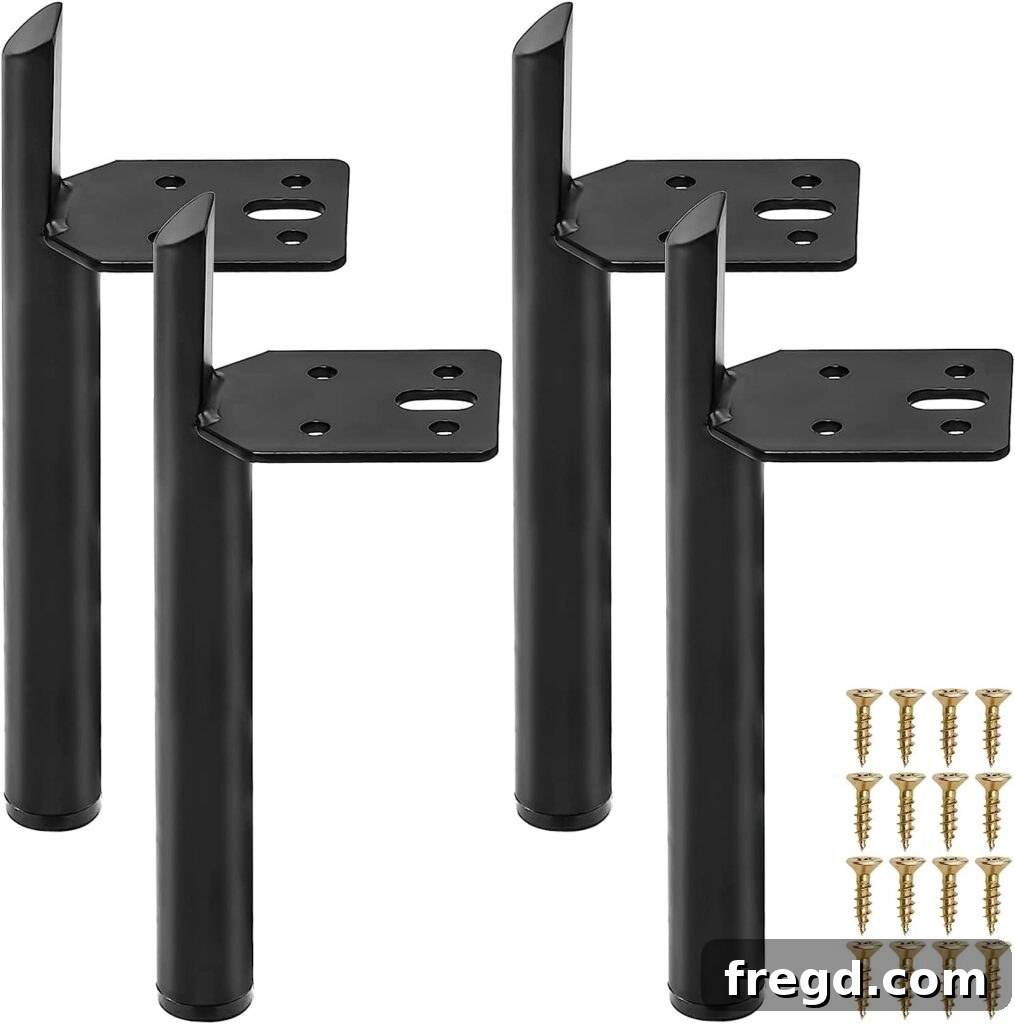
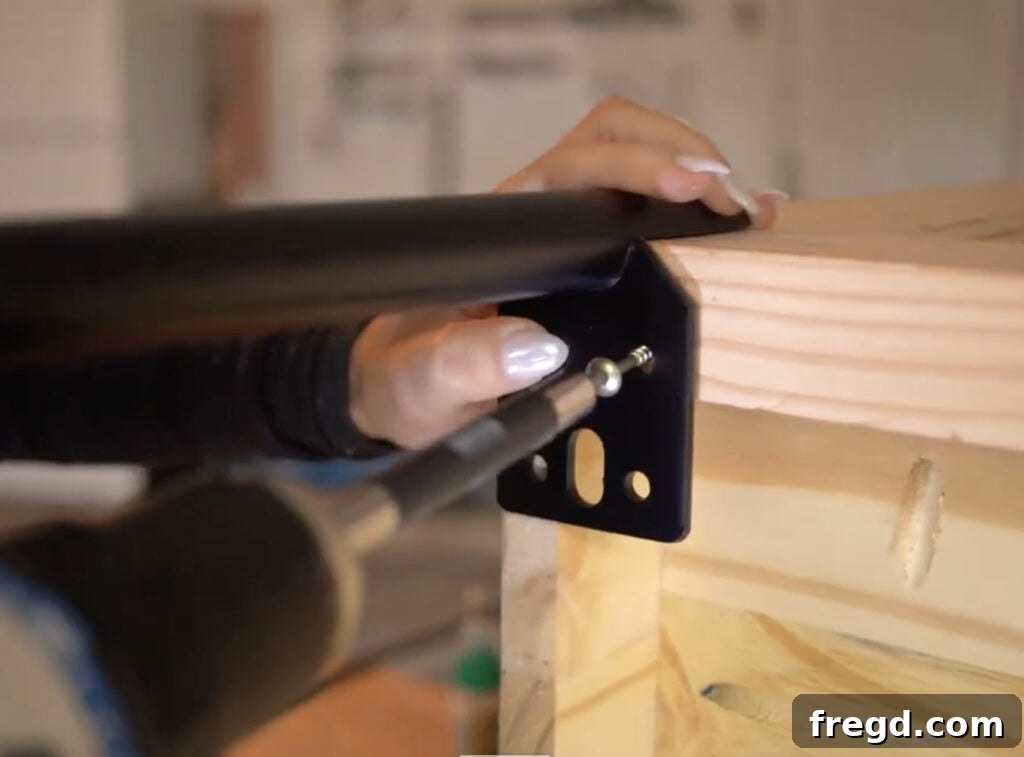
With the primary wooden structure of your rustic modern nightstand complete, it’s time to add those crucial finishing touches that truly define its character: the hardware. For this particular design, we chose adorable metal feet from Amazon, which add a subtle touch of modern elegance and lift the nightstand off the ground, creating a lighter, more sophisticated feel. The selection of hardware can significantly impact the overall style, so take your time to choose pieces that resonate with your vision. You can find the exact metal feet we used on Amazon.
Attaching the feet is a straightforward process. Simply position them securely on the base of the console table (which the nightstand can also serve as). We chose to attach our feet before the staining process. This decision was based on the knowledge that the wood stain would not negatively affect the metal feet, simplifying the finishing steps. Always consider the order of operations for hardware and finishing to ensure the best possible outcome for your DIY project.
Staining Your Custom Nightstand
The finishing stage is where your nightstand truly comes to life, allowing you to impart a personalized touch that perfectly matches your home decor. Instead of opting for a single, off-the-shelf stain color, we decided to create our own unique hue by mixing three different Varathane stains. This method is not only incredibly fun but also surprisingly simple, giving you an even more custom and nuanced look that stands out. You can get a visual guide on how we created this bespoke color by watching our reel!
To achieve this specific blend, we started with an empty mixing tub, readily available and inexpensive at any hardware store, or you can use any clean empty container you have at home. Our custom mix consisted of two parts Natural stain, one part Golden Oak, and a delicate splash of Weathered Gray. Simply combine these in your bucket and stir gently until well blended, and you’re ready to apply your unique stain!
Before applying any stain, proper surface preparation is absolutely critical for an even and beautiful finish. Begin by thoroughly sanding all surfaces of your nightstand. We recommend starting with a medium-grit sandpaper to smooth out any imperfections, followed by a fine-grit sandpaper to achieve a silky-smooth surface. For this task, our Ryobi Corner Cat sander is a favorite, as it easily reaches tight spots, but a standard orbital sander also works wonderfully for broader surfaces. Ensure all sanding dust is completely removed before staining.
Once your custom stain is applied and dry, adding a protective topcoat is essential to seal the wood, enhance its durability, and protect against daily wear and tear. We are often asked about our go-to protective finish, and our favorite polyurethane is this one! It provides a clear, hard-wearing finish that will keep your rustic modern nightstand looking pristine for years to come.

Download Your Free Plans!
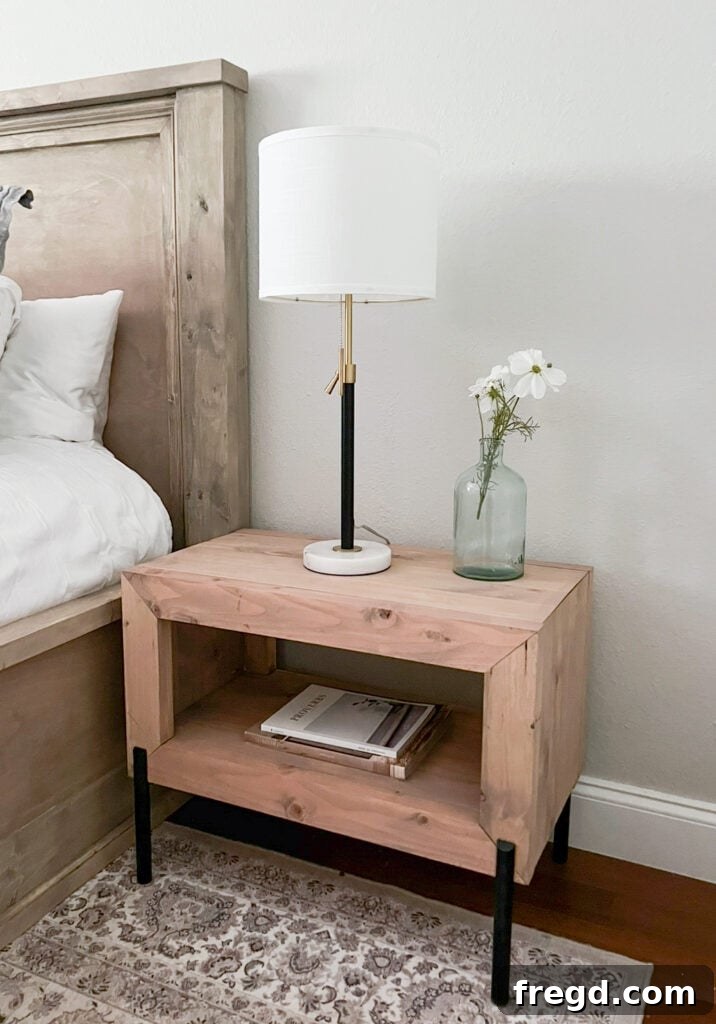
We are absolutely thrilled with how our new nightstands turned out! The added storage space is a huge bonus, and we love styling them with a cozy basket, a stack of books, or a charming lamp on top. The blend of rustic warmth and modern simplicity makes them a perfect addition to any bedroom.
Ready to build your own? Don’t forget to download and print the completely free, detailed plans with all dimensions below! These plans are your essential companion for a smooth and successful build.
DIY Rustic Modern Nightstand: Printable Instructions
Follow our concise, step-by-step tutorial to build this easy DIY wood nightstand using only a few tools. Achieve a rustic modern bedside table perfect for any bedroom! Download and print the FREE PLANS HERE!
Instructions
-
Create the Frames First: Start by crafting two identical rectangular frames from your 2×4 boards, ripped to 2.5″ wide. Each end of every frame piece should be cut at a 45º angle. Use your Kreg Jig to add 1.5″ pocket holes to the ends of the shorter frame pieces, also at a 45º angle. Assemble these two frames using wood glue and 2.5″ pocket hole screws.

-
Attach the Tabletop: Secure the tabletop to the front frame. Drill 3/4″ pocket holes along both long ends of the tabletop board. Apply wood glue and attach the tabletop to the frame with 1.25″ pocket hole screws, ensuring the top of the shelf lines up flush with the top of the frame. The tabletop ends should also be cut at 45-degree angles to match the frame edges.
-
Add the Side Panels: Attach the laminated pine side panels. The base of each side panel should have a straight cut, while the top will be cut at a 45° angle. Add 3/4” pocket holes to the top of each board (just below the angle cut) and along both long sides. Using wood glue and 1 1/4” pocket hole screws, attach the sides to the base, ensuring they are flush with the outside edge of the frame. Repeat for the opposite side.
-
Secure the Bottom Shelf: Attach the bottom shelf board, made from a project panel, to the front frame. Drill 3/4″ pocket holes along both short and long ends of this board. Use wood glue and 1.25″ pocket hole screws to attach, ensuring the top of the bottom shelf lines up flush with the top of the bottom frame piece.
-
Attach the Second Face Frame: The final structural step is to attach the second face frame to the back of the table. Ensure the pocket holes from this frame face towards the back. Attach it using wood glue and pocket hole screws, driving them through the pocket holes on all project panels and into the front of the back face frame.
Explore More DIY Nightstand Projects!
Loved building this rustic modern nightstand? Why stop there? Dive into our archives and discover a variety of other DIY nightstand plans, each offering a unique style and challenge. Expanding your woodworking skills and customizing every corner of your home has never been more rewarding!