
Hello fellow creators and DIY enthusiasts!
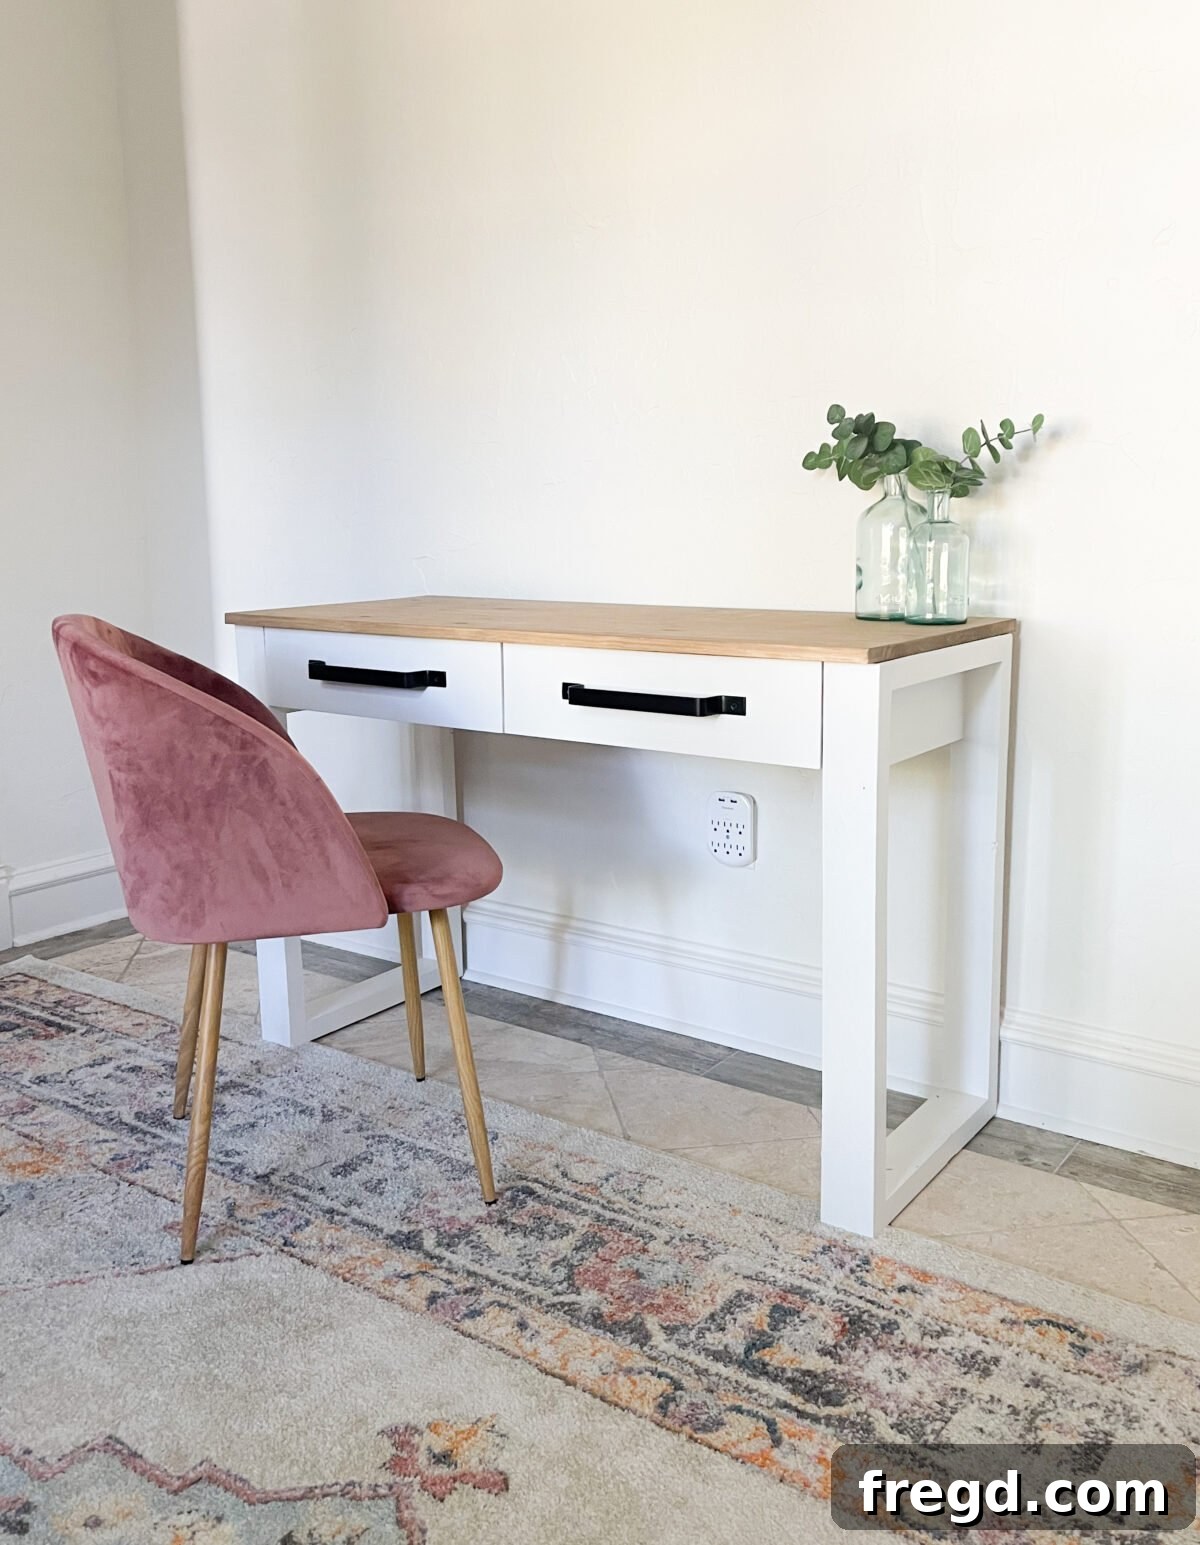
We’re thrilled to share an exciting project that brought so much joy and functionality into my home. Recently, my talented friend Ashley joined me for a fantastic collaboration, and we had an absolute blast filming and building together again. Our mission? To convert my dining room into a versatile, multi-functional space: a dedicated office for my work, a vibrant playroom for Jed, and a serene therapy room. The cornerstone of this transformation was crafting a brand-new desk, and it turned out even cuter than I imagined!
This desk is just the beginning! Its success has inspired me to design and build two matching storage towers to flank each side, further enhancing the functionality and aesthetics of the room. And yes, Ashley will be by my side for that next adventure too – because building with a friend makes every project better! If you’re ready to dive into the world of custom furniture, this DIY desk project is a perfect place to start.
Before we delve into the intricate details of the build, we invite you to watch our comprehensive video tutorial. It provides a visual guide to every step, offering invaluable insights and demonstrations that complement these written instructions. Discover how we brought this beautiful and functional desk to life, from the first cut to the final finish.
Watch our video tutorial for a visual guide to this desk build!
Unlock Your Potential: Download Free Desk Plans!
Empower your DIY journey right from the start! To ensure you have all the precise measurements and detailed instructions at your fingertips, we’ve made the complete project plans available for free. These printable plans are an essential resource, guiding you through every cut and joint with clarity and precision. Make sure to download and print them before you begin, as they are your roadmap to success in creating this custom desk.
You can download and print the free plans here!
Embark on Your Build: Step-by-Step Desk Construction
Now that you have your plans in hand, let’s transform raw materials into a stunning piece of furniture. This project is designed to be approachable for intermediate DIYers, offering a rewarding experience as you watch your desk take shape. Follow these steps carefully, and remember that patience and precision are your greatest allies.
1. Crafting the Foundation: Preparing the Leg Boards
The journey to your perfect desk begins with meticulously preparing the foundation: the 2×4 boards that will form the sturdy legs. Precision here is paramount for both stability and aesthetic appeal. Start by taking your 2×4 boards and ripping each one down to a consistent 3 inches wide. This crucial step not only ensures uniformity but also provides clean, straight edges on all sides, which is essential for strong, seamless joints and a professional finish.
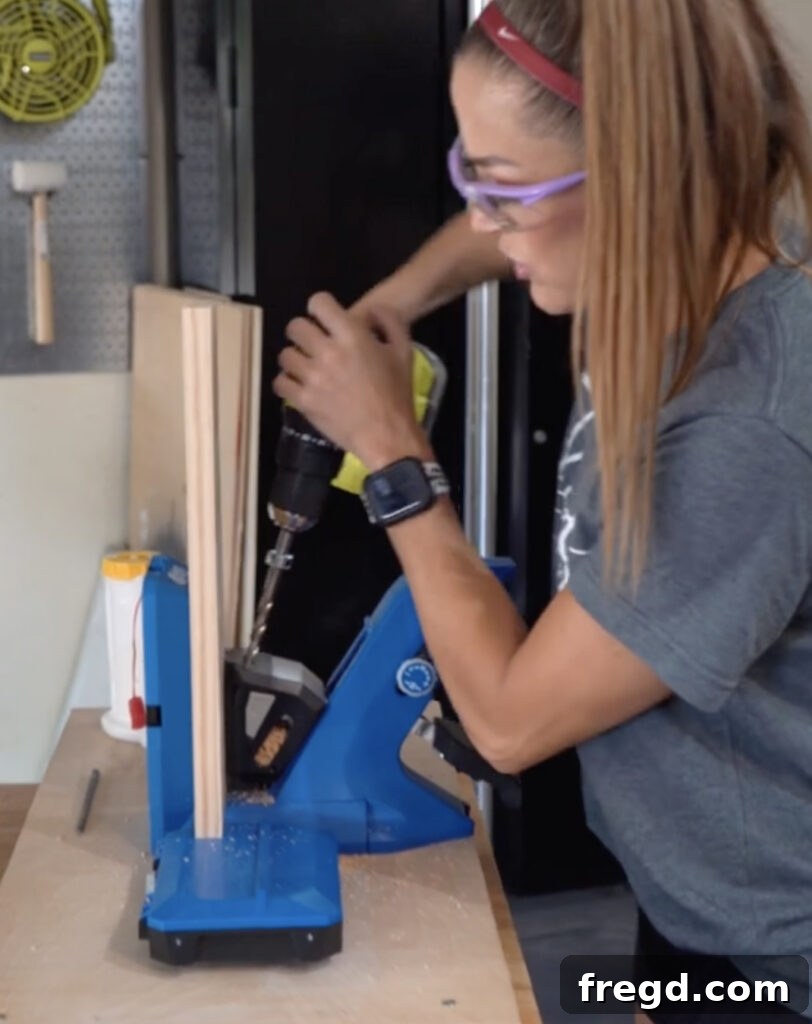
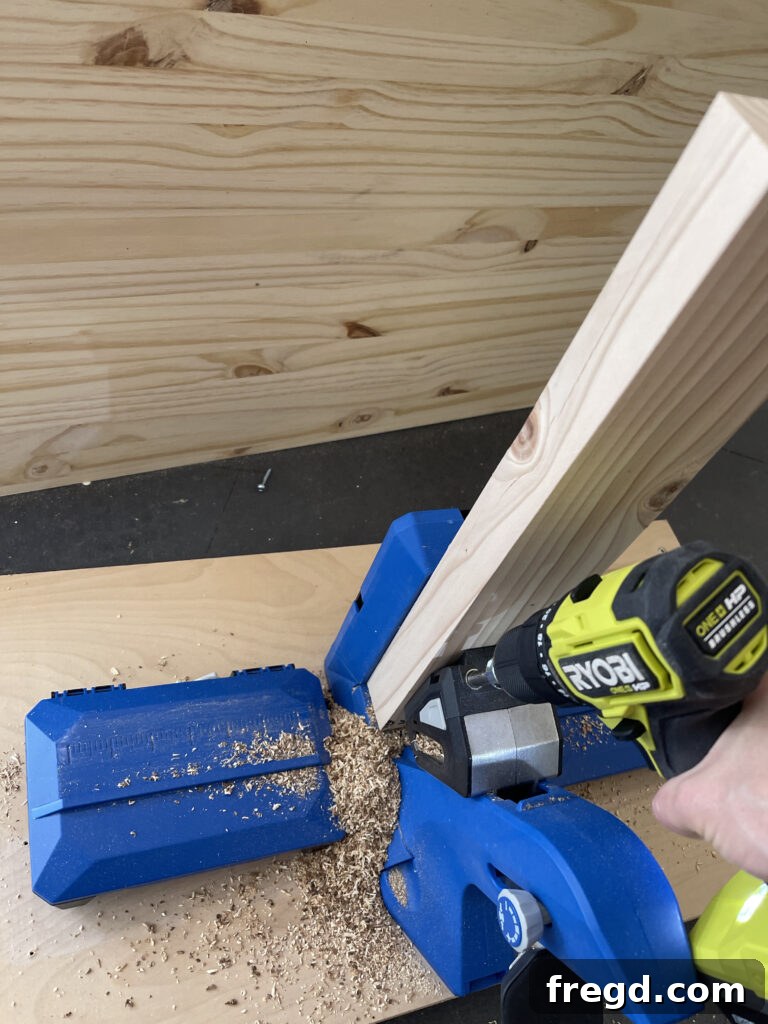
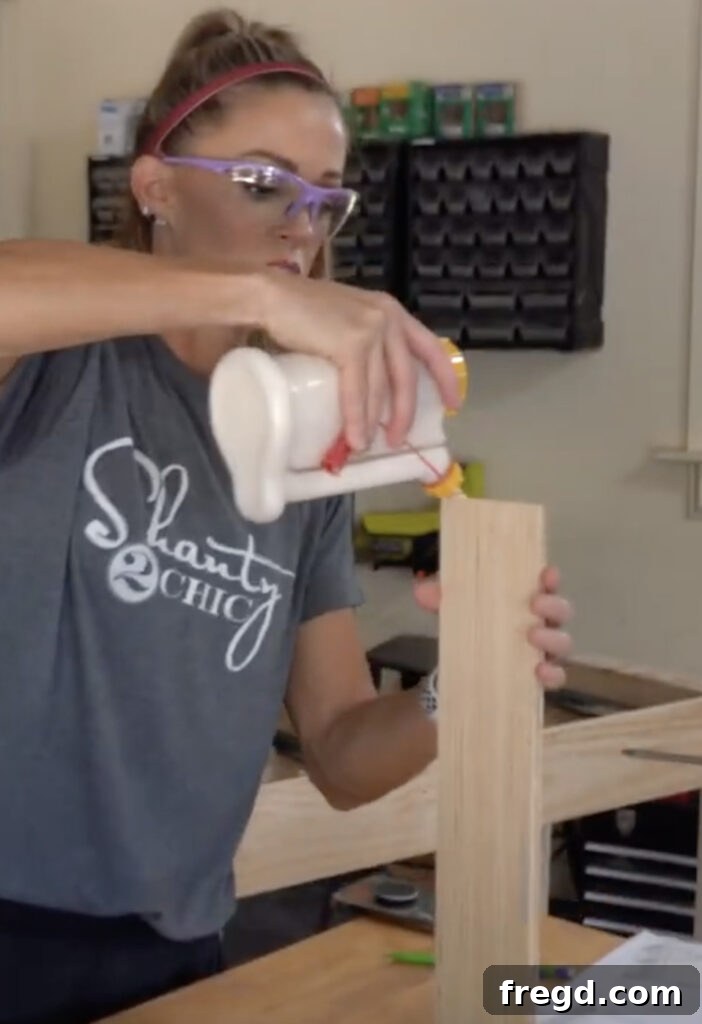
After achieving the desired width, proceed to make your shorter cuts according to the precise dimensions outlined in your free plans. Always double-check your measurements before cutting to avoid costly mistakes. Once your leg pieces are cut to size, the next critical task involves creating pocket holes. For the top and bottom leg pieces, you’ll need to drill 1.5-inch pocket holes on each side. These strategically placed holes, made easy with a reliable pocket hole jig, are the secret to incredibly strong and virtually concealed joinery. They allow for the discreet attachment of the leg components, resulting in a robust frame that can withstand daily use.
Essential Tool Spotlight: Kreg Jig 720PRO
For this build, we had the pleasure of using our new Kreg Jig 720PRO, and it truly revolutionized our workflow! This model stands out as our absolute favorite Kreg Jig to date, and for good reason. Its user-friendly design significantly streamlines the pocket-hole drilling process, saving valuable time and effort. Beyond convenience, the Kreg Jig 720PRO ensures that every joint is incredibly strong and professional-looking, elevating the overall quality and durability of your projects.
Even if you’re currently working with a K5 or other Kreg Jig models, we wholeheartedly recommend considering the 720PRO. It represents a significant upgrade, offering enhanced features and ease of use that make it an indispensable tool for any serious woodworker or DIY enthusiast. Investing in this tool is truly worth it, especially when building projects from our plans, as it guarantees robust and beautiful results. You can find it readily available on Amazon here.
2. Assembling the Leg Frames
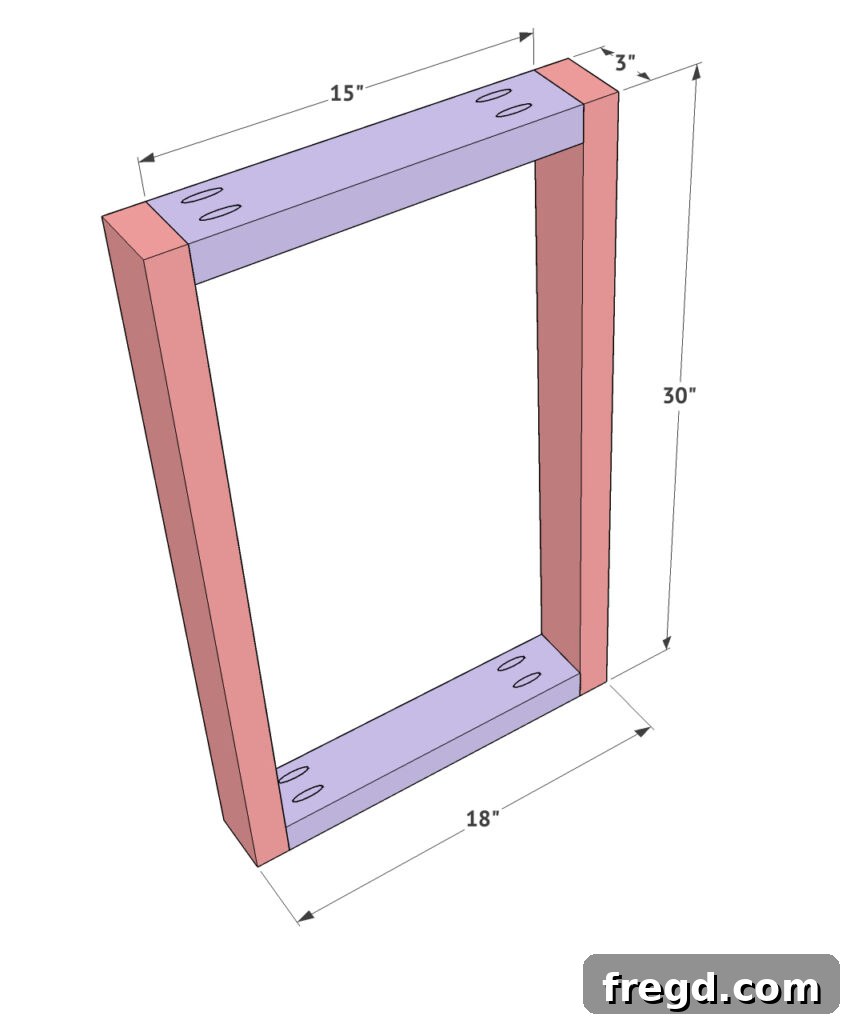
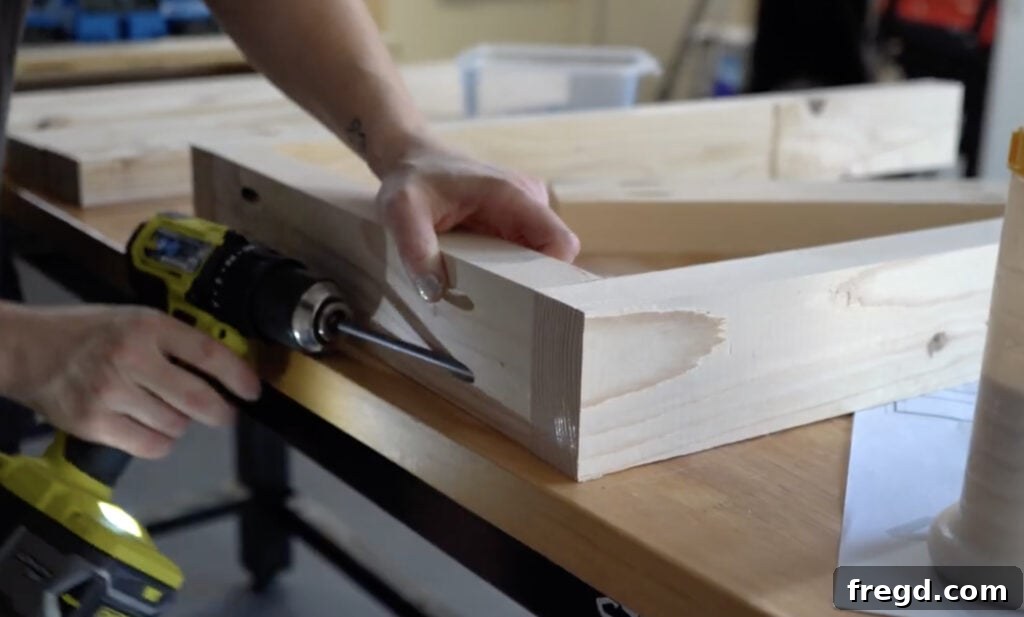
You will construct two identical leg assemblies to form the sturdy base of your desk. Begin by building each frame. Take two of the shorter leg pieces and two of the longer leg pieces. Apply a generous amount of wood glue to the mating surfaces before joining them. Then, secure these pieces together using 2.5-inch pocket hole screws, driving them into the pocket holes you created in the previous step. Ensure each joint is tight and square, as the integrity of your leg assemblies is crucial for the overall stability of the desk. Clamping the pieces together while screwing can greatly assist in achieving a precise and strong connection.
3. Attaching the Side Apron Boards
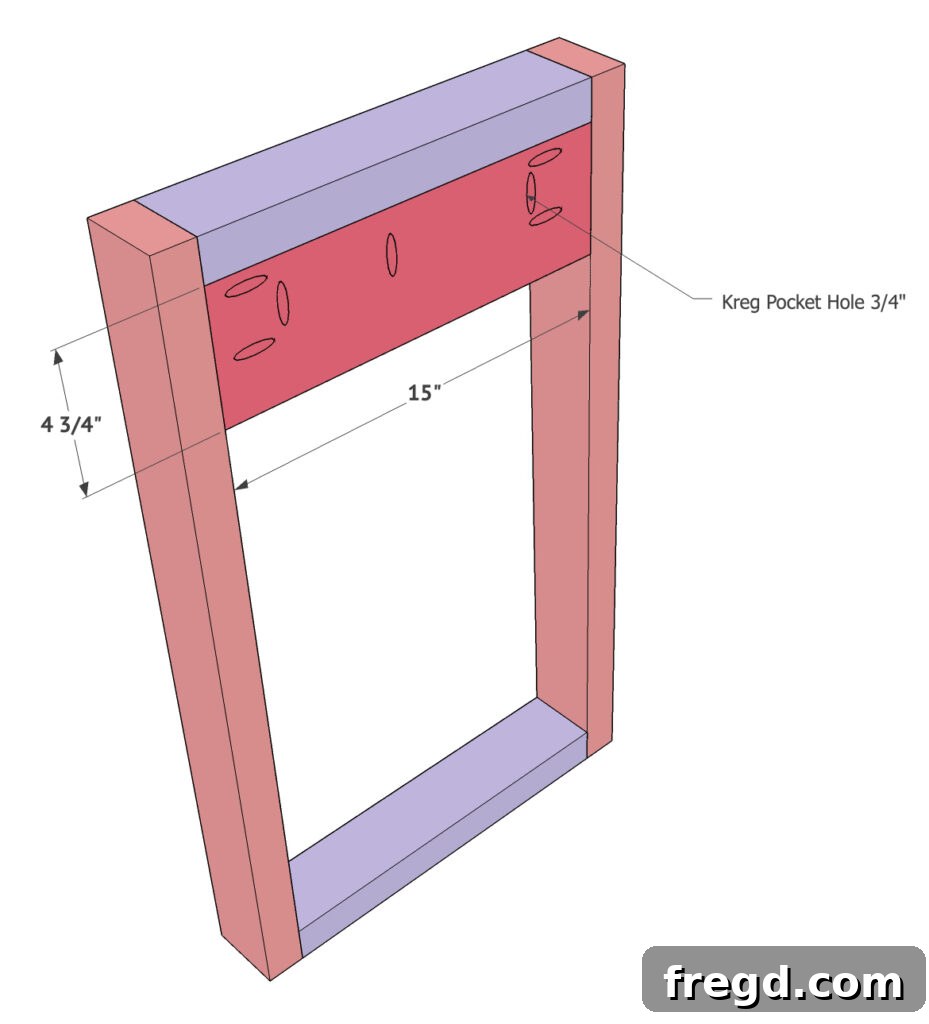
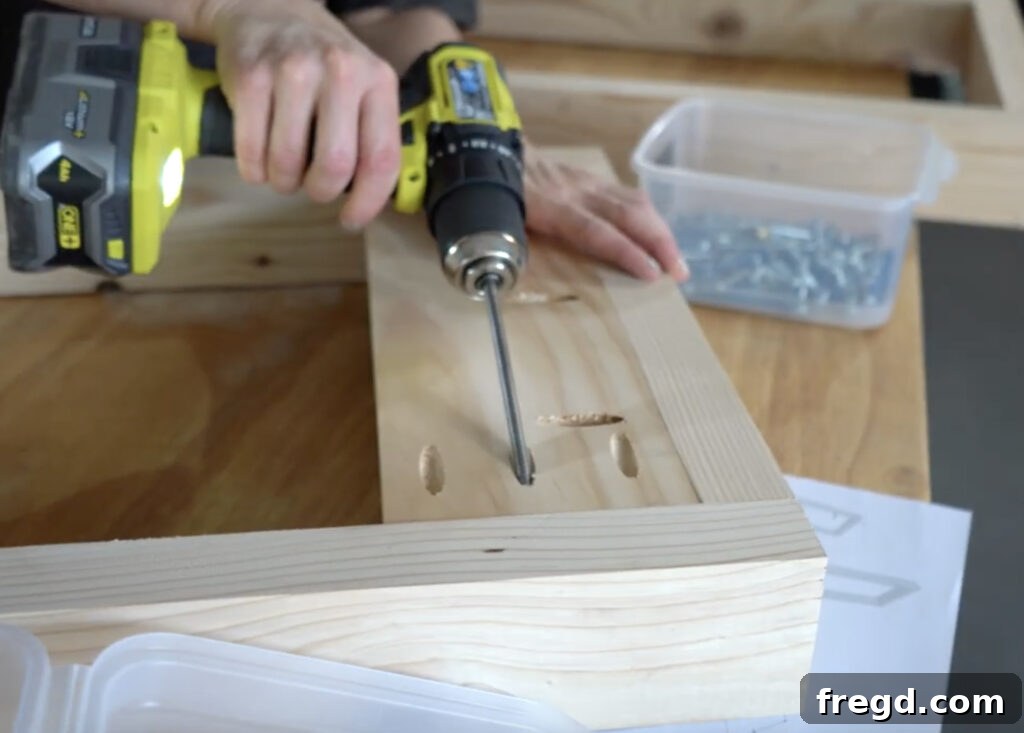
With your leg assemblies complete, it’s time to connect them with the side apron boards. These aprons provide structural rigidity and also begin to define the desk’s profile. Start with a 1×6 board and rip it down to 4 3/4 inches wide. This specific width is important for the aesthetic and functional design of the desk. Next, prepare these apron boards by adding 3/4-inch pocket holes to both short ends. Additionally, drill pocket holes along one of the long sides of the apron board.
Now, carefully attach these prepared side apron boards. Apply wood glue along the edges where the apron will meet the leg assemblies. Position each apron board flush with the inside edge of each leg assembly. Secure them in place using 1 1/4-inch pocket hole screws. The flush alignment ensures a seamless look and a strong, integrated structure. Double-check that the apron is level and square with the leg assemblies before fully tightening the screws.
4. Securing the Back Apron Board
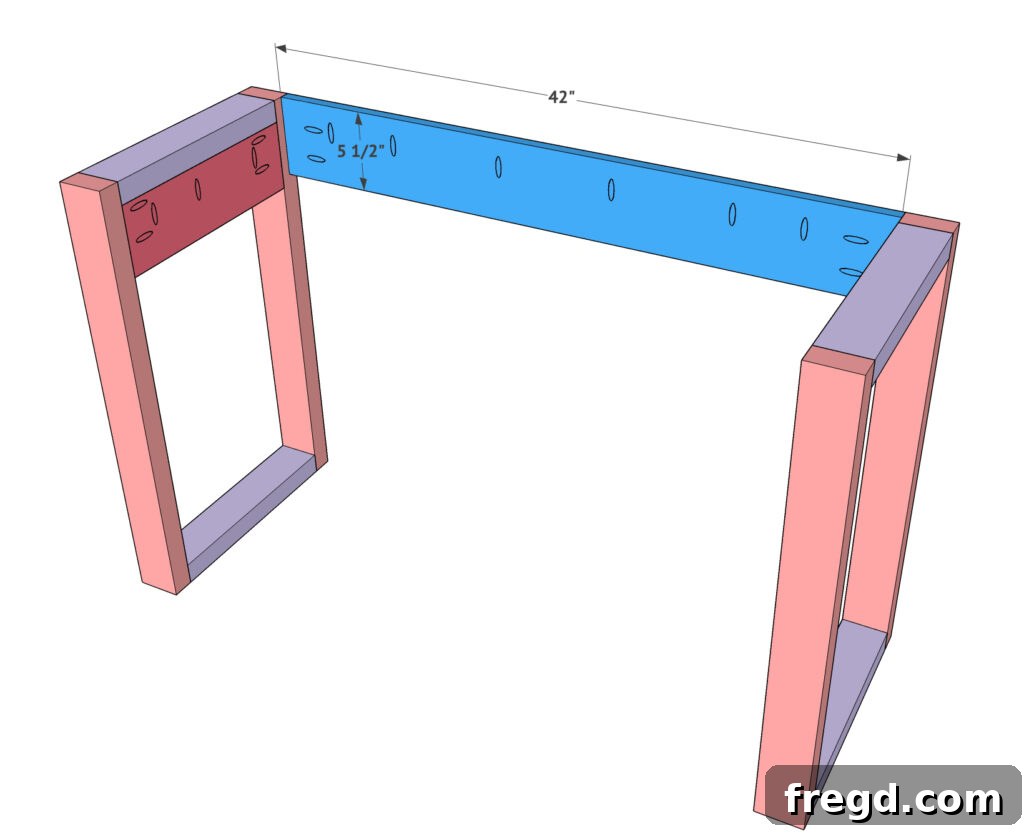
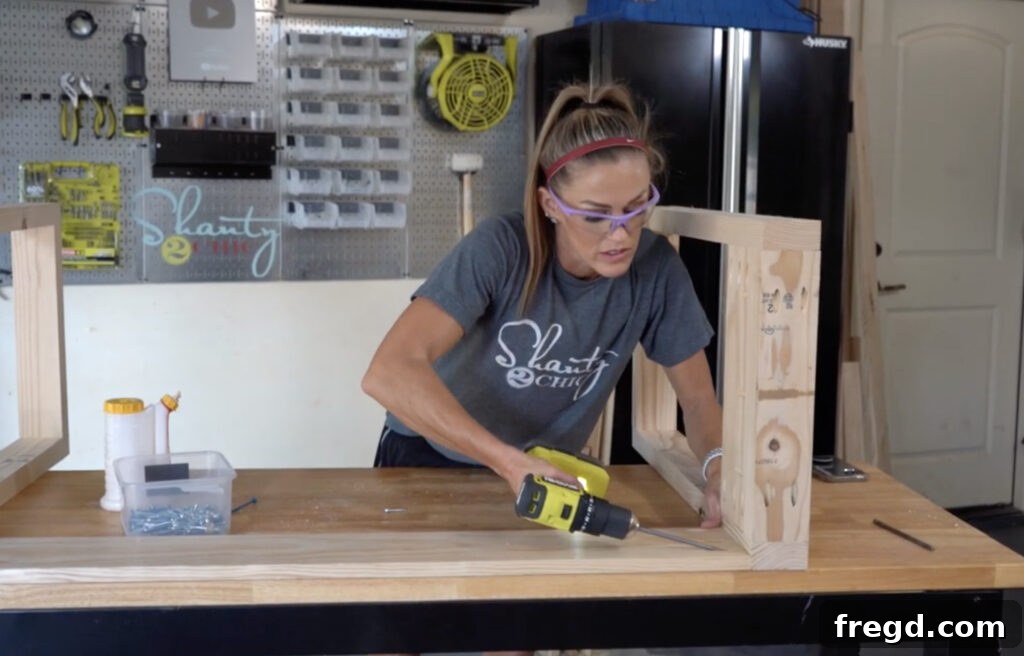
Once both side apron boards are firmly in place and your two leg assemblies are connected, the next crucial step is to attach the back apron board. This piece will further stabilize the structure and tie the entire desk frame together. Use another 1×6 board for this. Just like the side aprons, you’ll need to add 3/4-inch pocket holes to both short ends of this long apron board, and also along one of its long sides. These pocket holes will facilitate the hidden joinery that gives your desk a clean finish.
When attaching this board, it’s vital to position it precisely. The back apron board should be flush with both the top edge and the very back edge of each leg assembly. Apply wood glue to the mating surfaces before securing it with 1 1/4-inch pocket hole screws. An important tip for this step: ensure your pocket holes on the apron board are facing upwards or towards you. This orientation allows for easy access when driving the screws and keeps the finished underside of the desk smooth, ready for the tabletop. This strong connection will form the rear integrity of your desk frame.
5. Installing the Middle Support Board
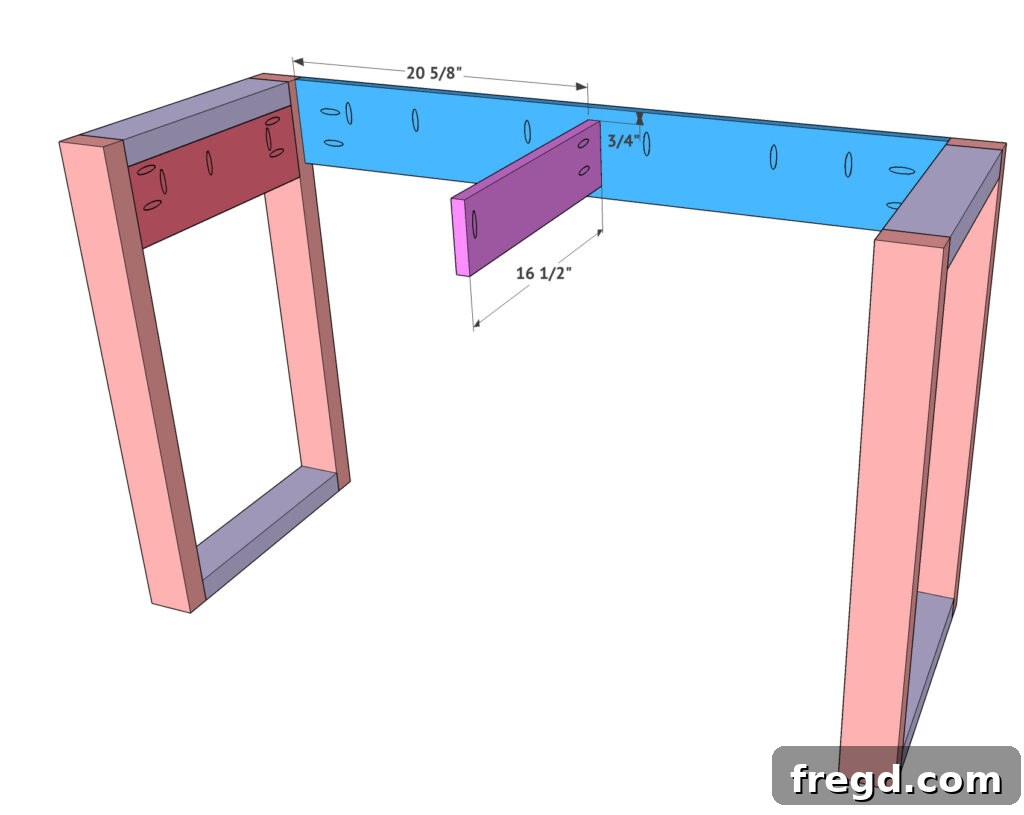
To provide additional rigidity and to prepare the internal structure for your drawers, you will now add the middle support board. This board is also ripped from a 1×6, ensuring consistent material thickness throughout the desk frame. For the pocket holes, you’ll need to be strategic: add a 3/4-inch pocket hole on one short side, and then add another 3/4-inch pocket hole on the opposite short side, ensuring this second pocket hole faces the opposite direction. This specific orientation allows for strong, hidden attachments from different angles.
Carefully align this middle support board in the exact center of the middle apron board. Apply wood glue generously to the mating surfaces to create a lasting bond. Then, secure the board in place using 1.25-inch pocket hole screws. This central support is crucial for distributing weight evenly and reinforcing the overall frame, making your desk exceptionally sturdy and durable. Ensure it is perfectly centered and level before the glue sets.
6. Reinforcing with the Front 1×2 Support Board
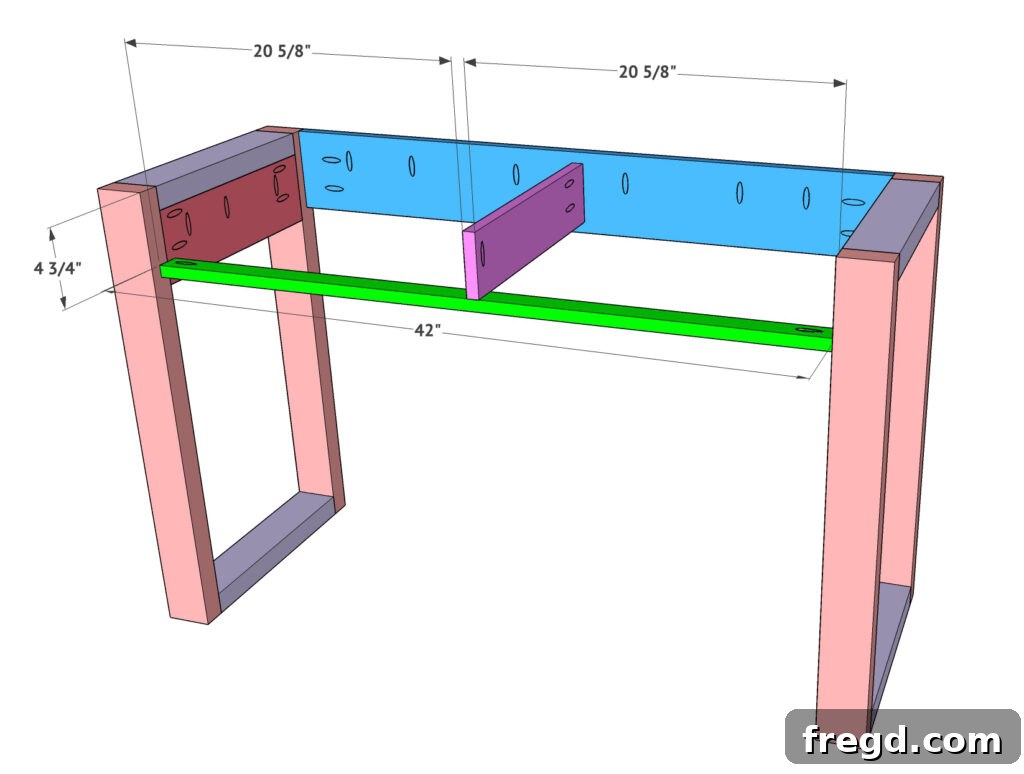
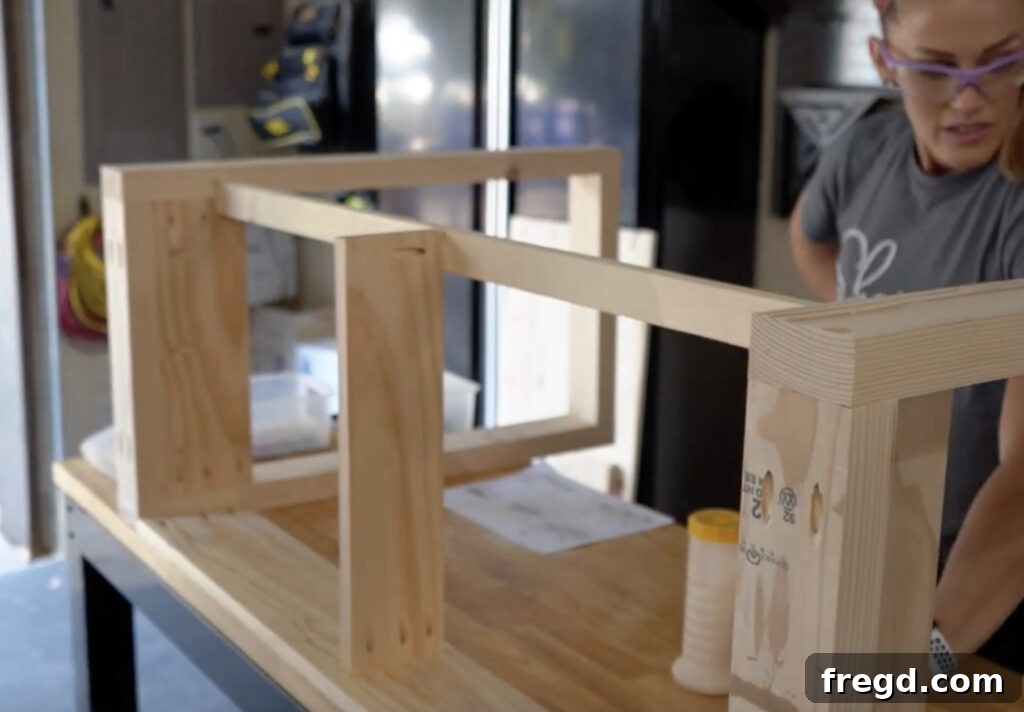
The next step is critical for defining the front of your desk and establishing the framework for your drawers. You will add a 1×2 support board along the front of the leg assembly. This seemingly small piece plays a significant role in both structural integrity and functional design. Begin by adding 3/4-inch pocket holes on each end of this 1×2 board.
With pocket holes prepared, attach the 1×2 board securely to the front of the leg assemblies using 1.25-inch pocket hole screws. Ensure it is level and flush across the front. Crucially, you will also connect the previously installed middle support board to this new 1×2 board. Apply wood glue to the joint and then secure it with one 3/4-inch pocket hole screw. This connection not only adds tremendous strength to the front structure but also perfectly frames the openings where your drawers will eventually slide, creating a robust and precise foundation for their operation.
7. Constructing the Drawers: Functionality Meets Simplicity
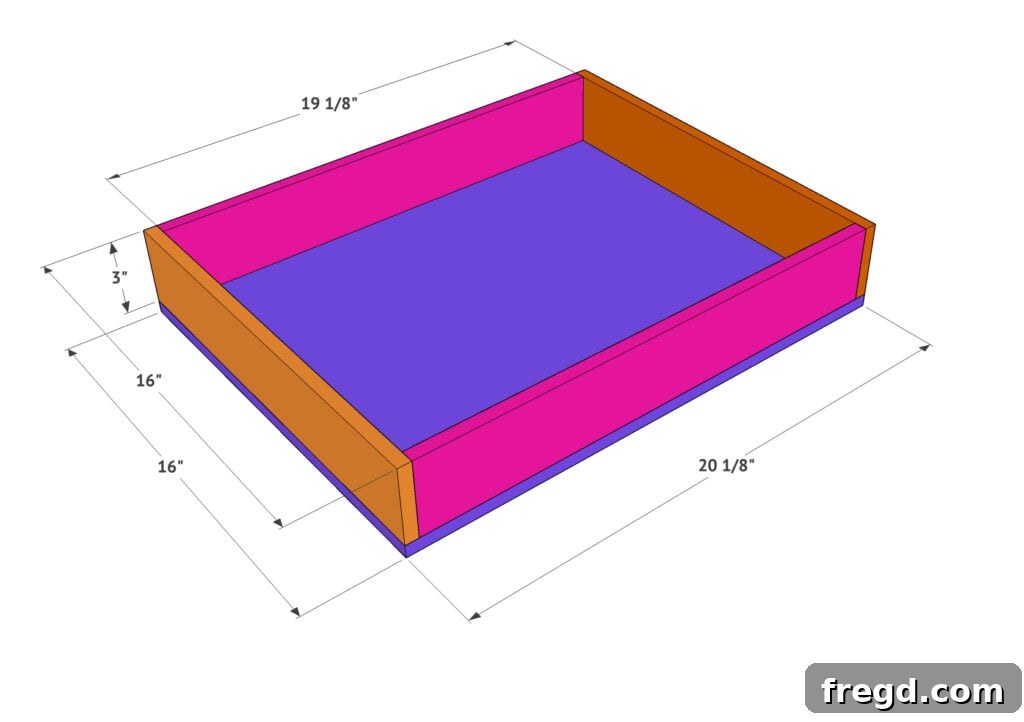
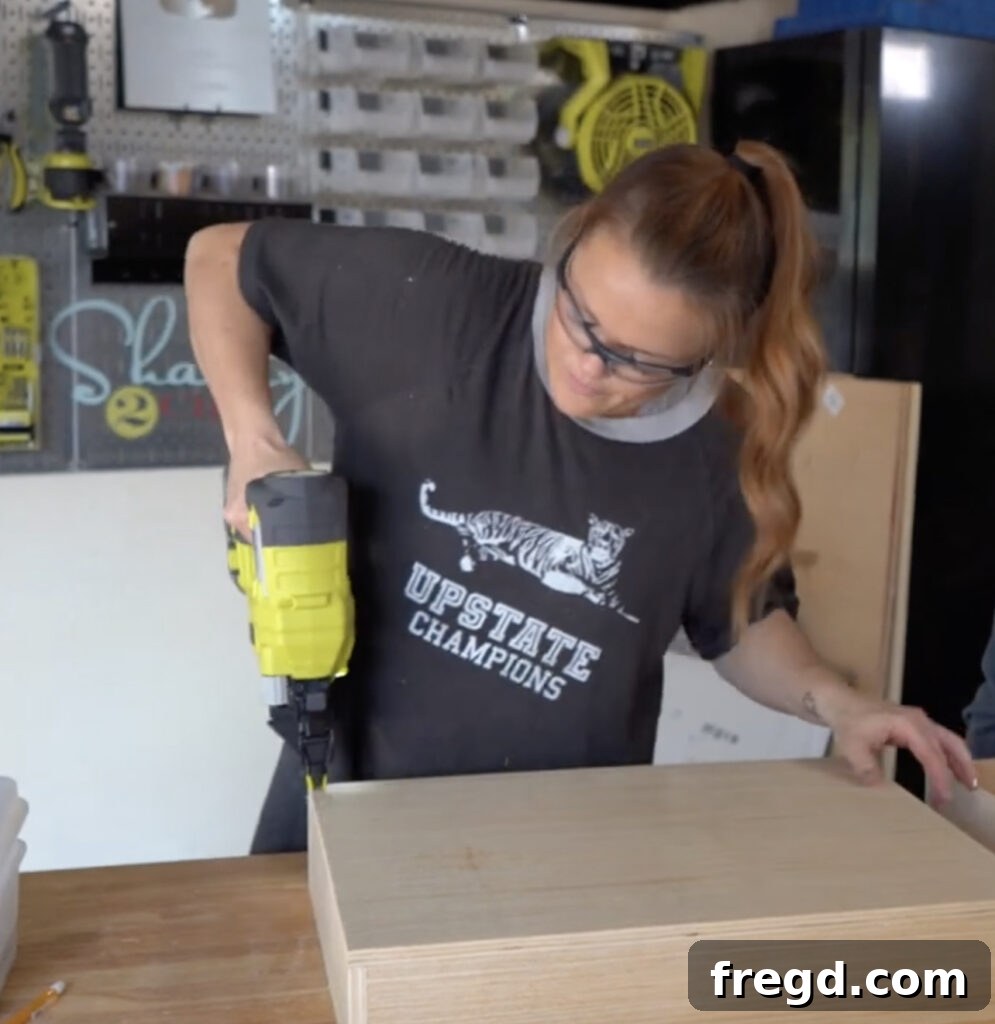
Now for the heart of your desk’s storage: the drawers! You’ll be pleased to know that both drawers can be efficiently built from a single 2×4 sheet of 1/2-inch plywood, making this a very material-friendly project. Start by cutting your plywood pieces for the drawer sides and fronts/backs according to the plans. For each drawer, you will first build its frame by attaching the corners. Apply a good amount of wood glue to each joint before securing them with 1.25-inch brad nails. Use at least two brad nails in each corner to create a strong, square frame. Brad nails are excellent here for holding pieces together while the glue dries, providing a robust joint.
Once you have the frame for a drawer assembled, it’s time to add the base. Apply a consistent bead of wood glue around the bottom edges of the drawer frame. Then, carefully position the plywood base onto the glued edges. Secure the base by driving 1.25-inch brad nails through the drawer base and into the side frames. Ensure you nail all around the perimeter of the base, creating a solid and durable drawer box. Repeat this process for the second drawer, ensuring both are identical and built to last.
8. Installing Drawer Slides: Smooth Operation
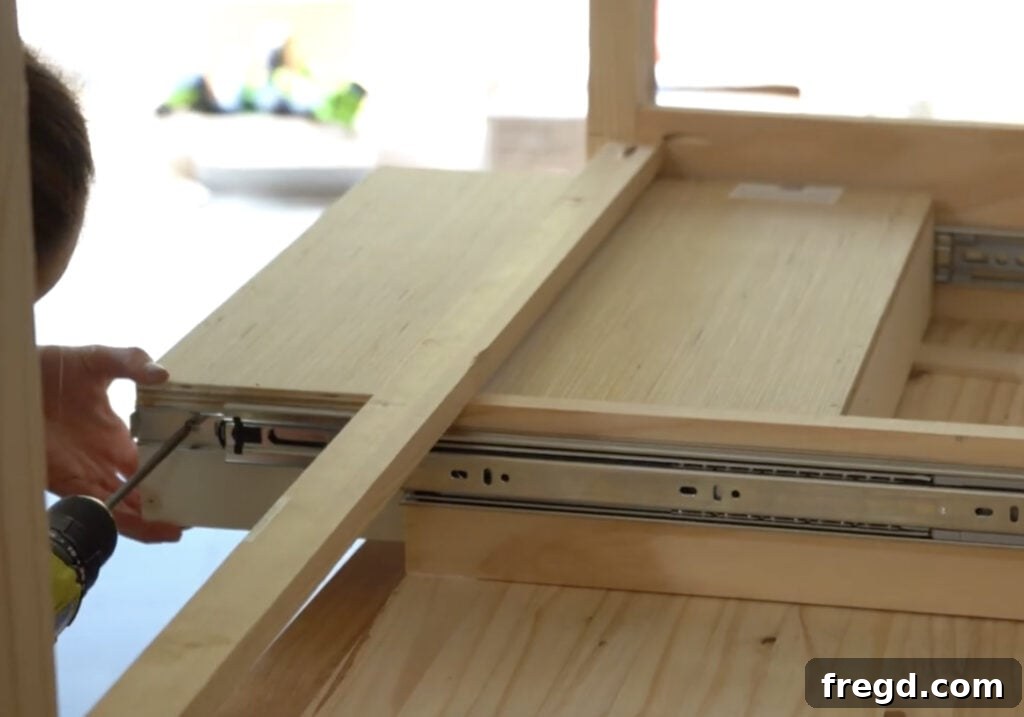
With your drawers built, the next step is to integrate them smoothly into your desk frame using drawer slides. The choice of drawer slides can significantly impact the functionality and feel of your desk, so opt for a quality set. We used a particular type of slide for this desk, which you can investigate further here (replace with specific product link if available). Carefully follow the manufacturer’s instructions for your chosen slides, as installation methods can vary slightly.
Generally, you will attach one part of the slide mechanism to the insides of the drawer frames (the upright supports) and the corresponding part to the sides of your newly built drawers. Ensure that both sets of slides are perfectly level and parallel to each other. Precise alignment at this stage is crucial for drawers that open and close effortlessly without sticking or wobbling. Take your time to measure and mark accurately before screwing the slides into place. A well-installed drawer slide system truly elevates the user experience of your custom desk.
9. Attaching the Project Panel Top: The Desk Surface
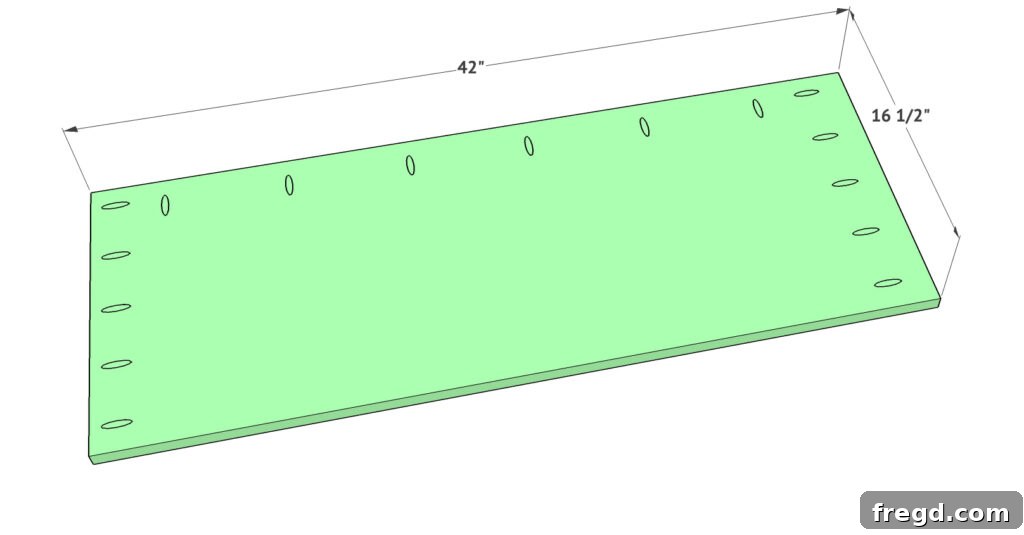
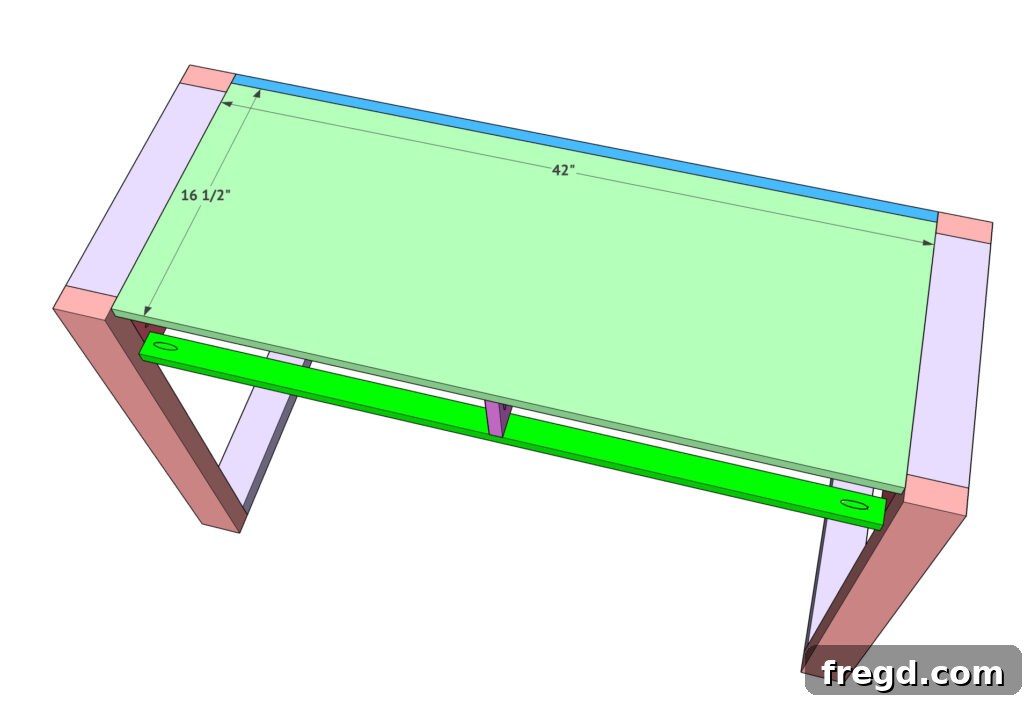
Now comes one of the most exciting parts: adding the desk’s surface! For this, we used a project panel top, which offers a smooth, stable, and ready-to-finish surface. Begin by preparing the project panel. You’ll need to drill 3/4-inch pocket holes along both of the shorter sides of the panel. Additionally, create more 3/4-inch pocket holes along the backside of the project panel. These pocket holes will be crucial for securely attaching the top without visible fasteners on the finished surface.
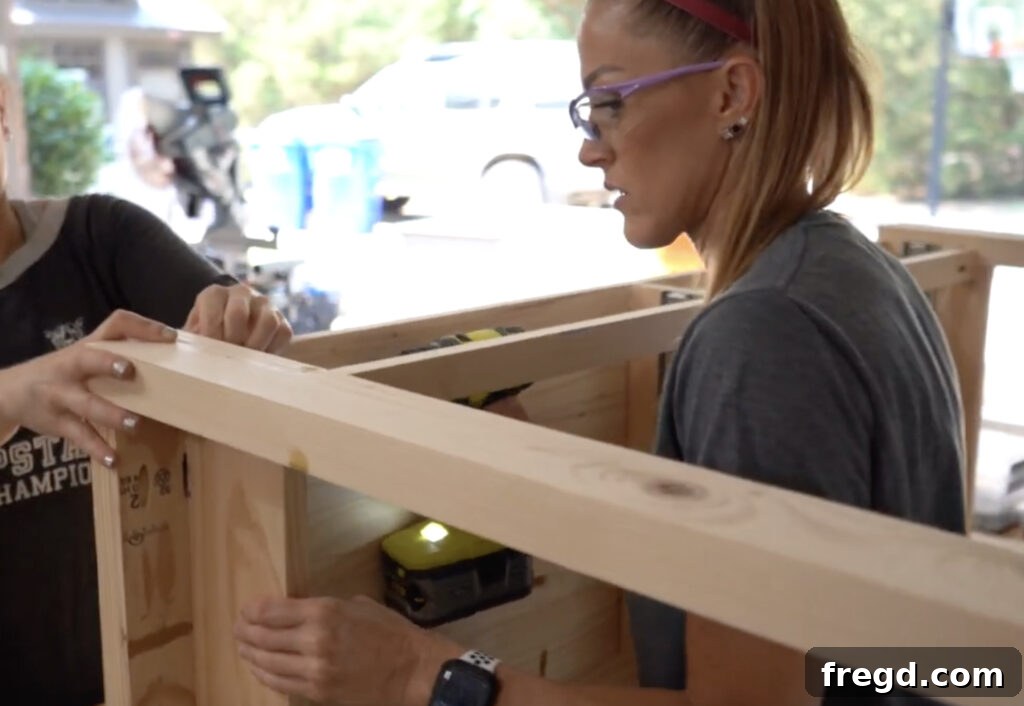
Carefully position the project panel onto your assembled desk frame. Ensure it is perfectly flush with the top of your leg assemblies and also flush with the back apron board. This precise alignment is key to a professional-looking finish. Once the panel is correctly positioned, apply wood glue to the top edges of the desk frame where the panel will sit. Then, secure the panel in place by driving 1.25-inch pocket hole screws through all the pocket holes you created and into the desk frame below. This combination of glue and screws creates an incredibly strong and stable desktop that is ready for all your work, play, or therapy needs.
10. The Final Touch: Adding Drawer Faces
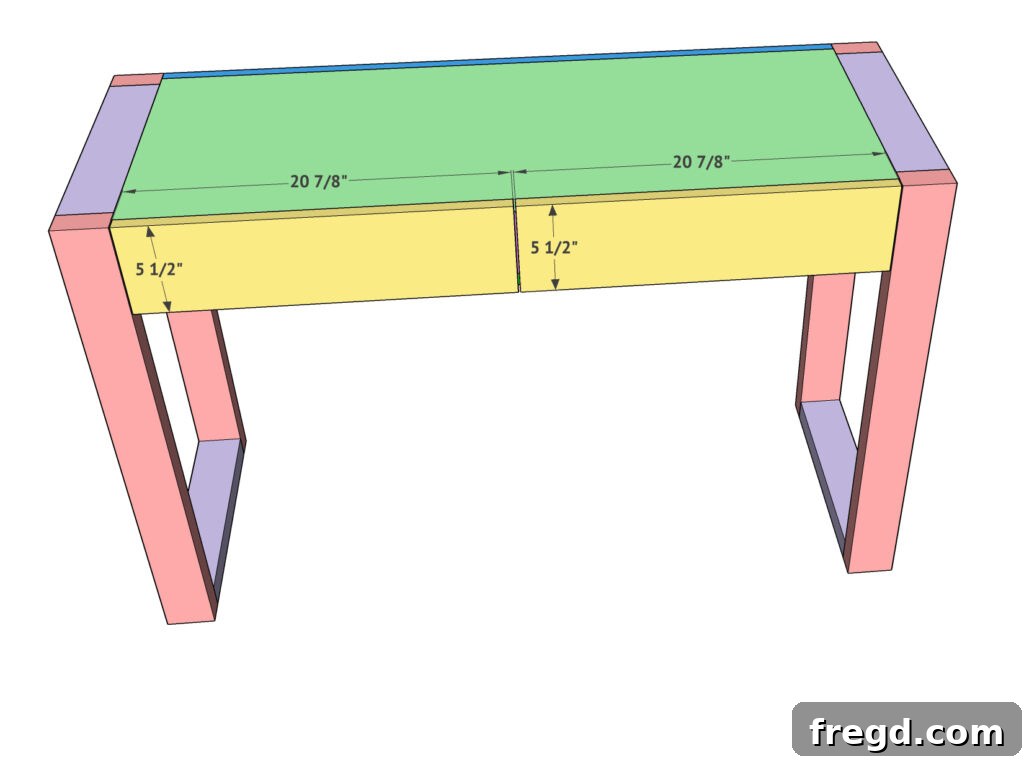
The final structural step in this build is attaching the drawer faces, which are essentially the decorative front panels of your drawers. These are typically 1×6 boards cut to size, designed to fit perfectly over the drawer boxes you built earlier. The drawer faces are what guests will see, so take your time with this step to ensure precise alignment and a flawless finish.
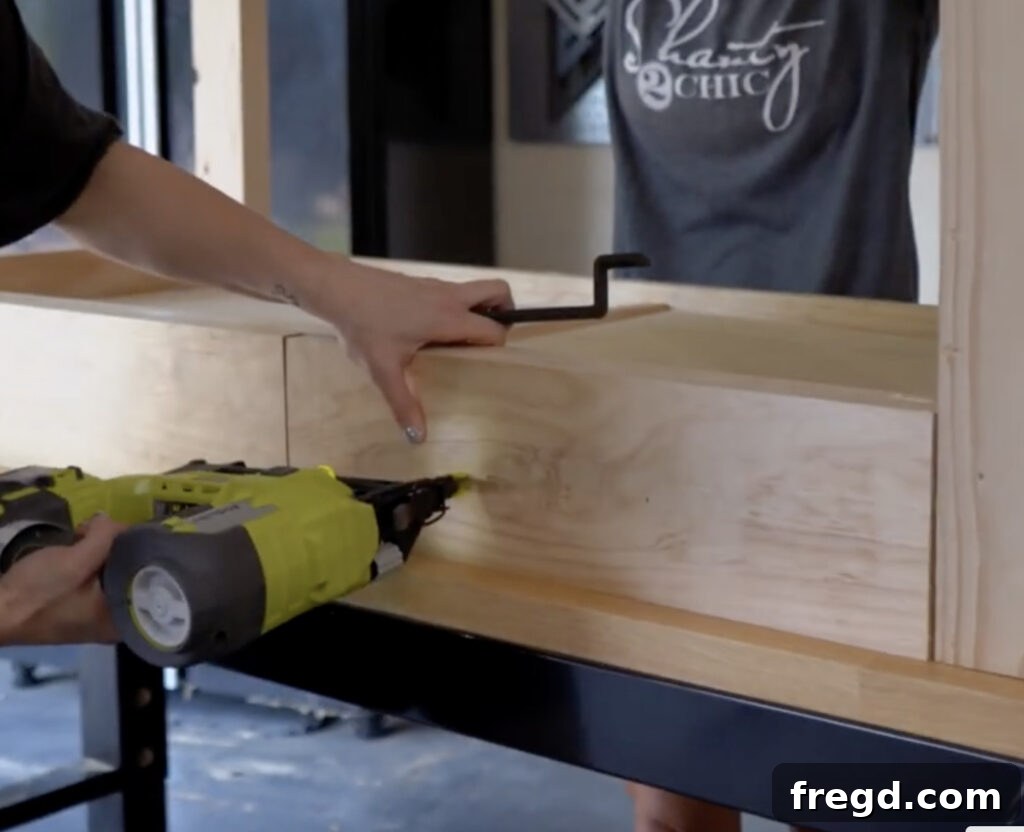
Start by applying wood glue to the front of your drawer box where the face will attach. Carefully position the drawer face in place, ensuring it is centered and has even gaps around its perimeter relative to the desk frame. A helpful trick is to use a few small pieces of painter’s tape or shims to hold it perfectly in position. Then, temporarily nail the drawer face in two inconspicuous spots from the front. Choose areas that you know will be easy to cover later with wood filler or paint, or where your drawer pulls will eventually be installed.
Once the drawer face is temporarily secured, gently open the drawer. From the inside of the drawer box, drive screws or nails through the drawer box and into the back of the drawer face. This creates a strong, permanent bond that will withstand years of use. This two-step attachment method ensures that the drawer face is both beautifully aligned from the outside and incredibly strong from the inside. Repeat for all drawers.
Finishing Your Custom Desk: Paint, Stain & Personality
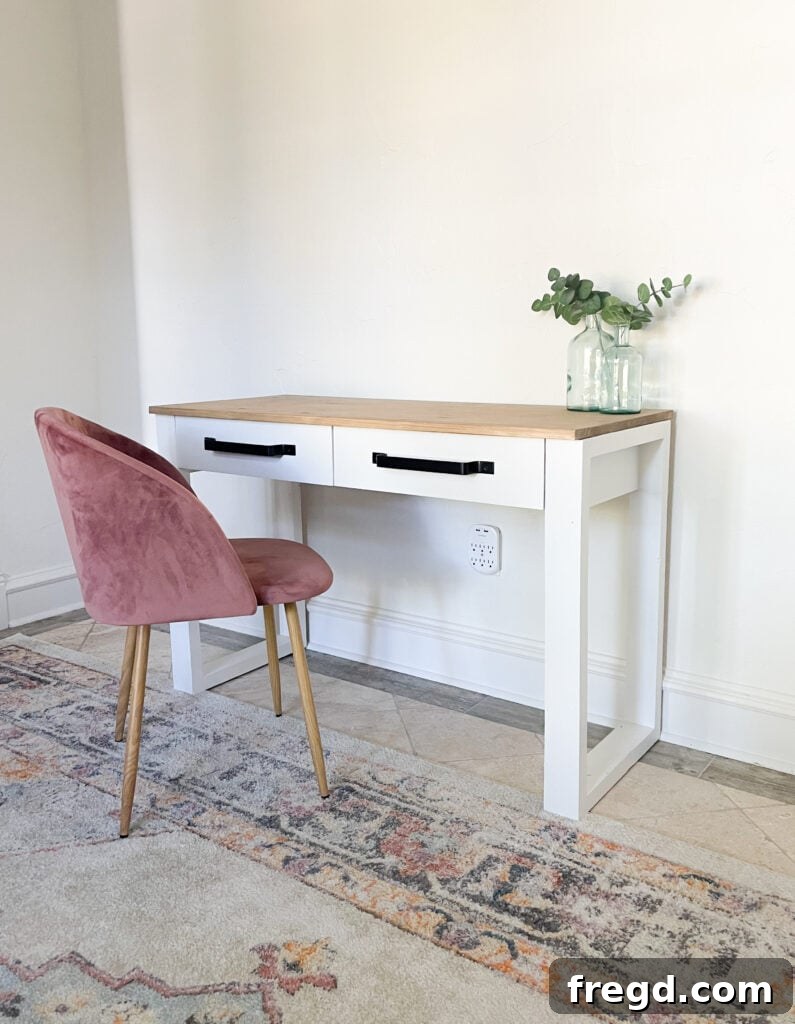
With the construction complete, it’s time to bring your desk to life with color and character! The finishing touches are where your personal style truly shines through. For my desk, I opted for a crisp and timeless aesthetic. I decided to paint the main body of the desk using one of my absolute favorite shades: Pure White by Sherwin-Williams. This classic white provides a clean, bright foundation that instantly freshens any space. I applied two thorough coats of paint, ensuring complete coverage and a durable finish that will stand up to daily use. Proper prep, including sanding and priming, is key before painting to achieve such a smooth and lasting result.
For the desktop, I envisioned a contrasting, warm, and rich look. Instead of painting the top as initially considered, I chose to stain it. To achieve a unique and custom hue that I absolutely adore, I combined two different Varathane stains: Willow Gray and Golden Oak. By mixing equal parts of each color, I created a beautifully balanced stain that offers depth and character, providing a lovely counterpoint to the bright white base. The staining process involved applying the mixture evenly and then wiping away the excess to reveal the wood grain beneath, allowing its natural beauty to show through.
Initially, I had a single project panel for the top. However, to achieve a perfectly uniform look with my chosen stain and ensure a seamless, expansive workspace, I ended up adding an additional project panel. This decision was purely a matter of style and personal preference, allowing me to achieve the specific stained finish I desired. Both single or double panel approaches work perfectly fine; either way, you will have a flush desktop. It truly comes down to your aesthetic goals and how you envision your finished desk.
Elevating the Details: Drawer Pulls and Room Accessories
No desk is truly complete without the perfect hardware! The right drawer pulls can transform the entire look and feel of your furniture. For this desk, I found these stunning drawer pulls on Amazon, and I couldn’t be happier with them! You can see them here! These are genuinely some of my favorite handles; their design adds so much character and a touch of elegance to the desk, making it feel bespoke and high-end.
Beyond the desk itself, creating a cohesive and inviting multi-functional room involves carefully selecting complementary pieces. My desk chair is another fantastic find from Amazon, priced at an incredible $100! It’s not only incredibly comfy and soft but also comes in a lovely color that ties the whole room together. An ergonomic and stylish chair is essential for any office setup, and this one delivers on all fronts. You can find it here on Amazon!
To ground the space and add a layer of warmth and texture, I chose a beautiful rug from Boutique Rugs. This was actually the very first piece I picked out for the room, setting the tone for the entire design. Its pattern and colors instantly caught my eye and perfectly complement the desk and other elements. You can find it here on their website! And here’s a special treat for you: be sure to use code S2C60 at checkout to get an amazing 60% off your rug purchase, plus free shipping! It’s an incredible deal to help you complete your own dream space.
What’s Next? Expanding Your Custom Workspace!
This desk project is merely the first chapter in our dining room transformation! As mentioned earlier, I’m eagerly planning to build two matching storage towers that will sit on either side of this desk. These towers will not only provide essential storage but also create a beautifully integrated and symmetrical workspace, perfect for maximizing functionality in my office, playroom, and therapy room. I can’t wait to share the plans and the entire build process for these towers with you in the coming weeks. Stay tuned to see the complete, cohesive setup!
Imagine a space where every item has its place, where work flows smoothly, and where creative play and therapeutic sessions can unfold without clutter. That’s the vision for this room, and these towers are a crucial next step. We’ll be detailing how to construct them to perfectly complement your new desk, adding both form and incredible function to your multi-purpose area.
Conclusion: Your Dream Desk Awaits!
Thank you so much for joining us on this exciting DIY journey. We truly hope this detailed guide empowers you to build your very own custom home office desk. There’s immense satisfaction in creating something beautiful and functional with your own hands, and this desk project offers that reward in spades. Whether you’re setting up a dedicated workspace, a creative playroom, or a tranquil therapy area, a custom-built desk provides unparalleled flexibility and style.
Don’t hesitate to reach out if you have any questions at all about the build process, tools, or finishes. We love hearing from you and seeing your projects come to life! Be sure to follow us on social media for more DIY inspiration, tips, and updates on our upcoming projects, including those matching storage towers. Happy building, and may your new custom desk bring you joy and productivity for years to come!