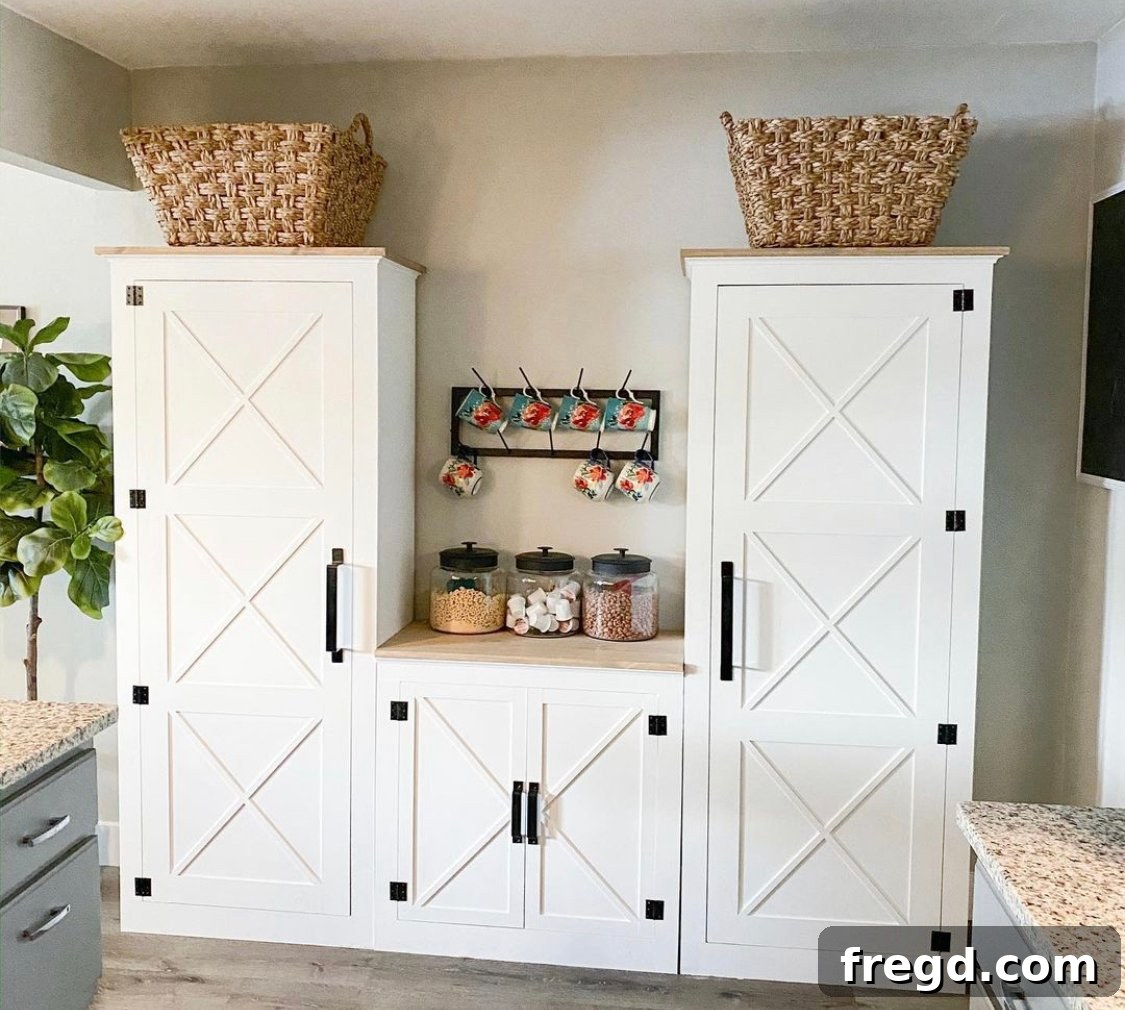
Welcome, fellow DIY enthusiasts! Many of you followed along as I crafted the incredible DIY Pantry System for my sister’s home, a project that transformed her kitchen storage. What makes this system truly special is its modular design, allowing you to tailor each component to perfectly fit your unique space and organizational needs. Today, I’m thrilled to share the detailed build plans for a crucial part of that system: the versatile table-height cabinet. This piece seamlessly complements the taller pantry units, creating a cohesive and highly functional storage solution. Yet, its elegant design and practical size also make it an ideal standalone cabinet, perfect for entryways, living rooms, or home offices. Before we dive into the step-by-step instructions, be sure to watch the comprehensive YouTube video below to visualize each phase of this exciting project!
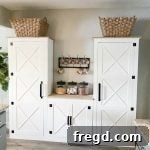
I absolutely adore the final look of this table-height cabinet. It’s not just a storage unit; it’s a statement piece that combines rustic charm with modern functionality, offering ample space while enhancing the aesthetic of any room. The “X” detailing on the doors adds a sophisticated touch, making it appear far more custom and high-end than a typical DIY project. This cabinet is designed to be sturdy, durable, and incredibly versatile, providing endless possibilities for decluttering and organizing.
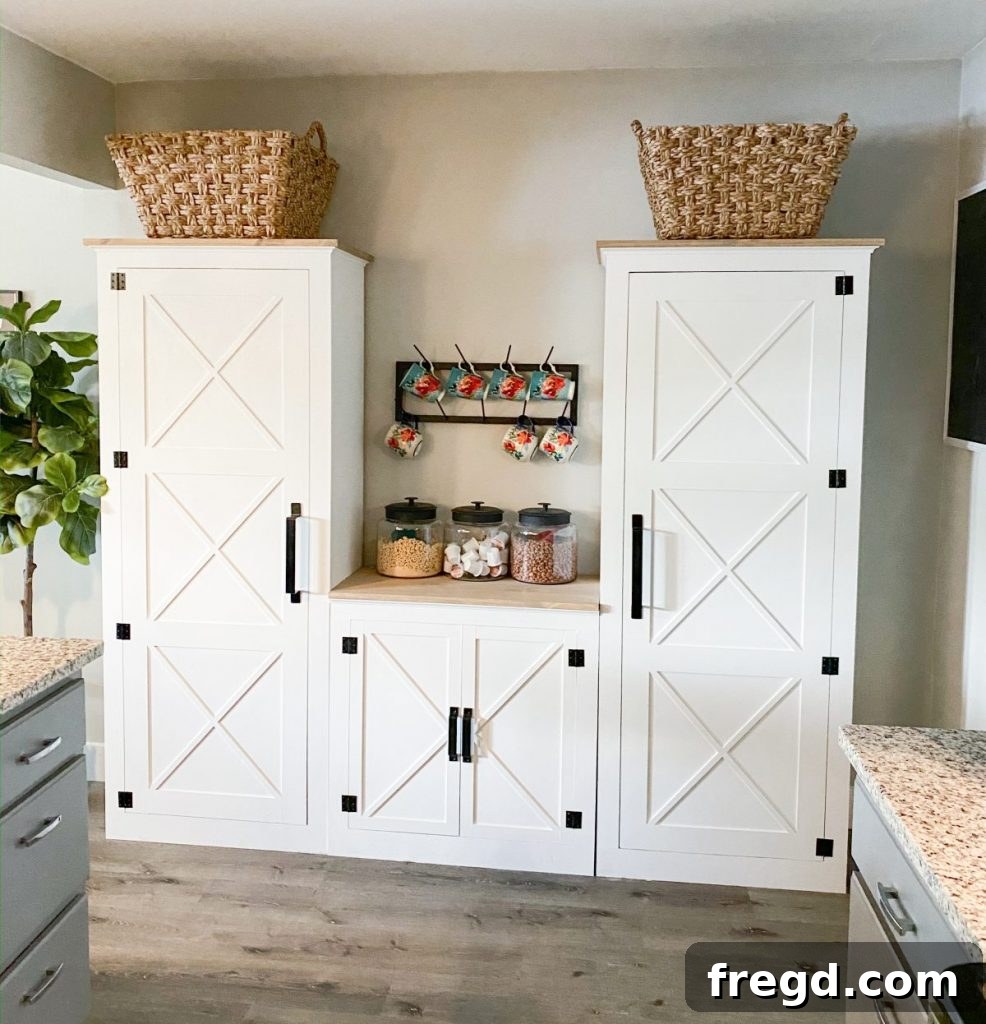
Building the Core Structure: A Robust Cabinet Body
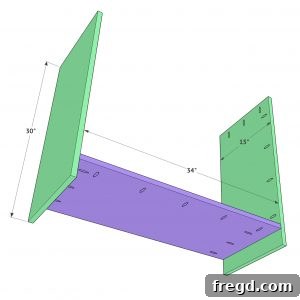
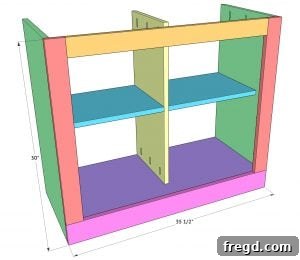
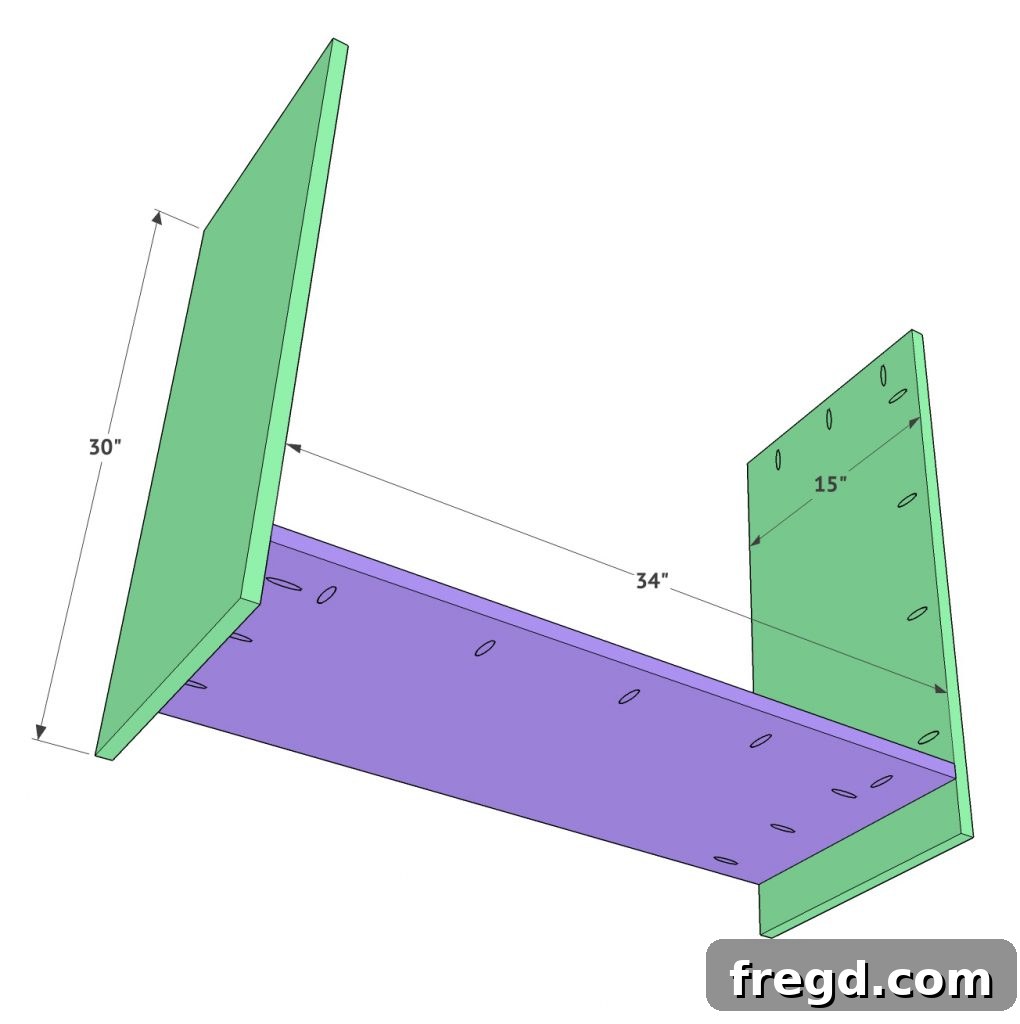
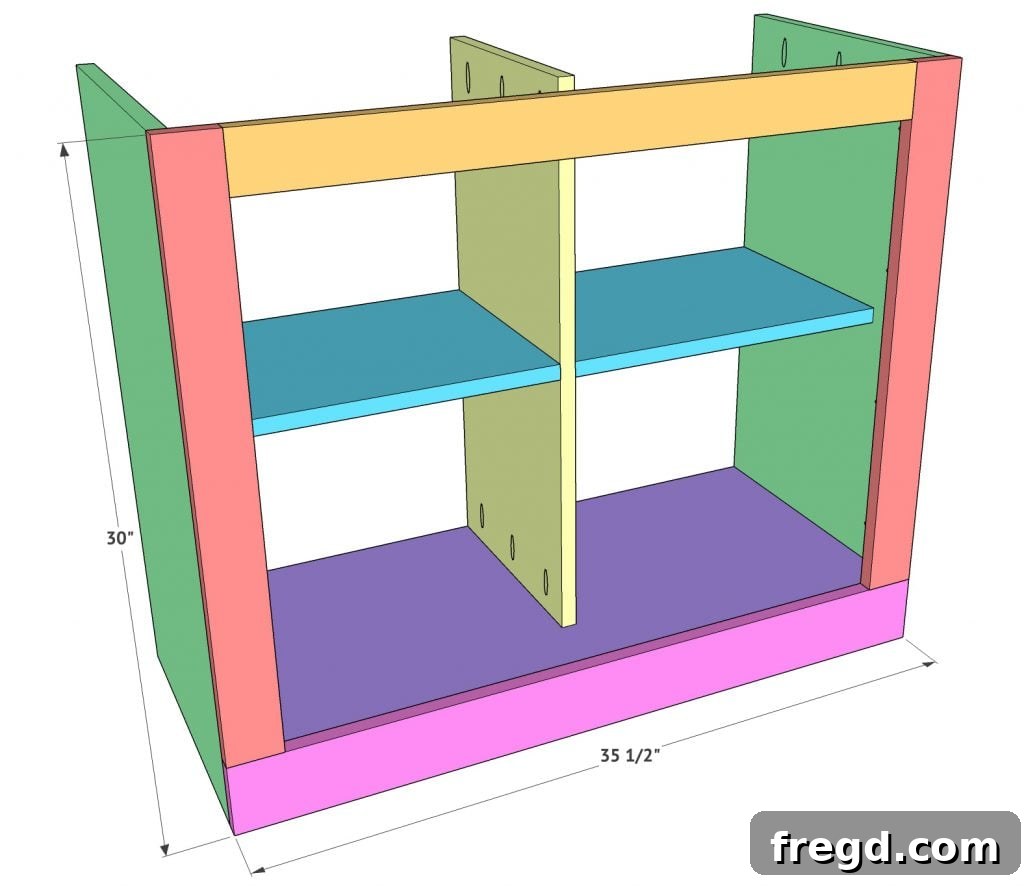
The journey to your perfect table-height pantry cabinet begins with constructing the main body. For this, we’ll use 3/4” hardwood plywood, a material chosen for its strength and stability, ensuring your cabinet stands the test of time. Measure and rip your plywood boards to a precise 15” width. If you don’t have access to a table saw or prefer to save time, most hardware stores offer a convenient cutting service, which can be incredibly helpful for transporting large sheets of plywood. Once your boards are cut, prepare them for assembly by adding 3/4” pocket holes to both sides of the main panels and along the edges of the base piece. These pocket holes are essential for creating strong, concealed joints. Align the base piece 2.75” from the bottom of the side panels. This specific placement lifts the cabinet slightly, giving it a more finished look and providing clearance. Securely attach the base to both sides using a generous line of wood glue for extra reinforcement and 1.25” pocket hole screws driven through your pre-drilled pocket holes. Ensure all connections are tight and square for a stable foundation.
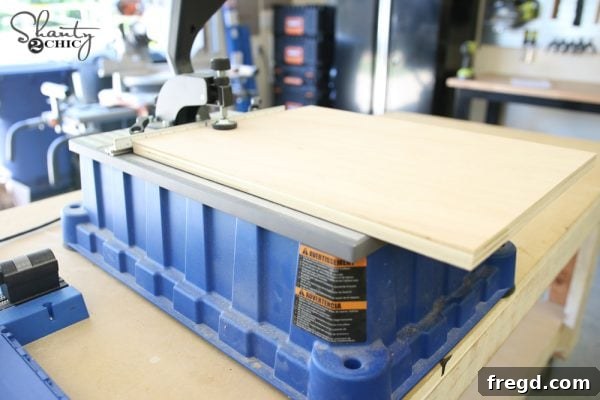
Essential Tools for Precision Joinery: Kreg Jigs
For this project, I relied heavily on my Kreg Foreman. This tool is a powerhouse for pocket hole joinery, especially beneficial for larger builds like this pantry cabinet. It operates much like a drill press, allowing for rapid and precise pocket hole drilling, significantly speeding up the assembly process without compromising accuracy. The Kreg Foreman produces the same high-quality pocket holes as other Kreg models but in a fraction of the time, making it an invaluable asset for serious DIYers and professionals alike.
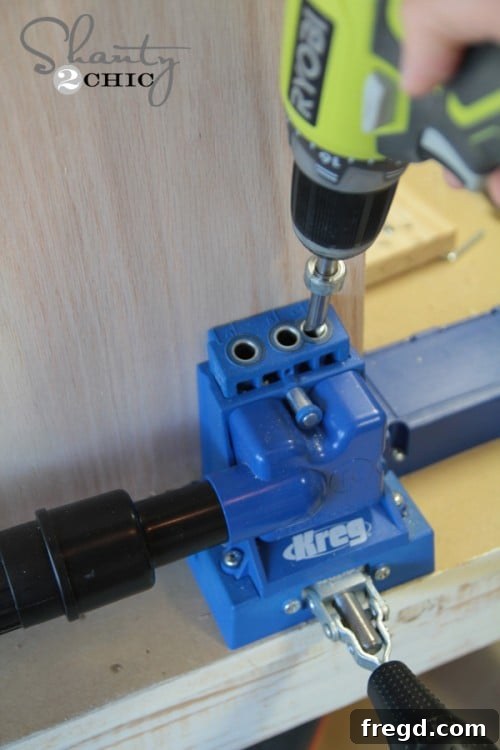
However, if you’re not planning extensive large-scale woodworking, are building for personal use, or need a more budget-friendly option, the Kreg Jig K5 is an excellent alternative. The K5 is incredibly versatile and perfect for a wide range of projects, from small crafts to substantial furniture pieces. It offers exceptional precision and ease of use, making it a favorite among both beginner and experienced woodworkers. Both Kreg jigs empower you to create strong, durable, and professional-looking joints, which are fundamental to the structural integrity of your cabinet.
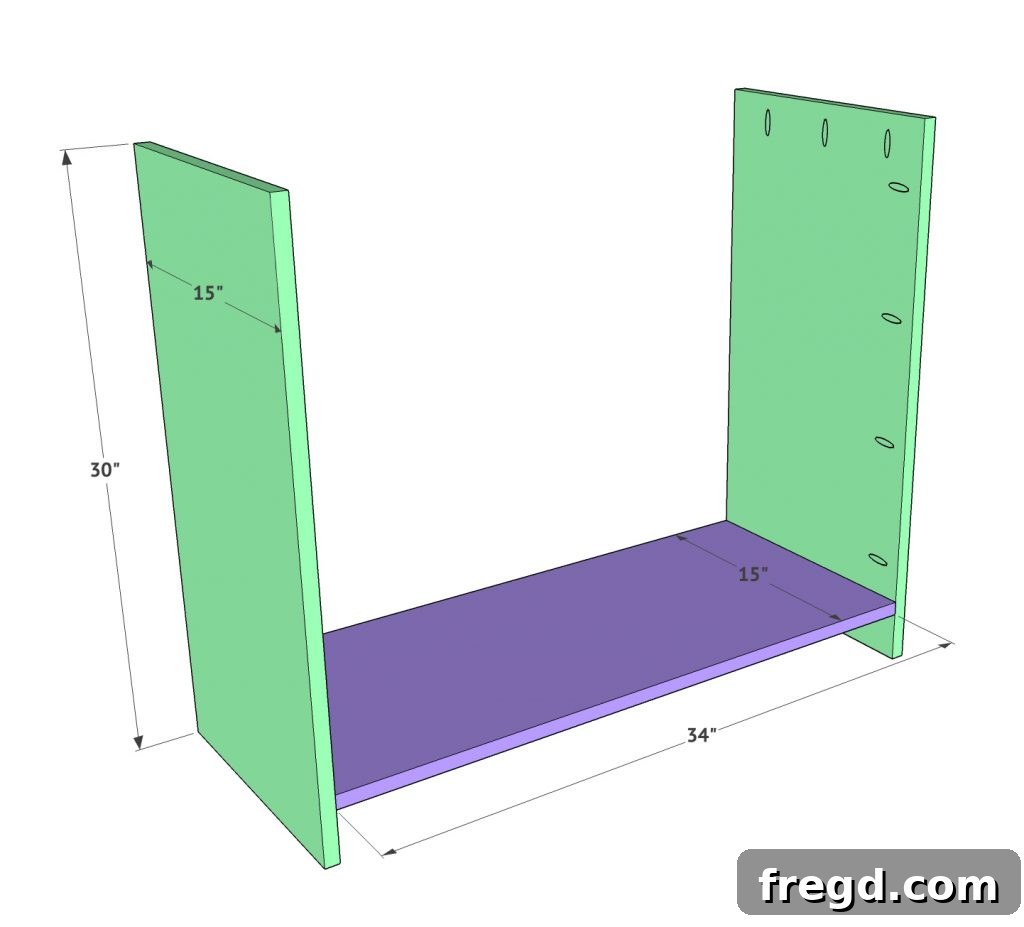
Adding Internal Structure: The Middle Divider
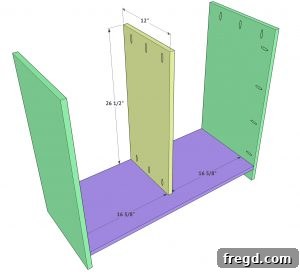
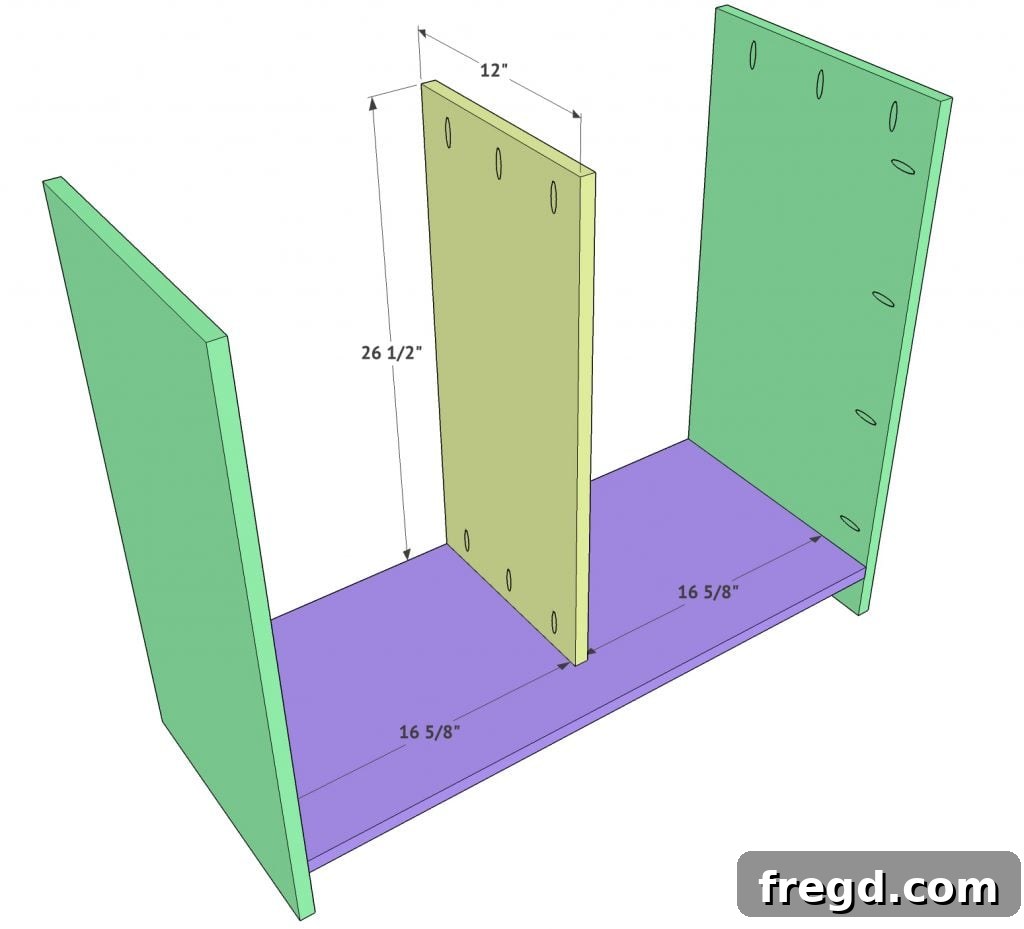
Once the main body is assembled, the next step is to install the middle divider. This piece is crucial for creating separate compartments within your cabinet, offering enhanced organization and structural support. Just like the main body panels, drill 3/4” pocket holes into both the top and bottom edges of this divider board. Apply wood glue along the edges where it will meet the base board, then carefully position it in the precise center of the bottom board. Secure it firmly with 1.25” pocket hole screws. This central divider ensures that your cabinet will be robust and well-equipped to handle various items, from kitchen essentials to office supplies.
Crafting the Face Frame: The Cabinet’s Aesthetic Front
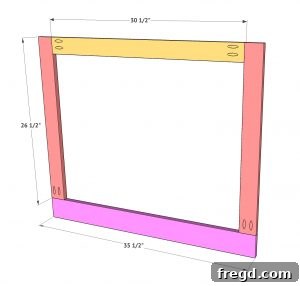
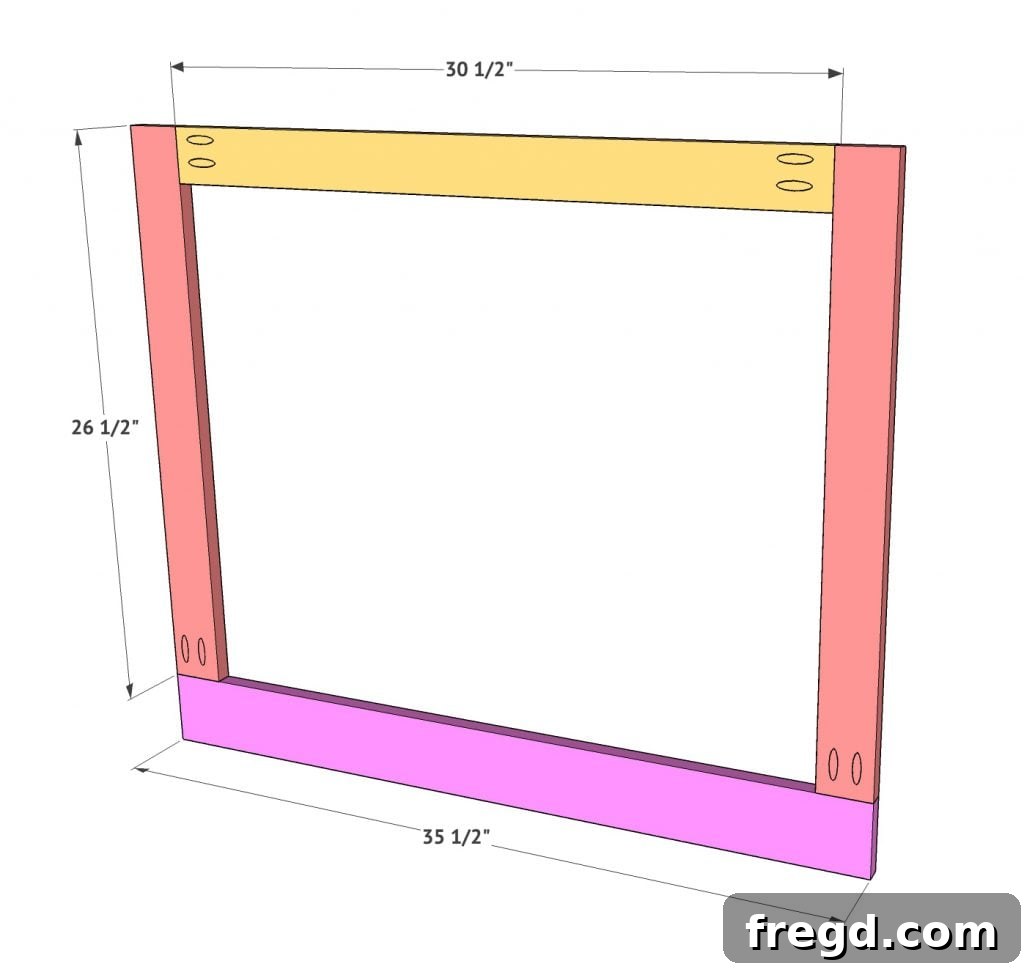
The face frame is an essential component, providing both structural rigidity and a finished, professional appearance to your cabinet. Begin by preparing the individual pieces: the bottom board will be a 1×4, while the side and top boards will be 1x3s. This variation in width creates a visually appealing proportion. Drill 3/4” pocket holes on both ends of the top board and one end of each side board. Apply wood glue to all mating surfaces, then assemble these pieces to form a perfect rectangle. Secure the joints with 1.25” pocket hole screws. Pay close attention to ensure all corners and sides are perfectly flush; this precision is key to a high-quality finish and proper door fitment later on.
Installing Functional Shelves for Optimal Storage
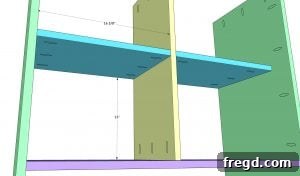
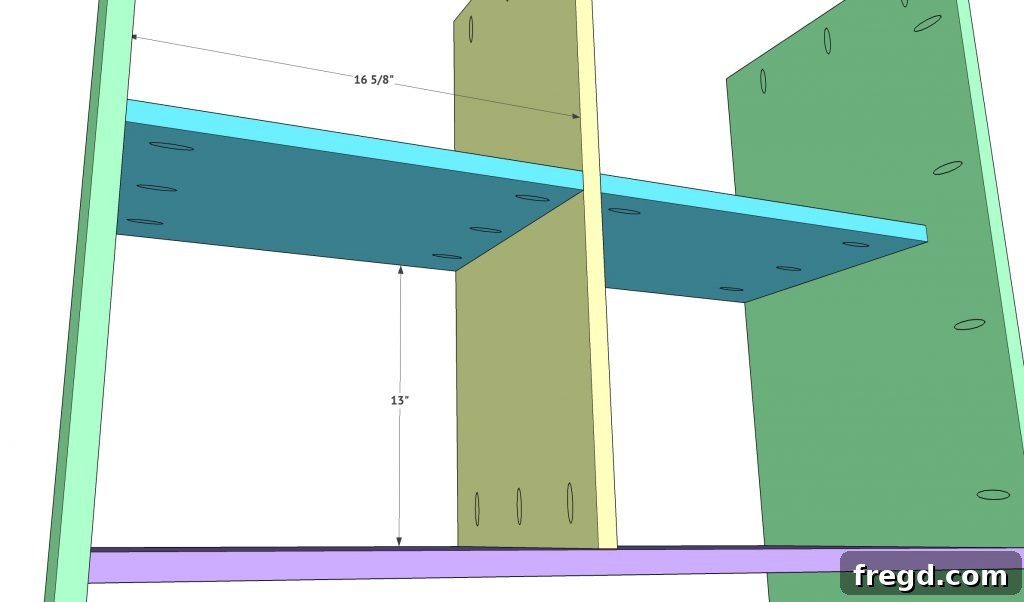
Before you attach the face frame, it’s critical to install the interior shelf boards. This allows for easier access and ensures precise placement. The shelf boards are also 12” deep, matching the middle divider, which helps maintain a consistent interior depth. I positioned my shelves 13” from the base, but this is a fantastic opportunity to customize your cabinet! Consider your specific storage needs—whether you need taller spaces for bottles or smaller compartments for linens—and adjust the shelf height accordingly. Attach the shelves to both the cabinet sides and the middle divider using wood glue and 1.25” pocket hole screws through the 3/4” pocket holes you’ve drilled. Securely fastening these shelves ensures they can hold substantial weight without sagging.
Finalizing the Cabinet Structure: Attaching the Face Frame and Top
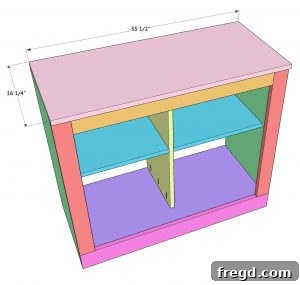
With the shelves in place, it’s time to attach the face frame. This is a crucial step for both the structural integrity and the aesthetic appeal of your cabinet. Carefully align the face frame with the front edges of the cabinet body, ensuring all sides and the base are perfectly flush. Use wood glue along the contact points for a strong bond, and then secure the face frame using 1.25” pocket hole screws driven through the 3/4” pocket holes on the cabinet body. A flush fit here is essential for a professional look and for the smooth operation of the doors.
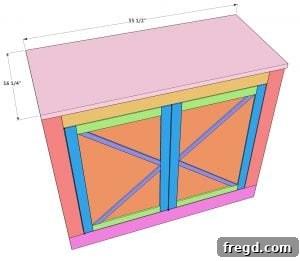
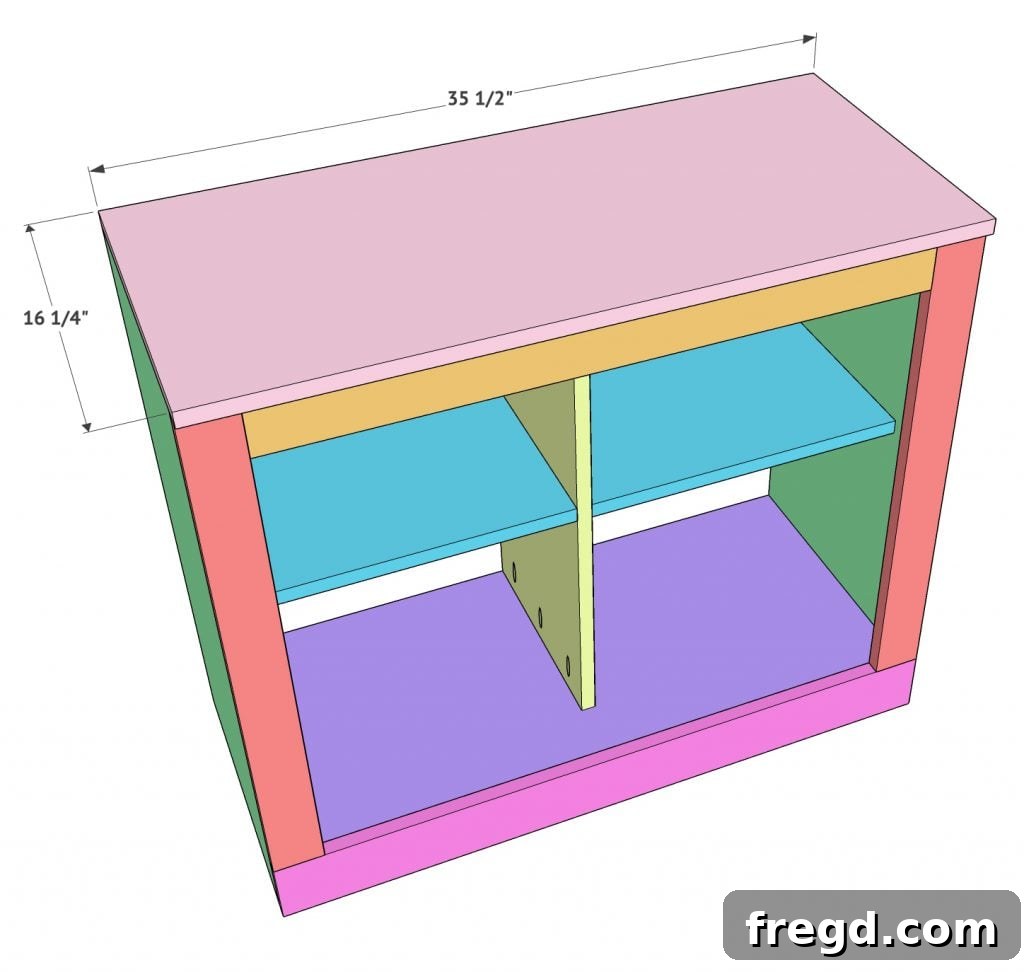
Next, install the cabinet top. I chose a 3/4” thick edge-glued panel for my top, which provides a beautiful, solid surface that’s both durable and visually appealing. Cut the panel to the exact size of your cabinet top. Apply wood glue along the top edges of the cabinet frame, then carefully place the top panel. Secure it from the inside using 1.25” pocket hole screws through the 3/4” pocket holes you’ve drilled on the inside top edges of the cabinet. This hidden fastening method ensures a clean, screw-free exterior for your cabinet top.
Adding the Back Panel: Versatility and Stability
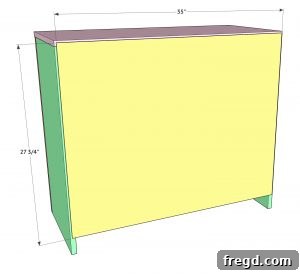
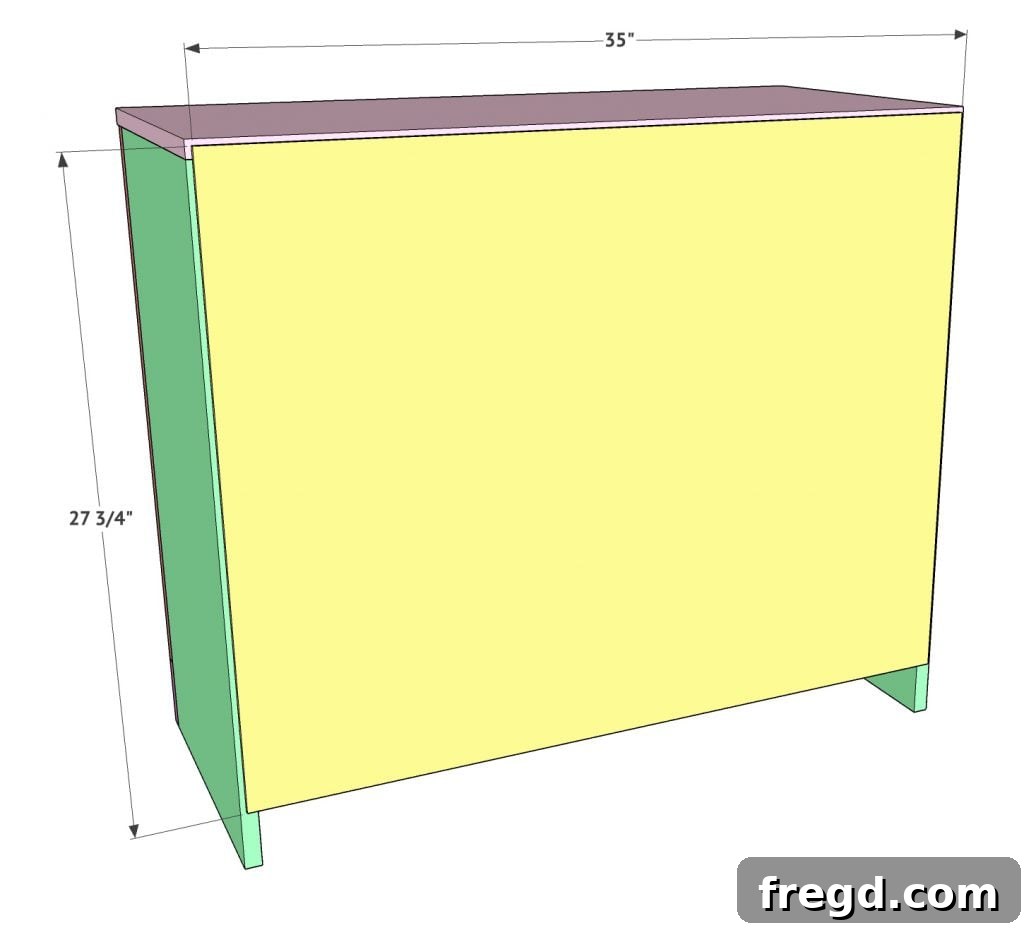
The back of your cabinet is not just for aesthetics; it adds significant stability to the entire structure. For my cabinet, I opted for barnwood planks, which lend a charming, rustic character to the piece. However, the accompanying plans suggest using 1/4” hardwood plywood, a perfectly viable and common choice. This section offers a great opportunity for personalization – you can truly use whatever material best suits your desired look and available resources, whether it’s beadboard, shiplap, or another decorative panel. Attach the back panel securely using 1” brad nails or staples, spaced evenly along all edges. This will square up your cabinet and prevent racking.
Constructing the Distinctive Cabinet Doors
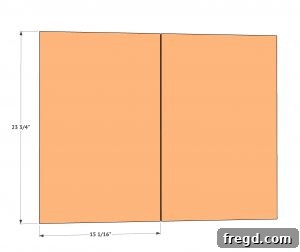
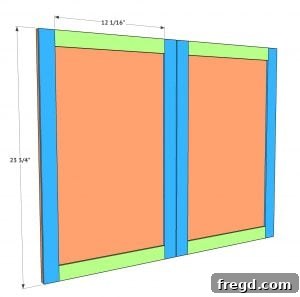
Now for one of the most exciting parts: building the cabinet doors, which will feature that eye-catching “X” design. Begin by cutting the main door panels from 1/2” hardwood plywood to your desired size. Hardwood plywood ensures that the doors will be stable and resist warping, crucial for doors that will be opened and closed frequently.
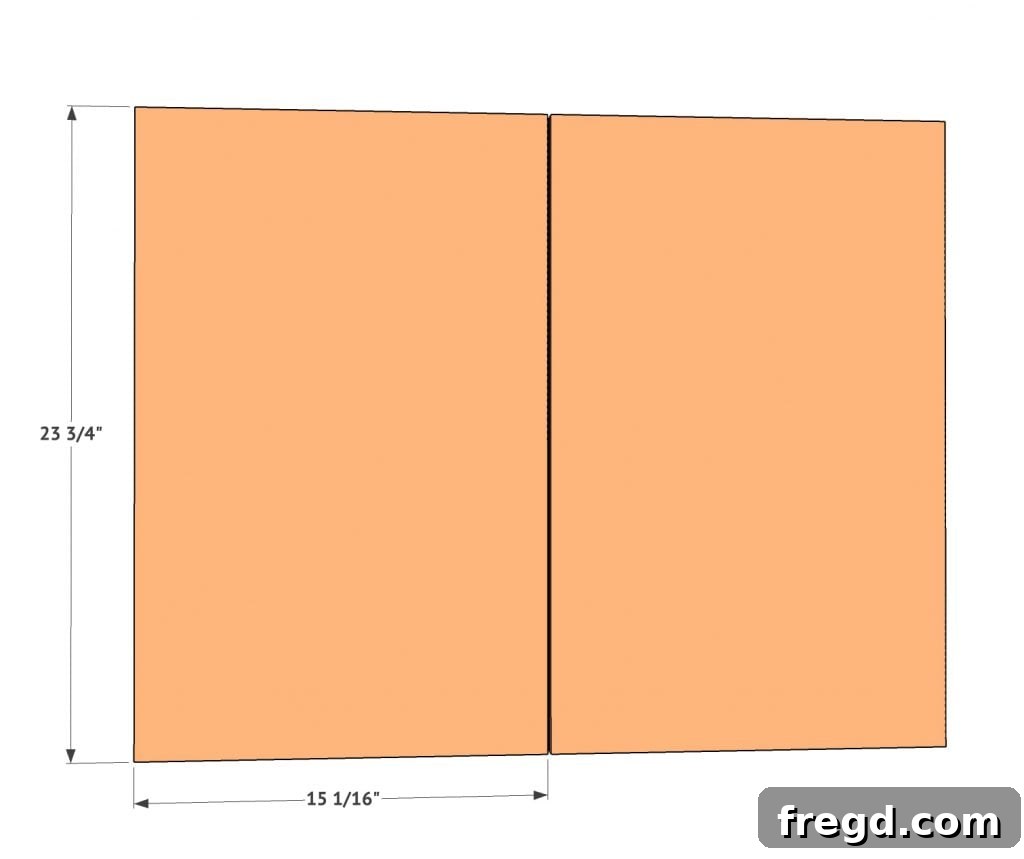
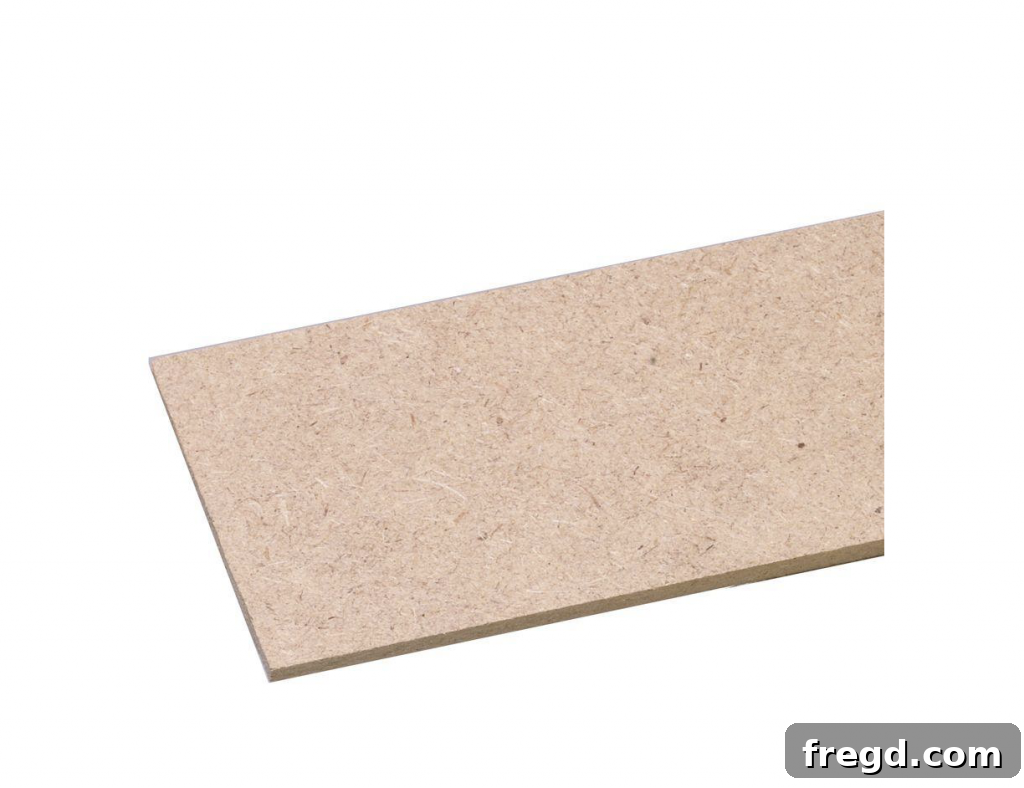
Next, add the outside trim. I utilized this bender board from Home Depot for its flexibility and smooth finish, but 1/4” craft boards are also an excellent option. Bender boards are typically used for concrete forms but are surprisingly versatile for decorative trim due to their workability. These boards should be ripped to 1.5” wide each. Begin by attaching the vertical trim pieces first. Apply wood glue to the back of the trim and secure them to the plywood door panels using 1/2” brad nails. Once the vertical pieces are in place, measure and cut your horizontal trim pieces to fit snugly between them. Again, use wood glue and 1/2” brad nails for a secure attachment. This creates the outer frame of your door.
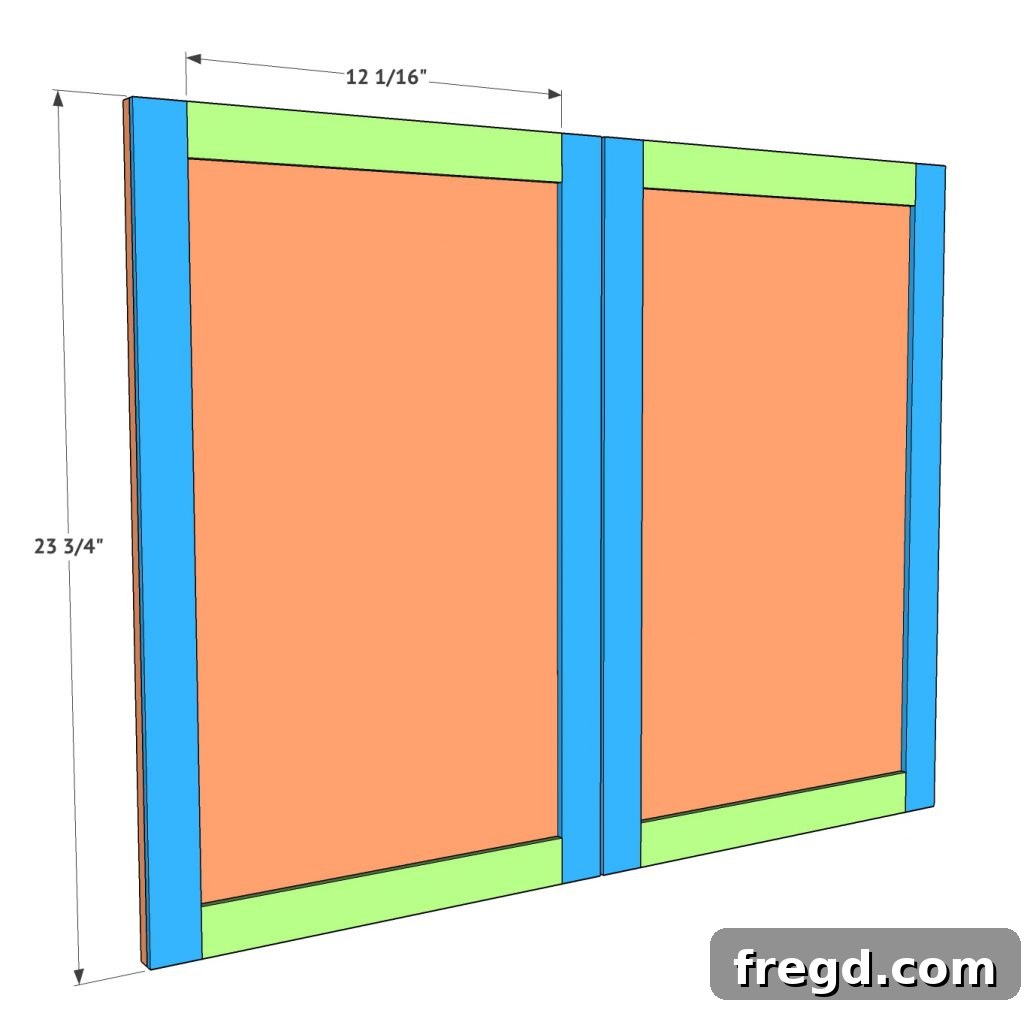
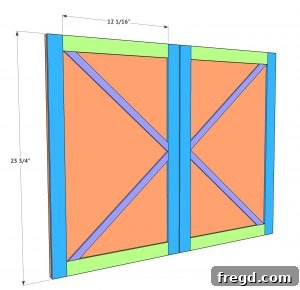
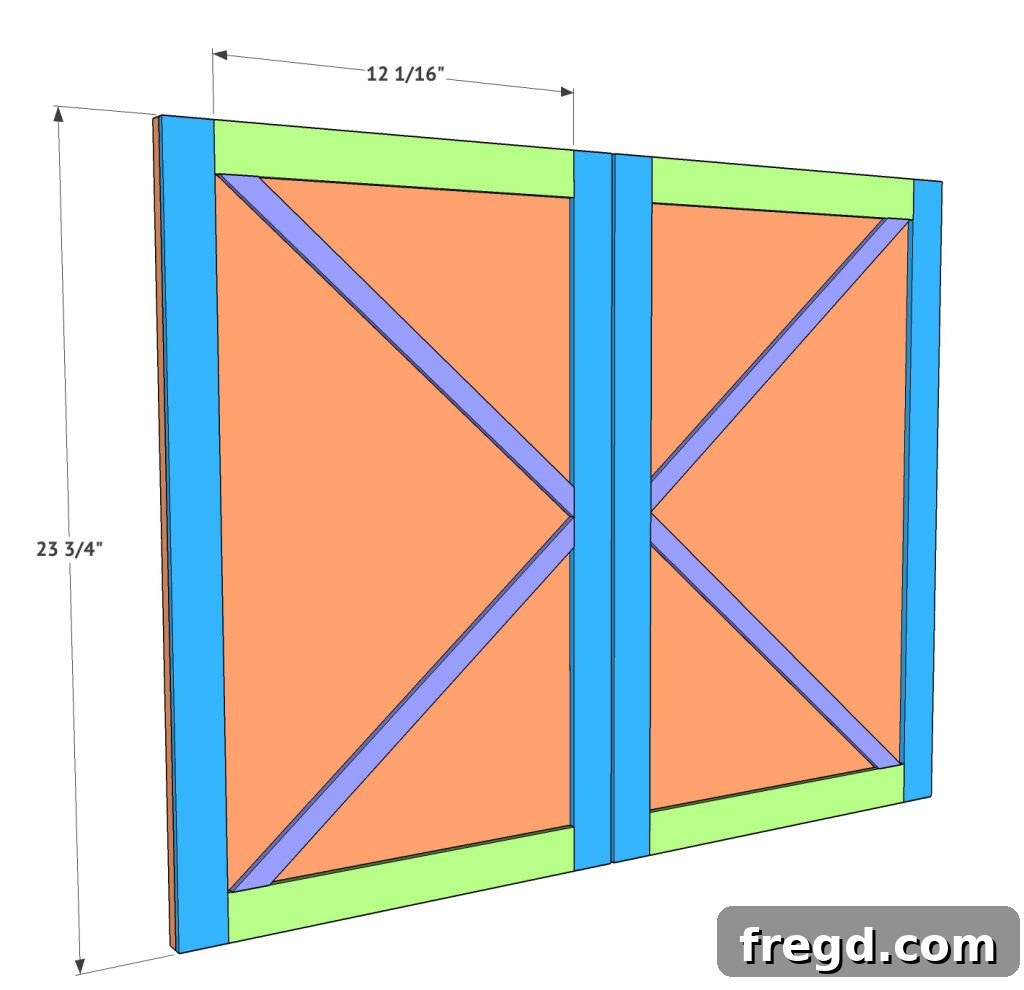
Now, for the signature “X” design! Measure and cut the diagonal trim pieces. These can also be crafted from bender boards or craft boards, ripped to a narrower 3/4” width for a more refined look. Carefully miter the ends of these diagonal pieces to ensure a tight, professional-looking joint where they meet the outer trim. Attach these pieces with wood glue and 3/4” brad nails. The combination of glue and nails creates a very strong bond, keeping your decorative trim firmly in place.
The Finishing Touches: Paint, Stain, and Hardware
With the construction complete, it’s time to bring your cabinet to life with paint, stain, and hardware. I chose to paint the doors and the cabinet body separately before final assembly. This approach allows for cleaner lines and easier access to all surfaces, ensuring a flawless finish. For the paint, I used Sherwin-Williams Pure White in SW7005, a classic and versatile shade that brightens any space. I applied a satin finish, which provides a subtle sheen and is easy to clean and maintain. Similarly, I stained the top board before attaching it, which simplifies the staining process. If you prefer to stain after attachment, be sure to carefully tape off the surrounding painted areas to protect them. I used this stain for the cabinet top, which beautifully complements the white paint and highlights the natural wood grain.
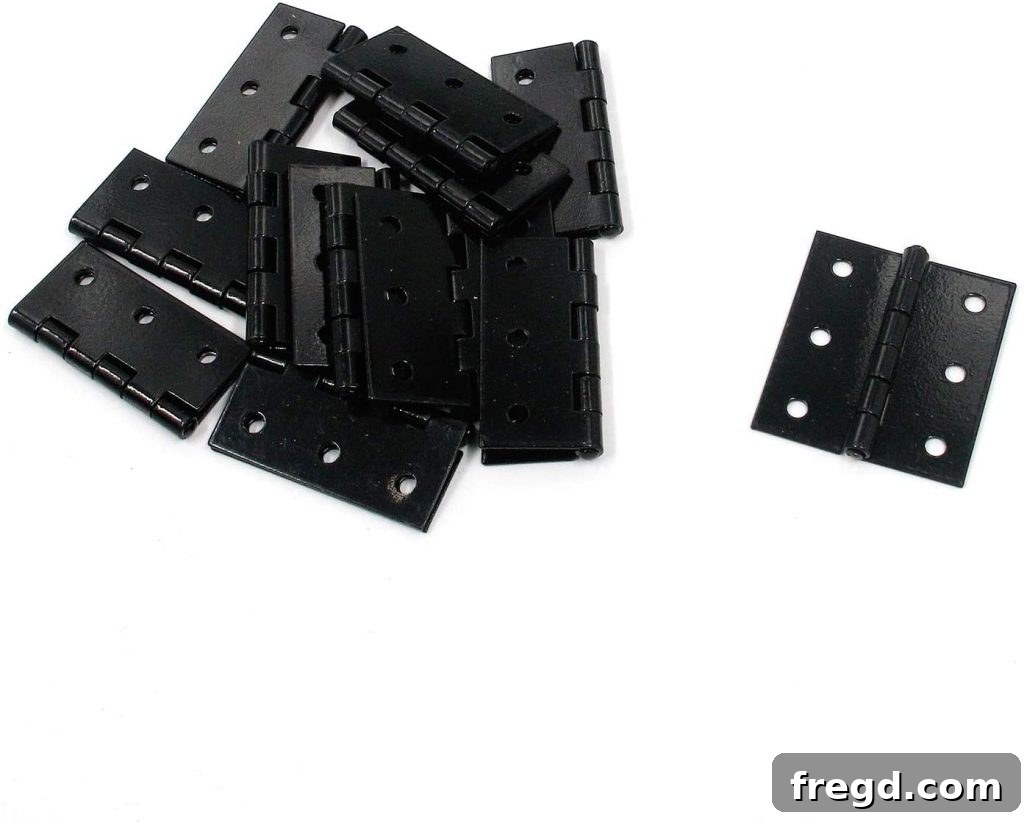
For the cabinet doors, selecting the right hinges is crucial for both function and aesthetics. I used these hinges, chosen for their durability and ease of installation. They provide smooth operation and hold the doors perfectly in place. Once the paint and stain are dry, attach the doors to the cabinet, ensuring they open and close without obstruction.
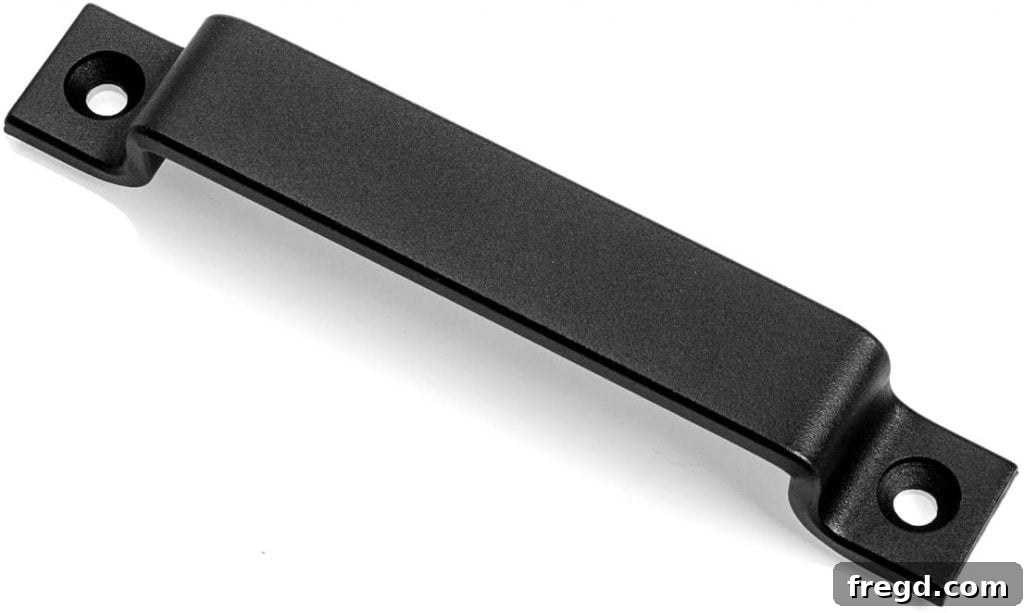
Finally, add the door pulls – the jewelry of your cabinet! These are my absolute favorite door pulls, having used them on countless projects due to their timeless design and exceptional value. You can find them conveniently on Amazon HERE, and they offer a fantastic blend of quality and affordability. Installing these pulls is the last step in completing your stunning DIY table-height pantry cabinet.
You’ve now successfully built a gorgeous and functional piece of furniture that will enhance any room. This table-height cabinet is not just a testament to your DIY skills but a valuable addition to your home’s storage and style. Whether you integrate it into a larger pantry system or let it shine as a standalone feature, its versatility and custom appeal are undeniable. Remember, the free plans for this project are available to guide you through every cut and joint.
DIY Table Height Pantry Cabinet
Instructions
-
1. Build the Cabinet Body: Begin by cutting 3/4” hardwood plywood to 15” wide. Drill 3/4” pocket holes on both sides and the base piece. Attach the base to the side panels, lining it up 2.75” from the bottom of the sides. Use wood glue and 1.25” pocket hole screws.

-
2. Install the Middle Divider: Add 3/4” pocket holes to the top and bottom of the divider board. Securely attach it to the center of the bottom board using wood glue and 1.25” pocket hole screws.
-
3. Construct the Face Frame: Use a 1×4 for the bottom board and 1x3s for the sides and top. Drill 3/4” pocket holes on both ends of the top board and one end of each side board. Form a rectangle with wood glue and 1.25” pocket hole screws, ensuring all corners are flush.
-
4. Attach Shelf Boards: Before securing the face frame, install the shelf boards (12” deep). Position them 13” from the base, or customize to your needs. Attach to sides and the middle divider with wood glue and 1.25” pocket hole screws through 3/4” pocket holes.
-
5. Attach Face Frame to Cabinet: Align the assembled face frame flush with the cabinet body. Use wood glue and 1.25” pocket hole screws through the 3/4” pocket holes on the cabinet.
-
6. Add the Cabinet Top: Cut a 3/4” thick edge-glued panel to size for the top. Attach it to the cabinet using wood glue and 1.25” pocket hole screws through 3/4” pocket holes drilled on the inside top edges of the cabinet.
-
7. Secure the Back Panel: Choose your preferred material (e.g., barnwood planks or 1/4” hardwood plywood). Attach the back panel using 1” brad nails or staples for added stability.
-
8. Build the Cabinet Doors: Cut 1/2” hardwood plywood to size for the door blanks.
-
9. Add Door Trim: Rip bender board or 1/4” craft boards to 1.5” wide. Attach the vertical trim pieces first with wood glue and 1/2” brad nails, then measure, cut, and attach the horizontal pieces similarly.
-
10. Add Diagonal Door Trim: Rip bender boards or craft boards to 3/4” wide. Measure and cut the diagonal trim pieces, then attach them to the doors using wood glue and 3/4” brad nails to create the ‘X’ design.
-
11. Finish and Install Hardware: Paint the cabinet body and doors (Sherwin-Williams Pure White, satin finish) and stain the top board before or after attachment. Attach hinges to the doors, then mount the doors to the cabinet. Finally, install your favorite door pulls (e.g., these from Amazon).