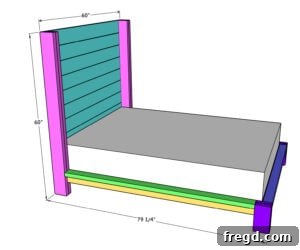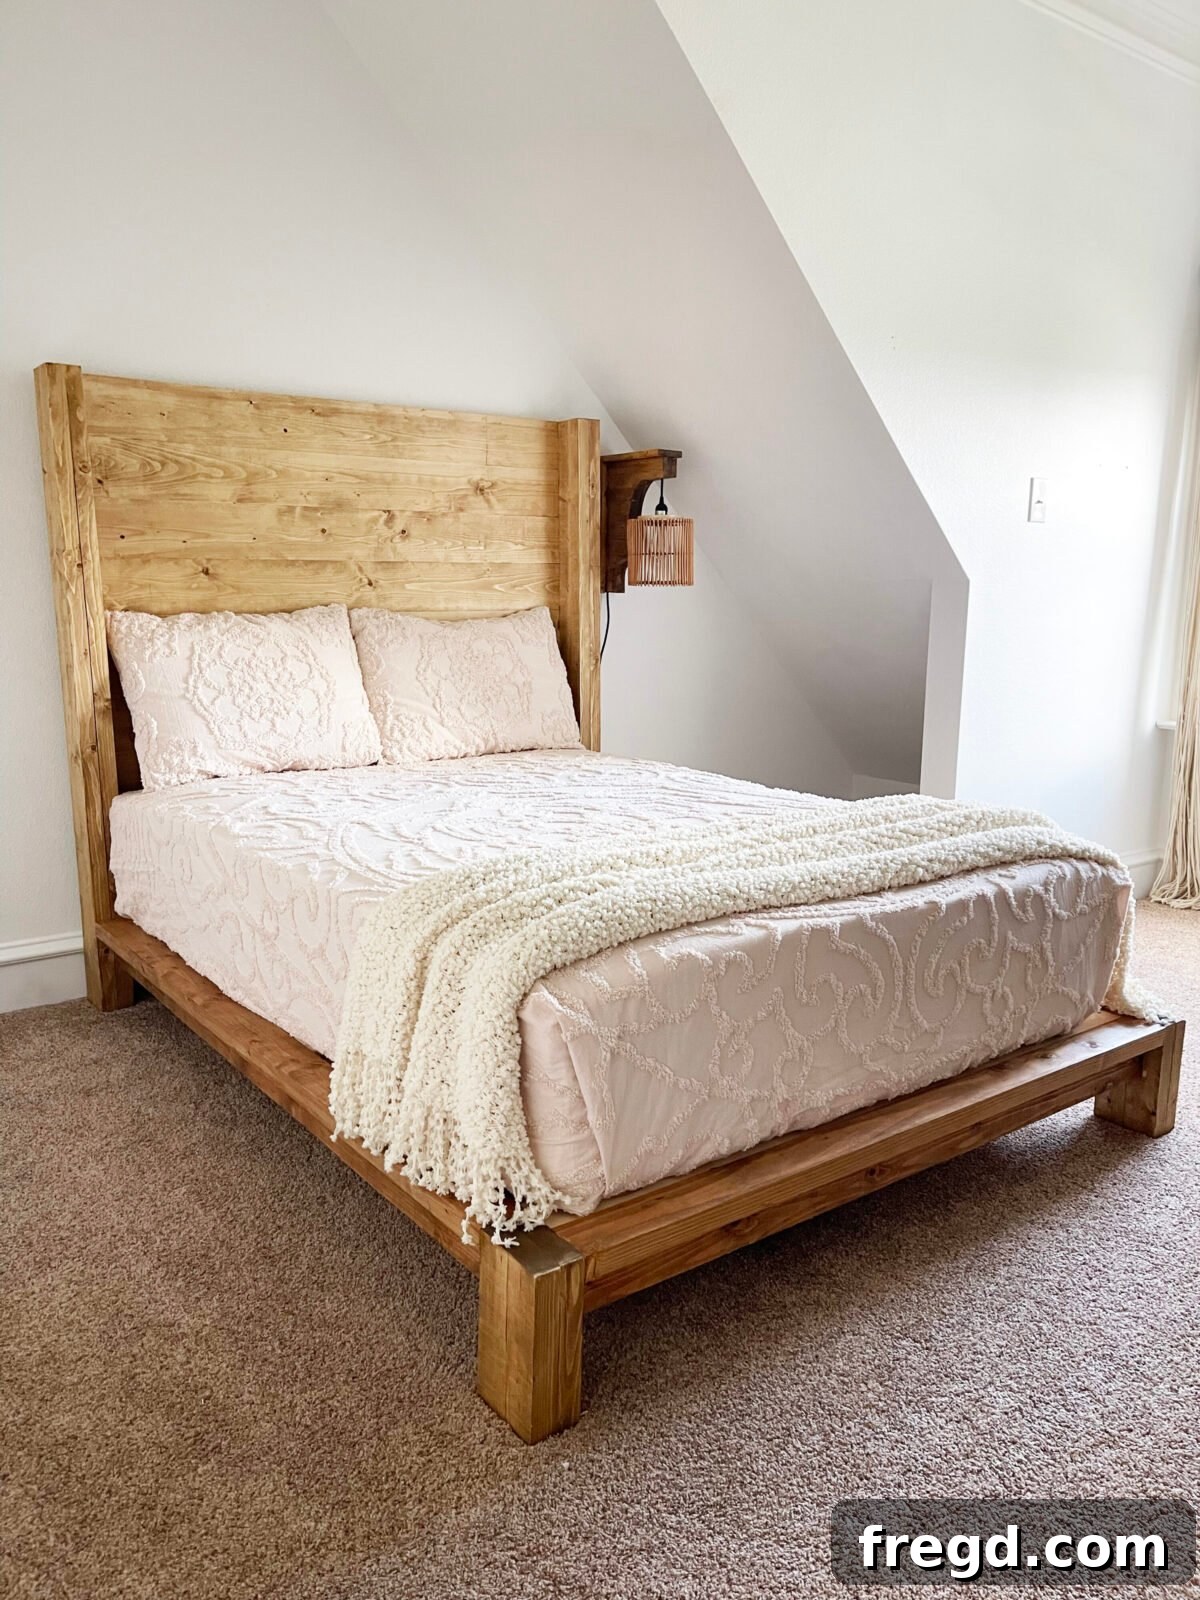
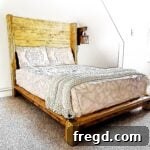
Transform your bedroom with a stunning, custom-built piece of furniture! This comprehensive guide will walk you through building a beautiful, modern DIY bed frame and wood headboard, designed for a full-size mattress. Whether you’re an experienced woodworker or just starting your DIY journey, our free plans and detailed step-by-step tutorial make this project approachable and incredibly rewarding. Say goodbye to flimsy, mass-produced furniture and hello to a sturdy, stylish bed crafted with your own hands.
A few years ago, I embarked on a fun project to build my daughter a DIY Loft Bed. It was perfect for her remote learning setup, offering a unique space-saving solution that she absolutely adored. However, as she transitioned into middle school, the charm of climbing a ladder every night began to wane. Her new request? A more “grown-up” bed, something modern and sophisticated that reflected her evolving style. We spent hours exploring Pinterest, gathering inspiration for the perfect aesthetic, which then fueled my design process. A quick trip to Home Depot for high-quality woodworking supplies, and I was ready to bring her vision to life – a sleek, modern bed frame that she would love for years to come.
This project is not only incredibly satisfying but also surprisingly easy on your budget. By building it yourself, you save significantly on retail markups while creating a piece that’s tailored to your taste and built to last. We’ve meticulously prepared free printable plans and a comprehensive, step-by-step tutorial to ensure your success. You’ll find all the information you need, from detailed cut lists to precise assembly instructions, making the process smooth and enjoyable. Get ready to create a centerpiece for your bedroom that showcases your craftsmanship and personal style!
Click here to jump directly to the printable plans section!
How to Build a DIY Wood Bed Frame and Headboard
This detailed set of plans is specifically designed for a full-size mattress, ensuring a perfect fit and robust support. Crafting your own bed frame allows for complete customization, from wood selection to the final finish, resulting in a piece of furniture that truly reflects your personal style and meets your functional needs. Follow these instructions carefully, and you’ll soon have a beautiful, handmade bed.
Essential Woodworking Tools:
Having the right tools is crucial for any woodworking project, ensuring precision, efficiency, and safety. Here’s a list of the essential tools you’ll need for building your DIY bed frame and headboard:
- Miter Saw: Indispensable for making accurate crosscuts and miter cuts on your lumber, ensuring all your pieces fit together perfectly.
- Drill: Essential for pre-drilling pilot holes, driving screws, and creating pocket holes. A cordless drill offers greater flexibility.
- Kreg Jig: Your best friend for creating strong, concealed pocket hole joints, which are key to the clean, modern look of this bed frame. We highly recommend using a Kreg Jig for seamless construction.
- Brad Nailer: Perfect for quickly attaching trim pieces or securing temporary joints with small nails, providing extra holding power alongside wood glue.
- Sander: Vital for smoothing out rough edges, preparing the wood for staining or painting, and achieving a professional-quality finish. An orbital sander works wonders for this.
- Table Saw (optional): While not strictly necessary, a table saw can be incredibly useful for ripping lumber to specific widths and removing rounded factory edges from framing lumber, giving your project a more refined, custom look.
Materials and Supplies List:
Selecting the right lumber and hardware is the first step towards a durable and beautiful bed. We’ve chosen common framing lumber for cost-effectiveness and ease of availability, but you can upgrade to hardwoods like oak or maple if your budget allows for an even more premium finish.
- 4 – 2x6x8 Framing Lumber: These robust pieces will form the core structural components, providing excellent stability and support.
- 9 – 2x4x8 Framing Lumber: Versatile and strong, these will be used for various parts of the frame and headboard, contributing to the overall integrity.
- 9 – 1x6x8 Framing Lumber: Ideal for the headboard planks and other visible elements, offering a balance of strength and a desirable aesthetic.
- 11 – 1x4x8 Furring Strips: Primarily used for bed slats, these provide the essential support for your mattress.
- 1 1/4″ Pocket Hole Screws: For joining thinner pieces and general assembly where a strong, concealed joint is desired.
- 2 1/2″ Pocket Hole Screws: For robust connections between thicker lumber, ensuring maximum stability in the main frame components.
- 1 1/4″ Wood Screws: Useful for attaching slats and other non-pocket hole connections.
- 2 1/2″ Wood Screws: For heavy-duty connections where pocket holes might not be practical or additional strength is needed.
- 2″ Brad Nails: For temporarily holding pieces together or for attaching trim with a less visible fastener.
- Wood Glue: The unsung hero of woodworking! Always use wood glue in conjunction with screws and nails for incredibly strong, long-lasting joints.
Crafting the Stylish Headboard
The headboard is the focal point of your new bed, adding character and a sophisticated touch to your bedroom. This section details the precise steps to build a sturdy and attractive wooden headboard.
Step 1: Preparing and Joining the Headboard Planks
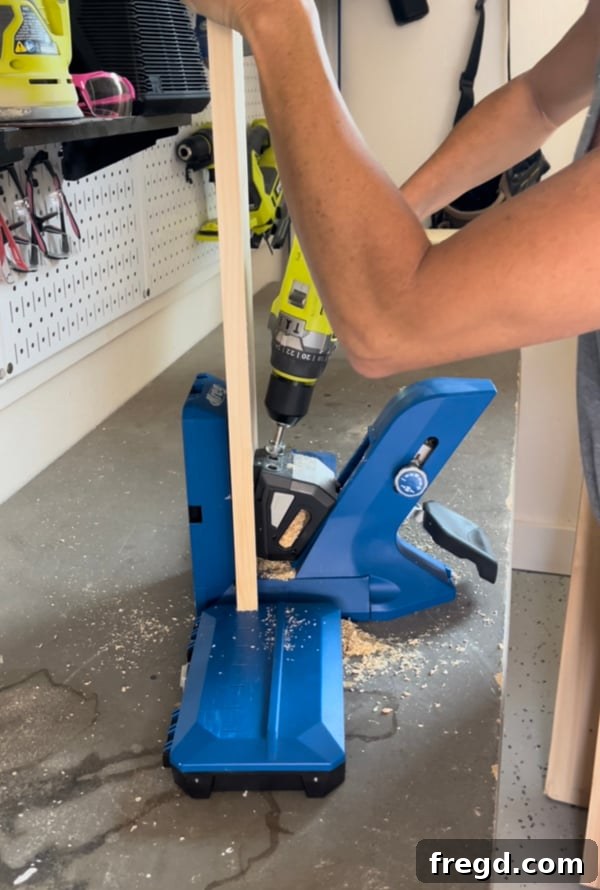
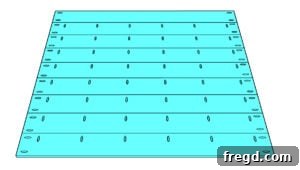
Begin by carefully cutting your 1x6x8 lumber to the specified sizes as detailed in your cut list. Precision here is key for a seamless headboard. Once your planks are cut, it’s time to drill pocket holes. Using your favorite Kreg Jig model (we highly recommend the Kreg Jig 720Pro for its ease of use and consistent results), drill 3/4″ pocket holes into the edges of your planks according to the diagram in the plans. These pocket holes will allow you to create strong, concealed joints. After drilling, apply a generous amount of wood glue along the edges of the planks and join them together, securing them with 1 1/4″ pocket hole screws. Ensure the faces are flush and the assembly is square before the glue sets.
- You can find our favorite Kreg Jig model here
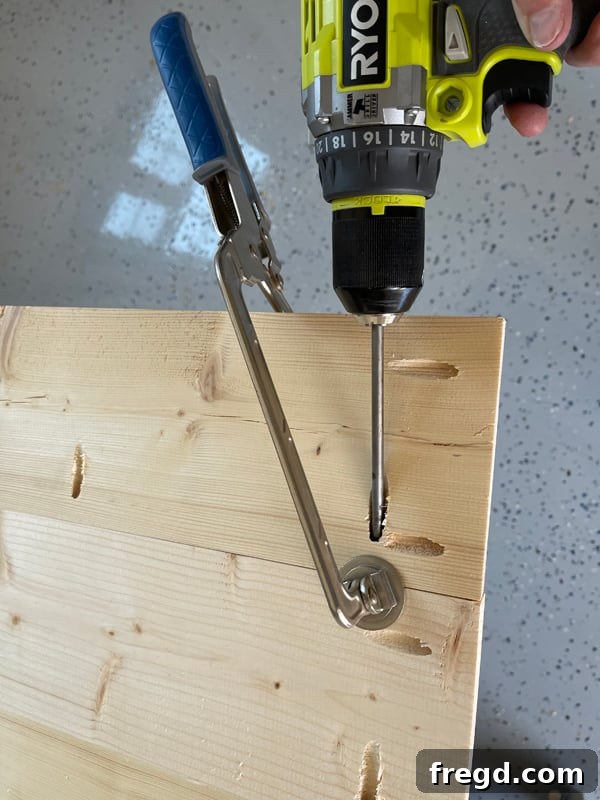
Attaching the planks together with 1 1/4″ pocket hole screws creates a solid, uniform headboard panel.
Step 2: Constructing the Headboard Leg Assemblies
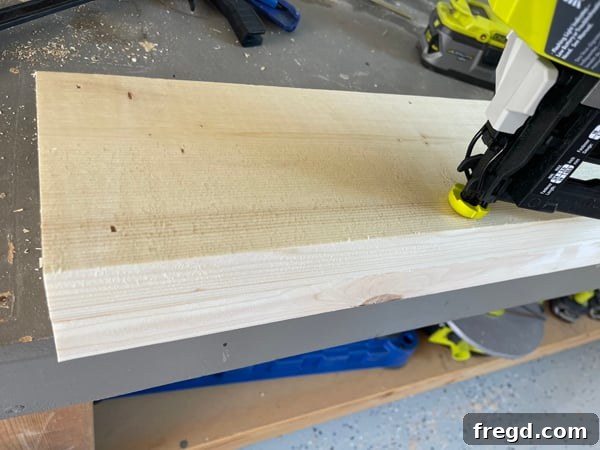
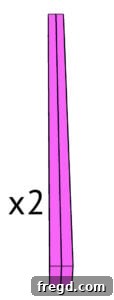
Next, cut the leg pieces from your 2x4x8 lumber according to the cut list. For each headboard leg, you will stack two of these cut pieces to create a thicker, more substantial post. Apply wood glue between the two pieces, then secure them together using 2″ brad nails. The brad nails will hold the pieces in place while the wood glue dries, creating a single, robust leg. You will need to build two identical leg assemblies for your headboard.
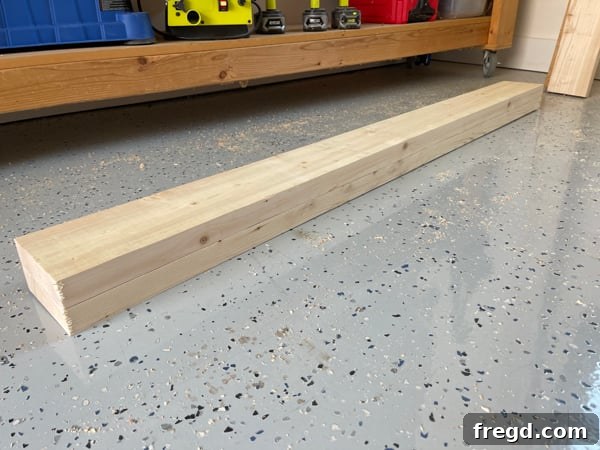
Ensure both leg assemblies are strong and perfectly matched.
Step 3: Attaching the Leg Assemblies to the Headboard Planks
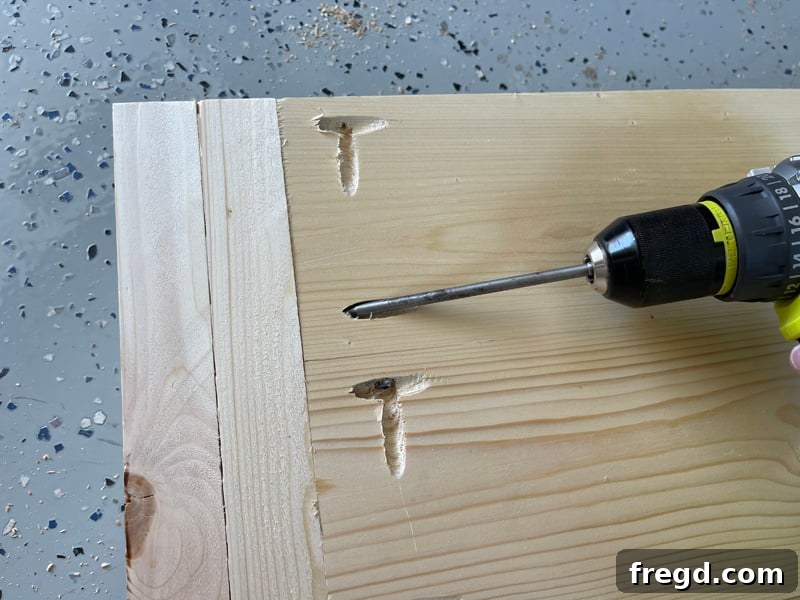
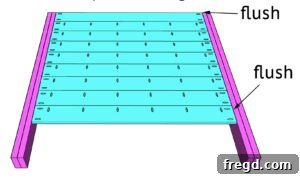
With your leg assemblies complete, it’s time to connect them to the headboard planks. Apply wood glue to the mating surfaces and position each leg assembly onto the headboard planks. It’s crucial that the back and top edges of the planks are flush with the back and top edges of the leg assemblies to ensure a clean, professional look. Secure the legs to the planks using 1 1/4″ pocket hole screws. For added stability during this step, a Kreg Right Angle Clamp can be incredibly helpful. It acts as an extra set of hands, holding the boards firmly in position while you drive the screws, ensuring a perfectly flush joint.
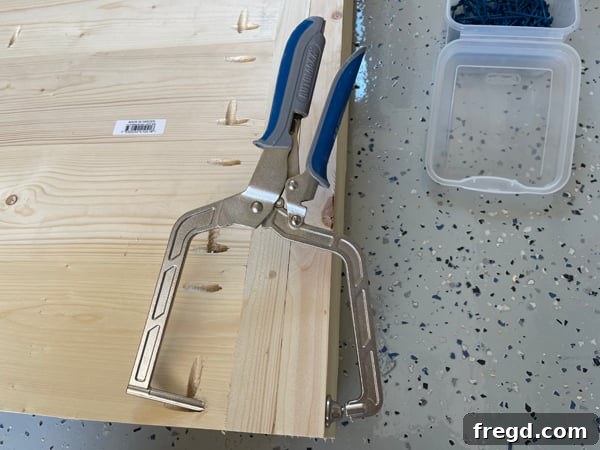
The Kreg Right Angle Clamp is invaluable for maintaining alignment.
- You can find the right angle clamp we use here
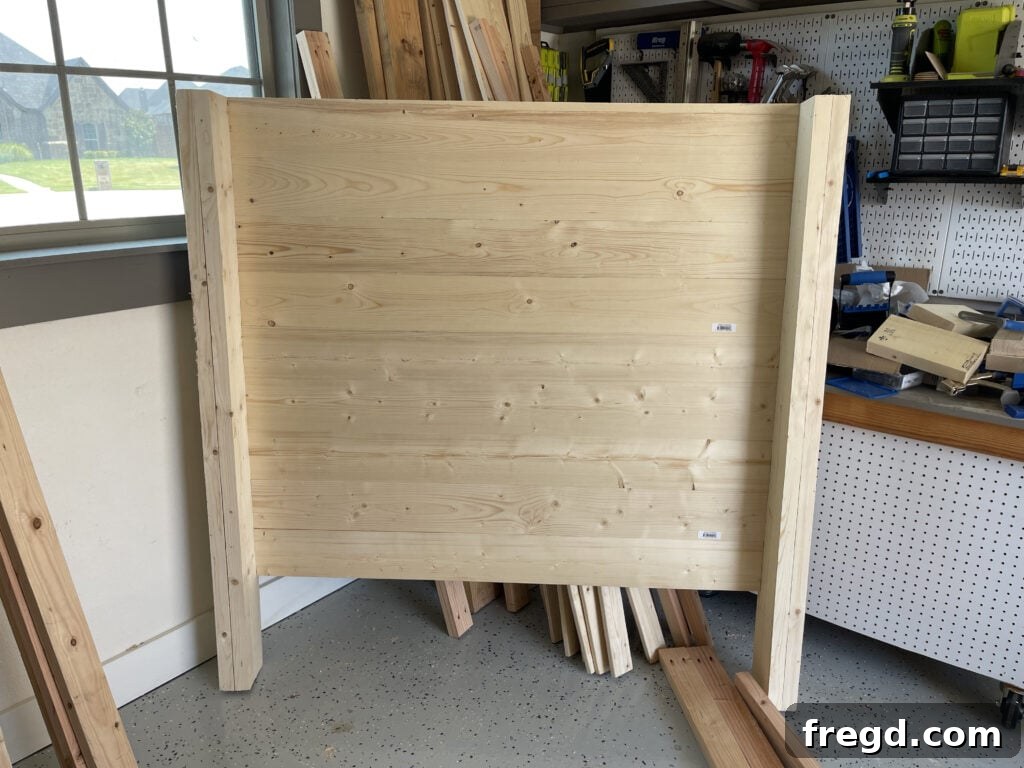
At this stage, your headboard should begin to take its final form, looking sturdy and well-integrated.
Step 4: Installing the Headboard Stretcher
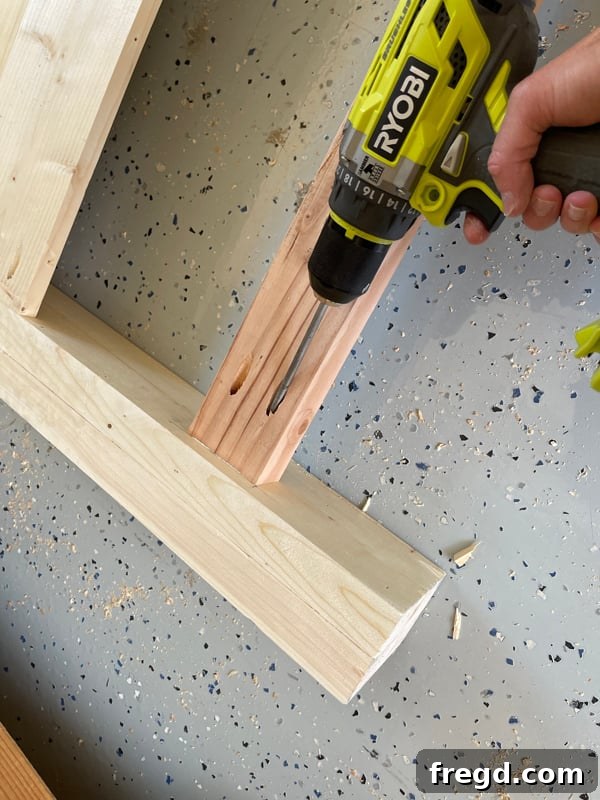
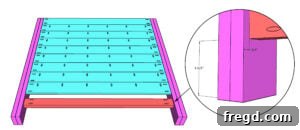
To further enhance the stability and rigidity of your headboard, cut the headboard stretcher piece to size as per your cut list. Drill 1 1/2″ pocket holes into both ends of this stretcher. Apply wood glue to the ends and attach it between the headboard legs, connecting it with 2 1/2″ pocket hole screws. This stretcher acts as a crucial cross-member, preventing any racking or wobbling and ensuring your headboard stands strong for years to come.
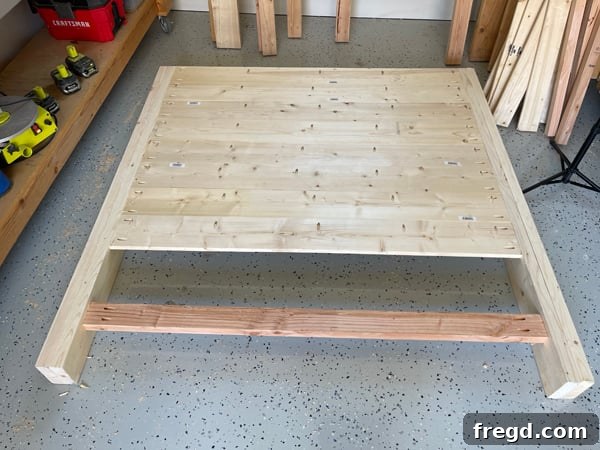
Your headboard is now complete and ready to be integrated into the full bed frame structure. Take a moment to appreciate your handiwork!
Constructing the Sturdy Wooden Bed Frame
Now that your headboard is complete, it’s time to build the foundational structure of your bed – the bed frame. This part involves creating the footboard and the essential side rails that will support your mattress.
Step 1: Assembling the Foot Assemblies
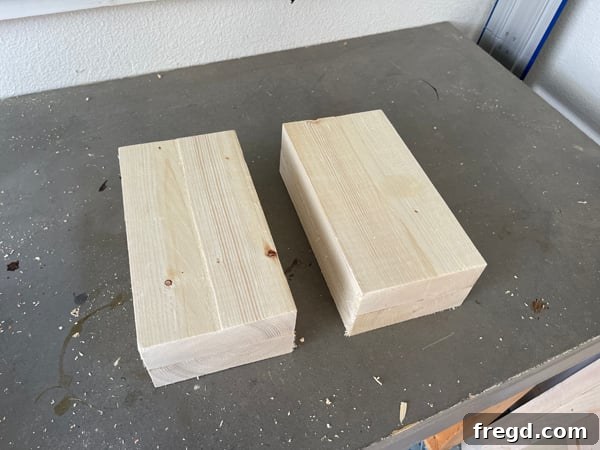
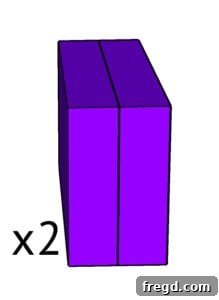
Similar to the headboard legs, the foot pieces will also be built for added thickness and stability. Cut the necessary foot pieces to size according to your cut list. For each foot assembly, you will stack two of these pieces together. Apply wood glue generously between the pieces and secure them with 2″ brad nails. You will need to build two identical foot assemblies. Ensure they are square and the glue has a chance to set properly before moving to the next step.
Step 2: Attaching the Footboard Trim
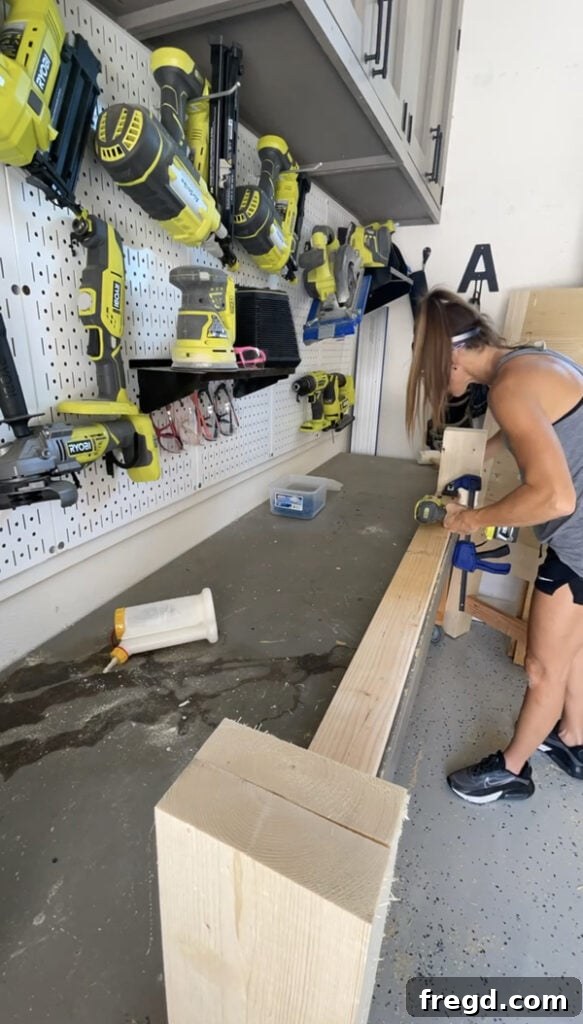
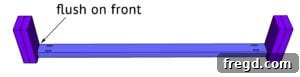
Next, cut the footboard trim piece to its specified length. Drill 1 1/2″ pocket holes into both ends of this trim piece. Apply wood glue to the ends of the trim and position it between the two foot assemblies. It’s important that the front and top edges of the trim are flush with the front and top edges of the feet. Use clamps to hold the joints perfectly flush while you secure the trim to the feet with 2 1/2″ pocket hole screws. This creates a neat and strong connection for the base of your footboard.
Step 3: Installing the Footboard Rail
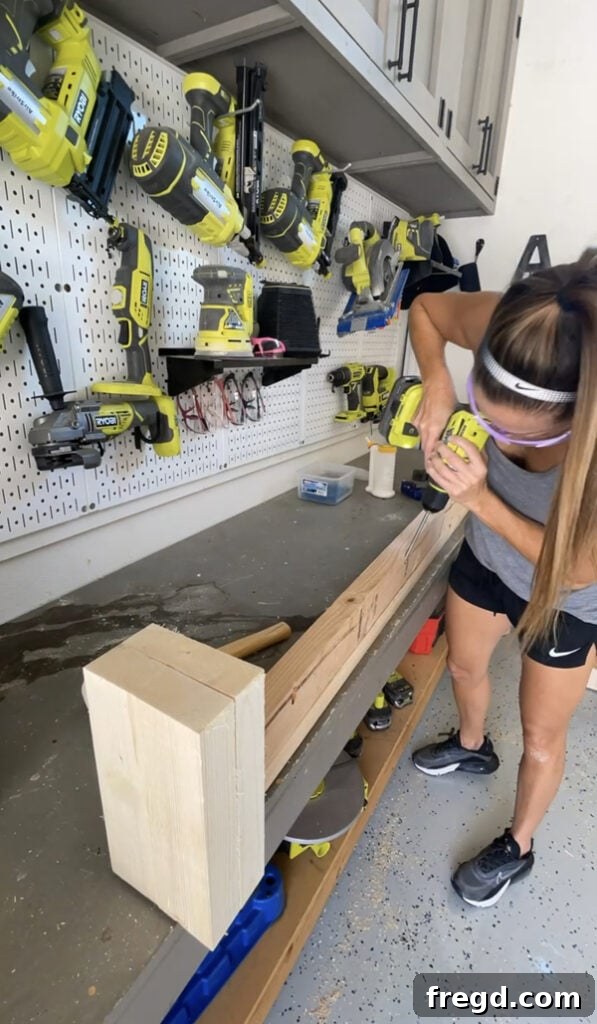
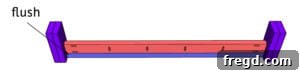
Now, prepare the footboard rail by cutting it to size. Drill 1 1/2″ pocket holes along one edge and at both ends of the rail. Apply wood glue to the mating surfaces and attach this rail to both the footboard trim and the feet using 2 1/2″ pocket hole screws. Ensure that the back of the rail is perfectly flush with the back of the trim. This rail provides the essential upper structure of your footboard, connecting the two foot assemblies firmly.
Step 4: Attaching the Side Trim Pieces
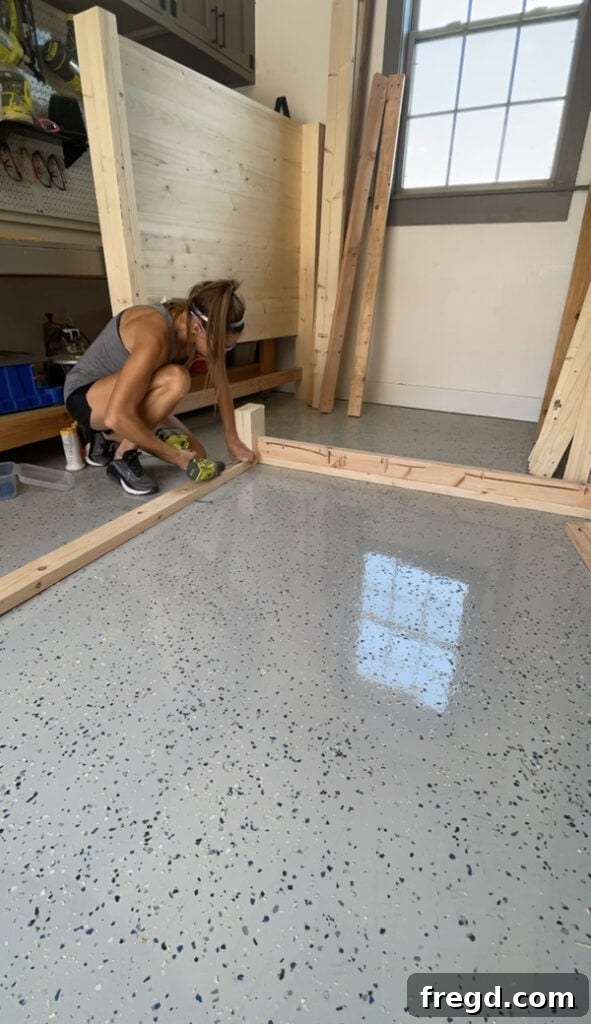
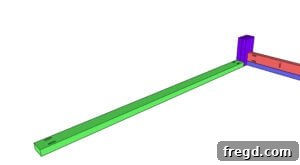
With the footboard section completed, focus on the side elements. Cut the two side trim pieces to their correct lengths. Drill 1 1/2″ pocket holes at both ends of each side trim piece. Apply wood glue and attach each side trim piece to one of the foot assemblies using 2 1/2″ pocket hole screws. This step begins to define the length of your bed frame and provides a foundation for the side rails. Make sure to repeat this process for both sides of the bed frame, creating mirror images.
Step 5: Securing the Side Rails
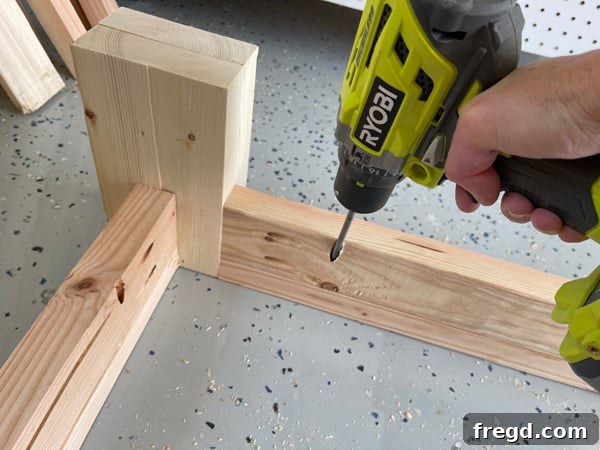
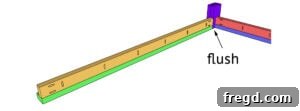
Finally for the frame construction, prepare the side rails by cutting them to size. Drill 1 1/2″ pocket holes along one edge and at both ends of each side rail. Apply wood glue to the connecting surfaces. Attach the side rails to the side trim and the foot assemblies using 2 1/2″ pocket hole screws. A critical alignment point here is to ensure the back of the side rail is flush with the back of the side trim and the inside edge of the foot. This connection creates the full rectangular perimeter of your bed frame, providing robust support for the mattress and ensuring structural integrity.
Final Assembly: Bringing Your DIY Bed Together
With the headboard and bed frame components individually completed, it’s time for the exciting part – bringing everything together to form your complete DIY bed. While I temporarily assembled the bed for demonstration purposes before staining, you can certainly add your chosen finish at this stage before the final assembly, or after. It truly depends on your preference and workspace.
Step 1: Connecting the Bed Frame to the Headboard
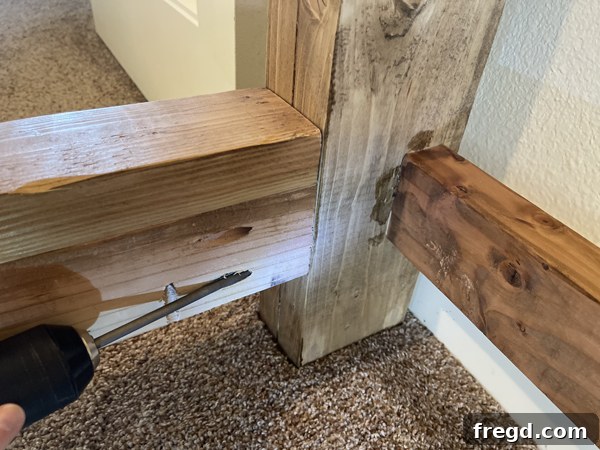
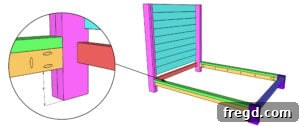
Carefully position the assembled bed frame against the headboard. Apply wood glue to the contact points where the side rails meet the headboard legs. Then, secure the bed frame to the headboard by driving 2 1/2″ pocket hole screws through the side rails and into the headboard legs. Pay close attention to alignment: the inside edges of the side rails and trim should be perfectly flush with the inside edges of the headboard legs. This connection is vital for the overall rigidity and aesthetic seamlessness of your finished bed.
Step 2: Installing the Mattress Support Cleats
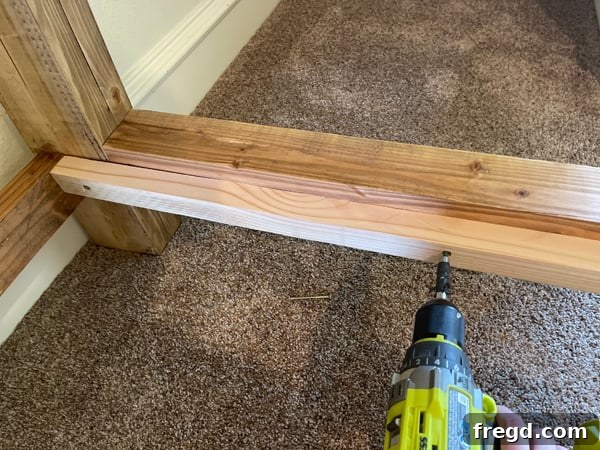
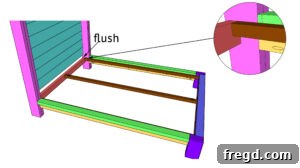
The cleats provide the essential support for your bed slats and ultimately your mattress. Cut your cleat pieces to size according to the plans. Drill 1 1/2″ pocket holes at both ends of at least one of the cleats (the center one). Attach one cleat to the inside of each side rail using 2 1/2″ wood screws. Ensure they are positioned at the correct height to achieve your desired mattress level. The final, central cleat should be carefully centered and then attached using 2 1/2″ pocket hole screws. This three-cleat system distributes weight effectively and reinforces the bed’s structure.
Step 3: Adding the Bed Slats for Mattress Support
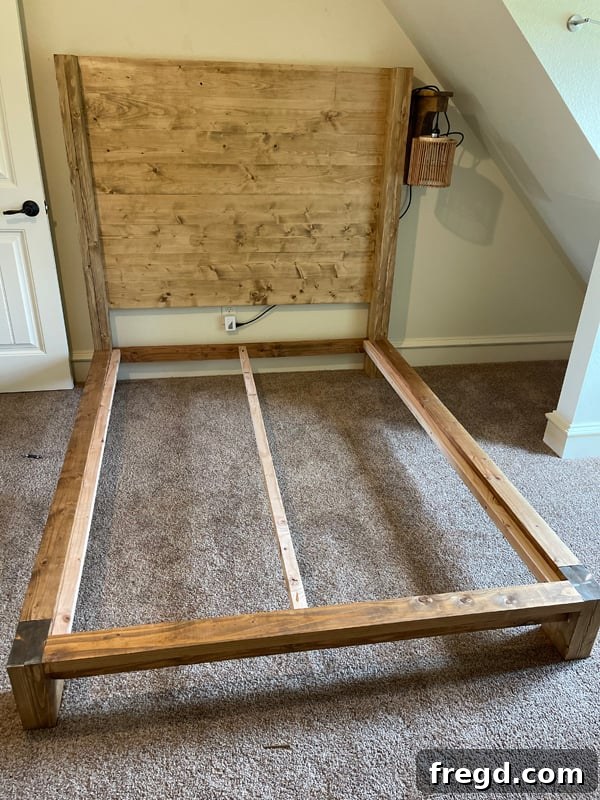
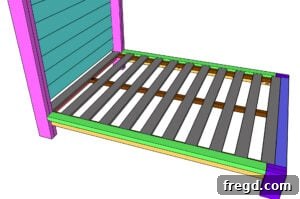
The slats serve as the box spring replacement, providing firm and breathable support for your mattress. Cut all your slats to the specified width. Carefully space them out evenly across the installed cleats. A common trick is to use a scrap piece of wood as a spacer to ensure consistent gaps between each slat. Ensure that the top and bottom slats are flush with the headboard and footboard rails, respectively. Once positioned, attach each slat to the cleats with 1 1/4″ wood screws. This robust slatted system eliminates the need for a traditional box spring, creating a clean, modern profile for your bed. If you prefer to use a box spring, you can simply drop the cleats and slats down a bit to accommodate the extra height.
Applying the Perfect Finish
With the bed fully assembled, it’s time to bring out the natural beauty of the wood and protect your hard work with a professional finish. This step is crucial for both aesthetics and durability.
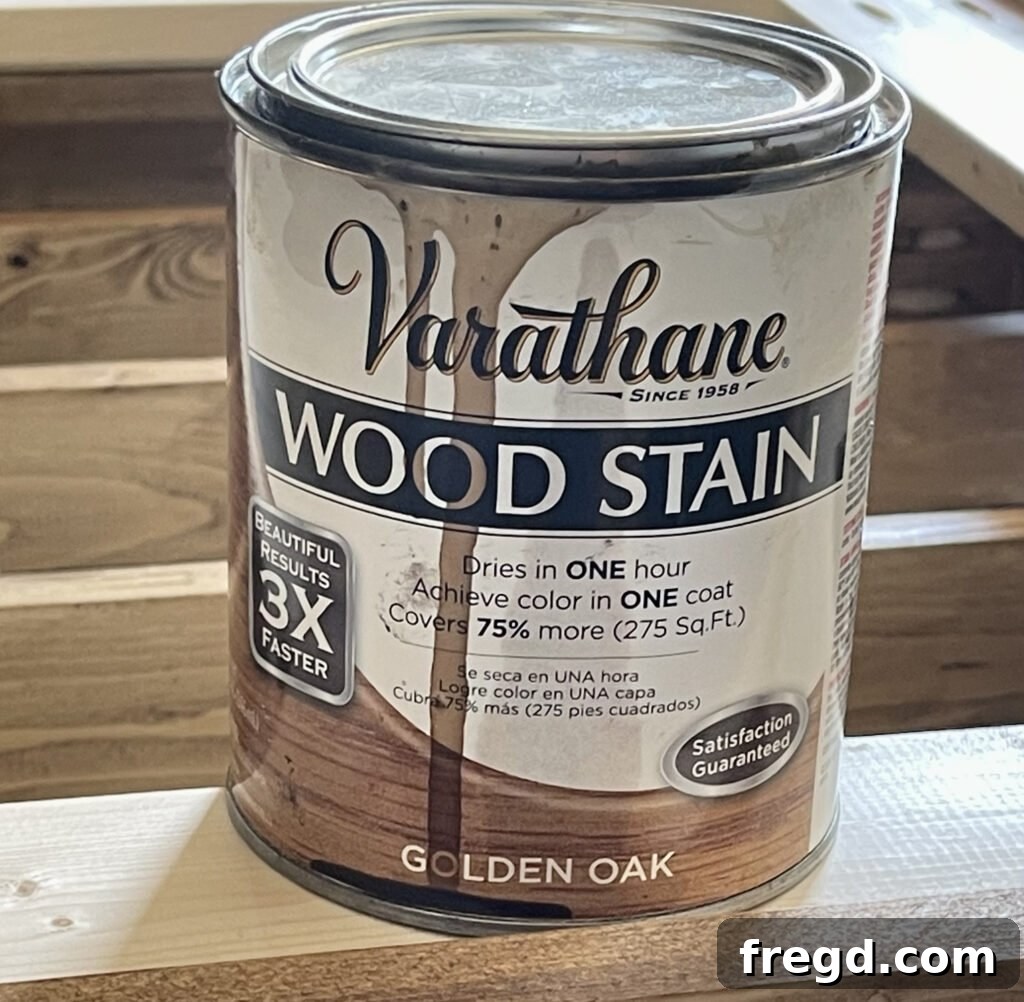
Start by thoroughly sanding the entire bed frame and headboard. Begin with a coarser grit sandpaper (e.g., 120-grit) to smooth out any imperfections or rough spots from construction, then progress to finer grits (e.g., 180 or 220-grit) for a silky-smooth surface. A well-sanded surface is essential for an even stain application. After sanding, wipe down the entire piece with a tack cloth to remove all dust. For this project, I chose to apply just one coat of a rich stain, which beautifully enhanced the wood grain. I used a classic Golden Oak stain, which provides warmth and timeless elegance. Depending on your desired depth of color, you can apply additional coats, allowing adequate drying time between each. For long-term protection, especially if you plan to use a stain, consider adding a clear topcoat like polyurethane or a protective wax.
- You can find the stain I used here
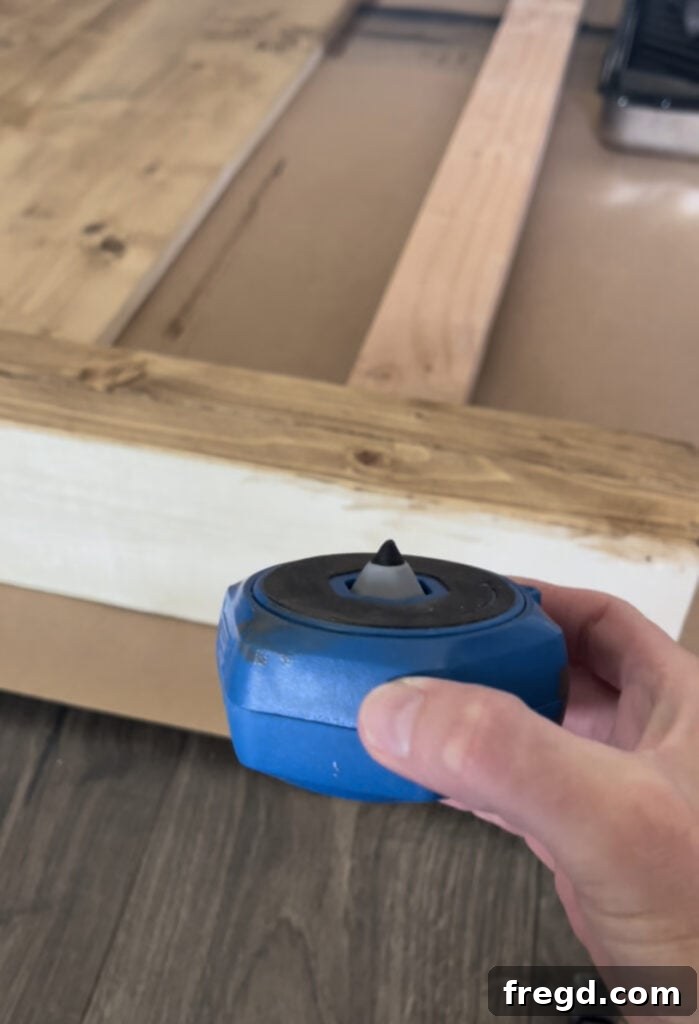
When it comes to finishing, Kreg Project Blocks are an absolute game-changer! These clever little tools come in a pack of four and feature unique tips that gently elevate your project off your work surface. This allows you to apply stain or paint evenly to all sides without waiting for one side to dry, preventing drips and making the finishing process much cleaner and more efficient. They are a must-have for anyone serious about achieving a professional-quality finish on their DIY projects.
- You can find the Kreg Project Blocks here
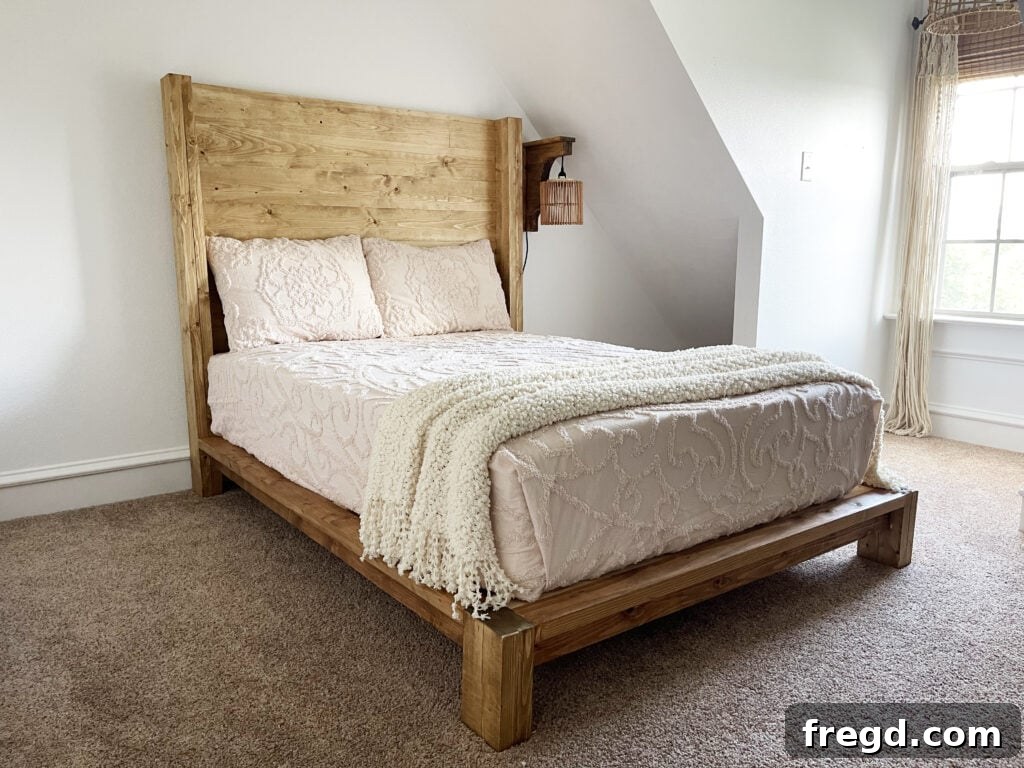
With the finish dry, it’s time to dress your new bed! My daughter had a blast picking out her bedding, and I must say, her choice of quilt is absolutely perfect. It adds a wonderful touch of comfort and style. The quality is fantastic, especially considering its affordable price point, proving that you don’t need to break the bank for beautiful linens. Choosing the right bedding can truly transform the look and feel of your DIY bed, making it a cozy retreat.
- You can find the quilt here
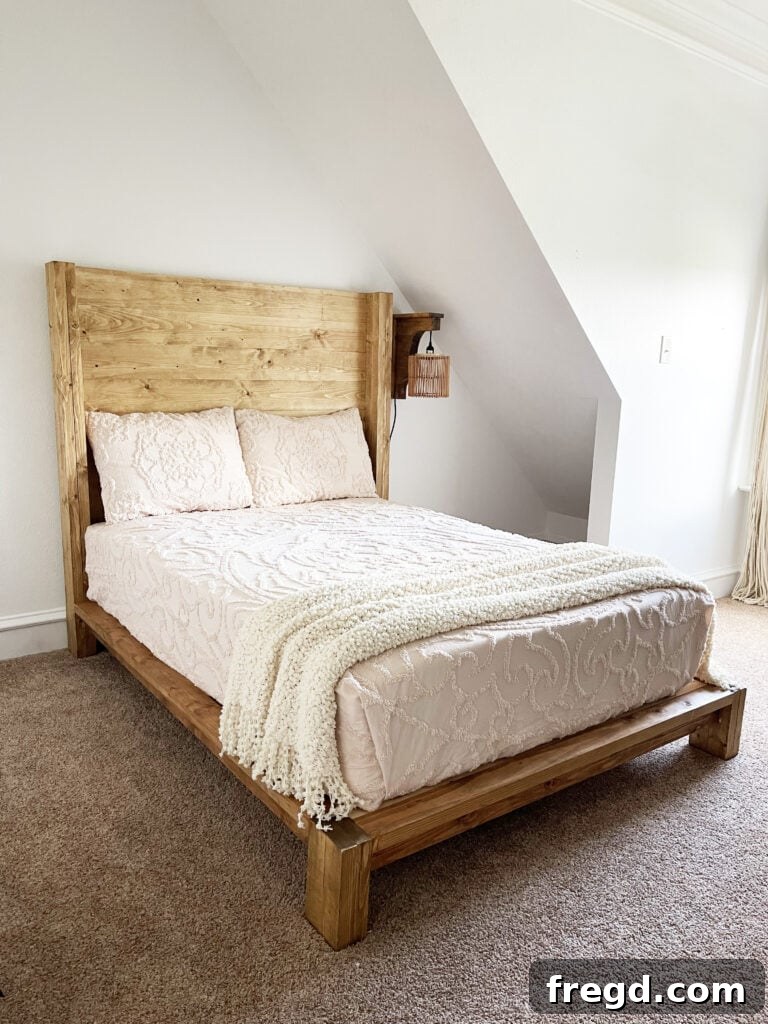
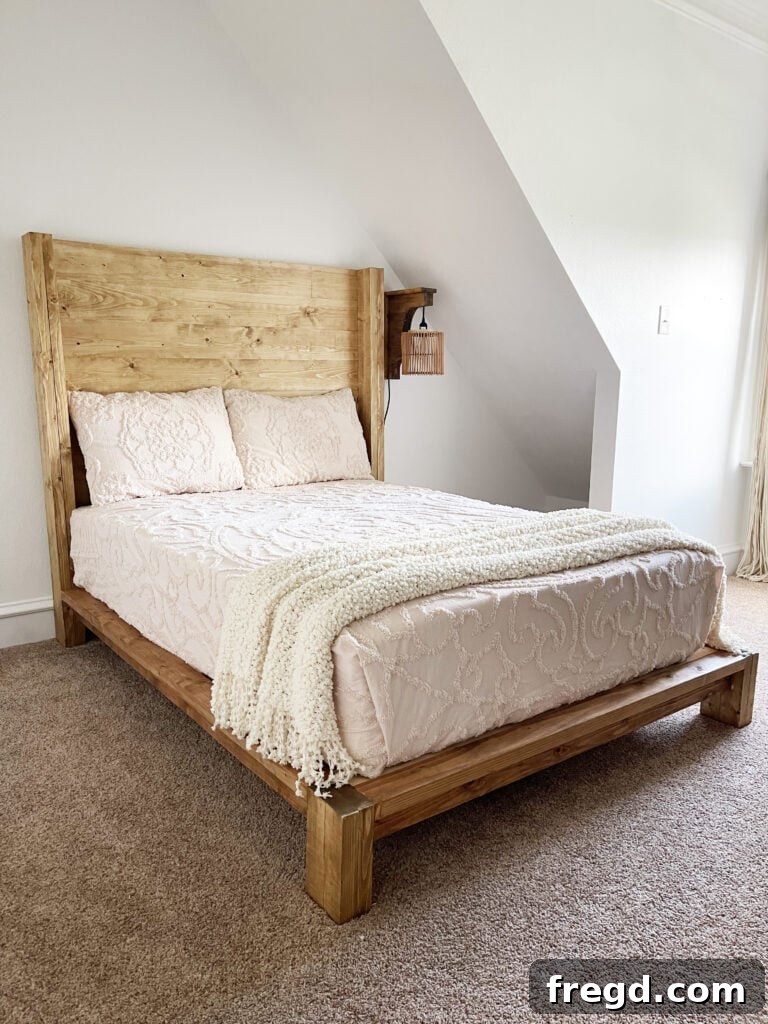
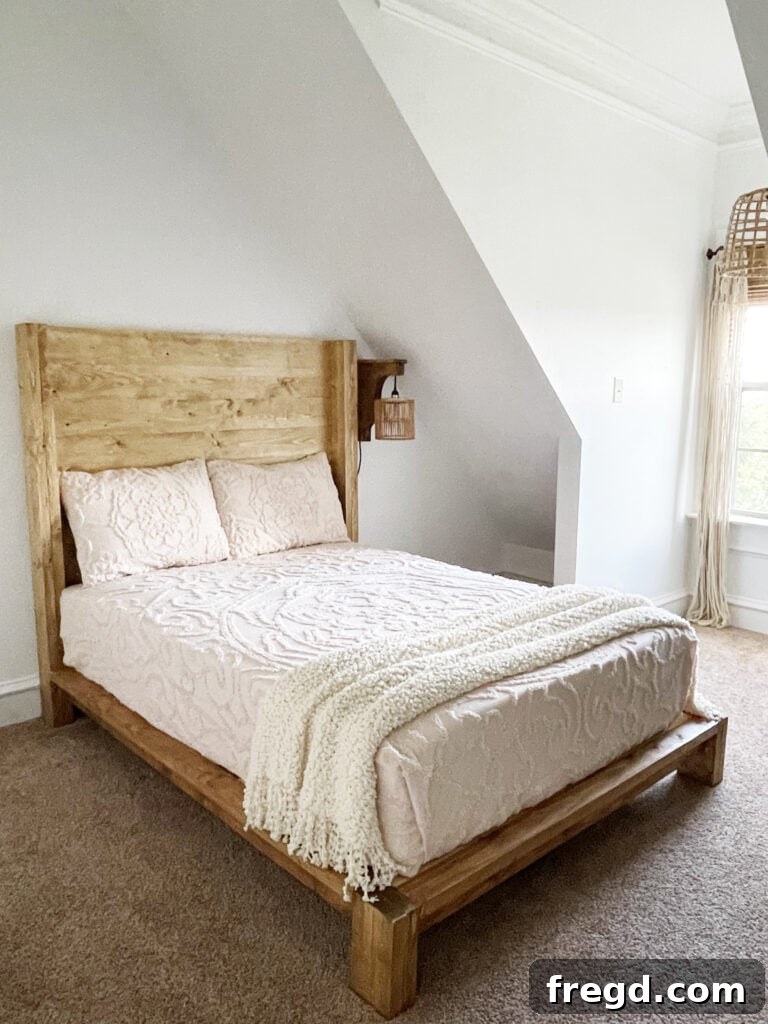
Over the past 11 years, I’ve built quite a few beds for my daughter, adapting to her changing needs and styles. But I must say, this modern, grown-up bed frame and headboard might just be my absolute favorite creation to date. It perfectly blends functionality with a chic aesthetic, and the joy of seeing her love it makes every moment spent building worthwhile.
While these plans are specifically designed for a full-size mattress, modifying the dimensions for a different size bed is a very straightforward process. Understanding the standard mattress dimensions is the first step in customizing your plans:
- Twin: 75″L x 38″W
- Full (this plan): 75″L x 54″W
- Queen: 80″L x 60″W
- King: 80″L x 76″W
You will primarily modify the width of the headboard and footboard components, and the length of the side rails, depending on the mattress size you are building for. Here’s a general guide for adjustments:
- For a Twin Bed:
- Width Adjustment: You would need to subtract 16″ from the width of all components that run across the bed (e.g., headboard planks, headboard stretcher, footboard trim, footboard rail, and all bed slats). (Full width 54″ – Twin width 38″ = 16″ difference).
- Length Adjustment: The length of the side rails, side trim, and cleats remains the same as the full-size plan (75″ length).
- For a Queen-Sized Mattress:
- Width Adjustment: You would add 6″ to the width of all components that span the width of the bed (e.g., headboard planks, headboard stretcher, footboard trim, footboard rail, and all bed slats). (Queen width 60″ – Full width 54″ = 6″ difference).
- Length Adjustment: You would add 5″ to the length of the side rails, side trim, and cleats. (Queen length 80″ – Full length 75″ = 5″ difference).
- For a King Size Mattress:
- Width Adjustment: You would add 22″ to the width of all components that span the width of the bed (e.g., headboard planks, headboard stretcher, footboard trim, footboard rail, and all bed slats). (King width 76″ – Full width 54″ = 22″ difference).
- Length Adjustment: You would add 5″ to the length of the side rails, side trim, and cleats. (King length 80″ – Full length 75″ = 5″ difference).
Remember to carefully recalculate all cuts based on these adjustments for each specific component. Always double-check your measurements before making any cuts to ensure a perfect fit for your chosen mattress size.
Explore Other DIY Bed Frame Projects We’ve Designed!
If you’ve enjoyed building this bed frame, or if you’re looking for different styles and sizes, be sure to check out some of our other popular bed frame designs. We have a variety of projects that cater to different tastes and skill levels, from rustic to modern, and loft beds to platform beds. Each design comes with detailed free plans to help you create more beautiful furniture for your home.
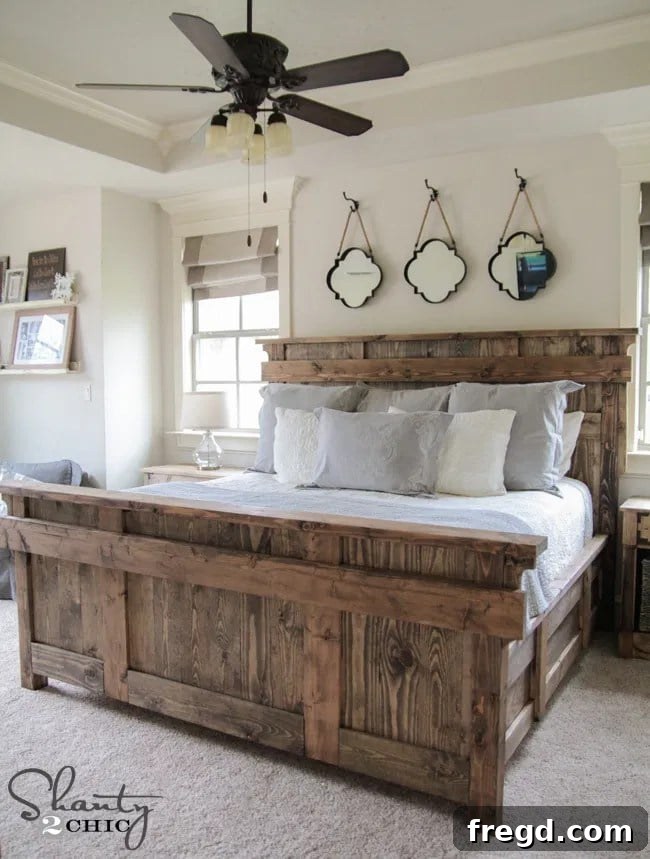
King-sized Bed Frame: If you’re looking to upgrade to a grander scale, our king-sized bed frame plans offer robust design and spacious comfort.
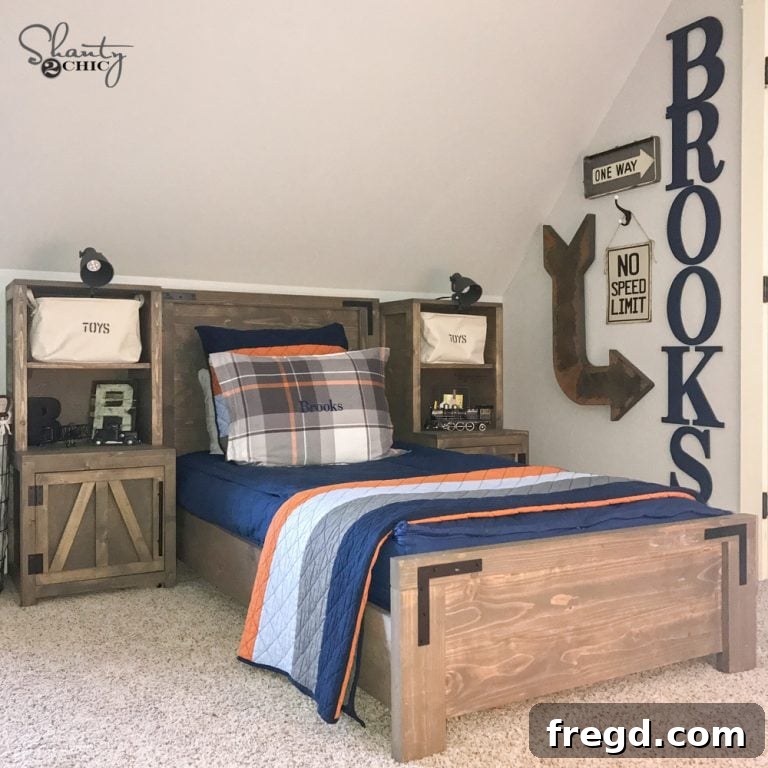
Modern Farmhouse Wood Platform Bed: Embrace rustic charm with a modern twist with this stylish platform bed, perfect for contemporary farmhouses.
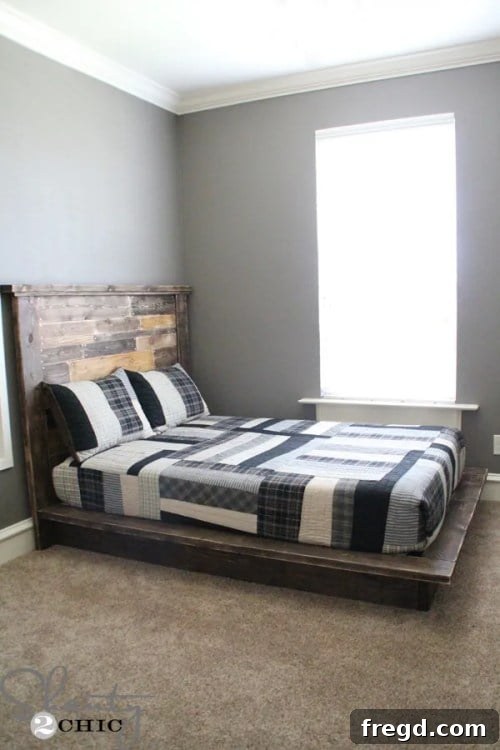
Easy DIY Platform Bed Frame: A simpler, minimalist design that’s quick to build and offers excellent mattress support without a box spring.
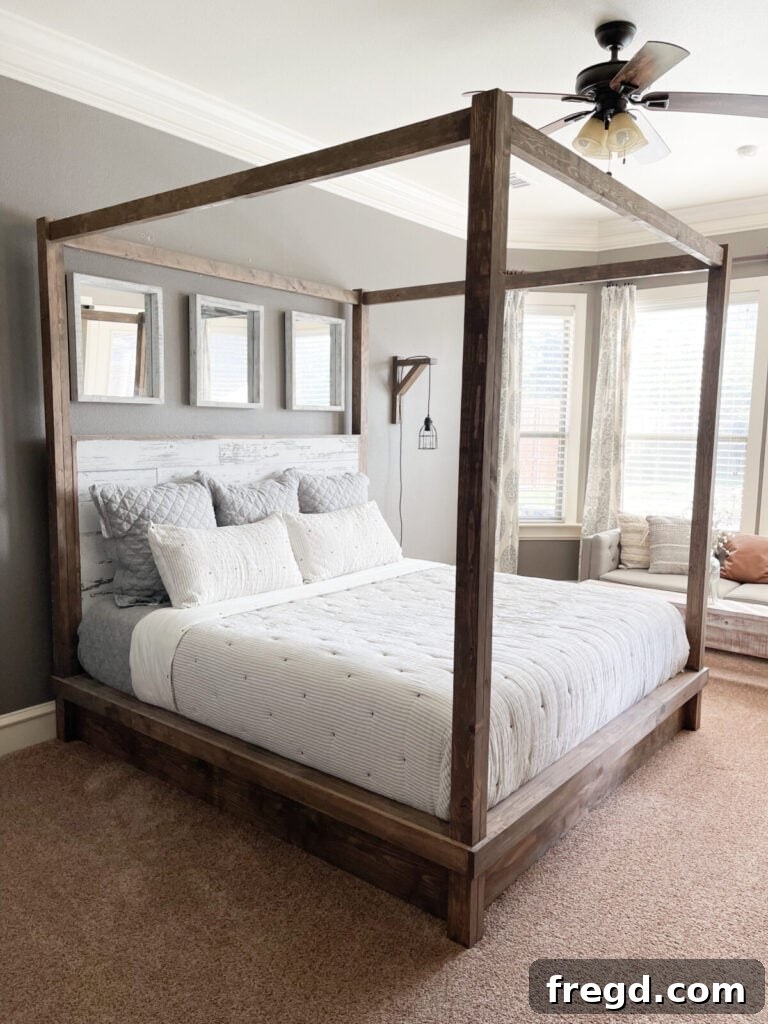
Farmhouse Canopy Bed: Create a dreamy bedroom retreat with this elegant farmhouse-style canopy bed, offering both style and privacy.
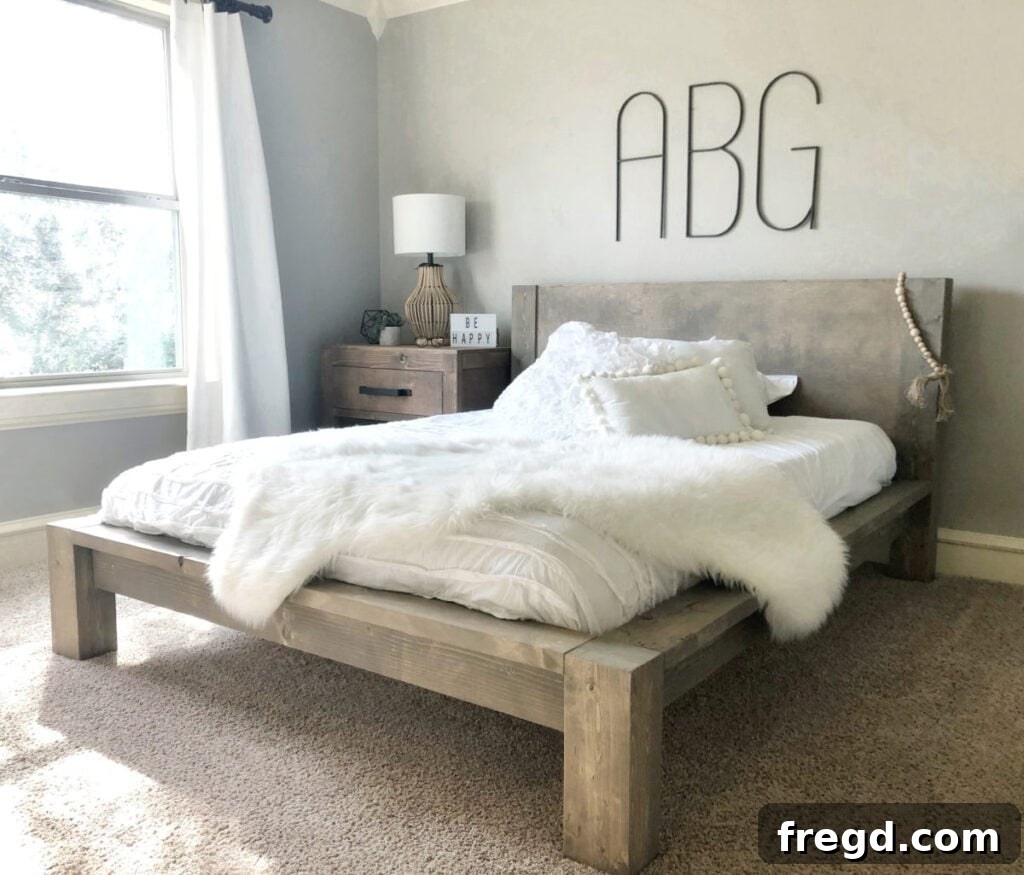
Rustic Modern Queen Bed: A beautiful blend of rustic textures and modern lines, designed to perfectly fit a queen-sized mattress.
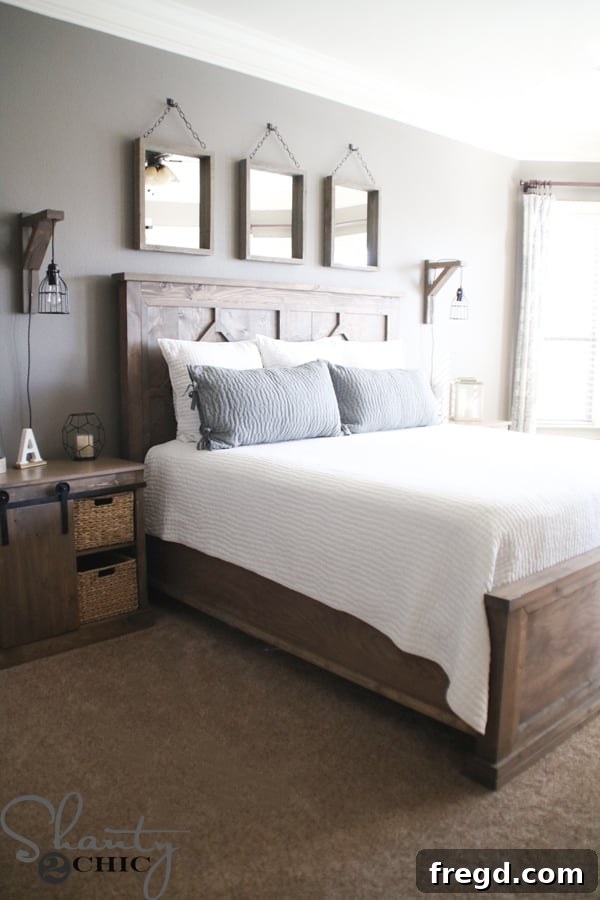
Pottery Barn Inspired King Bed: Achieve that coveted high-end look without the designer price tag with this Pottery Barn-inspired king bed.
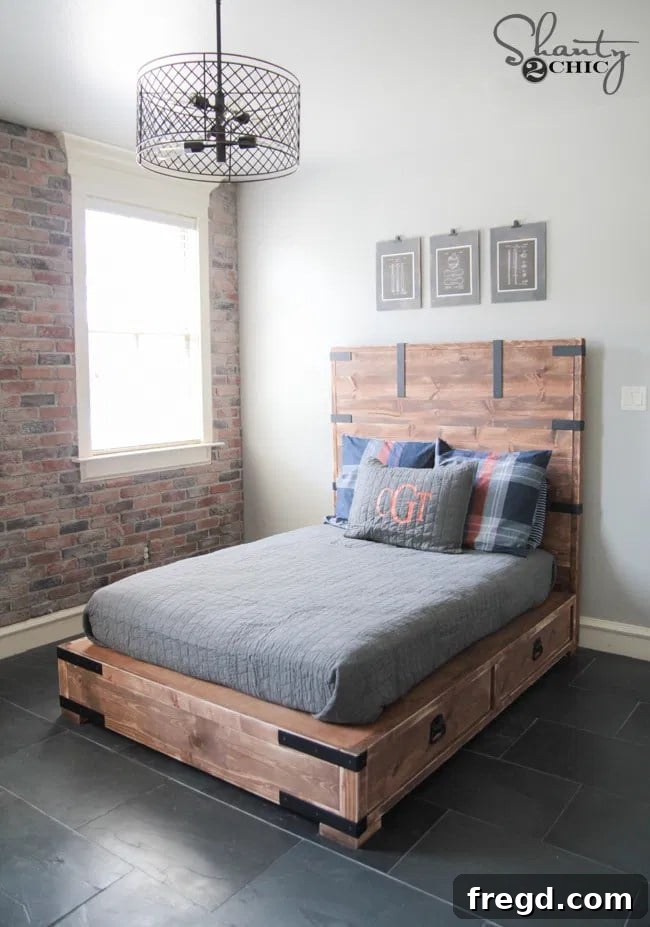
Full Bed with Metal Hardware and Drawers: Maximize your bedroom’s storage with this smart design featuring integrated drawers and stylish metal accents.
DIY Bed Frame & Wood Headboard Plans
Tools
-
Miter Saw
-
Drill
-
Kreg Jig
-
Brad Nailer
-
Sander
-
Table Saw (optional)
Supply List
- 4 2x6x8 Framing Lumber
- 9 2x4x8 Framing Lumber
- 9 1x6x8 Pine or Common Boards
- 11 1x4x8 Furring Strips
- 1 1/4″ Pocket Hole Screws
- 2 1/2″ Pocket Hole Screws
- 1 1/4″ Wood Screws
- 2 1/2″ Wood Screws
- 2″ Brad Nails
- Wood Glue
Instructions
Cut List
-
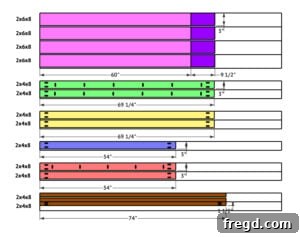
Cut List 1: (Note: I ripped the rounded edges off the 2×6 and 2×4 boards for a cleaner look. This step is optional. If you choose not to rip your boards, please adjust the plans accordingly for slightly different dimensions.)

-
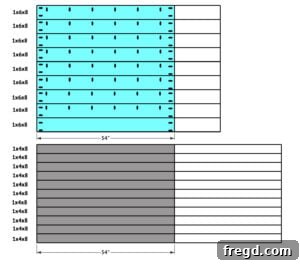
Cut List 2:
Building the Headboard
-
Cut the planks to size and drill 3/4″ pocket holes according to the cut list. Attach the planks together using wood glue and 1 1/4″ pocket hole screws to form the main headboard panel.
-
Cut the leg pieces to size. Stack 2 leg pieces together for each side, applying wood glue between them and securing with 2″ brad nails. Build two leg assemblies.
-
Attach each leg assembly to the headboard planks using wood glue and 1 1/4″ pocket hole screws. Ensure the back and top edges of the planks are flush with the back and top edges of the legs for a clean finish.
-
Cut the headboard stretcher to size and drill 1 1/2″ pocket holes at both ends. Attach it between the headboard legs with wood glue and 2 1/2″ pocket hole screws, ensuring stability.
Building the Bed Frame
-
Cut the foot pieces to size. Stack 2 pieces together for each foot, using 2″ brad nails and wood glue. Build two foot assemblies for the footboard.
-
Cut the footboard trim to size and drill 1 1/2″ pocket holes at both ends. Attach it to the feet with wood glue and 2 1/2″ pocket hole screws. The front and top of the trim should be flush with the front and top of the feet.
-
Cut the footboard rail to size and drill 1 1/2″ pocket holes along one edge and both ends. Attach it to the trim and feet with wood glue and 2 1/2″ pocket hole screws. Ensure the back of the rail is flush with the back of the trim.
-
Cut the side trim pieces to size and drill 1 1/2″ pocket holes at both ends. Attach each side trim to its respective foot assembly with wood glue and 2 1/2″ pocket hole screws. Repeat for both sides of the bed frame.
-
Cut the side rails to size and drill 1 1/2″ pocket holes along one edge and both ends. Attach the rails to the side trim and feet with wood glue and 2 1/2″ pocket hole screws. The back of the rail should be flush with the back of the trim and the inside of the feet.
Assembling the Bed
-
Attach the bed frame to the headboard by driving 2 1/2″ pocket hole screws through the side rails and into the headboard legs. Ensure the inside of the rails and trim are flush with the inside of the headboard legs.
-
Cut the cleats to size. Drill 1 1/2″ pocket holes at both ends of the center cleat. Attach one cleat to each side rail with 2 1/2″ wood screws. Center and attach the final cleat (with pocket holes) to the footboard and headboard rails with 2 1/2″ pocket hole screws.
-
Cut the slats to size and space them evenly on the cleats. The top and bottom slats should be flush with the headboard and footboard rails. Attach them to the cleats with 1 1/4″ wood screws for robust mattress support.
The Finish
-
Thoroughly sand down the entire bed frame and headboard for a smooth surface, then apply your desired stain, paint, or protective finish!
We love to see your creations! Make sure to share your finished bed frames with us on social media and use the hashtag #shanty2chic so we can celebrate and share your amazing builds too!
Happy Building!