
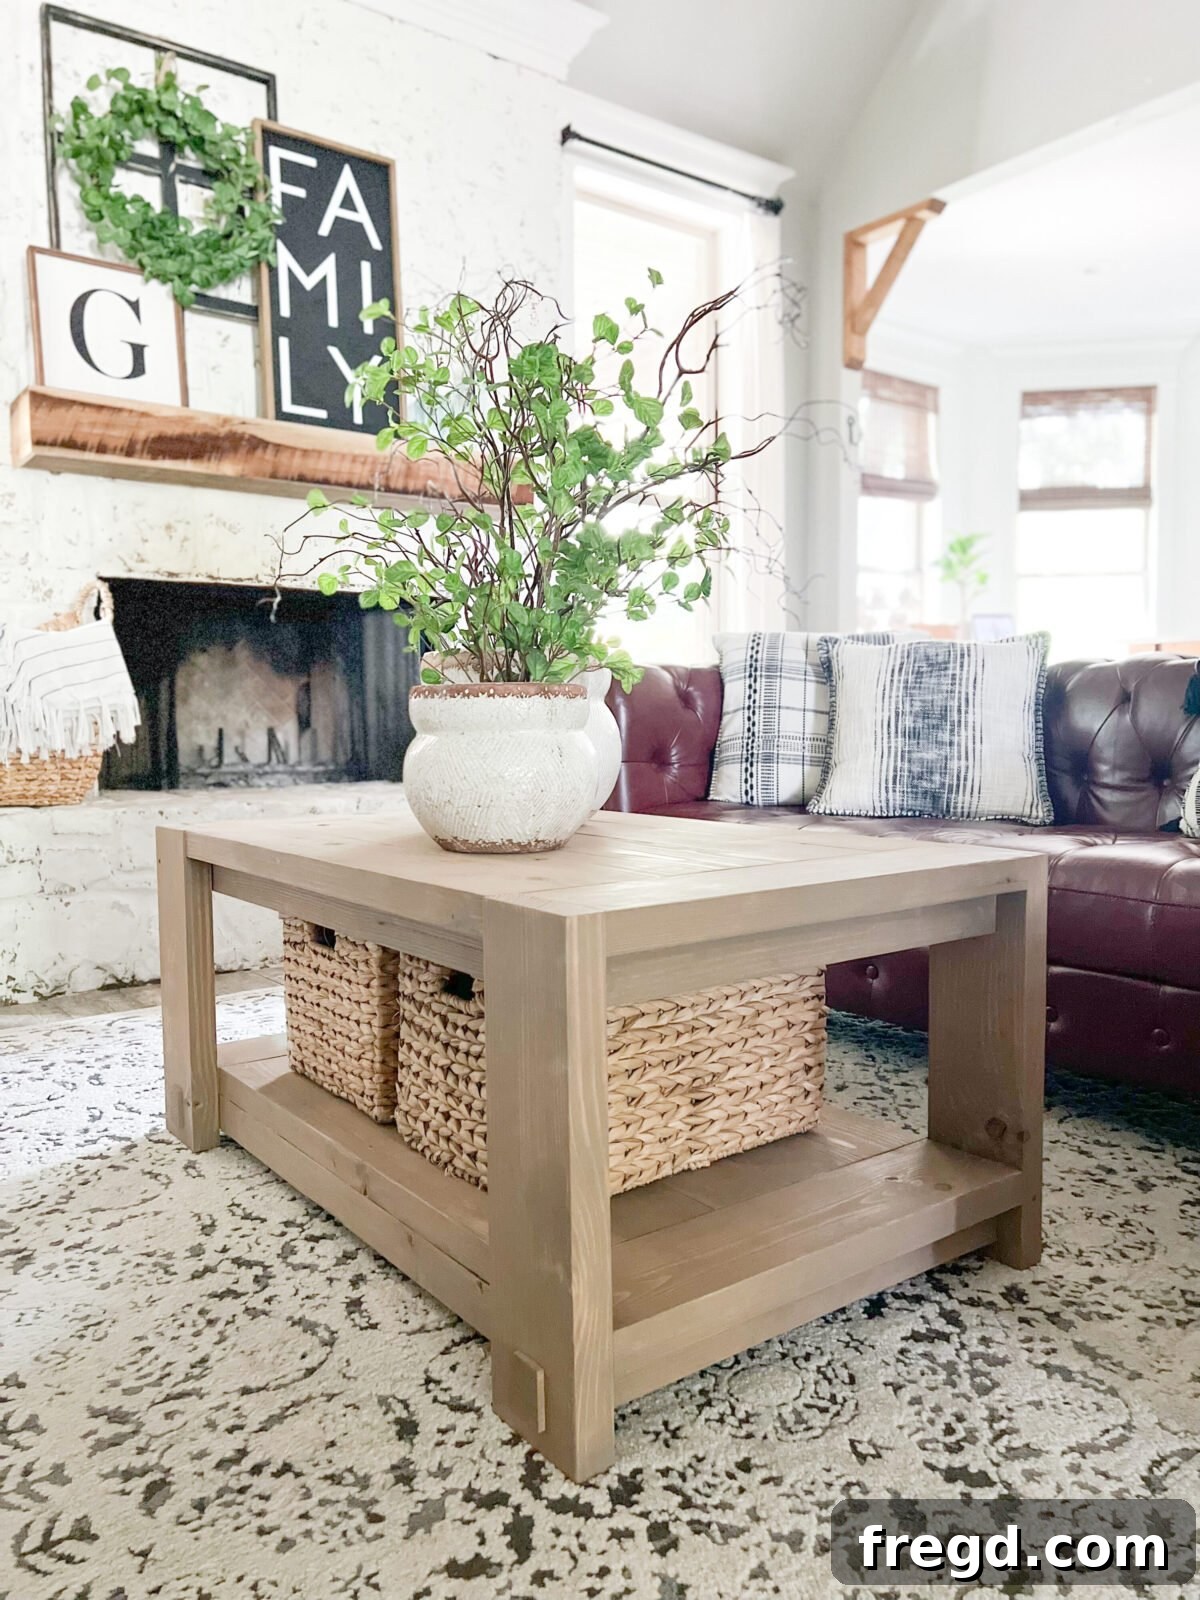
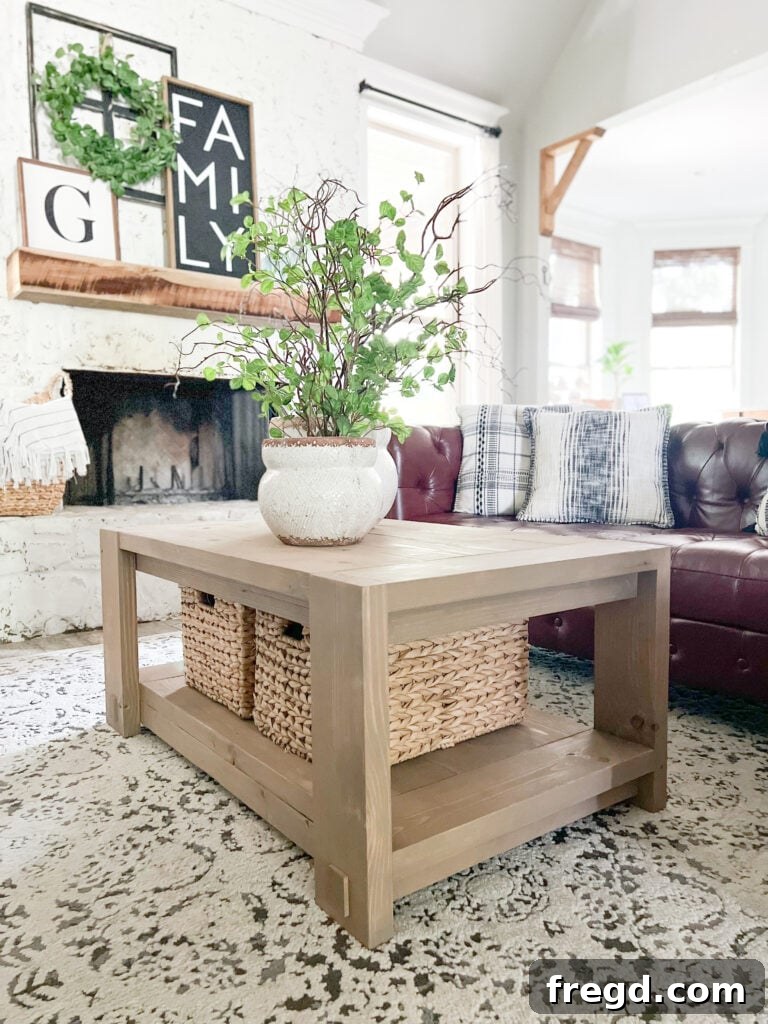
There’s nothing quite as satisfying as crafting a piece of furniture with your own hands, especially when it results in a beautiful, custom item that perfectly fits your home and budget. For a while now, I’ve been dreaming of a new coffee table, a centerpiece that would elevate my living space. However, with lumber prices often soaring, I hesitated to embark on such a project. But when I recently noticed standard 2×6 boards drop to under $8 each, I knew it was the perfect opportunity to finally build the coffee table I’d envisioned!
Using just seven 2×6 boards, I was able to construct this entire coffee table, keeping the total lumber cost to an incredibly affordable $60. The result is a robust, stylish, and highly functional coffee table that brings a touch of custom craftsmanship to my living room. I couldn’t be happier with how this project turned out, blending practicality with a beautiful aesthetic. Join me as I share the detailed steps to recreate this fantastic DIY coffee table for your own home!
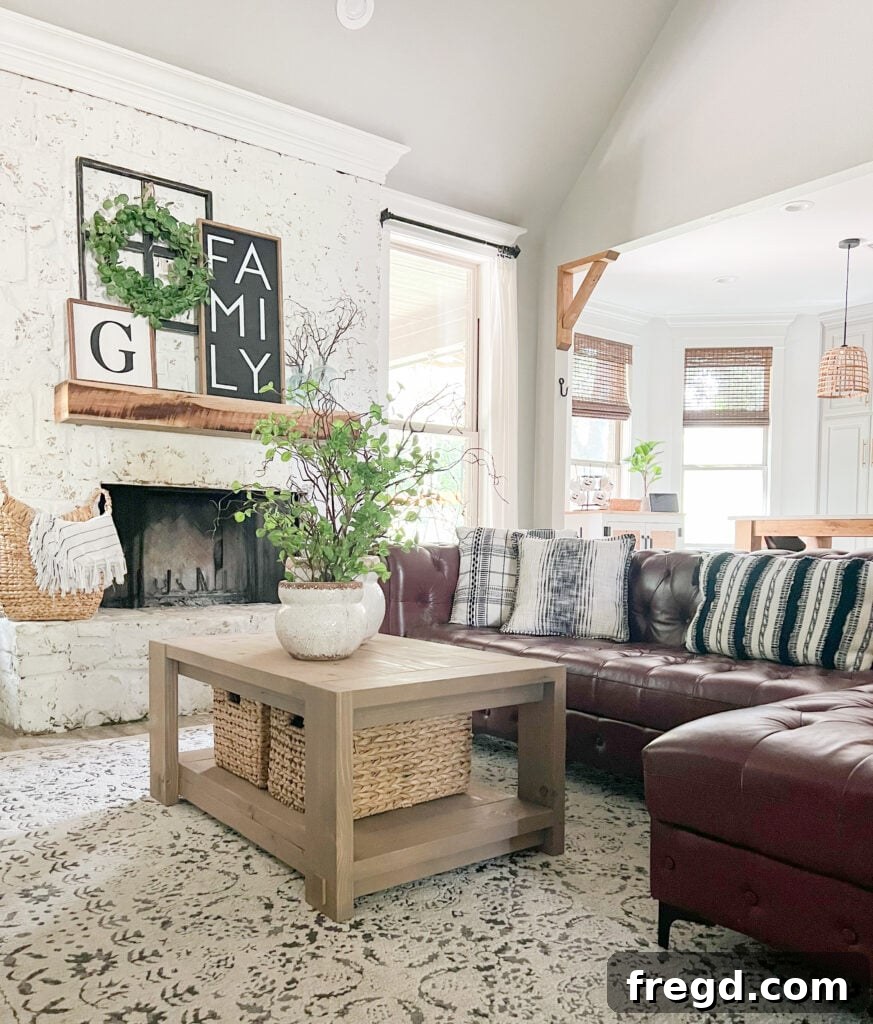
Table of Contents
Preparing the Lumber for a Professional Finish
Working with dimensional lumber, such as the readily available 2×6 boards used in this project, offers an excellent balance of affordability and accessibility. However, for a truly custom and professional-looking finish, we employ a crucial technique: ripping the edges with a table saw. Standard 2x lumber often comes with slightly rounded edges, which can give a project a less refined appearance. By carefully ripping off these edges, you achieve crisp, straight lines that mimic higher-grade lumber, resulting in a much cleaner and more tailored aesthetic for your furniture.
Beyond the enhanced visual appeal, ripping your lumber provides incredible design flexibility. Instead of being limited to the standard width of a 2×6, you can precisely cut boards to various dimensions to suit your specific project needs. For this coffee table, I custom-ripped boards to 5 inches, 4 3/8 inches, and 2 inches wide. This allowed me to create distinct elements for the tabletop, shelves, and structural components, all while working with the same cost-effective source material. This method not only keeps the overall cost down but also opens up a world of creative possibilities, allowing you to achieve unique designs that wouldn’t be possible with off-the-shelf sizes.
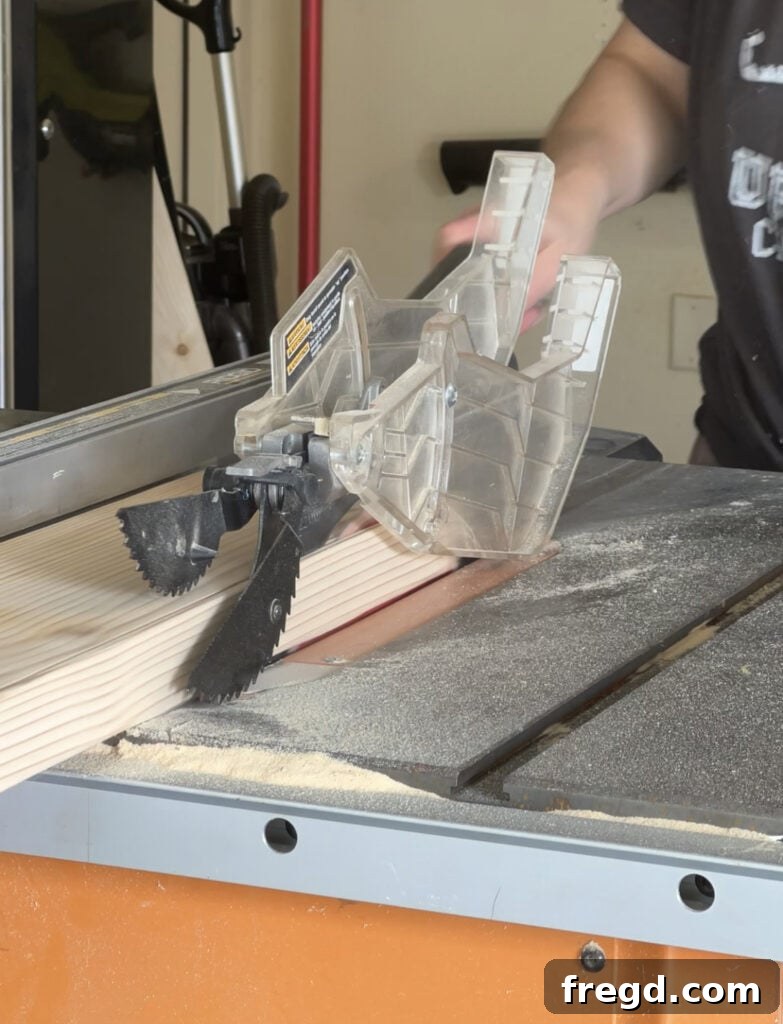
When preparing your lumber, a common practice I find particularly helpful is to make all necessary cross-cuts (cutting boards to their final lengths) before moving on to ripping them to width. This approach results in shorter, more manageable pieces to handle on the table saw. Maneuvering full-length 2×6 boards through a table saw can be challenging and physically demanding due to their weight and length, increasing the risk of inaccuracies or safety concerns. By cutting them down first, the process becomes significantly easier, safer, and more precise, ensuring each piece is perfectly prepared for assembly and contributing to the overall quality of your DIY coffee table.
Mastering Pocket Hole Joinery with Kreg Jig
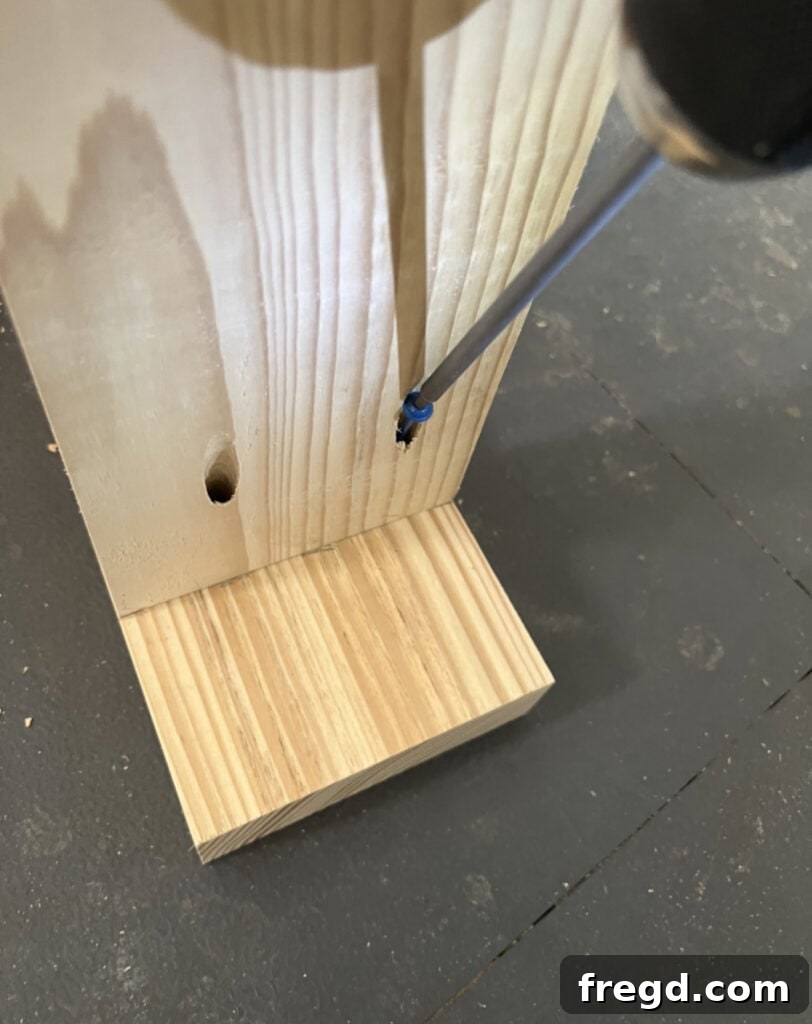
Pocket hole joinery is a game-changer for DIY furniture builders, offering a remarkably strong, simple, and aesthetically pleasing method for connecting wood pieces. This technique involves drilling a hole at an angle into one piece of wood, then joining it to a second piece with a self-tapping screw. The result is a virtually invisible joint that holds incredibly well, eliminating the need for complex dadoes, mortise and tenon joints, or visible fasteners from the outside.
For this coffee table, which relies heavily on robust connections, I utilized my incredible Kreg Foreman. If you’re tackling projects with numerous pocket holes, this tool is an absolute revelation. It significantly speeds up the process, allowing for rapid and consistent pocket hole creation with minimal effort. The Kreg Foreman is a true time-saver, transforming what could be a tedious task into an efficient and enjoyable part of the build. You can see how effortlessly it works in the Instagram reel I previously shared, linked below. For those interested in enhancing their woodworking efficiency, you can explore the Kreg Foreman on Amazon here.
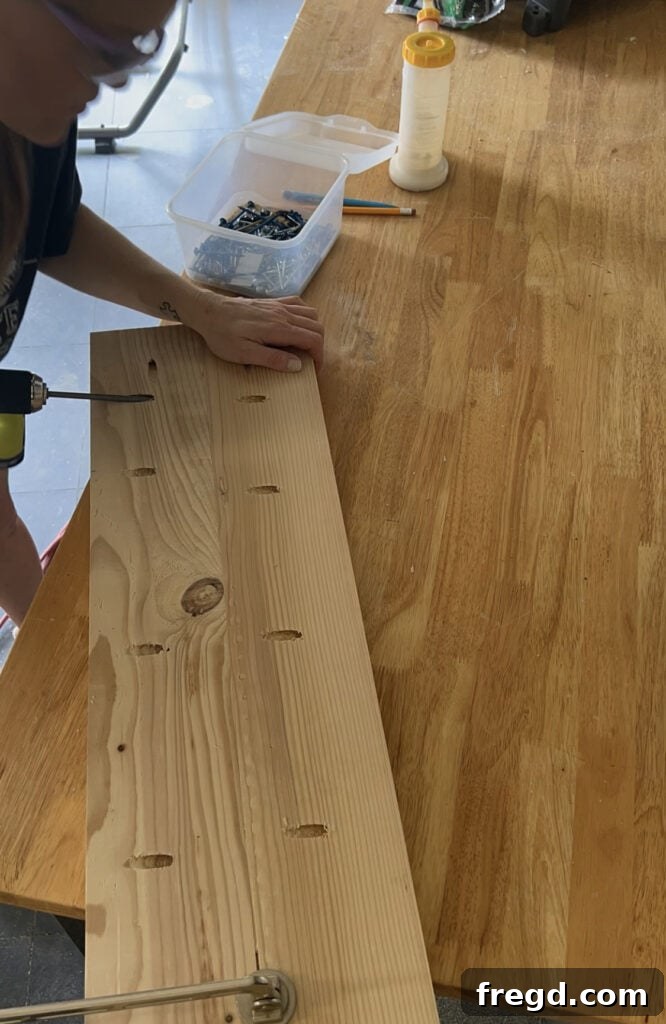
Every single pocket hole on this coffee table project is set to a standard depth of 1 1/2 inches. This depth is ideal for joining standard 2x lumber (which is actually 1 1/2 inches thick) securely. While the Kreg Foreman is fantastic for high-volume work, rest assured that any Kreg Jig model you own – whether it’s the 720PRO, K5, or another version – will perform the task beautifully. The key is to correctly set your jig for the material thickness and use the appropriate screws to ensure strong, lasting joints throughout your coffee table construction, providing the durability needed for a frequently used furniture piece.
View this post on InstagramA post shared by Shanty2Chic (@shanty2chic)
Step 1: Building the Leg Assemblies
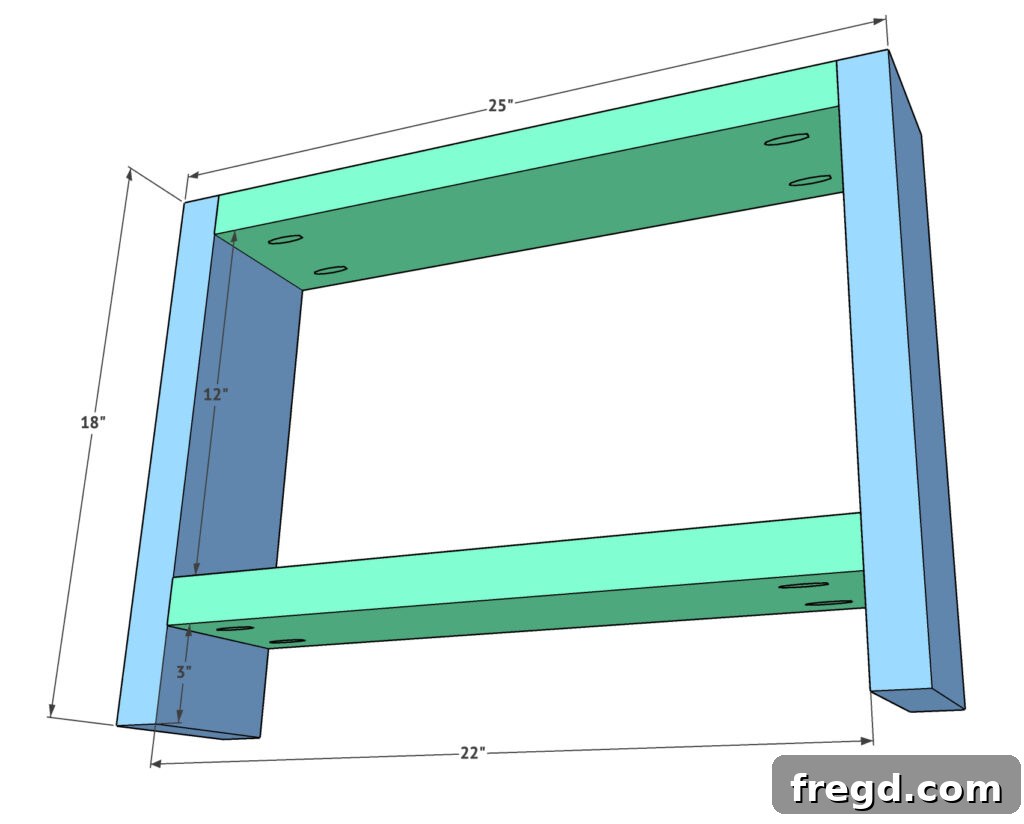
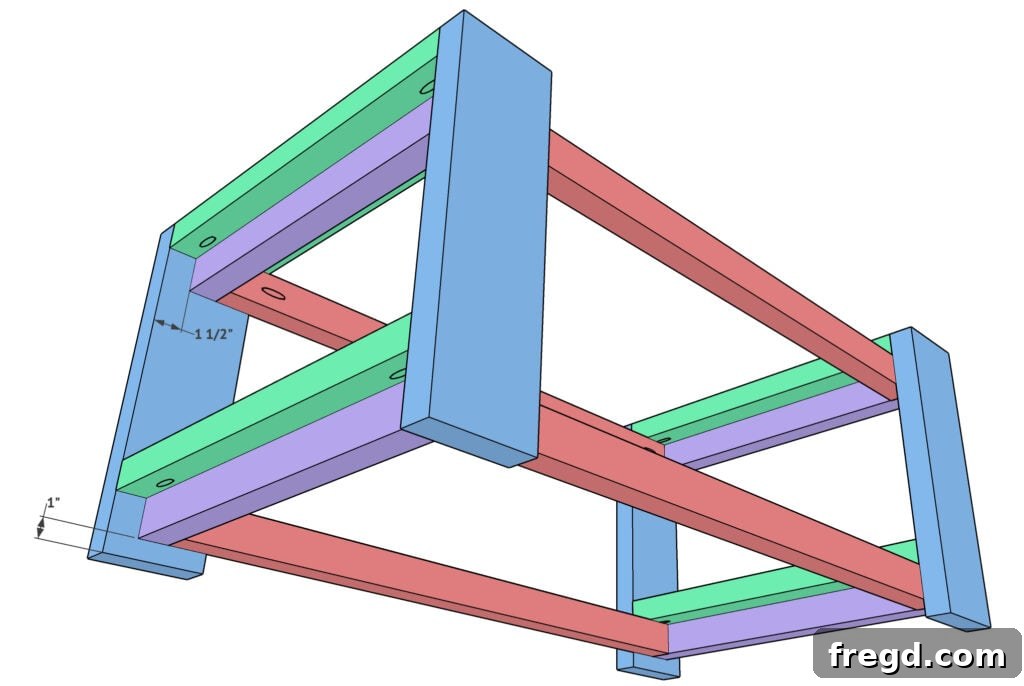
With all your lumber precisely cut and your pocket holes drilled, it’s time to transition from preparation to assembly – the exciting part where your coffee table truly begins to take shape. The foundational step involves creating the two identical leg assemblies. Each assembly consists of two vertical leg pieces connected by two horizontal “breadboards.” Breadboards are key structural elements that not only provide stability but also offer convenient surfaces for attaching other components.
To begin, apply a generous amount of wood glue to the mating surfaces of your breadboards and leg pieces. Wood glue is essential for creating strong, lasting joints, forming a bond that’s often stronger than the wood itself. Then, secure these connections using 2 1/2-inch pocket hole screws. The top breadboard should be positioned flush with the very top edge of the leg pieces, ensuring a seamless surface for the tabletop later on. For the bottom breadboard, measure and position its base exactly 3 inches up from the bottom end of the leg pieces. This strategic placement ensures adequate clearance and contributes to the overall aesthetic balance of the table. By creating two such identical leg assemblies, you lay a solid and symmetrical foundation for your entire coffee table structure.
Step 2: Constructing the Apron Frames
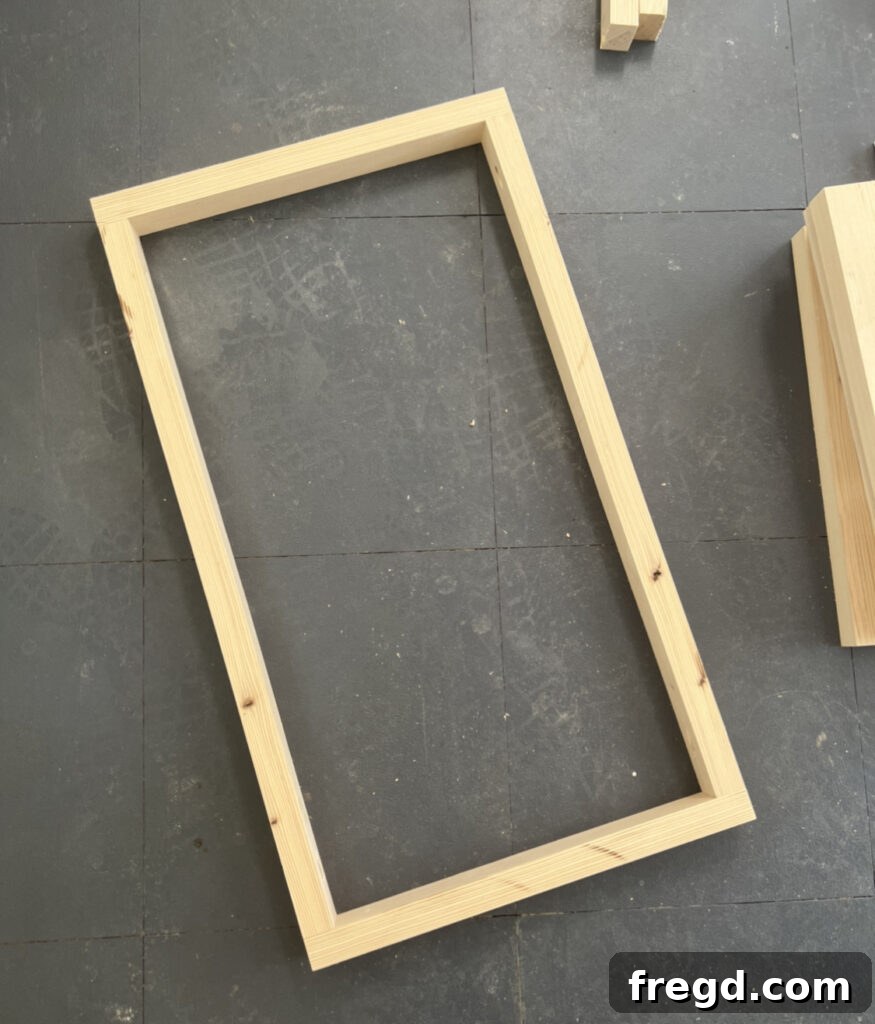
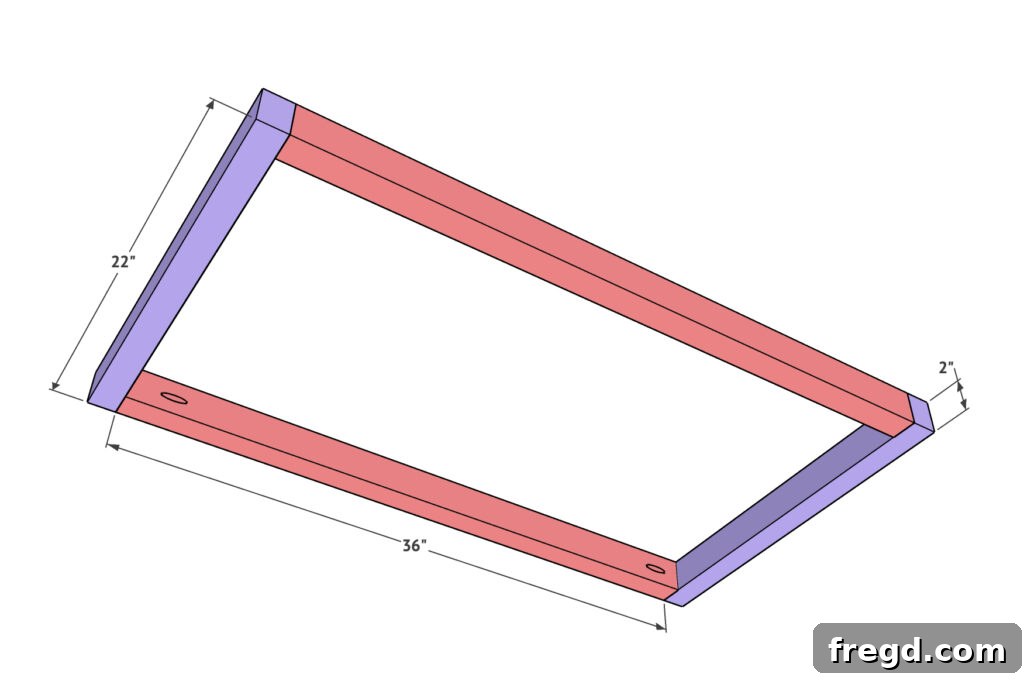
The apron frames are critical components that will connect the two leg assemblies, providing robust structural support and defining the table’s overall rectangular shape. You will need to create two identical apron frames. Each frame is composed of two longer boards and two shorter boards, all of which were previously ripped to a 2-inch width. These narrower boards contribute to a sleeker profile for the table’s sides, enhancing the design without adding bulk.
Begin by laying out the pieces for one apron frame on a flat, stable surface. Apply wood glue to the ends of the shorter boards where they will meet the longer boards. Then, connect these pieces to form a rectangular frame using 2 1/2-inch pocket hole screws. Ensure that all corners are square and the frame is flush before fully tightening the screws. A speed square or combination square is invaluable here to check for precise 90-degree angles, which are vital for a stable and aesthetically pleasing table. Repeat this process to build the second identical apron frame. These frames will serve as the strong lateral connections for your coffee table, integrating seamlessly with the leg assemblies you’ve already prepared and forming the crucial framework for your tabletop and shelf.
Step 3: Assembling the Table Body
Now comes the exciting part of bringing together the individual components to form the robust body of your coffee table. In this step, you will attach the two apron frames you just constructed to the two leg assemblies. This process will unify the structure, creating a strong and stable base for the tabletop and lower shelf, and truly giving your table its foundational shape.
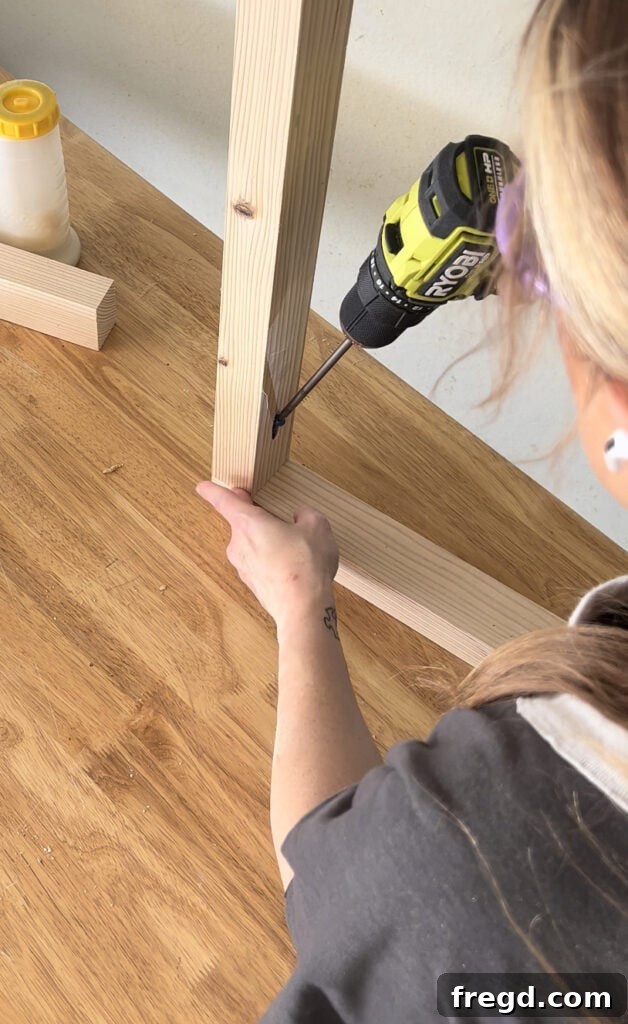
First, position one of the apron frames to serve as the bottom apron. Apply wood glue to the contact points where it will meet the bottom breadboards of the leg assemblies. Securely attach this bottom apron frame using 2 1/2-inch screws driven through the bottom edge of the apron frame and into the breadboards. This creates a powerful connection from underneath, ensuring stability. For areas that might be a little tricky to access, like driving screws upwards, I found my Kreg QuickFlip invaluable; it makes flipping screws easy and precise, particularly useful in tight spots. Additionally, for extra reinforcement, add a screw on the inside of the apron frame, driving it into each leg piece to prevent any lateral movement or racking.
Next, take the second apron frame and attach it in the same manner to the top breadboards of the leg assemblies. Again, use wood glue for a strong bond and 2 1/2-inch screws through the top apron frame into the breadboards, along with additional screws from the inside of the apron into each leg piece. It’s crucial to pay close attention to the placement of these frames as depicted in the picture – they should be flush with the outer edges of the leg assemblies, creating a clean, integrated look. Throughout this step, regularly check for squareness using a large speed square or framing square to ensure your table body is perfectly aligned and wobble-free. This meticulous attention to detail now will result in a perfectly stable and professional-looking finished product, ready for its surfaces.
Step 4: Creating the Planked Tabletop
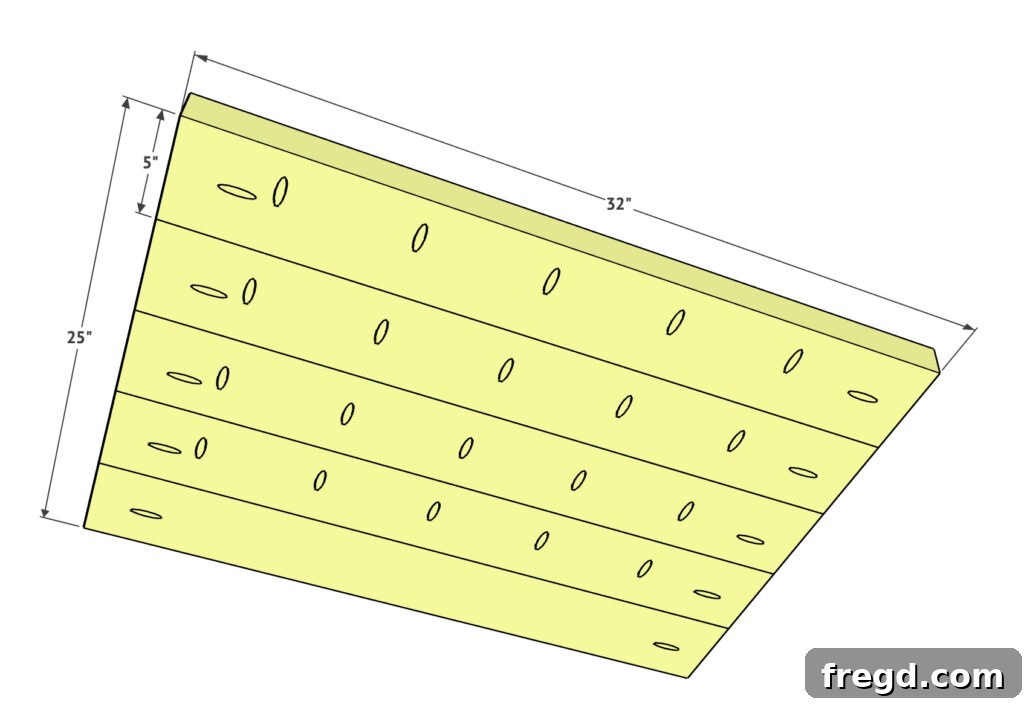
The tabletop is the focal point of your coffee table, and creating a beautifully planked surface adds significant character and style. For this project, the tabletop boards were expertly ripped to a uniform 5-inch width, giving the top a substantial yet refined appearance. The consistent width of these planks contributes to a cohesive and intentional design, highlighting the natural grain of the wood and creating a visually appealing surface that’s both modern and classic.
To assemble the tabletop, arrange your ripped planks side-by-side on a flat surface, ensuring their ends are flush. Apply a generous bead of wood glue along the long edges where each plank will meet its neighbor. This glue joint will provide significant strength and prevent gaps. Then, using 2 1/2-inch pocket hole screws, attach each board securely to the adjacent one. Place pocket holes strategically along the length of the boards, ensuring even distribution for maximum strength and flatness. Clamps are invaluable here to hold the boards tightly together as you drive the screws, preventing any gaps from forming and ensuring a seamless, solid panel. The goal is to create a single, unified tabletop panel that is both visually appealing and incredibly durable, ready to withstand daily use for years to come and serve as a stylish centerpiece in your living room.
Step 5: Crafting the Base Shelf Planks
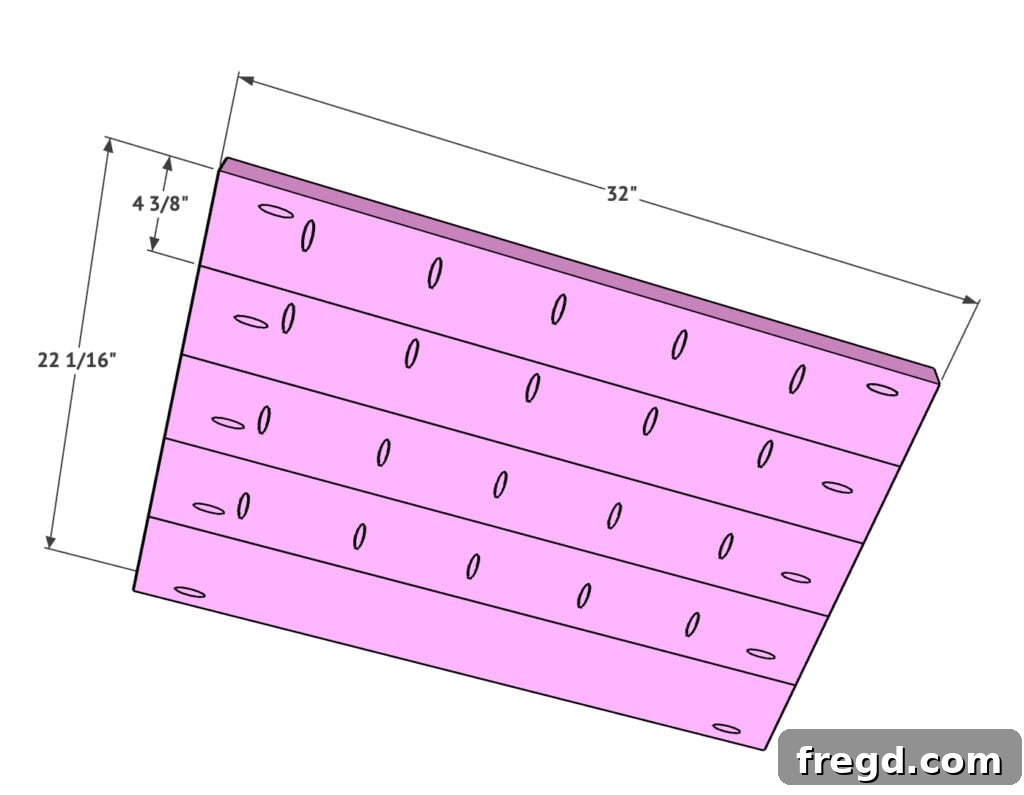
Just like the tabletop, the base shelf will also feature a planked design, adding both functionality and a consistent aesthetic to the overall coffee table. The process for assembling the base shelf planks is identical to that of the tabletop, ensuring a unified construction method and strength. However, a key distinction lies in the dimensions: these base shelf boards are typically ripped to slightly smaller widths to fit perfectly and evenly within the designated space of the lower apron frame, ensuring a custom, tailored look.
Carefully lay out the prepared boards for your base shelf, aligning them precisely. Apply a continuous bead of wood glue along the edges where the planks will join. Then, use 2 1/2-inch pocket hole screws to firmly attach each board to its neighbor, creating a solid, single-panel shelf. Utilize clamps to keep the boards tightly pressed together during this process, which helps eliminate gaps and ensures a smooth, flat surface. The precision in ripping these boards to the correct, slightly smaller dimensions is crucial for them to integrate seamlessly into the table’s structure, creating a robust and practical lower storage area that mirrors the craftsmanship of the tabletop and enhances the table’s utility.
Step 6: Attaching the Tabletop and Shelf
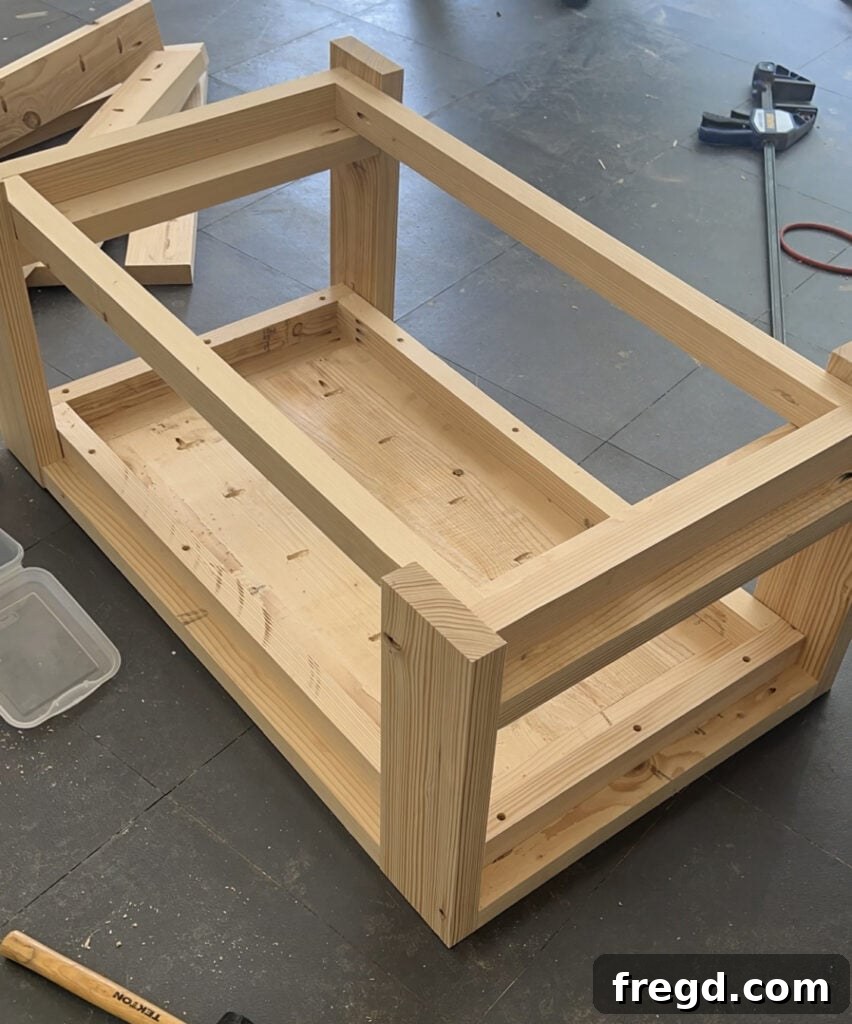
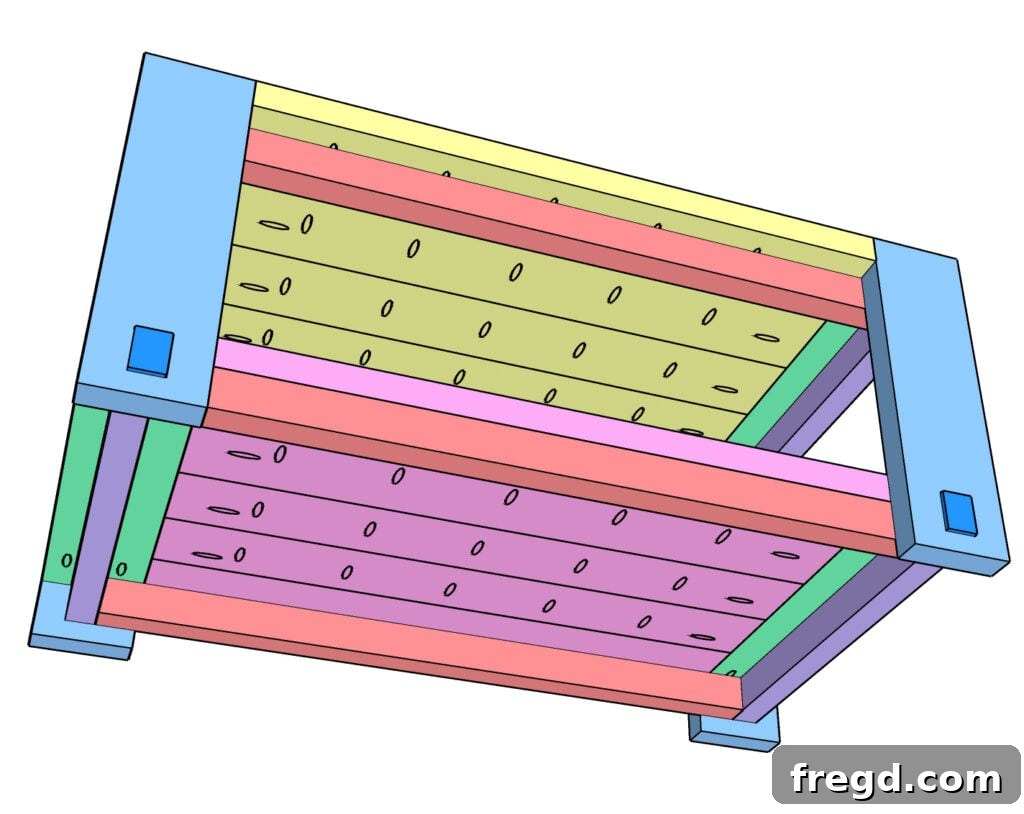
With the main table body assembled and both the tabletop and base shelf panels constructed, it’s time to bring these major components together, giving your coffee table its final functional form. This step involves securely fastening both the top and bottom planked panels to the table’s framework, ensuring stability and durability for years of use.
Begin by positioning the assembled tabletop onto the top breadboards of the leg assemblies. Ensure it’s perfectly centered and aligned, with an even overhang on all sides. Apply wood glue along the top edges of the breadboards where they will meet the tabletop. Then, from underneath the tabletop, drive 2 1/2-inch pocket hole screws into the breadboards. This method provides incredibly strong, hidden fasteners, maintaining the clean aesthetic of your tabletop surface. Double-check for proper overhang and alignment before fully tightening all screws, as this is your last chance to adjust the tabletop’s position.
Next, attach the base shelf planks to the table body. This part can be slightly trickier due to access, but with the right technique, it’s easily manageable. Apply wood glue to the top edges of the bottom breadboards and to the top edges of the bottom apron frame where the shelf will rest. Carefully lower the base shelf into place. To secure it, drive 2 1/2-inch pocket hole screws from the underside of the base shelf into the bottom breadboards, similar to how you attached the tabletop. Additionally, drive 2 1/2-inch screws upwards through the bottom apron frames and into the bottom of the shelf planks. For stability during this process, I highly recommend using a clamp to firmly hold the base shelf in its exact position while you attach the screws. This prevents any shifting and ensures a tight, secure fit. This dual fastening approach guarantees that both your tabletop and base shelf are incredibly stable and ready for use, providing robust storage and display surfaces.
Step 7: Adding the Final Decorative Touches
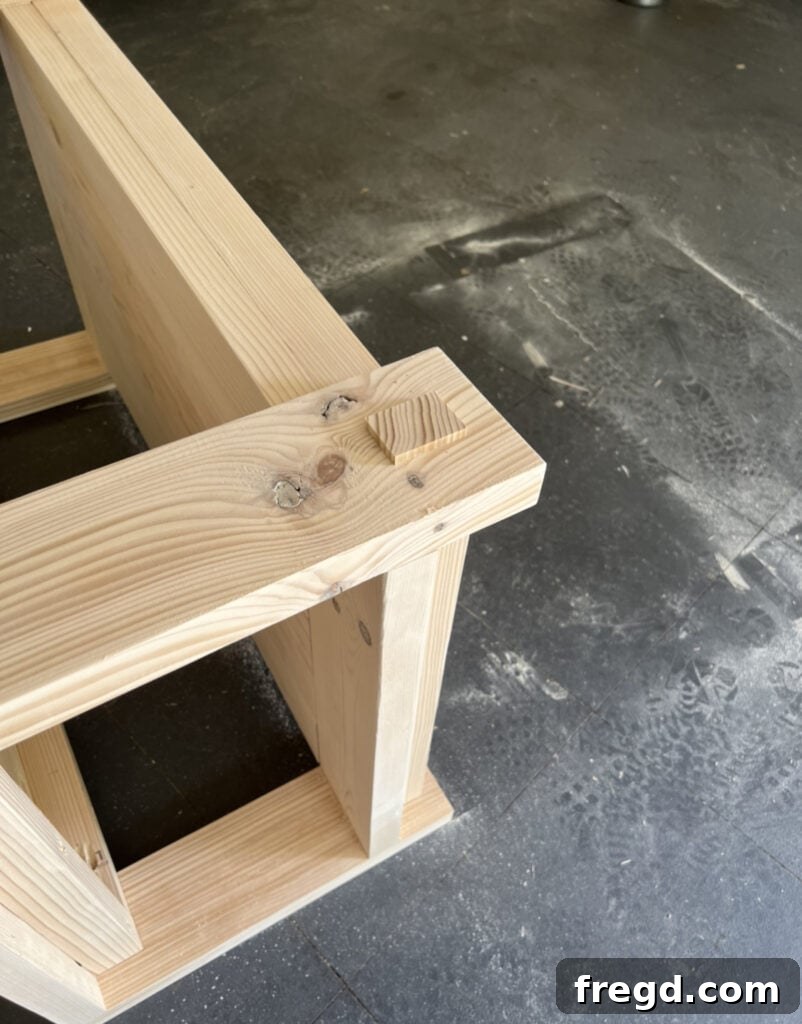
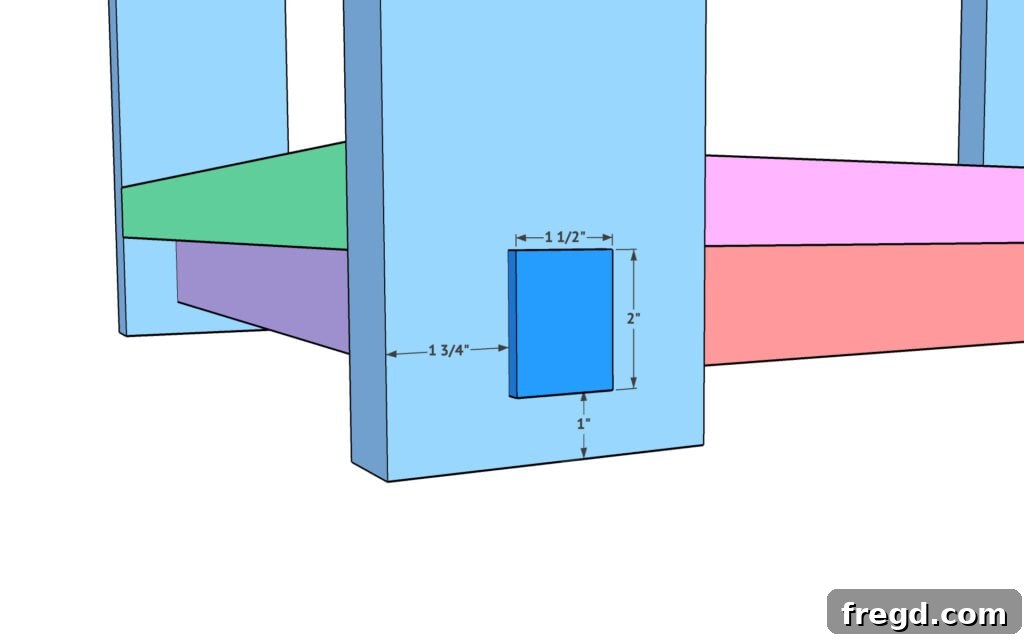
The structural assembly of your coffee table is now complete, but it’s often the small, thoughtful details that elevate a project from good to truly exceptional. In this final assembly step, we’ll add decorative pieces to each leg, providing a refined finish and a touch of custom detail that enhances the table’s overall aesthetic appeal. These pieces aren’t just for looks; they can also subtly conceal any minor imperfections or joinery, giving the table a polished, professional appearance.
These decorative elements are crafted from 1/4-inch thick pieces of the 2-inch wide boards that were custom-ripped at the very beginning of the project. Each piece measures 1 1/2 inches by 2 inches, perfectly proportioned to accent the legs without overwhelming them. To attach them, apply a thin, even layer of wood glue to the back of each decorative piece. Position them carefully onto the legs, aligning them precisely. Then, secure them in place using 1.25-inch brad or pin nails. Brad and pin nails are ideal for this application because they create very small holes that are barely visible once filled and stained, ensuring a clean finish. Take your time with this step, ensuring each decorative piece is square and evenly placed on all four legs for a consistent and high-quality result. Once these are in place, your coffee table is structurally complete and ready for finishing, showcasing careful attention to detail.
Custom Staining Your DIY Coffee Table
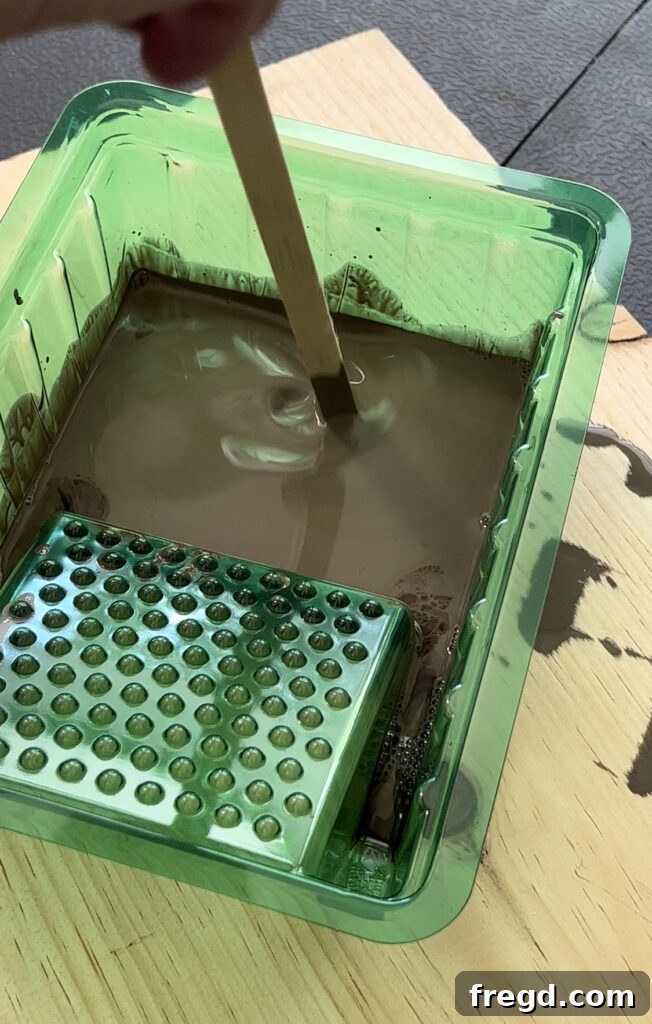
After all the hard work of building, the finishing stage is where your coffee table truly comes alive, showcasing the beauty of the wood and your personal style. One of my favorite techniques for achieving a unique and perfectly tailored look is to mix different wood stains. This allows for endless customization, ensuring the final color complements your existing decor and vision. For this project, I created a stunning custom shade by blending two fantastic stains: Willow Gray by Varathane and Early American by Rustoleum.
The process of mixing stains is surprisingly simple and incredibly rewarding. Start with a clean, empty container. Pour in your desired proportions of each stain; there’s no strict rule, so feel free to experiment with small batches on scrap wood until you achieve your ideal hue. Once combined, mix them thoroughly until they are completely blended and uniform in color. This mixed stain offers a depth and complexity that a single stain often can’t achieve, creating a sophisticated and personalized finish that makes your DIY coffee table truly one-of-a-kind.
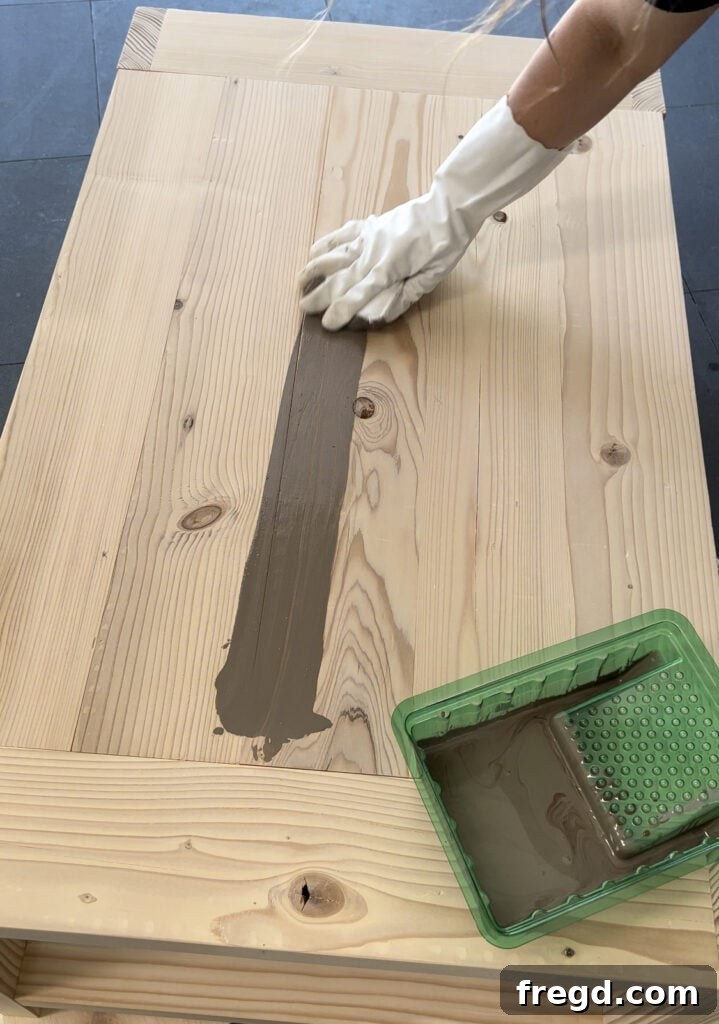
Before applying the stain to your coffee table, ensure the wood surface is clean, smooth, and free of dust. Sanding with progressively finer grits of sandpaper (e.g., 120, 180, 220) will prepare the wood to absorb the stain evenly, preventing blotchiness. Apply the mixed stain with a brush or a clean cloth, working in the direction of the wood grain for the best results. Allow the stain to penetrate for a few minutes (refer to stain manufacturer’s recommendations for specific timing), then wipe off any excess with a clean rag. For a deeper color, you can apply additional coats, allowing adequate drying time between each. Once the stain is completely dry, typically 24-48 hours, consider applying a protective topcoat, such as polyurethane or a clear wax, to enhance durability and protect against spills and wear, ensuring your beautiful custom finish lasts for years.
Enjoying Your Beautiful New DIY Coffee Table!
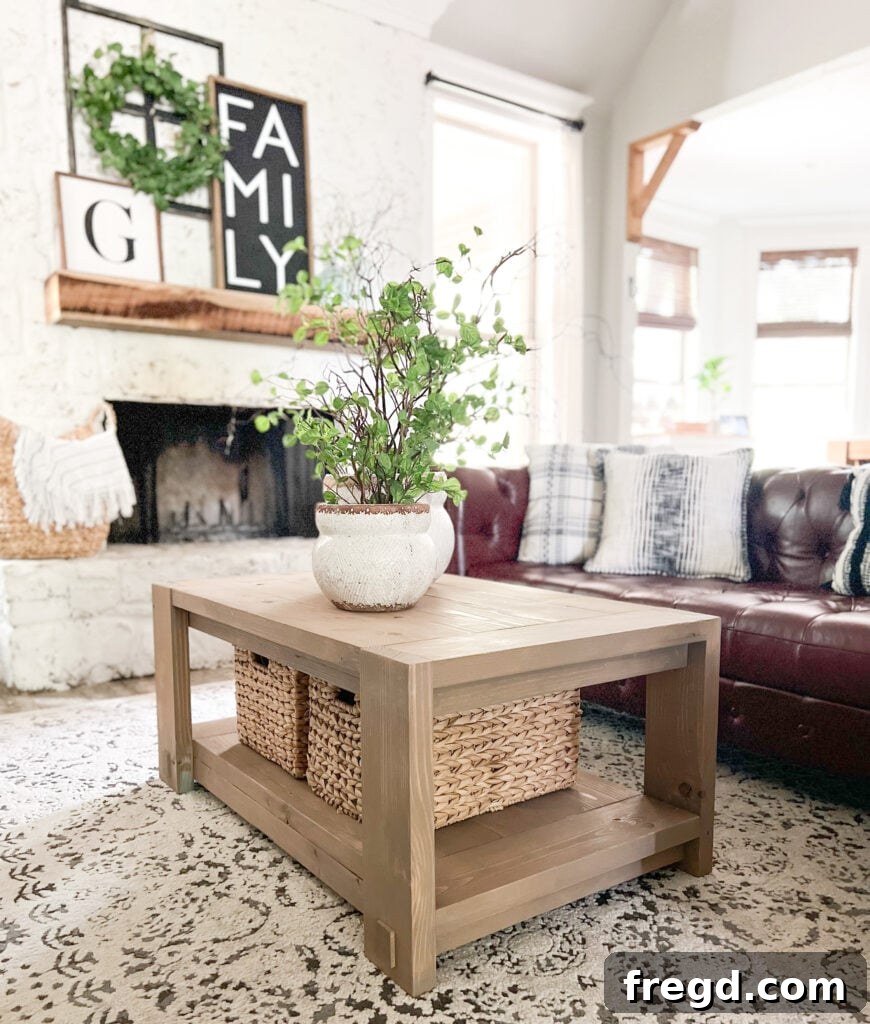
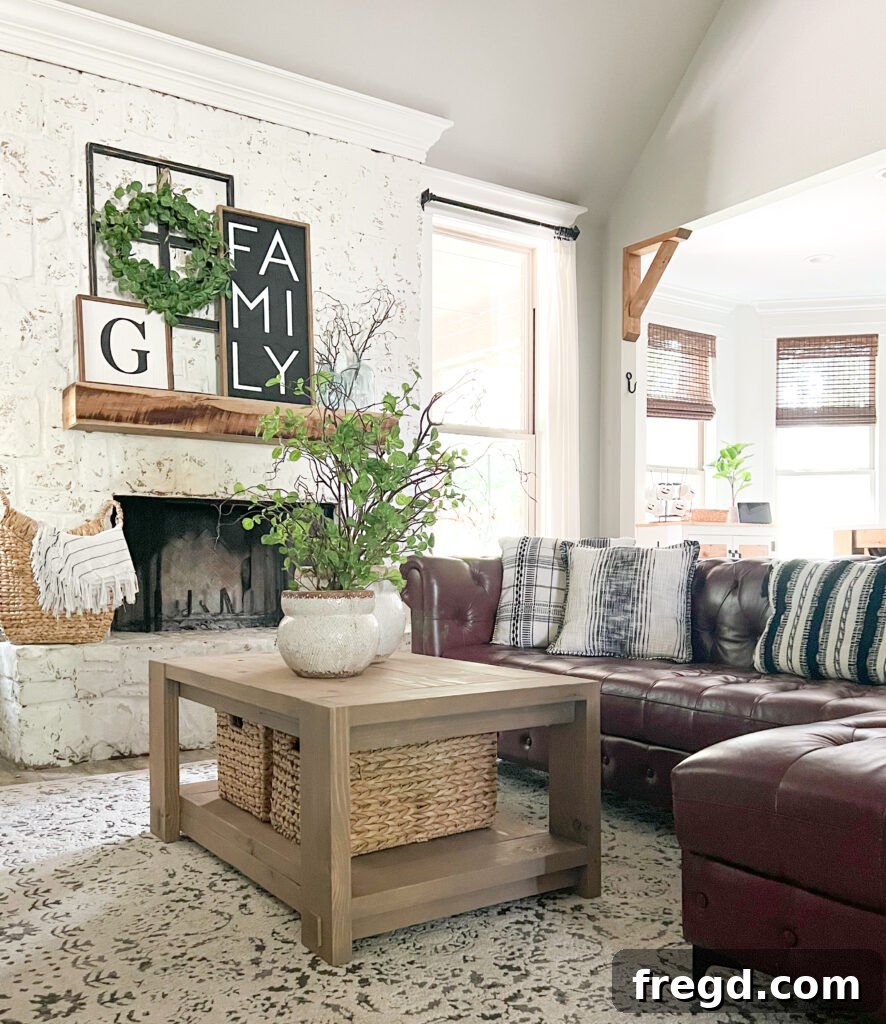
And there you have it! The culmination of your hard work and creativity: a stunning, handcrafted coffee table that not only serves a functional purpose but also stands as a testament to your DIY prowess. I am absolutely thrilled with how this piece turned out. The custom ripped lumber gives it a high-end, tailored look that defies its budget-friendly origins, and the unique mixed stain has brought out the natural beauty of the wood in a way that perfectly complements my home’s aesthetic.
This coffee table isn’t just a piece of furniture; it’s a conversation starter, a focal point, and a source of immense pride. It proves that with a little ingenuity, some accessible materials like 2×6 lumber, and a clear step-by-step guide, you can create truly remarkable and durable pieces for your home without breaking the bank. The blend of sturdy construction, thoughtful design elements like the planked top and shelf, and the personalized finish makes it an exceptional addition to any living space. I hope this detailed guide inspires you to pick up your tools and embark on your own woodworking adventure, creating custom furniture that reflects your style and passion!
Download Your FREE DIY Coffee Table Plans!
Ready to build this fantastic coffee table yourself? To make your woodworking journey as smooth as possible, we’ve prepared comprehensive, easy-to-follow plans that you can download and print today. These plans include detailed cut lists, diagrams, and specific measurements to guide you through every step of the construction process, ensuring you have all the information you need for a successful build.
You can download and print the FREE plans right HERE! Get started on your own custom coffee table project and experience the satisfaction of building something beautiful and functional for your home, all while saving money and gaining valuable woodworking skills.
If this project sparks your interest in more DIY furniture, be sure to explore our extensive collection. We offer over 15 unique DIY Coffee Table Plans, catering to a wide range of styles, budgets, and sizes. Whether you’re looking for something rustic, modern, small, or large, you’re sure to find the perfect plan to inspire your next woodworking endeavor and transform your living space with handcrafted charm!